


We may receive a commission when you use our affiliate links. However, this does not impact our recommendations.
Designed to work closely with your bench, this toolbox keeps your tools organized and close at hand, but out of the way of your project. By making it the same height as your bench, it also works as an outrigger for breaking down plywood and supporting large work.
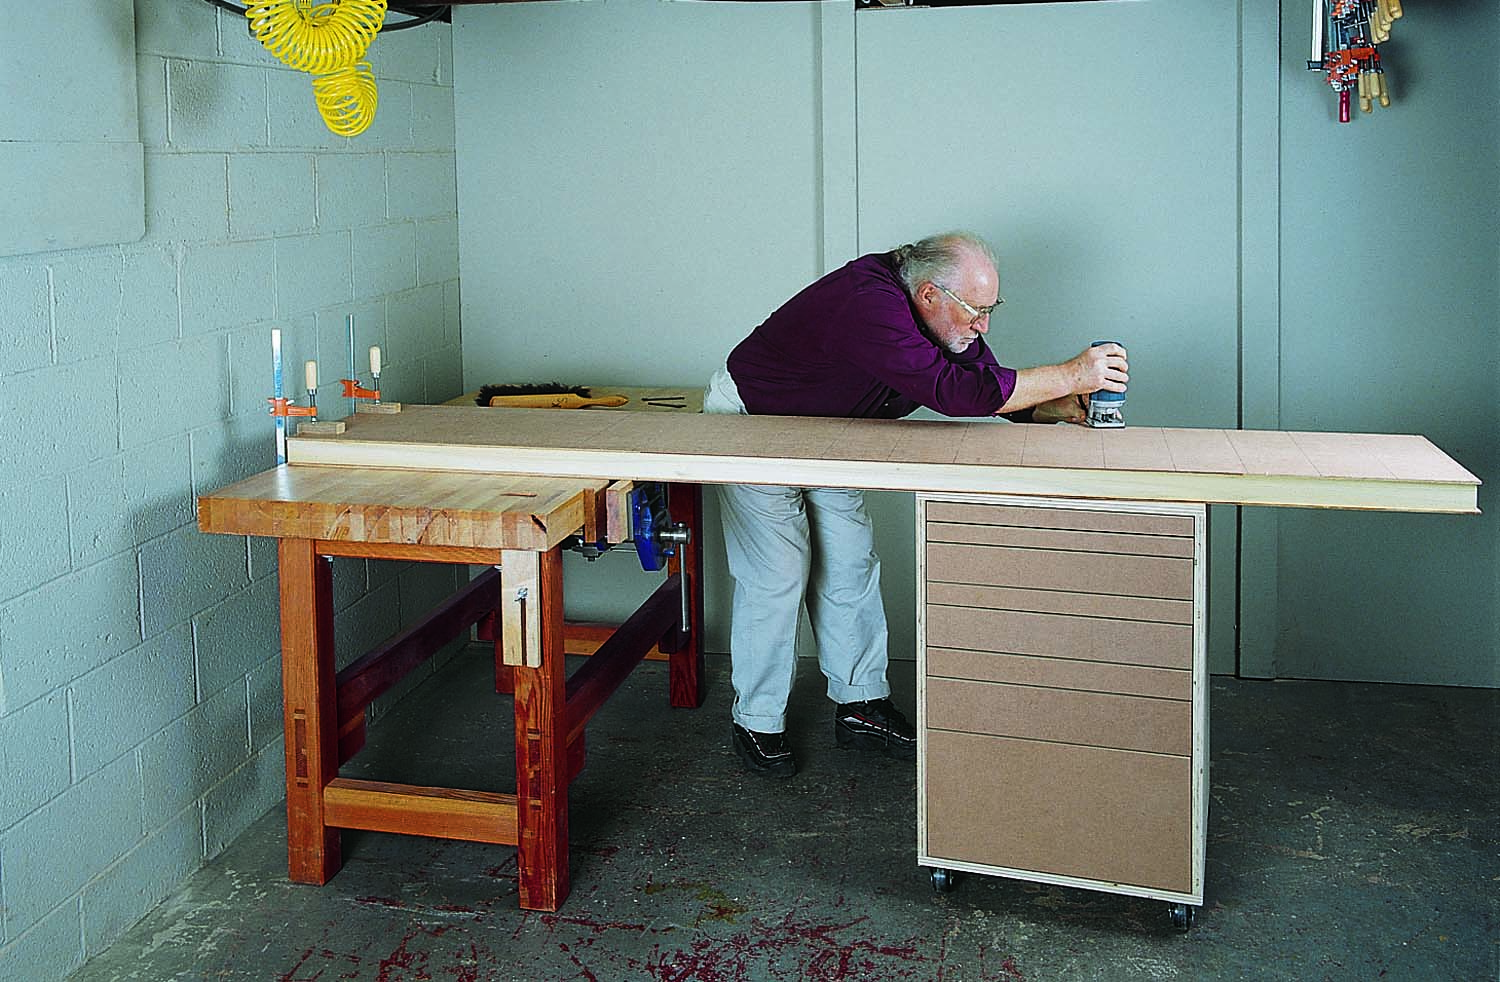
Instant support: This toolbox is the same height as your workbench, so simply roll it into position to support long stock. The drawers have touch latches, so there are no protruding handles.
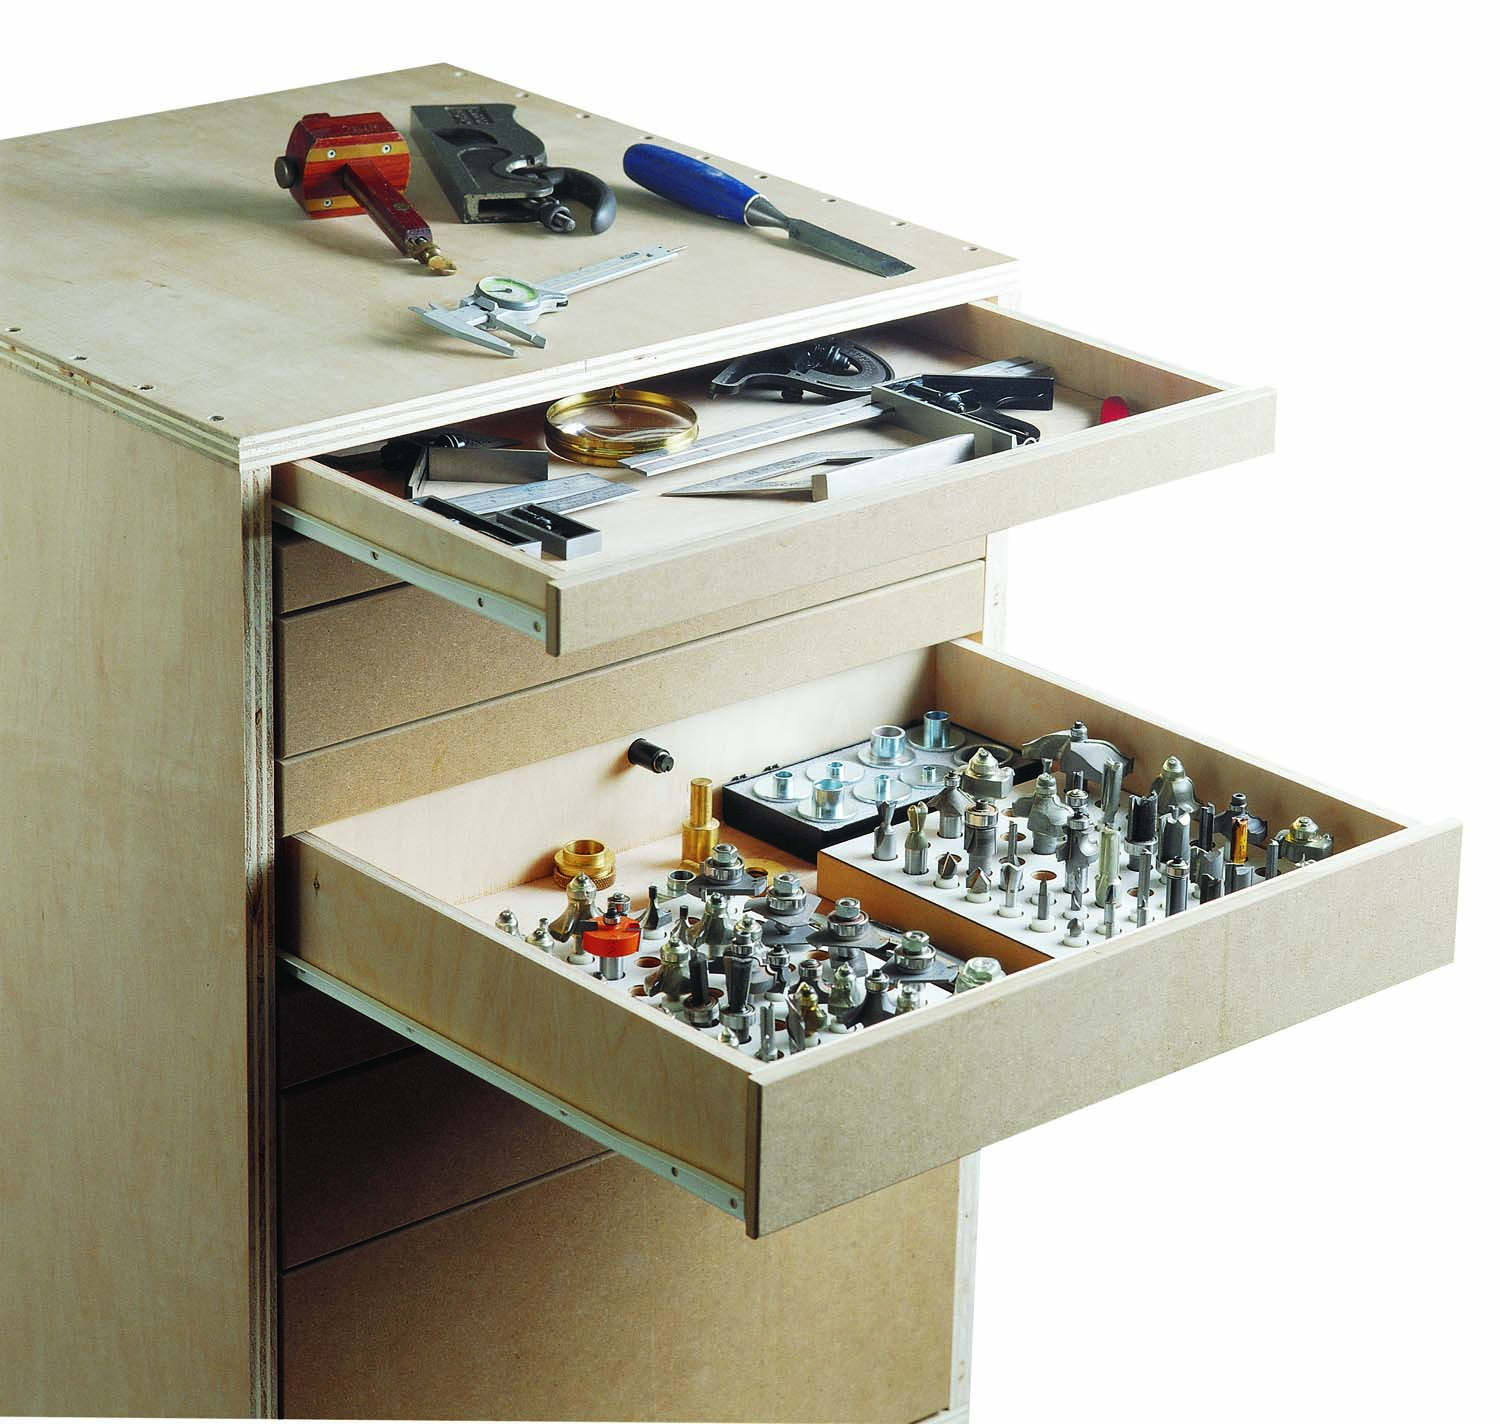
The cabinet features full-extension drawers without the cost of full-extension slides. The trick is to install ordinary bottom-mount slides that are 4″ longer than the drawers. The drawers have touch latches—push in and they spring open. Pulls or handles are the old-school option. Another nifty feature is the “strongback,” a shallow compartment installed behind the drawers. Accessed through doors on the back of the cabinet, the strongback stiffens the structure and accommodates tools up to 28″ long.
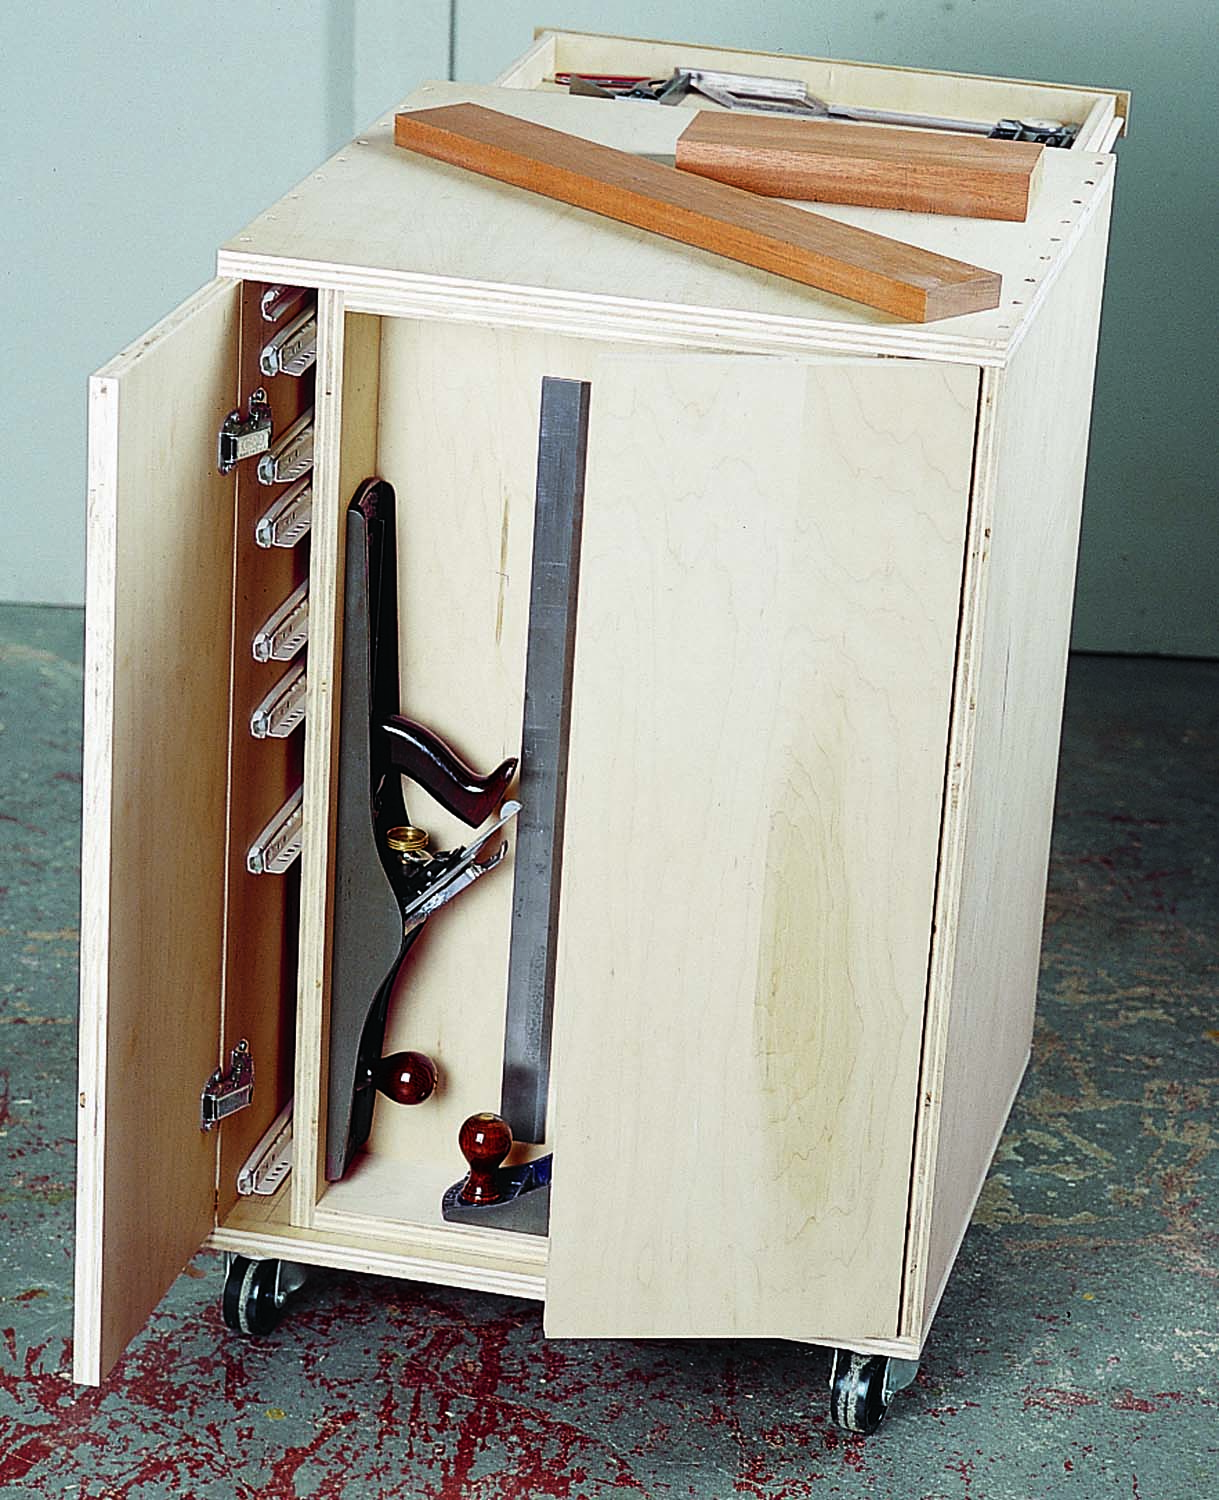
Hidden storage: Longer tools fit in the “strongback,” a shallow box mounted inside the cabinet. The drawer slides are extra long, so the drawers extend fully, without the expense of full-extension slides.
This toolbox isn’t meant to be a showpiece. It’s a tough, utilitarian piece of shop furniture with exposed screw heads and exposed plywood edges. The big advantage to this design is that it doesn’t take a lot of time or money to make. Of course you could edge-band the plywood, use biscuit joints instead of screws, and apply finish, but there’s no functional reason for any of that.
Custom drawers
You’re the only one who knows what tools you have, so you have to design your own drawer layout. If you take a little time to do it, you’ll be able to fit an incredible number of tools into the box, and you’ll have them grouped to suit your needs. Quick access is important, and workshop space is precious, so think about what tools you use together, which ones you use all the time, and which rarely see daylight. Make a drawer template out of plywood or cardboard, so you can lay out each group of tools (Photo 1).
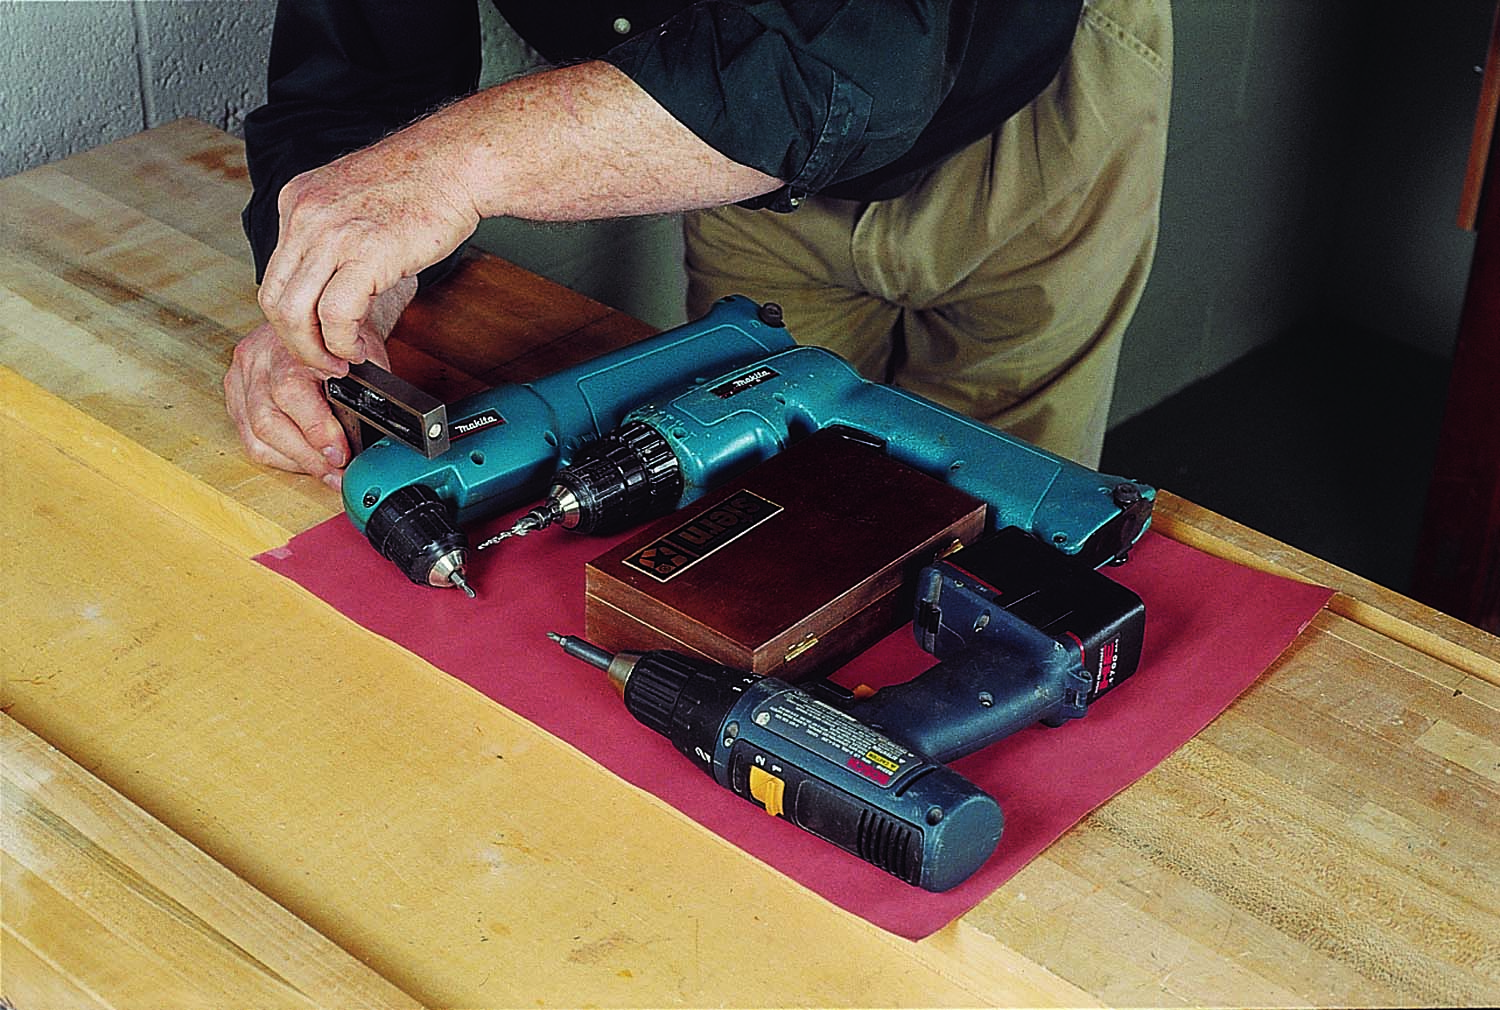
Photo 1. Design the drawers to hold the tools you have. A piece of plywood or cardboard the same size as the drawer bottom helps.
I like to keep my measuring tools handy, so I put them in the top drawer, with gauges and layout tools in the next drawer down. Some things aren’t compatible in the same drawer—chisels with files, for example. Spade bits and drill bits can lie down in a shallow drawer, but router bits should stand up in holes drilled into a block, so they can’t knock together. Group like tools together in shallow trays, with dividers to maintain order.
Pro Tip: Maximize useful space in drawers by running dividers from front to back instead of from side to side.
Once you’ve planned your layout, it’s easy to dimension the drawer parts. To determine the distance from the bottom of one drawer to the next, measure the height of the contents and add at least 1/2″ (for the 1/4″ plywood drawer bottom and a little clearance). The drawer sides and ends can be as wide as the depth of the contents they’ll contain, but they don’t have to be—routers and other big tools sit very well on shallow trays. The top drawer should have sides that are about 1/2″ narrower than the drawer opening, so the drawer can be tipped up for installation.
Draw before you saw
Have all the hardware on hand—drawer slides, hinges, touch-latches and casters—before you start to build, so you can adjust your design, if necessary, to work with the hardware you have. (This is much easier than reconfiguring metal hardware to work with wood pieces you’ve already cut.) Plan to make a full-size sectional drawing to show how the drawers fit inside the box. This will help you avert hardware conflicts. Pay close attention to the back-door hinges. You might have to rearrange the drawers to make room for them.
Threaded magnetic touch-latches bypass the need for drawer pulls and keep the drawers closed while you roll the cabinet around the shop. Single latches won’t have enough oomph to open deep drawers full of heavy tools, so plan to install two or more, as necessary.
Assemble the box
You can cut all the parts for the cabinet from one sheet of 3/4″ plywood (A–F, Fig. A, and Cutting List). Plan to cut the sides, rear doors, strongback sides and back to the same height. Then shorten the rear doors by 1/8″, so they’ll close easily.
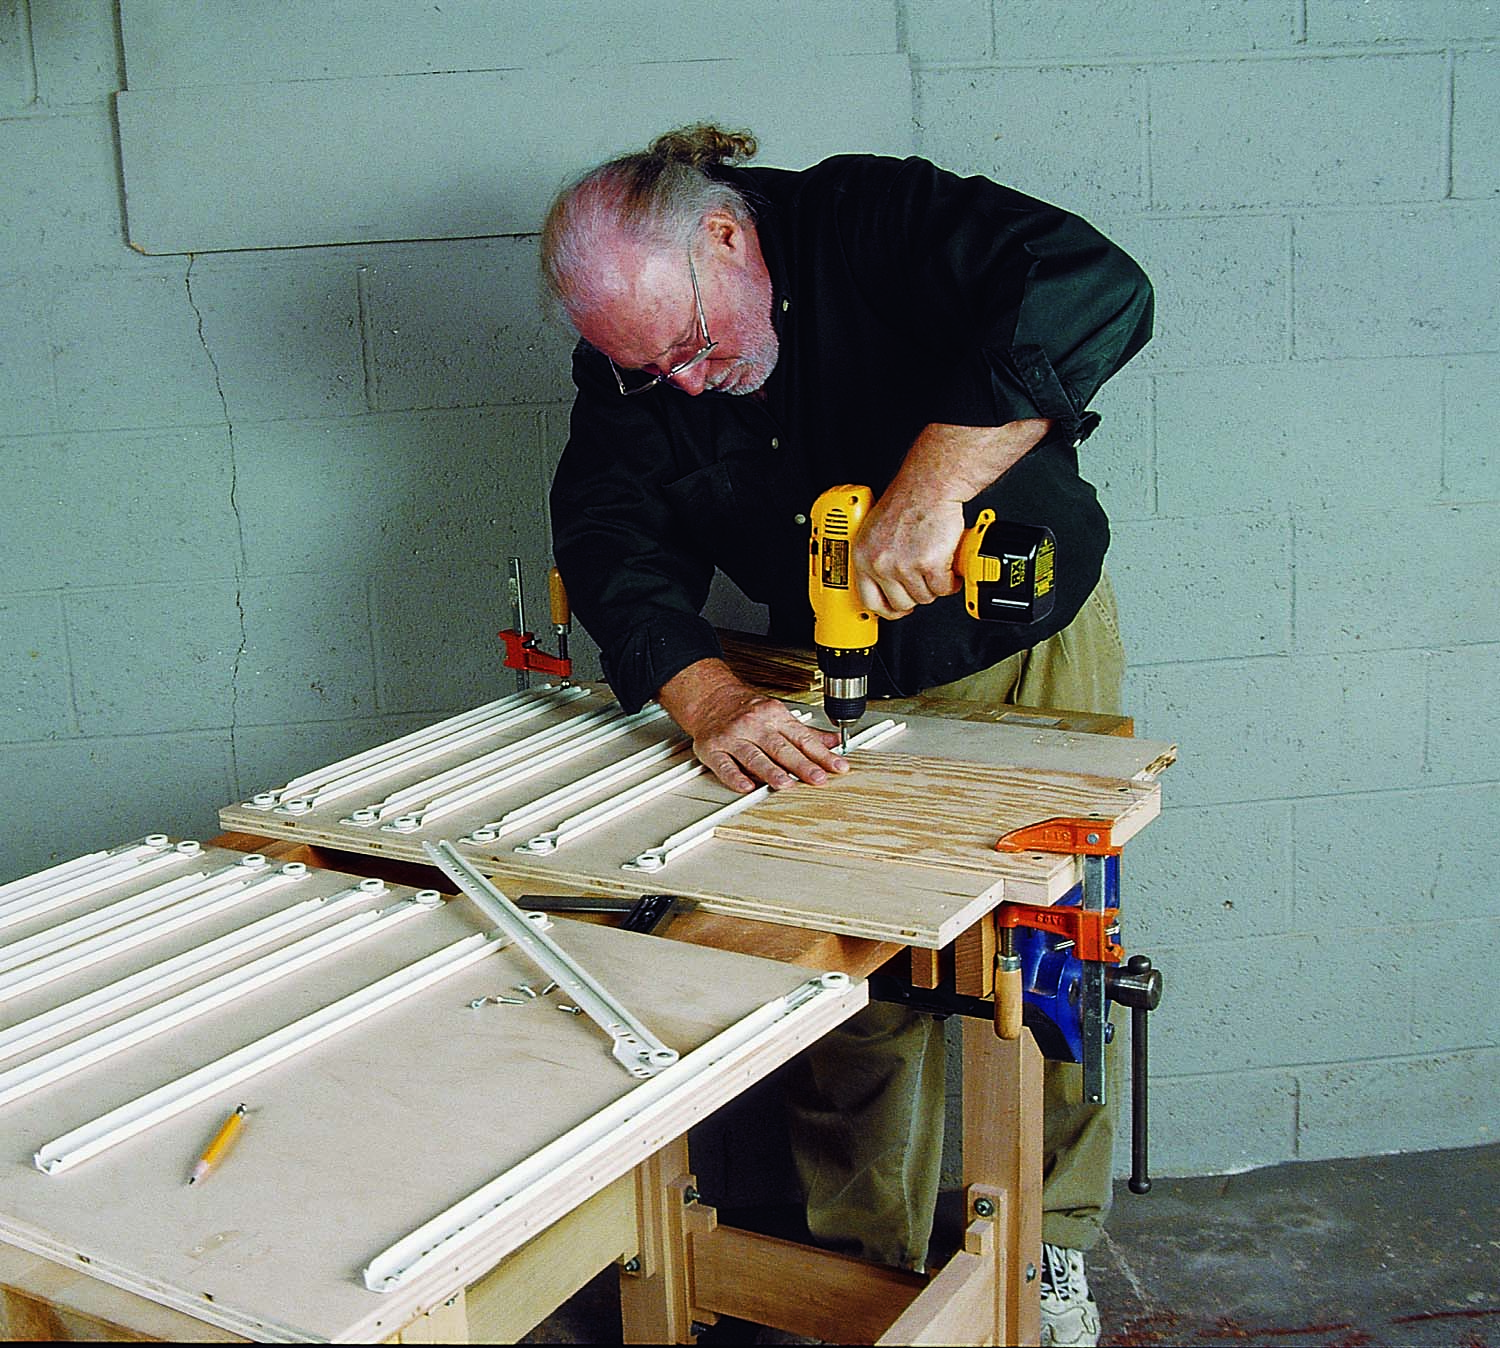
Photo 2. Mount the drawer slides before assembly, using a plywood jig to ensure they’re square and at the same height on both sides.
Mount the drawer slides on the cabinet sides prior to assembly (Photo 2). Use a simple jig consisting of a piece of plywood with a cleat to locate the bottom slide on each side. The top of the slide should sit tight against the bottom end of the plywood jig. After mounting each pair of slides, shorten the jig to prepare it for mounting the next pair—remove the exact distance from the bottom of one drawer to the bottom of the next.
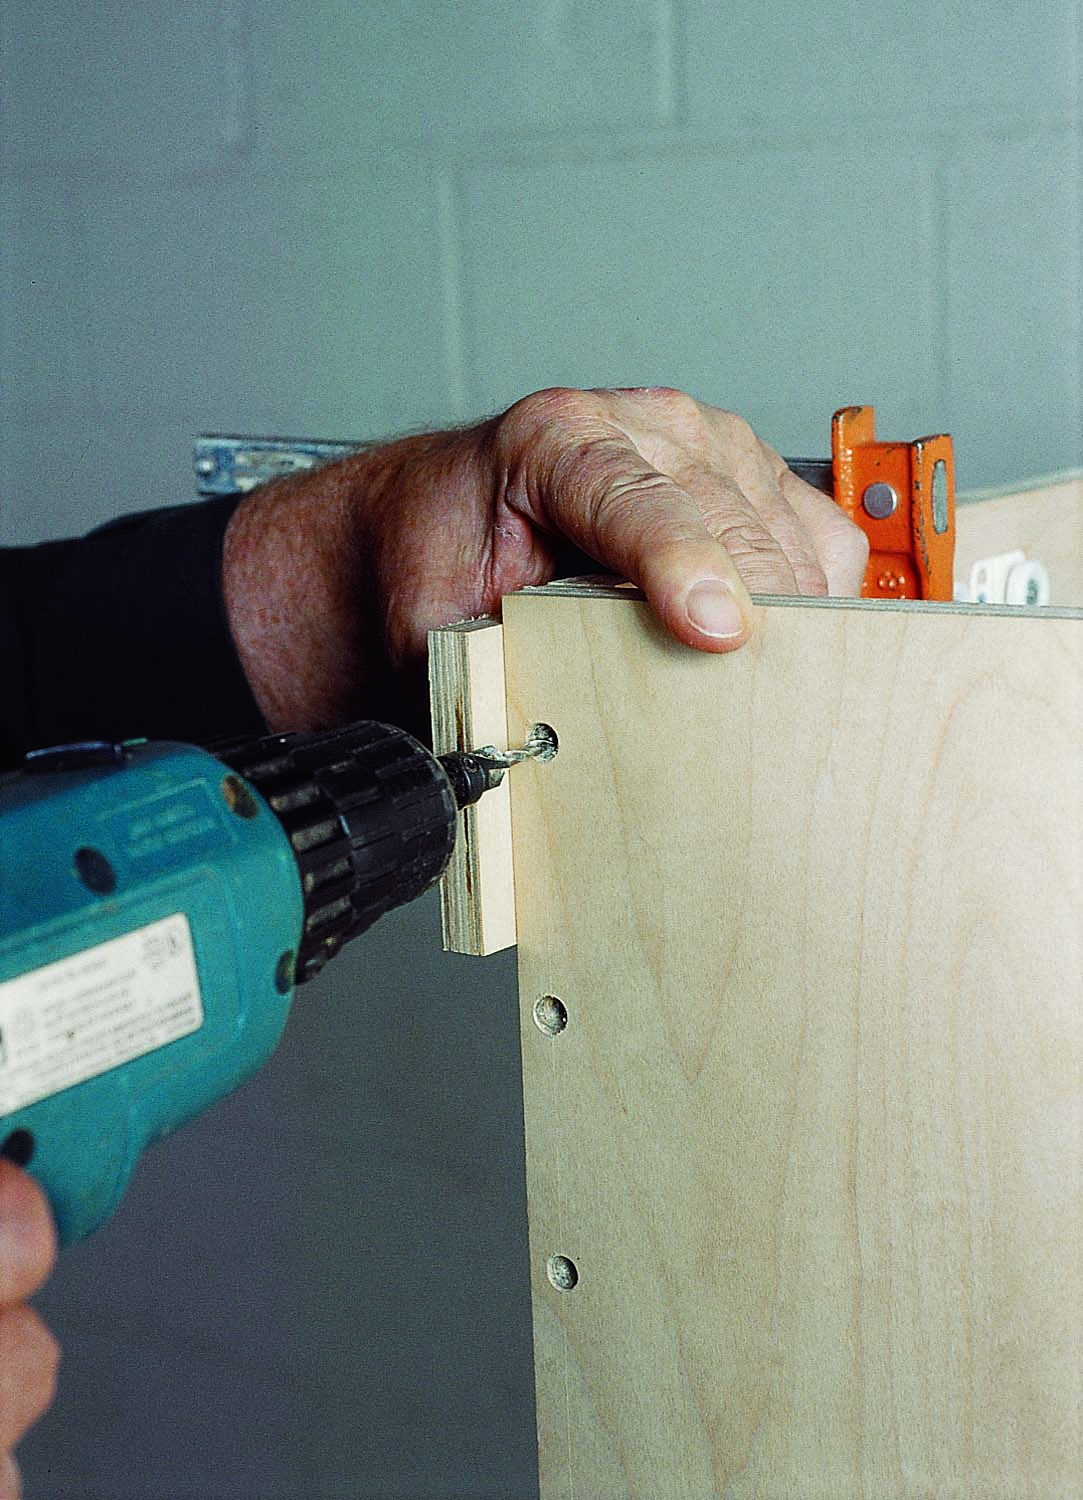
Photo 3. Drill countersunk pilot holes for the screws used to assemble the cabinet. Clamp a piece of scrap alongside to keep each joint flush.
Assemble the cabinet with 2-1/2″ No. 8 construction screws spaced about 3″ apart. Lay out the location of the screw holes on the plywood top and bottom, so you can drill and countersink clearance holes with the plywood flat on the bench. Set up the first joint with the aid of clamps (Photo 3). Be sure to drill the pilot holes into the second piece of plywood. If you skip this step, the entering screw will make the plywood bulge, interfering with a tight connection. Make the strongback the same way.
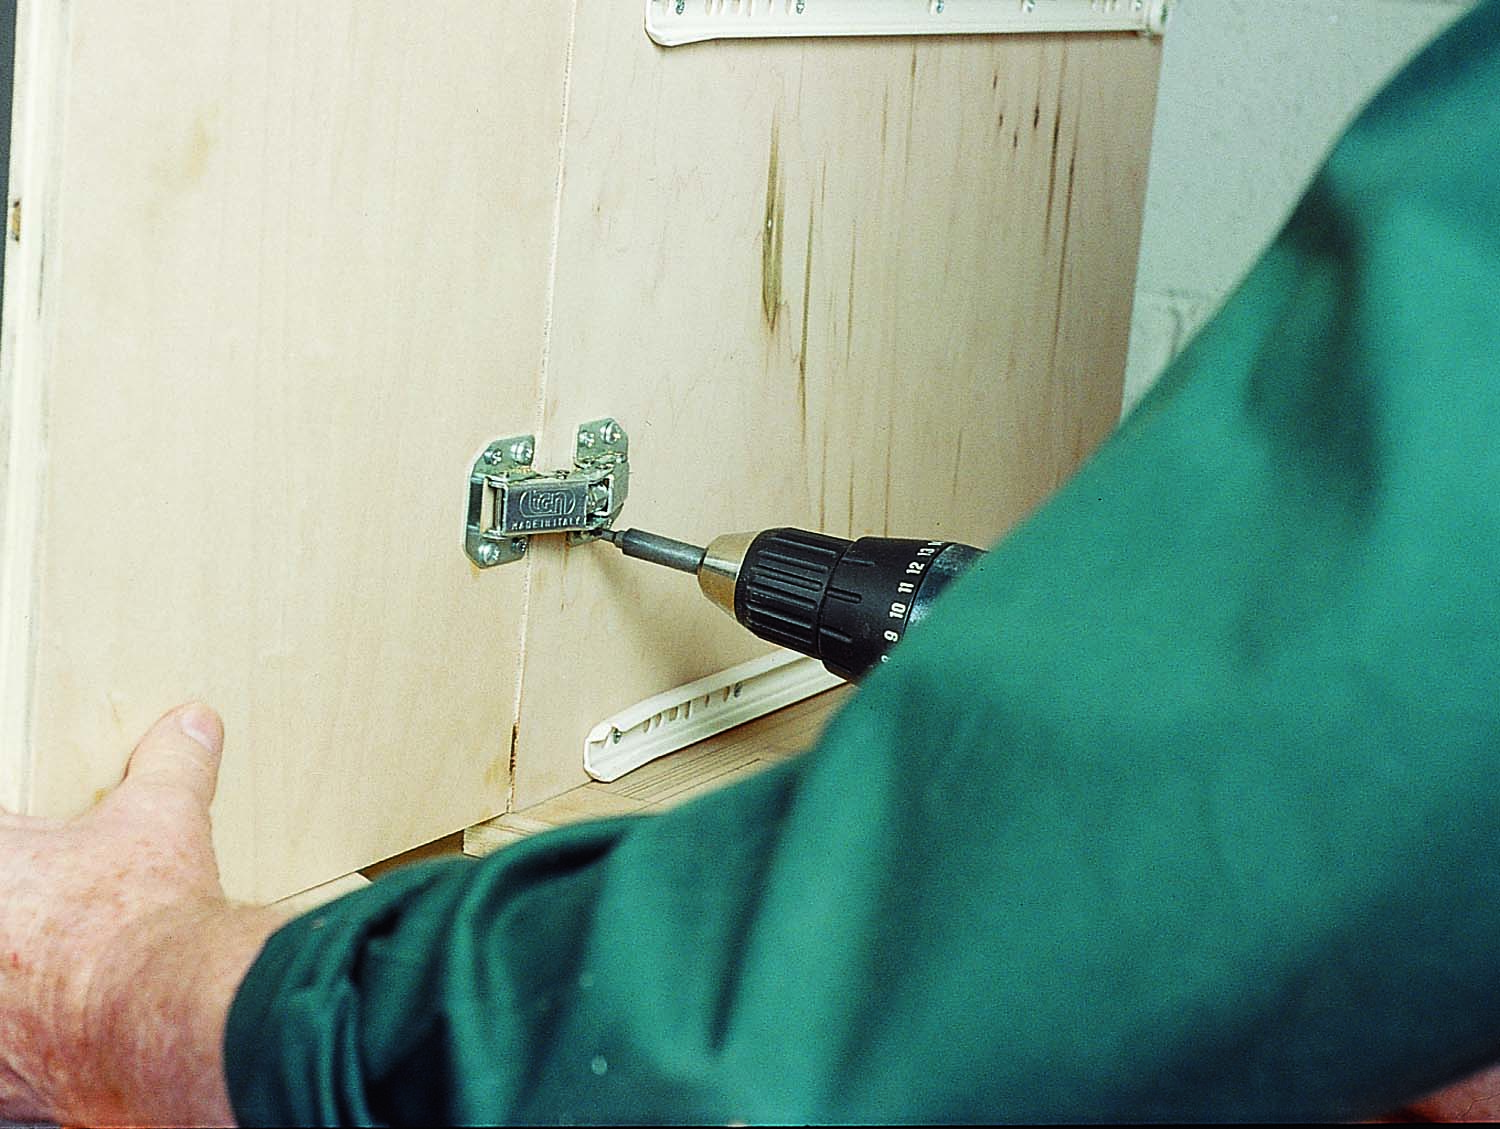 Photo 4. Hang the back doors with surface-mount hinges. Screw the hinges to the doors first, then screw the doors to the box.
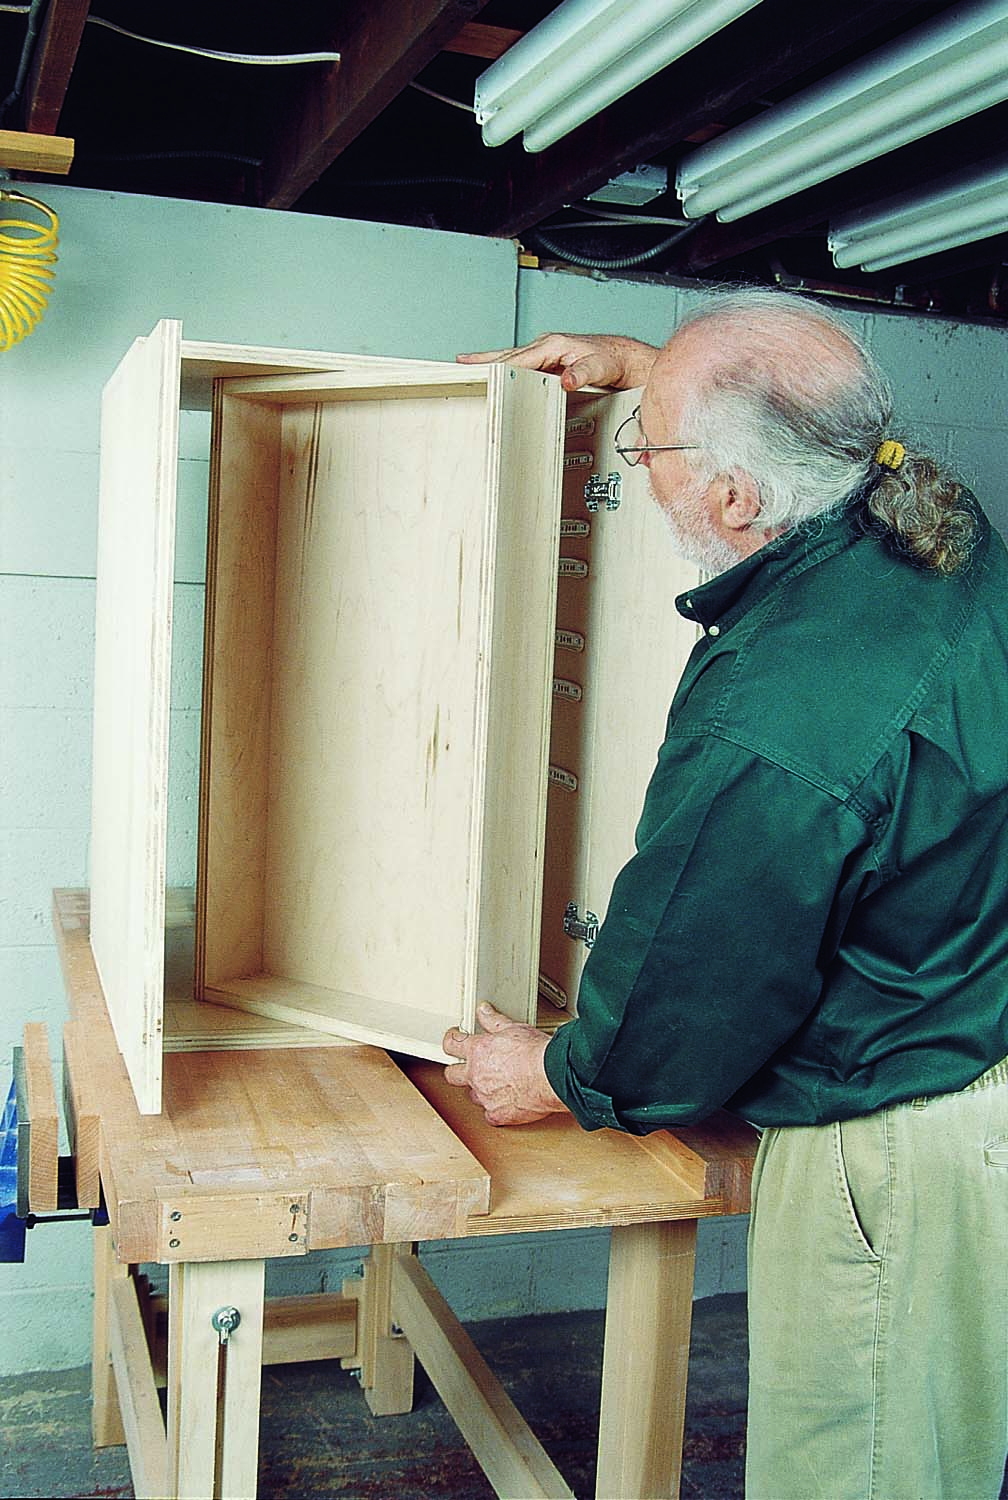
Photo 5. Insert the strongback, center it and set it back 3/4″, so it acts as a stop for the doors. Then fasten it with screws on the cabinet’s top and bottom.
Mount the hinges on the doors and screw them to the cabinet sides (Photo 4). Then slide in the strongback (Photo 5). Its edge should sit 3/4″ inside the cabinet, so the doors can close against it. Make sure everything is correctly positioned before you screw the strongback to the cabinet. Complete the assembly by installing casters (Photo 6).
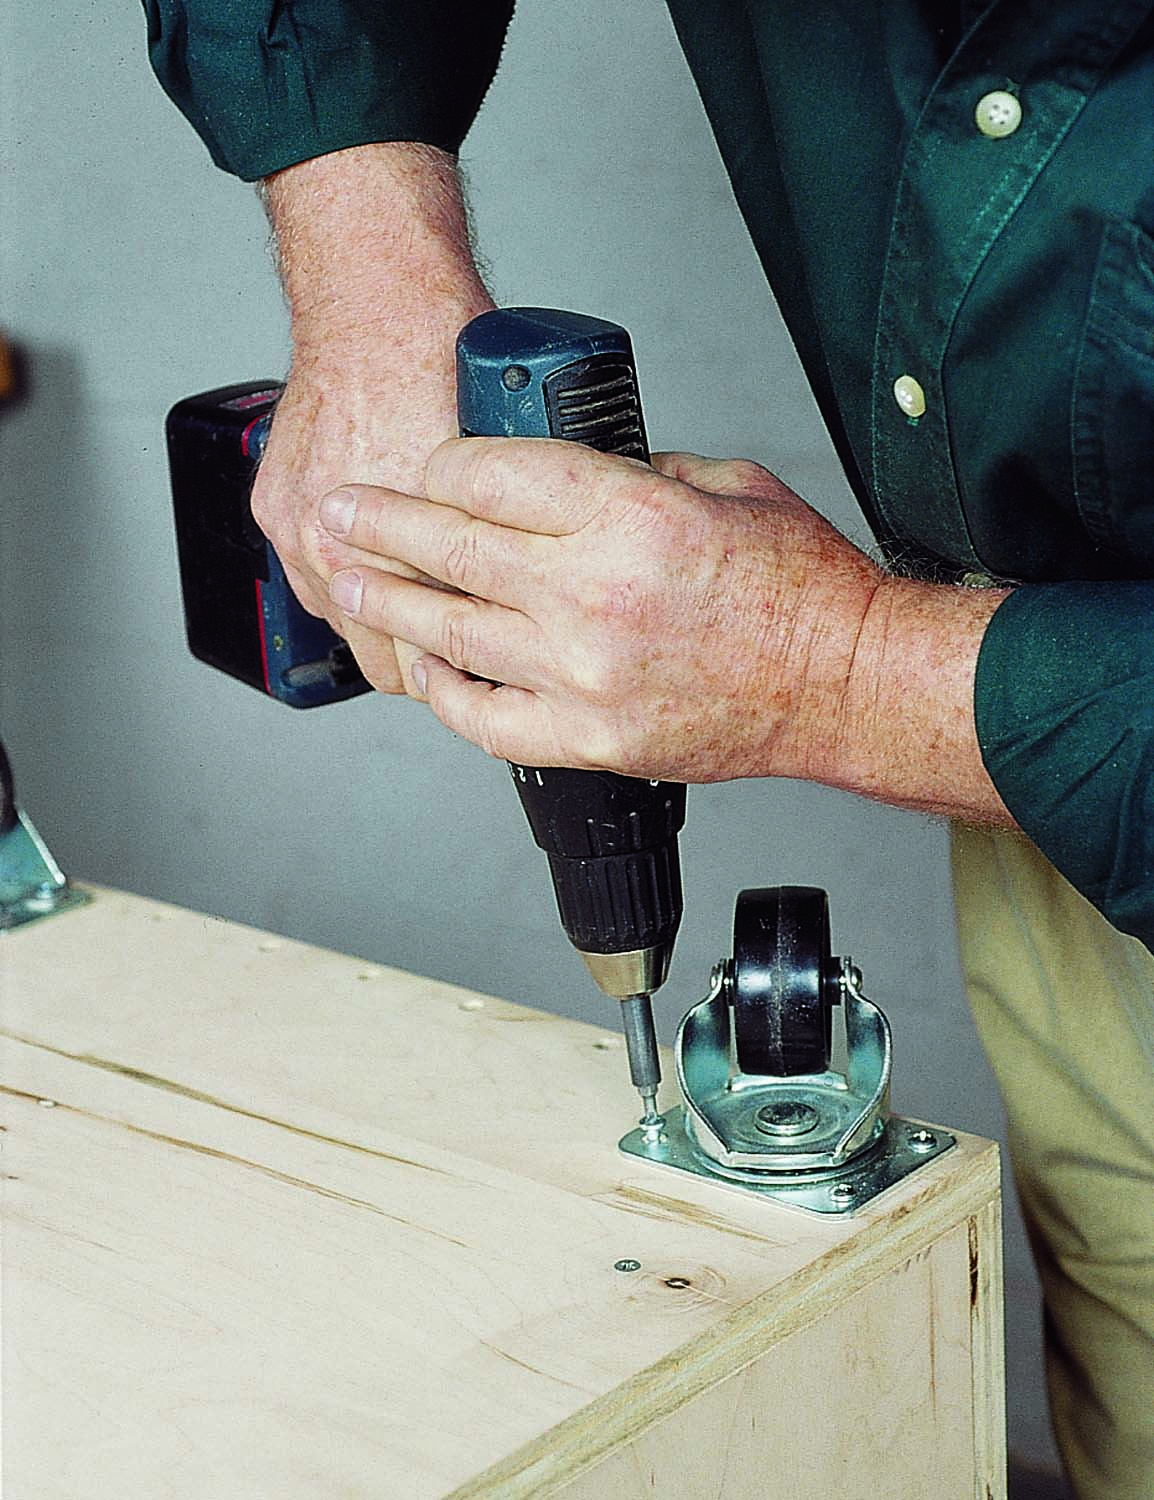
Photo 6. Install two swivel and two fixed casters. This arrangement provides easy steering and some rigidity when using the cabinet as a work support.
Cutting List
| Mobile Toolbox Overall Dimensions: 34″ H x 22″ W x 22″ D |
||||
| Part | Name | Qty. | Material | Th x W x L |
| A | Cabinet top/bottom | 2 | Plywood | 3/4″ x 22″ x 22″ |
| B | Cabinet side | 2 | Plywood | 3/4″ x 22″ x 29-1/2″ |
| C | Door | 2 | Plywood | 3/4″ x 10-1/8″ x 29-1/4″ |
| D | Strongback top/bottom | 2 | Plywood | 3/4″ x 4″ x 17″ |
| E | Strongback side | 2 | Plywood | 3/4″ x 4″ x 29-1/2″ |
| F | Strongback back | 1 | Plywood | 3/4″ x 18-1/2″ x 29-1/2″ |
| G | Drawer side | 2/drawer | Plywood | 1/2″ x (a)” x 15-3/4″ |
| H | Drawer end | 2/drawer | Plywood | 1/2″ x (a)” x 18-1/2″ |
| J | Drawer bottom | 1/drawer | Plywood | 1/4″ x 15-3/4″ x 19-1/2″ |
| K | Drawer front | 1/drawer | MDF | 3/8″ x (b)” x 20-1/4″ |
| Notes (a) Drawer height. (b) Drawer height plus 1/8″. |
||||
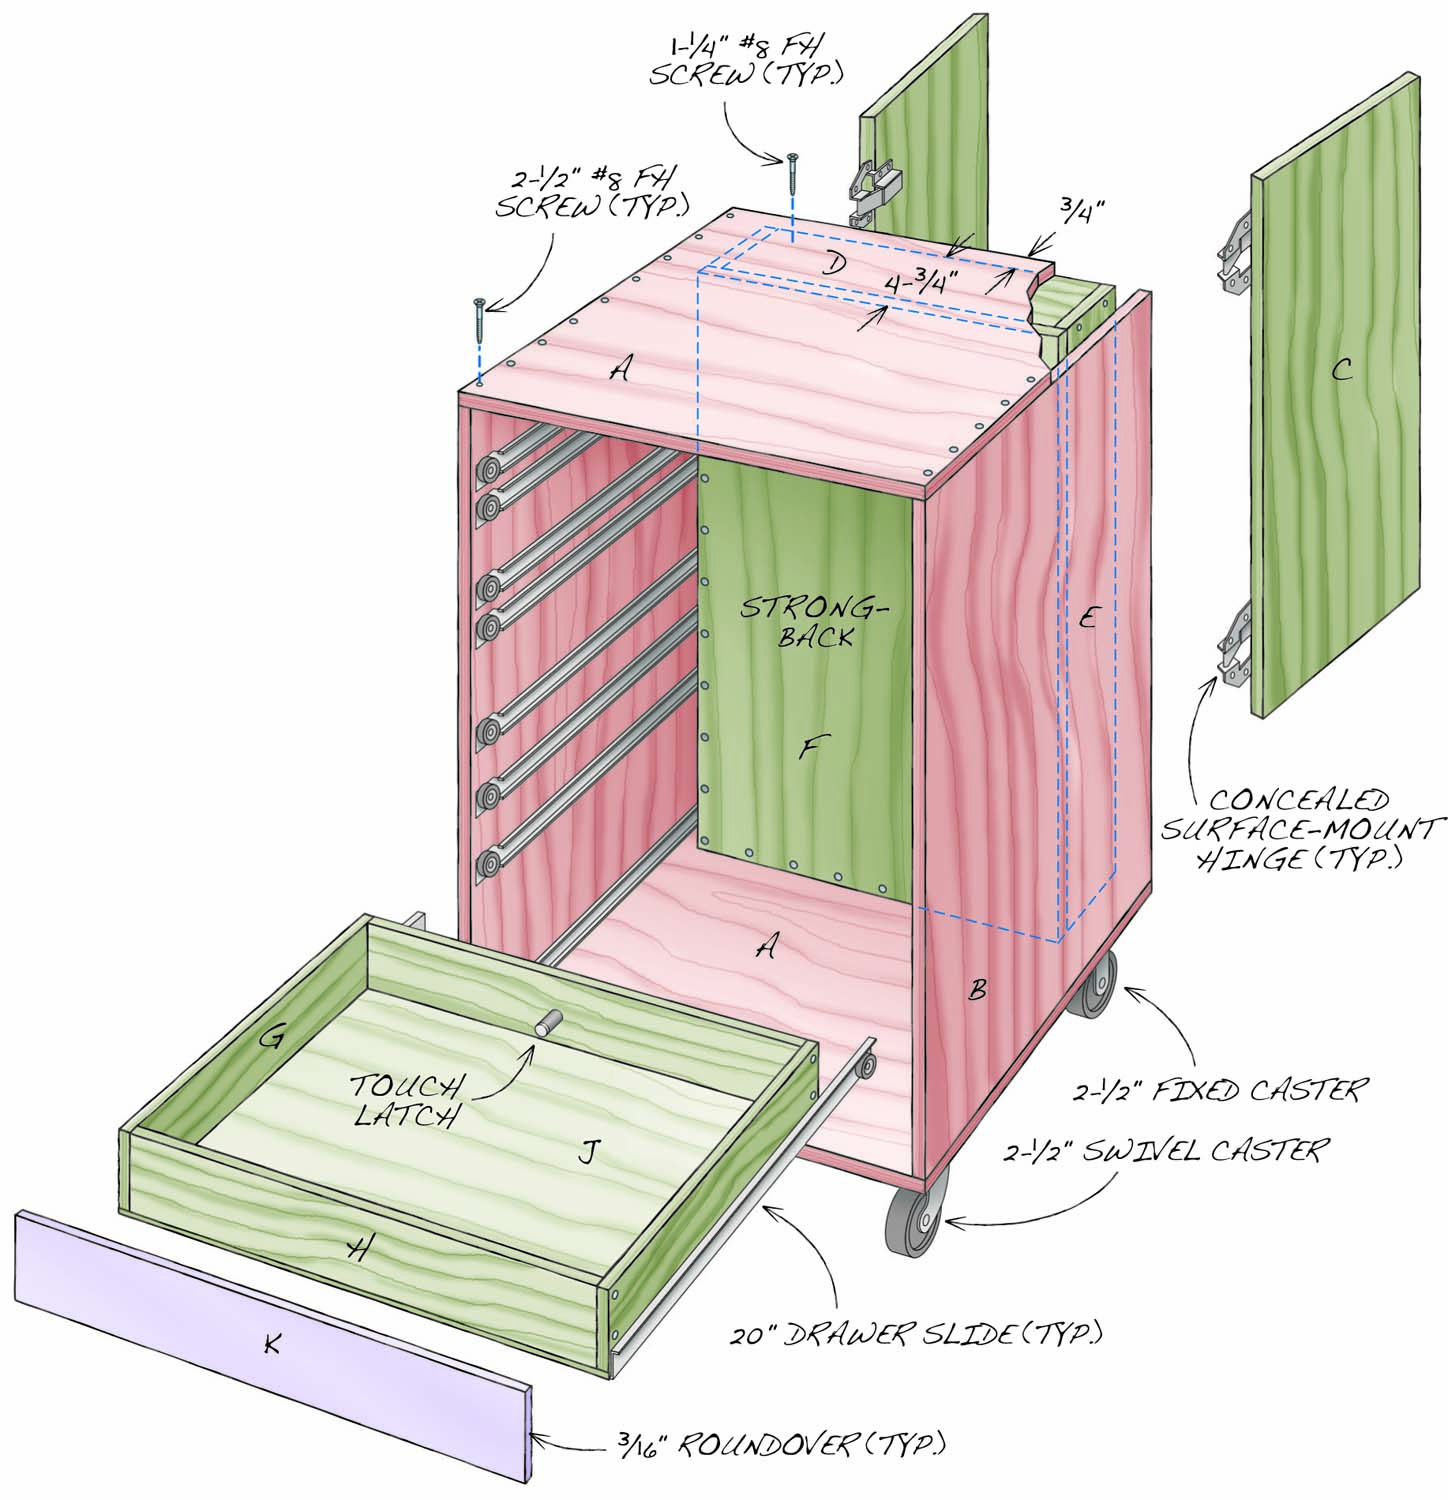
Fig. A. Exploded View
Make the drawers
The drawers are simple boxes with applied fronts (G–K). Make the box sides and ends from 1/2″ Baltic birch plywood; use 1/4″ plywood for the bottoms. Drill holes in the back pieces for the threaded touch latches. Screw or nail the sides and ends together. Then glue on the bottom to square the box and add strength. Apply glue on the bottom edges of the box. Then position the bottom, align the corners, and nail it all around (Photo 7).
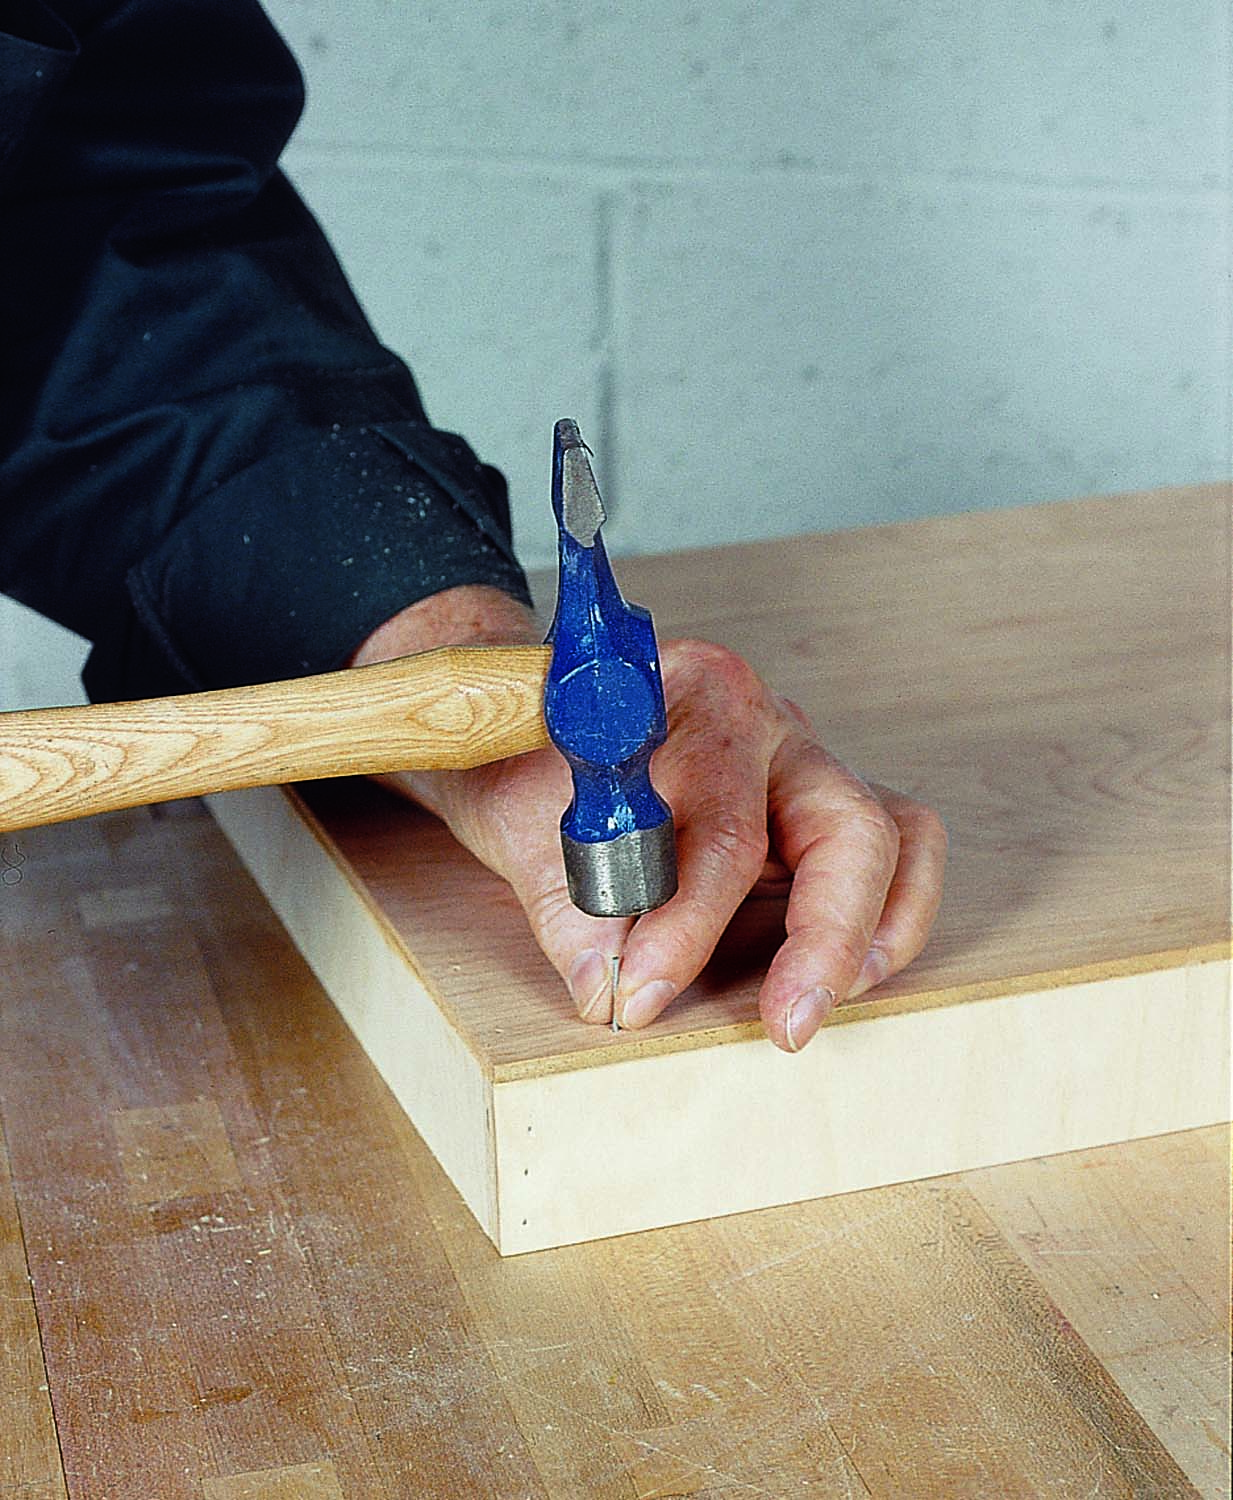
Photo 7. Assemble the drawers. They’re simple boxes, glued and nailed, with plywood bottoms. Gluing on the bottom makes the drawer rigid and square.
Close-fitting drawer fronts help keep shop dust out of the box. The drawer fronts shown here are 3/8″ MDF with a 3/16″ roundover. The fronts are 3/4″ longer than the drawer box. (Standard drawer slides require 1/2″ on each side of the box, so this provides 1/8″ clearance.) Each drawer front fits flush with the bottom of the drawer box and is 1/8″ wider. (This leaves a gap of about 1/8″ between the drawer fronts.)
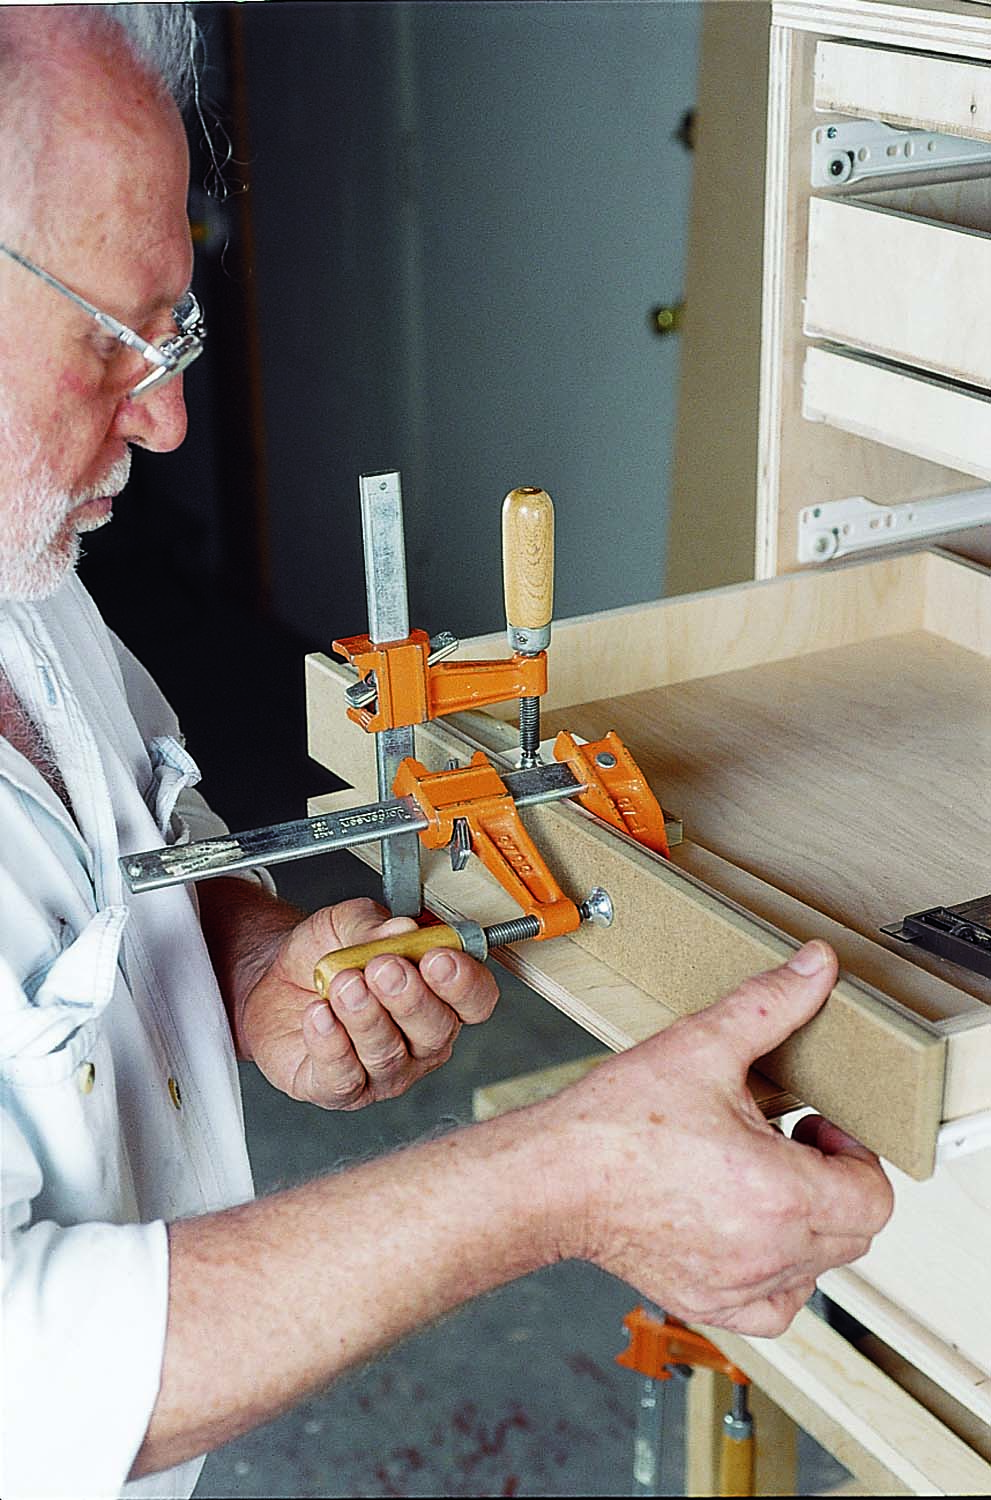
Photo 8. Glue on the drawer fronts, using clamps, nails or screws to hold them until the glue sets.
Starting near the middle of the cabinet, glue and clamp the drawer fronts to the drawer boxes (Photo 8). Position the first one by measuring and you’ll be able to do the rest by eye. If you have a brad nailer, won’t have to bother with clamps. Use the touch latch holes in the back of the drawer boxes to locate the strike plates on the strongback. Install the touch latches and thread them in or out as necessary to make them function properly.
Here are some supplies and tools we find essential in our everyday work around the shop. We may receive a commission from sales referred by our links; however, we have carefully selected these products for their usefulness and quality.


Very practical. Look forward to making this to help organize my small work space.
Hello, great idea, I want to make the same toolbox for my workshop. I have an old cabinet that is not designed for this, I plan to take your advice and do it for my tools. It doesn’t look very difficult, I recently started working on wood and earlier in situations when I could not cope with the task, I called the worker from https://contractorfinder.bradfordwhite.com/contractors, but I hope I will manage to do this project myself. Thank you for sharing, have a nice day!