We may receive a commission when you use our affiliate links. However, this does not impact our recommendations.

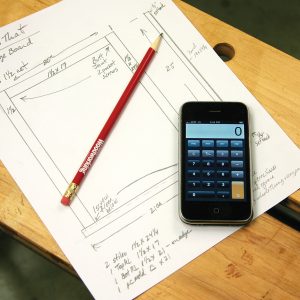
If you have come to this post looking for an easy, no-hard-work method to scale furniture, I’m afraid you’re going to be disappointed. There is no magic bullet. No simple number that can be used as a multiplier to arrive at the final sizes needed to enlarge or scale down a plan. However, there are a couple ways that work if you put in the time and effort.
The easiest, most simplistic method to scale furniture is to take a scaled drawing to your local copy shop and have them enlarge the piece to the size you are after. The drawings on the blanket chest in our August 2009 issue are to scale, so you would need to take the drawings to your copy shop and have them enlarge the plans by a certain percentage. To adjust the plan from a box size of 32″ to the larger box size of 42″, you should ask that the plan be enlarged by 31.25 percent (32″ x 1.3125 percent = 42″). In turn, the other measurements would also adjust accordingly. The overall height adjusts from 20″ to 26-1/4″ and the feet go to 5″ from 3-3/4″.
While this option allows you to work from a drawing, I find it much more helpful to learn how to scale from photos , photos that are shown with full, mostly front-on views and not necessarily shown from angles. To do this, I use ratios of measurements taken off the photo.
As an example, the blanket chest photo I’m using measures 6-3/4″ wide and in the description of the chest the actual width is 53″. To find other measurements along the width of the chest such as the width of one drawer, I’ll set up a ratio of 6.75/53. I can use this ratio to find the width of any other part of the chest so long as I take all my measurements from the same photo.
If the width of one of the long drawers in my photo equals 2-1/4″, then I would set up the following where X is the actual width of the drawer front:
(Read as 6.75 is to 53 as 2.25 is to X)
Solve for x with cross-multiplication
119.25 = 6.75X
119.25/6.75 = X
17.666 = X
So the actual measurement of the drawer front, based on the photo, is 17-5/8″.
I would find another ratio for any measurements of height. Using my example, the photo measurement of the height of the chest is 3-7/16″ while the height of the actual chest is listed at 29″. My ratio is 3.4375/29. Measuring the drawer height in the photo at 9/16″ and solving for X in the ratio finds the actual drawer height.
(Read as 3.4375 is to 29 as .5625 is to X)
.5625 x 29 = 3.4375X
16.3125 = 3.4375X
16.3125/3.4375 = X
4.745 = X
The drawer height is 4.75 or 4-3/4″.
This process, along with a general knowledge about furniture construction, should give you a way to scale furniture from photos. I would use this ratio information to establish the sizes of the box of the blanket chest, and any interior-piece sizes would be determined off the actual box , as it should be. Begin with the main structure, be it a box for a blanket chest or the case for a chest of drawers, then fit any parts to that structure.
Additionally, there are ways to manipulate the drawings in SketchUp that allow the sizes to be scaled up and/or down , use the scale tool. But in doing so, the thicknesses of the parts also change and there might be other issues of which I’m not aware. If you scale in SketchUp, I would suggest you work only with the elevations of the drawings. And work on a copy of the project. That way you can compare your changes to that of the original.
Looking for More Free Woodworking Information?
– Sign up for our newsletters to get free plans, techniques and reviews HERE.
– Like tools? We do! Read our latest tool coverage HERE.
– Looking for free project plans? We have hundreds. Click HERE.
– Learn a new woodworking technique today. Click HERE.
– Want more videos? See all our free videos HERE.
– Check out our selection of half-price woodworking books HERE.
– Get 8 years of Popular Woodworking on one CD. Click HERE.


