


We may receive a commission when you use our affiliate links. However, this does not impact our recommendations.
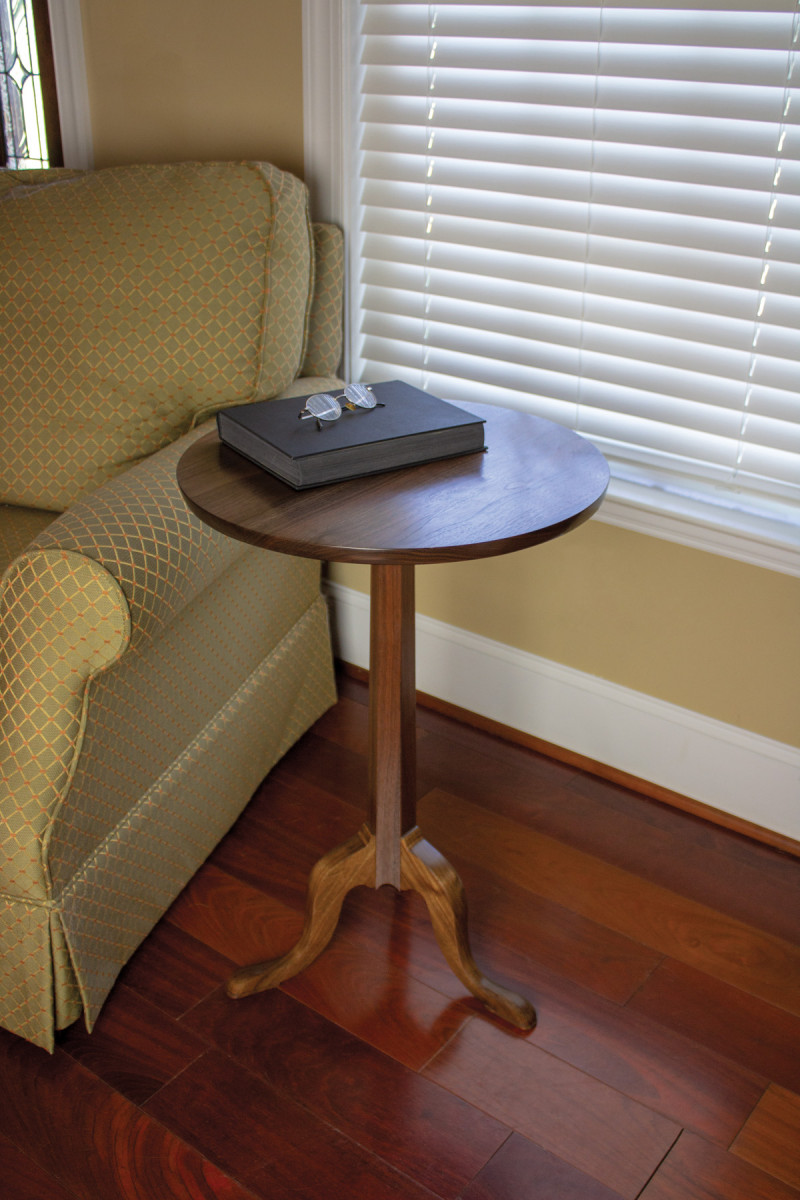
A tapered (not turned) post sets this stand apart from contemporaries.
I have a thing for candle stands. These small tables are quick to make, don’t require a lot of material to build, and are useful furniture to own. They make for excellent bedside tables, end tables and work well as a standalone piece, too.
I ran across a photo of this candle stand while searching for something else—isn’t that when you find the good stuff?—on the online database of Museum of Early Southern Decorative Arts (MESDA) in Winston-Salem, North Carolina. Most candle stands have a turned post. Other historic forms I’ve seen that weren’t turned weren’t very attractive and tend to be on the crude side. This one, with its tapered hexagonal post and shapely legs had a unique appearance and I was taken with the table immediately. Best of all, no lathe is necessary to make one.
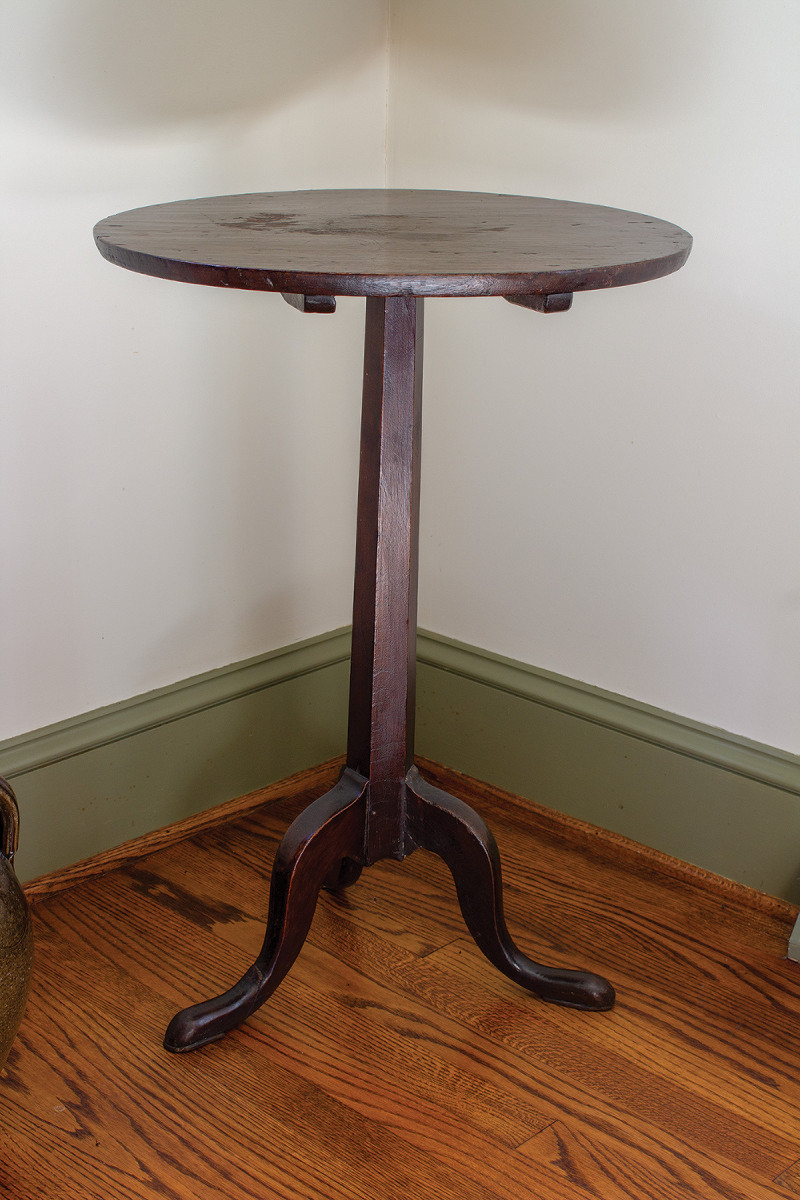
1. The original candle stand from Randolph County NC. Dating from around 1800.
The original table listed in the MESDA catalog was privately owned. After contacting MESDA, they kindly helped me get in touch with the owner who let me measure and document the original table. The table, described below, is an exact copy of the original.
Tapered Hexagon Post
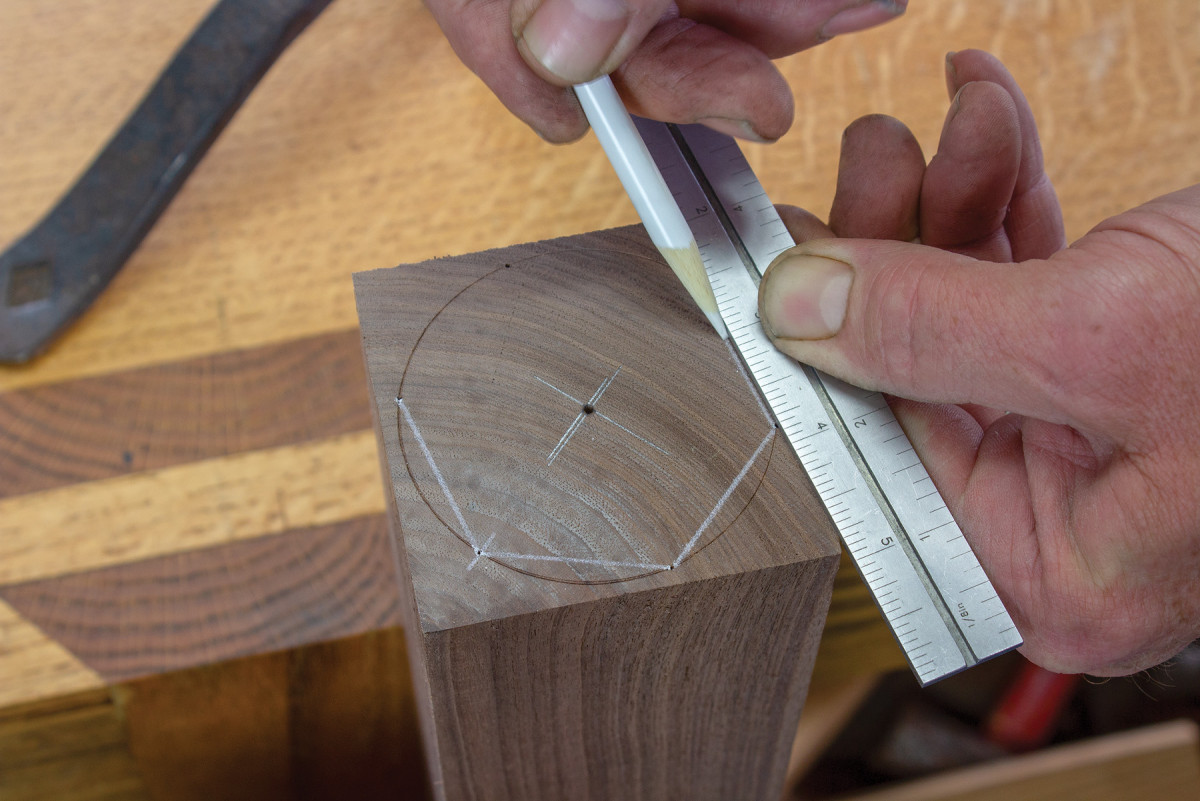
2. Pace out the hexagon on the large end. Use a straightedge to connect the divider points around the circle.
The original table was made from walnut, that’s what I’m using here, but any relatively hard species will work just fine.
The hexagonal post for this table gives the impression of a difficult piece of furniture to make, but it’s quite simple to lay out and shape. Start by milling out the post blank straight and square. Once that’s done, cut it to final length being sure the ends are square as well.
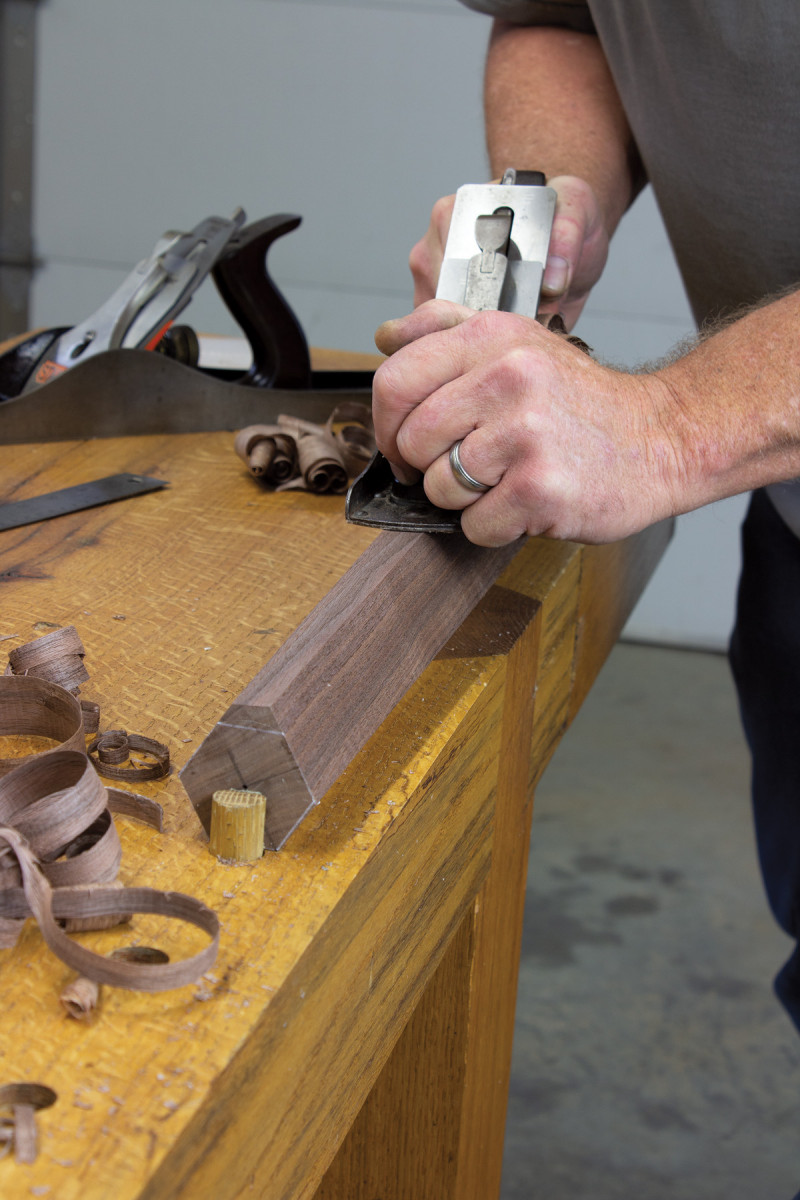
3. Almost done, planing the final side of the hexagon shape to size.
Find the center of the blank on both ends by using a straightedge across the corners. Use an awl to make a mark where the lines cross. Decide which end you want to be the top, and using a pair of dividers make a 2″ circle.
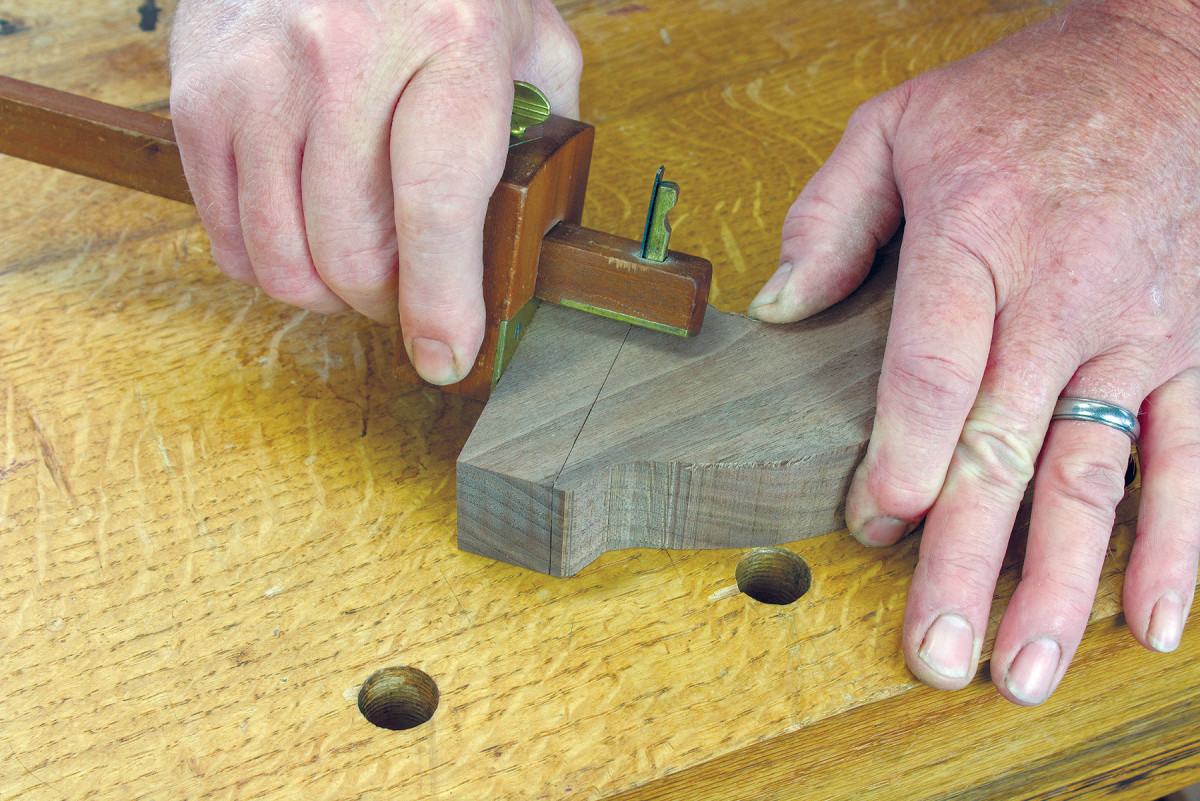
4. Set a cutting gauge to 1″ and gauge around the end of the legs to lay out the shoulders.
Use a straightedge and make a line from the center mark to one corner of the blank. Using the point where the line crosses the circle as a starting point, use the dividers, same setting as you just used to make the circle, and pace around the circle six times.
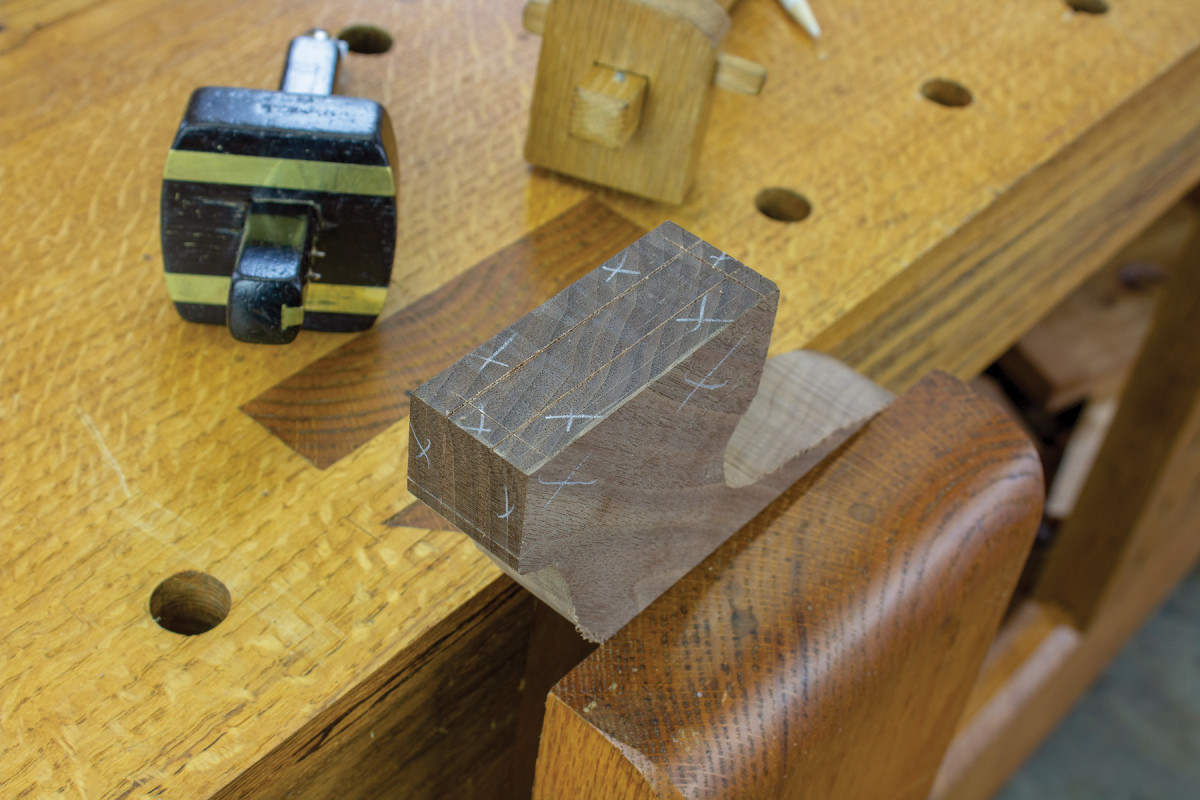
5. To lay out the width of the tenon, a double-tooth mortise gauge set to the width (1/2″ in this case) of the chisel you’ll be using works well. You’ll also need to mark about 3/16″ from the top and bottom of the tenon to create a small shoulder.
The large end of the post layout is identical but using a larger 23/4” circle. Be sure to use the same corner of the post blank to make the starter line on the lower end as you used on the top. This will assure the facets, or the two hexagons, are aligned between the two ends.
6. Cutting a V-groove on the waste side of the cutting gauge mark makes for a clean and straight start for the shoulder saw-kerf.
Clamp the blank to the bench and use a jack plane with a heavily cambered iron to hog off most of the waste on one facet of the post. Once you’re close to the layout lines, finish with a jointer plane. A long straightedge is handy to make sure the facet is straight over the length of the blank. With the first facet complete, flip the blank over and do the facet opposite the one you just completed. Continue on around the post in this manor until all six are finished.
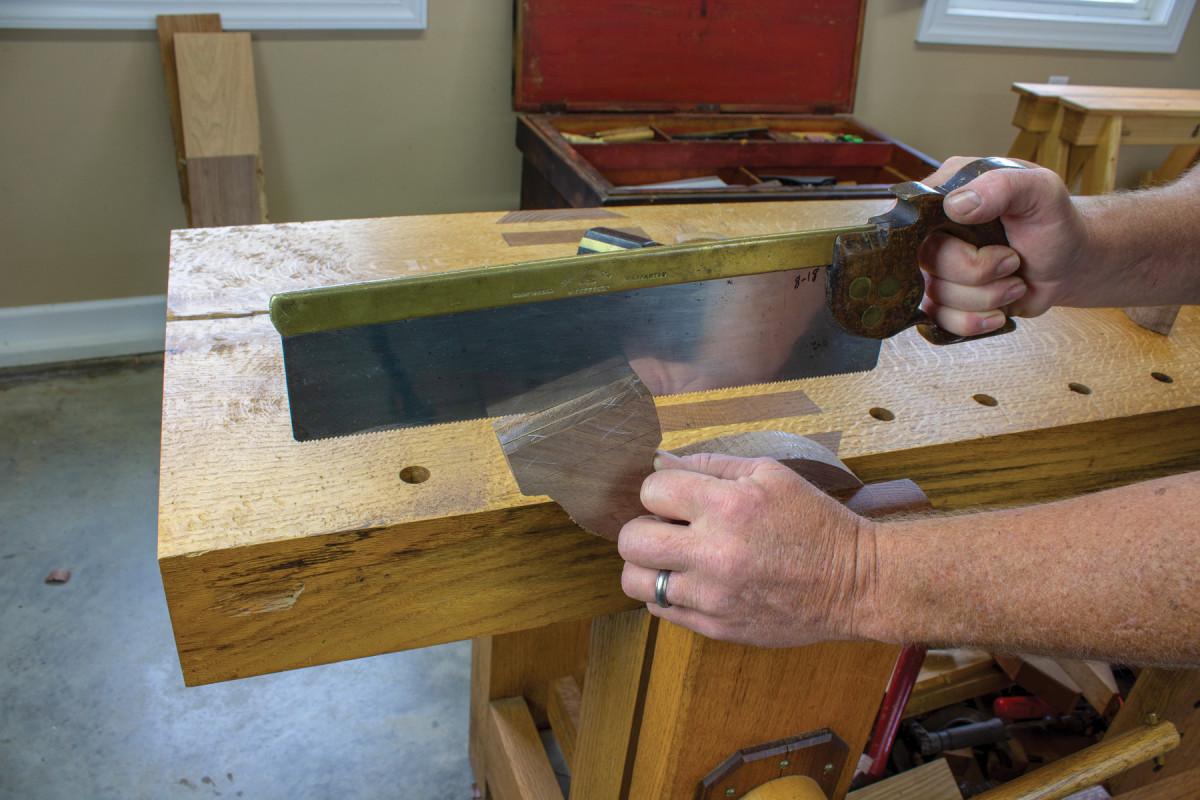
7. Saw the two long cheeks first, then the shoulders.
I know you’re probably thinking that is a lot of wood to plane away, but it’s only 30-40 minutes of work to complete the post with just handplanes. Using a hatchet or drawknife to rough out the post close to size would be perfectly acceptable then finish with planes.
Curvy Legs
8. Last, cut the tenon to length.
Using the illustration, lay out the leg blanks. Be sure to align the pattern with the grain of the wood so that the grain is straightest through the curve just above the foot. This is the smallest portion of the leg and thus the weakest; cross grain here might make for a sad and short life for your table. After the leg blanks are cut to shape we need to get the joinery out of the way before we do any of the shaping.
Tenons and Mortises
9. The eyeballed mortise layout works well in this case.
The legs attach to the post with a simple mortise-and-tenon joint. The end of the legs where the tenons will be cut needs to be square and straight.
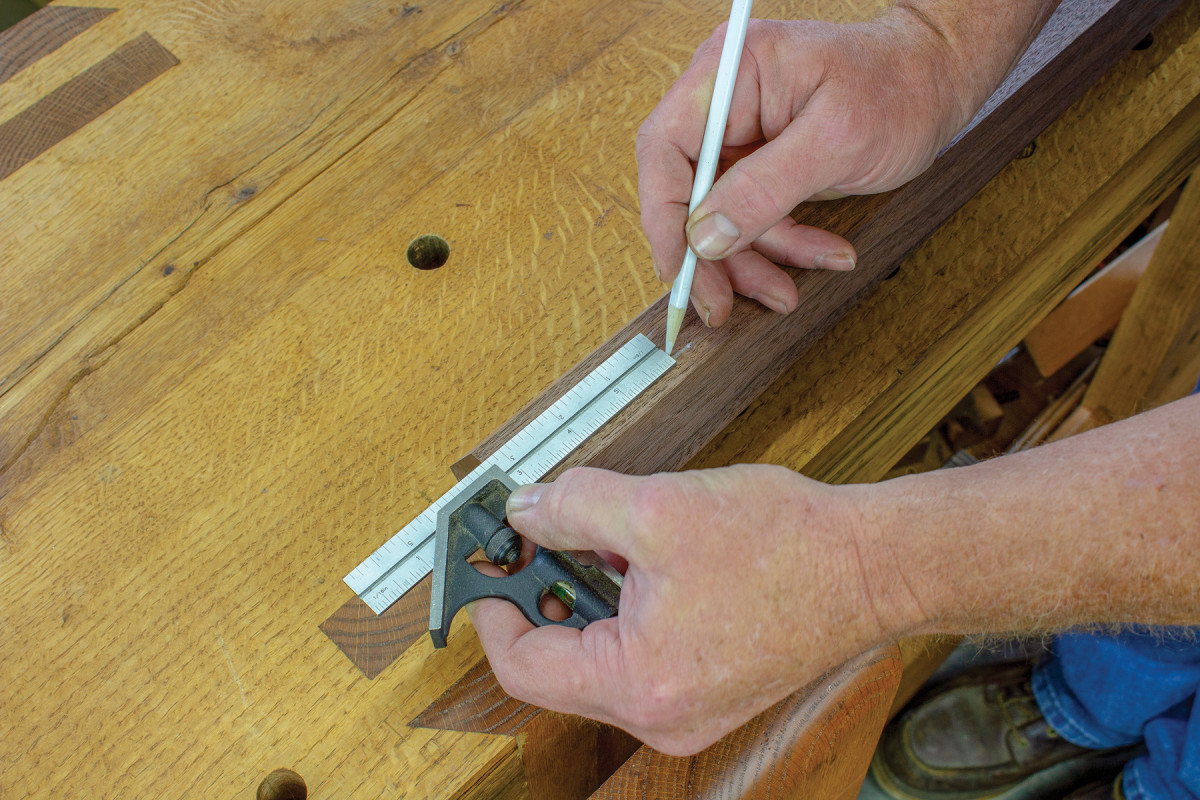
10. The top and bottom of the mortises are laid out with a machinist square to make sure the vertical location of mortises is the same.
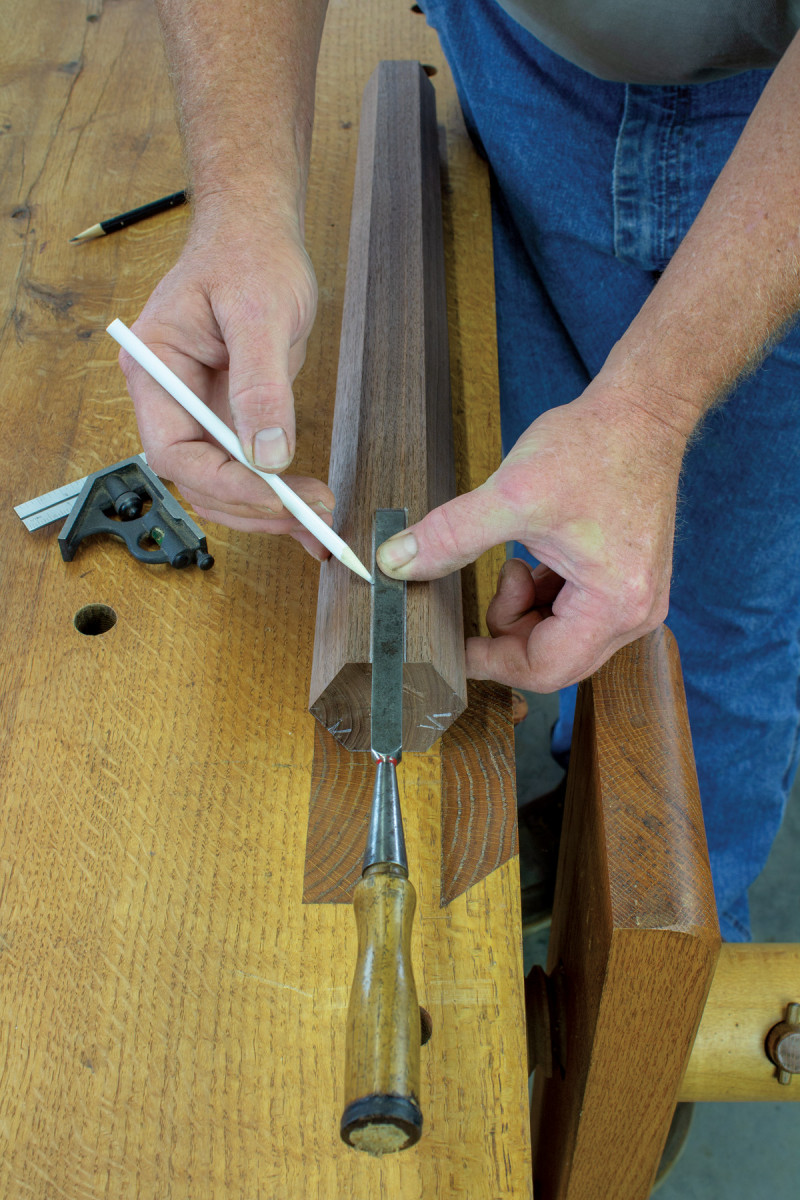
Three mortises chopped into every other facet around the bottom of the post attach the legs. There’s no great method that I know of to lay out the leg mortises that doesn’t require making some kind of jig. I had good success using the 1/2” chisel I set the mortise gauge to in order to lay out the mortise width. Simply lay the chisel on the facet where the mortise will be, eyeball it for center and straightness, then trace down either side of the chisel.
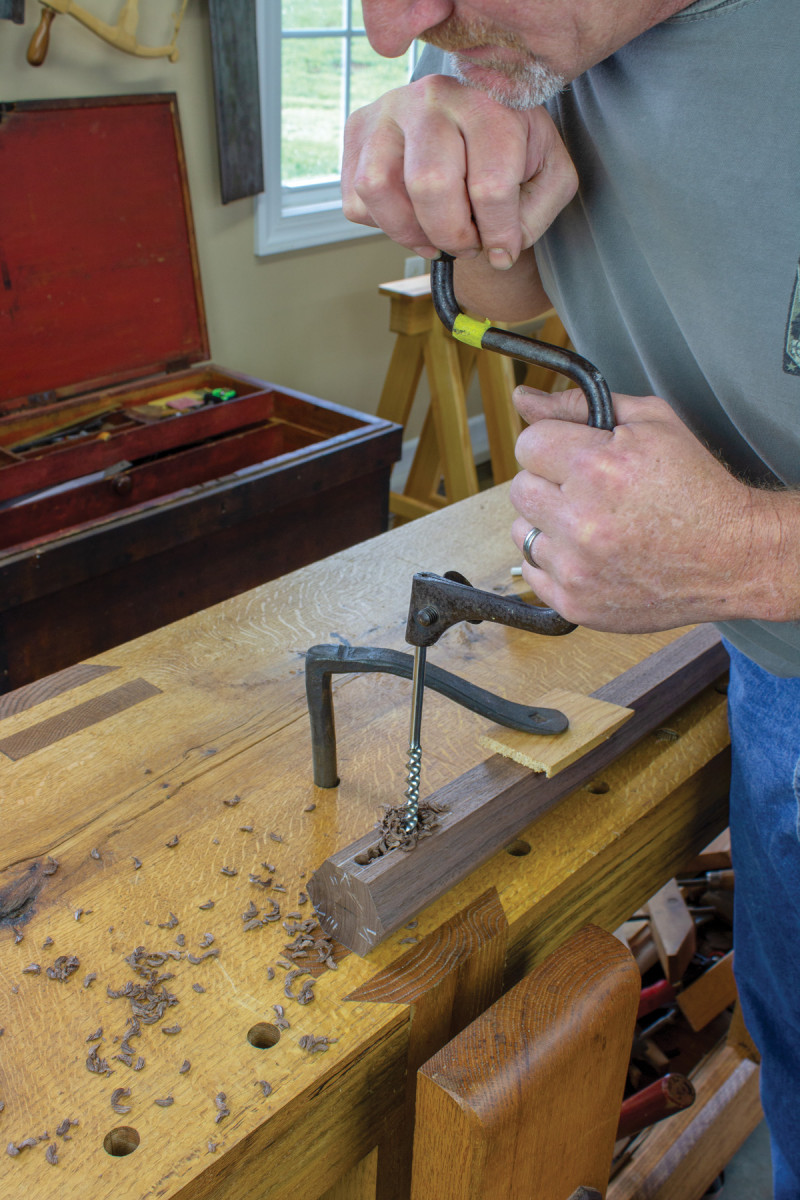
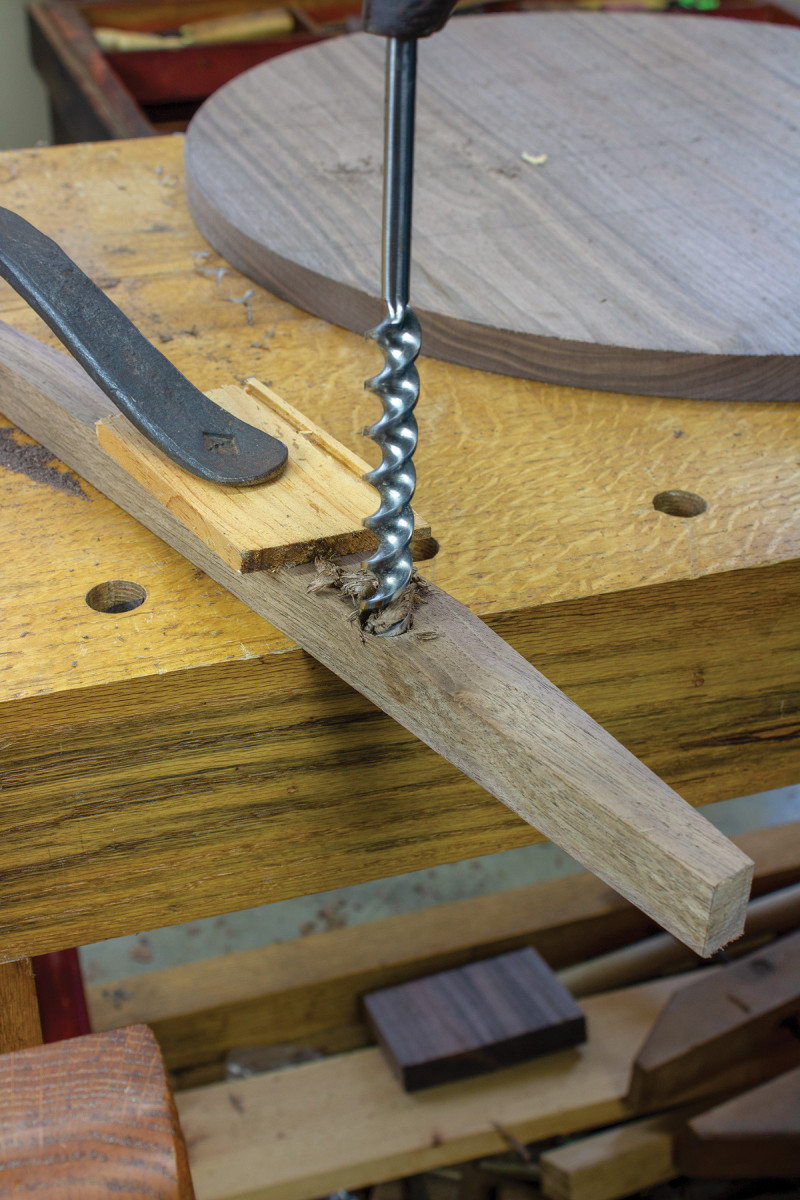
11. Most of the waste is bored out of the mortise with a 7/16″ auger.
You can measure and find the center of the facet, mark 1/4” on either side of center and square off the bottom of the post to lay out the mortise sides. This gets a little trick, because there isn’t much area on the bottom of each facet to register the square. A small square is helpful. Take your time and double check your layout before you chop your mortises.
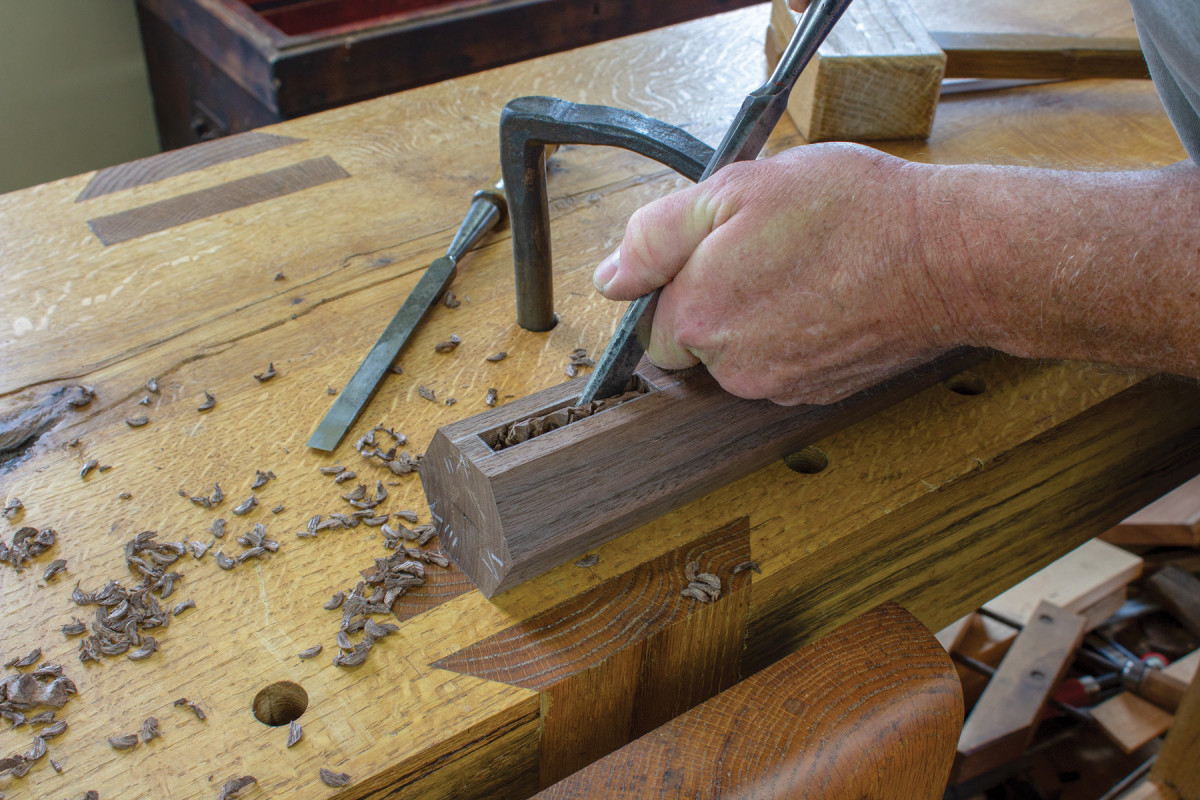
12. Complete the mortises by paring the walls to the layout lines.
Fit each leg to their mortises and number them; go for a snug fit. The legs are difficult to clamp in place once the glue is applied at assembly time. If they fit tight and hold themselves in place, you won’t have to try to clamp them. The upper part of the mortises will intersect so you may have to chamfer the ends of the tenons to keep them from contacting one another inside the post.
13. Guidelines are drawn on by hand leaving about 15/16″ thickness at the narrowest point.
After all the mortises are complete, dry-fit the legs and post. On a flat surface check to make sure the feet are sitting flat. If they aren’t, you can use a block plane to level them. Also, with a framing square check the straightness of the post. If it has a lean, the feet or the top of the tenon can be trimmed allowing the offending leg to move up.
Legs and Feet

14. Set your marking gauge to 3/16″, and with the fence against the bottom of the foot cut a deep line around the foot.
Even though the legs look like they’d be difficult and time-consuming to shape, there isn’t much to them. Don’t worry about getting the three legs identical to one another (the originals aren’t). Once they’re mounted to the post, slight differences in the shape of the legs are almost invisible.
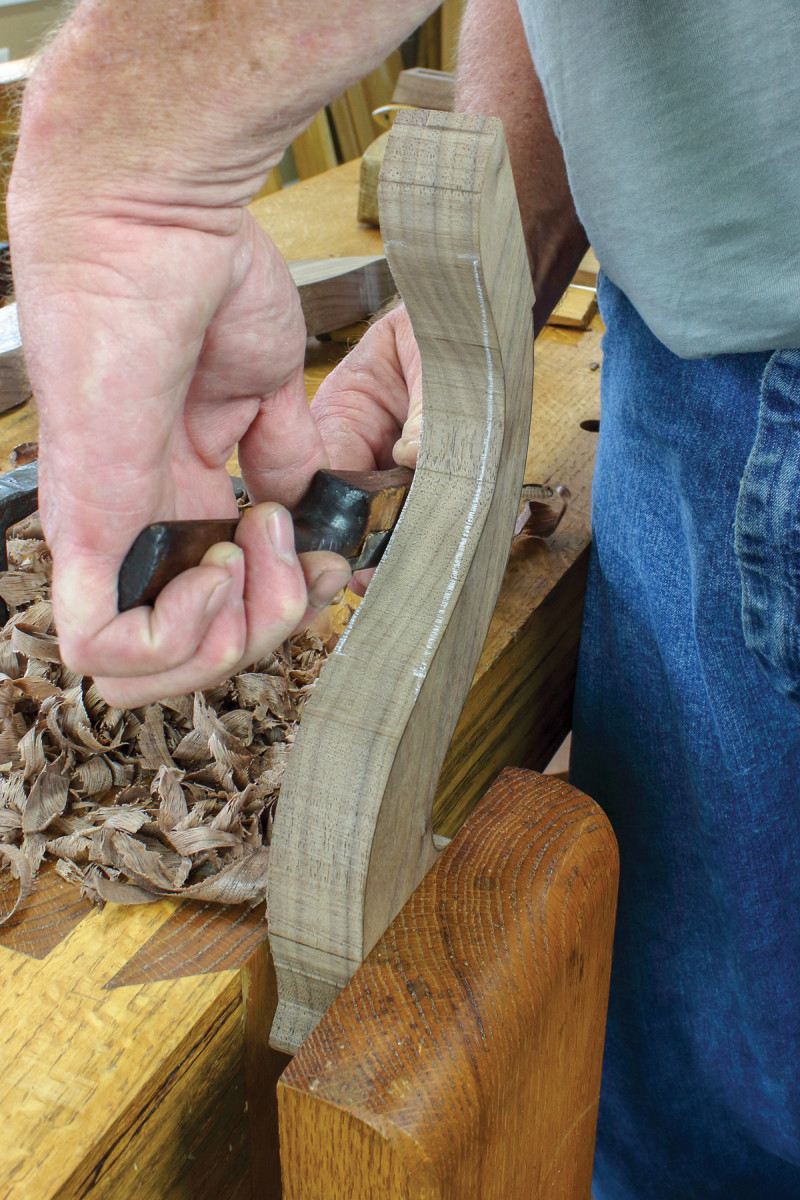
Start by thinning the sides of the leg with a spokeshave just above the feet.
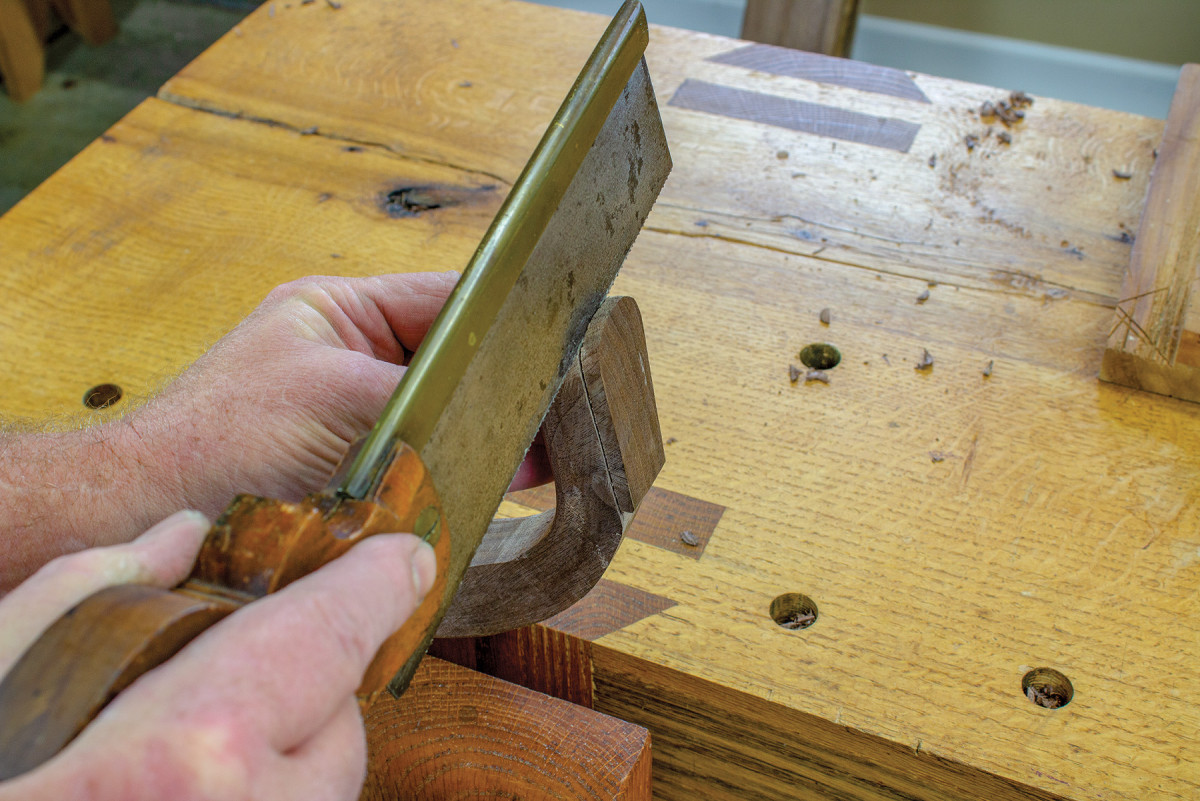
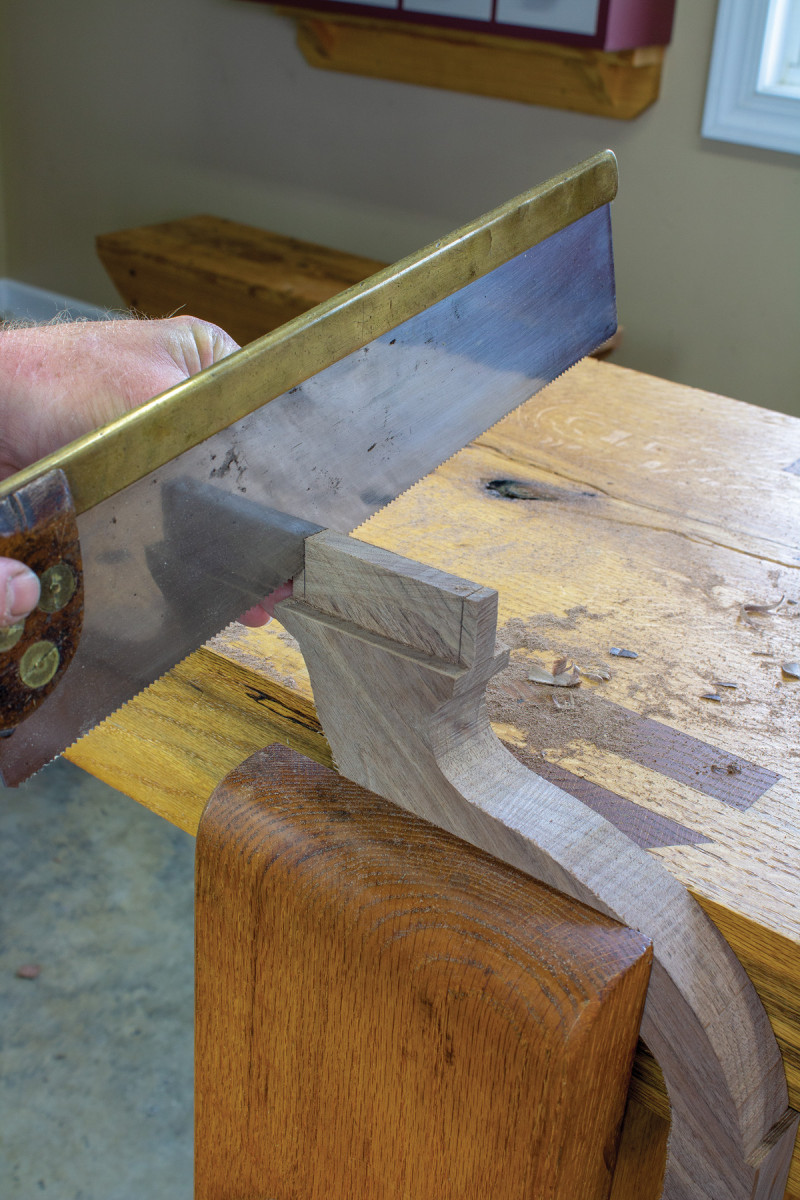
15. Saw right in the knife line to a depth of 1/8″ or so around the foot using a fine-tooth saw.
The side taper goes up the leg from the thin area about 3″ and down the sides of the feet leaving the very end of the toe full-width. When you look at the bottom of the feet they should look trapezoidal. Using the spokeshave, round over the topside of the leg from just below where they meet the post, rounding progressively more at the toe. Pay close attention to the grain and reverse direction as needed. A fine rasp can be used to final shape the sharper radius areas. A card scraper works well on the sides and less-curved areas.
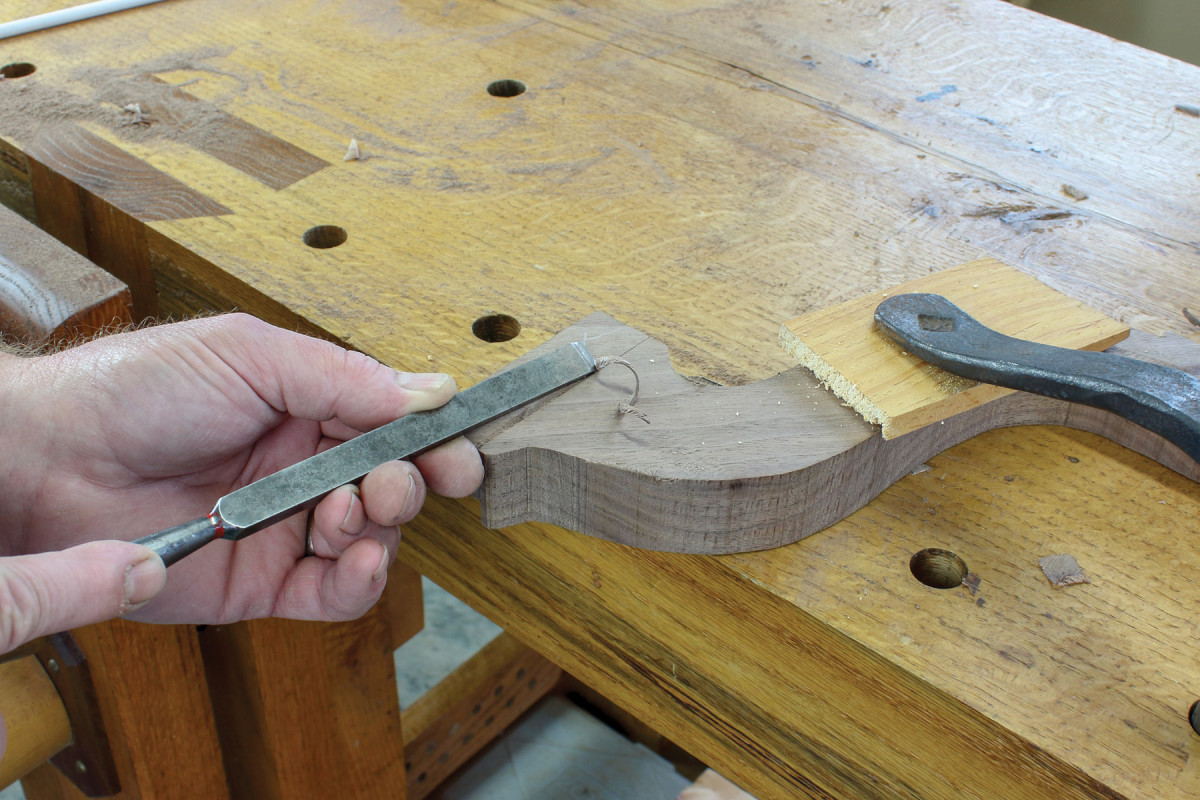
16. Finish shaping with a fine rasp.
The feet have neat detail at the bottom; a little pad that’s carved from the lower part of the foot. Again, this is easier to execute than you’d think.
Use a chisel to round the areas above and below the cut. Here again, keep a close eye on the grain as you work to prevent chipping the foot or the pad. The bottom edge of the pad is rounded over as well.
The undersides of the legs are flat so there’s not much to do here. Shave, scrape and rasp them smooth. Once all the shaping is complete, sand any areas that are still rough. It’s much easier to sand the legs now before they’re attached to the post.
Alternative Legs
Don’t be afraid to experiment with this design.
Variation A
 I call this variation Falcon 9. (My eight-year-old said this table looked like a rocket!). These are a straighter, simpler profile with beveled edges. They include a bit of rounding to keep from being too angular. Another plus is that the grain runs straight through, making them very strong.
Variation B
 On this version, I also did sliding dovetails to attach the legs. The flat facets of the post make cutting the socket and tail easier than in a round post.
Candle Stand Cut List
No. Item Dimensions (inches)
t w l
1 (A) Post 3 x 3 x 22 5/8
3 (B) Legs 5 x 15/16 x 13
1 (C) Top 11/16 x 20 x 20
1 (D) Top mount 7/8 x 5 1/2 x 7 1/2
2 (F) Battens 1 1/4 x 7/8 x 15 1/2
1 (G) Toggle 7/8 x 5/8 x 2 1/8
 Round Tenon
 Round Tenon
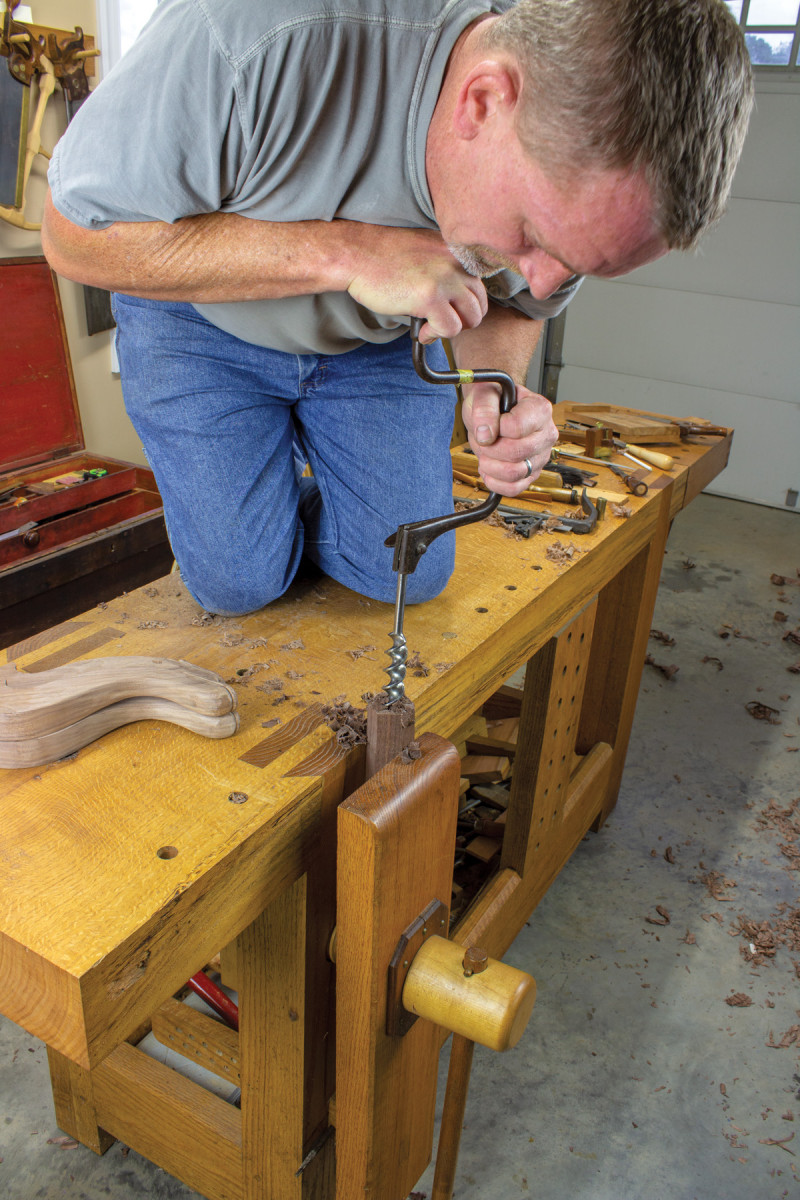
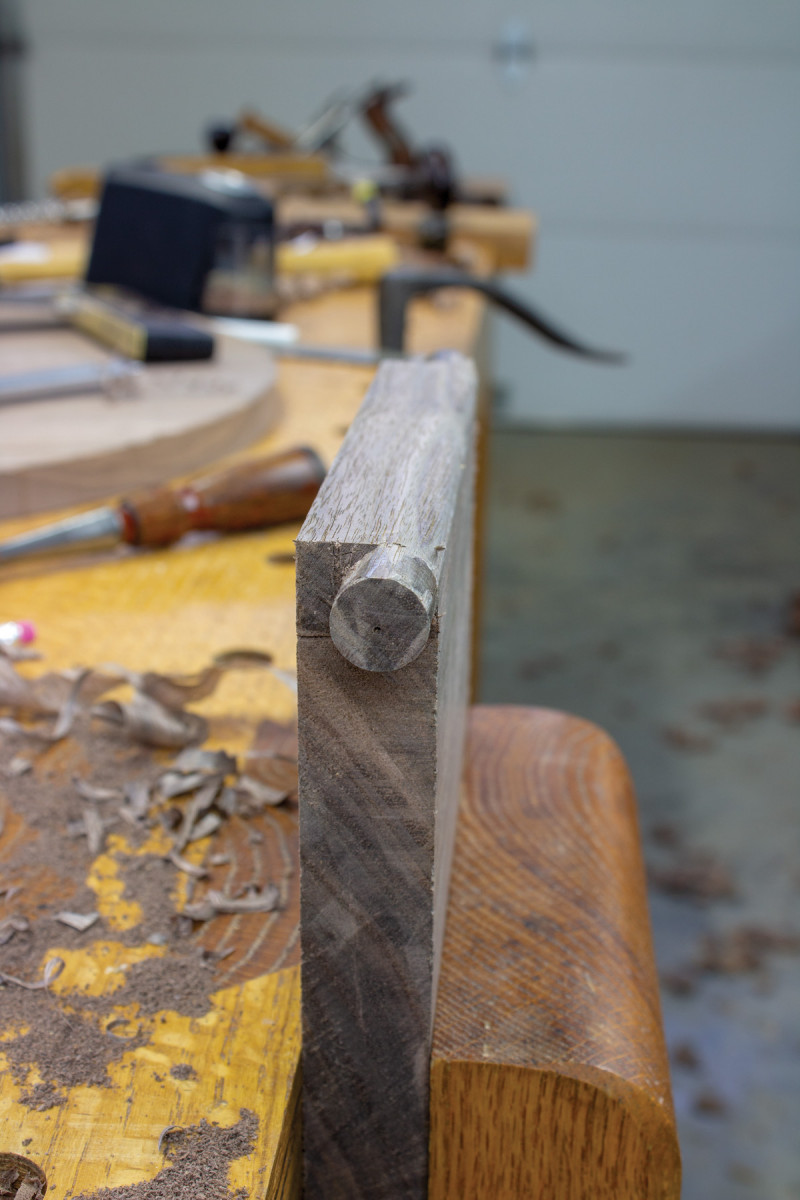
17. The tip of the auger bit often needs some downward pressure to bite into the end grain.
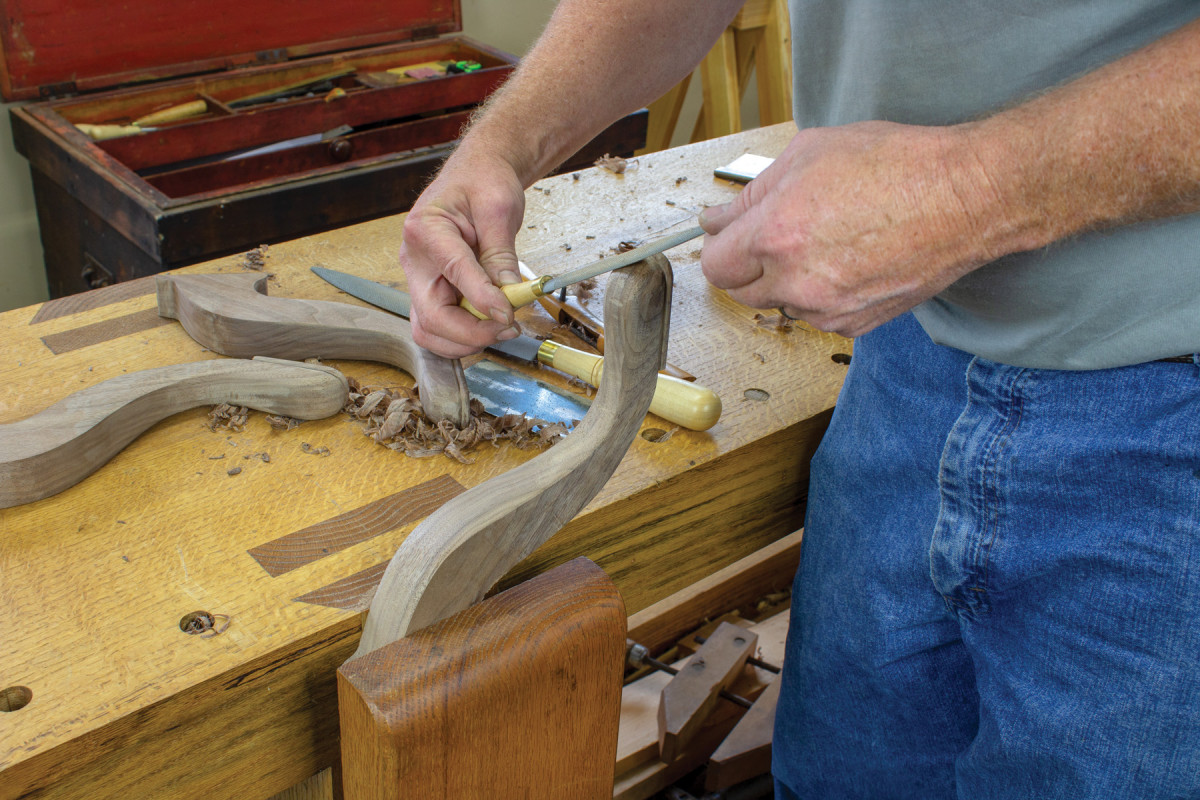
The top of the post has a 1″ diameter tenon that attaches the top. This can be made by using dividers set to a 1/2” radius, and scribing a circle on the end of the post. Reset the dividers to 1″, and with one leg on the end of the post scribe across the facets to create a shoulder line. Saw the shoulder line first, and then chisel around the circle removing the waste to create the tenon.
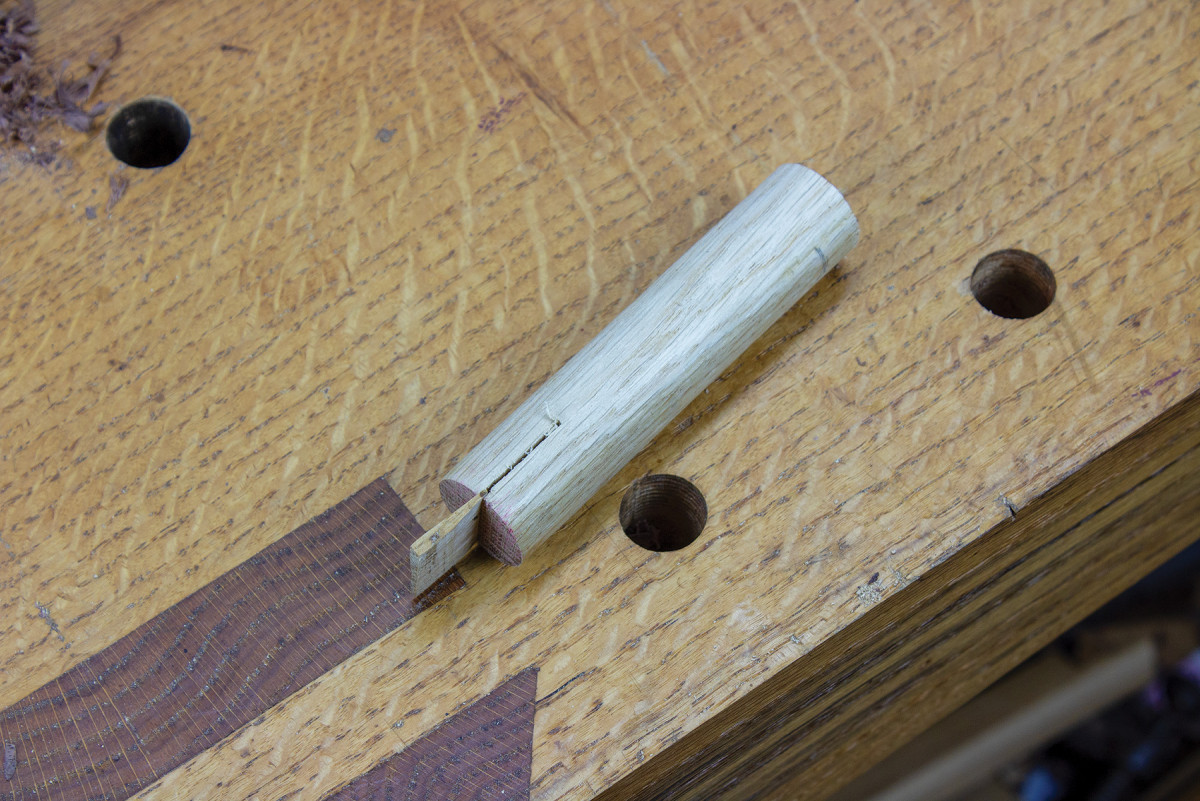
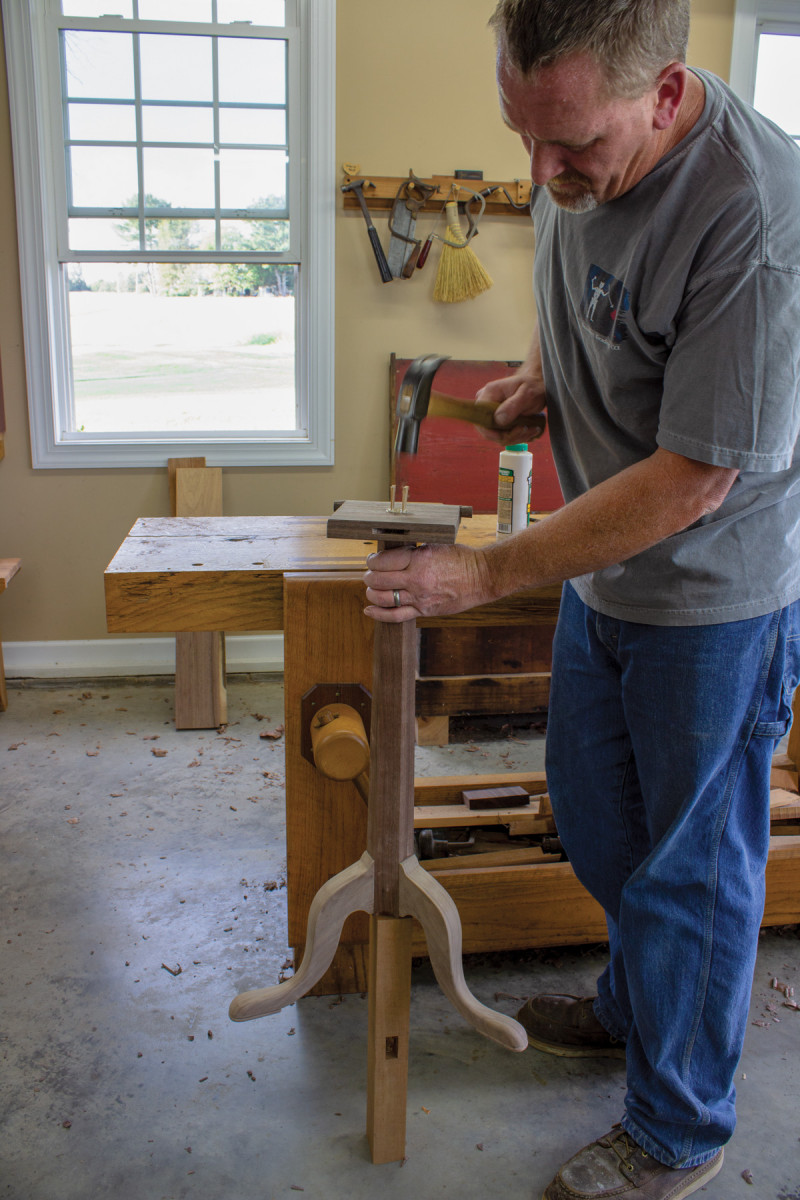
18. This wedged dowel joint will continue to hold even if the glue fails at some point.
The post I used here had funky grain at the top that I was afraid would compromise the tenon. To fix the problem, I bored a 1″ hole about 21/2” deep into the post and used an oak dowel with a wedge set into the bottom for the repair. After applying glue, the dowel was driven in. When the wedge bottoms out in the hole it expands the dowel and locks it into place.
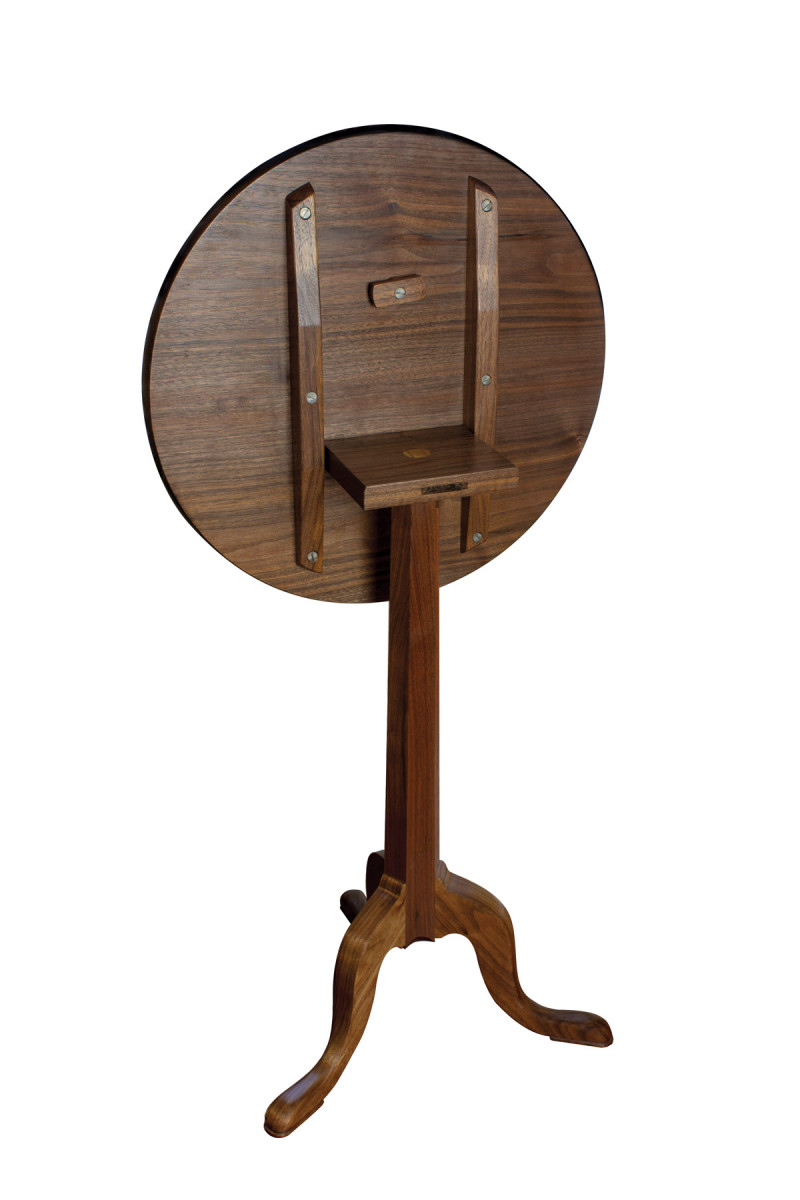
Tilt-Top Mechanism
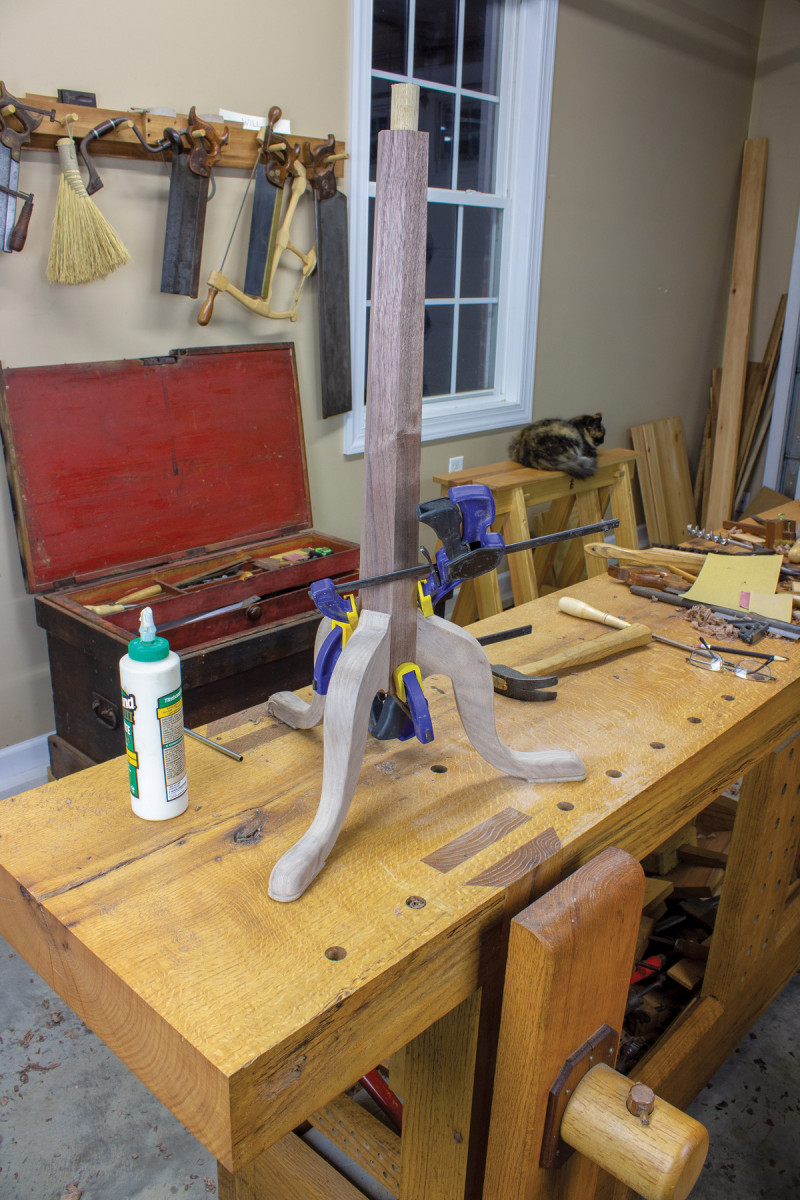
19. Once the round tenon is complete, apply glue to the leg mortises and tenons and assemble them.
The original table has a tilt top and that’s how I made mine. When tilted into the vertical position, the tilt top saves space by allowing the table to be stored closer to a wall. In the case of this particular table, the benefit of the tilt top is negligible. With the top horizontal it projects 20″ from a wall, tilted vertically, the feet project 15″. So, if you wanted to make yours with a rigidly mounted top it would be fine and would simplify the build a bit. The tilt top does get a few extra points for “coolness.”
The top pivots on two 1/2” diameter round tenons that are shaped from the back edge of the top mounting block.
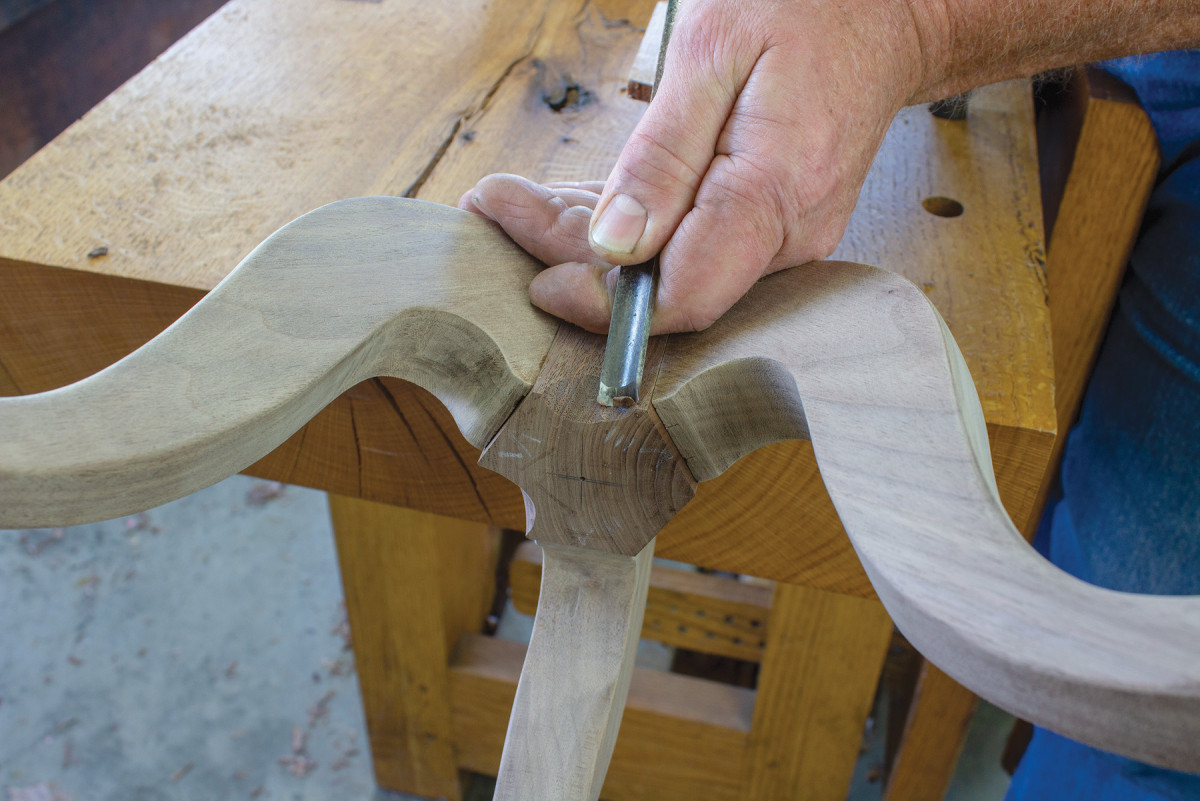
20. A nice detail on the original table was a set of three small coves on the facets between the legs that were shaped with a gouge or rasp.
The tenons have to be flush with the top of the block and back edge. Set a marking gauge to 1/2” and gauge all the way around both ends of the block. Using the same gauge setting, gauge from the top and back edges to make a square where the tenon will be located. From the front, saw down the gauge lines on both the edges stopping 1/2” from the rear edge. Now you can saw the other two lines leaving a 1/2“-square tenon.
21. Pare the tenon down to a circle. Bore a 1/2″ auger hole in a scrap to test the tenon as you get close to size. Plane the top back corner of the mounting block to the radius of the tenons after the tenons are shaped.
The mounting block attaches to the round tenon on the top of post. After finding the center, bore a 1″ hole to accept the tenon.
The 1/4” wide mortise is 11/2” long and about 1/2” deep centered on the thickness of the block.
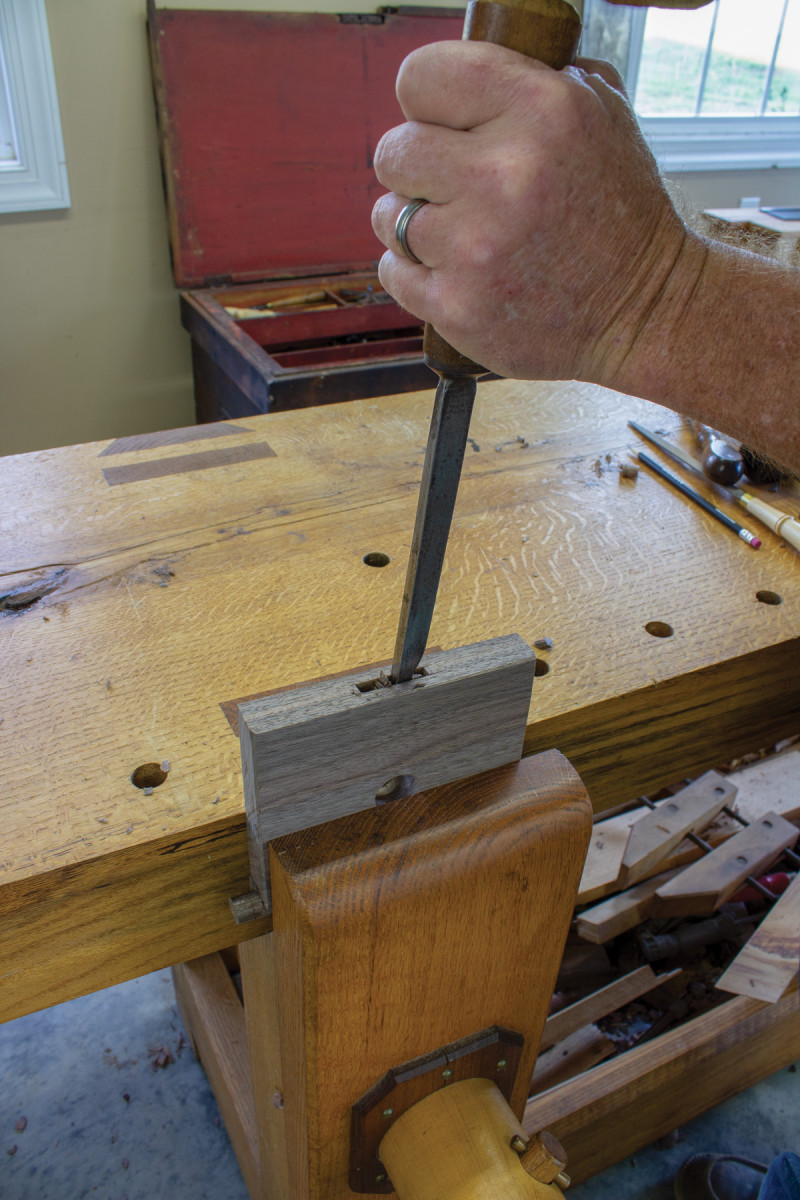
22. The mounting block has a mortise cut into its front edge for the locking toggle to engage.
The top-mounting block attaches to two battens that are screwed to the underside of the top. The battens also serve double duty by keeping the top flat and preventing warping. The battens on the original table extend all the way to the edge of the underside of the top. For this table I shortened them so they stop about 1″ shy of the edge of the top, thus making them less visible.
The battens have a taper on either end; these are quick to do and lighten the look of the parts a bit. It’s best to lay the battens out as a pair. First, find and mark the center, then measure either side of the center 23/4” and square the lines across. Next, measure or gauge from the top of the battens down 3/4” on either end. Use a jack plane to remove the majority of the waste and finish with the jointer.
23. The pivot holes are bored 1/2″ deep, right on the top edge of the batten. Be sure to bore as close as possible to the edge because if the auger breaks out the side a bit that’s no problem.
The ends of the battens are rounded to match the curvature of the top, and angled back a bit too. Rough out the ends with a chisel and finish the shaping with a rasp.
The pivot holes are bored with a 1/2” auger 21/2” from the centerline you made earlier. If the pivot hole is away from the edge the top will be set flat on the mounting block causing the top to lean.
To complete the battens, bore and countersink for the screws that mount the top. There are three #12 screws in each batten, one 13/4” screw in the center and one 11/4” screw at either end. The outer screw holes are elongated slightly to allow the top to expand and contract with seasonal humidity changes.
Top
24. The block is attached to the round tenon with glue and two wedges.
The top is 20″ in diameter made from two boards I edge-glued. Lay out the circular shape of the top with a large pair of dividers and cut it out.
Next, on the underside of the top, use a straightedge aligned to the center mark on the underside of the top, and make a mark across the grain the width of the top. Make a parallel line 3″ on either side of the first line. Assemble the mounting block and battens, align the inside edges of the battens with the layout lines. Slide the assembly so the center mark of the top is in the center of the 1″ hole of the top-mounting block. With everything in place, mark the screw locations to the top and bore the pilot holes.
Mounting the Top
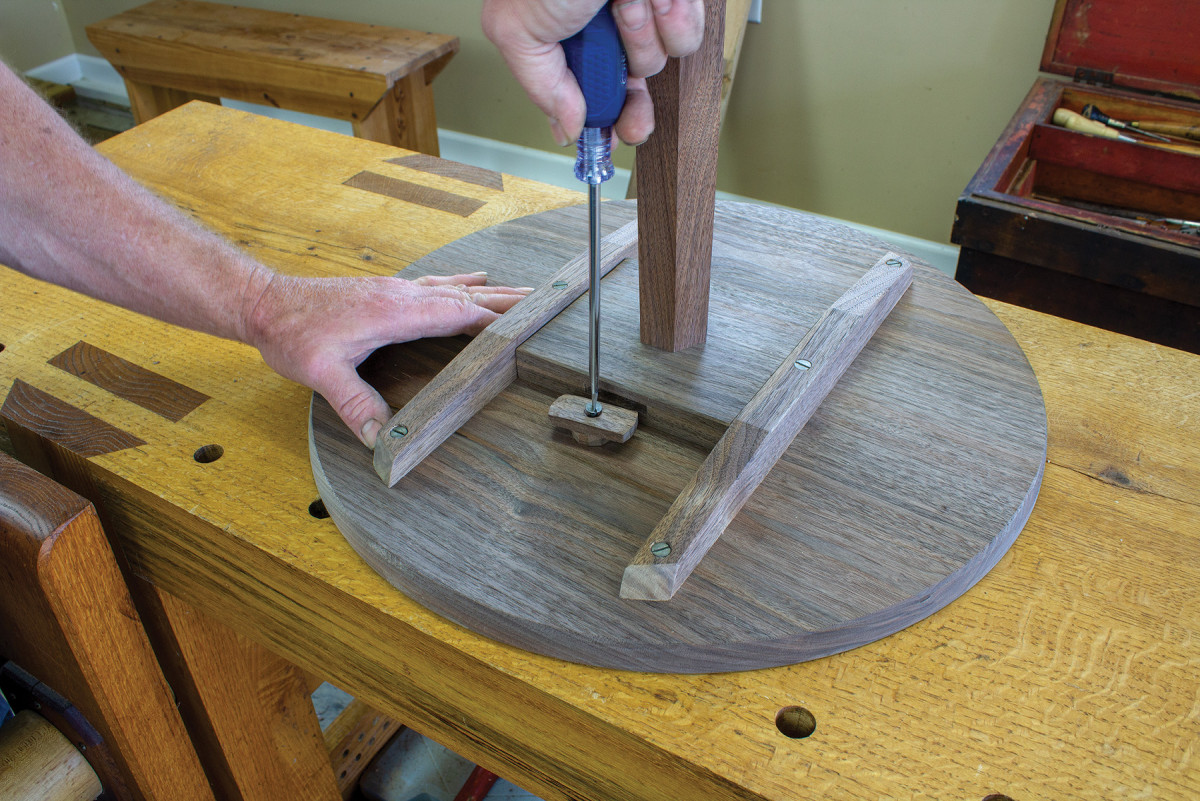
25. With the table and base upside down, place the toggle about 1/4″ into the center of the mortise on the mounting block. Mark the screw position on the top, bore a pilot hole and install the screw.
When the top is tilted vertically it needs to be directly over a leg to prevent it overbalancing the base. To accomplish this, the pivot side of the mounting block needs to be aligned or “clocked” to the base. There are a couple of ways to do this. One way is to set the mounting block on the post and eyeball the side with the round tenons over one leg. The second way is to install the block, and then on a flat surface lay the base assembly on its side with the latch side of the block down. This will align the tenon side of the block with the single leg sticking in the air. Make a witness mark between the tenon and mounting block once aligned.
The wedges need to be oriented to put pressure along the grain of the mounting block. Be sure to take note of this when sawing the kerfs in the round tenon to start the wedges in.
After the glue has dried, saw the remaining portion of the wedges off and plane flush with the mounting block face.
Assemble the battens to the block and screw on the top.
To lock the top in the horizontal position there’s a toggle that mounts to the underside of the top. Use a marking gauge set to 1/4” and mark all the way around the block. On the underside measure in 5/8” from both ends and square the lines across. Saw away the waste, then round the center portion and ends with a chisel or rasp. In the center of the toggle bore and countersink a hole for the pivot screw.
Finish
I like to use a finish that has a decent water resistance on most any kind of table I build. We have kids and pets; sooner or later something wet will end up on it. My favorite finish for pieces like this is a wipe on 50/50 Danish oil and satin poly mix. Simply rag it on, wait 15 minutes, and wipe off the excess. Let it dry for three days or so, scuff and reapply. PW
Will Myers is a writer, teacher and period-furniture maker in North Carolina.
Here are some supplies and tools we find essential in our everyday work around the shop. We may receive a commission from sales referred by our links; however, we have carefully selected these products for their usefulness and quality.


Will, just want to thank you for such a wonderful article. I always wanted to make a candle stick table but since the only thing I don’t own is a lathe I never did…….until now. Would love to send you a few pictures if you could tell me where or how to send them. Thank you again and keep the great articles coming!
Will, this looks like a great project. I’ll be looking forward to giving it a try. I have some mesquite that I think would make a nice table.