


We may receive a commission when you use our affiliate links. However, this does not impact our recommendations.
 It is surprising how important is a tight throat plate to ensure successful sawing on the bandsaw. A throat plate with a narrow kerf that flanks the blade neatly will prevent small wedge-shaped parts that separate during the sawing process from jamming the blade.
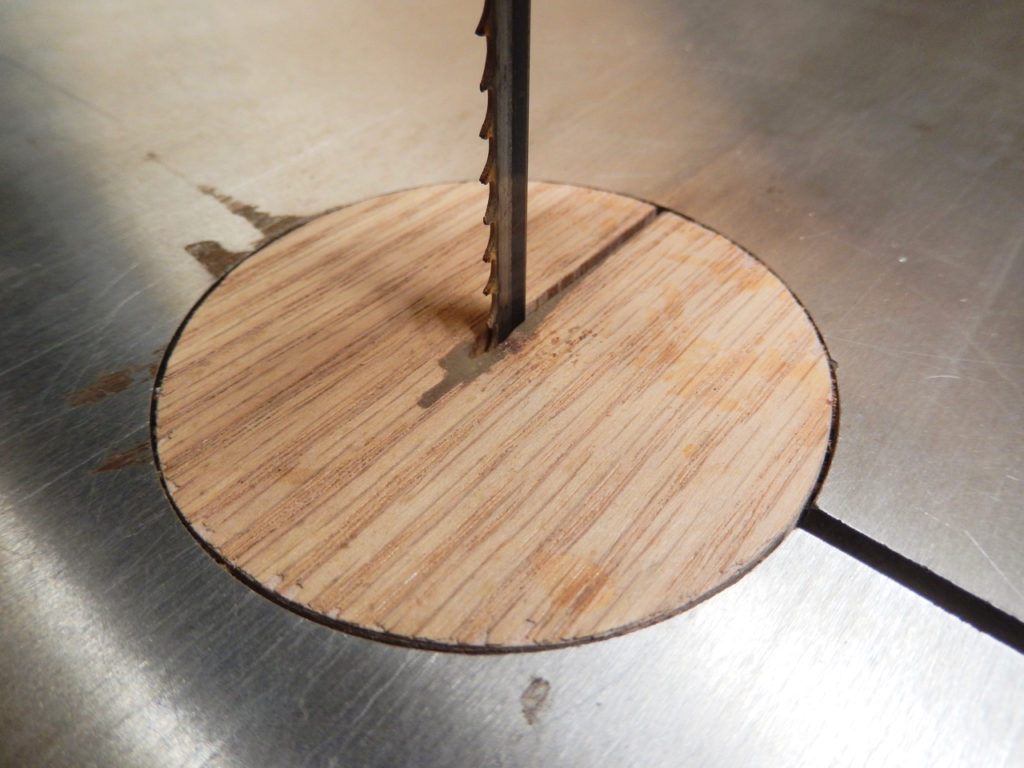
Our Grizzly Band saw came with plastic throat plate that had unusually wide kerf. This plate agonized us for a long time, that is until I decided that it is time to make a replacement. I used plywood and cut the circular plate on the band saw. Then I shaped a rabbet around its circumference to allow it to sit flush with the band saw table top surface. Once the plate was ready, I cut the kerf.
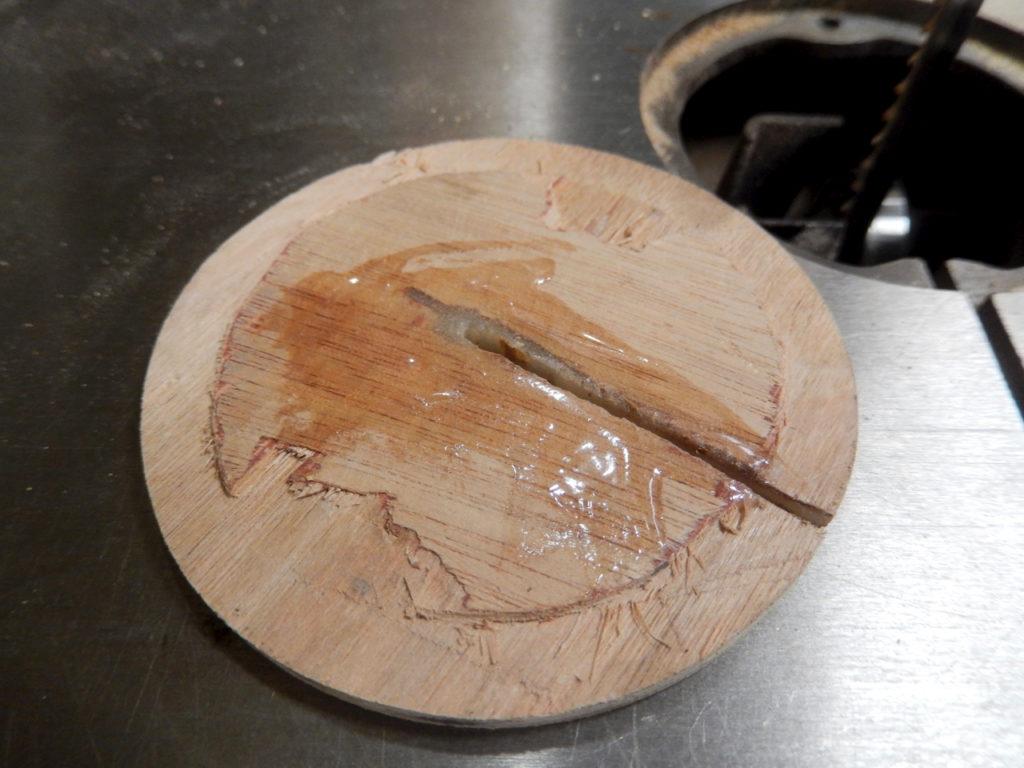
The main advantage of plywood for throat plates is that you can easily rehabilitate it even after the kerf had been widened up or became longer with use. To do so I take the plates out, affix a strip of masking tape over the top surface, turn it upside down and pour epoxy into the wide irregular kerf. After the epoxy cures, I reintroduce the plate to the band saw and behold – the new-old throat plate had been re-born. Sure it is possible to spend a few dollars and buy an aftermarket plastic throat plates, (although it might not fit into every bandsaws model out there), but these plates cannot be restored as most likely it would be very difficult to have the epoxy adhere to the plastic surface.
For this reason, I believe it’s worthwhile to spend some time and make your next plate from MDF or Plywood.
– Yoav Liberman
 With Power Tool Essentials – Digital Collection you’ll learn:
About proper drill press speeds for different bits and how to set the pulleys to match. Tips for tilting & realigning the drill press table for accurate drilling. The simple steps to keep mortiser chisels and drill bits sharp and cutting true. How to set the mortiser bit and chisel perfectly to avoid heat build-up and improve chip removal. Ripping and cross-cutting tips for sheet goods and solid wood. How to improve cuts using the proper blades. Where to stand and how to position your hands and body for the safest, most accurate performance. Simple maintenance and accurate setup and much more!
Learn the ins and outs of power tools with this digital collection!
Here are some supplies and tools we find essential in our everyday work around the shop. We may receive a commission from sales referred by our links; however, we have carefully selected these products for their usefulness and quality.


I turn a blank my my lathe, turn the tenon that fits in the drop in portion and part off the top. If it’s proud I just touch it on a belt sander.
I do multiples this way.
Very good! But you don’t address the one aspect of the job I’ve struggled with: cutting the kerf in the insert. I have come up with a couple methods for keeping the circular workpiece straight as it’s cut, but I’d like to hear about yours. I have fastened the new throat plate to a square piece of scrap and used that to guide it along a fence. I have marked a pencil line and cut to that freehand. I have trapped the circular blank between two parallel fences and done my best not to let it rotate as I hold it down with a good, sticky push stick. But all these methods seem either too involved or too imprecise to me, and I’d like to hear how you do it.