We may receive a commission when you use our affiliate links. However, this does not impact our recommendations.
As with most things in woodworking, there’s more than one way to fit doors and drawers. Nothing beats a handplane for precision, flexibility, and speed when you have a solid bench and vise. A table saw can also do the trick – quite well, in fact, even for tapered cuts. But what about those times when you’re working in a shop (or on a jobsite) with a less-than-solid workbench and a portable table saw that shakes as though it’s about to take off when you switch it on?
Twelve years ago, my employee and I were fitting a set of cabinets for a local kitchen. For jobs involving inset doors and drawer faces, I always prefer to save the final fitting until after the casework has been installed; it’s more precise and, in the end, more efficient. (Yes, I am well aware that some cabinetmakers will disagree with me on this, but this is what I’ve found works best for my business.) We had my old Black & Decker Workmate – a trusty friend since 1980 – and a portable table saw. But the Workmate shook when I tried to plane the inch-thick end grain of the drawer faces, and most of the doors were too large to fit between the vise screws. The table saw made too coarse a cut for the task at hand.
It suddenly dawned on me that I could use a router with a pattern bit to cut the doors and drawer faces exactly to size – a useful technique that I’ve come to rely on in a variety of situations, especially when I’m working out of town and don’t have access to a shop. Here’s how.
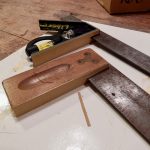
Hold your workpiece up to the opening and mark each end of the line you need to trim.

This is the mark at one end of the door I need to fit. I like to draw a circle around my marks for ease of visibility.
Clamp the workpiece on a stable surface; this can be a portable work bench or a pair of saw horses with a piece of plywood on top. Now clamp a straightedge on the workpiece, just touching your marks. The ideal straightedge will be:
- Dead straight.
- Wide enough to allow for clamping to your workpiece without the clamps getting in the way of the router.
- Long enough to extend beyond each end of your workpiece, to prevent you from rounding the end and cutting into your work
- Thick enough for the bearing to make good contact, but not so thick that your cutting edge can’t reach the full depth you need to cut. (Hint: If your cutting edge is not long enough, you can make the first pass, then remove the straightedge and use the trimmed edge of the workpiece as the straightedge.)
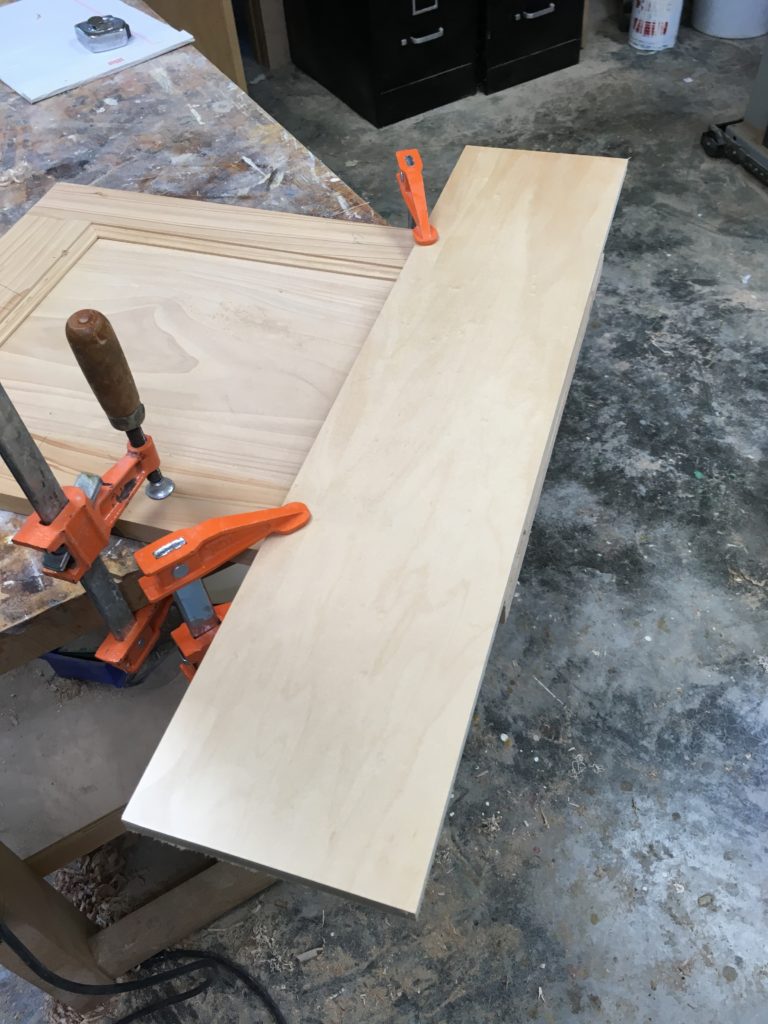
Clamp the workpiece firmly to a stable surface, then clamp the straightedge to the workpiece so that it JUST touches your marks. Although you can’t see the amount to be removed in this shot, you’ll see it in the next.
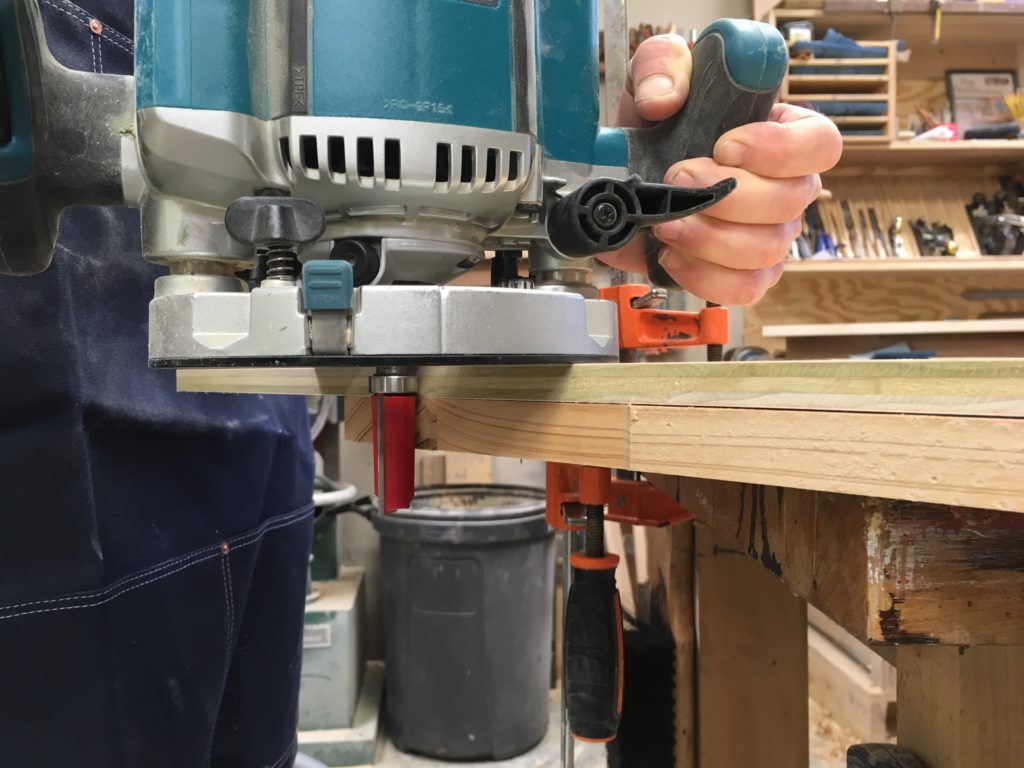
Adjust your router’s depth of cut so that the bearing will ride solidly against the straightedge. This is very important! If the bearing diverges from the straigh edge it will cut into your workpiece. (How do I know this?)
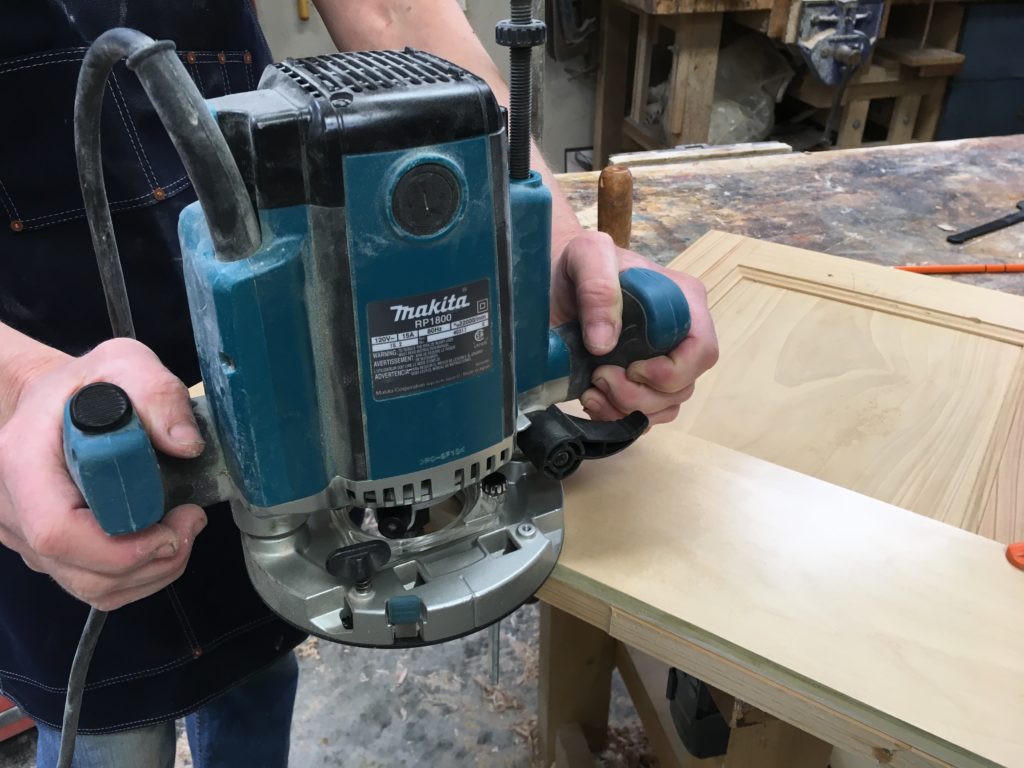
Hold your router steady and keep it dead flat on the surface for accuracy. This image shows the cut part-way along the bottom rail of the door.
Keep the router steady as you cut, holding it squarely to prevent it from cutting into your workpiece at an angle.
Another view of the cut partly made: The router is flat on the straightedge and square to the workpiece. The full height of the bearing is in contact with the straightedge.
Aside from the speed and precision, this technique allows you to make tiny adjustments. Simply repeat the process until you have the fit you want.
One final note: For doors, once you have the basic fit, plane a bevel on the opening stile by hand to allow the door to open.
And that kitchen from 2005? You can see it here.
Nancy is the author of three books – “Making Things Work: Tales From a Cabinetmaker’s Life” (2017), “A Home of Her Own” (2011) and “The Hoosier Cabinet in Kitchen History” (2009), and a contributor to numerous magazines.
Here are some supplies and tools we find essential in our everyday work around the shop. We may receive a commission from sales referred by our links; however, we have carefully selected these products for their usefulness and quality.