


We may receive a commission when you use our affiliate links. However, this does not impact our recommendations.
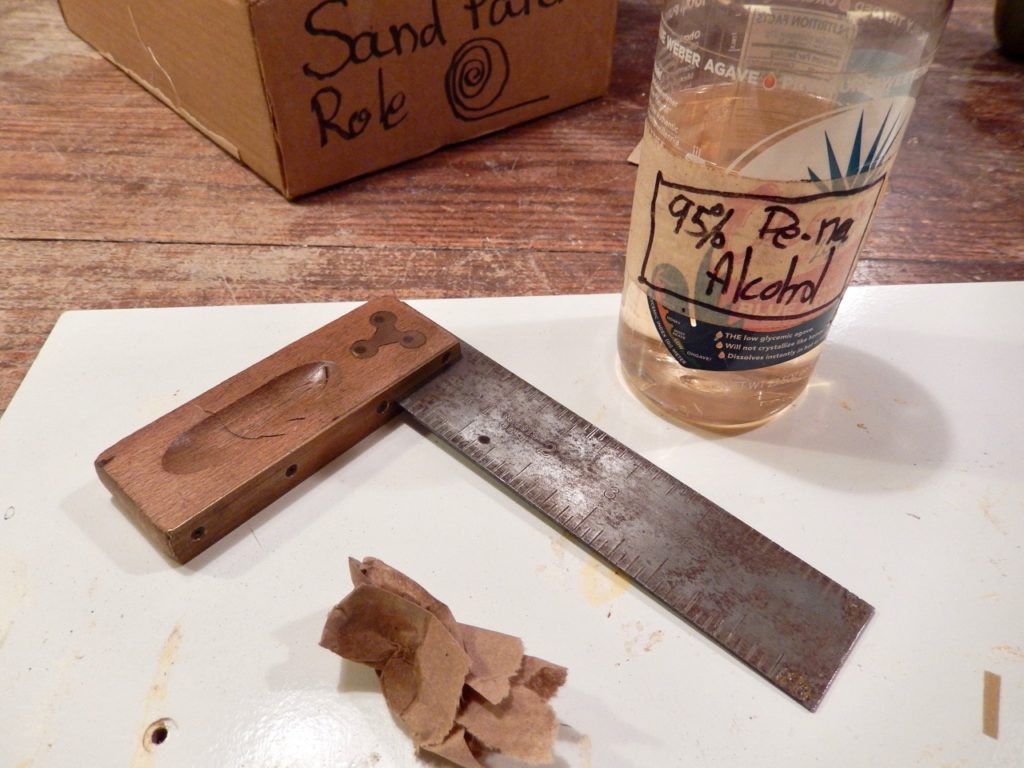
 Anyone who has introduced a square to young students or beginner woodworkers knows the challenges of teaching them how to control the tool and maintain it square to the edge of the workpiece during use. The main problem for the inexperienced woodworker is to keep the square where they intended. As the student slides their pencil or marking knife down the ruler, problems begin. The further away they slide the marking tool from the square head, the more likely they are to lose control of the square, which leads the square to slide or pivot. One way to help my students keep the square secured to the workpiece is to add friction between it and the work. The way I choose to do this is by affixing a strip of Pressure Sensitive Adhesive sandpaper to the edge of the square’s head.
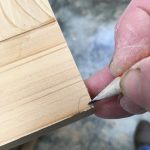
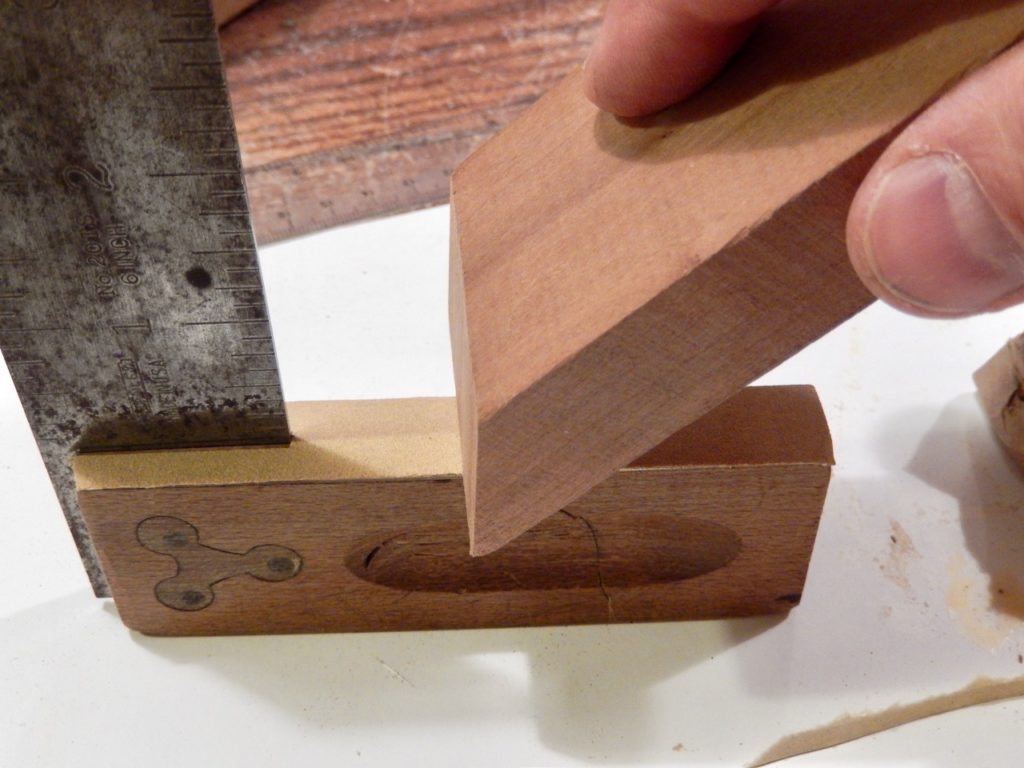
I begin by cleaning the edge of the square head with alcohol. Then I cut the PSA sandpaper with a utility knife and press it onto the edge of the square. To solidify the marriage between the two, I use the corner of a scrap piece of wood and press it along the PSA strip.


This technique is not restricted to beginners or young woodworkers; even seasoned woodworkers can appreciate it. With the PSA sandpaper on the square, you can reduce the force you apply on the square – producing more accurate right angle marking.
If you’d like to explore more tips and tricks for marking, check out Marking & Measuring: 11 Articles to Help You Zero in On Perfect Work. Available for purchase at shopwoodworking.com.
Here are some supplies and tools we find essential in our everyday work around the shop. We may receive a commission from sales referred by our links; however, we have carefully selected these products for their usefulness and quality.


Is there much competition for the ‘sandpaper role’ in the school hand tool pageant?
Lost feature but an important one . . .
Teach ANY woodworker to use the “finger” hold on the body of the combo square. My father-in-law, (Master Carpenter), taught me this several years ago and it has proven very helpful in holding the square secure for measuring and drawing a line. This feature has all but been forgotten over the years. Doesn’t anyone question why the body is shaped like it is with the “dip” in it?!?!?!
There are a few mfg’s that still produce this design feature which is really sad.