


We may receive a commission when you use our affiliate links. However, this does not impact our recommendations.
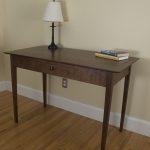
 As a follow-up to a recent post about shop-made leather drawer pulls, I thought I’d share with you a photo of the completed sideboard.
Just how did this piece evolve? There’s a Sam Maloof cabinet that has the same proportions and drawer arrangement. I like very much the look of the all-walnut piece he built in 1949. I was working on a presentation for a Woodworking in America seminar about then, and the subject had to do with construction methods for modern or contemporary furniture. I then started with a 200-year-old lowboy that’s been in my wife’s family because it had the same proportions and general functionality as the Maloof cabinet. So, I build my piece to compare and contrast the joinery of all three pieces.

Here’s a view of the top of the leg attached to the end panel from inside. Note the flat where the panel and leg join and another flat where the edge of the drawer fronts transistion to the leg. You can click on the image to enlarge. Oh, yeah, the dings in the work are thanks to the movers who moved the piece back to my shop from WIA.
Strangely, my cabinet started as nothing more than a prototype (and I suspect some of you will conclude it should remain just that, given the contrasting wood color and grain pattern). But I really like the piece and now consider it a keeper. Interestingly, I was browsing a book on modern furniture at about the time I was finishing the piece and saw a cabinet done in the very same style of alternating/repeating grain pattern and color.
While I am quite pleased with my first-ever attempt at making the leather pulls, there’s another element to the cabinet that I’m excited about. It’s the legs. Yup, the legs. Why? First, I’ve never seen a cabinet with legs that are turned round from the top of the case to their gentle tapers that start at the case bottom and run to the floor. So I like that design element. And second, figuring out how to make those round legs then join them to the case sides was a bit of a challenge.
In a nutshell, here’s how I did it:
I started with square blanks just slightly larger than my finished turned diameter. While the stock was square, I marked the centers on the ends then routed a long 1/2″-wide mortise to a stopping point. Next, I went to the jointer and made a stopped cut to remove a given amount of stock from two edges: one edge where the mortise was cut and one edge where the inset drawers would close adjacent to the leg. The cut on the mortise side would provide enough flat so the panel with the tenon would join a flat rather than a rounded surface. With this work done, I turned the legs round. None of these steps was difficult. The hard part was figuring out the appropriate steps in the process and doing the layout work to predetermine particular dimensions.
The last part of project was the single-board solid-walnut top I used from my private stash. It’s a gorgeous piece of wood and matches the walnut legs, so that ties the piece together as a design. I guess you never know what might come of making a prototype. In this case, I’m so glad I did.
Here are some supplies and tools we find essential in our everyday work around the shop. We may receive a commission from sales referred by our links; however, we have carefully selected these products for their usefulness and quality.


Steve:
That piece is really cool. It is a nice break from the arts and crafts and earlier pieces that dominate woodworking magazines. What wood did you use on the drawer fronts and sides? It is hard to see the detail on the legs that you talk about – could you post a detail picture?
Again, really nice piece.
Robert
I like it a lot. It has a 50s/60s modern feel to it and it probably would look well in a variety of settings or homes.