We may receive a commission when you use our affiliate links. However, this does not impact our recommendations.
The first time someone showed me a photo of an infill handplane, it was bewilderment at first sight.
“That’s a handplane?” I asked. All I could see were a bunch of odd lumps of wood and some steel. This was years before both the Internet and modern toolmakers made this form of tool a common sight in workshops again.
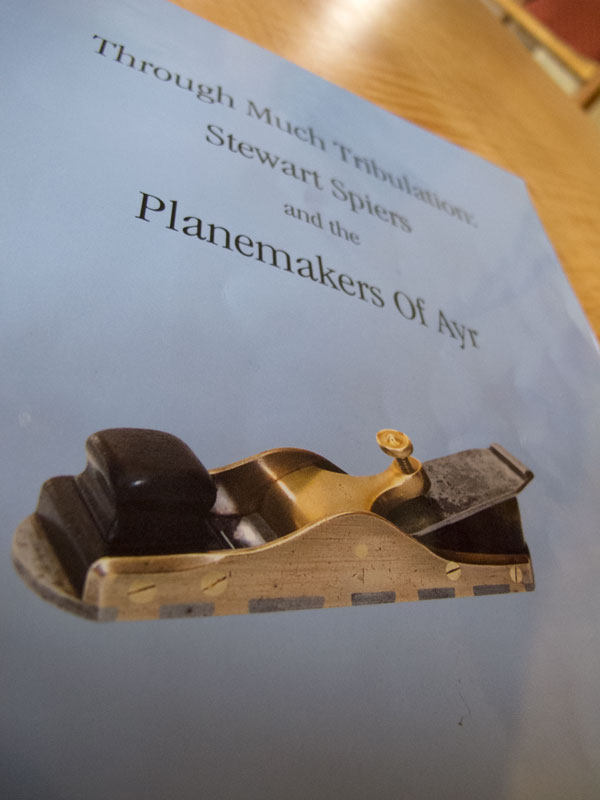 After years of looking at other people’s infill planes, I became accustomed to their shape. But it wasn’t until I read “Through Much Tribulation” (Oliver Publications) by Nigel Lampert that I considered owning one. Like Lampert, I preferred the planes made by Spiers of Ayr over the other makers. Stewart Spiers (and his family) know a fair curve. But buying a Spiers was something that was out of reach for a newspaperman.
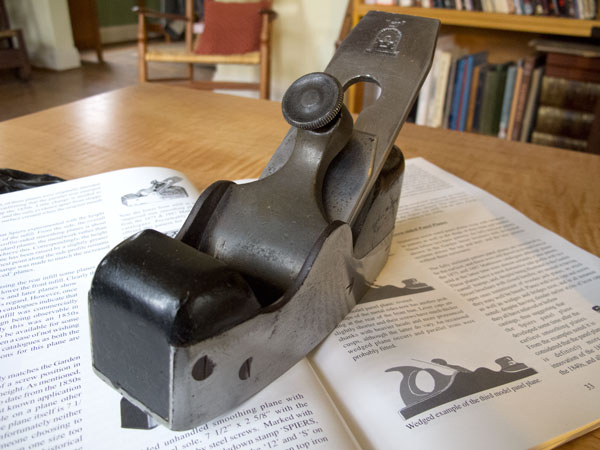
Flash forward 17 years or more and I got the opportunity to buy an early Spiers smoothing plane for a price that even a writer can afford. And though I don’t need a smoothing plane, I bought it and fixed it up. Perhaps I’ll give it to one of my friends to use. This plane has clearly seen a lot of work during the last 130 years, and it has a another four of five generations of life left in it.
If you’ve ever considered fixing up an infill, consider the following a cautionary tale. This is probably the fourth or fifth vintage infill I’ve fixed up, and they all had significant problems.
While I enjoy fixing up planes OK, I much prefer woodworking. Fixing up a tool like this is more of a public service for the woodworking community than a passion of mine.
Like all the infills I’ve fixed up, the wooden bed of this Spiers had shrunk so it was not coplanar with the metal mouth block. This is usually not as big a deal as when you have a Bailey-style plane or wooden-bodied plane with a bed error. The monstrous lever cap will usually hold the iron in position. So don’t go messing with the bed immediately.
The biggest problem with this Spiers was another typical problem: the iron and chipbreaker were radically mis-ground. And the other (common) problem was that the long edges of the plane iron were not parallel. Add to that a super-tight fit between the plane body and the iron and it was tricky to find the correct grind so that the iron could emerge and be adjusted laterally.
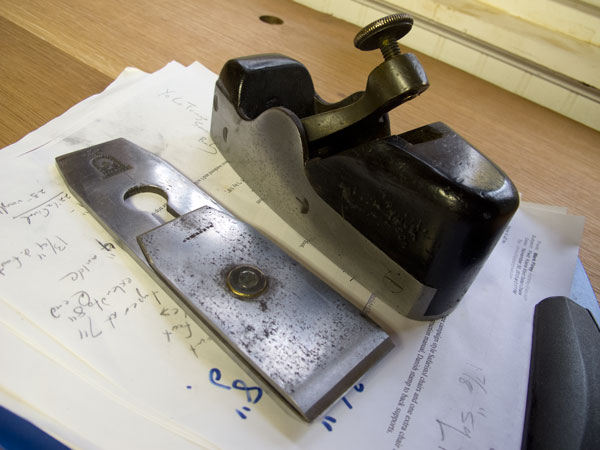
So I did something that would make a collector fetch a pitchfork with which to skewer me. I reduced the iron’s width slightly using a motorized belt sander. Then I abraded the chipbreaker to match. This radical surgery gave me the opportunity to make the long edges of the iron parallel, which will make a lot of things easier (such as grinding or honing with a jig) for a future owner.
This reduction in width allowed the iron to move laterally in the mouth.
Next up: the chipbreaker. Mine was dogmeat. Its edge wasn’t even close to square to its long edges. So on the grinder it went. I ground a 50° bevel on the front edge, which is what I prefer. Then I removed all the burrs from the iron and chipbreaker with some #220-grit sandpaper.
Then I took a look at the sole of the plane. I’m not OCD about sole flatness. When the plane stops working, I’ll investigate the sole eventually. But on this tool, the front of the mouth was so worn I could see the depression. I didn’t even have to measure it.
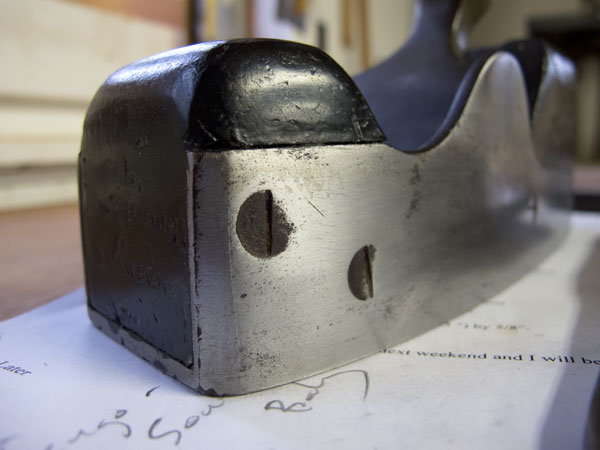
Why do soles wear right in front of the mouth? We use that part of the sole more than any other when working on edges and corners. If that area isn’t flat, you are likely to see more tear-out because the mouth isn’t pushing down the wooden fibers (at least in my experience).
So I stuck some #80 sandpaper to my jointer bed and flattened the sole. I stopped as soon as the worn area began to disappear. There’s no need to dress the sole so the toe and heel are flat unless you simply prefer shiny. I finished up the sole with #220 sandpaper.
I think the rear infill of this tool is a little loose, but I’m going to ignore that until it becomes a problem. It might not ever.
When I fix up a plane, I don’t like to remove any patina on the metal or dress up the wood. Tools look better with age on them to my eye.
Then I took it to the wood. Many of the infills were used on mahogany, so I fetched some old Swietenia macrophylla for a test drive. The grain is interlocked in this species, and I decided to work against the grain, just for kicks.
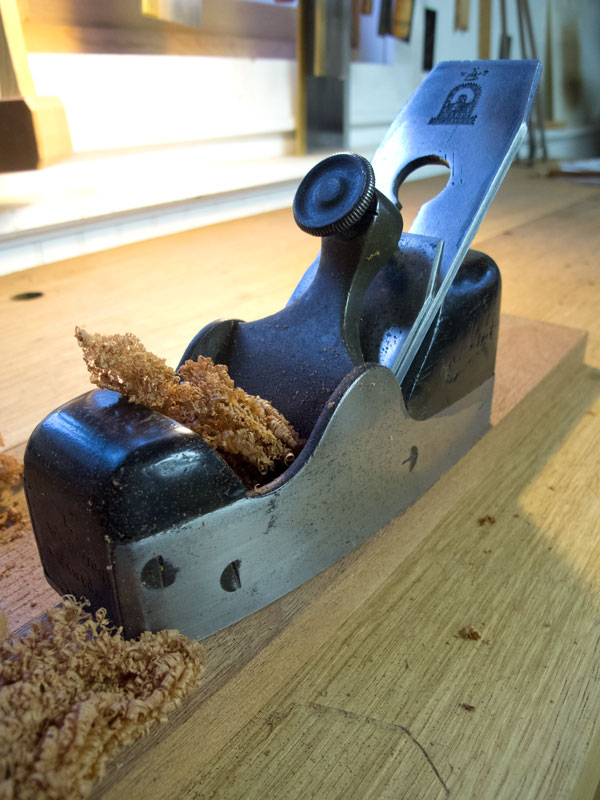
Success. There is something nice about bringing one of these tools back to life, but I’m glad I hadn’t tried all this restoration on a tool before I really knew what I was doing with handplanes. Fixing up old tools before you know how that particular form of tool is supposed to perform can be tricky, especially on a nice old tool like this Spiers. If you’re going to fix up old tools, you might consider working on some less-expensive ones first.
I’ve got a few British projects coming up for customers, so I’ll probably keep this Spiers around for a while to lend a hand.
— Christopher Schwarz
More on handplanes (a lot more) can be found in my book “Handplane Essentials” (Popular Woodworking)
Here are some supplies and tools we find essential in our everyday work around the shop. We may receive a commission from sales referred by our links; however, we have carefully selected these products for their usefulness and quality.