


We may receive a commission when you use our affiliate links. However, this does not impact our recommendations.


Recently I’ve become somewhat obsessed by the puzzle of storing saws.
During my years as a woodworker, I’ve been admonished many times for how I handle this tool. Here are a few choice ones to chew on:
1. With handsaws, you should never lay the entire tool on a flat surface. This will cause the weight of the blade to bend its sawplate. Instead, set the blade alone on the benchtop – let the tote hang off the bench.
2. Never store or set down a saw with the handle on the floor and the blade against the wall. Again, the angle and the gravity will cause the sawplate to bend.
3. Saws should be stored only by hanging them from their handles (centering their chi with the molten core of the earth) or by storing them on their teeth as long as they are fully supported.
And on and on.
This got me thinking about sawtills. You know, those cool cabinets that woodworkers build that store the saws vertically. The saw totes rest on a base. The blades are held in blocks that are kerfed. I’ve actually seen some sawtills that were the size of a small car.
The first time I saw a sawtill was when Sam Peterson, a denizen of the oldtools listserv, contacted me in 2000 to see if I’d be interested in publishing plans for one of the listserv’s “group projects,” where a bunch of their members made a project together.
I convinced the other editors that a two-page article wouldn’t hurt anything, and we put the plans in the October 2000 issue of Popular Woodworking.
Since that time, I’ve seen lots of sawtills that improved upon this design, but I was curious: Where did this design come from? I spent a day in my library digging through all my books, both real and electronic. But I couldn’t find anything that looked like the sawtill from the oldtools list.
I’m still looking.
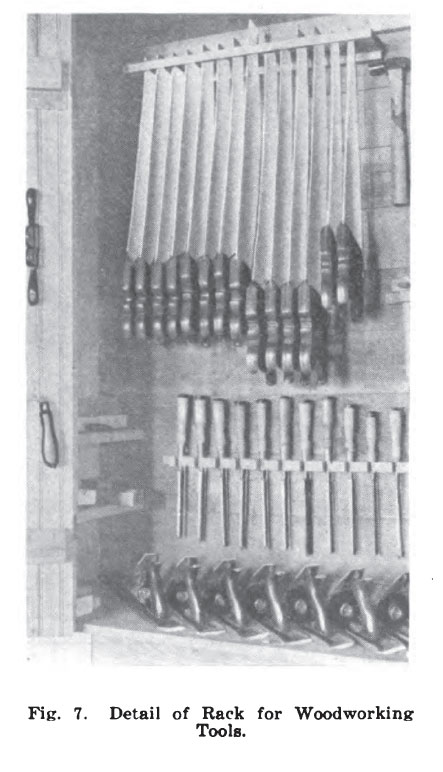
What I did find was interesting, however. Most references to storing saws in old books get into how you do it in a tool chest. A few sources had special open racks for storing saws, or they had a wall shelf that would hold the handles and let the sawplate hang down.
But I didn’t find anything old in print that looked like an open-front cabinet.
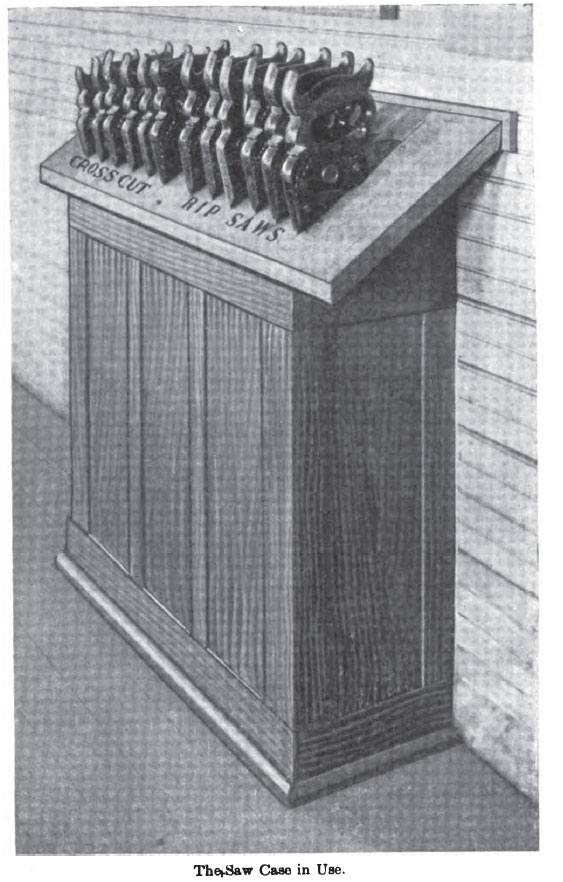
The only thing that was close was a very intoxicating book on how to design your hardware store that was published in the 19th century. This book had several solutions for storing handsaws, but none of them looked like the oldtools cabinet. They hung handsaws by the handles for the most part.
But when I turned to the section on two-man crosscut saws I raised my eyebrows. There the book showed open cabinets – some with shaped sides – that looked every bit like the oldtools sawtill.
I’m not saying that this book is the source. But it is interesting. And I think there has to be a source out there that shows a cabinet like the oldtools sawtill.
If you have the Holy Grail or the Ark of the Covenant, I’d really appreciate you sharing it with me. I know I have seen this design somewhere in some old book.
— Christopher Schwarz
Learn to Sharpen Your Saws
Ron Herman can give you the confidence and know-how to sharpen your saws after viewing his short DVD. His techniques make it easier than you ever imagined. Check it out in our store.
Here are some supplies and tools we find essential in our everyday work around the shop. We may receive a commission from sales referred by our links; however, we have carefully selected these products for their usefulness and quality.


Hi Chris! How do I get a copy of the October 2000 issue of PW, or at least the plans for building a saw till? I can’t seem to find it at the PW.com site.
Thanks!
I didn’t have room for a “rack” and I like to view the entire saw to determine which saw to use for particular projects. So, I made a wood hanging devise out of 1X2x30″ pine with five 3/4″ wood dowels (pegs) 2 inches in length and glued them into the 30″ horozontal piece thus resembeling a “coat rack”.I put the wood pegs in on a slight angle so to prevent the saws from accidently slidding off. I taught 4-H woodworking for several years and those youth had no problem in learning which saw to use on their project and properly replaced the saws when done using them.
The saw till that I saw on Lumberjocks.com got me thinking and lead me to develop my version of this saw till. The nice thing about this saw till is it does not discriminate. You can put any type of saw in it. Gravity does the rest.
The following link will describe it better and show how it is built. Also see the original idea by following the link in the first sentence of the posting.
http://lumberjocks.com/projects/41465
Does this saw till win a prize?
The sawtill was a group project of the OLDTOOLS group and I don’t remember any historical references, but do recall that there were several already built rough versions of the till. After much discussion about how to best store saws the group settled on vertical and from there the design was refined and finalized. I still have and use the till featured in Popular Woodworking and it holds 20-30 saws. It sits next to my Foley equipment(filer, toother and jointer) which allows me to take beater saws and bring them back to life.
The jointry of the till could be better, and did have to be re-glued. The shelve at the bottom is very handy and the file storage at the top is unused since I have it french cleated to the wall above my main bench.
To better understand my obsession with saws, see the Disston panther saw and flying eagle saw handles that I have carved.
http://galootcentral.com/index.php?option=com_copperminevis&Itemid=2&place=gallery&cat=10358
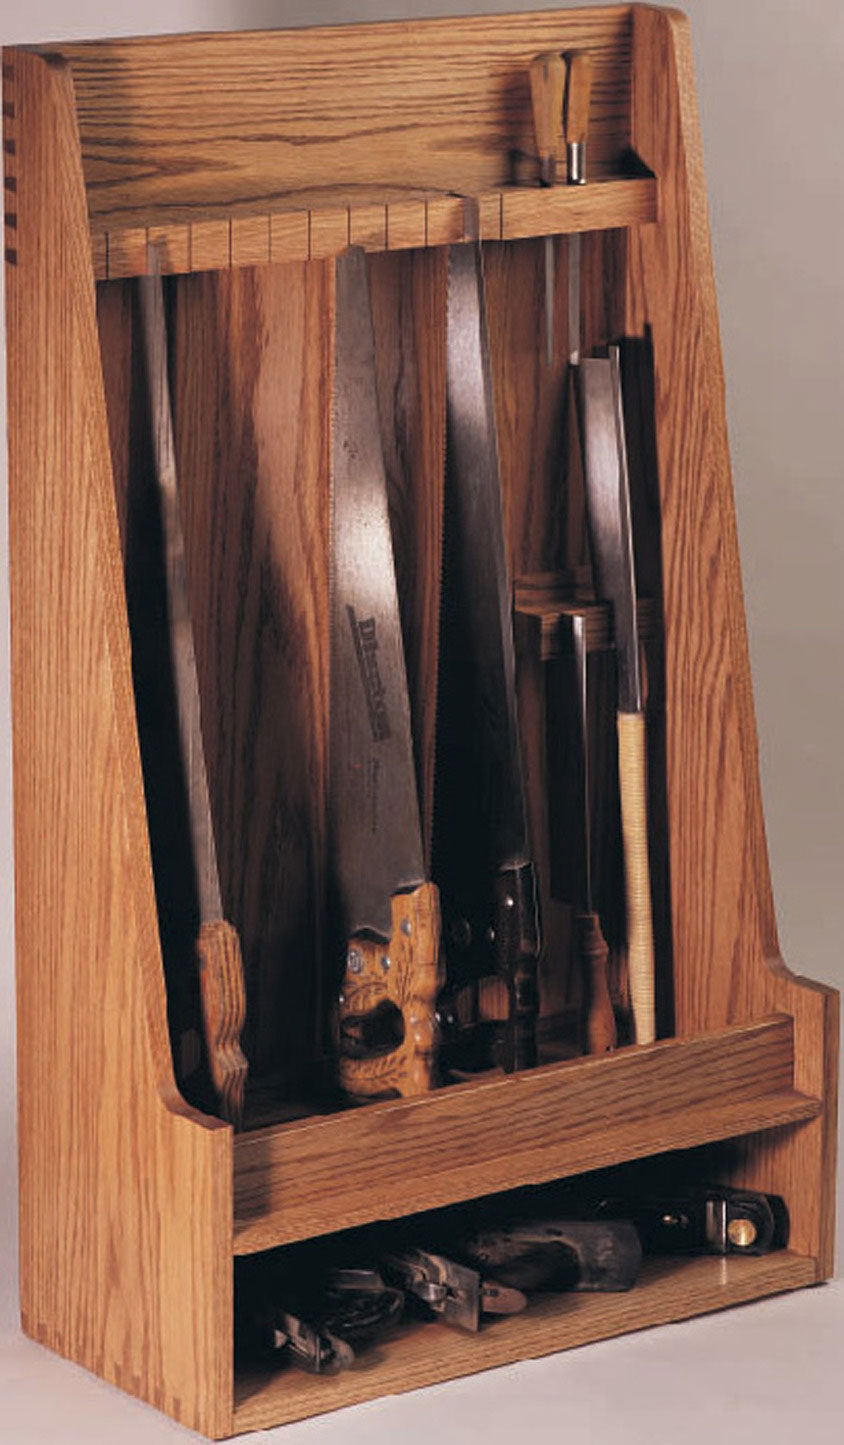
I like the idea of hanging the saw from its handle, as opposed to resting its weight on the handle. However, putting the handle at the bottom does make it easier to reach when removing the saw from the till. The other thing I note in the photos is that the saw’s teeth face toward the wall. That seems to me to be a fundamentally good shop safety practice. Imagine making a kitchen knife block with all the blades sticking out of the block!
Correction: “The Workshop Book” NOT “Work Shop Book”. Being unable to delete or edit ones reply makes posting rather awkward to say the least.
You can see page 176 in the “Work Shop Book” that Larry mentions, at the address below. You can click on the down arrow on the button marked “Contents” or you can page down 3 or 4 times until you see the Contents page. Then, click on the Storage link (or Chapter 8 link if you scrolled down), which will take you to page 169. From there page, or scroll down until you come to page 176. There you’ll see the “Handsaw rack” that Larry referred to. There is a caption just below the drawing which mentions Clifford Metting’s name.
http://books.google.com/books?id=UtdHxvzENa0C&printsec=frontcover&dq=The+Workshop+Book+inauthor:Scott+inauthor:Landis&hl=en&ei=mRNkTuHoJ8vbiAKa0JmqCg&sa=X&oi=book_result&ct=result&resnum=1&ved=0CC4Q6AEwAA#v=onepage&q&f=false
Chris, I am confident that I have the “Holy Grail” of saw tills. It is a dedicated wall hung saw till. I dimensioned mine to 24 x 40, and sandwiched it between my twin wall hung (non-handsaw) hand tool cabinets of equal width and breadth. The till is shallow enough (slightly deeper than the height of my largest ripsaw handle) to permit the left and right hand doors of the adjacent twin cabinets to bookmatch and to cover the till when the twins are opened. The layout permits me to house a couple of hundred pounds of tools on on about 20 square feet of wall space, produding only 13″ from the wall, above my primary workbench. The saw till designer appears to have been one Clifford Metting, and a schematic of it can be found in Scott Landis’s “The Workshop Book” (Taunton Press) at p. 176. It can accomodate as many as 23 panel saws, as well as a half dozen or more backsaws, with room to spare for keyholes, copers, frets, flush-cutters, etc. To remove a panel saw from the till, you just pinch the blade, lift it up 1/2″ to clear the handle from its cradle, and pull it out. I wouldn’t keep my handsaws anywhere else……not even in a traditional tool chest. 🙂 Wish I knew how to post photos into this reply. Larry
I imagine the first saw tills were created for/by retailers, to display an assortment of saws for sale. Before the rise of an affluent middle class, it seems unlikely that many could afford to purchase more than the minimum number of saws needed to accomplish their work. In the painting Carpenters Shop at Forty Hill (1813 by John Hall), I notice there is a hand saw hanging by its tote from a peg on the back wall. Noteworthy because all three workers depicted have their toolbox close by. A handsaw is also hanging on the back wall in the 1816 painting of English Joiners by George Foster, though I don’t see tool chests.
I imagine the first saw tills were designed for/by retailers, as they’d be the only ones with a need to display a large selection of saws. Until the rise of an affluent middle class, few would have the means (need?) to accumulate a collection of saws. Carpenters and joiners would be constrained by either the size of their toolbox (if working from a fixed location) or their back (if carrying their tools to a job site). The painting Carpenters Shop at Forty Hill (1813 by John Hill)shows a handsaw hanging from a peg on the back wall, even though all three workers pictured have their own toolbox.
Just a (slightly elaborated) echo on the physics and chemistry of steel. Because a saw plate is, by definition, spring-tempered, it is not possible to “bend” a saw plate permanently by the weight of the blade or tote alone, and that’s both on an instantaneous timeline and centuries from now timeline.
It is possible, of course, to “kink” a sawplate by the use of a large force, either localized on a small area, or by a substantially larger force across the width of the sawplate. This happens because the force applied exceeds the elastic modulus of the spring-tempered steel in the saw plate. But it’ll never happen by the weight of the tote/sawplate alone.
Thanks for the examples. I have been looking for a way to better keep my two backsaws. Top right should do the job.
Think I will put a drawer at the bottom to hold my split nut driver and dovetail marking gauge. May use more of a V notch to hold the blade. Worry about bending the plate in the kerf.
One thing to keep in mind – magnets have a lot less shear strength.
DonP
I happen to be partial to this design:
http://www.wkfinetools.com/tCare/sawCabinet/sawCabinet1.asp
I no longer have that cabinet, but as coincidence would have it, I currently am smack-dab in the middle of building a new, larger, better, improved version, along the lines of the one shown on the second page in the link. But I’m adding to it, so that I will have not only my larger rip and cross-cut saws, but also my backsaws, neatly nestled all in the same cabinet. And I like having cabinet doors on it, to keep the saws out of sight and to try to minimize the accumulation of dust.
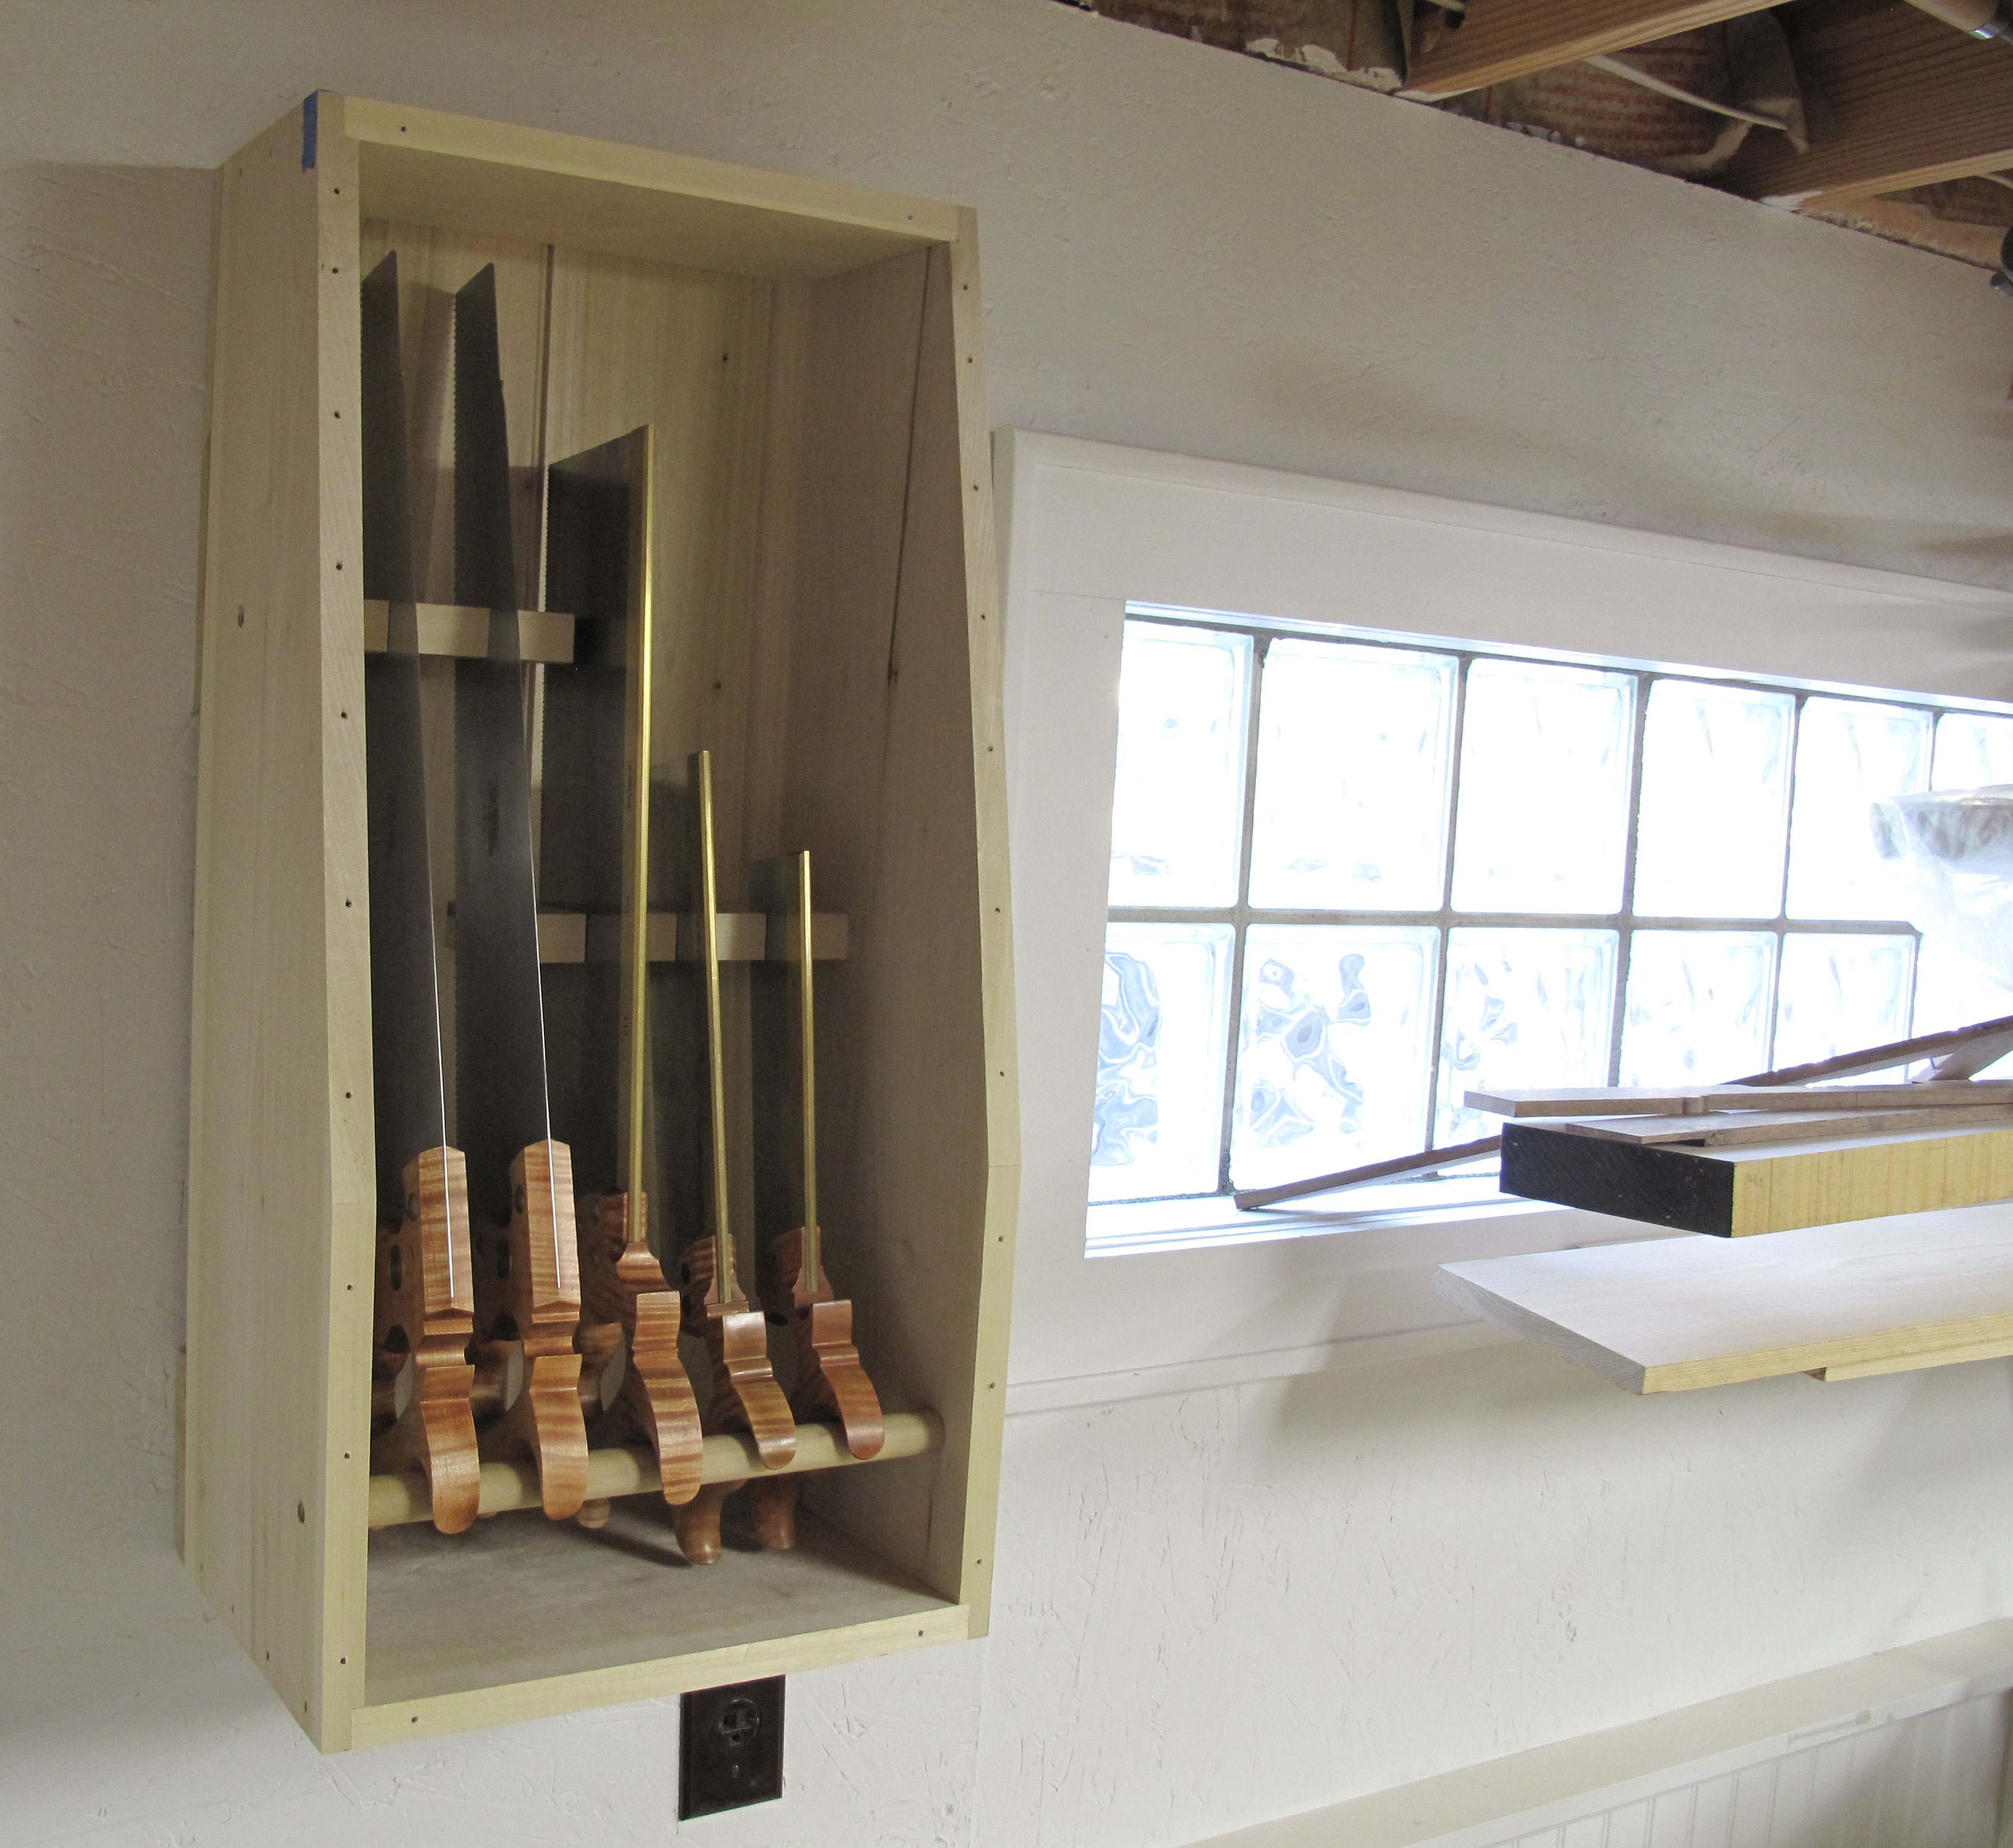
I warned about the unsound joinery in the Samuel Peterson sawtill (second image on the left) when it was first made public, and I must complain again. The connections between the upper back rail and the sides are easy-open, non-reusable zippers, not dovetails. This “design” should not be repeatedly foisted on inexperienced woodworkers. Just a little racking stress, and all the tails shear off the sides at the baseline. The failure could well happen during the initial test fit, especially if the baseline was struck with a knife instead of a pencil. To understand the proper way to build a dovetail for this application, reference any plans for a Shaker 3-step stool. A single, wide tail should be cut in the back rail, with a half pin cut in the stile. Make sure to lay out the tail with substantial shoulders, especially above the tail. Another acceptable solution would be to cut a rabbet in the stile and nail and glue the rail to it.
William
Something like in the bottom left would certainly be simple enough to make, and the saws would be easy to get in and out.
It would get my old saws up off the shelf.
Seems like the middle right image would come closest to providing good dust protection (thinking with my tool chest hat on). It would be easy enough to make that work for handsaws and backsaw, both western and Japanese.
And thanks for mentioning reuse. Had that talk with my Cub Scouts last night. Didn’t want them thinking that their den leader was a bit touched for having a stack of pallets and various “roadside acquisitions.”
The “crate” shows the way I like to store all of my tools, whenever possible: (a) pointy parts up, to minimize damage to the tool, the floor, and my foot when I drop it; (b) pointy parts towards the back, to minimize incidental contact; (3) tool handle positioned to allow sure and easy pickup, to minimize scenario (a).
-Steve
I take my hand saws on the road with me a lot when I’m doing demo’s and have the fancy wood strips that cover the teeth, but I like the cheap and handy so I use PVC, slice it down on one side(bevel the start of the cut on both ends). It clamps onto the blade, if the teeth have any set it’s not coming off unless you pull it off and even my Japanese saws without set don’t come off while traveling and banging around in whatever tool box their in. they aren’t pretty, but I don’t have to mess with string, rubber bands or velcro like I do with the wood strips.
Can you send a citation for the hardware store design book?
The picture on the bottom right looks like it should be called The Hip Shredder. Ouch!
Jonathan
===============================
Chris,
Look at your copy of the 1939 Disston Saw Manual. You do have a copy, don’t you? If not, get the .pdf from Rose Tools. On the cover, handsaws are shown stored in a wall cabinet with totes down, blades vertical in a fashion very similar to the sawtill many of us have built to store our saws. The guy on the cover using the D-8 is dressed in white shirt and tie so this has to be authentic, not some artist’s vision of how a workshop should look.
Ken Shepard
In the saw box / crate in the top left, what’s the deal with all the holes in the case sides? Nail holes from a top?
Tee hee. Bend the saw. Neither steel nor brass have any creep at room temperature.
Chris,
Wouldn’t hanging both handsaws and backsaws horizontally on Benchcrafted’s MAG-BLOKs be a great way to store them?
It’d be metal on the wood of your choice, the teeth would be suspended in mid-air and not in contact with anything, and, as long as the MAG-BLOKs are set out far enough from the wall, the handles wouldn’t bend the sawplate on the handsaw. A nice thin (perhaps 4-6″ deep) cabinet with or w/o wood or glass doors seems like it’d make a handy and safe storage cabinet for both types of saws. Unless of course I’m missing something? Joe