We may receive a commission when you use our affiliate links. However, this does not impact our recommendations.
Sanding is nobody’s favorite task, but if you use these tricks, you might find it just a little more bearable.

We may receive a commission when you use our affiliate links. However, this does not impact our recommendations.
Flexible Sanding Tool
A complex moulding can be difficult to sand. Softening its crisp edges is a crime, so I’ve been using a thin, flexible stick with sandpaper adhered to it for getting into the flat areas.
Not just any stick will do; it must have just the right amount of spring. An auto-body putty spreader, cut into narrower pieces, is perfect. Putty spreaders taper in thickness. The part you hold is somewhat stiff, the part that holds the sandpaper is more flexible.
Look for a putty spreader at an auto-parts store. It will only cost a few bucks. -Richard Tendick
 Wedged Sanding Block
 Wedged Sanding Block
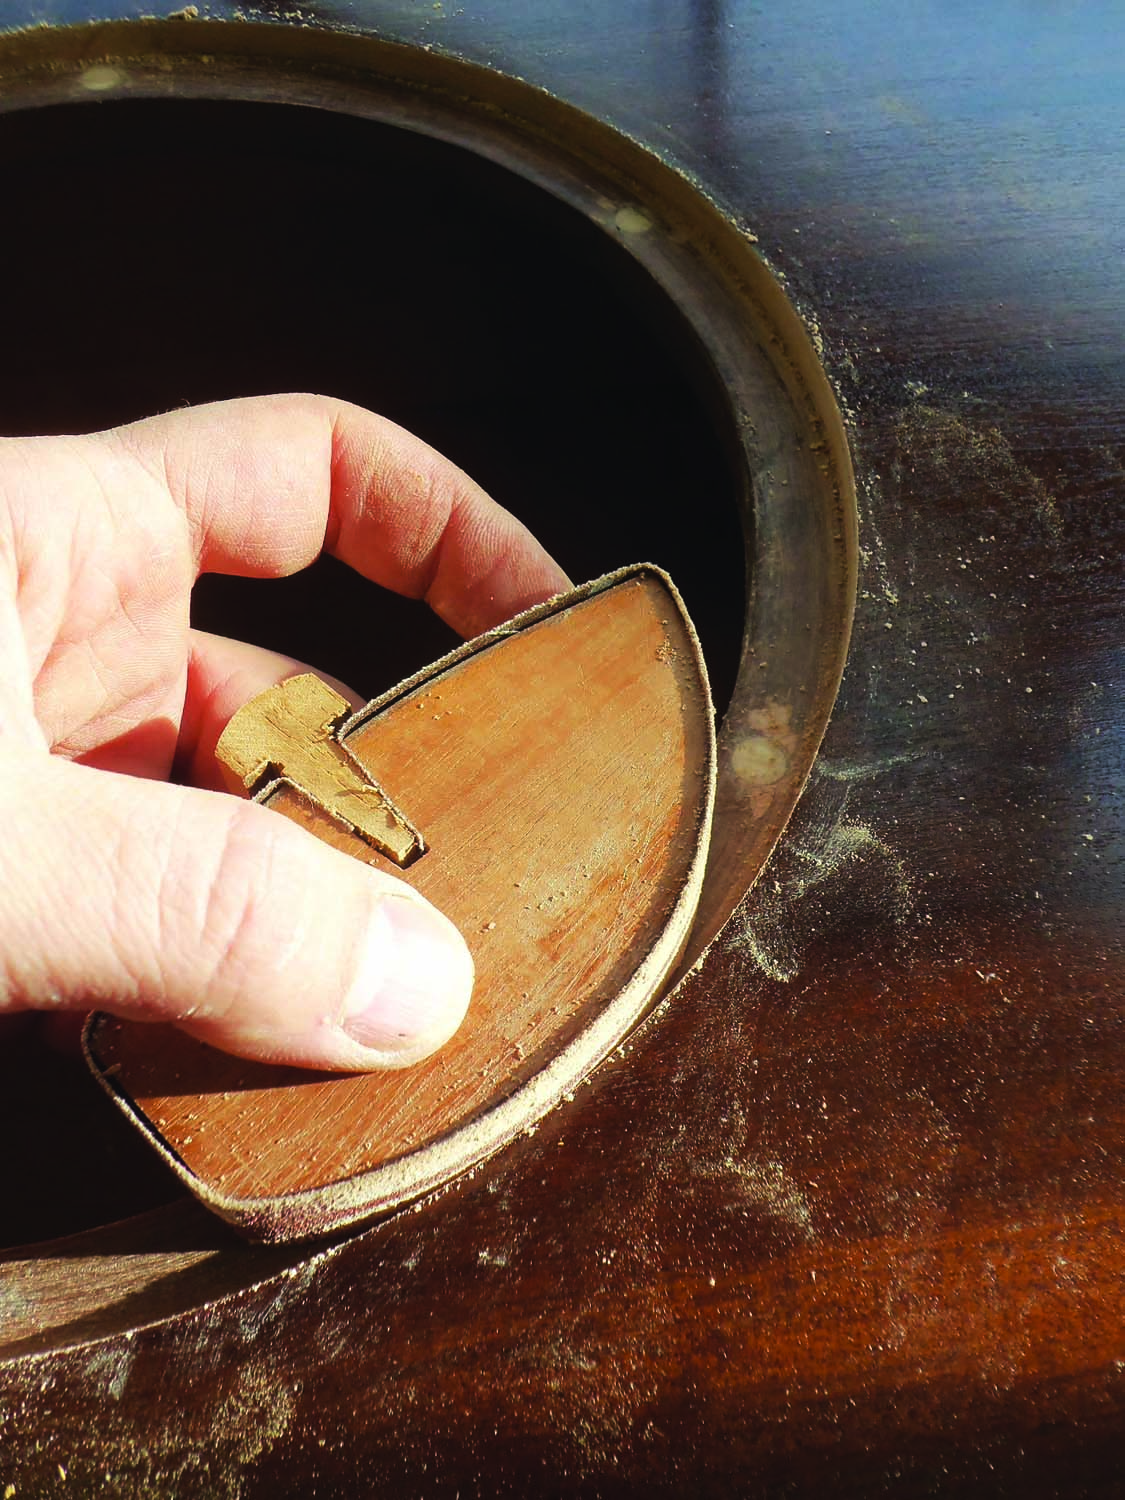
A curved sanding block can really save the day for sanding concave parts. Over the years, I’ve made several to accommodate different radii.
To secure the sandpaper in to the block, I use a wedge. This design stretches the paper tightly around the block, and allows quick paper changes.
I make my sanding blocks to match the width of commonly found sandpaper rolls. You can also easily cut strips from sheets or belts.
To make a block, draw its shape on a piece of hardwood, using a compass for the radius. Cut out the shape on the bandsaw, and then fair the curve using sandpaper taped to a flat surface.
Next, make the hardwood wedge, with an angle no greater than 15°. The wedge’s finished length should allow it to penetrate no more than half way through the block.
Place the wedge on the block in its “in-use” position, trace around it, and then cut the wedge shape out of the block.
To use, cut a strip of sand paper to length and then wrap it around the block, with both ends of the paper in the cutout. Insert the wedge to stretch and secure the sandpaper in place. This design also works for flat sanding blocks. -Yoav Liberman
Sandpaper Cutting Board
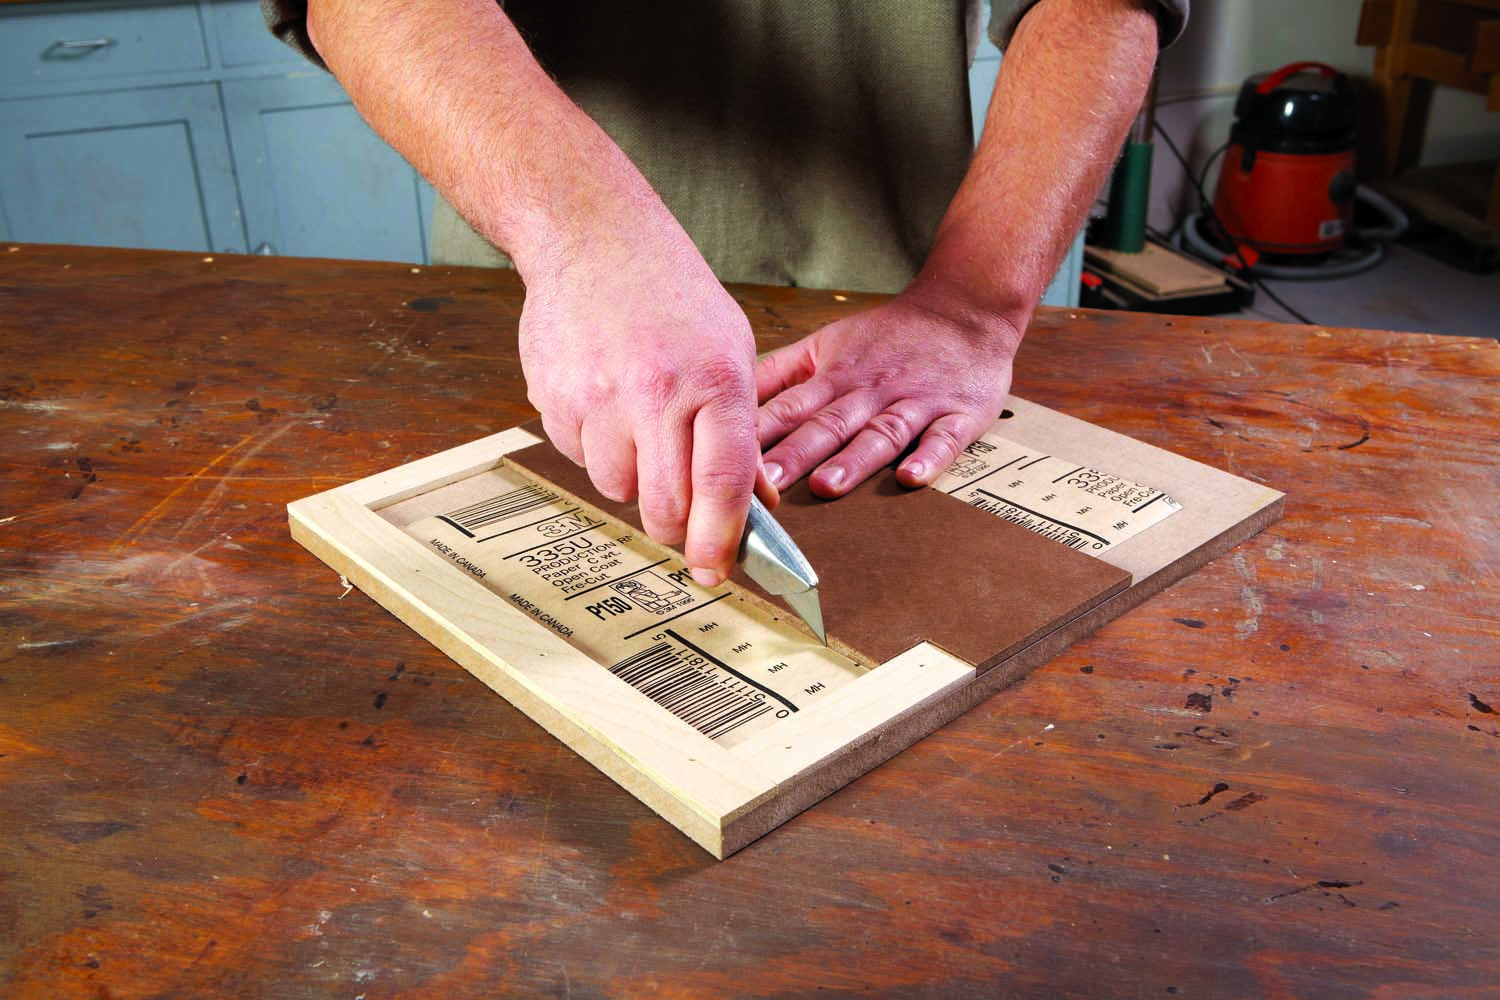
I’ve got a sander that takes a half-sheet of sandpaper, another one that takes a quarter-sheet, and a sanding pad that uses a third of a sheet. To quickly and accurately cut sheets for the three sizes, I made this cutting jig.
It’s just a 1/2″ mdf base with a 1/4″-thick frame around the edge. A 1/4″- thick guide block butts against the frame ends as a straight-edge. One side of the guide block is straight, to cut 1/2-sheets. The other side is notched for cutting 1/3–sheets. I use a second guide with deeper notches to cut 1/4-sheets.
Note that the frame is slightly wider than the sandpaper. That’s so you can easily draw the knife all the way to the end of the paper. -Len Urban
Convex Sander Pad
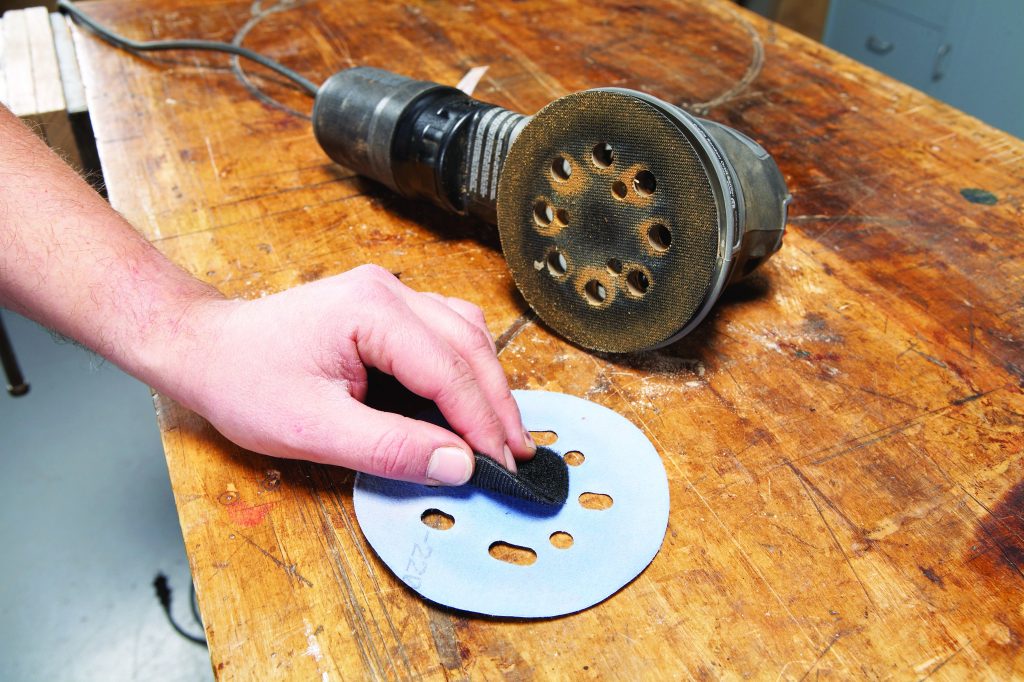
In the process of refinishing an old chair, I found that my random orbit sander’s flat surface didn’t work for sanding the concave hollow of the seat. My sander uses hook-and-loop paper, so I purchased some adhesive-backed hook-and-loop material at the hardware store.
After sticking the material together with the hooks on one side and loops on the other, I cut out a disc shape that was small enough to fit in the center of my sander without blocking the dust collection holes. I then applied the paper over the pad. It worked perfectly to create a slight convex bottom on my sander that conformed to the chair’s curve, and held the sandpaper firmly in place. -Steve Laber
Disc Sander Jig
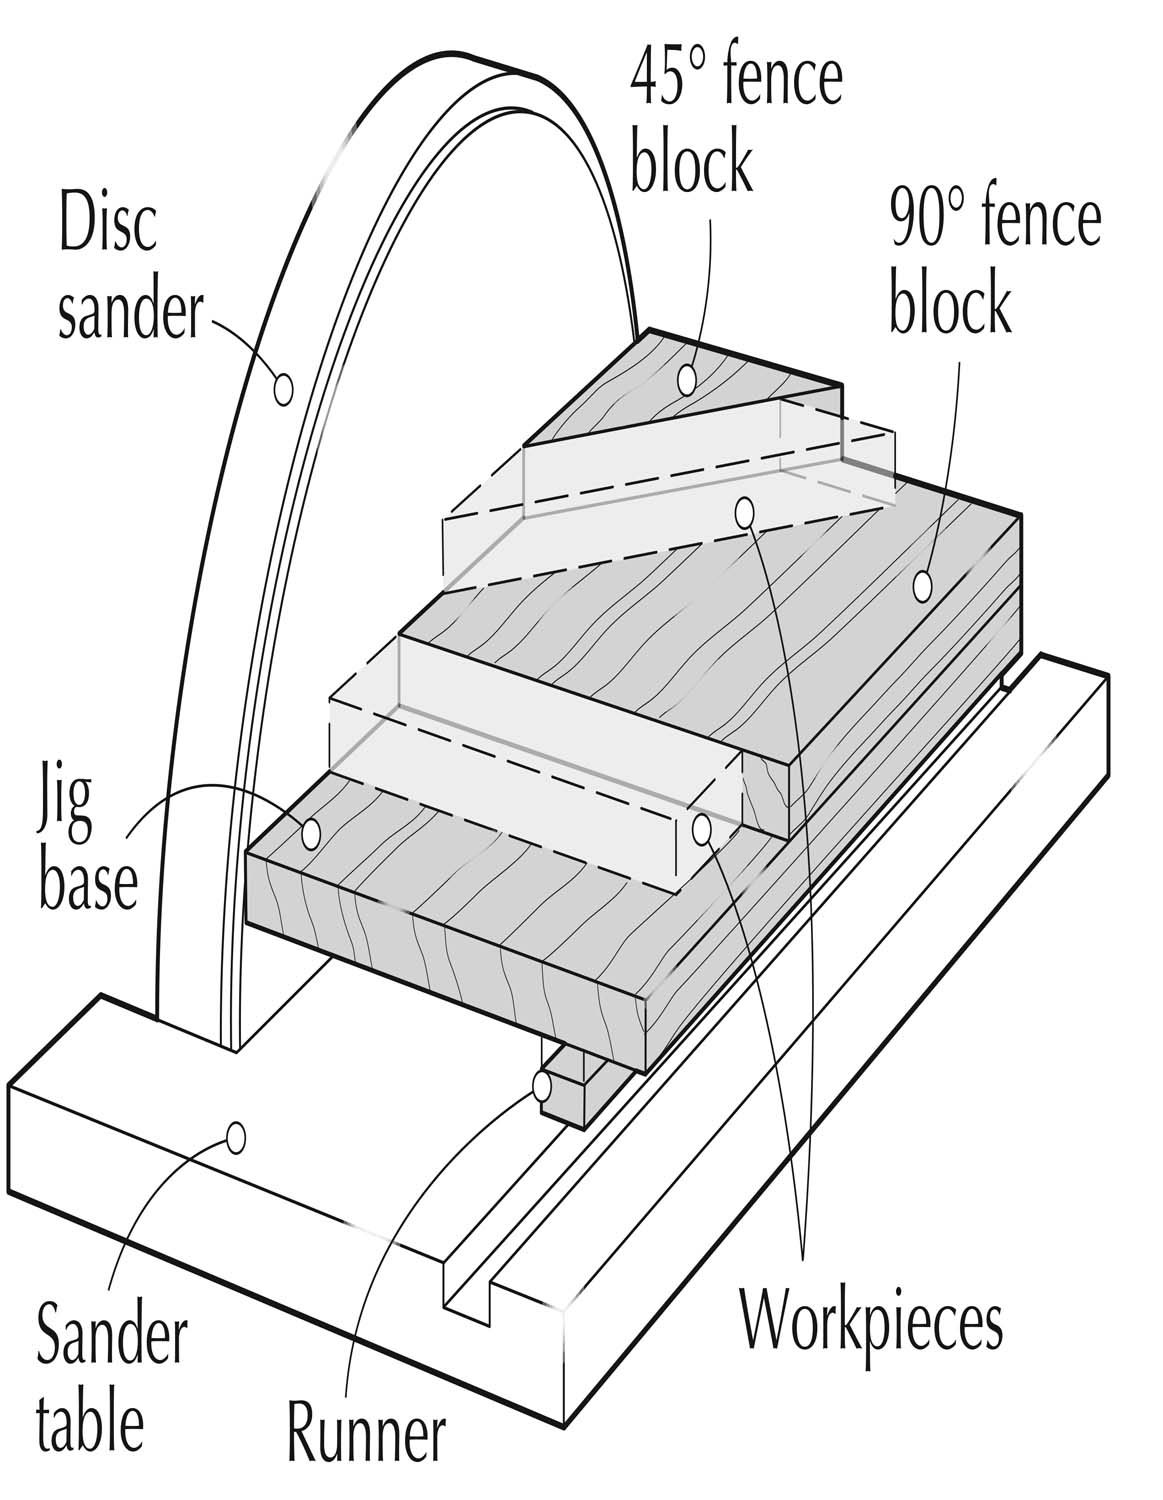
I use my disc sander quite a bit for cleaning up the ends of squared or mitered workpieces. To increase speed and accuracy at the machine, I devised an inexpensive and easy-to-build fixture for the job. It consists of two 3⁄4″-thick “fence blocks” attached to a 3⁄4″-thick base that registers to the sander table via a runner fitted in the table slot. The plywood base and fence blocks abut the sanding disk to create a zero-clearance platform. This ensures that thin workpieces don’t bend downward at their ends during sanding.
Make the base and runner first, locating the edge of the base against the sanding disc and carefully fitting the runner to the table slot so there’s no slop. (I use acrylic to avoid seasonal movement experienced by wood runners.) After attaching the runner, cut the fence blocks, accurately sawing their 90° and 45° angles. Then place the 90° fence block on the base perfectly square to the disk, clamp it down and screw it to the base. Next, do the same for the 45° fence block. Done. -Bill Mitchell
Here are some supplies and tools we find essential in our everyday work around the shop. We may receive a commission from sales referred by our links; however, we have carefully selected these products for their usefulness and quality.