


We may receive a commission when you use our affiliate links. However, this does not impact our recommendations.
An antique dealer’s secret formula for turning gunk into glow.
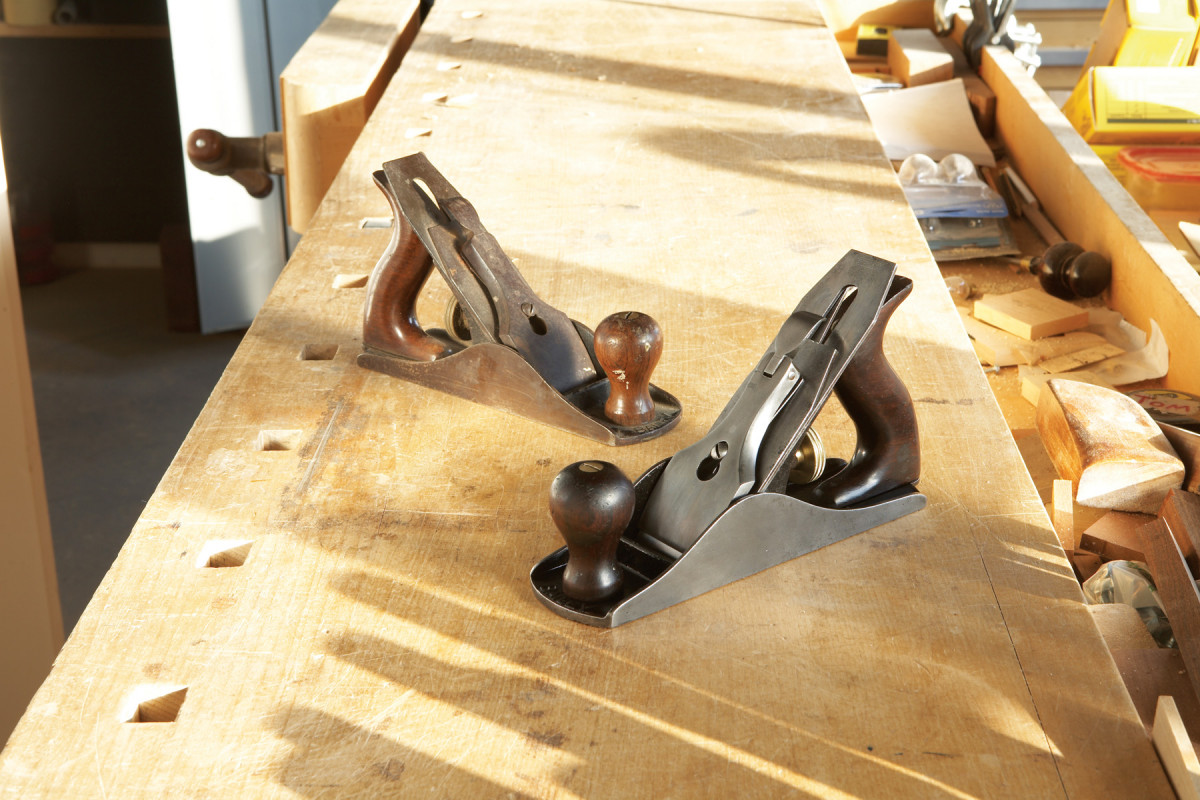
I’ll bet you’ve got an old, tarnished plane sitting somewhere in your shop. Maybe it was your grandfather’s tool–one he lovingly used and cared for, now neglected. If the plane isn’t heavily rusted, you’d be surprised how easy it is to return the plane to its former glory. I know, because I’ve restored over 500 of them.
I’m a dealer in antique tools as well as a woodworker. I restore every plane I sell, because I believe tools should be well-maintained, and look just the way they did when they were used every day.
With so many tools to refurbish, I’ve worked hard to develop an efficient, low-cost method for restoring them. It takes me only an hour or so to turn a pretty ugly plane into one that glows with a soft shine. Let me show you how to do it.
Disassembly
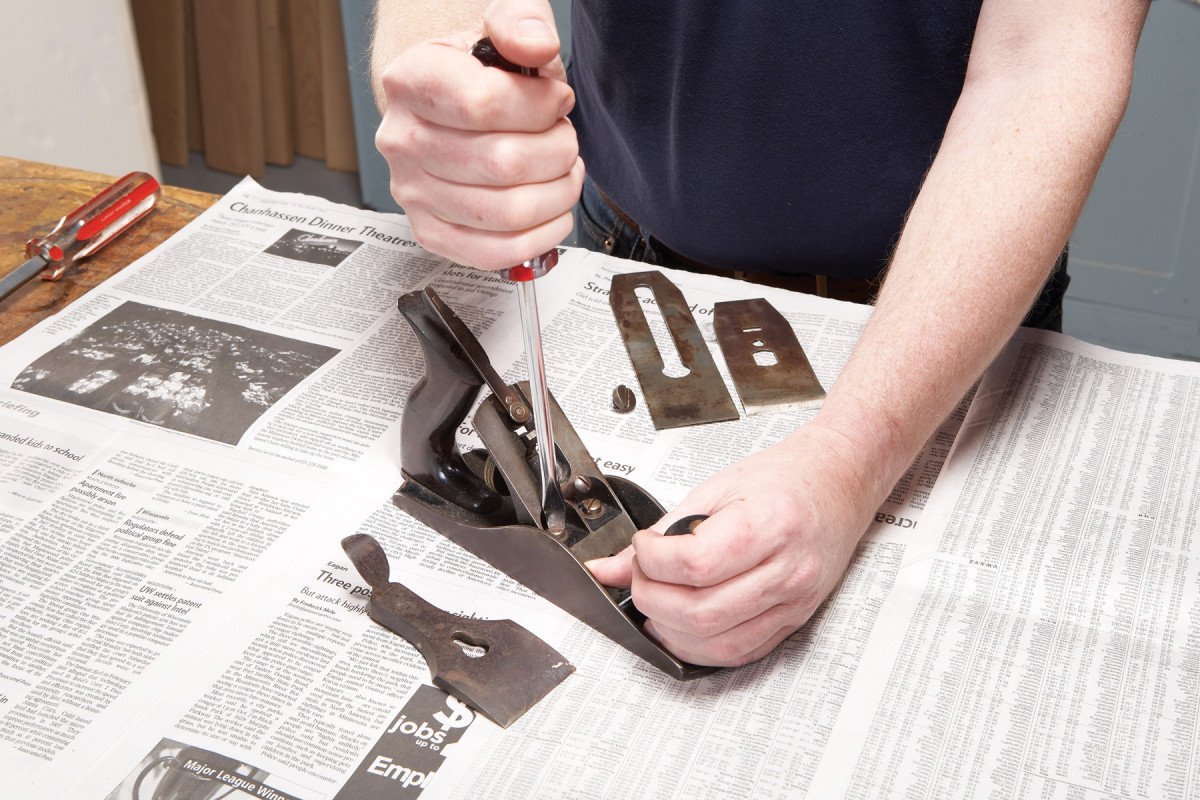
1. Completely disassemble your plane. To avoid damaging any parts, use a screwdriver with a large blade that perfectly fits the screw slots.
First, take the plane completely apart. As you disassemble it, count and keep track of the parts–particularly the screws. They may have special threads, and often can’t be replaced by hardware-store screws.
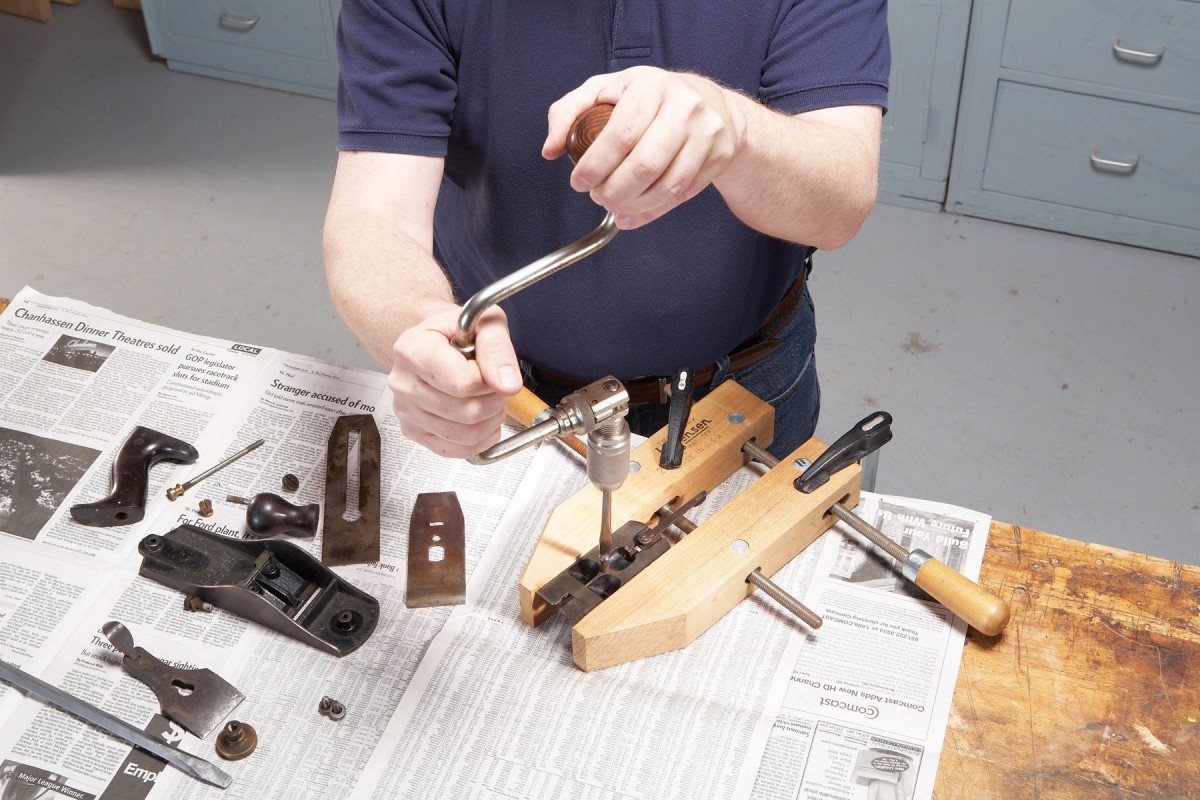
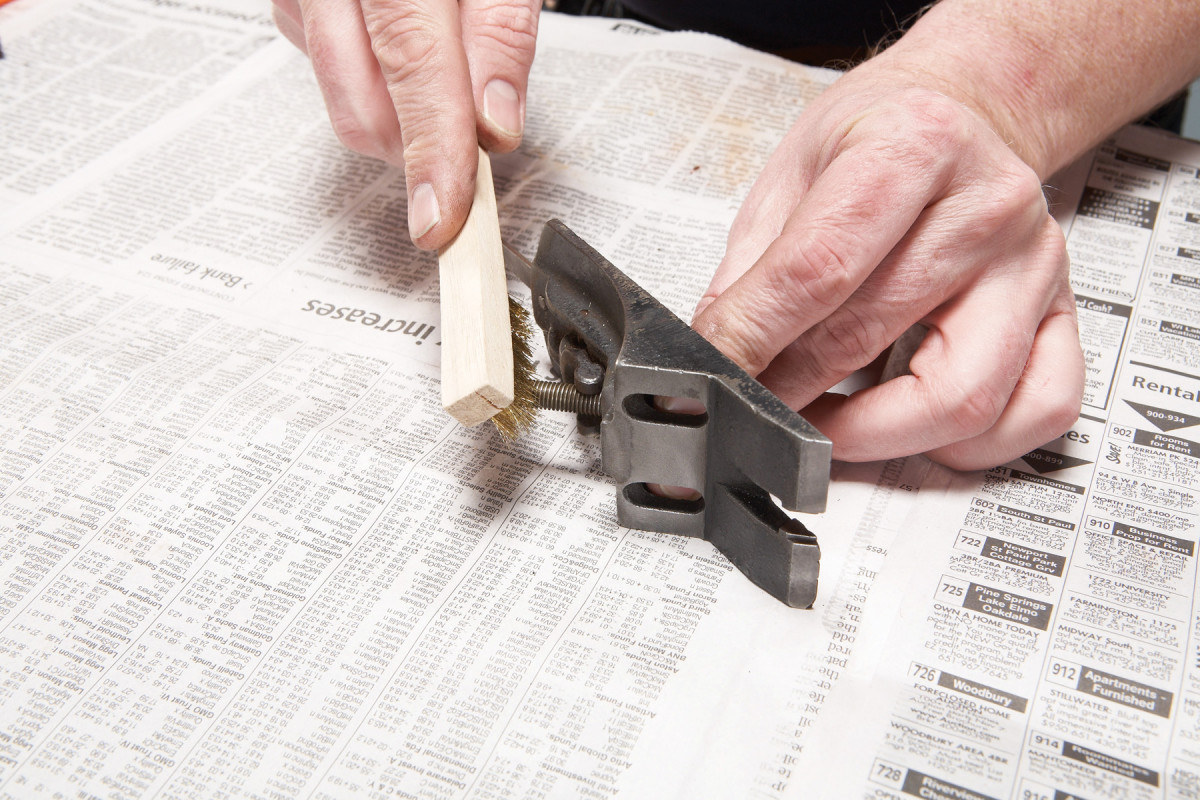
2. If a screw won’t budge, use a brace and bit for added leverage. Secure the piece in a handscrew or vise.
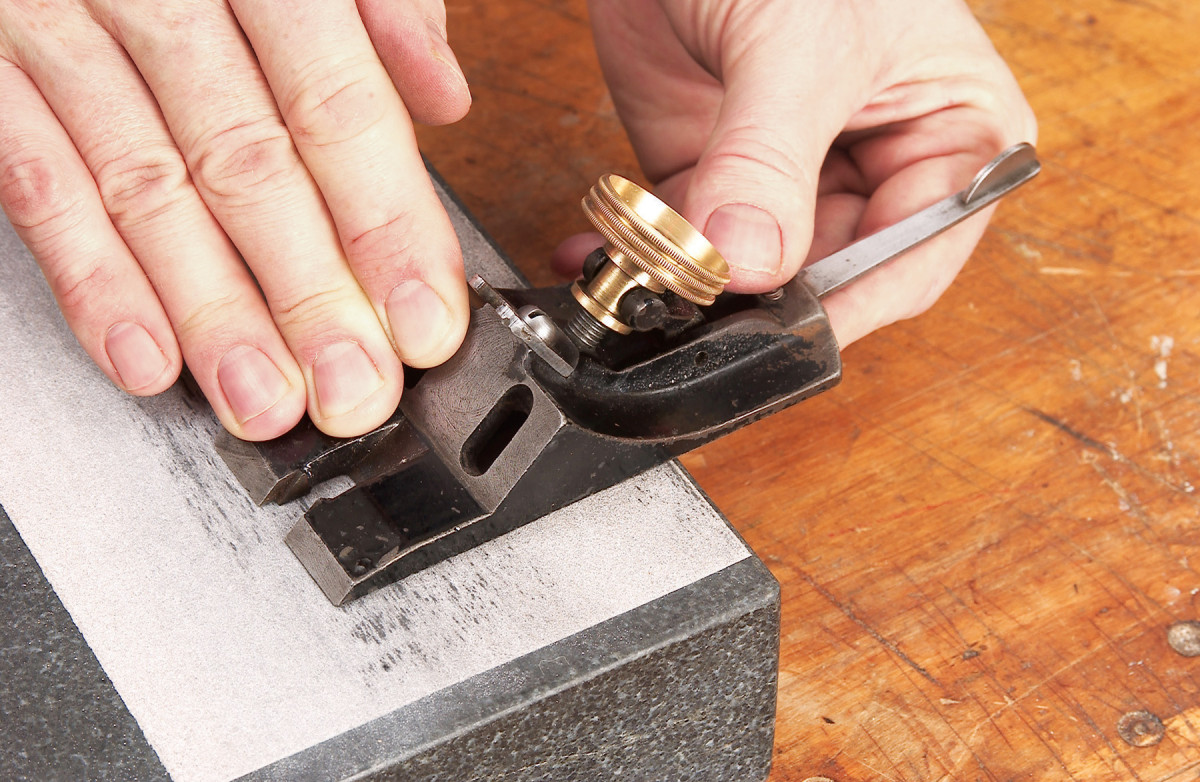
First, remove the lever cap and the plane iron assembly. Separate the iron from the chip breaker by unscrewing the cap screw. Next, remove the frog by loosening the two screws that fasten it to the plane’s body (Photo 1). Each screw should be accompanied by a washer. Disassemble the frog by unscrewing the brass adjustment nut, then remove the lever cap screw (Photo 2) and the frog adjusting screw and tab.
Remove the knob and handle. They’ll be fastened to the plane’s body by a bolt and brass nut. To avoid damaging the nuts, use a screwdriver with a wide blade (you may have to shorten a screwdriver with a grinder to get a good fit). If possible, unthread the nuts from the bolts.
Degreasing
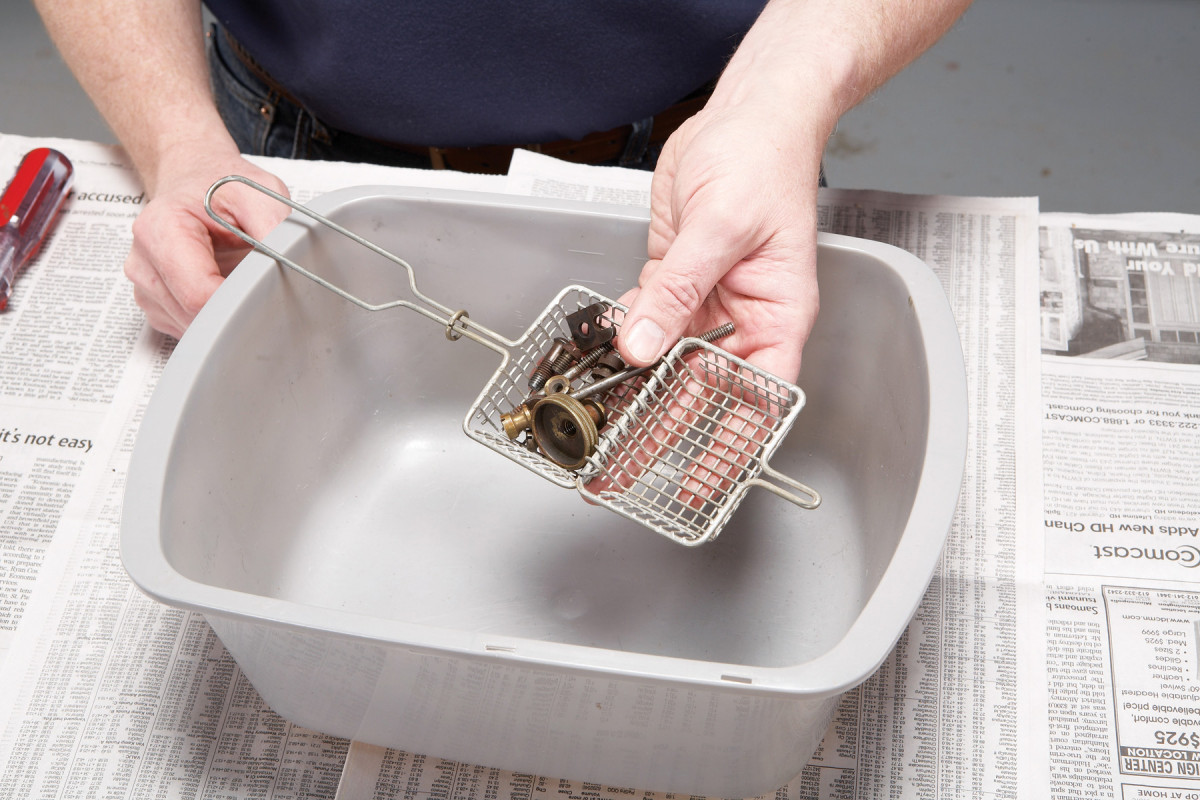
3. Gather all the parts for degreasing. Put the small ones in a metal container, so they don’t get lost. Don’t include the plane’s frog or body. Degreaser may harm the black paint, also called japanning.
Next, clean the accumulated grease and grime from all the unpainted parts. I place the small ones in a wire basket that I found at a flea market (Photo 3), but a strainer–a kitchen utensil–would work just as well. Set aside the plane’s body and frog for now, because degreasers usually soften their paint.

4. Spray degreaser on every surface. Removing oils with degreaser is an essential step. It prepares the parts for removing rust and tarnish.
Degreasing agents are corrosive, so wear rubber gloves and work in a well-ventilated area. Spray all of the parts with degreaser and allow them to sit for a few minutes (Photo 4).
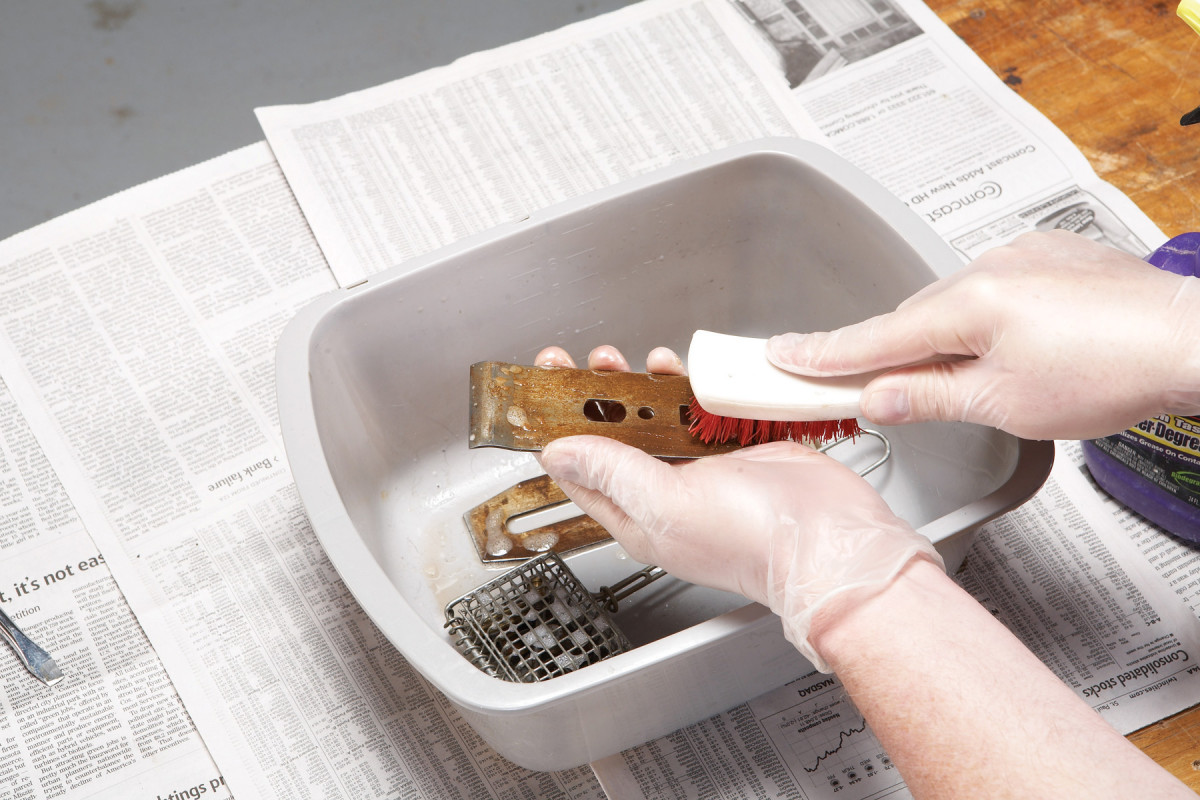
5. Scrub the parts with plain water and a nylon brush to wash off the degreaser.
Scrub the parts with a nylon brush to remove any stubborn grease deposits, then rinse the parts in hot water (Photo 5).
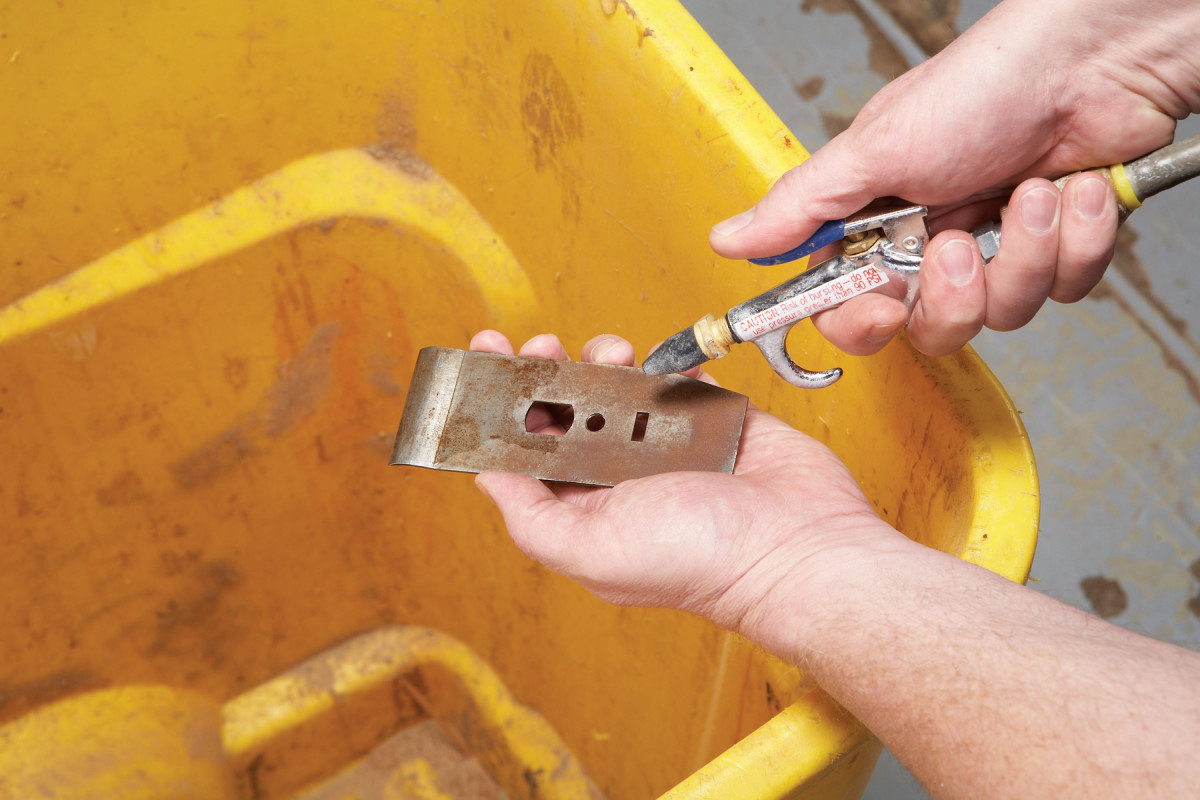
6. Thoroughly dry each part with compressed air. This removes moisture from every nook and cranny.
Dry the parts thoroughly with compressed air (Photo 6).
De-rusting
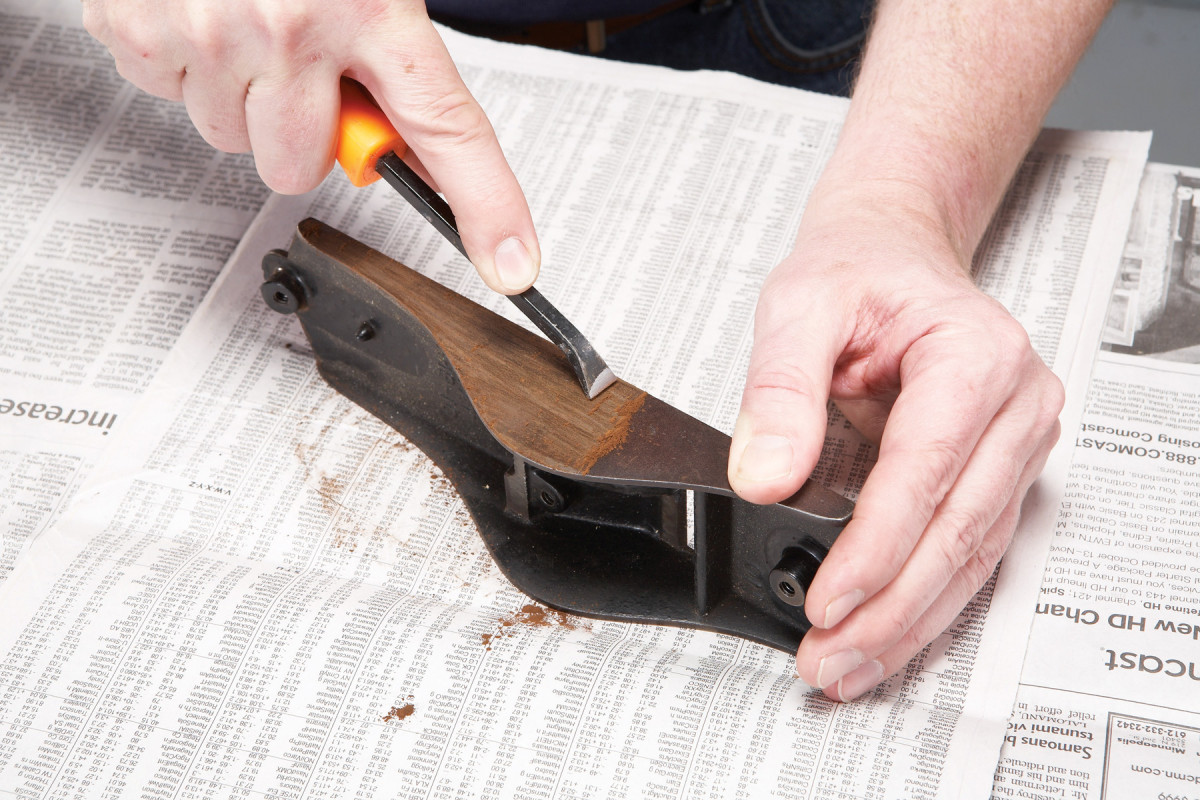
7. Turning to the plane’s body, scrape off rust and tarnish with a de-scaling tool. I use a hardware-store pry bar whose end is beveled and sharpened.
Now you’re ready to treat corrosion on the plane’s body and frog. You can use a knife or scraper to remove most of it, but I like to use a small pry bar on which I’ve freshly ground a sharp, 60° edge (Photo 7). Used carefully, this tool won’t damage the cast iron. Alternatively, you can make a scraper from a hacksaw blade. Snap 6″ off one end, then place this short piece on your bench and sand 1″ of both faces on 120-grit paper. File or grind the end square. With this tool, pushing works better than pulling.
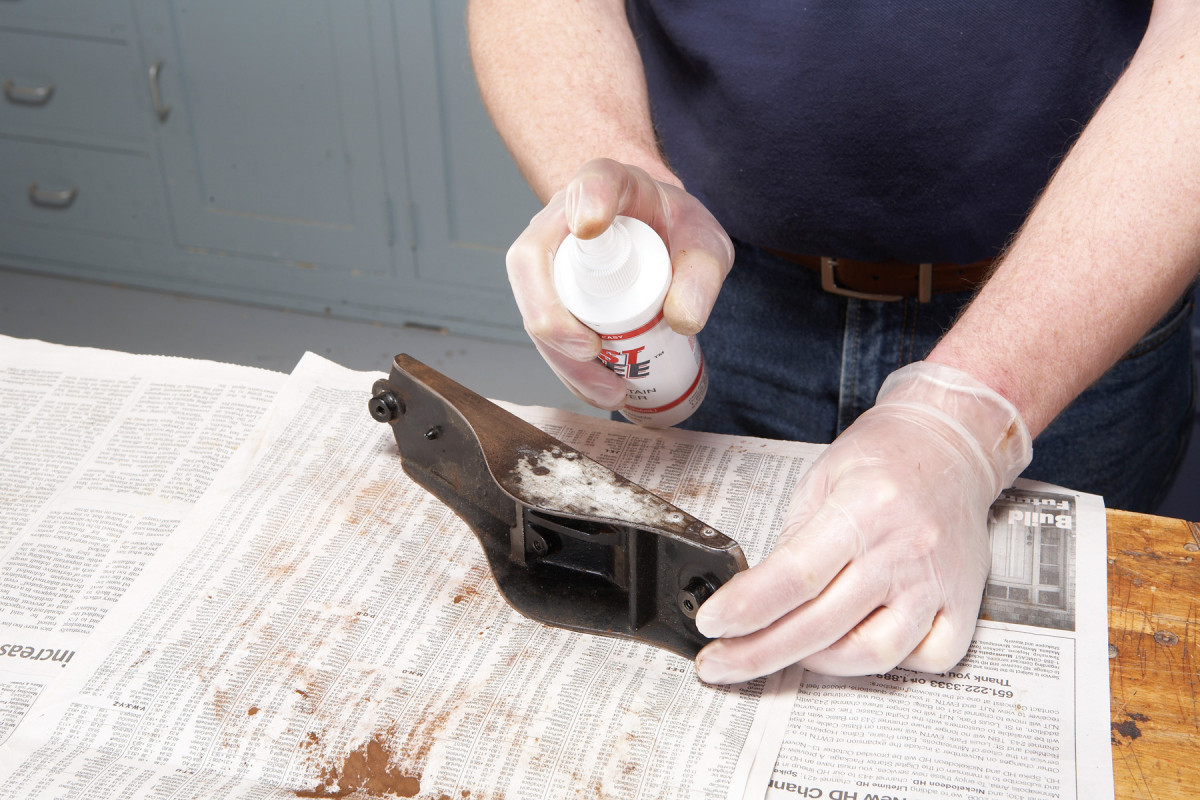
8. Spray Rust Free on the body to help remove the rust that you can’t get to with the de-scaling tool. Avoid getting Rust Free on the japanning.
To remove the rest of the corrosion, I use a product called Rust Free. Again, wear rubber gloves and work in a well-ventilated area. Don’t use Rust Free on a very old, plated tool, however. Its chemicals may damage the plating.
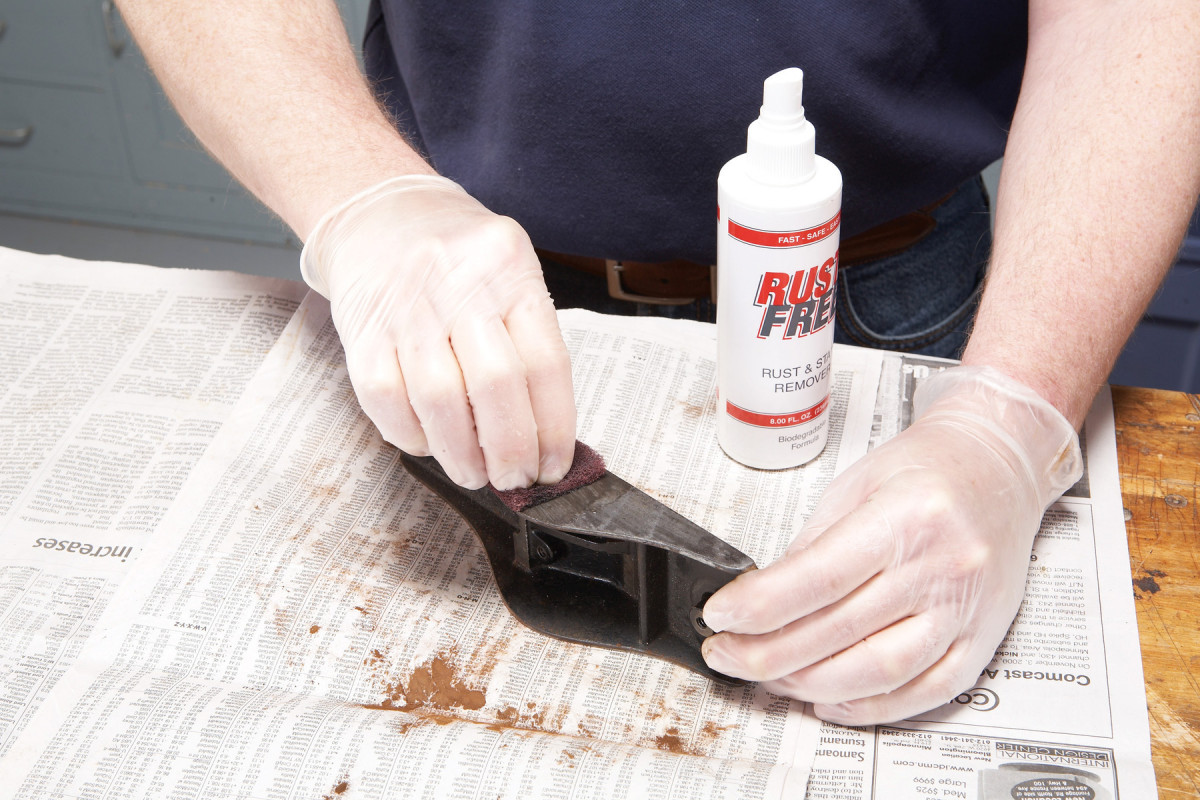
9. Scrub with a fine abrasive pad. Wipe off the residue with paper towels before it dries. You may have to repeat this a few times. Use the same procedure on all of the other parts.
Spray Rust Free directly on the plane (Photo 8), but avoid getting it on the japanning (the black, enamel-like paint on the plane). Gently scrub the area with a fine abrasive pad (Photo 9). I use 3M Metal Finishing pads, cut into small pieces. 3M Scotch Brite 7447 pads are similar, and available in bulk quantity. I usually go through about one-half pad per plane.
While the treated surfaces are still wet, thoroughly dry them with paper towels. If you don’t, the chemicals in Rust Free may continue to work after you are finished, producing an inconsistent appearance on the surface. After drying, the metal should appear dull and free of black corrosion. If rust remains in some spots, repeat the process, starting with the pry-bar scraper.
Polishing
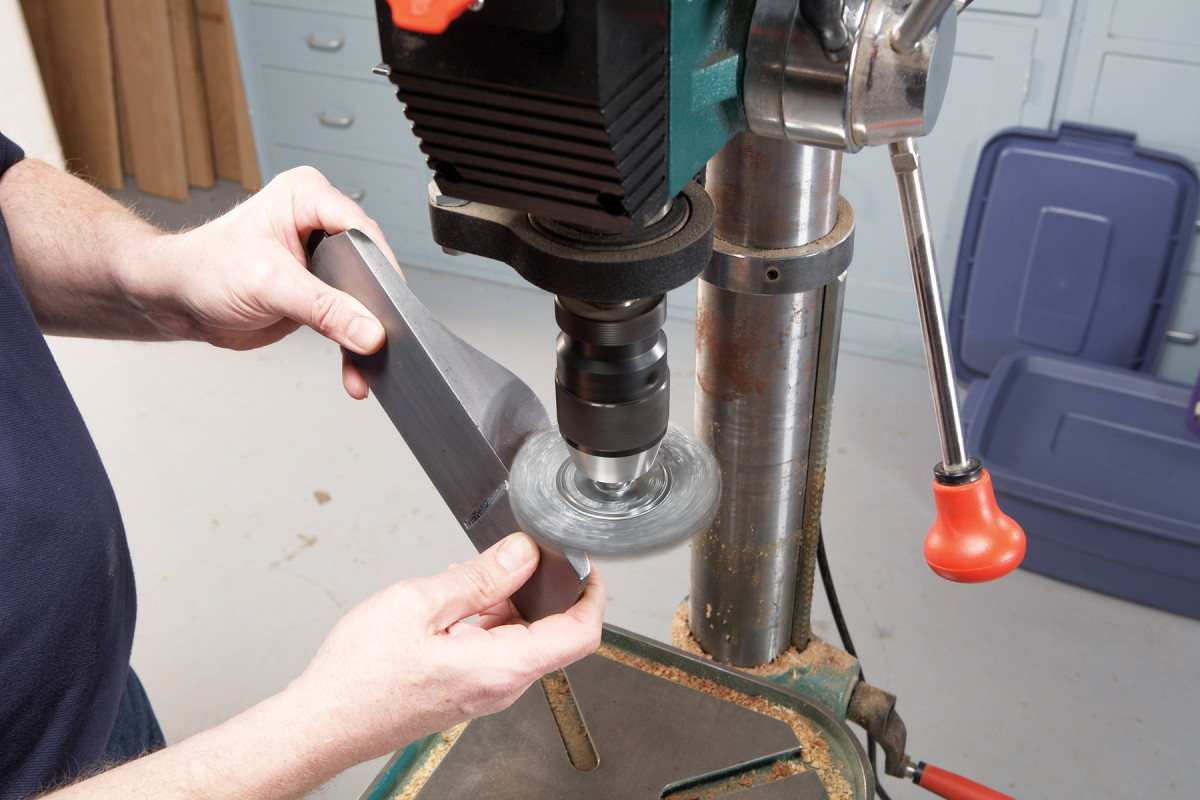
10. Polish the body, and all the other parts, with a fine wire wheel chucked in your drill press.
Next, polish all of the plane’s parts using a fine wire wheel (Photos 10 and 11). Begin by using the edge of the wheel, then the flat side.
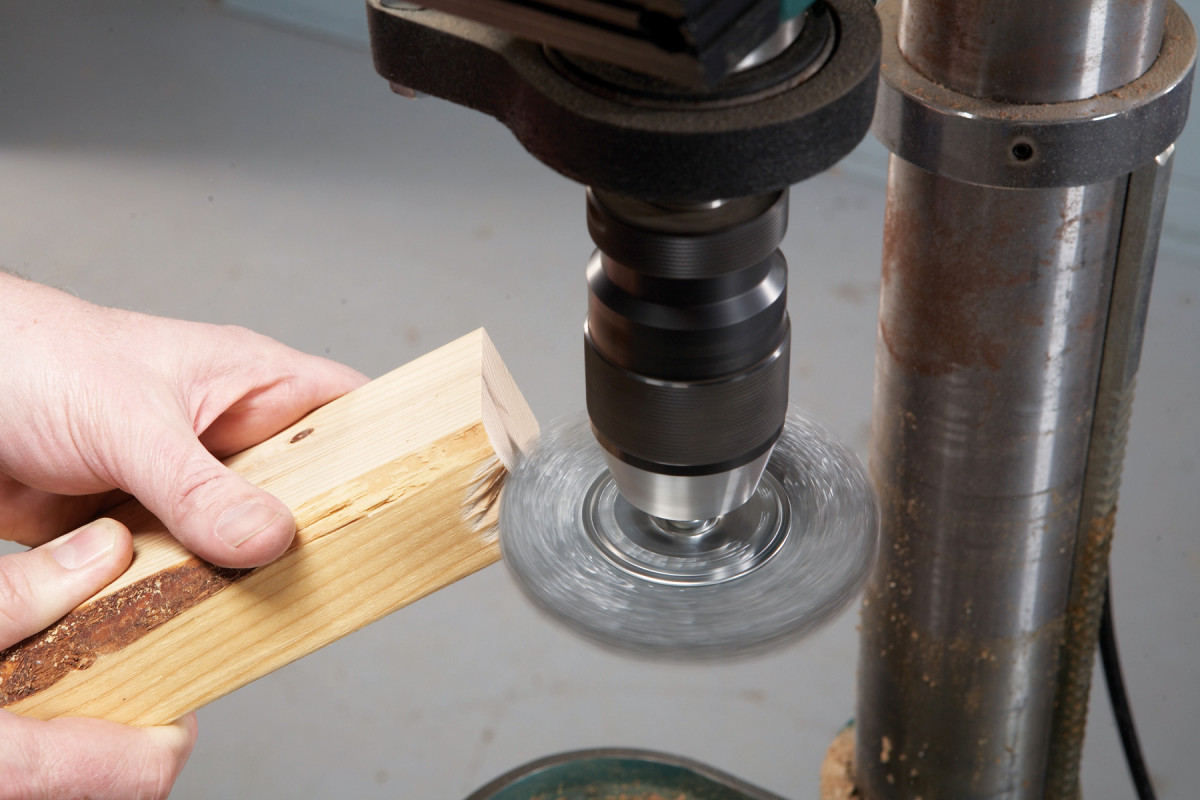
11. TIP: If your wire wheel becomes contaminated with oil or dirt, run it against the corner of a 2×4. This transfers the oil from the wheel to the wood.
The wheel shouldn’t leave any marks, but if it does, remove them using 0000 steel wool.
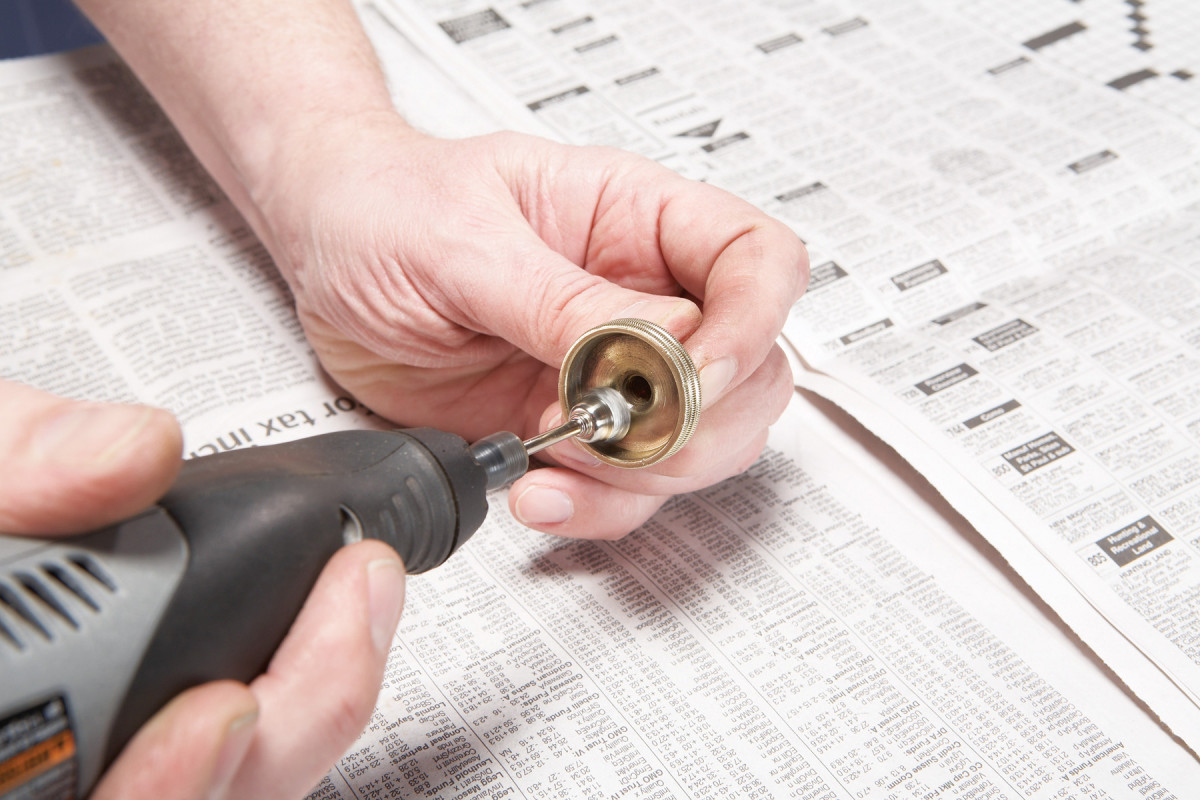
12. Use a small wire wheel mounted in a rotary tool, such as a Dremel, to polish the inside of the brass adjusting nut.
It’s pretty hard to get inside the brass adjusting nut with a large wire wheel, however. For this part, and other similar items, use a small wire wheel mounted on a rotary tool, such as a Dremel (Photo 12). Be careful when polishing brass parts–you don’t want to dig in and texture their surface.
13. If the threads on the adjusting-nut stud are rusty, clean them with a wire brush.
The stud for the adjusting nut is also hard to get to with a wire wheel. Clean this by hand with a wire brush (Photo 13).
Do not use a wire wheel or steel wool on a highly polished surface. They will dull it, and you’ll have to buff the surface to restore its shine.

14. Immediately after polishing the plane body and all other parts, apply Boeshield T-9 to protect them from tarnishing.
Immediately after cleaning and polishing, treat all the parts with a preservative to ensure that they do not begin to rust (Photo 14), which can happen right away. I use Boeshield T-9 (also available in a combo pack with Rust Free). Allow the T-9 to dry for at least one hour (overnight is best), then remove the excess with a paper towel and buff with a cotton rag.
Tuning Your Plane
Many old planes don’t work very well because they haven’t been tuned. They weren’t like electric drills, ready to go right out of the box. Back in the glory days of hand tools, experienced artisans expected that new tools would need additional work–but most folks didn’t do it.
Once you’ve restored a plane, here’s a tuning checklist:
• Flatten the bottom.
• Fit the chip breaker to the iron.
• Flatten the frog.
• Ease the sole’s edges.
• Grind a cambered or straight edge on the iron, depending on how the plane will be used.
• Square the frog to the sole.
• Adjust the amount of pressure delivered by the cap screw.
• Adjust the setback of the chip breaker and the throat opening as required.
Cleaning
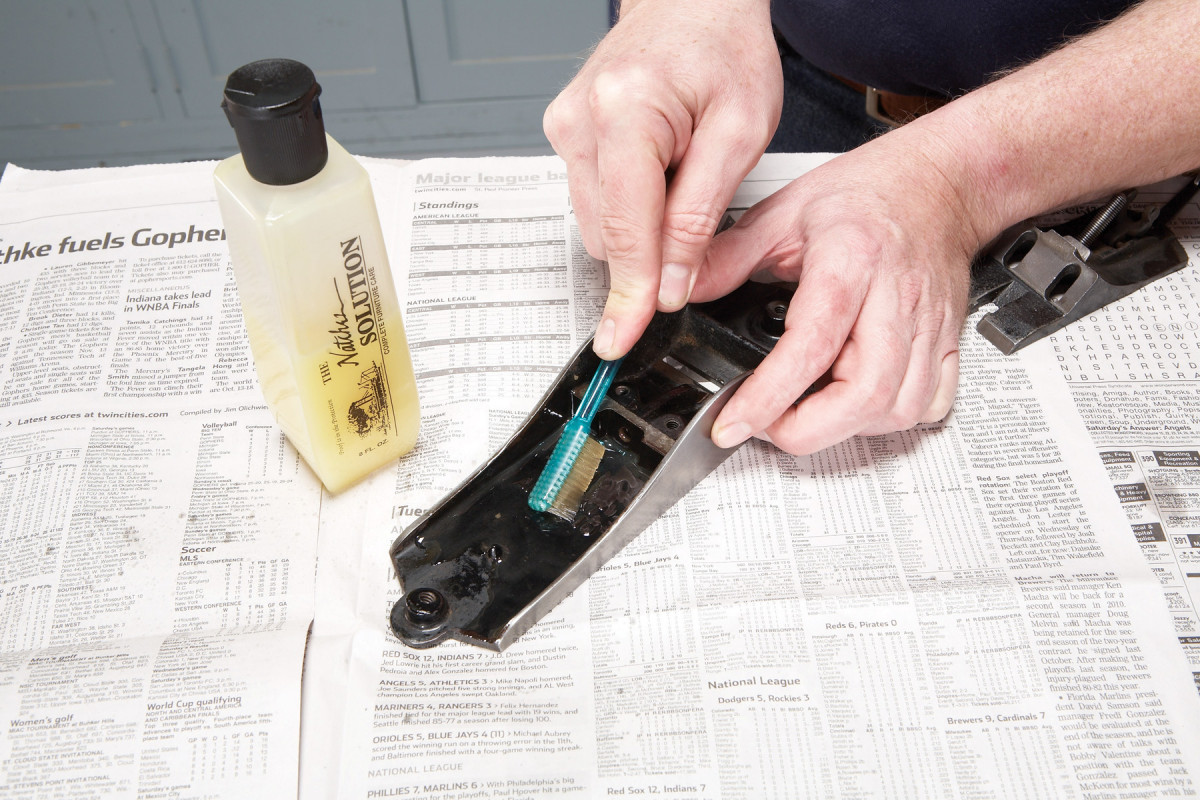
15. Clean the japanning on the plane’s body and frog with Natchez solution, a mixture of light oils and beeswax.
Clean the japanned parts of the plane–and any other painted parts–with Natchez Solution (Photo 15). Scrub with a toothbrush. If the grime residue is especially stiff, scrub it lightly with 0000 steel wool.
Wipe the parts dry with a paper towel, then polish with a cotton rag. Natchez Solution leaves a clear waxy finish on the japanning. It should be shiny–if the finish appears dull, then a grime residue remains. Repeat the process until the shine lasts.
I also apply Natchez solution to all the unpainted parts, too, because it leaves such a nice, soft luster.
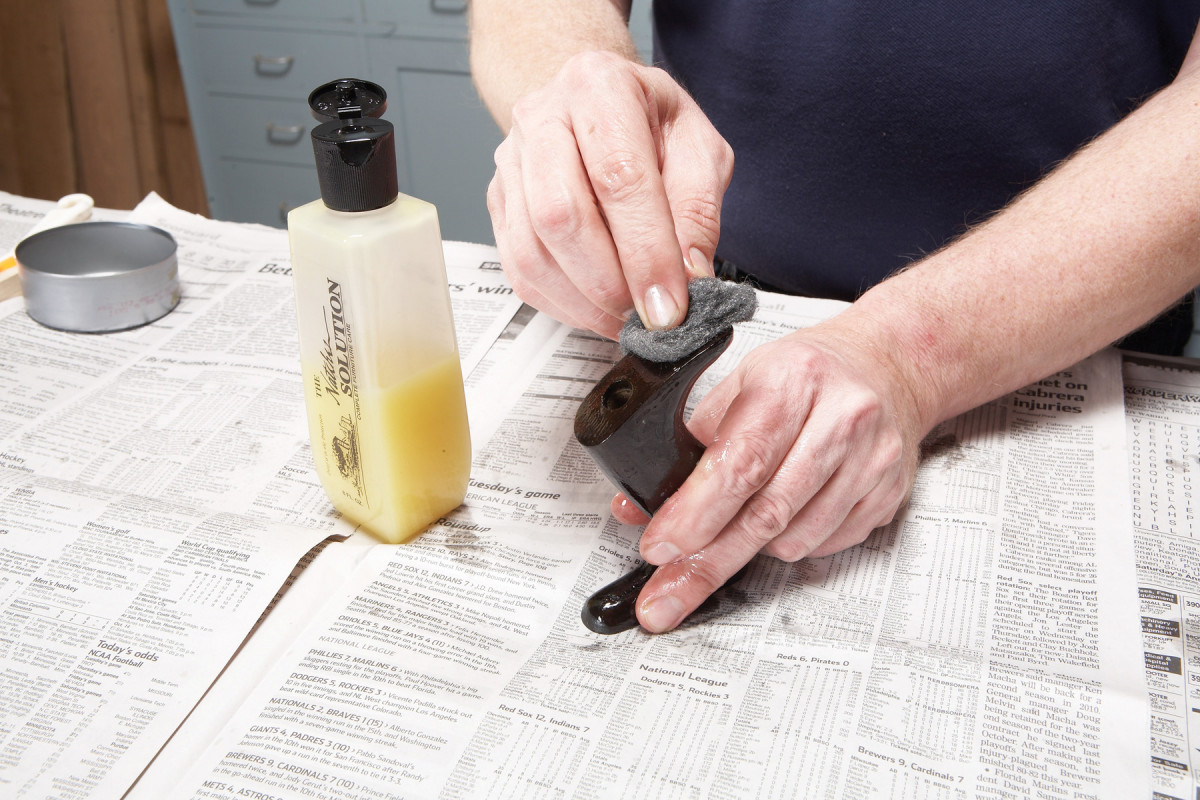
16. Clean the handles with 0000 steel wool and Natchez solution. to bring back the finish’s luster.
Treat the knob and handle with Natchez Solution (Photo 16). Remove dirty solution with a paper towel. Apply an additional coat and allow the solution to remain overnight, so that the wood will absorb it. (If the wood’s color has faded, repeat this process several times. Staining shouldn’t be necessary.) Polish with a clean cotton rag.
Reassemble your plane. For further protection, add a drop of 3-In-One oil to all the screws and under the frog. You may have to reapply Natchez solution to the knob and handle every three months or so to retain the luster.


