


We may receive a commission when you use our affiliate links. However, this does not impact our recommendations.
 Turning the body is half the fun.
 Turning the body is half the fun.
When I picked up Silvio Calabi’s book Antique Fishing Tackle, my interests in fishing, antiques, and wood turning met head on: Now I’m hooked on making wooden fishing lures. I know this passion is somewhat irrational, because plastic lures are abundant and economical—and they catch fish. I make my own wooden lures because it’s fun. I love recreating old patterns as much as I love to explore my own theories on catching fish. I enjoy testing unusual shapes and unique finishes. And I can report first-hand that catching a fish with a lure I’ve made myself is a sheer delight. You should try it yourself.
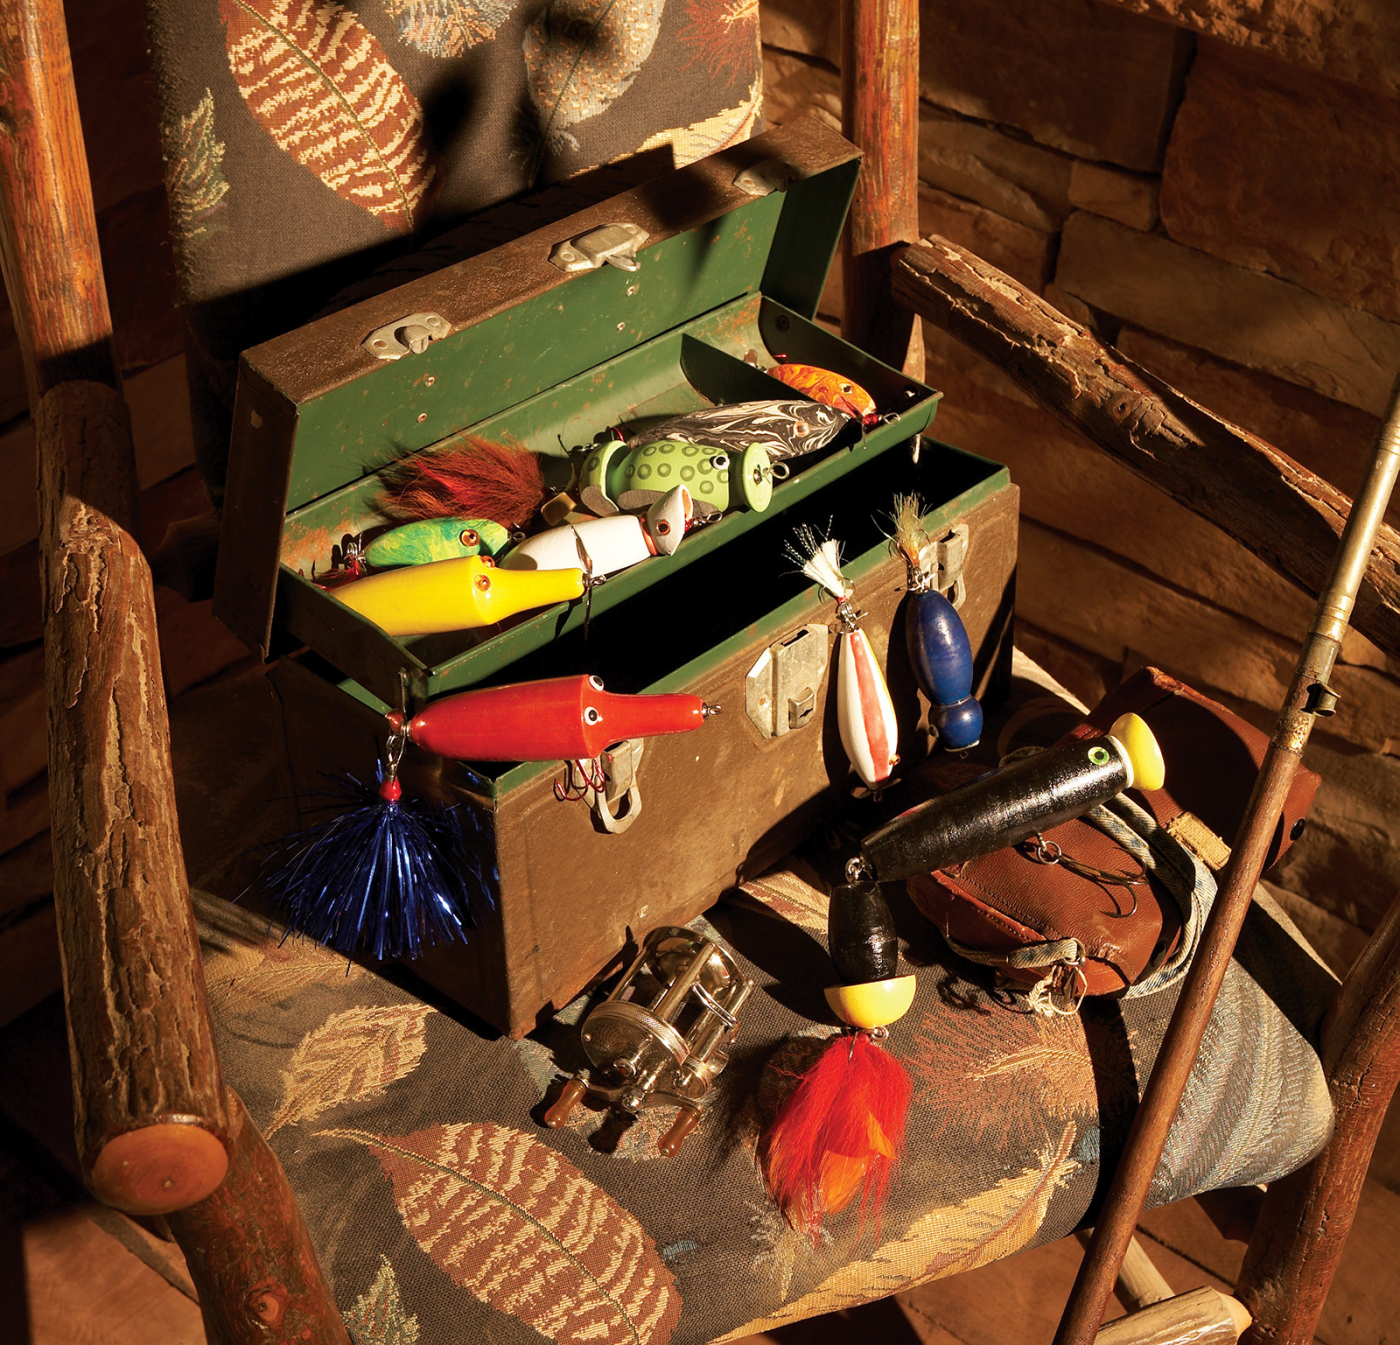
 I like to fish for bass, musky and pike, which are all known to feed at the surface, so most of the lures I that make are designed to skip across the water’s surface. These “top water” lures can be made from almost any wood that holds screws well. (There’s nothing worse that having a trophy fish escape because it was able to rip out the screw that anchored the hook to the lure!) I usually work with poplar and start with 1-1/2″ to 1-3/4″ square blocks. My bass lures range from 2″ to 5″ in length, while my musky and pike lures tend to be 5″ to 11″ long.
Use your imagination
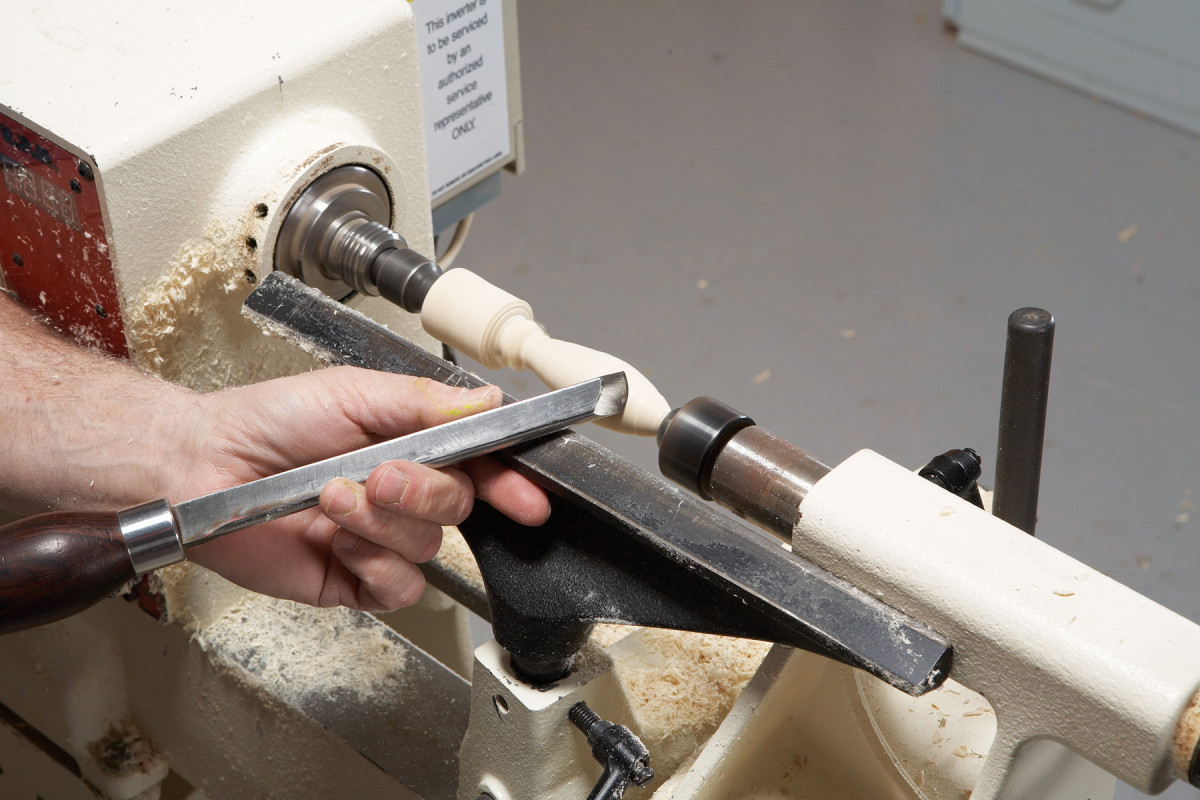
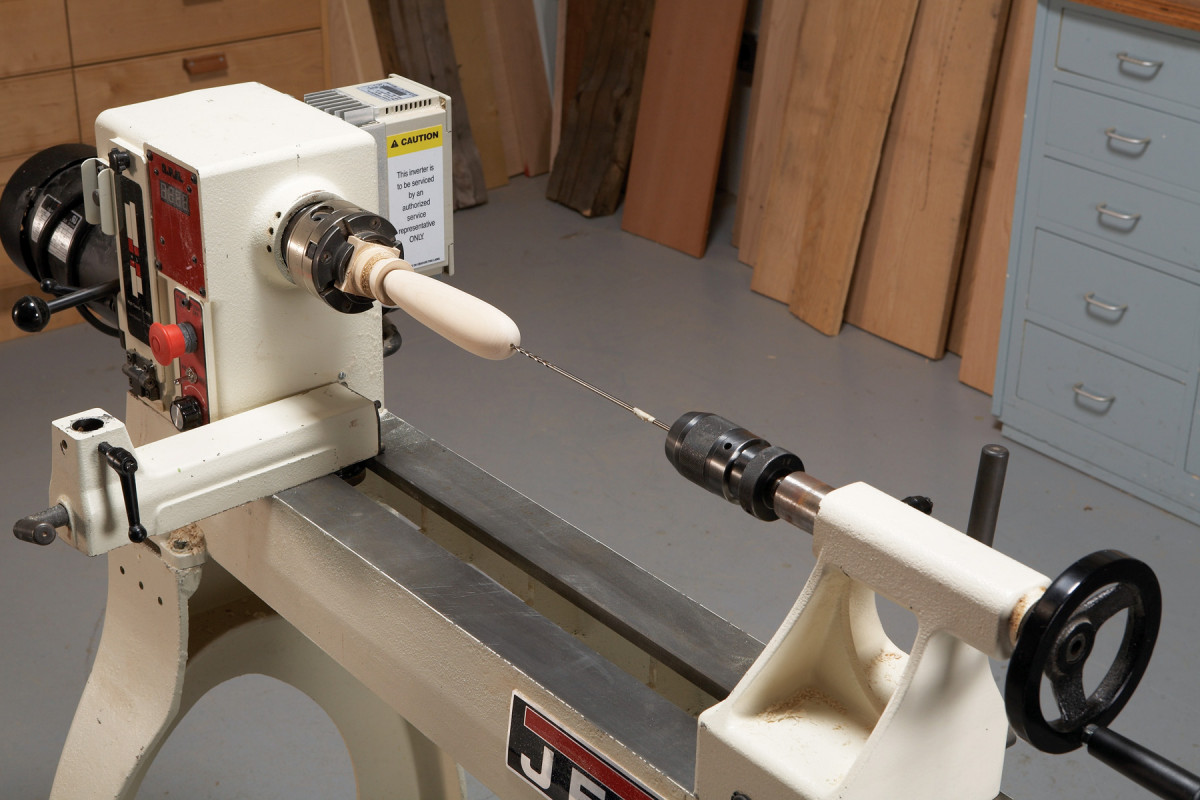
1. Most lures are simply shaped, so they’re easy to turn with a skew chisel or detail/spindle gouge. Cylinders and elliptical shapes like this one are typical. Sizes vary, depending on the type of fish you want to catch.
Usually, turning a wooden lure is basic spindle work, but the shapes you can experiment with are almost endless. Mimic a minnow or a small fish, a crawfish, a frog, a mouse, a bug, a bird, an eel, a worm or a snake. Sometimes the turning doesn’t resemble anything specific from nature.
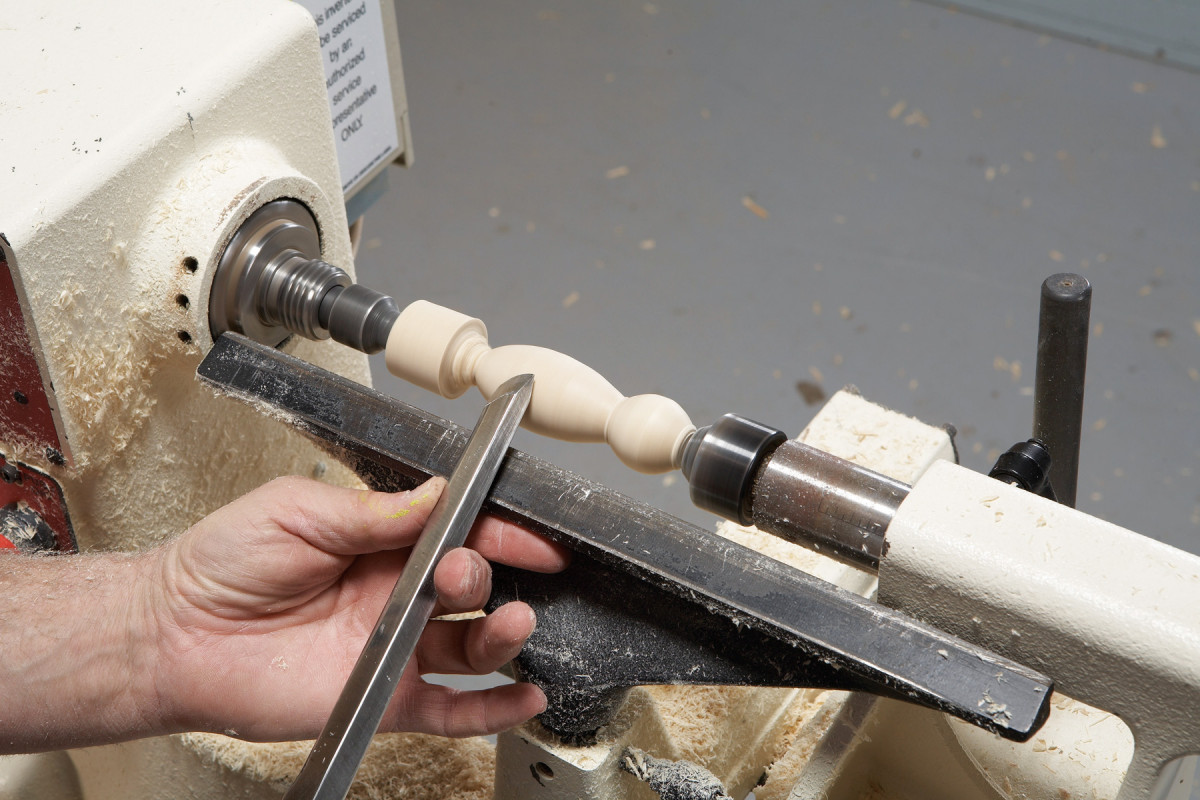
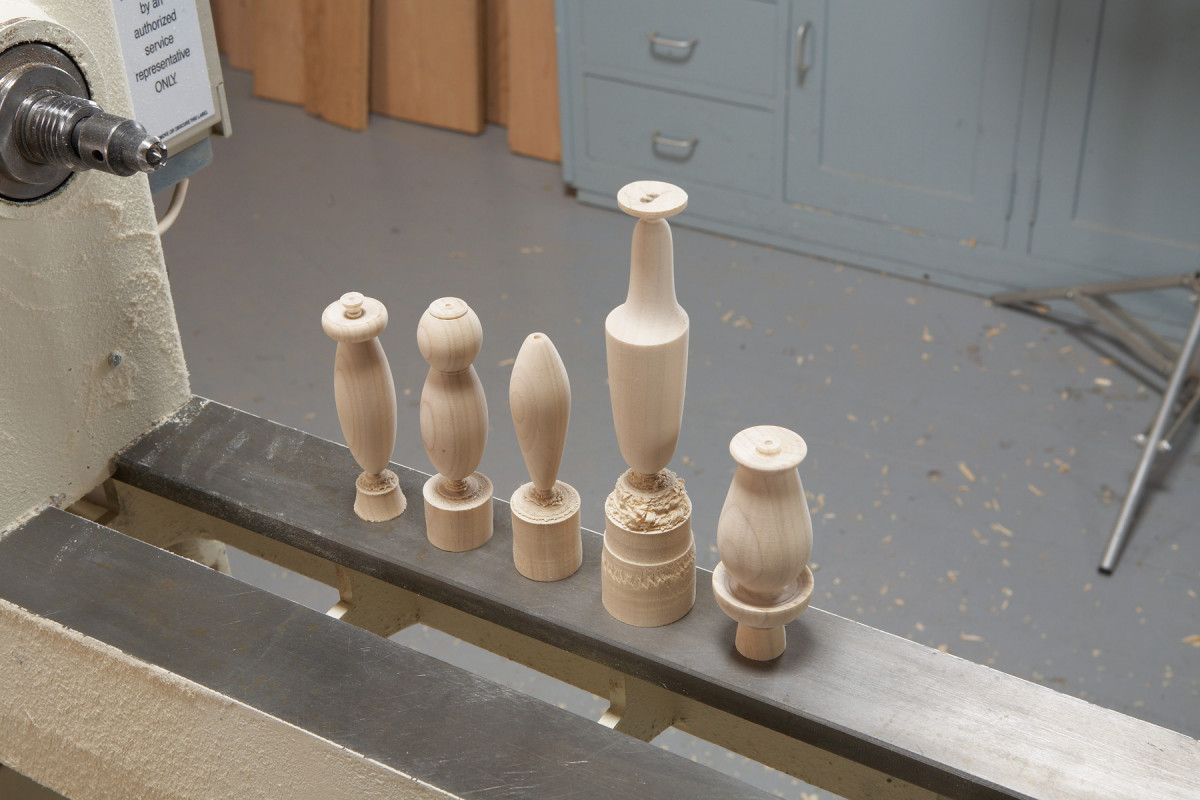
2. Embellish the basic shape to create variations. Adding a head and unique details, such as lips and a necklace (the small beads on both sides of the head), show individuality that’s not always found on factory-made lures.
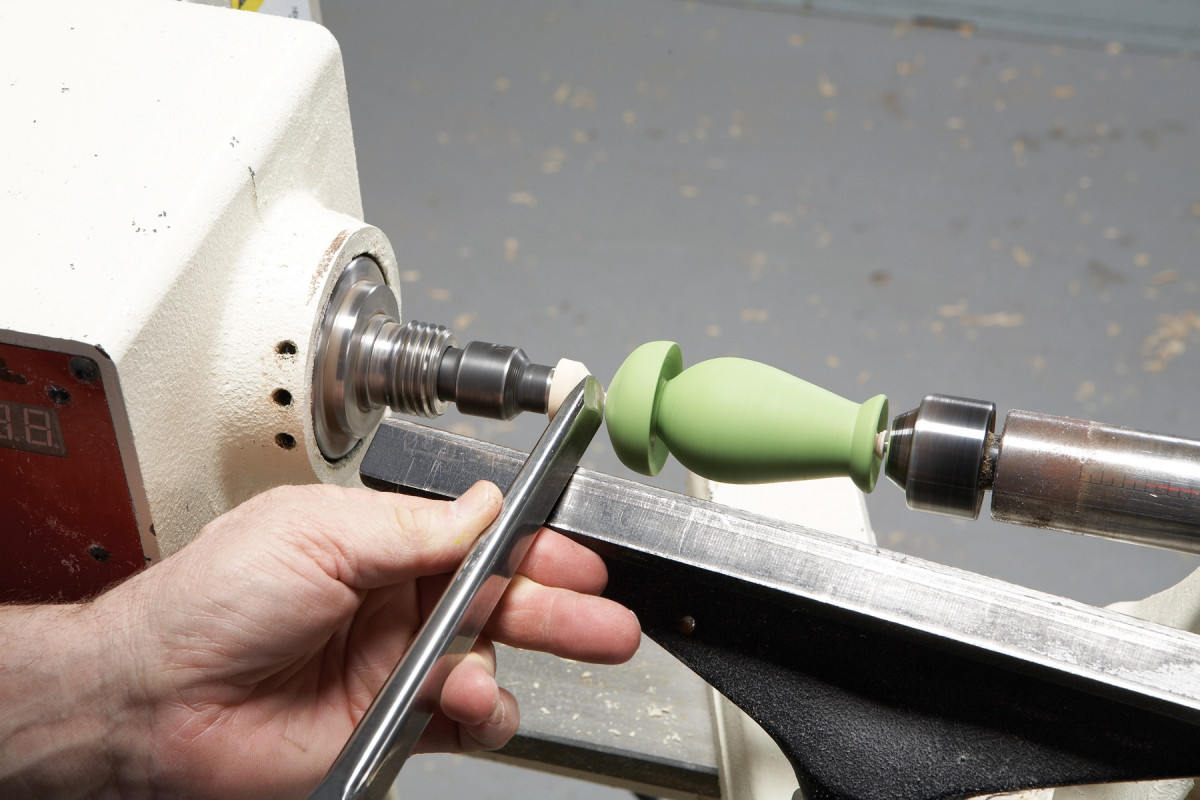
Most lure shapes are turned between centers with basic tools (Photos 1 and 2). If you’re adept with a skew chisel, you can complete most of the work with it alone.

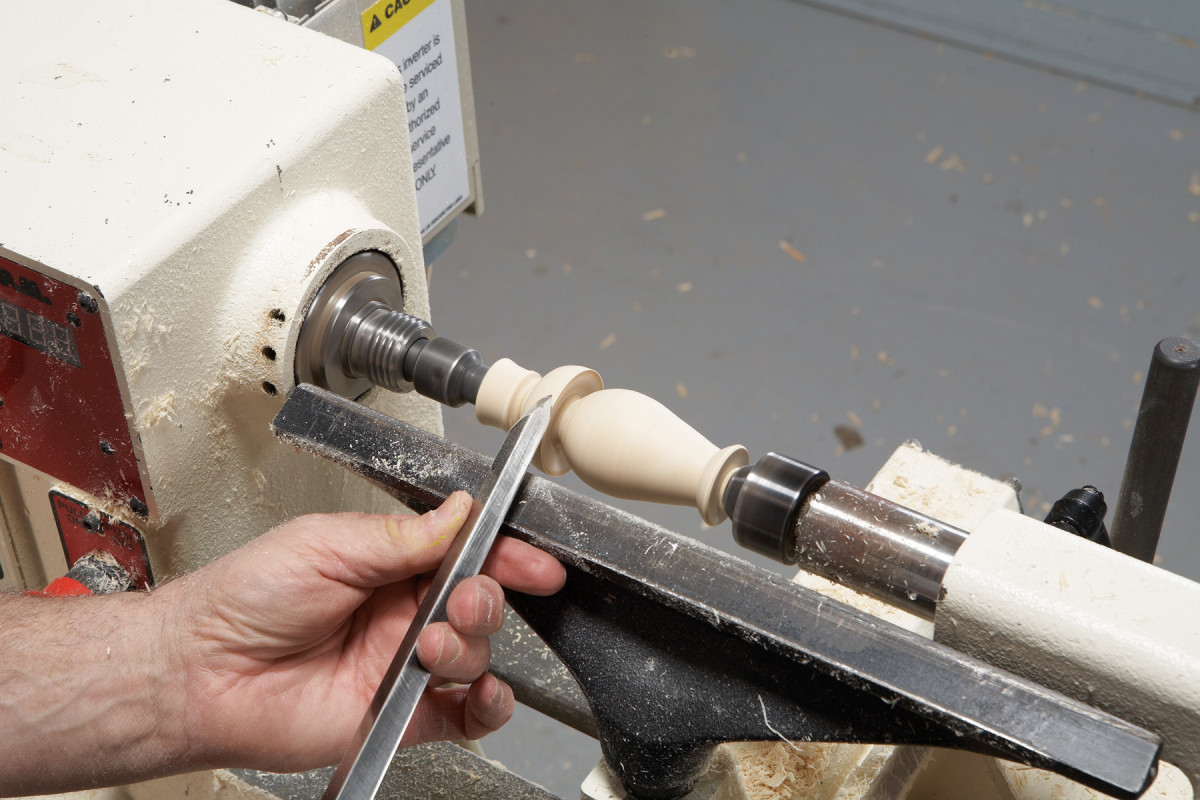
3. Add a hollowed-out collar to create additional sound and surface disturbance. The hollow shape makes the lure chug and pop as it’s pulled across the water. To hollow the collar, cut in with a skew chisel, long point down.
Use the skew or a 1/2″ round nose scraper for hollowing, a detail that gives the lure more “action” (Photo 3).

4. Create a lure with an offset snout by turning on two different centers. Turn the body with the blank centered between the ends. Then offset the blank’s mounting point at the tailstock end to turn the snout.
Use a 3/8″ detail/spindle gouge and turn from two different centers to create a lure with an unusual face (Photo 4).
5. Create your own designs. I call this lure the “Leapin’ Lacer.” The turning is just a squat-shaped ellipse with hollowed collars at both ends. But as you’ll see, the completed lure will look like a tasty frog to a largemouth bass.
Refer to old lure shapes you find appealing, or use your imagination to dream up your own shapes (Photo 5).
6. To strengthen any lure, drill all the way through and mount the hook on solid wire. Install the lure in a scroll chuck and drill from the tailstock end, using a long bit and a Jacobs-type chuck.
Whatever the shape, chances are you’ll be done turning it before you know it, so you might as well turn another one (Photo 6).
7. Most lures take ten minutes or less to turn, so it makes sense to turn multiples, whether they’re unique or all the same. Leave the waste attached for now—it makes painting much easier.
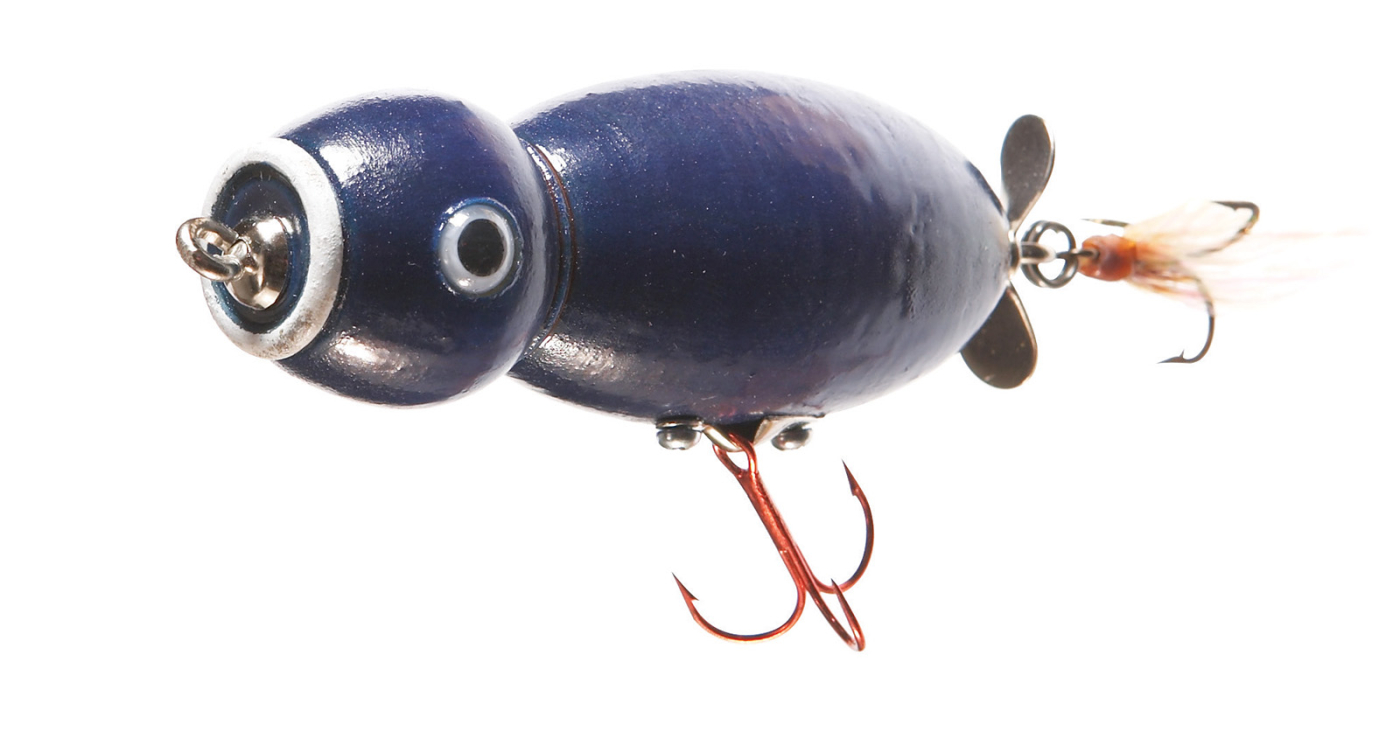
To eliminate any chance of a fish ripping out the hook, attach the hook to a wire that runs all the way through the lure (Photo 7). Drill a 1/8″ hole through the lure from end to end. Glue in 1/8” aluminum tubing to house the wire. Then insert the wire and create loops at both ends for tying on the lure and for mounting the hook. This through wire also creates a nice foundation for adding propellers, beads and other details.
 What fish want
 What fish want
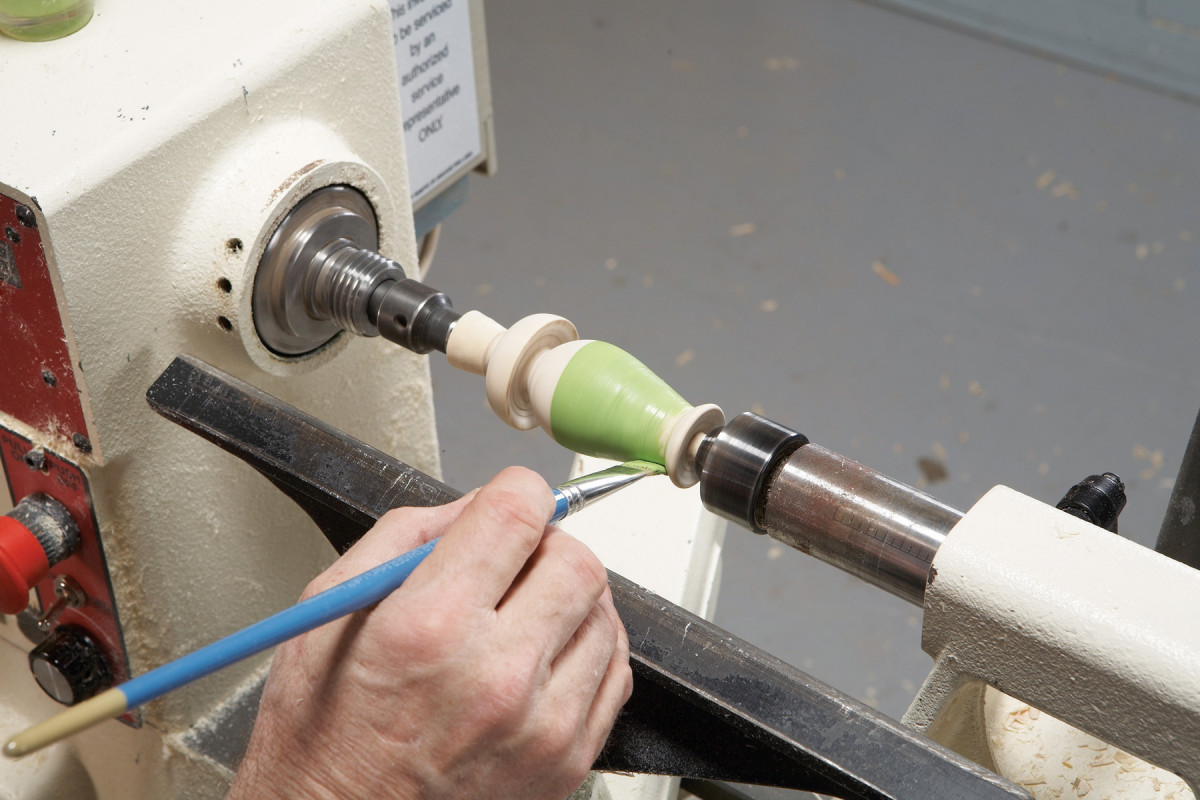
8. Here’s the lazy man’s painting method—just hold the brush and let the lathe do all the work. Run the lathe very slowly and thin the paint so that it flows evenly onto the lure.
As far as I can tell, fish don’t appreciate wood turning, as such. To attract fish, wooden lures are usually painted, and they almost always have eyes.
9. Turn down the waste material at both ends, after the paint has dried. Then part off. This step shortens the time it takes to produce finished surfaces on the ends.
Historically, lures were brush-painted, dipped, marbled or sprayed. Red was often used as the primary color or for details, in the belief that predator fish would view it as blood, a sign of injury. Examples decorated with real frog skin have also been documented. All of these options are open to the contemporary lure maker (except, perhaps, the frog skin option). I usually use a variation of the brush-painting method to apply paint while the lure is still on the lathe (Photos 8 and 9). Epoxy paints are the most durable, but they take a long time to dry. That makes applying multiple colors a lengthy process, so I often use acrylic paints for the color coats, followed by a coat of clear epoxy paint for durability.
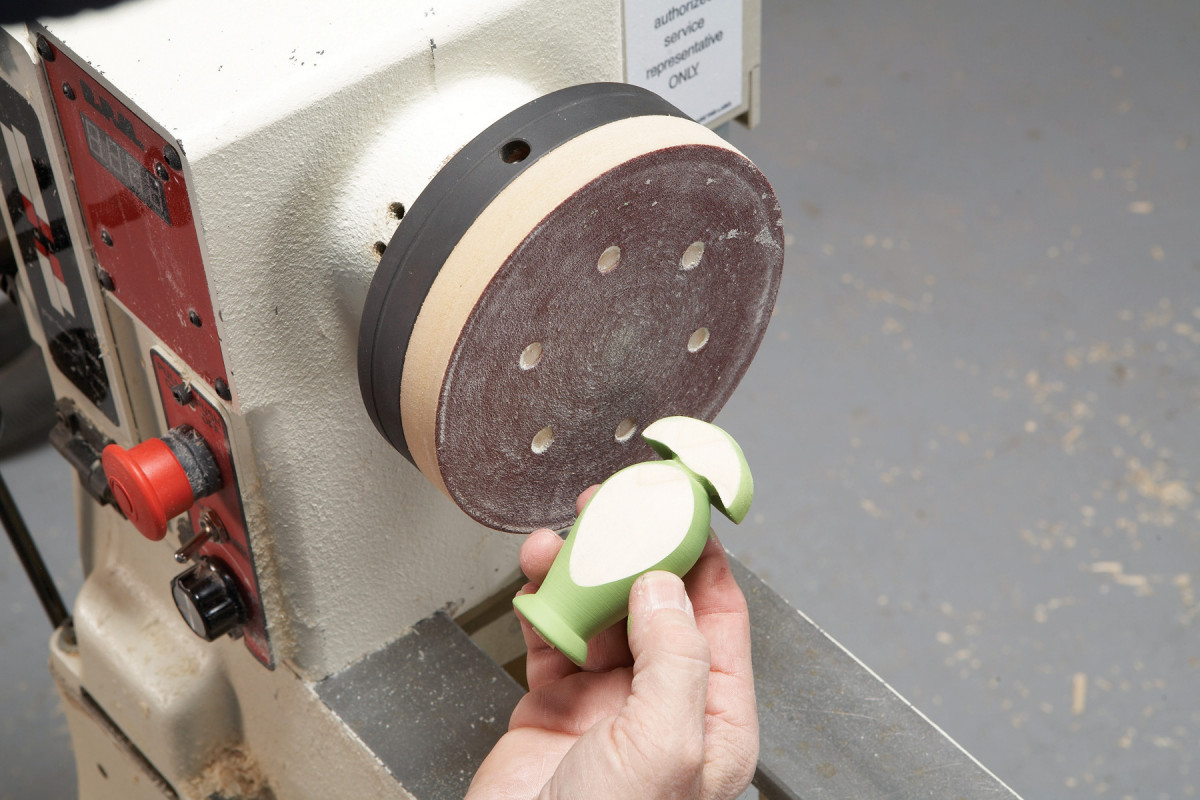
10. Flattening one end on a sanding disc transforms the turning I call the “Leapin’ Lacer” into a frog—especially from a largemouth’s viewpoint.
Another option is to carve or sand the turned body, before or after painting, to make the lure attract more piscean attention it moves across the surface of the water. Carving the head end of a lure will make it wobble or dive, much like hollowing on the lathe. A bit of sanding can dramatically change a turned lure’s appearance (Photo 10). Viewing historical examples is a great way to get ideas for additional shaping.
 Eyes really do make a difference—just ask anyone who casts a lure. Eyes can be painted on or dotted, or they can be small tacks or nails that are driven in and then painted. You can also buy eyes—made of glass or plastic, adhesive backed or with stems to glue into a hole, or even “doll eyes” with loose pupils for that “come hither” look. Whatever your choice, adding eyes gives expression to your lure and may help in hooking the big one.
Please the consumer
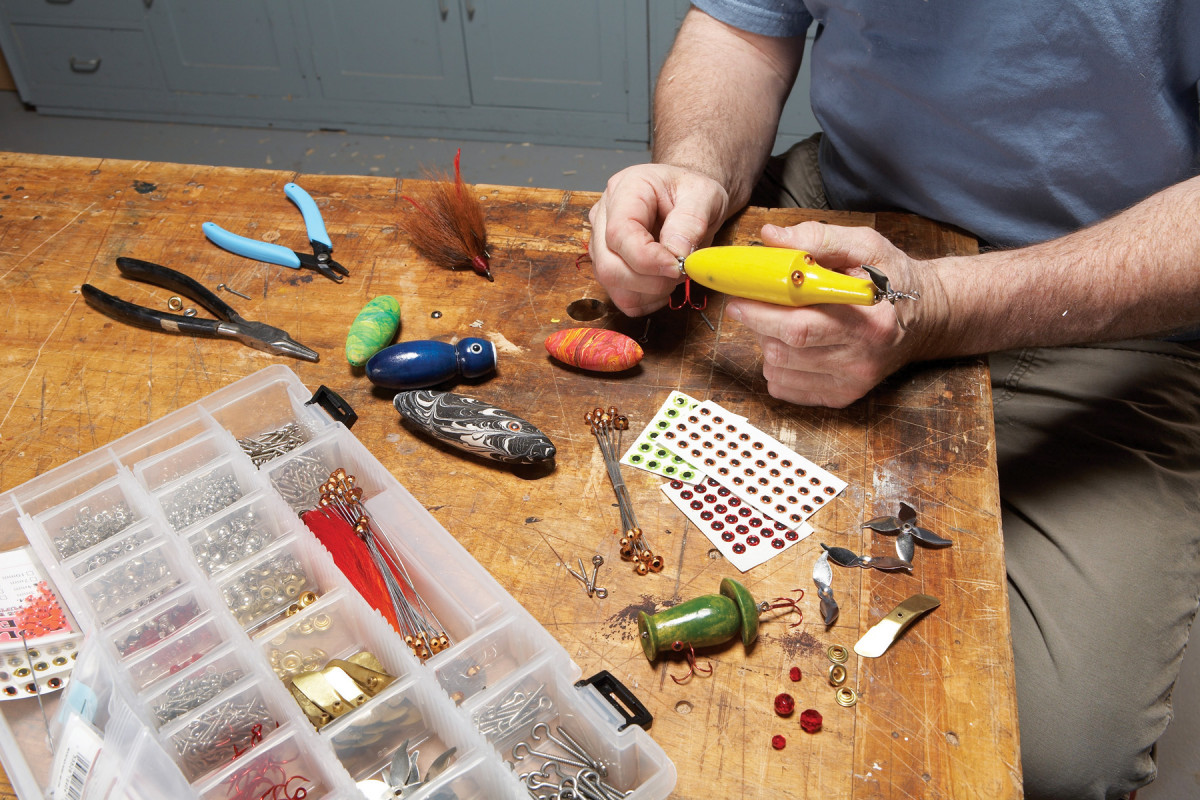
11. Attach eyes, hooks, weights and other hardware to complete each lure. Outsmarting fish isn’t always easy, so use both your experience and imagination. And don’t hesitate to change hardware that doesn’t seem to work.
An almost endless array of options exists for mounting hooks and adding the final touches that make a piece of wood irresistible to fish (Photo 11). You can buy hardware online, strip it from an old lure, or make it yourself from metal or plastic. You can keep it simple or go for broke, by installing hooks wrapped with fur or feathers, eyelets, diving lips, spinners, propellers, fins, collars, glass and metal beads, wire, spacers, cup washers, weights, and split rings. The bottom line during the entire lure-making process is to think like a hungry fish, because ultimately, hungry fish will be your greatest critics.

Here are some supplies and tools we find essential in our everyday work around the shop. We may receive a commission from sales referred by our links; however, we have carefully selected these products for their usefulness and quality.


