


We may receive a commission when you use our affiliate links. However, this does not impact our recommendations.
 These simple tools are essential for dimensioning lumber by hand or machine.
It’s hard to believe that something as simple as a pair of parallel pieces of stock can be a highly precise tool for flattening stock. However, once you’ve used a pair of winding sticks and understand how to use them, they’ll become your go-to partner for wrangling rough stock.
Winding sticks can be as simple or as fancy as you’d like. A few pieces of quarter-sawn stock milled flat, square, and parallel will suffice just fine. Or, you can opt for a fancy pair—the ones I have here are from Will Adams at Honey Brook Tools. If you choose to make your own, there are a couple of things to remember.
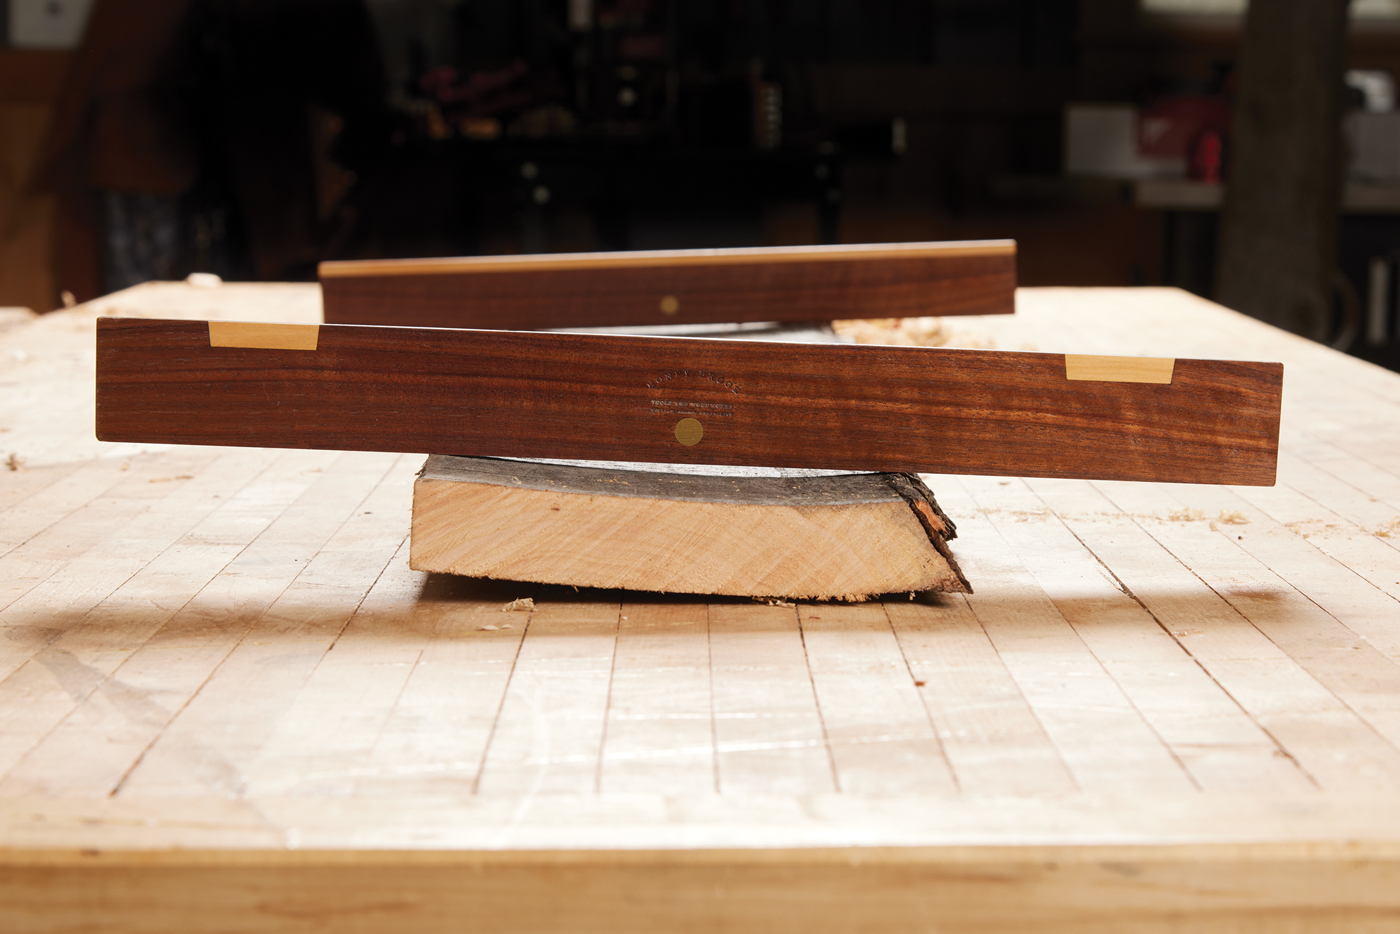
1 You can make (or buy) winding sticks in a variety of profiles. I find myself leaning towards the narrower topped version.
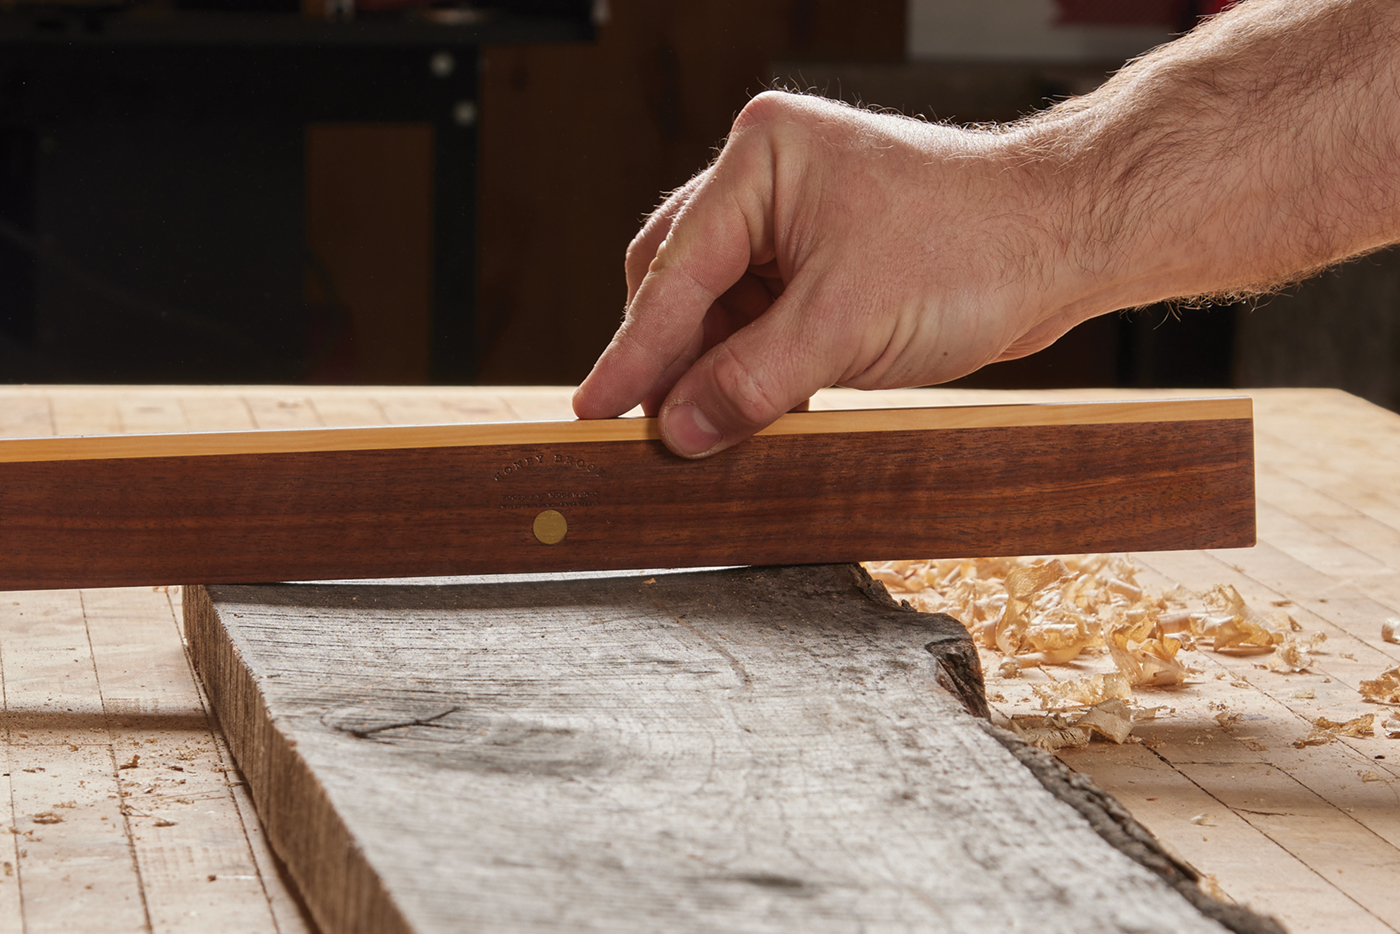
First, as I mentioned, quarter-sawn stock is preferable. It moves less than flat or plain-sawn material and will remain true and accurate. Oftentimes, winding sticks will have a few different inlays. The first designates the winding stick’s center (brass rod in the pair above). Knowing the center point helps quickly position the winding sticks centered on your material. Another type of inlay you may find is contrasting inlays along the top — a long, narrow strip or a pair of inlays along each end. These help gauge the level of the sticks (you’ll see an example of this in a photo in a little bit).
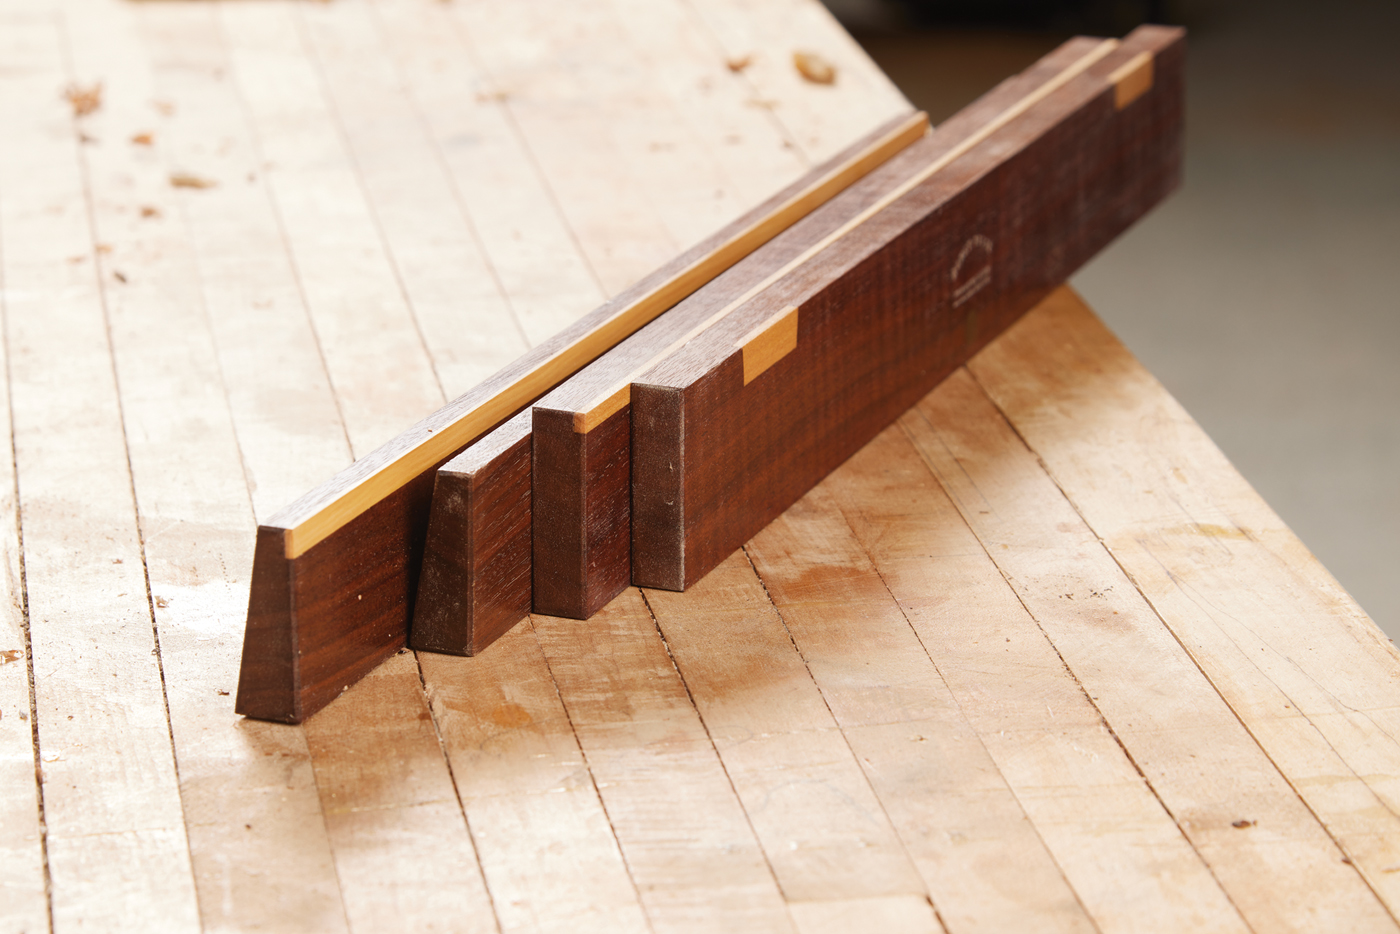
The length of the winding sticks isn’t essential, but remember that the longer they are, the more accurate they’ll be. I find 18“-24“ sticks are plenty long and will fit in most toolboxes. The final thing to consider is the winding stick profiles. You can see two profiles in Photo 1. One is squared stock, and the other is a trapezoidal shape. I think the narrower the top edge, the easier it is to gauge with your eye.
In Use
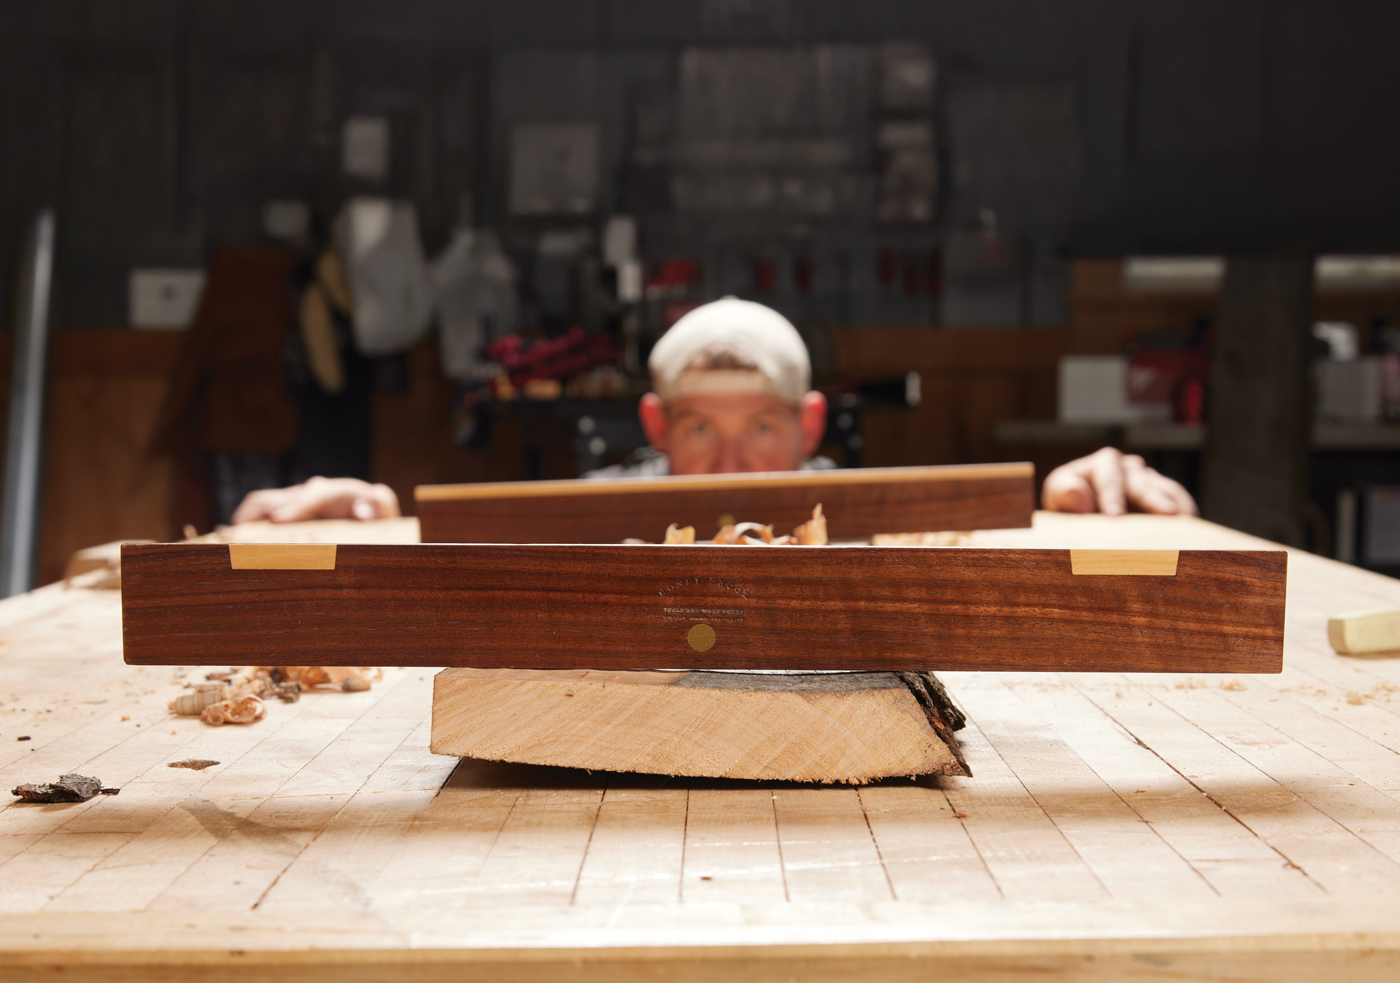
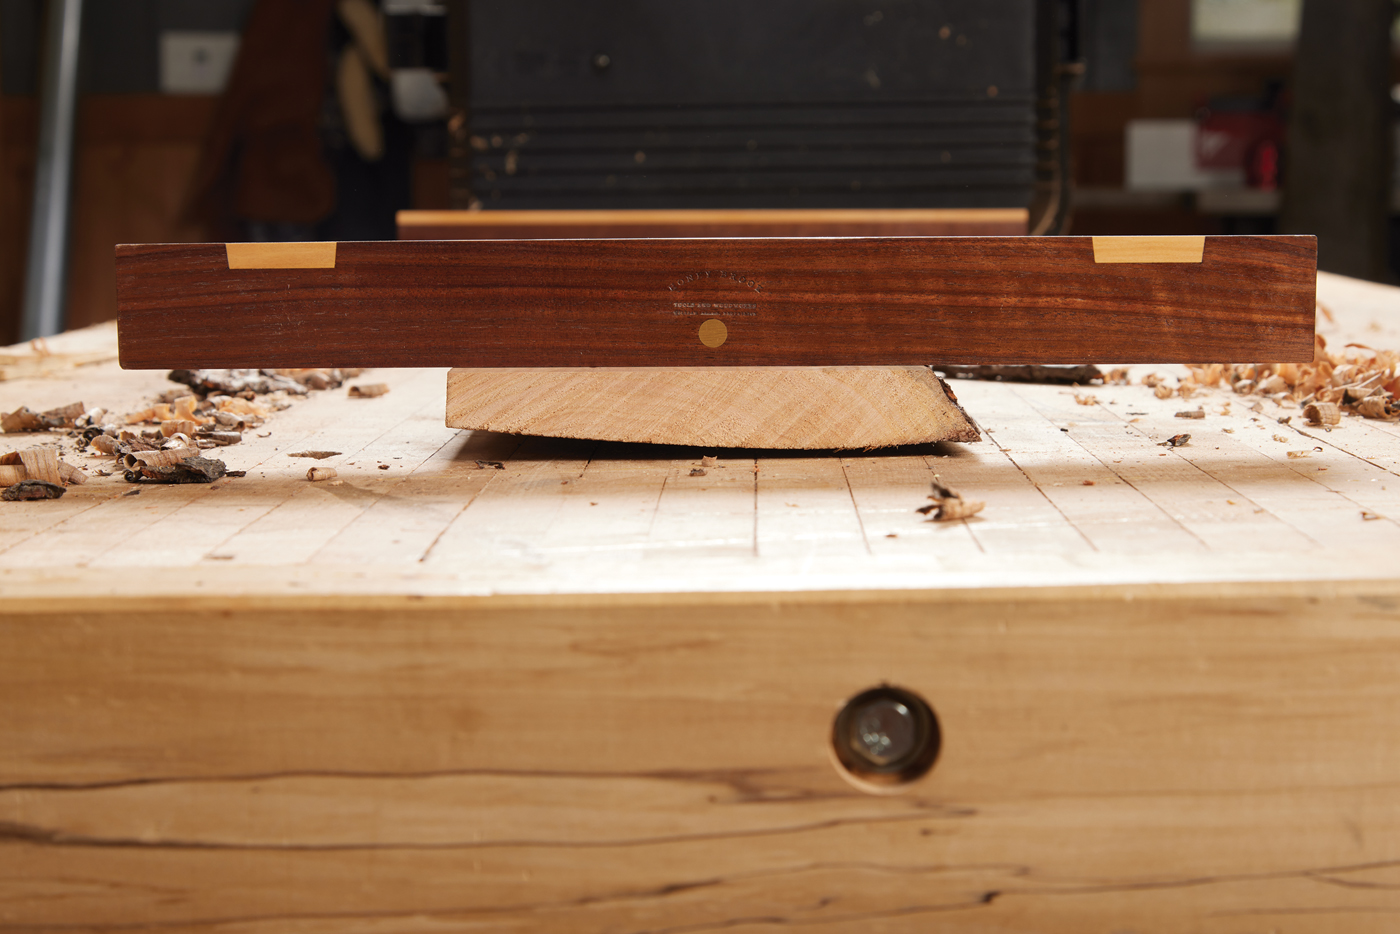
Putting your choice of winding stick to use is a straightforward process. With rough stock, I like to break my parts down as far as possible—a saw is the fastest way to flatten a board. With the stock to rough size, use one of the winding sticks as a straight edge; start to judge the stock and see if there’s any cup or bow. Photo 2 shows a light cup on the top of this stock. The second winding stick lands on the opposite end. Pay attention to any cup on this end as well.
2 Winding sticks tell whats going on across the width of a board (cup) as well as the length (twist).
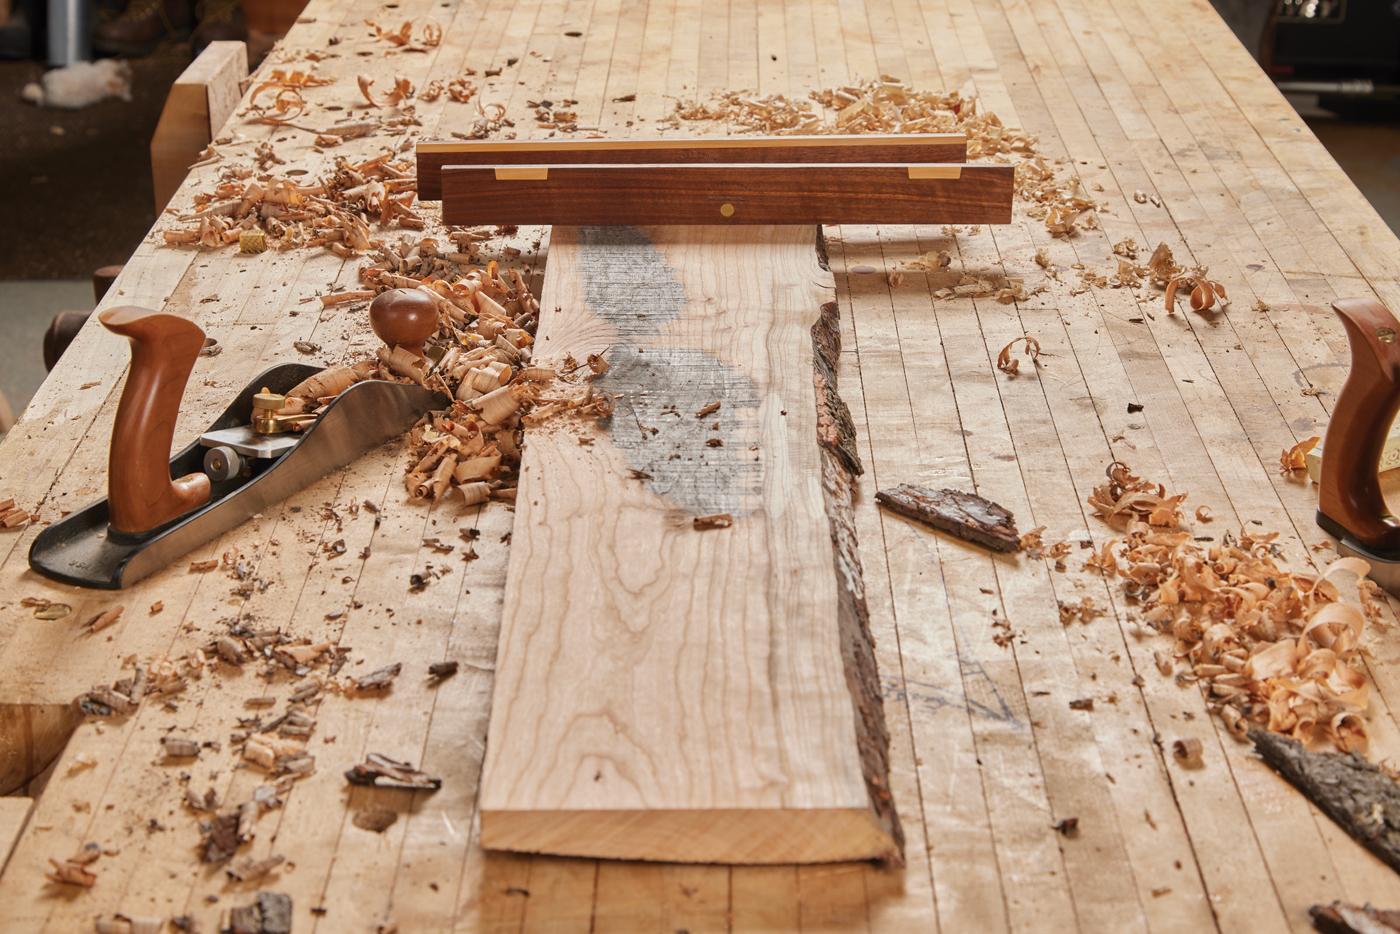
Now, here’s the trick with winding sticks: Start to lower your perspective, look down the stock, and line up the two winding sticks. The winding sticks project what’s happening on the surface and amplify it.
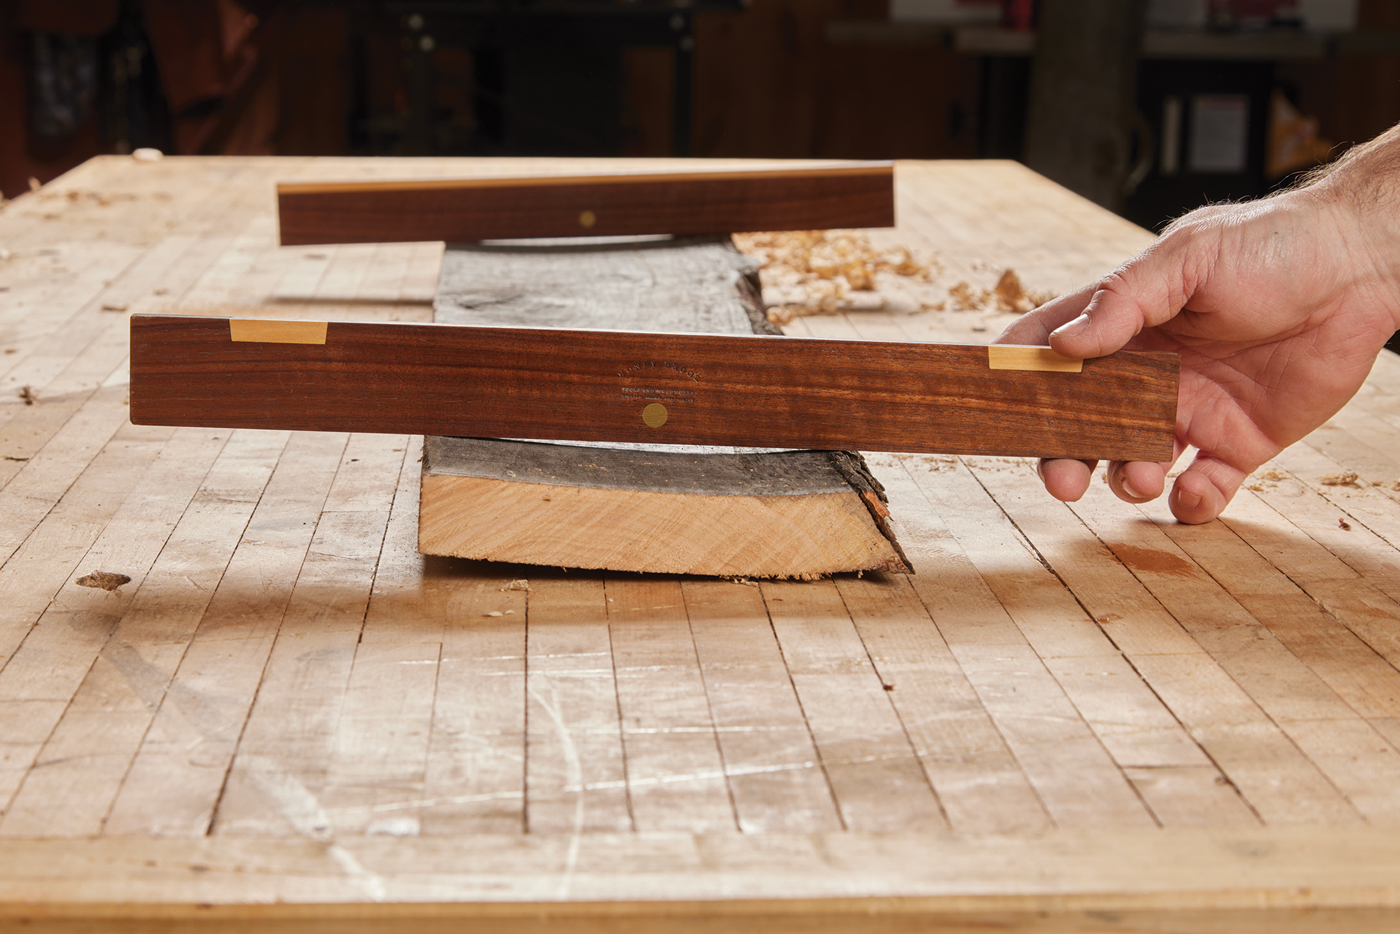
3 Make a note of the difference in cupping between the front and back winding stick. Ideally, the amount of cup will be the same.
4 As you look down the board at a raking angle, you’ll see that the winding extrapolates any movement that’s happening on the surface of the board. Make a note of the small acute angle formed between the top of the front stick and the bottom of the rear stick. Any changes in this angle is a good way to gauge progress as you flatten the board.
As you can see in photo 4, there’s a twist. The back right corner is high, as is the front left corner. I find myself often moving around my stock and forgetting what I’m doing, so I’ll grab some chalk and squiggle across the high corners, just so I remember what I’m doing when I (inevitably) get interrupted. Before reaching for a hand plane, make a mental note of how much twist there appears to be so that you can gauge your progress.

5 Identify the high spots and mark them with chalk.
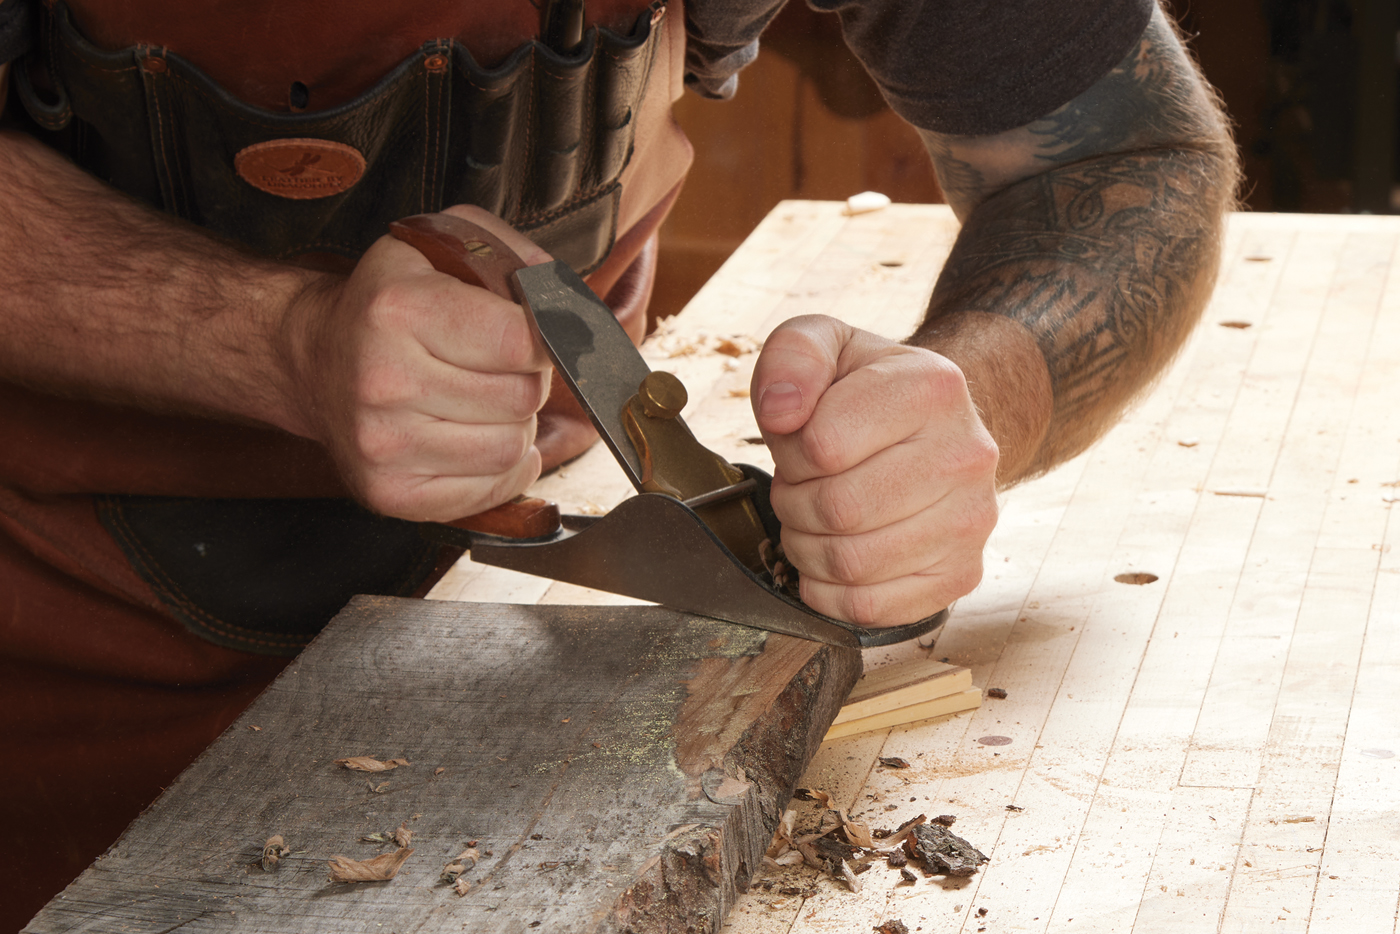
Now, you can start to flatten the stock. Concentrate on the high spots you marked first. Many people will suggest that you use a jack plane to do this. I enjoy using my scrub plane a little more for this step—a sharp iron and a moderate cut produce large curly shavings that quickly make progress. As a side note, a scrub plane has no chip breaker. It’s a rough-cut tool. Therefore, it has a tendency to tear out if you go against the grain at all. I use this time to make mental notes about which direction the grain is going in different areas of the board, which helps when you get to the finer planes.
6 Grab your choice of plane and start to plane them down.
Drop the winding sticks back in place once you feel you’ve made progress on the high spots. Crouch down and look at the sticks. Gauge your progress. As you can see in the main photo in this article, the twist of the sticks is slightly less. You can continue working on the board’s high spots until the sticks are in alignment. Take a look at photo 7. You can see how the contrasting inlay strips make it easy to judge how closely the two ends are to being in the same plane.
7 The goal is for the top of the winding sticks to line up, indicating they’re in the same plane.
8 After they do, you can switch over to a jack or jointer plane and start to make full-length passes, flattening the board.
Once the winding sticks line up, it doesn’t mean the flattening is complete. As you can see in Photo 8, there’s still some work. But now, you at least know that the twist has been removed, and now plane the entire surface until it’s clean and flat. Just because I’m working with a hand plane doesn’t mean these are hand tool-only tools. I find them just as valuable as I’m working on the jointer, especially when working with extra-long stock that is sensitive to twists.


