


We may receive a commission when you use our affiliate links. However, this does not impact our recommendations.
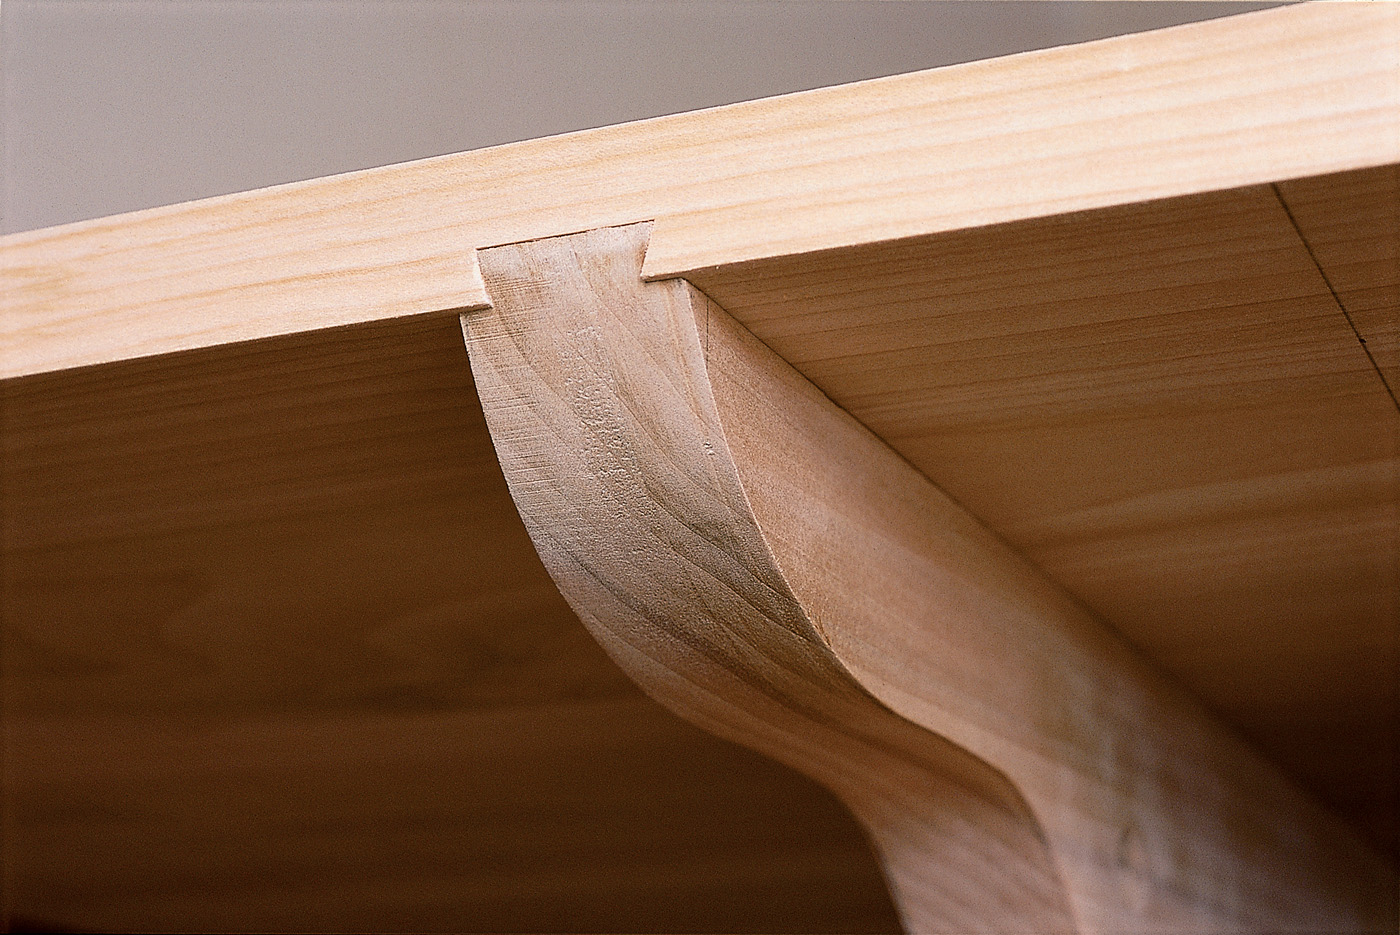
A stout batten joined to the underside of the tabletop with a sliding dovetail will keep the top flat. Here, the batten extends to the very edge of the tabletop. In winter, when humidity is low, the top will shrink, and the batten will protrude very slightly. In summer, when the top swells, the batten end will be slightly recessed.
Battens: Just one proven method to keep you on a level playing field.
The best way to keep a tabletop flat is to make it flat in the first place and to attach it properly to a rigid frame, such as that formed by a leg-and-apron assembly. But not every tabletop is attached to a frame. Trestle tables, pedestal tables, even drop-leaves lack frames to stiffen the tabletops and keep them flat.
Two common constructions effectively prevent cupping of a tabletop or of individual boards in one. One is a batten attached or joined to the underside of the tabletop. This column will show you how to do that. In this article I cover the other – a breadboard end joined to each end of the top.
Batten Basics
So what is a batten? The idea is simple. You attach a stiffener across the grain of a board or panel to counter any tendency of it to cup. The batten has to be strong enough to resist the board’s cupping power, as does the method of attachment. In addition, you must allow for expansion and contraction of the board or panel. It’s common to use two or three battens per board or panel.
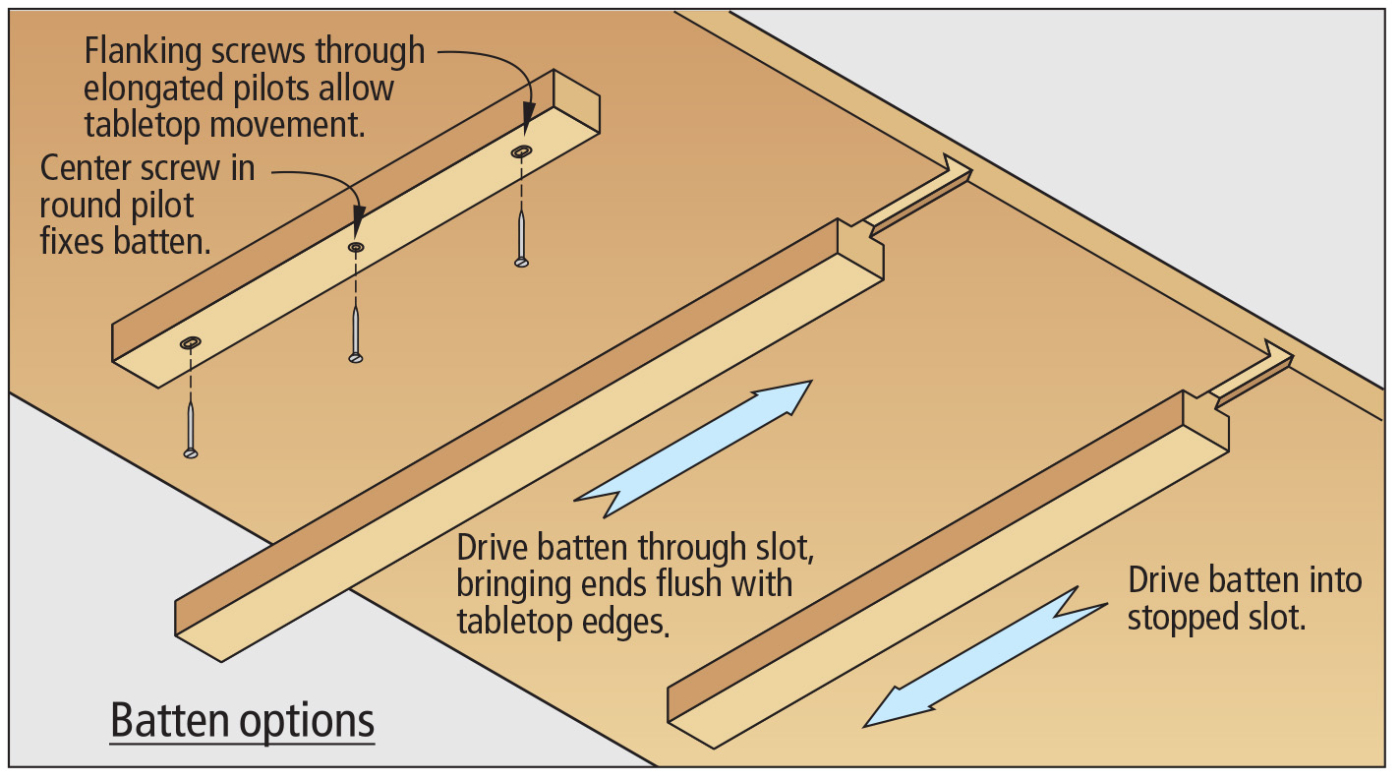
The drawing above shows two basic options: Attach each batten with three screws or with a sliding dovetail. No glue is used. The obvious advantage of using fasteners is that you can cut and mount each batten quickly. In addition, a batten secured with screws can be relatively unobtrusive; cut it 3″ or 4″ shorter than the table’s width so it can be set back from the table’s edges.
The primary difficulty in using screw-mounted battens is elongating the clearance holes to allow the wood to move freely. You can enlarge drilled holes with a small-diameter round file or a coping saw. A simple but effective trick is to drill oversize clearance holes, rather than trying to create oblong ones, and use washers under the screw heads.
The Sliding Dovetail Solution
Using a sliding dovetail to join a batten mechanically to a tabletop is more work, but it’s stronger. Cutting the joint isn’t difficult, but some patience is required to get a proper fit between your pieces. It’s a router operation. Cut the slot by guiding the router along a fence clamped to the tabletop. Form the tail on the batten on the router table.
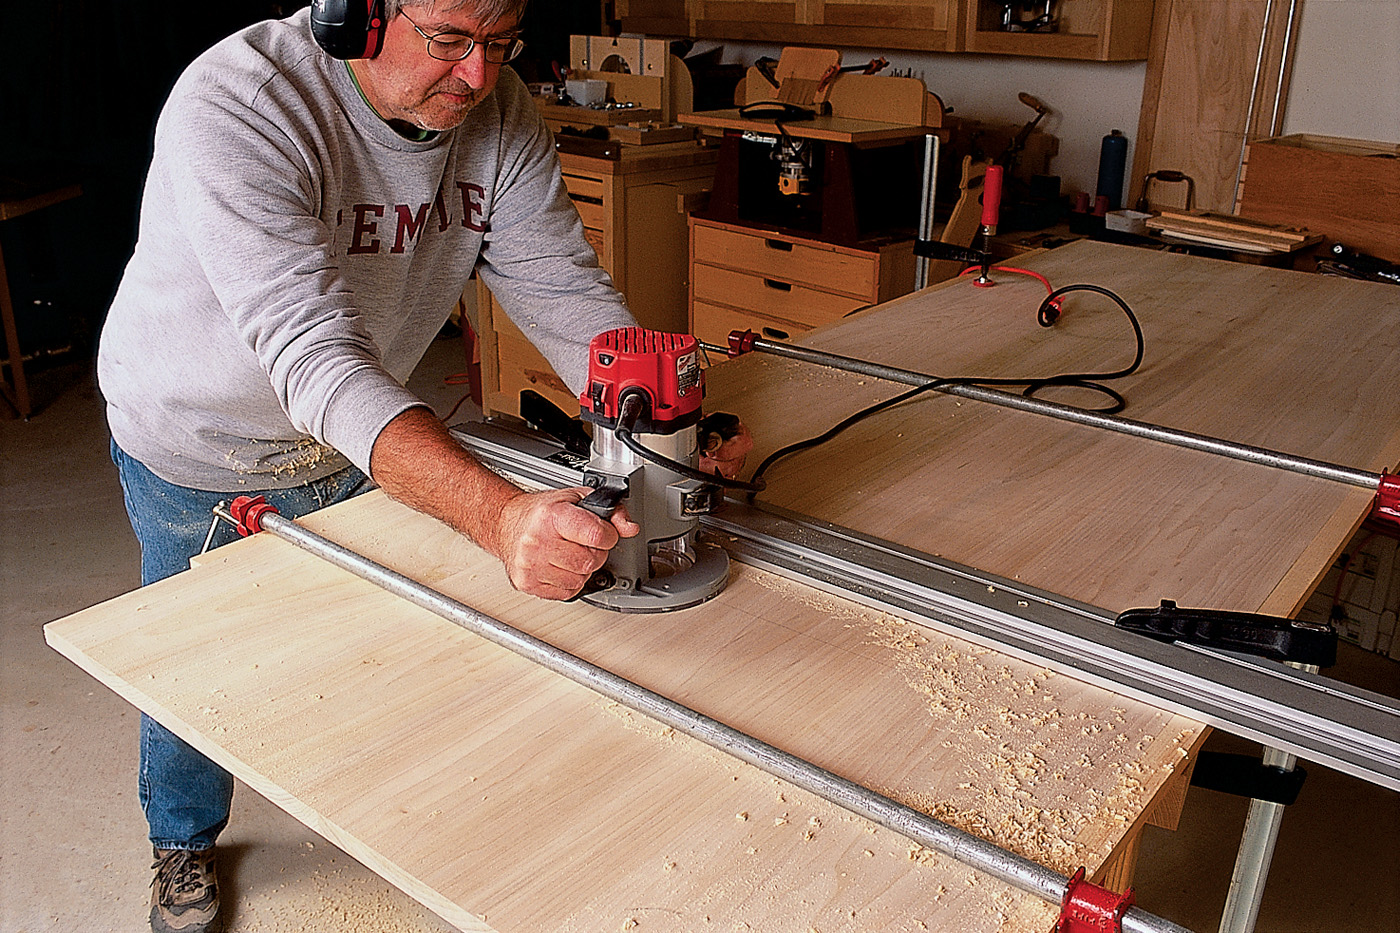
The dovetail slot must be cut with the bit set to final depth. Clamp scrap to each edge of the tabletop to prevent tearing out the top’s edges. Make sure your guide is straight and rigid, perpendicular to the tabletop edges, and securely clamped.
Most any dovetail bit will do the job, but the particular bit you choose impacts some details of the operation. A dovetail cut must be done full depth in one pass (of course!). In this application, the cut doesn’t need to be more than 5⁄16” deep. The bottom of the cut should be just about as wide as the batten. Of course you’ll use the same router bit to cut both the slot and the tail.
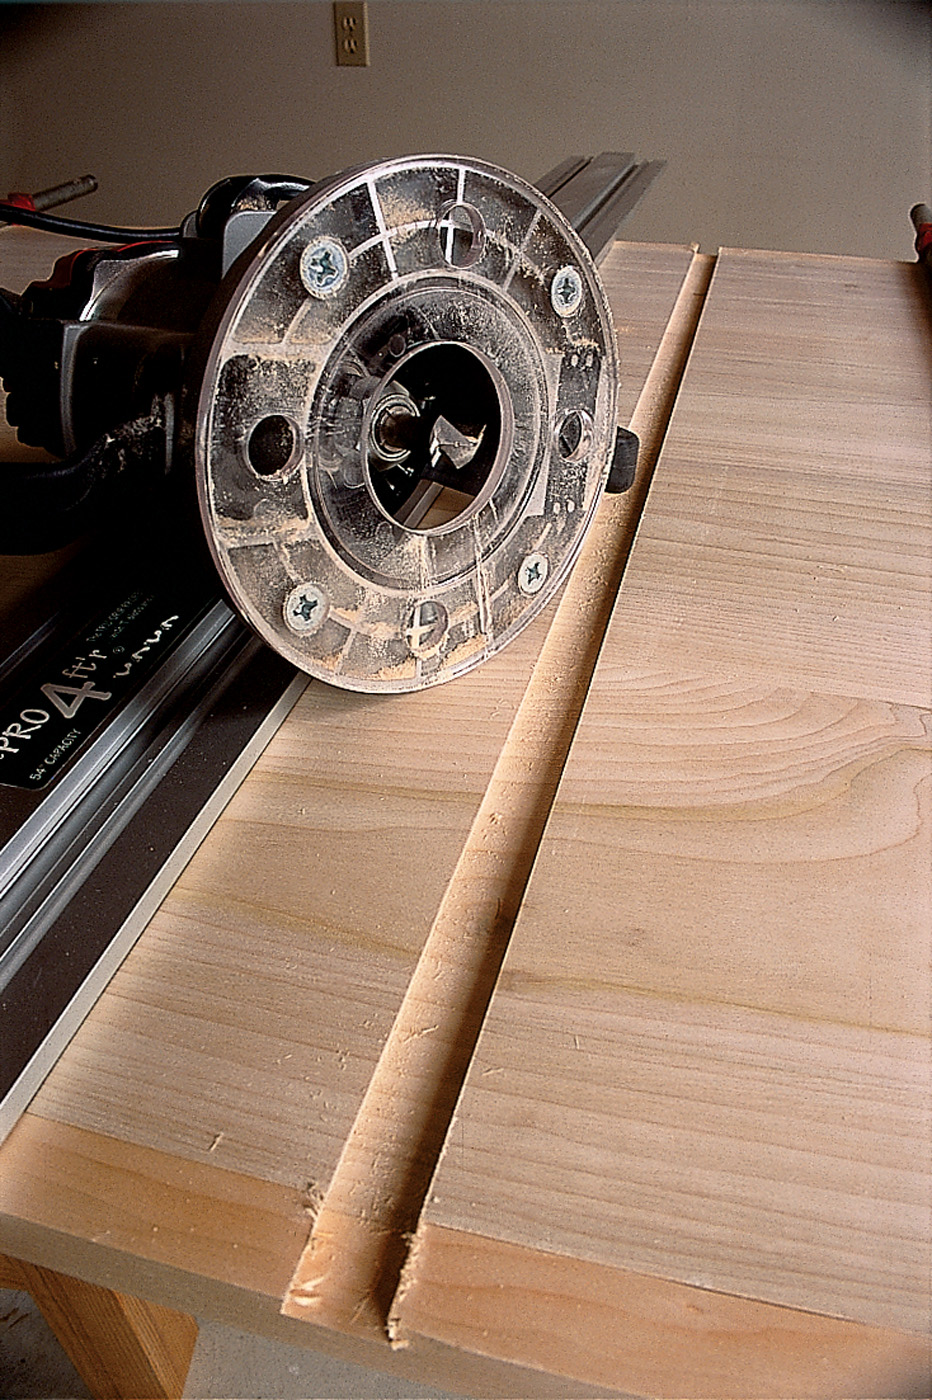
The dovetail slot for a batten doesn’t need to be more than 1⁄4″ to 5⁄16″ deep. You can rout that in a single pass with a 3⁄4″ to 1″ 14° bit on a 1⁄2″ shank. If you use a smaller dovetail bit, its waist will be weaker; then it’s advisable to first rough out the groove with a straight bit.
If you use a commonplace 1⁄2“-14° bit, it’s prudent to first rough out the slot with a straight bit in your router. To match the slot to the batten thickness, you’ll need to make two passes with the dovetail bit. A larger-diameter bit has more substance at the waist, and you should have no problem hogging out the slot in a single pass.
Test the Tail’s Fit
Cutting the tail follows. The first adjustment is bit height. You want a snug fit, with the shoulders of the tail tight against the tabletop surface, so you don’t want the bit too high. The next adjustment is the fence position. I make test cuts on scraps of the batten stock, and fit the resulting tail to the slot.
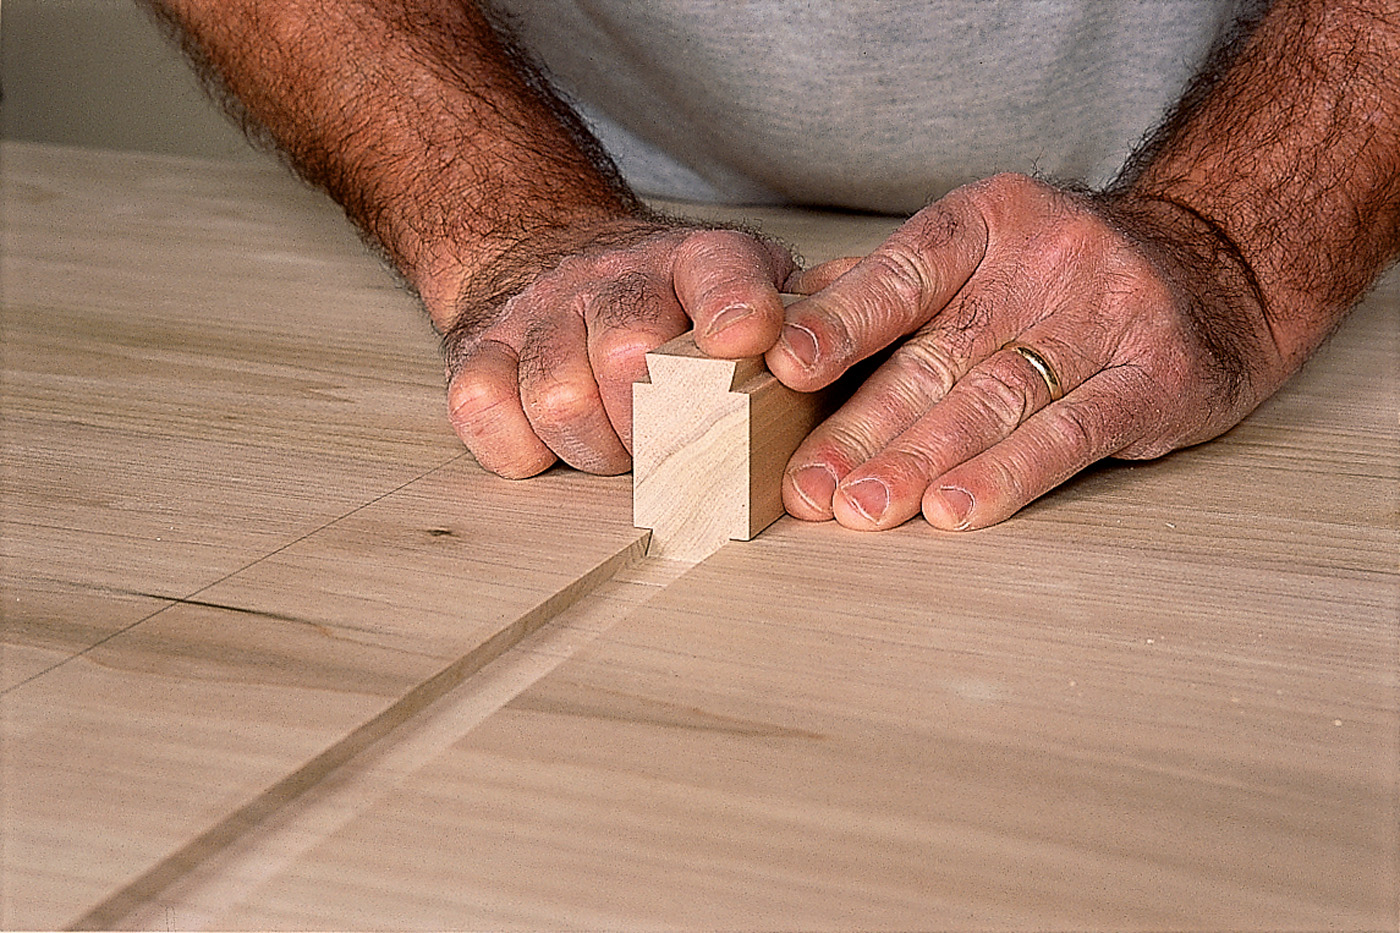
As you set up your router table for cutting the tails on the battens, fit the test block to the slots. When you have a test block that fits the slot, slide it all the way through to ensure you won’t have an unpleasant surprise during final assembly of the actual batten.
Remember that it isn’t simply a matter of fitting the test block into the slot. It has to pass completely through the slot, from one end to the other. Invariably, I find tight spots – often two or three – where a block that’s otherwise sliding satisfactorily binds. The test block isn’t impeded by the friction buildup that will drag on the batten itself. So you must use your judgment.
You can try easing the tight spots with sandpaper. Or, feed your test block through the slot several times, abrading and easing the tight spots. Or tweak the setup, cut a new tail, and run it through the slot. (Which might convince you that the previous setup was the better one, so be sure you can return to it.)
Cut the tail on each batten only after you are satisfied that you have the right fit. Slide it along the fence and cut into one face, then turn it around and cut the second face, completing the tail. You can make an angled sanding block to remove any high spots on the tail.
Ultimately, you are going to have to cut a tail on the batten itself and feed it into the slot. The batten isn’t glued in place. I copied a detail from an old table a friend owned. Tables of similar construction are in the Pennsylvania Dutch collections at Winterthur; a single wooden pin driven through the tabletop into its center fixes the batten while allowing the tabletop to expand and contract.
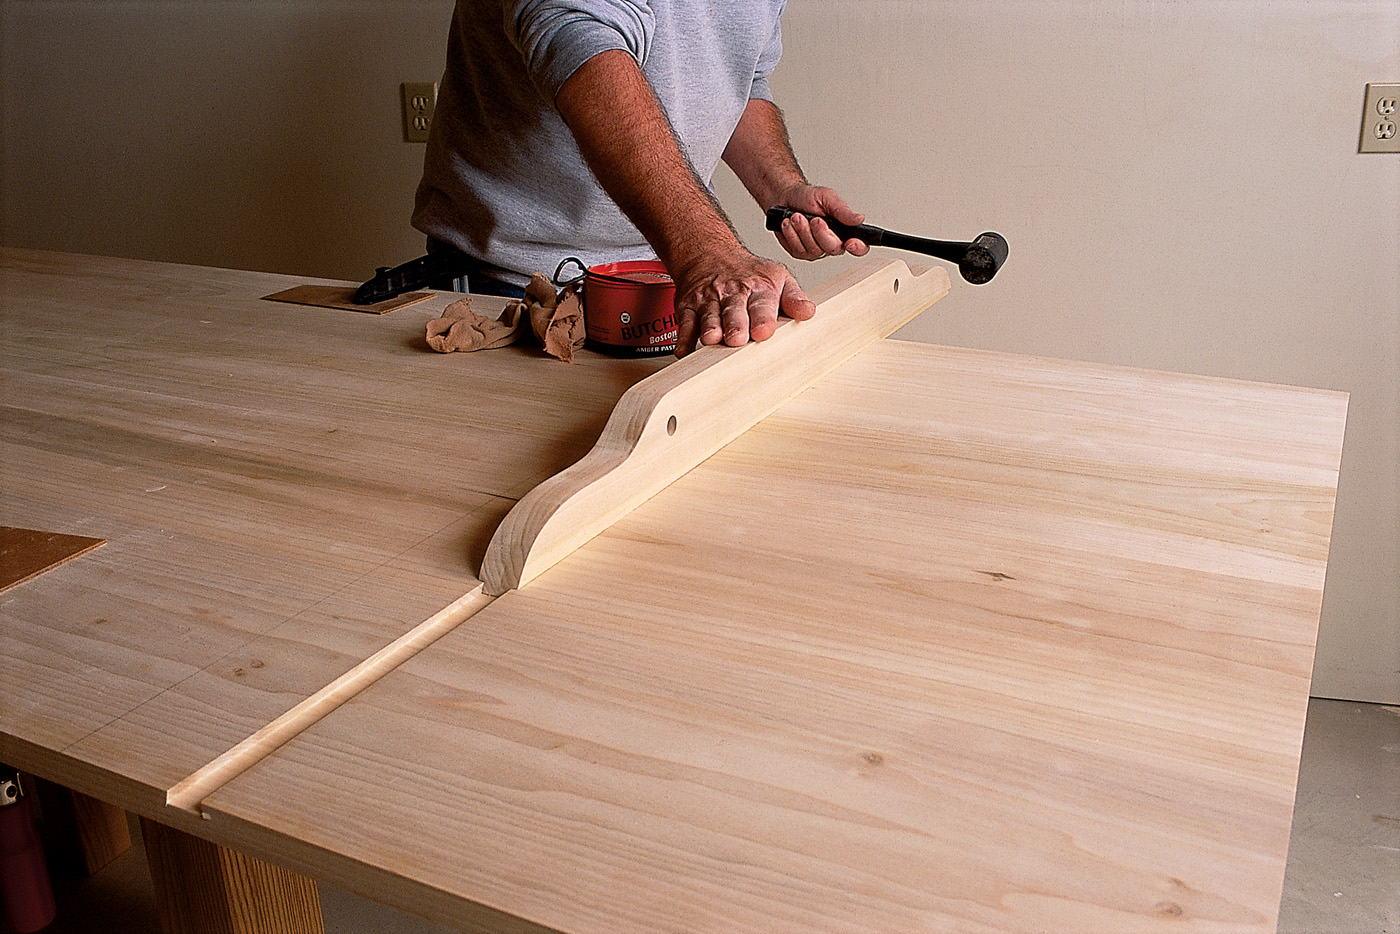
Sliding the batten into place requires some force. Since you aren’t gluing the parts, and there’s going to be some seasonal movement anyway, go ahead and apply wax to the slot and the tail. As friction builds, you’ll have to whack the batten with a dead-blow mallet to keep it moving.
Slide the tail into the slot. I expect to meet resistance, so I lubricate the ways with paraffin or paste wax. It’s nice if you can push the batten halfway in before resorting to a dead-blow mallet. On more than one occasion, it’s taken a lot of pounding to drive the batten home. On the other hand, if it slides completely into the slot without real resistance, you may want to make a new one. Once the batten is in place, drill a hole and drive a wooden pin through the top and into the batten.
This type of batten construction is a country kind of thing. In the summer, the ends will be somewhat recessed, but next New Year’s, they’ll be proud of the tabletop edges. That’s not what you want in a formal table. For a higher-style table, you’d shorten the battens so they aren’t obvious at the top’s edges, and attach them with screws.


