


We may receive a commission when you use our affiliate links. However, this does not impact our recommendations.
 Woodworkers often find themselves doubling as the resident fixer-upper. As the go-to person who has the tools you’ll often be asked to “fix this” or “build that” for the house. I recently did some window repair on my own house, and I must say that all of the things I’ve been learning about the craft helped me do a better job than I might have a few years ago. Regardless of what you like to build, a few DIY skills for the home are nice to have and can win you a few brownie points in your household. Here are some instructions on how to make a window – perfect for a loft, small house or shed (excerpted from “Building Small: Sustainable Designs for Tiny Houses & Backyard Buildings” by David & Jeanie Stiles).
How to Make a Window
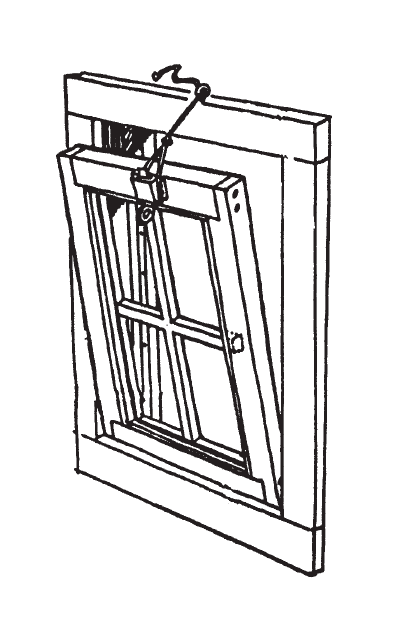
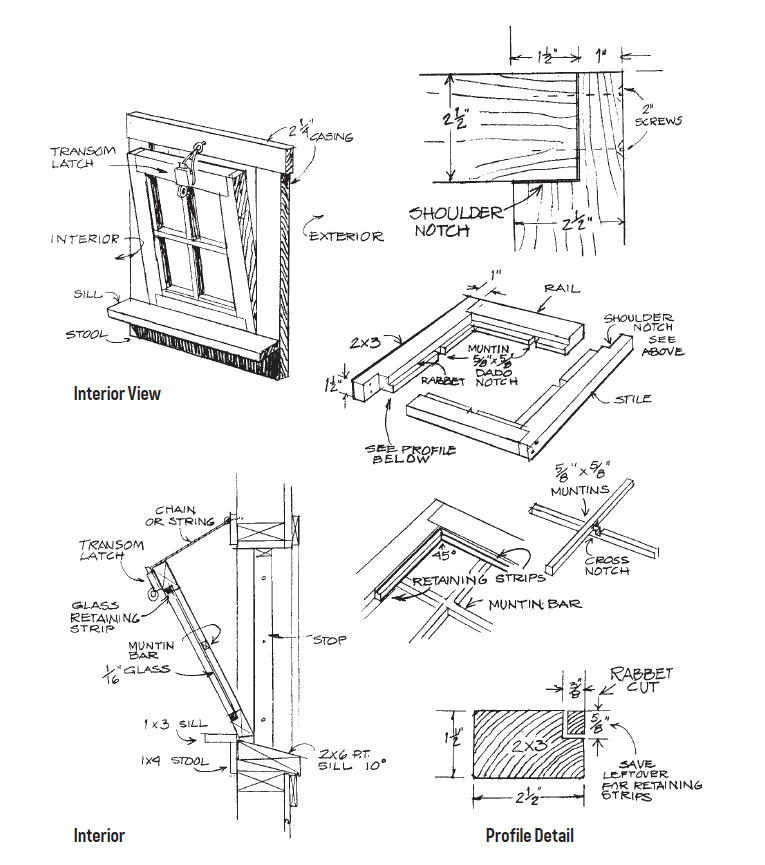
A small window – for instance, a window in a loft – is not difficult to make. If you have a table saw, it can be done in less than half an hour. From an 8′ (1-1/2″ x 2-1/2″) piece of cedar or mahogany, cut two pieces 19-1/4″ long (stiles) and two pieces 18¼” long (rails). Cut a 3/8″ x 5/8″ rabbet along the edge of each piece as shown in the profile detail. (Save the leftover pieces for later.) Clamp the two longer pieces (stiles) together and cut a 2-1/2″ shoulder notch out of the ends. Locate the center of all four pieces and cut a 5/8″ x 5/8″ dado for the muntins. From the leftover wood, cut two 5/8″ x 5/8″ muntin bars and cross-notch them in the middle. Glue and screw all the pieces together, and cut a piece of 1/16″ glass or Plexiglas to fit the rabbet. Cut the ends of the leftover pieces at a 45° angle and fit them into the rabbets to hold the glass in place. On your table saw, trim the bottom edge of the window at 10° to match the slope of the sill.
Make a Matching Window Screen
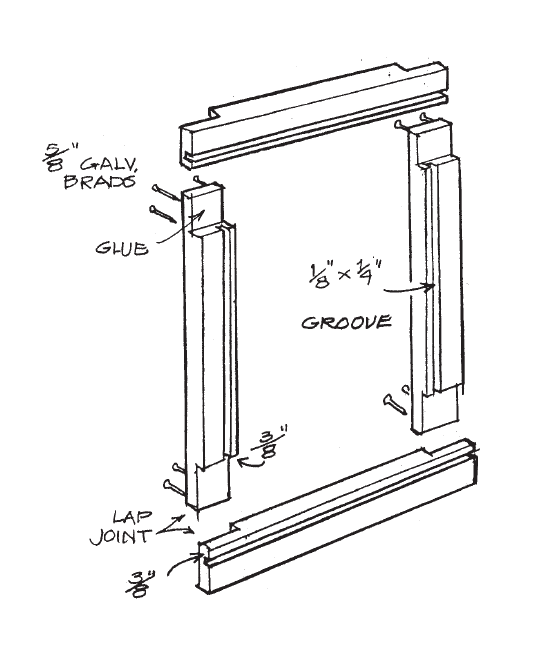
Make your own screens, using lightweight 1×3 boards (preferably red cedar). Cut four pieces of 1×3 to fit the opening. Using a table saw, cut a 1/8″ wide x ¼” deep groove, 3/8″ from the inside edge of all four pieces. Cut the lap joints on the table saw. Join the pieces together using galvanized brads and waterproof glue. Once the glue has dried, cut a piece of insect screen 1″ larger on all sides than the inside opening. Lay the screening over the frame and, using a tool made especially for this purpose, press the screen and a retaining spline into the groove. Trim off any excess screening with a utility knife.

 For more great ideas for tiny houses and backyard buildings, check out “Building Small” by David & Jeanie Stiles, available at ShopWoodworking.com.
Here are some supplies and tools we find essential in our everyday work around the shop. We may receive a commission from sales referred by our links; however, we have carefully selected these products for their usefulness and quality.


Wow! Great article! Easy to follow instructions and illustrations. You’ve inspired me.