We may receive a commission when you use our affiliate links. However, this does not impact our recommendations.
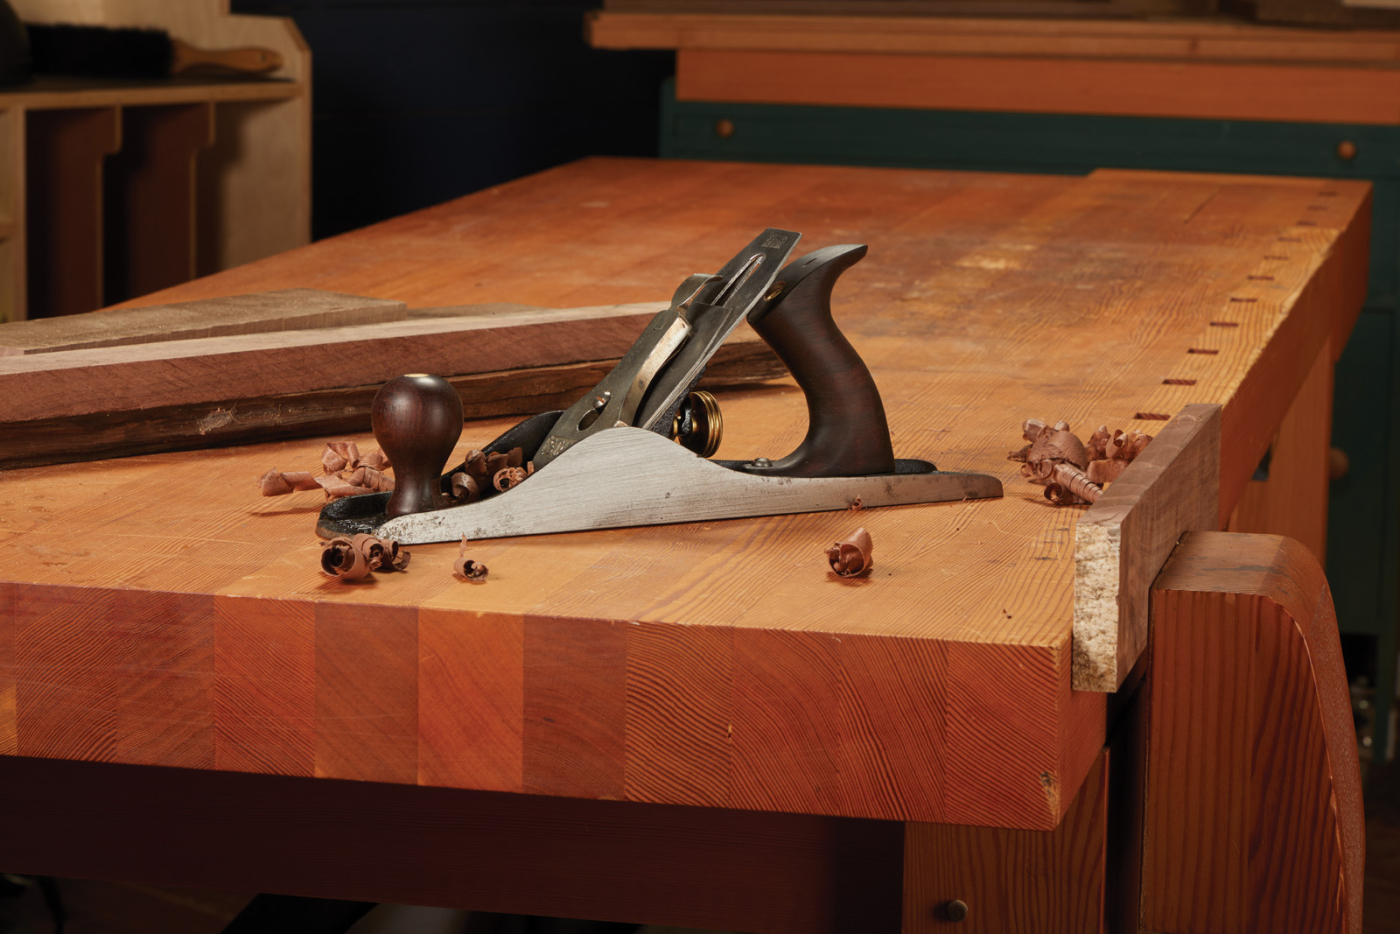
Bringing an old hand plane back to life is simple to do, and will yield a top-not tool.
When I build a project, I use a variety of “fancy” tools (readers’ words, not mine). Lie-Nielsen, Bill Carter, and Blue Spruce, amongst others. It never fails that I get comments about how “it must be nice” or “I can only afford vintage tools.” Well, here’s my secret: me too. Now, I don’t mind paying for craftsmanship. However, I’ve paid for almost every one of my “nice” modern tools by buying vintage tools, restoring them, and selling them. The money goes into a “nice tool” fund that I use to fund this… problem… that I have. Do these “fancy” tools work better than a good, restored vintage tool? Nope. Not at all. I’m just shallow and love the look of them. However, I don’t want anyone to think that a particular tool works better because it’s “new.” Vintage tools, when properly restored, can work every bit as well as modern makers at a fraction of the price.

Inspecting my “restoration” queue, I pick a decent Stanley #5.
Good Bones
When it comes to vintage tools, the key is to pick a good candidate for restoration. I mainly focus on hand planes, although I occasionally get into saw, chisels, and other tools. But for this article, let’s focus on hand planes. I don’t necessarily look for hand planes, but somehow I always seem to find them (maybe I subconsciously search for them?). When it comes to hand planes, I look for a couple of things.
The first is condition. If the body (sole) of a plane is damaged in any way, it immediately gets knocked down a few notches in my book. At that point, I start looking at it as an organ donor and debating whether the blade, tote, knob, and frog are worth salvaging for parts. If it’s cheap enough, the cracked/damaged sole will go to the chop shop. I’ll cut the brand name/logo embossing off and turn it into a key chain.
If the body is crack and chip-free, the next things I look at are the tote and knobs. Typically, I’m looking at a Stanley/Bailey brand plane. The best examples of these will have rosewood totes and knobs. During specific periods, beech was used for these parts and they may be stained or painted. While these may make good users, generally, I will pass on them from a resale standpoint. If you’re using this plane, feel free to grab them. I just like rosewood for re-sale. Shallow, as I said.

Off the bat, the biggest eyesores on this plane are the cracked rosewood tote (with an old, poorly done repair) and a beech knob that doesn’t match the tote.
After inspecting the body and the wood, the next consideration in my purchasing decision is the overall condition. Is the body caked with rust? If so, we may be dealing with deep pits that are hard to remove or may require a new blade. Heck, if it’s super corroded, you may find that certain screws are rusted in place and cannot be removed (ask me how I know this).
However, if it appears to be light surface rust, paint splatter, or general patina, the final point on my purchasing checklist is price. Price is the hardest thing to give an opinion on, as it depends on the plane size/style (number), condition, etc. When reselling, I’m in if I can double my money without replacing parts. I’m not looking to swindle anyone, so if I can buy a plane for $30, spend two hours on it, and sell it for $75, I’d call that fair.
A Note on Brands and Condition
Before we go much further, let me touch on brands of vintage tools. The most common brands you’ll run into are Stanley (Bailey), Miller Falls, Sargent, and (less common) Union. These are, as a rule, great user planes that were the “brand names” of the day. You’ll often find other brands, such as Craftsman, Hercules, Defiance, etc. These brands were often made by the “larger” manufacturers and were re-branded for re-sale. Generally, these were slightly lower-quality planes with inferior parts. I don’t mess with them for resale, but again, if you’re using them in your shop, be my guest (I haven’t met a plane I can’t tune up to a “working” state).
And finally, before the rubber gloves come out, let me cut off the collector comments. I’m not a collector. This is my “user restore” process—a process to bring a plane back to user shape and also spit shine it a bit. If you think your plane is particularly valuable, then get other opinions before scrubbing it. If you’re like me, who cares. Clean it up and use it… Collectors be damned.

Strip the plane down, removing all parts.
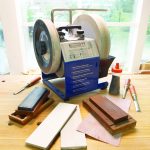
Clean and De-Rust
The first step on my restoration list is to get the metal parts on the plane clean and de-rusted. This starts by stripping down the plane. I sit the tote and knob aside after removing them and break the plane down. This means removing every screw, washer, and metal part off the plane. I use these small mesh containers from a hardware store to hold all the plane parts as I work on them. My initial step is going to be a cleaner soak. The best cleaner I’ve found for vintage tools is Simple Green. It has a small amount of citric acid, so if you allow a body to soak too long, it will soften the Japanning (black “paint”) on the plane. Reader beware. Sometimes, if the Japanning is sketchy and I’m going to repaint the plane, I’ll let it soak in the Simple Green until I can scrub off the remaining Japanning. The Simple Green cuts through grime and light rust, and a quick brushing with a brass brush will clean up a lot of the nasty on the parts. If stubborn rust persists, I’ll go one step further and soak the parts in Evaporust, which will dissolve any remaining rust and leave a dull-metal look (more on cleaning that up in a bit).


These plastic baskets hold all the plane parts and fit inside a larger plastic container with Simple Green or Evaporust, allowing easy draining once they’re cleaned.
Now here’s where I’ll ruffle some feathers. Once my parts have been cleaned, I’ll take them to the bench grinder (or drill press) and hit them quickly with a wire wheel. A soft brass wire wheel will quickly polish most of the metal show parts, such as the plane body, the lever cap, cap iron, and blade, along with the brass parts. For some of the flashier parts (the brass parts and lever caps in particular), I’ll spend a few minutes at the buffing wheel. The brass will polish up quickly. If the lever cap has most of the nickel plating left, I’ll gently polish up what’s left. If a lot of it is missing or it’s rusted, I’ll strip the rest with a wire wheel before polishing up the bare metal with the buffing wheel and compound.

A brass brush provides gentle scrubbing to parts.
Wood Next
After the metal parts have been taken care of, the tote and knob are next. More often than not, one or both of these require repair.

The “as found” knob (left) is beech. Reaching into my parts bin, I found a damaged rosewood knob that will work well and matches the tote.
The knob, if it’s broken, will often break around the bottom (see photo; this is a rosewood knob I’m replacing the beech knob with). Luckily, this is a fairly easy repair. I cut out the damaged area with a pull saw. Then, I scab in a piece of rosewood that matches. Often, I’ll pick up cheap rosewood marking gauges that are damaged beyond repair. The fences provide enough rosewood for these simple repairs, and I keep several on hand to match colors as well as I can (see below).

Old rosewood from a broken marking gauge will be a donor.
Totes will often have the horn (top) broken off, or the waist will be snapped. With these, I’ll either scab on a new piece of rosewood or pull apart the break and fix it. I’ve found the best adhesive, whether a patch or a simple glue joint, is black super glue from Starbond. The black color blends in with the dark grain lines of the rosewood well. Hand screw clamps are great for clamping the odd-shaped totes together, and after the glue is dry, I’ll blend the joint together with a fine rasp .

The patch has the correct grain direction, and after gluing in place, will be turned down to match the knob. You can just see the repair in the main picture at the top.

Blend any repairs in using a rasp and sandpaper. Hard, sharp glue lines are more noticeable than a glue line that’s been flared into a smooth tote shape.
Once the wood is structurally sound, I’ll flip into refinishing mode. Most of the vintage totes were finished with lacquer or shellac. I’ve found a gel stripper works well for both of these. These strippers are nasty, however, so wear gloves, follow the instructions, and use an after-wash to neutralize the stripper.

Gel stripper will remove all finish from the tote and knob without sanding or scraping.
Once the after-wash is dry, I hand sand the tote and knob. Sanding sponges work well to remove most marks and smooth out the surface. I use the Eskadiamond from Uneeda. Now, it’s time for the finish. I don’t like a film finish on my hand planes. Instead, I use a natural Danish oil. It will darken the rosewood significantly, however. If you want to pop the grain and keep the rosewood light, blond shellac will work well.

I prefer a Danish oil finish on my knob and tote, even though it significantly darkens the rosewood. Glossy film finishes can cause blisters during use.
Final Steps
At this point, everything we’ve done is pretty much cosmetic (other than removing rust). The final cosmetic thing is to touch up the body if the Japanning is shot. My rule is if 65(ish)% of the Japanning is in good shape, I’ll leave it. If more than that is missing, I’ll repaint the body. High heat black enamel works well, but I’ve found the best representative of Japanning is Duplicolor semi-gloss black engine paint. Do yourself a favor and tape off non-paint areas.

For planes in rough shape, a fresh coat of paint is often necessary. “Die hards” will often use a home-brew mix of japanning, however I prefer the simplicity of painting.
Now, let’s make this plane work as well as any new one you can buy today. The first thing to do is make sure all the machined surfaces on the plane and frog are flat. I do this by clamping the frog in a vise (or hand screw) and filing the face of the frog completely flat. Also, hit the mating surface on the bottom of the frog. I’ll cover these with paint during the painting process, so I have some form of gauge as I’m filing. Also, file the mating areas inside the plane body. These can be a little tricky to reach but do your best. The goal here is to make the frog seat as soundly as possible on the plane body. You want zero movement between the body and frog, as well as the frog and blade.

Flatten the face of the frog where the blade seats. Avoid the lateral adjustment level and file until you get a flat, consistent pattern.

The bottom of the frog has mating areas that match up to the plane body. File these flat, as well as the mating area in the plane body.
Once everything’s flat on the frog, reassemble the plane. Use some 3-in-1 oil and slightly lube up each screw as you reinstall it. It will help keep anything from rusting after you assemble it and allow it to move when you needed.

As you reassemble the plane, apply a few drops of lubrication to each screw. This will negate any left over Simple Green in the screw holes.
Before installing the blade and chip breaker, spend several minutes at your sharpening stone. I like to take all hand plane blades through a 1,000-grit diamond stone and strop. For the chip breaker, it just needs to be flat and smooth (with no burrs). Here, I flatten the chip breaker on 180-grit and polish the lead edge, so shavings glide off. If I had to guess, I would say that 9/10 problems people have with (vintage) hand planes boil down to either the blade not being as sharp as they think it is or the chip breaker not being flat, so take your time here.

Most problems with hand planes boil down to a dull blade.
Flatten the Sole
The final step in my “user restoration” process is to flatten the plane’s sole. To do this, I ensure everything’s tightened down on the plane, and the blade is retracted. Then, I make a series of hash marks on the sole, giving me reference lines. Now, it’s a simple matter of lapping the sole on a flat reference surface. I use a cut piece of marble that I’ve verified flat with a ground rule. You can also use your cast iron table saw top if you’d like. For abrasive, I like to take a 6″ x 24″ belt sander belt and cut it along the seam. By grabbing a fairly coarse grit, you can usually make quick work of the plane’s sole. I usually start at 80-grit and will go all the way down to 220-grit as a final surface. The 80-grit does most of the work, and each successive grit will take a fraction of the time. While I’m here with the granite and sandpaper, I’ll spend a few minutes cleaning up the side of the plane body, especially if I had to clean up rust with Evaporust. Simply lay the plane on its side and lap it slightly.

Flatten the lead edge of the chip breaker.
Once everything’s flat, I’ll test out the plane and confirm everything moves well and that the plane is performing how I expect. Once the plane has been “verified,” I’ll strip it down once more for final buffing. This is done with a soft drywall sanding pad equipped with 800-grit sandpaper. This softens the “stark” look of the freshly sanded metal. Usually, I’ll hit the body, blade, and chip breaker with this sanding block. In no way am I trying to make this appear like a vintage plane, but I feel like it softens the look a little bit.

Mark the sole with a marker to gauge progress.

Flatten the sole with sandpaper on a flat surface.
With this process, I can usually get a plane done and ready to sell in about 2 hours, minus any soaking time that’s needed. At the end of this, you’ll end up with a plane that’s in perfect user shape and ready to go to work in the shop… or ready to get listed online for sale, so you can start your own “fancy tool fund.”
Here are some supplies and tools we find essential in our everyday work around the shop. We may receive a commission from sales referred by our links; however, we have carefully selected these products for their usefulness and quality.