


We may receive a commission when you use our affiliate links. However, this does not impact our recommendations.
 Learn how to repair typical damage
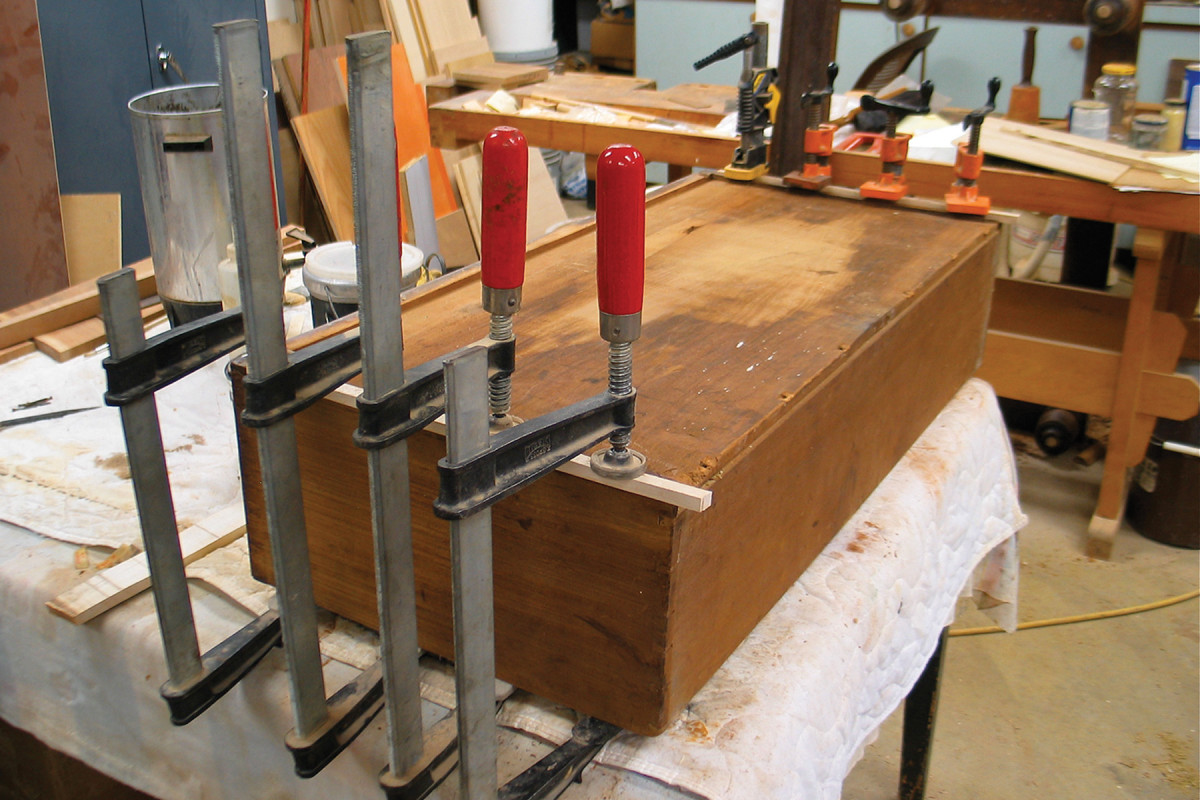
Thirty-five years ago, I traded $125 worth of work for the mid-19th-century Empire chest-of-drawers pictured here. You could argue that I paid too much, because the amount of work involved in restoring it was considerable, but it was an impulse trade and I could see that the chest would be beautiful when fully restored.
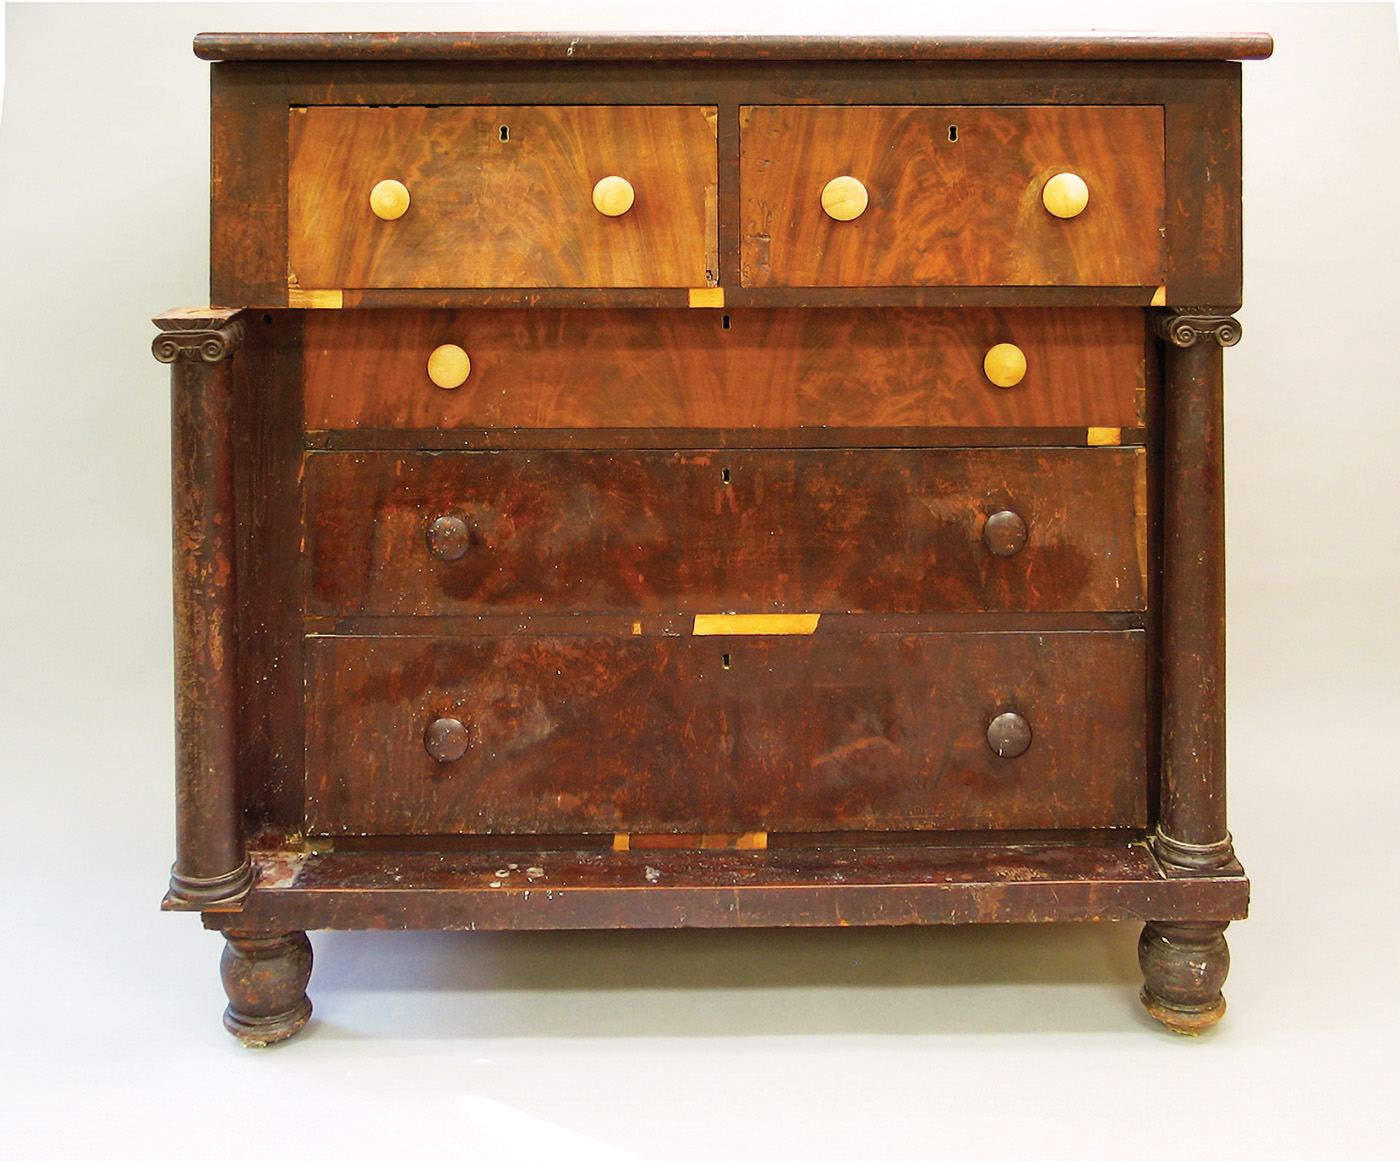
Waiting for renewal. This Empire chest-of-drawers looks bad now, but you can easily repair the damage.
Alas, more than 30 years had to go by before the motivation to tackle the project presented itself – the desire of my daughter-in-law to have the fully restored chest-of-drawers.
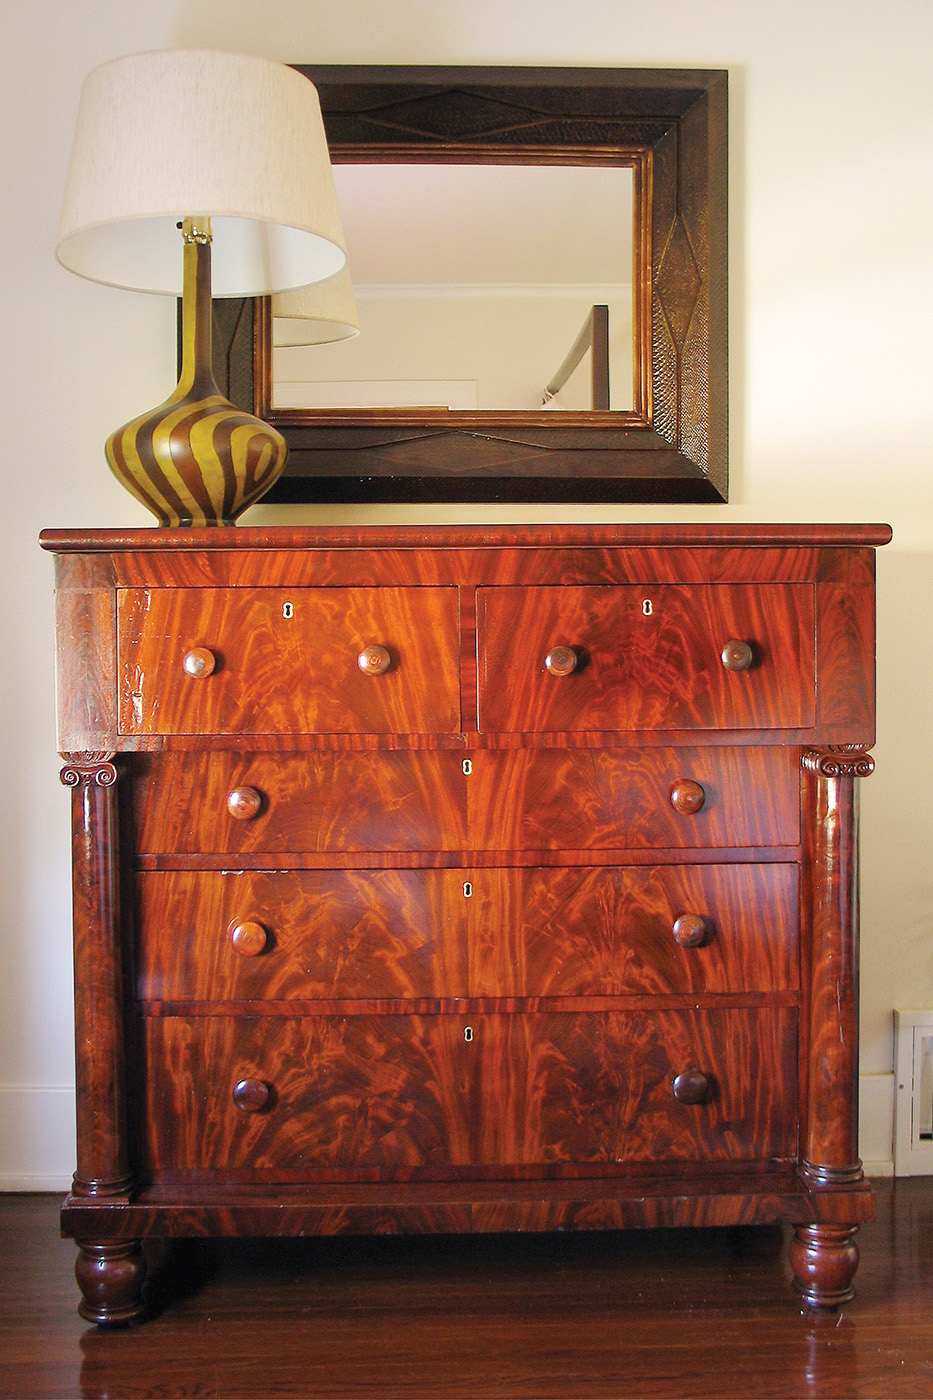
Renewal. Repaired veneer and drawers, and a new shellac finish, give this piece new life.
The problems were typical for Empire chests-of-drawers, or for any old veneered chest-of-drawers for that matter. Veneer was missing in several dozen places, and the drawers didn’t slide well because of wear to both the bottoms of the drawer sides and the runners the drawers slide on.
In addition, the shellac finish was so badly crazed that it almost totally hid the beautiful wood underneath.
In this article I’ll show you how to make the repairs. But first, a word about animal hide glue.
Additional Reading: Dive into the details of hide glue with this four-article series from Bob Flexner
More on furniture restoration: Learn about repairing damaged finishes
In our store: Buying & Restoring Hand Tools with Ron Herman Video Download
Animal Hide Glue
Almost all furniture glued up before the 1950s was glued with animal hide glue. This is glue made by soaking and cooking animal hides to remove the protein, or collagen, which becomes the glue. Many types of hides can be used, but cowhides are the most common.
The great virtue of this glue for furniture restorers is that it is much easier to deal with than modern glues and adhesives. Joints are usually fairly easy to take apart by dissolving the hide glue with hot water or steam, though using denatured alcohol to crystallize the glue is much easier and is the method I use. Once the glue is crystallized, joints can be knocked apart with a mallet, and veneer or wood strips can be separated with pressure from a dull chisel.
The glue is then easy to remove from the surfaces by washing it with hot water. This needs to be done to achieve “clean wood” before regluing with any modern adhesive, and it’s usually a good idea even with hide glue.
Drawer Runners
Worn drawer runner. Drawer runners, the strips of wood that drawers slide on, typically become hollowed out after many years of use. They should be replaced.
Remove the runners. The runners in this chest-of-drawers were nailed and glued with animal hide glue. They were easy to remove by first removing the nails, then crystallizing the glue bond by inserting denatured alcohol. Finally, applying pressure with a chisel separated the bond.
I’ve seen all sorts of repairs tried to fix problems with drawer runners, but nothing works as well as removing them and replacing them with new wood, or the same wood turned upside down (to preserve the original wood).
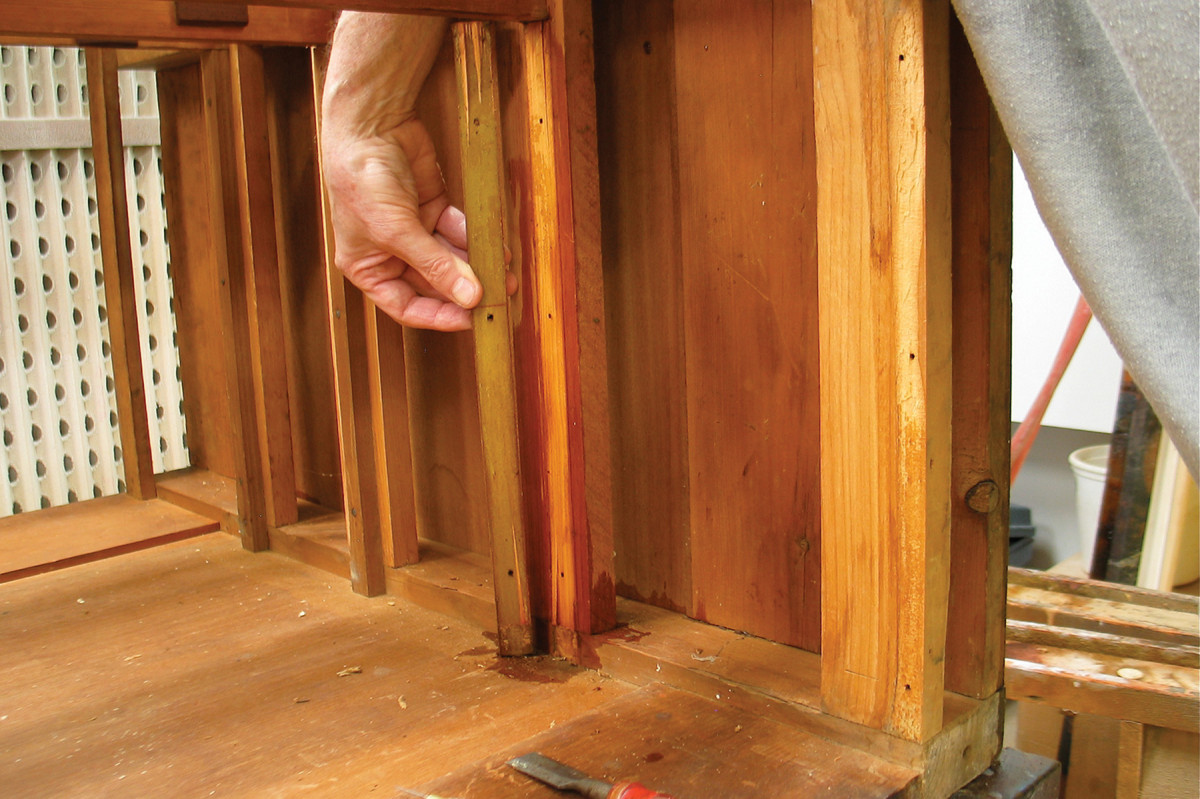
Clean separation. In most cases, the runners popped off clean.
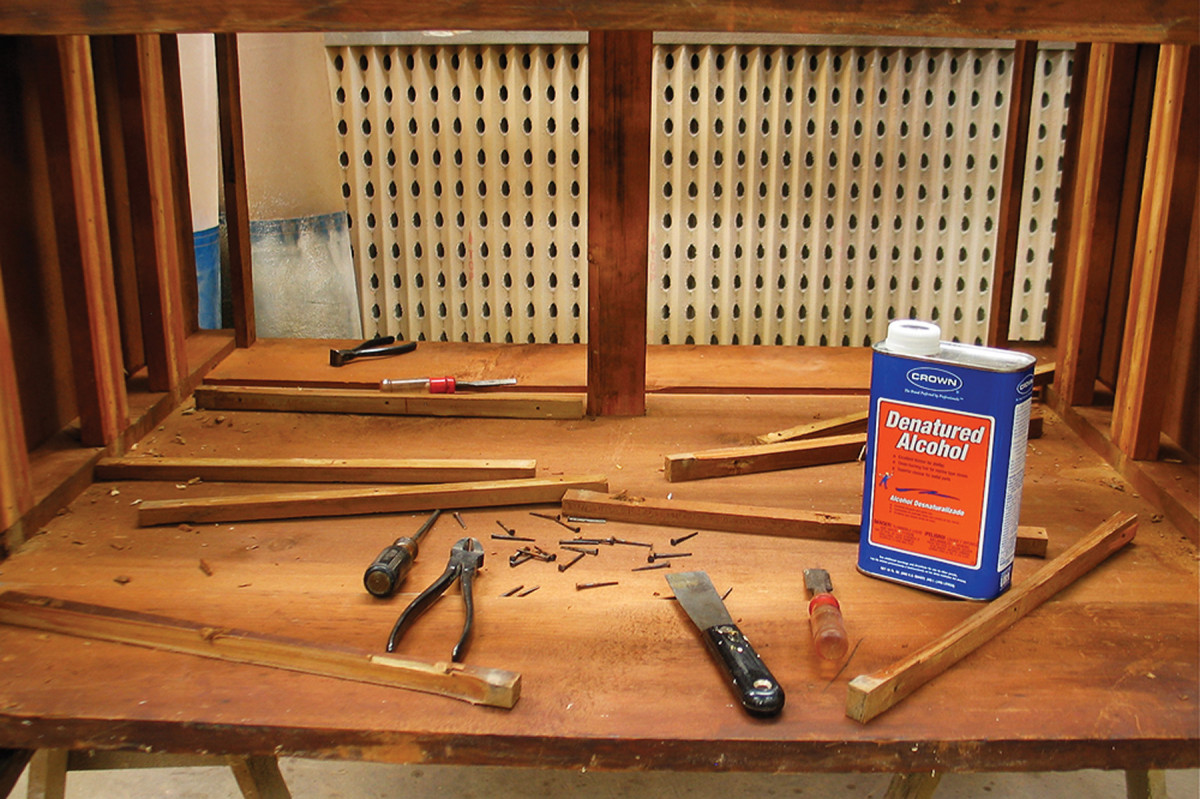
Runners, nails & tools. Here are the removed runners and nails, together with the tools I used.
The runners in this chest were nailed and glued, so I had to remove the nails first. The glue bonds were still strong because the grain of the runners and the structural rails they were glued to ran in the same direction. Nevertheless, with the aid of some alcohol, I was able to pop off the runners.
Drawer Sides
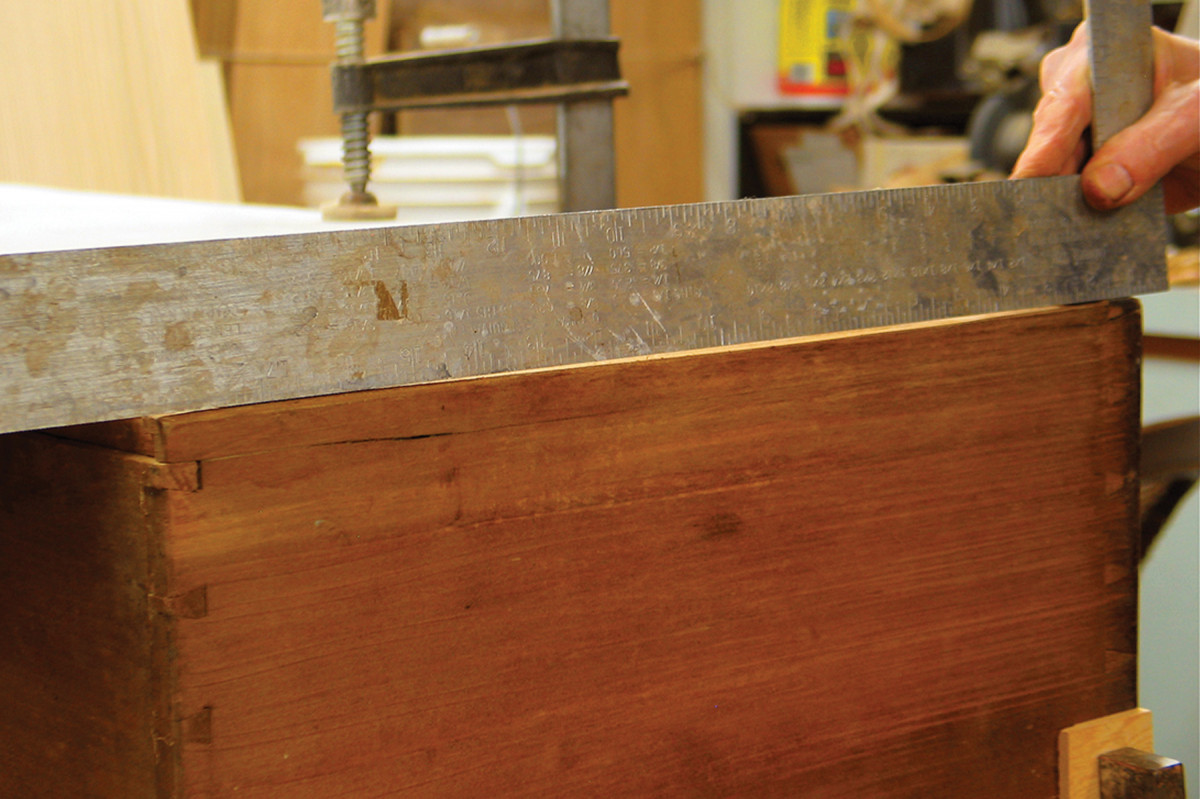
Worn drawer sides. Like the runners, the bottoms of the drawer sides also wear concave after many years of the drawers sliding in and out of a chest.
There are two typical levels of damage to the bottoms of the drawer sides. The easiest to repair is simple concave wear. The more difficult problem occurs when the drawer sides split at the groove the drawer bottom slides into.
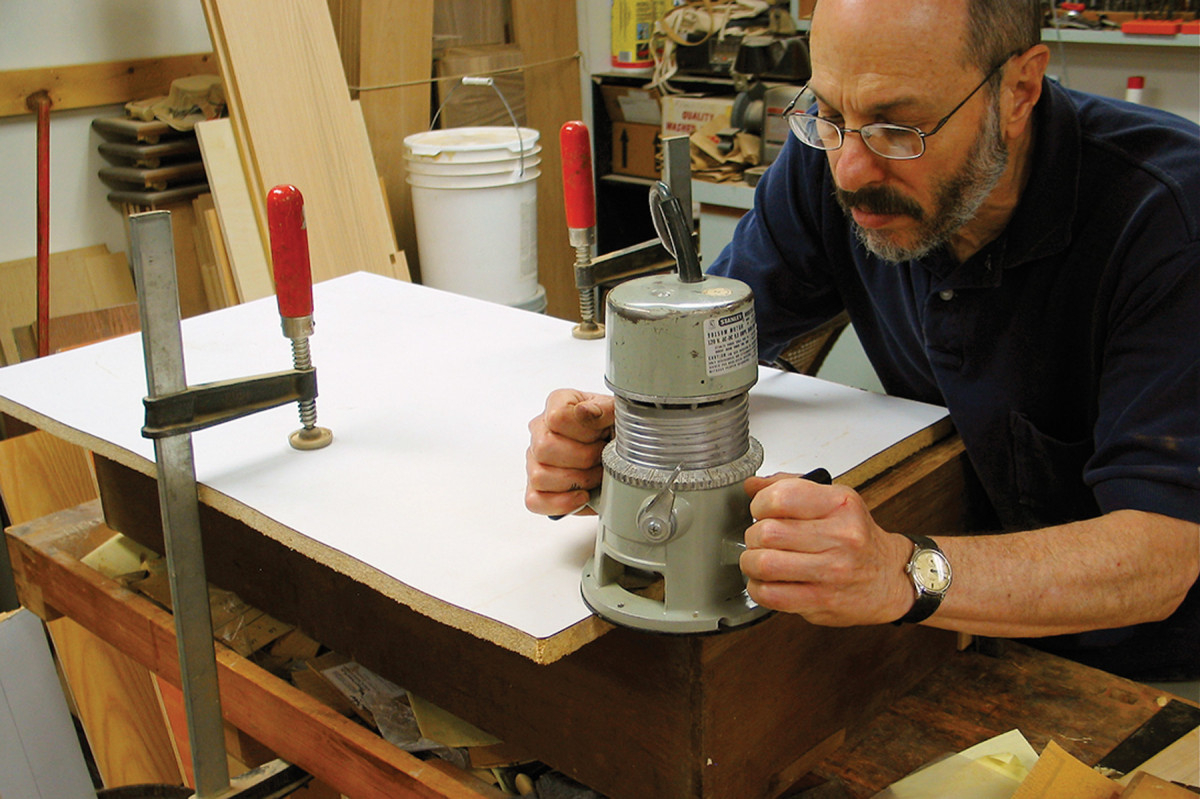
Flatten the wear. As long as the wear to the drawer side hasn’t cut into the groove into which the drawer bottom slides, or split the wood, the easy way to build out the wood is to first flatten the wear with a router and 1⁄2″ straight bit using the jig setup shown here.
In the first case, the easy repair is to turn the drawer upside down on a workbench and clamp a 3⁄4” plywood or MDF panel, cut to the approximate interior size of the drawer bottom, to the drawer and the workbench.
Set a straight 1⁄2” router bit to the maximum depth of the concave wear and slide the router along the clamped panel to remove enough of the wood to create a flat surface to glue to. Stop the router just short of the drawer front and use a chisel to remove the final piece of wood. Finally, glue on strips of wood to rebuild the sides and trim to size with a handplane.
Glue on new. With the bottom of the drawer side perfectly flat, it’s easy to glue on new wood, followed by trimming it with a handplane so the drawer slides easily on the new runners.
If the damage has penetrated the groove, or if the wood has split at the groove, the best repair is to remove the drawer sides, cut off the damaged part, glue on replacement wood, and recut the groove for the drawer bottom.
Veneer
The veneer on this chest is rich Cuban mahogany with a tighter pore structure than mahogany commonly available today. It is also double or triple the thickness of modern 1⁄32” veneer.
One of the primary lessons furniture restorers learn early on is: Never throw anything away. And indeed, I had saved some old solid pieces of Cuban mahogany. These matched the color and texture of the existing veneer perfectly, which made the finishing process much easier.
The easiest way to patch missing veneer is to make straight cuts with the grain at the edge of the damage using a box knife or a chisel. Then fit replacement veneer, also with straight cuts, into the voids.
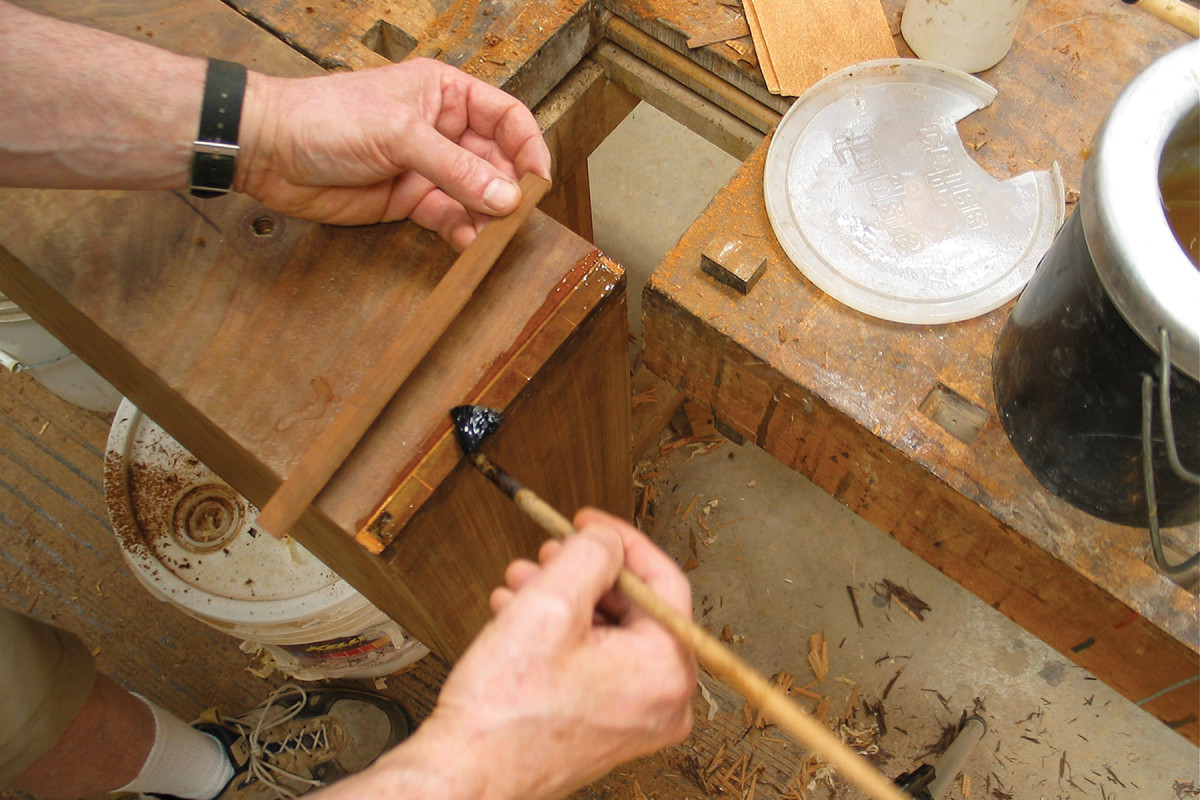
Wash off the deteriorated hide glue on the substrate and clamp on the replacement veneer. I used hot hide glue, but you could use any adhesive. Finally, trim the patched veneer if necessary.
Veneer Patch Step-By-Step
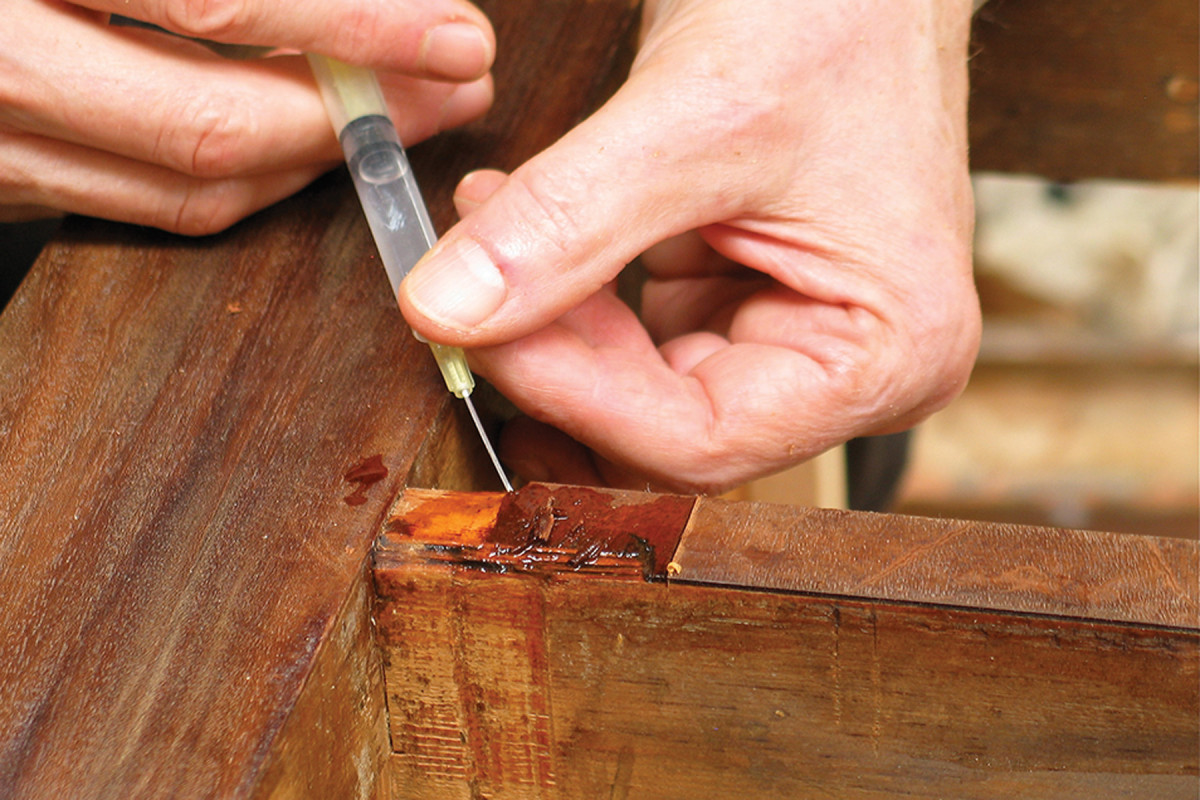
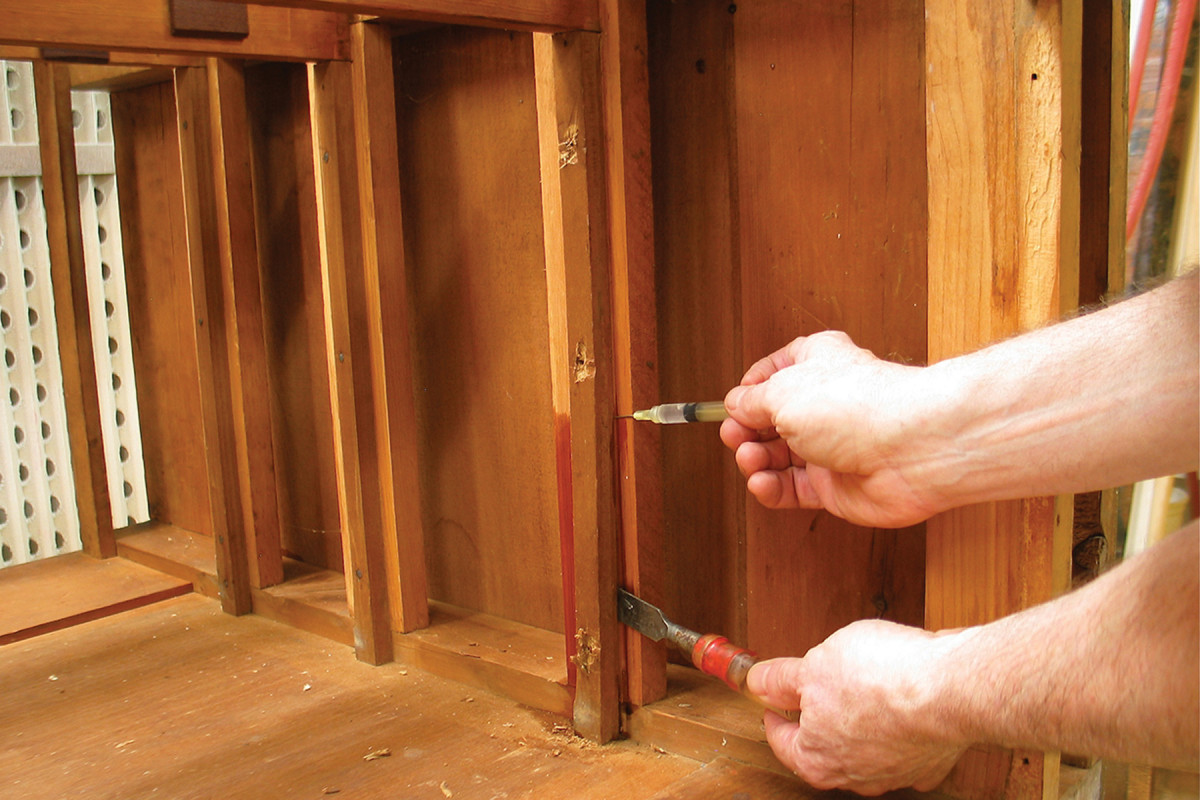
Crystallize hide glue. Veneer glued on with animal hide glue is usually easy to crystallize by inserting alcohol under the veneer. I find a syringe to be useful for directing the alcohol.
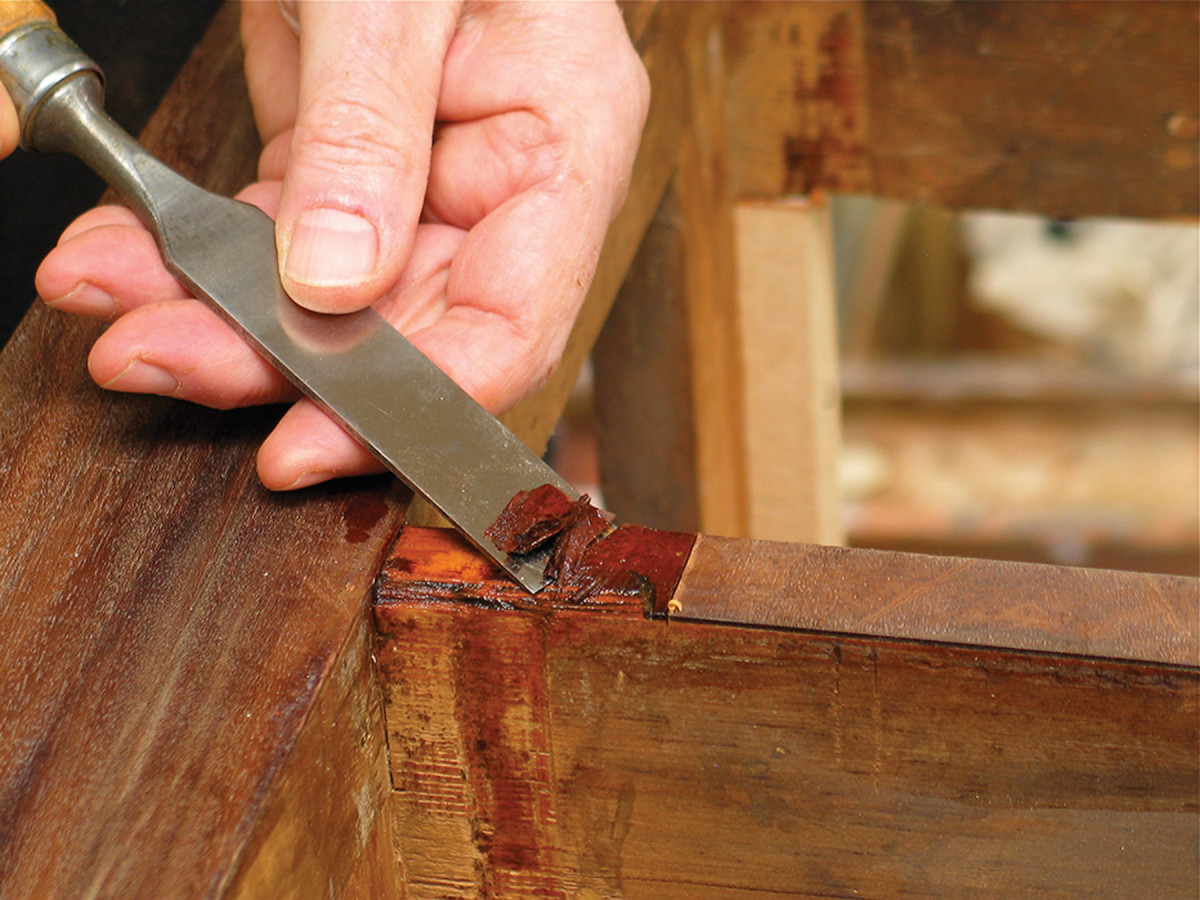
Separate the veneer. With the hide glue crystallized, it’s usually easy to separate the veneer from the substrate using a chisel. To avoid cutting into the substrate and losing control, I prefer that the chisel be dull.
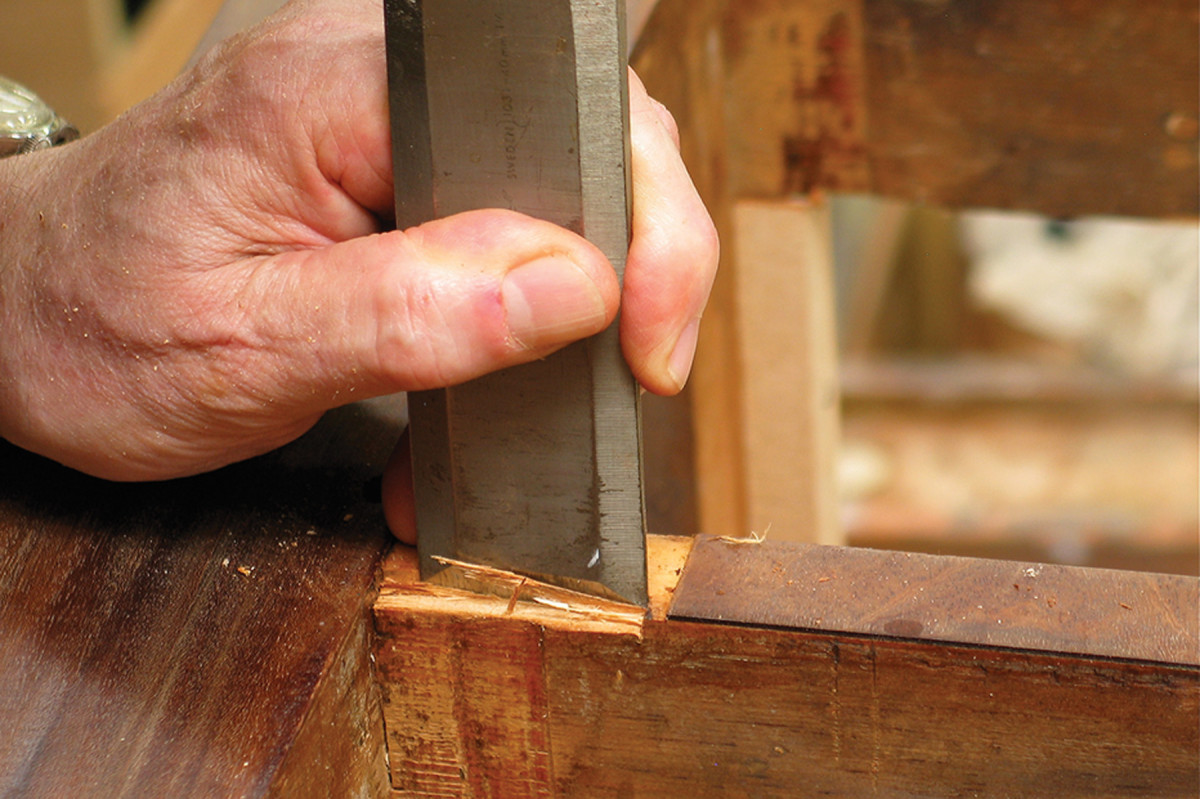
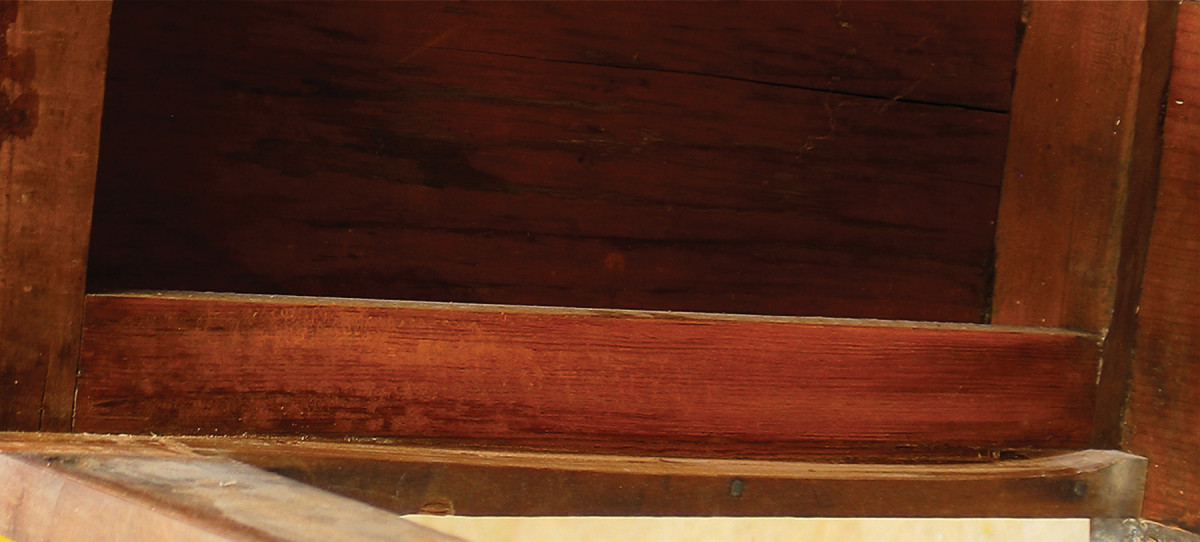
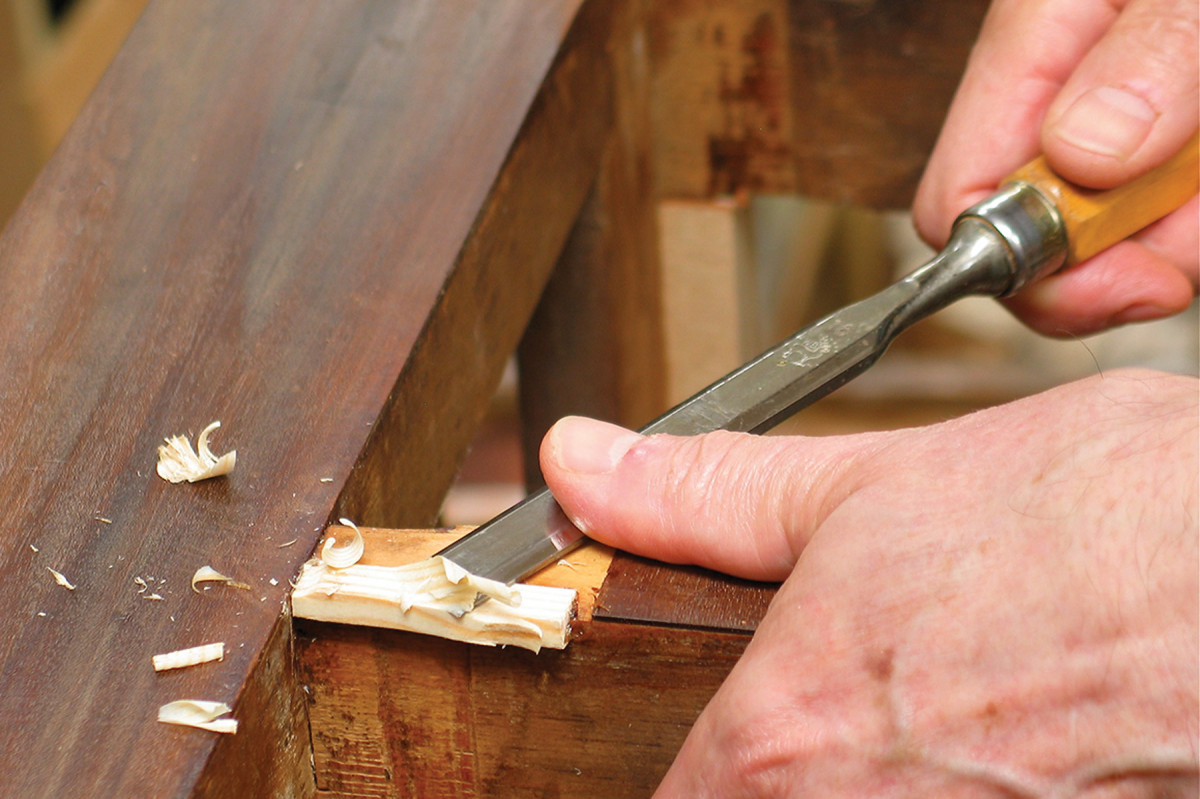
Build out substrate. Often the drawers have worn into the front rail of the chest so that the wear has to be built out before the veneer can be replaced. Here, I’m using a chisel to cut a flat surface for the patch to be glued on to.
Trim the patch. The patch should be left proud, then trimmed level with the substrate.
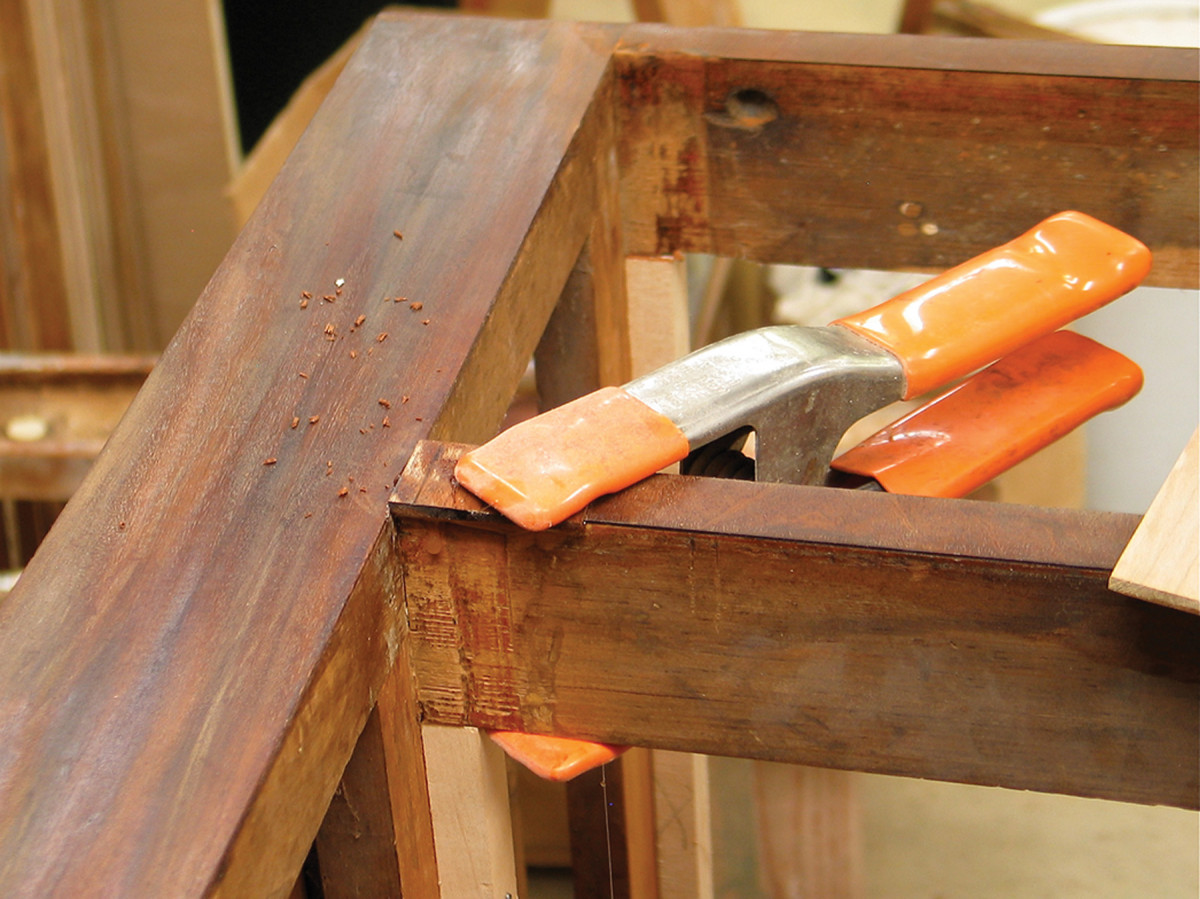
Clamp the patch. Thick veneer is actually very easy to work with. It can often be clamped without using a backing board.
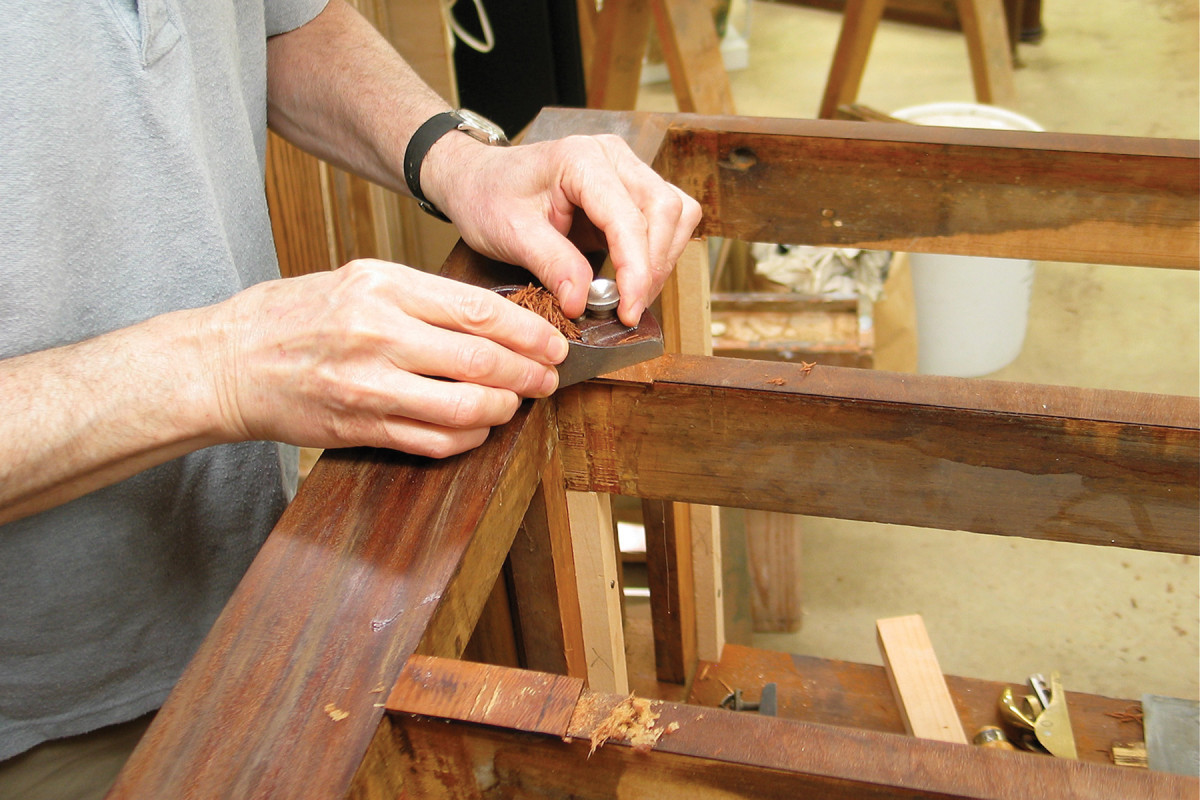
Trim the veneer. Because the veneer used on this chest-of-drawers was considerably thicker than modern veneer, I used solid wood for the patches. Then I trimmed each patch level with a handplane.
Patch #2
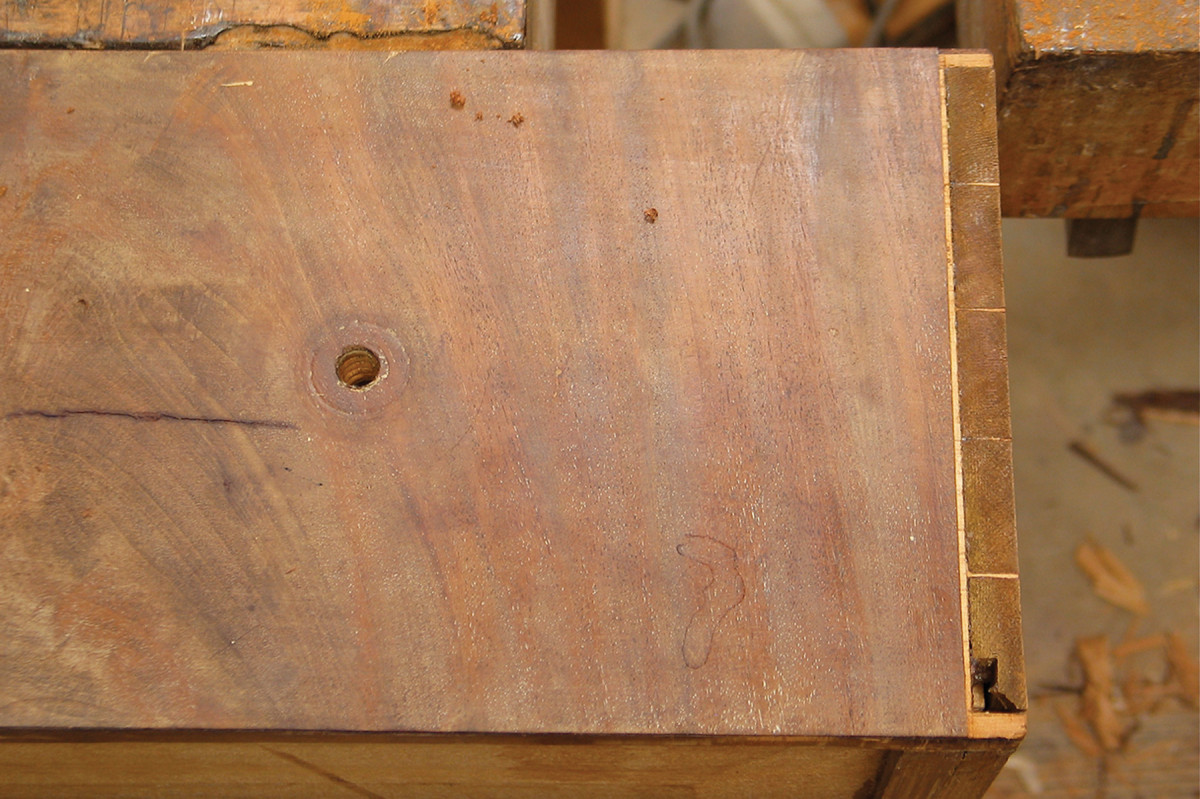
Dovetailed end grain. The glue bond of the veneer at the edges of the drawer fronts was weak because of the large percentage of end grain in the dovetail tails. Some of the veneer had popped off, leaving ragged edges. So I cut a straight line with the grain using a box knife just inside the damage and removed the waste with alcohol and a chisel.
Veneer patch. There was nothing to do about the weakness of the bonds to end grain. It’s the nature of the way these dovetails were cut. So I trimmed pieces of solid wood with a closely matching grain pattern perfectly straight on one edge with a block plane, then glued them into place, butted tightly against the existing veneer. After the glue dried, I trimmed the excess.
Finishing
This chest-of-drawers was originally finished with shellac, which was used on almost all furniture from the 1820s to the 1920s. As you can see from the “before” picture, this finish was in very bad shape.
To strip the old shellac, you can use any paint stripper, but for flat surfaces I like laying out cloths or paper towels, then wetting them with denatured alcohol. After a few minutes, it’s usually easy to simply wipe off the shellac. This avoids complications with many strippers, including having to remove all the residue wax in some, or having to dry out the very slow-evaporating solvents in others.
For the new finish, keep in mind that high-performance finishes such as polyurethane and catalyzed finishes will be very difficult to strip in the future without damaging the wood. Oil and wax aren’t good choices in my mind because they are too thin to create the proper appearance, nor do they offer much protection.
Shellac or lacquer would be best, but shellac has the downside of being available only in gloss sheen. To make it satin to create an “old” look, you have to rub it out with an abrasive such as steel wool, and this leaves noticeable scratches.
But the chest was originally finished with shellac, and my daughter-in-law likes gloss, so shellac is appropriate. Had the chest still been in my shop, I would have sprayed the shellac. But I had taken it to my daughter-in-law by this time, so I brushed the shellac, sanding between coats and thinning each new coat more to reduce brush marks almost entirely.
So after three decades on hold, my bartered chest became a great gift. I’d call that an excellent trade.
This article originally appeared in the August 2015 issue of Popular Woodworking Magazine.


