


We may receive a commission when you use our affiliate links. However, this does not impact our recommendations.
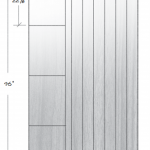
When I teach woodworkers about SketchUp we always reach a point where I say, “the level of detail to include in your model is up to you”. Then I explain the level that I usually work to and conclude with “but if you know what you’re doing it doesn’t take that long.” Dovetails are a good example of this. What you see is a typical drawer side.
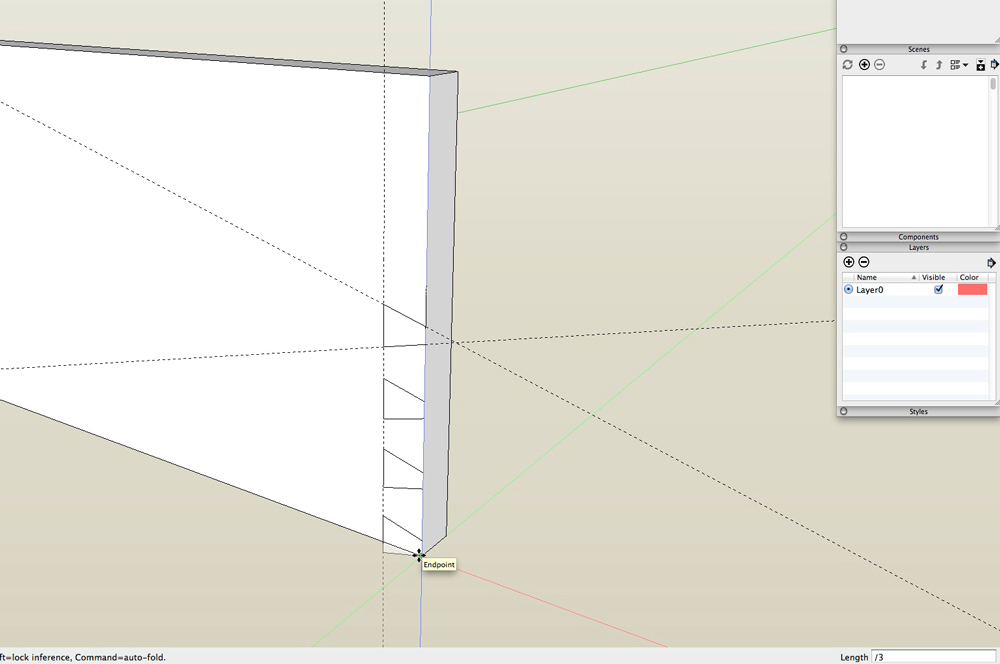
If you want to play along at home, start by drawing a rectangle 1/2″ wide x 12″ long and use Push/Pull to make it 5″ high. Use the Tape Measure to place a guideline 1/2″ back from the front edge. Then use the Protractor tool to make angled guidelines at the mid-point of the front edge. I move one up and the other one down to create the outline of a center pin. I trace over the guidelines with the Pencil tool then select the small face. I use the Move/Copy tool to make a copy on one end. I grab it by the outer corner and place it an the corner of the side, making a half pin that’s a little bigger than half the width of the central pin.
I click to set the position of the half pin and before I do anything else I type a slash followed by the number three (/3) and hit the Enter key. That action places two evenly spaced copies between the original and the first copy. If I don’t like the spacing, I can repeat the typing (/2 would put a single pin in the space between the first and the original.
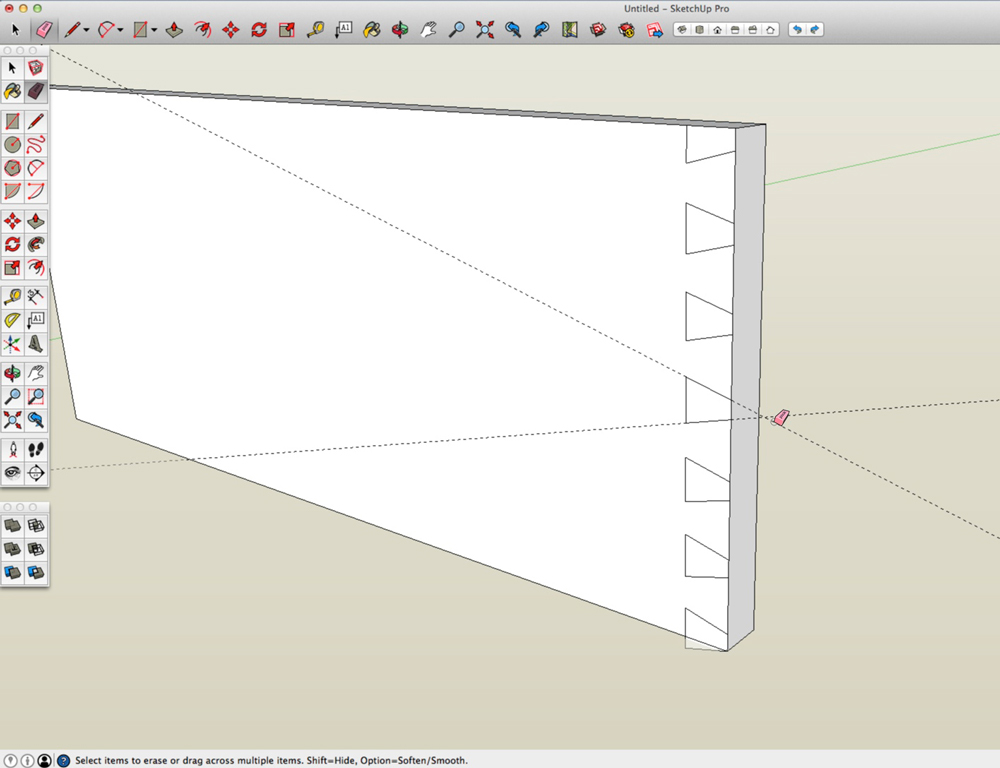
I then repeat the process to copy the pins above the center line and erase the guidelines. That completes the layout on one face of the drawer side.
Now I use the Push/Pull tool to “cut” the pins. After pushing the first pin to the other side I double-click on the rest one at a time to repeat the distance of the extrusion. And you thought Frank Klausz was fast.
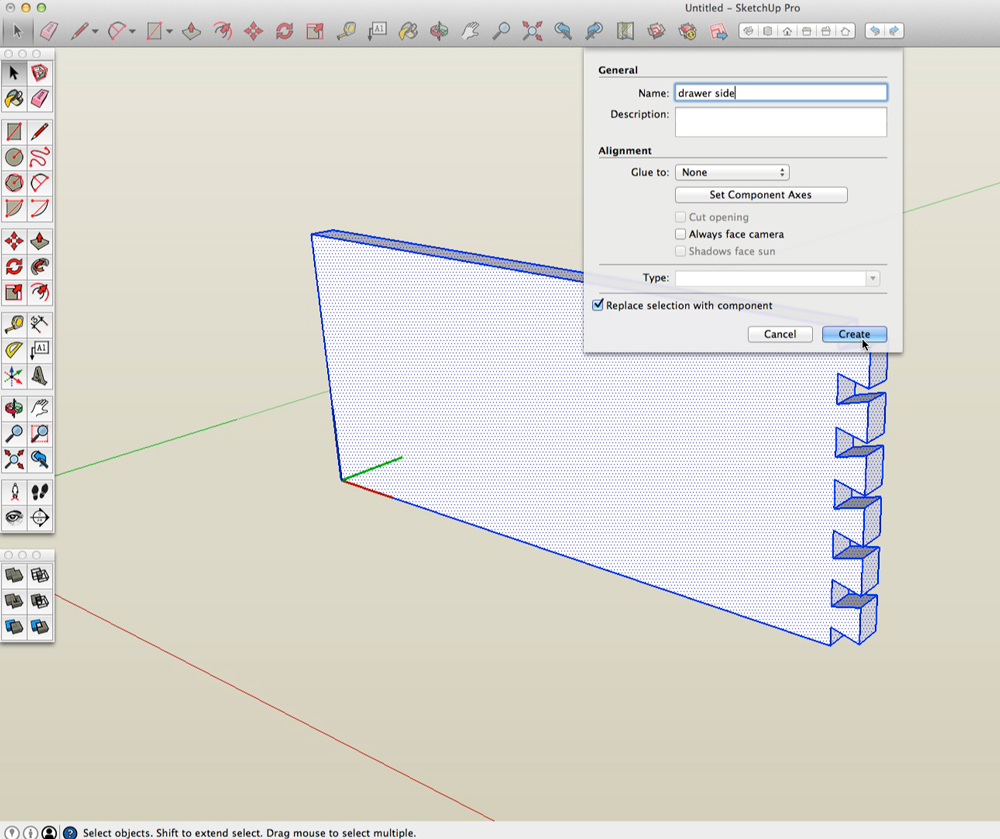
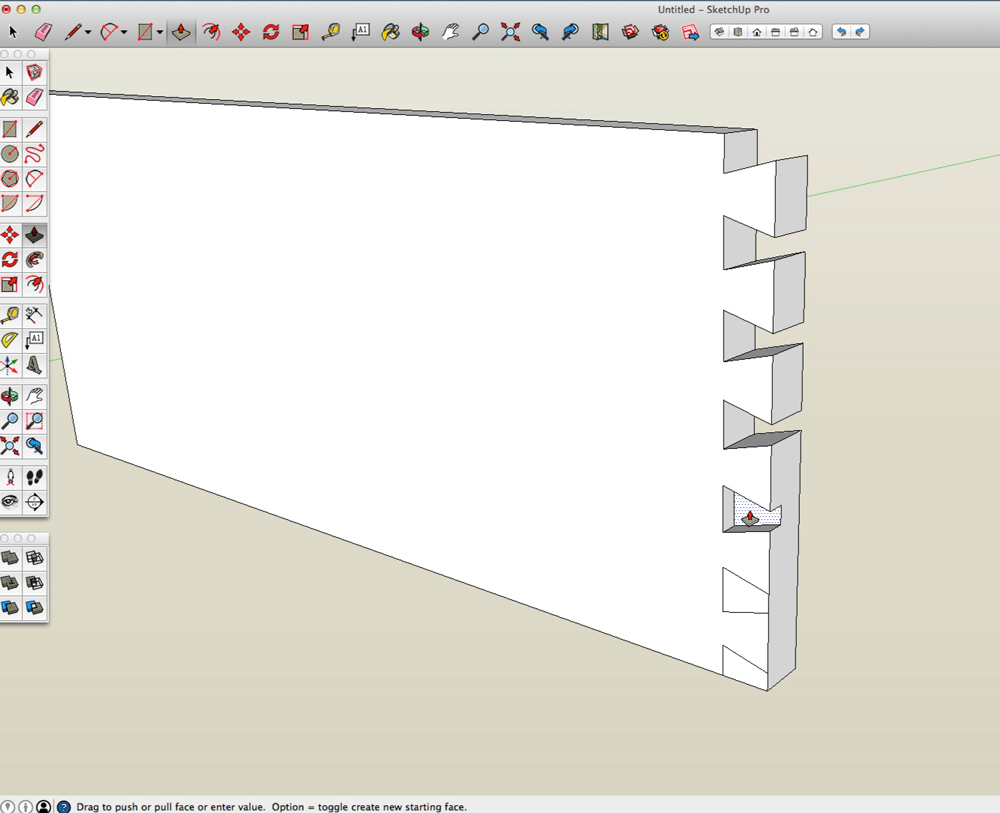
Now is a good time to make the drawer side into a Component. Three clicks on any part of it selects all of the geometry and a right-click brings up a menu with “Make Component” as one of the options. You can also type the keyboard shortcut “G” to bring up the dialog box. After the component has been created a double-click opens it for editing.
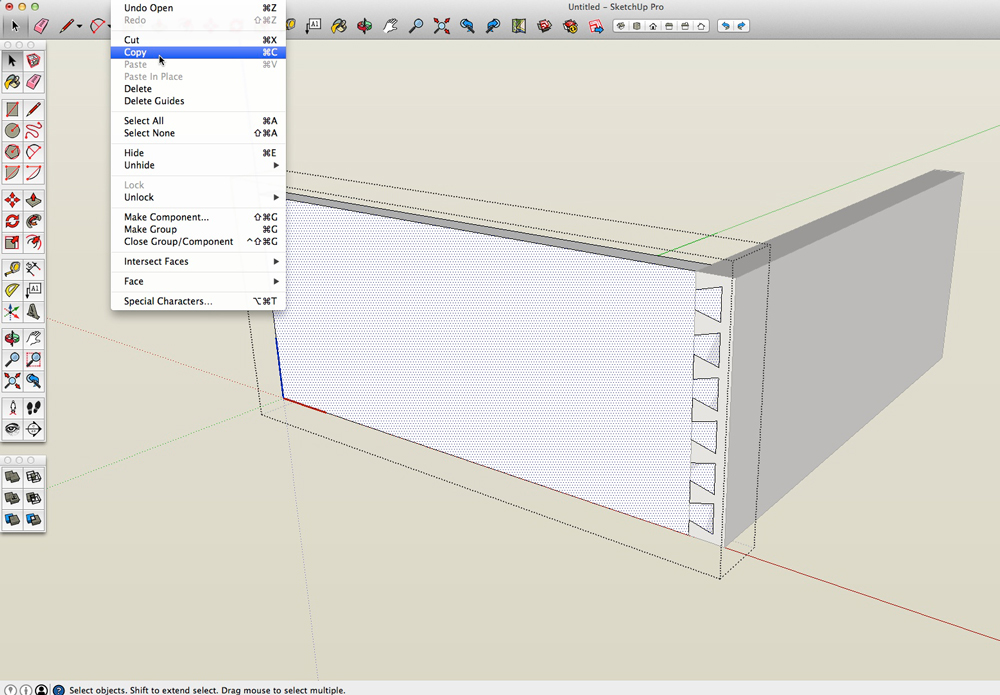
With the component open I select the face and then from the “Edit Menu” I select copy. This isn’t the same as making a copy with the Move tool, it copies the geometry to the computer clipboard. I could also (and usually do) use the keyboard shortcut to copy the geometry to the clipboard.
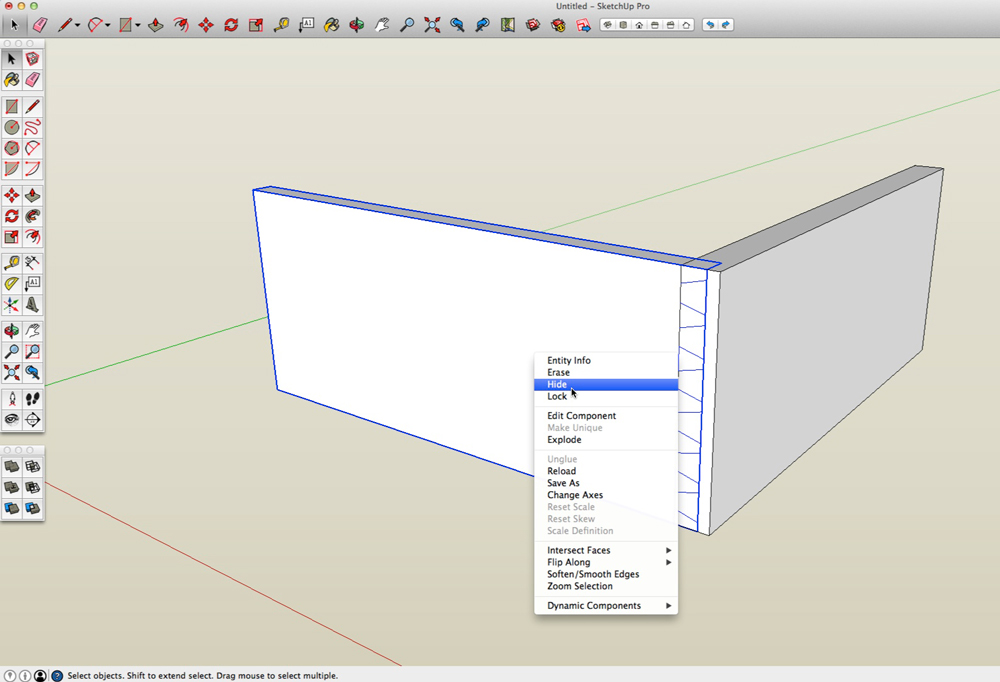
I make a drawer front with the Rectangle tool and Push/Pull. I like to start the rectangle at the corner of the drawer side where the two pieces will meet. Because the drawer side is a component, the new geometry won’t stick to it. After extruding the front to match the height of the side, I make the front into a component. Then I right-click over the side and select “Hide” from the menu. Hide makes the side invisible, but it is still there in the model. If you have “Hidden Geometry” selected from the View menu it will appear as a mesh.
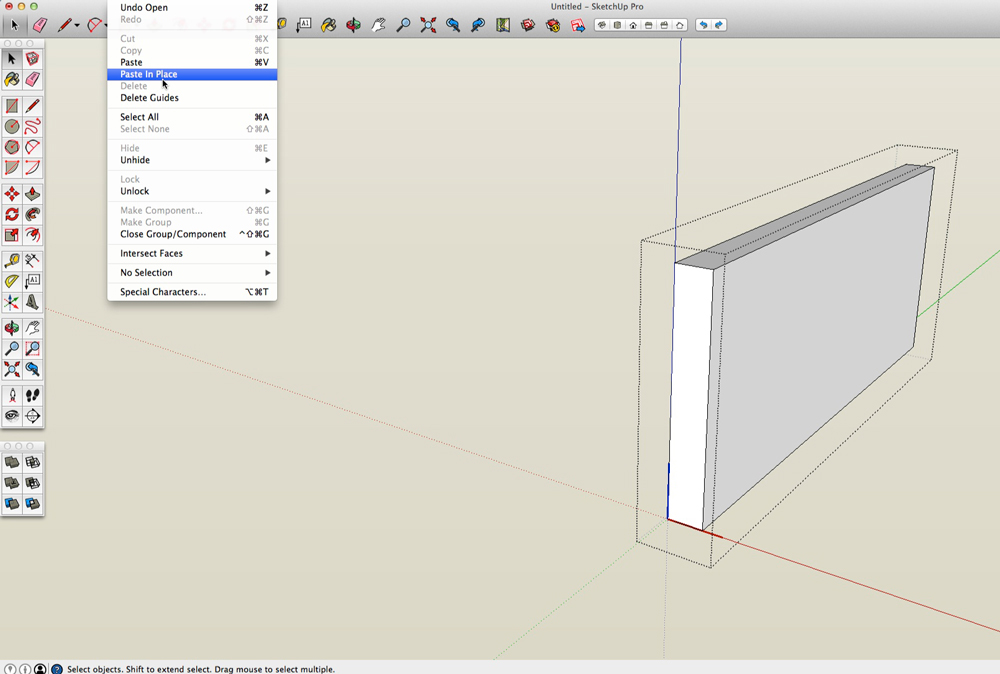
With the side out of the way, I open up the front component, go back to the Edit menu and select “Paste in Place”. Paste in Place takes the geometry I copied to the clipboard earlier and put in back in the model, exactly where it was.

One of my favorite things about using SketchUp is that copying is so much faster than drawing. It make take a while to get the tails in place on the drawer side, but it doesn’t take long at all to copy all of that detail from the side component into the drawer front component.

After erasing the lines I don’t need from the pasted in place geometry, I select the single face that surrounds the sockets and copy that from one end of the drawer front to the other.
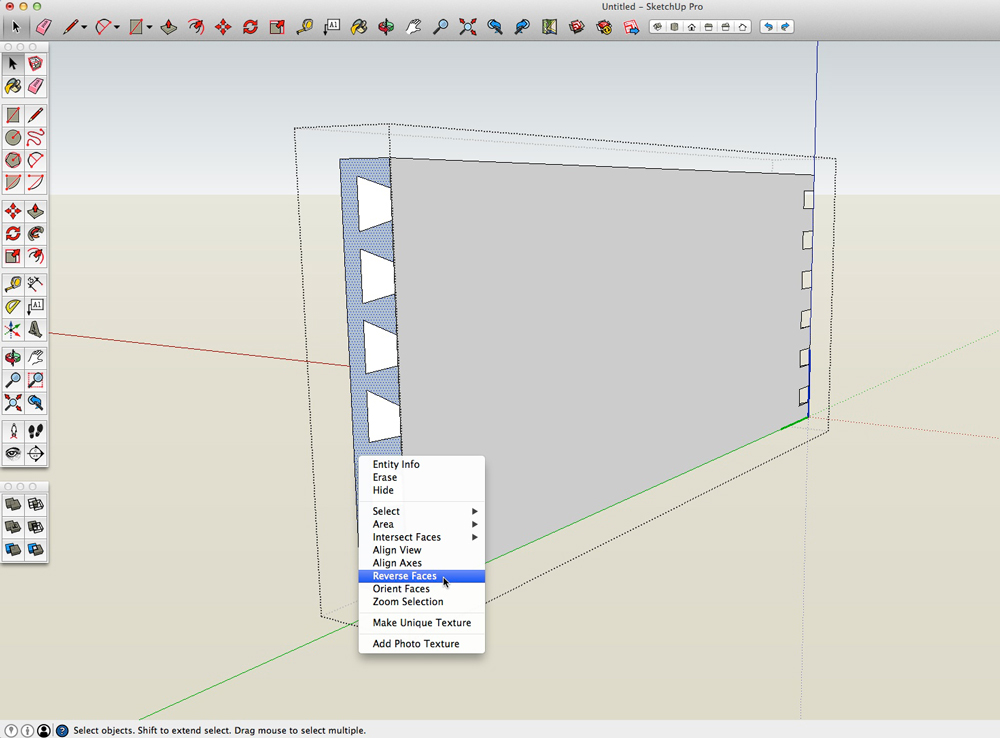
That copied face is inside out, the blue color should be on the back and a right-click brings up the menu that lets me select “Reverse Faces”. After that, Push/Pull makes the sockets and the pins on the drawer front are done. Even if you never go to this level of detail in your own SketchUp models, this is a valuable exercise to explore the powerful features of SketchUp that aren’t obvious.

To make the hidden side visible, go to the Edit menu and select Unhide/Last.

When the side is once again visible, it can be copied to the other end of the drawer front. After placing the copy, I right-click and select “Flip-along/Component’s Green”. That orients the drawer side so that the outside faces out and the inside faces in. Because the sides are two instances of the same component, when I add the groove in one it will also appear in the other. “Flip Along” in the direction that the copy was made ensures that the groove is where it is supposed to be.
If you would like to learn more about using SketchUp to plan your next woodworking project, there is a lot of information free on our SketchUp blog and on my personal blog. If you want a complete course full of techniques like this, you should get a copy of my digital book “Woodworker’s Guide to SketchUp“. It’s in PDF format with embedded videos and it’s the best way to get good at SketchUp quickly and a handy reference for the future. You can find it in our store.
Here are some supplies and tools we find essential in our everyday work around the shop. We may receive a commission from sales referred by our links; however, we have carefully selected these products for their usefulness and quality.


Does this work for handcut dovetails as well? 😉
Now, lets not turn this into FineSketchUp….I mean FineWoodworking magazine, please.
/S
Hey Bob,
I recently heard someone say that woodworking is all about subtraction, and that’s how I approach my 3D modeling. To drill a hole, I subtract a cylinder. To cut a dado, I subtract an extruded rectangle. And so when cutting dovetails, I subtract extruded triangles. Always modeling the “waste” as a component helps me visualize the cutting path of the tool.
-John
Aw geez, another dovetail article?