We may receive a commission when you use our affiliate links. However, this does not impact our recommendations.

Your joints will last for decades if you know how to apply your glue.
Much of woodworking is joinery: An edge-to-edge joint is used to join two or more boards to create a tabletop, dovetails are carefully cut and fit to create a box for a chest of drawers. And the corners of a door frame are joined with a mortise-and-tenon joint.
However, whether it’s a simple butt joint or a complex interlocking joint, glue is typically used to hold everything together. And if you’ve ever been asked to repair a piece of cheap, factory-made furniture (it’s often called curb furniture – it’s used for a few years and then set out on the curb) you’ll see that it’s typically the joint that has failed rather than the wood (assuming real wood was used).
Yet modern glue is strong stuff. In fact, try this experiment: Glue two inexpensive poplar boards together edge-to-edge with ordinary yellow glue and allow the glue to dry overnight. The next day break the boards apart and you’ll find that the wood will break instead of the joint. You see, when well-crafted, even a simple edge-to-edge joint is stronger than the surrounding wood.
Interlocking joints, such as dovetails, and the mortise and tenon, are incredibly strong even without glue. Add glue during the assembly and these joints can last for decades, even centuries.
So as woodworkers, how do we make certain that the joints that we carefully construct and glue together will not loosen and fall apart in just a few short years? Let’s take a look at what makes a good glue joint.
Mating Surfaces Must Touch
Yellow glue won’t add strength in a gap; the mating halves of a joint must make contact. Before gluing and clamping two boards to make a tabletop, I align them to see if the edges make contact. If the edges are convex (they touch in the middle and are open on the ends), a weak bond will result. Although you can squeeze the joint shut with clamps while the glue dries, the joint will always be in tension and will likely pull apart within a short period of time.
One theory is that an edge-to-edge joint should be sprung. In other words, the edges should be slightly concave. The idea is that as the tabletop experiences normal changes in relative humidity, the ends will shrink faster. (Remember, end grain absorbs and releases moisture at a faster rate than the other surfaces in a board.) A “sprung” joint will apply more pressure at the ends and keep it tightly shut.
My experience has been that a sprung joint isn’t necessary. As long as the edges make contact, the glue bond will be strong. This holds true for other types of joints, too. The mating parts of an interlocking joint should be in close contact. In fact, dovetails and a mortise and tenon should have a “friction” fit. When expertly crafted, they should assemble with moderate hand pressure or light blows of a mallet. To test the fit, I assemble the joint without glue to see if it holds together.
If you’re using a lot of clamp pressure to close a joint, there’s probably something wrong with the joint. Clamps should only be used to hold a joint in position until the glue sets; they shouldn’t be used to close a poorly crafted joint. In fact, when assembling dovetailed drawers and casework, I typically don’t use clamps. I just apply glue to the mating surfaces, tap the joints together with a mallet and set the assembly aside until the glue dries.
Grain Plays a Role
Pinned mortise-and-tenon joint
Glue bonds best to long grain; end grain will bond but the joint will be very weak. Simply put, you can join two boards edge-to-edge but not end-to-end. If you examine the end grain of a board under magnification (use a jeweler’s loupe or a photographer’s slide loupe) you’ll see that the wood resembles a handful of plastic drinking straws. Those straws served as the tree’s plumbing to transport sap. Sliced lengthwise the straws will create a strong glue bond. But when sliced and joined at the ends, a weak bond is the result. The solution is to use construction that joins long-grain. Both the mortise and tenon and dovetail joints do just that, which is another reason that they’re still used for the finest furniture.
In contrast, dowel joinery is weak because there is very little surface area for glue and most of it is end grain.
Cope-and-stick joinery created by matching router bits is another example of weak joinery. Although cope-and-stick joints make long-grain contact, there is very little of it. When a heavy wood or glass panel is added and the door framework is suspended from a pair of hinges, the joints undergo a lot of stress. A better solution is to use a mortise and tenon at each corner of the frame. The length of the tenon should be two-thirds to three-fourths the width of the stile to which it’s joined. This provides plenty of long-grain surfaces for gluing.
Too Much Surface Area?
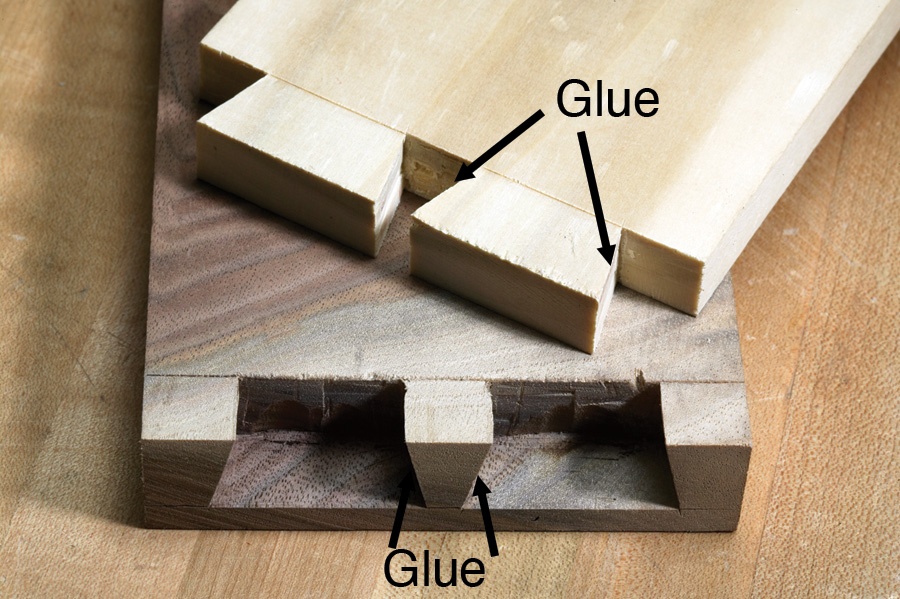
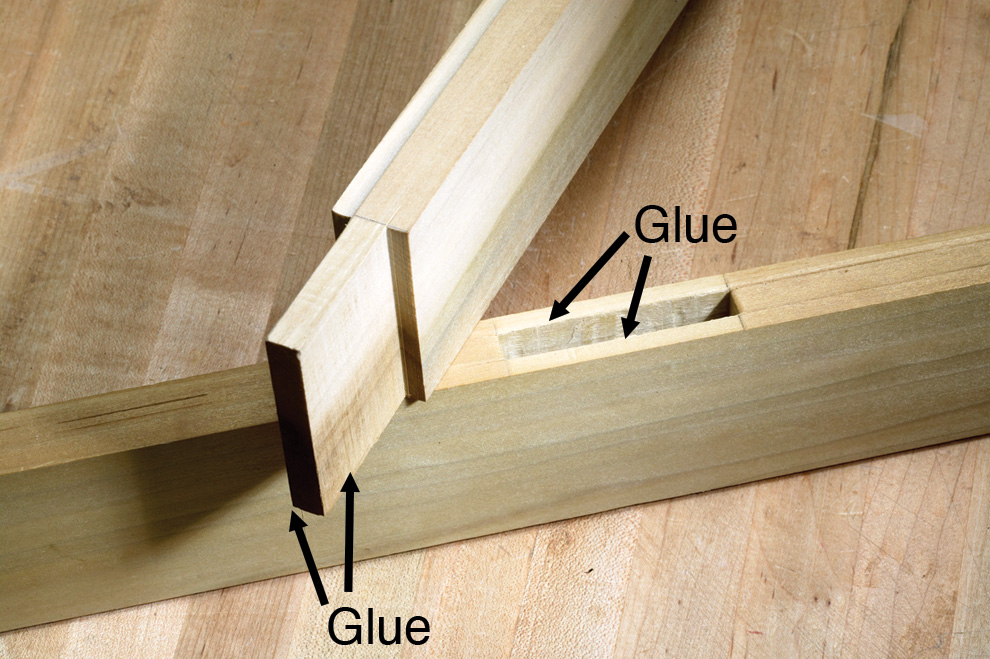

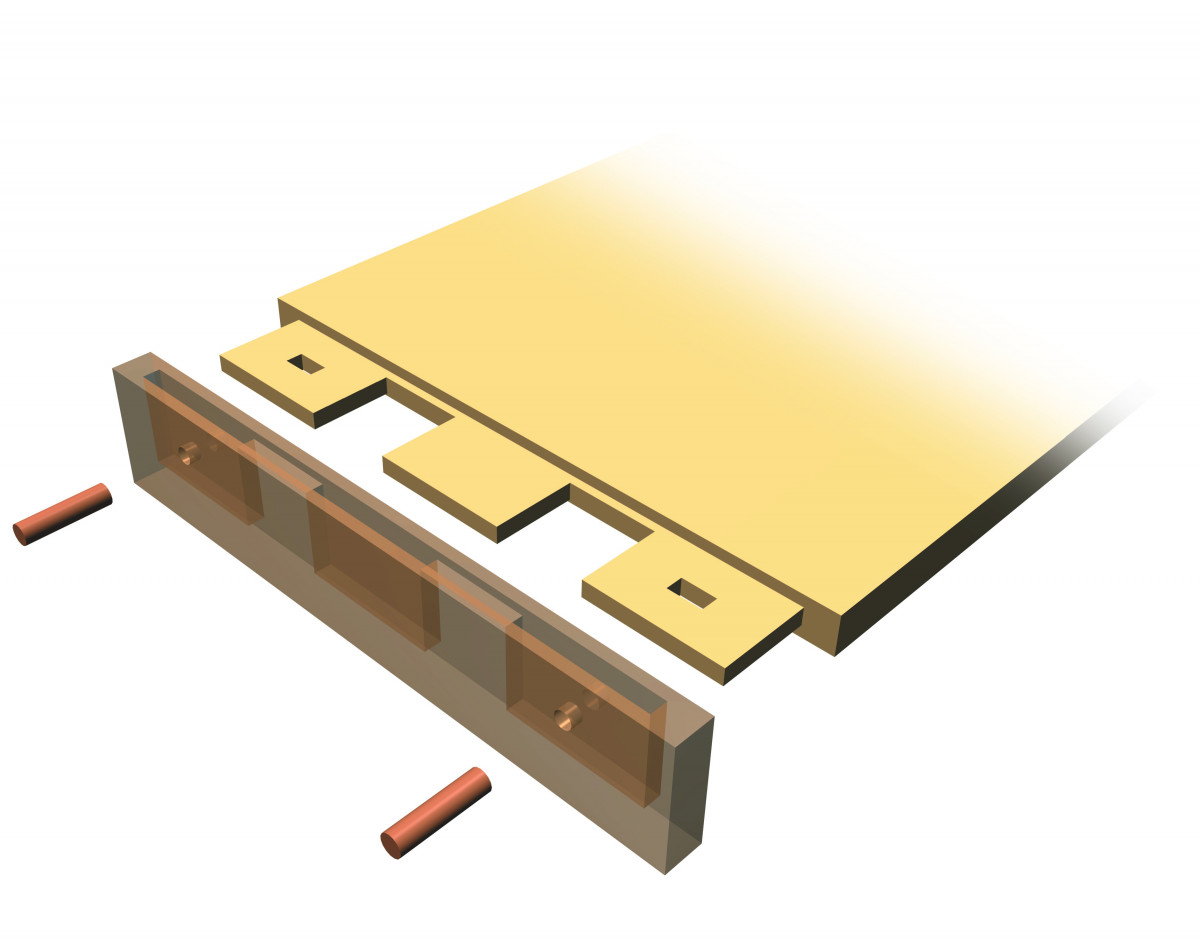
Pictured is a dovetail joint (top), a mortise-and-tenon joint (middle), a mortised-and-tenoned cope-and-stick
joint (bottom) and a long-grain-to-long grain edge joint (below). All four of these joints provide plenty of long-grain surfaces for gluing. Look closely at the callouts to see where you should apply glue to each joint.

Remember, joinery is often used to change directions such as when joining the sides of a box at 90°. This can often introduce cross-grain construction problems. When wood is joined and glued cross-grain, there is potential for one of the pieces to split. (Wood expands and contracts across its width during seasonal changes in relative humidity.) The solution is to reduce the surface area and/or to avoid glue application to certain areas.
For example, broad surfaces such as a tabletop or hinged lid of a slant-front desk are kept flat with breadboard ends. Tenons are cut on the tabletop, which are fit into mortises on the breadboard ends. But while this solves one problem, it creates a new one – cross-grain construction. The solution is to use an odd number of tenons and apply glue only to the center tenon. The remaining tenons are assembled without glue and held in place with a wooden pin. The hole in the tenon to accept the pin is slotted, which allows for expansion and contraction.
Another example of a potential cross-grain construction problem are tabletops. Tabletops shouldn’t be glued to the base that supports them. The glue bond will hold tight and cause the tabletop to split. Instead, a mechanical fastening system that allows for wood movement should be used.
As a general rule, I put glue on any long-grain surface of a joint. For example, when gluing up a mortise-and-tenon joint, I put glue on every part of the tenon and mortise that is long grain. I don’t put glue on the end-grain walls of the mortise. I also don’t put glue on the bottom of the mortise. See the pictures above to see where I apply glue on my joints.
Use Fresh Glue
This is how much glue you should apply before you start spreading.
The glue most widely used by woodworkers is yellow glue. It’s strong, inexpensive, doesn’t require mixing and it’s convenient – just squeeze it from the bottle. But yellow glue has a shelf life of only about 12 months. Have you ever squeezed old, outdated yellow glue from the bottle? It’s thick and somewhat stringy. In contrast, fresh yellow glue is creamy and smooth. By the time you use the glue, you’ve spent hours or days carefully selecting stock, cutting it to size, crafting joints and shaping mouldings and curves. Glue is cheap; probably the least expensive part of the entire project. I don’t risk spoiling all that work with an old bottle of glue. Instead, I discard it and spend two bucks on a bottle of fresh stuff.
The Work Should be Warm
Glue doesn’t bond well to cool surfaces. Read the back of the bottle and you’ll see that the manufacturer recommends surfaces that are at least 65°. During the winter I turn down the thermostat in my shop at night to conserve energy – except when I’ve just glued together an assembly.
Wet the Surface
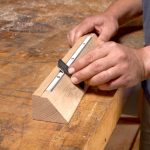
For a strong bond you’ll need to spread the glue evenly and thoroughly wet all mating surfaces. Any dry surface will not bond. Instead of relying on clamp pressure to spread the glue, I use a spreader. A thin stick works well for coating the walls of mortises and the sides of dovetails. For broader surfaces I’ll use a stiff paint brush or roller.
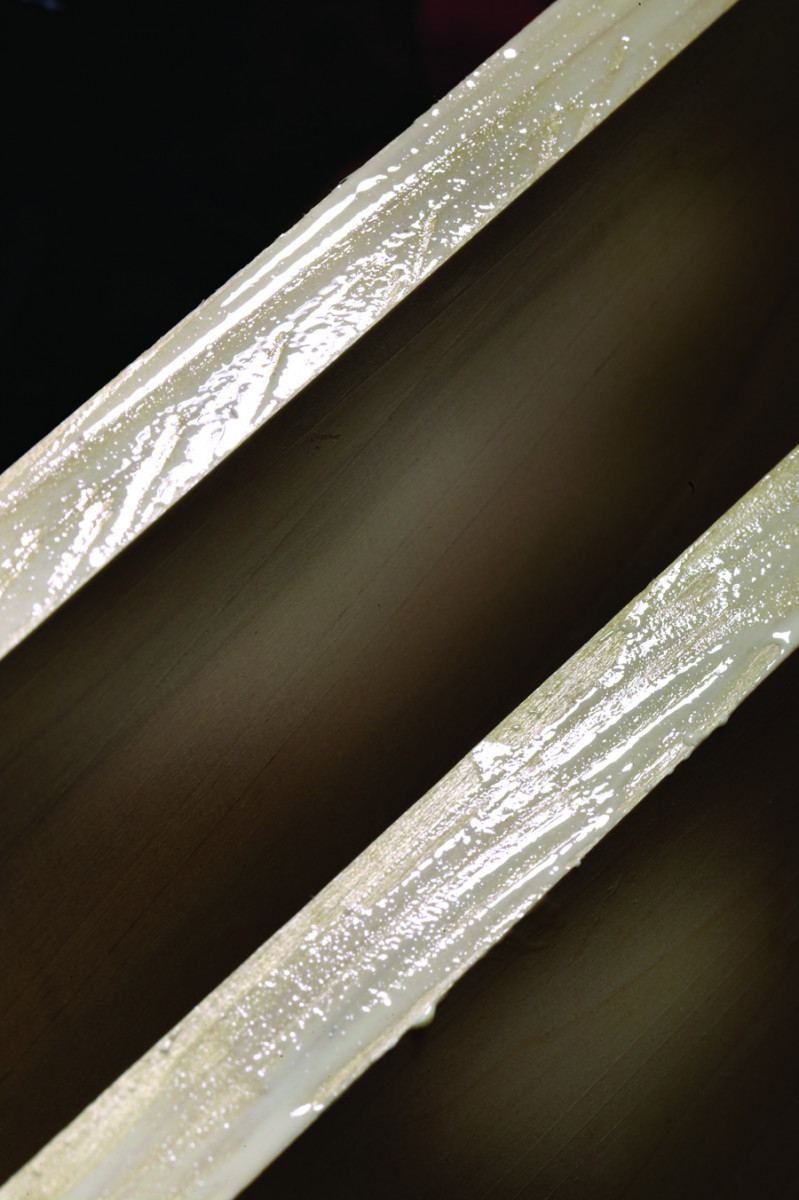
When gluing up an edge-to-edge joint, make sure the coat of glue is really thin. It’s easy to put too much glue on, which creates a very lubricated surface. Everything becomes slippery and suddenly very difficult to accurately align.
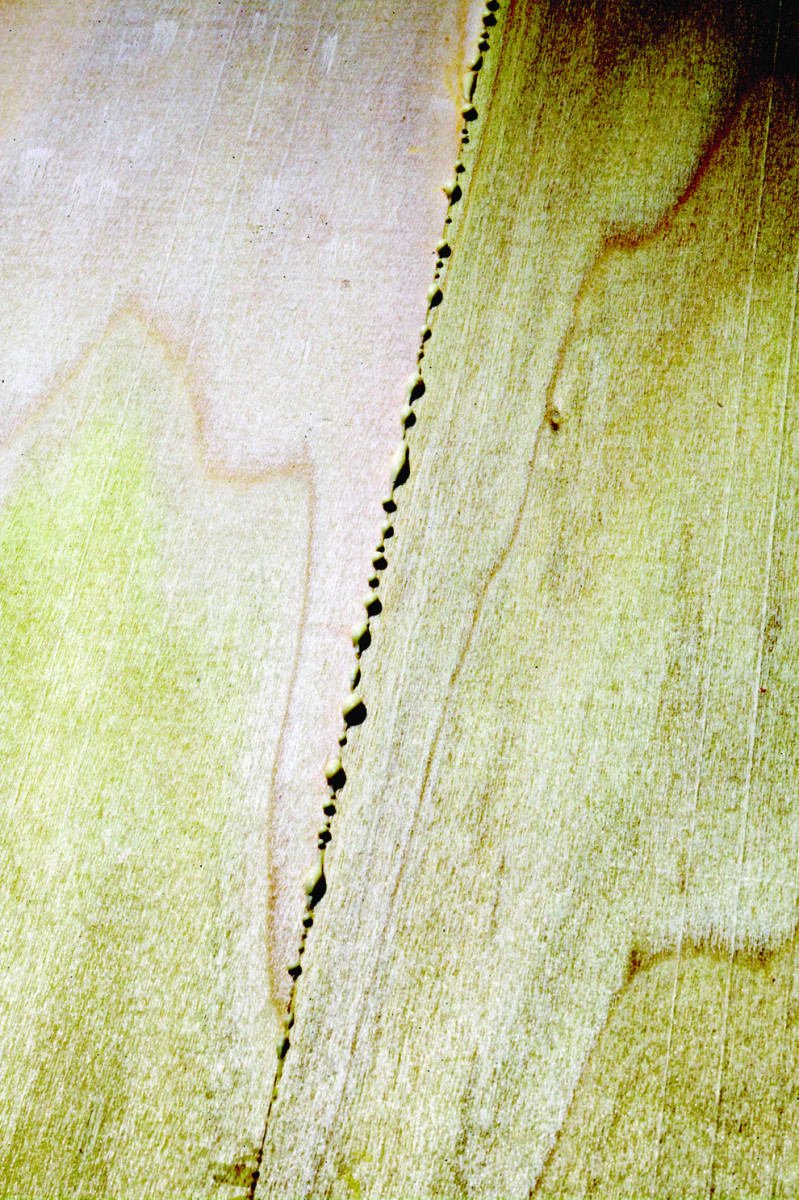
Don’t Let it Skin Over
Here you can see a thin, dry “skin” of glue beginning to form on the surface. This will create a weak bond.
The process of gluing up can take time. After applying glue you must assemble the joints, apply clamps and check for squareness. If the glue begins drying during this time, it can weaken the bond. You can tell if it’s started to dry; a thin dry “skin” of glue will have formed on the surface. To avoid this scenario, ask a friend to help with the process or just glue the project together in smaller, more manageable assemblies.
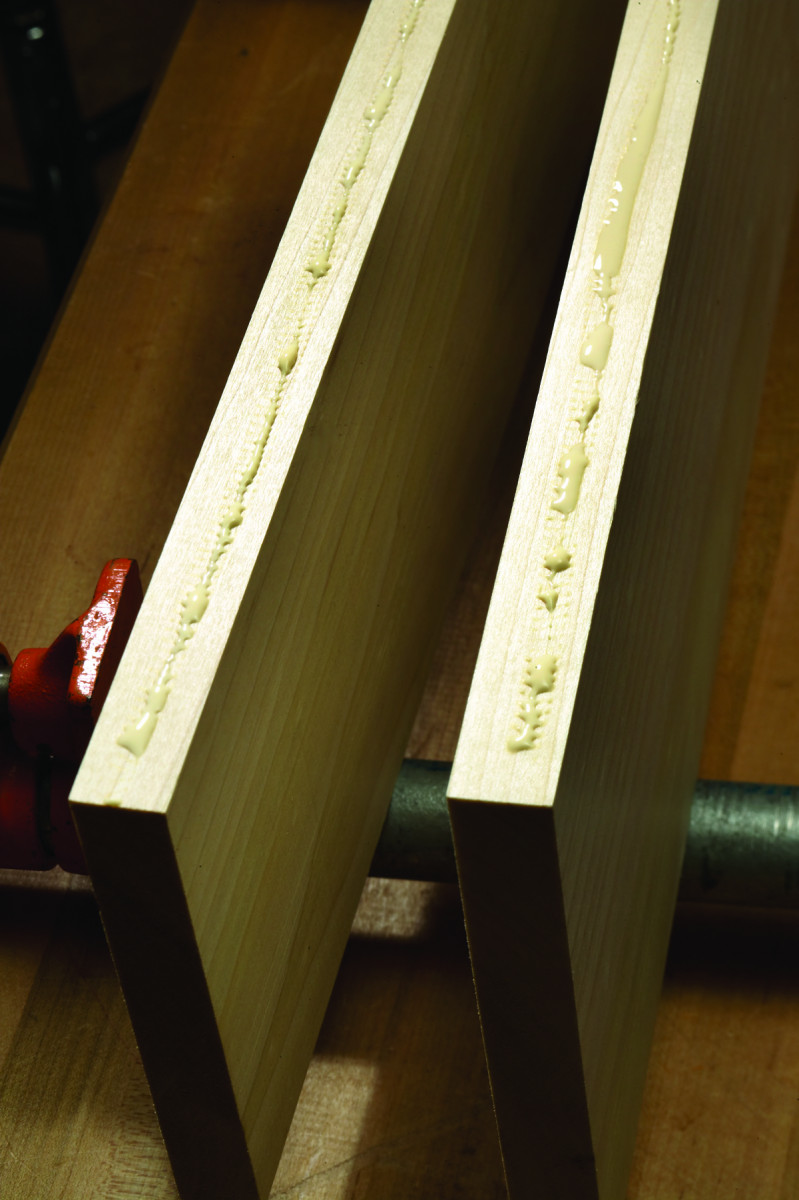
Don’t Forget Squeeze-out
A thin line of squeeze-out ensures your joint is not starved of glue. Any more than this and you’ll begin to have a sticky mess.
When gluing assemblies I like to see some glue squeeze-out. Not a running-dripping-sticky-mess-type-of-squeeze-out, but a few drops or a thin line of glue squeeze-out is good insurance that the joint is not starved of glue.
There are three ways to deal with the excess glue. You can let it dry completely, but this isn’t a good idea. Dried glue is tenacious and when you chisel it away it will often take small fragments of wood along with it. Some woodworkers wipe it with a wet rag but the diluted glue gets down into the porous surface around the joint, which can create finishing problems. The easy solution is to allow the glue to dry until it is soft but no longer liquid. It then peels away effortlessly with a sharp chisel.
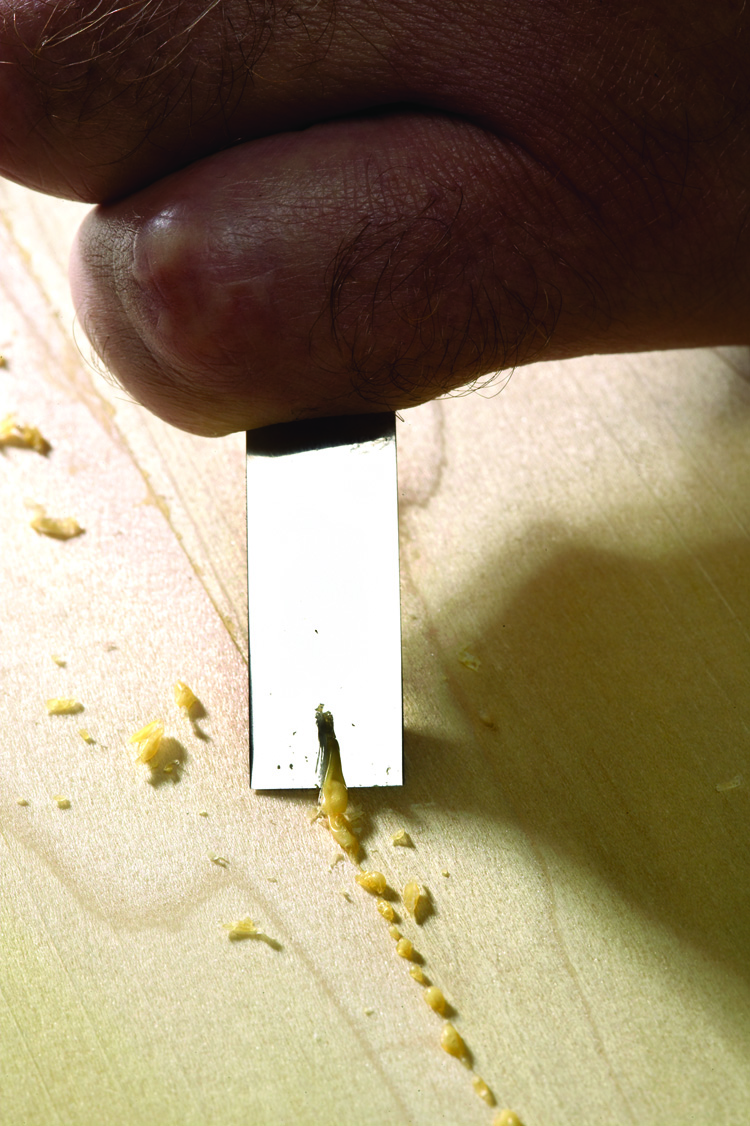
When the glue is soft but no longer a liquid, peel it away with a chisel. Make sure your chisel is sharp.
How Long Should it Sit?
After I apply glue and assemble a part of my project (for example, a dovetailed drawer), I usually wait an hour before I begin working on it again. Typically, after 24 hours, the glue will be at full strength. When you apply glue, it comes into contact with the air, the wood or both. If your joint is enclosed, such as a mortise-and-tenon, the glue isn’t exposed to air, only wood. So it dries slower than you might expect.
Here are some supplies and tools we find essential in our everyday work around the shop. We may receive a commission from sales referred by our links; however, we have carefully selected these products for their usefulness and quality.