We may receive a commission when you use our affiliate links. However, this does not impact our recommendations.
Why liquid hide glue should be your first choice as an adhesive.
Since the beginnings of civilization up until World War II, most pieces of furniture were assembled using animal-based glues. That fact changed almost overnight in the 20th century, however, with the introduction of polyvinyl acetate (PVA), what we call yellow or white glue.
In some ways, these modern glues are great. They are cheap, easy to use and available everywhere – even the grocery store. But they might not be the best choice for the individual woodworker making furniture.
Modern glues aren’t reversible – so fixing furniture or undoing your mistakes is agonizing. They set up fast – sometimes too fast when you’re working alone. And PVAs are prone to show up as white splotches when coated with a finish if you aren’t fastidious about cleaning squeeze-out.
Frustrated by these downsides to yellow and white PVAs, I began looking for an alternative. As is usually the case in woodworking, the problem could be solved by investigating traditional shop practices.
More than a decade ago, I began using liquid hide glue. And now it’s rare for me to use anything else. I don’t use hide glue because I build historical reproductions, wear frilly shirts or work at a living history museum. I use it because it simply is the better glue for me – a guy who builds pieces of furniture one at a time in a small shop. The guy who occasionally puts slot A into tab B by accident and needs to fix the mistake.
Patrick Edwards, who makes the liquid hide glue called Old Brown Glue, summed it up best for me: “I think protein glue is…” he said, a bit exasperated, “it’s not even a choice. You should use protein glue if you are a woodworker.”
Objection!

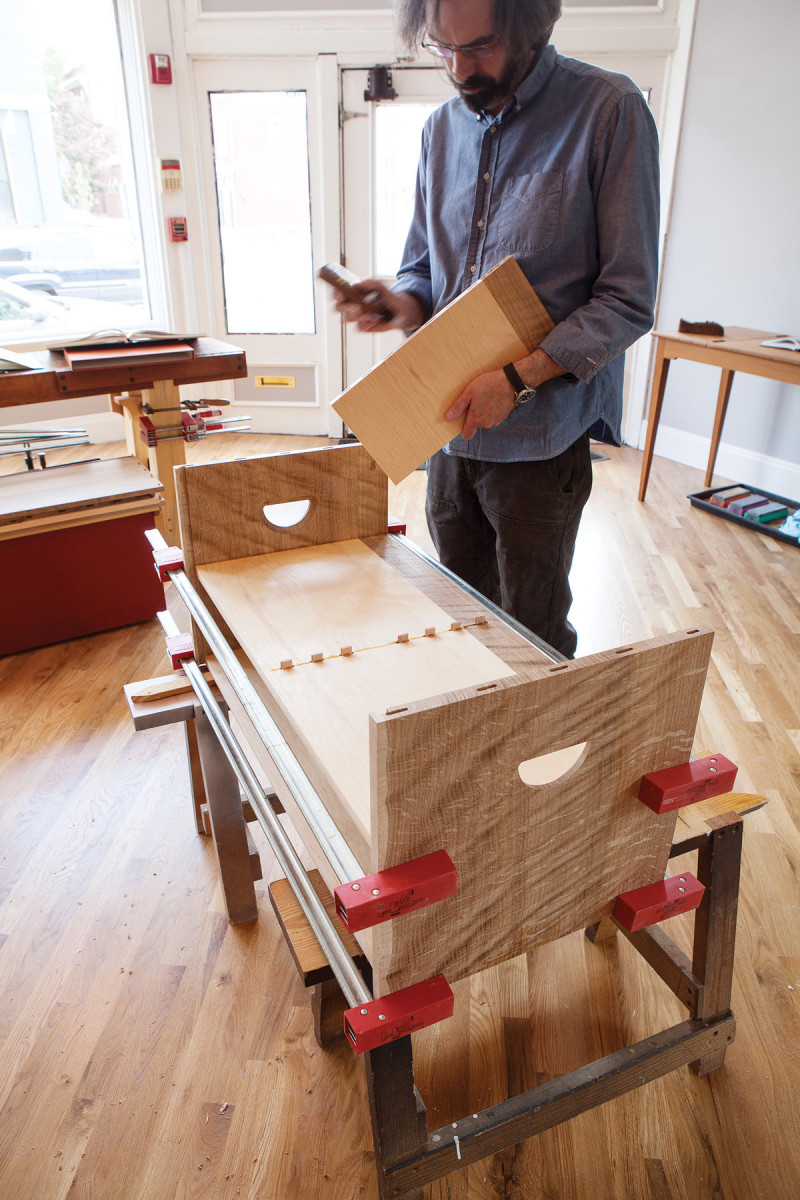
Group of glues. Once you go brown…
If you use yellow glue, I suspect you are squirming in your chair right now or about to call this out as bull pucky. Most woodworkers have objections to all forms of hide glue. Even if you’ve never used it, I’m sure you’ve heard it smells like rotting flesh, it has a short shelf life, it doesn’t bond as well as PVA and is generally difficult to use.
I won’t lie to you: Both hide glue and PVAs have advantages and disadvantages. But during the last 50 years, the reputation of hide glue has suffered from a lot of misinformation while the downsides to PVAs have been ignored.
Hide glue has been used to assemble furniture for thousands of years. Once you try liquid hide glue, you’ll find that it is as straightforward to use as PVA.
This article will lay out the plusses and minuses of liquid hide glue and PVA glue from the perspective of an individual furniture maker, not a glue manufacturer, furniture factory, luthier or museum conservator. I chose to focus on liquid hide glue instead of hot hide glue in this article because the liquid hide is more convenient, more similar to PVA and more readily available than hot hide glue.
Let’s examine the major differences by starting with where you live.
It’s Not Just the Heat…
Don’t blink. Yellow and white glue cure much faster than liquid hide glue, so if you use a PVA you need to work quickly, especially with complex assemblies. Once your yellow glue looks like this, you are in deep trouble.
In my opinion, the biggest advantage of PVAs is they are more consistent than hide glue. Whether you work in a swamp, desert or prairie, yellow and white glues will bond your joints with few complications. A dry or cold day might speed or slow curing, but you’ll almost always end up with a tough and stable joint.
Hide glue, on the other hand, is more sensitive to heat and humidity. In semi-tropical areas, such as the Deep South, it can be difficult to get hide glue to cure completely on humid summer days, especially in a shop without climate-control. The glue can stay tacky for weeks or months. (If this happens, take the piece into an air-conditioned room to allow the glue to cure. If this continues to happen, you’re probably better off with a PVA.)
Open Time & Assembly Time
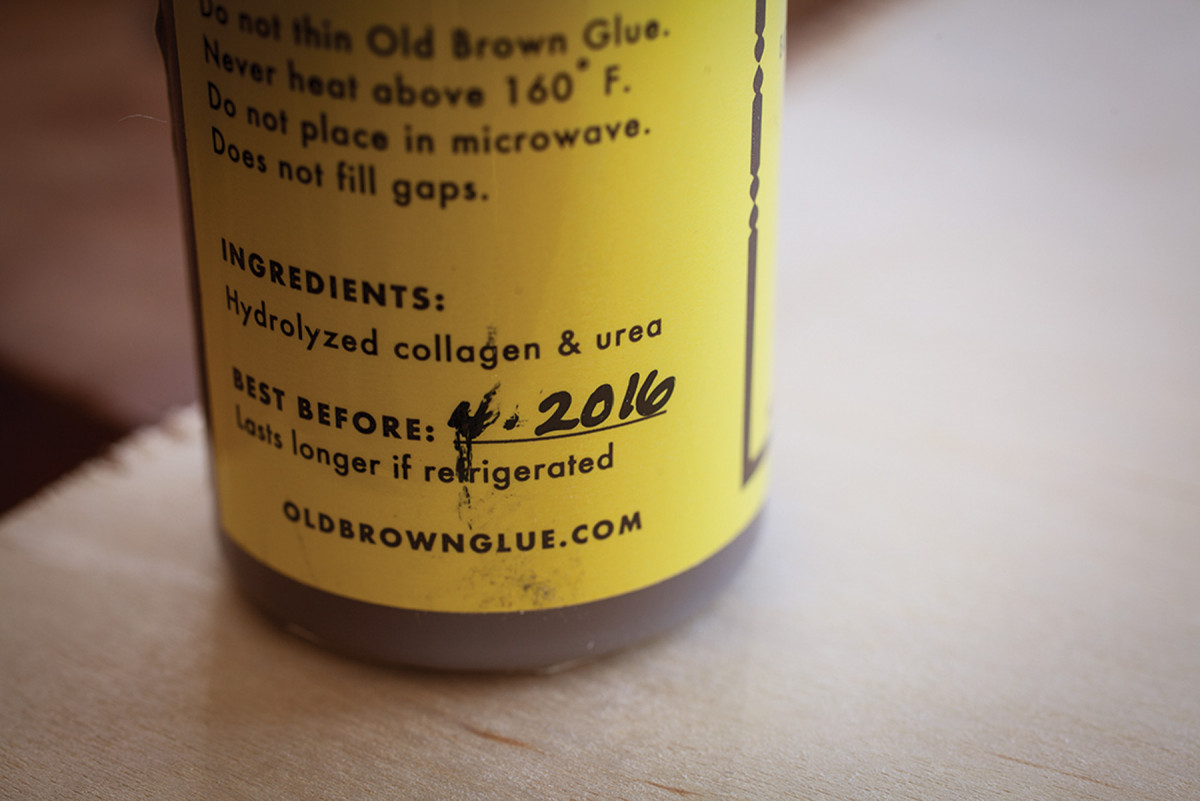
Important dates. With liquid hide glue, look on the bottle for an expiration date or a manufacturing date. Titebond has recently changed to printing a code on the back of its bottles. The first character is a country code. The second is the year. The next four are month and day. So a code that reads A608190073 means the glue was made on Aug. 19, 2016. (The last four digits are the glue’s lot number.) So with properly stored Titebond glue you have about two years (or more) from that date to use it.
PVAs set up fast. With a typical yellow glue, you have four to six minutes to get your joints together before the glue will start to set (this is called “open time”). And you have 10-15 minutes total to get the clamps on and walk away (this is called “total assembly time”).
Typically with a PVA you can remove the clamps after 30 minutes. So if you must work quickly (think: production work), PVA is your friend.
Liquid hide glue sets up more slowly. The open time is typically 10 minutes, with a total assembly time of 20-30 minutes or even more in a cold shop. You also need to let things stay clamped up for a longer time. While Titebond’s Liquid Hide Glue says you can release the clamps in 30 minutes, I’ve found it best to leave things in the clamps as long as possible. One hour of clamping is better; overnight is best.
As a woodworker who builds pieces by myself and one at a time, the longer open time is helpful with complex assemblies, and I don’t mind letting my assemblies sit overnight (you do have to sleep sometime).
The Smell
Lots of choices. PVAs come in many different flavors: water-resistant, waterproof, slow-setting, thick and more. Liquid hide glue comes in one flavor, but you can alter it yourself fairly easily.
For me, this issue is a red herring. Both PVA and hide glue have a slight odor. Hide glue doesn’t smell like a slaughterhouse. In fact, it smells a lot less than any barn I’ve ever been in. To me, PVA doesn’t smell particularly pleasant, either. So let’s say that after a few times of using either glue, you won’t notice the smell.
Shelf Life
Both glues have a long shelf life. Though most manufacturers recommend you use your PVA up within two years, I’ve found that it can last much longer when sealed in the bottle. Liquid hide glue typically lasts 18 months to two years if kept sealed in a cool and dry environment. Though that can also be extended. (See “How to Extend Your Shelf Life” below.)
In other words, if you can’t use up a little bottle of glue in two years, maybe you should take up a different pastime.
How to Extend Your Shelf Life
Alot of woodworkers have criticized liquid hide glue as having a short shelf life. Chances are, they have only themselves to blame.
Liquid hide glue is supposed to last 18 months to two years if it has been stored properly – sealed and in a cool place. So if you have stored it properly and you have let it sit for two years, maybe you should try to do some more woodworking.
Another way to ruin the glue is by exposing it to extreme heat. Think about how hot it can get in your car on a summer day – that will do it.
On the flipside of this equation, you can greatly increase the shelf life of liquid hide glue by storing it sealed up in a cool, dry place, such as a basement.
Recently the glue technologists at Franklin International tested old bottles of Titebond’s Liquid Hide Glue to see if it would cure. Surprisingly, properly stored bottles of liquid hide glue that were 18 years old cured just fine.
Some liquid hide glue enthusiasts recommend storing hide glue in the fridge or freezer to extend its life. This works – freezing doesn’t hurt hide glue – but the thawing process can cause water to condense on the glue if you aren’t careful.
Availability
PVA is everywhere. And you can readily buy PVAs that have been modified at the factory to be water-resistant, waterproof, ultra-thick so it won’t run, thinned out so it has a longer open time, with UV additives to find squeeze-out and on and on.
Liquid hide glue is available in only one basic form, so it’s up to you to tweak its chemistry for different effects. But you can make it do a lot of great things if you are willing to learn.
Liquid Hide Glue Tricks
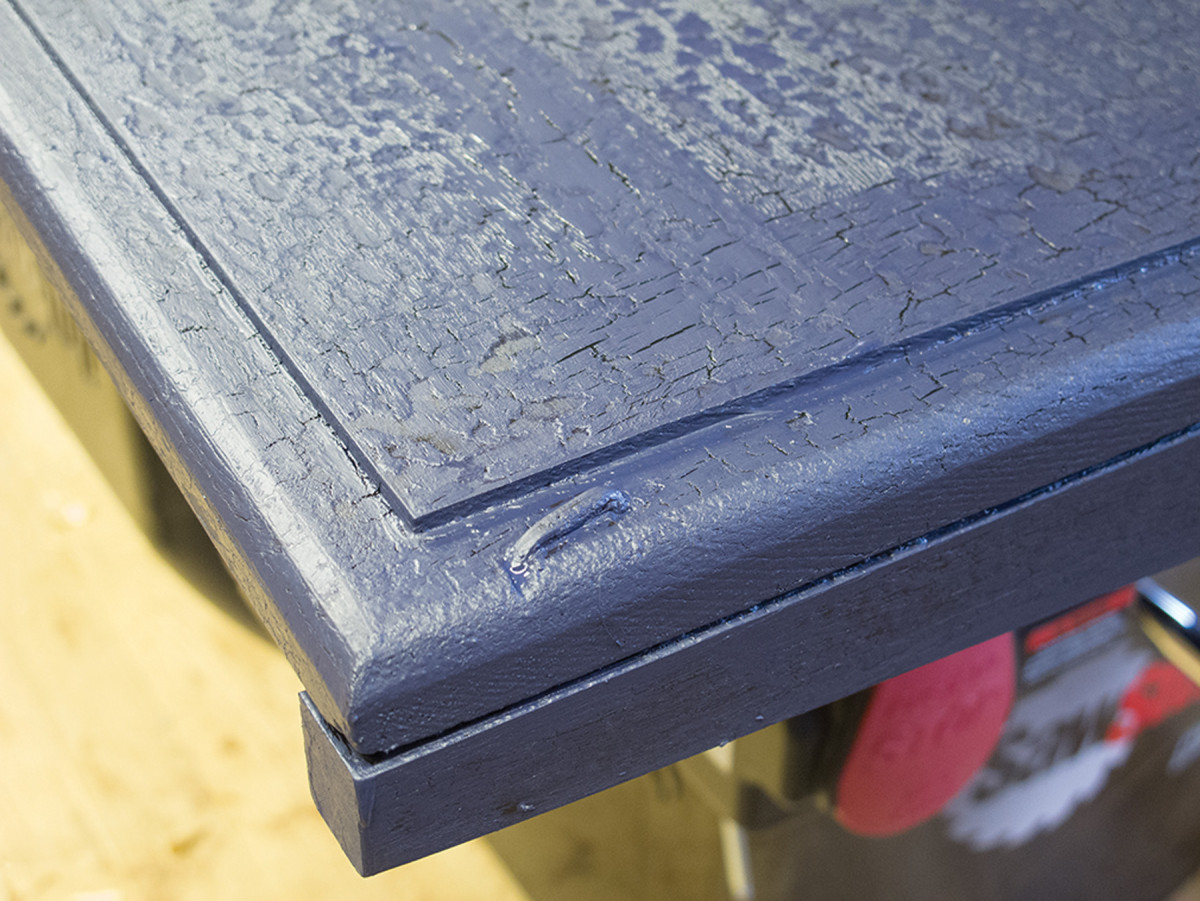
Make paint crackle. By painting on a coat of hide glue between layers of paint, you will cause the top layer to crackle.
Hide glue is made from the hides, soft connective tissue and bones of barnyard animals (so no, it’s not vegan). Dry out this material and you have hard, hide-glue pearls, which can be soaked in water and heated to make hot hide glue.
But how do you make this glue liquid at room temperature? Usually by adding either urea, salt or other chemicals. (There are many recipes on the Internet for making your own liquid hide glue from pearls.)
All hide glue can be modified to do special tricks. Below is a short list of common modifications. For a full list, check out “Hide Glue: Historical & Practical Applications” (Full Chisel Press) by Stephen A. Shepherd.
■ Reversing hide glue. In addition to using heat and moisture to reverse the bond of hide glue, you can also use denatured alcohol or acetone. These chemicals will desiccate the glue and make it brittle. A sharp rap on the joint with a mallet will then release the bond. Using alcohol or acetone is ideal for large-scale work (which would take a long time to heat) because the liquid can be injected into the joint with a syringe. Hide glue that has been desiccated can be renewed with new glue without a problem.
■ Add flexibility. Hide glues don’t creep, which is ideal for veneering and bent lamination. If you want to add some flexibility to the joint so it will behave more like a PVA, add glycerine to the glue (up to 5 percent) to add flexibility. Other old recipes I haven’t tried say that adding a little sugar or molasses will also render the glue more flexible.
■ Make it water-resistant. Add aluminum sulfate (up to 1 percent) to make the glue water-resistant.
■ Crackle finish. To simulate a crazed or crackle finish, paint a base coat on your project. Then brush on a layer of hide glue over the paint. The thicker the coat of glue, the more pronounced the crackling will be. Then paint a second coat of paint over the glue to begin the crackling effect.
■ Filling gaps. Mix in some chalk to your hide glue until it turns into a putty that can be used to fill cracks and gaps. The amount of chalk needed depends on the humidity and moisture content of the glue, so start by adding small amounts of chalk.
■ Bonding unusual materials. To glue teak or other oily woods together, rub the surfaces to be glued with a garlic clove before applying the hide glue. You can also adhere wood to brass by rubbing the brass with garlic before applying the glue.
—CS
Reversibility
The ‘undo’ button in woodworking. A little heat and moisture will cause hide glue to reverse its bond.
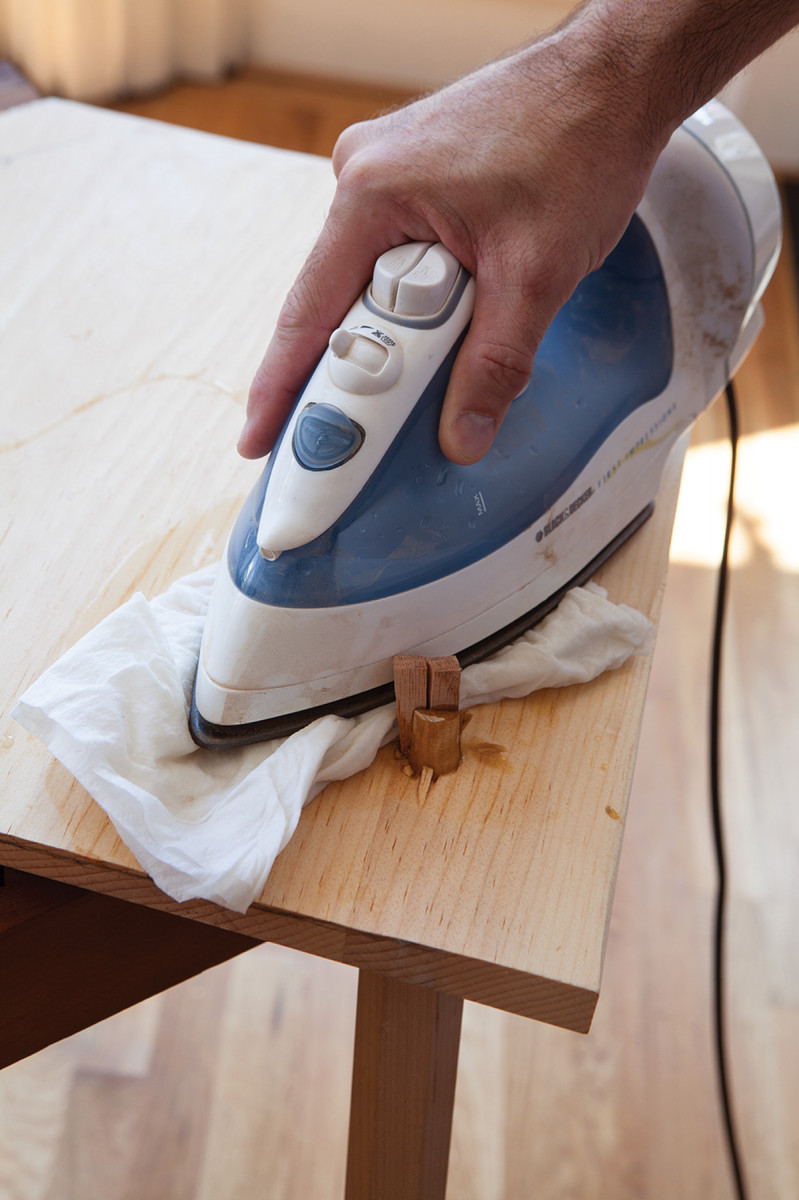
The biggest disadvantage to PVA glue is that it is not reversible. Once the glue cures, it is difficult to undo the joint without destroying the wood in the process. Liberal amounts of heat and moisture can get the joint to release – especially if the joint is new – but it’s a difficult job that could end up ruining the entire piece.
Liquid hide glue is easily reversible. A little heat and moisture will re-liquefy hide glue that is older than you are. This is one of the primary reasons I prefer hide glue.
Let’s say that you glue up a door. The next day you realize that everything is backward and reversed. If you used hide glue you can undo the assembly with ease and set everything right.
The reversibility of hide glue has saved me a few times in my shop and many times more in the classroom. It also has allowed me to make design changes to a project – moving or changing mouldings, for example – without remaking the entire piece.
Repairs to Joints
Risky business. Scraping PVA off a tenon can result in removing wood below the glue. This will weaken the joint.
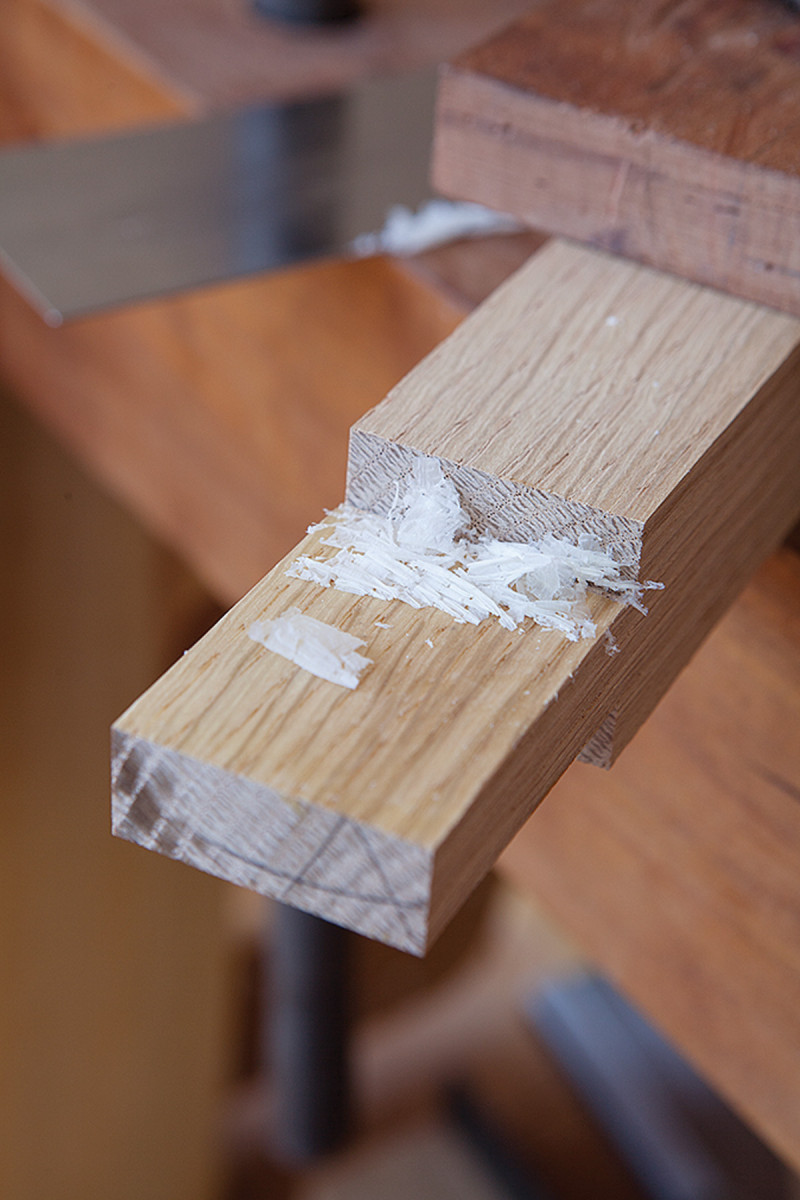
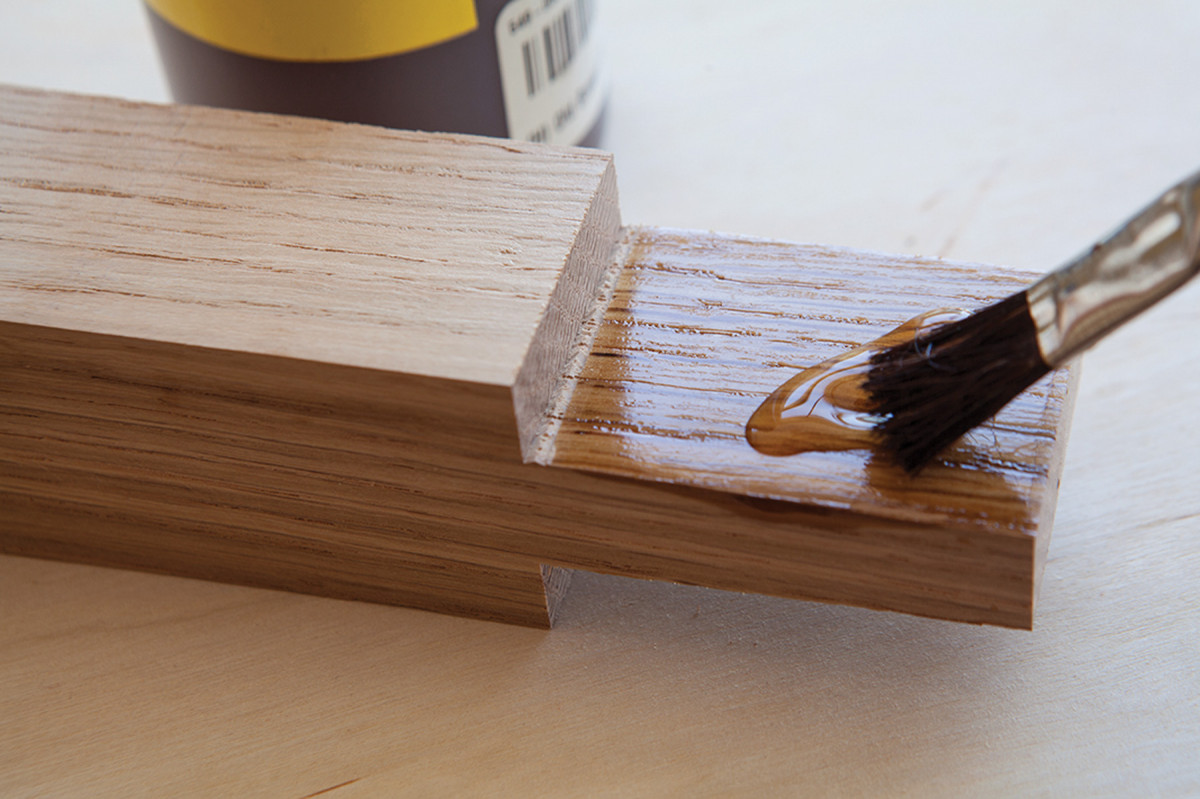
PVA doesn’t stick to itself. So if you have a tenon that has dried PVA on it, for example, a new coat of liquid PVA will not stick to the old glue. You have to scrape away the old glue down to the bare wood, so there’s a good chance you will remove some of the wood fibers and reduce the strength of the new joint.
With hide glue, you can just reapply more hide glue and assemble the joint.
Hide glue, on the other hand, sticks to itself. If you have a disassembled tenon with dried hide glue on it, you can reactivate it by brushing on some warm water then adding a new coat of fresh glue. The new and old glues will mingle to create a fresh bond. The first time you do this, you will hear angels sing.
A History of Liquid Hide Glue
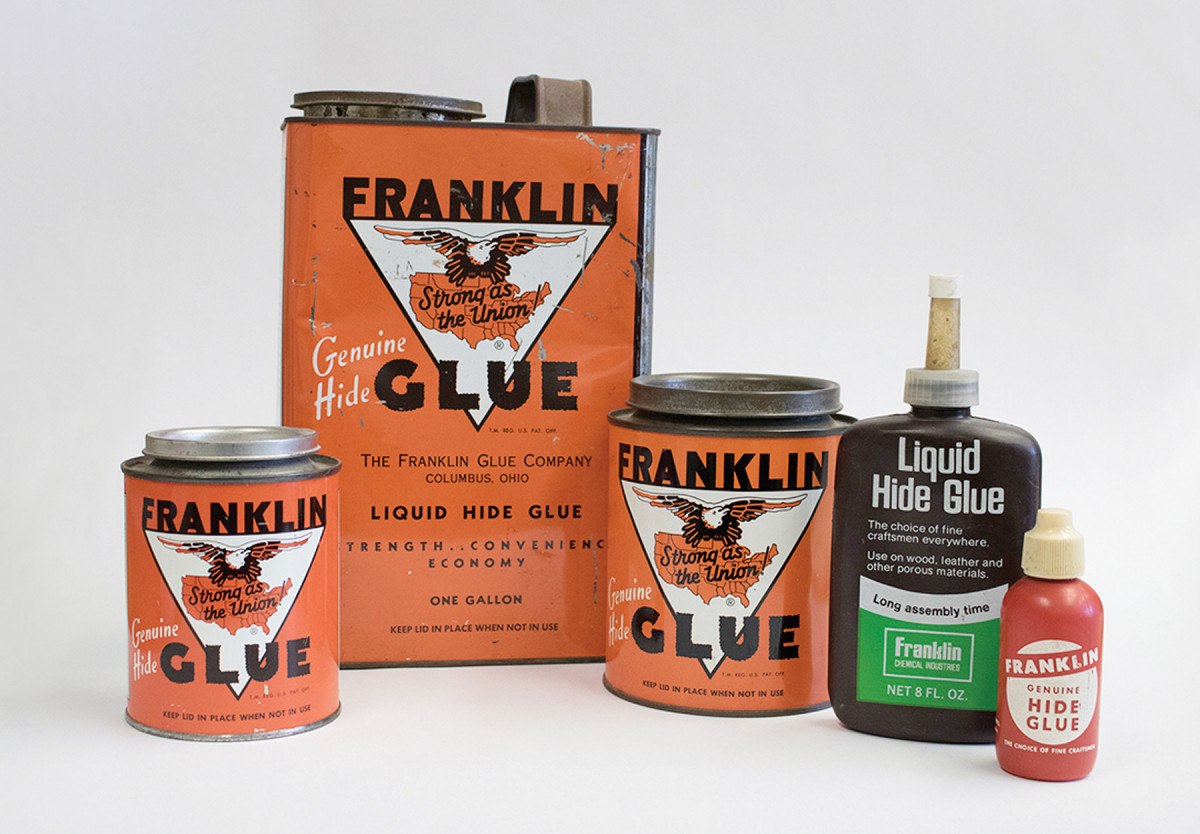
Early liquid hide glue. Franklin was the first to sell liquid hide glue.
Liquid hide glue has been sold commercially since the early part of the 20th century. Franklin International in Columbus, Ohio, was likely the first to sell the glue in the United States when the company was founded in 1935. And Franklin’s formula for the glue has remained basically the same for the last 81 years, according to company officials.
But liquid hide glue has been known to woodworkers for a much longer time. Somehow someone figured out that by adding urea (urine) to hot hide glue you could make it remain liquid at room temperature.
One unconfirmed story is that early French apprentices tried to sabotage their master’s hot hide glue by urinating in it. But their stunt ended up producing liquid hide glue instead.
While that may be lore, there are several 19th-century references to making liquid hide glue with the assistance of nitric or acetic acid.
But recent research suggests that liquid hide glue has been around a lot longer.
In 2010 archaeologists published a paper in the journal Archaeometry that concluded that liquid hide glue was used in the construction of a mosque in Uzbekistan in 1540.
Some exterior “muqarnas” (a decorative feature of a dome that can look like a honeycomb) were found to be held in place for the last 500 years by only animal glue and small dowels. When the glue was examined, some samples clearly showed the glue had been mixed with urine. Adding up to 4 percent urea makes the glue liquid at room temperatures and makes it easier to spread, according to the findings of the archaeologists.
So if anyone questions how long your liquid hide glue will last, you can safely say that it can last 540 years – or more.
Water-resistance
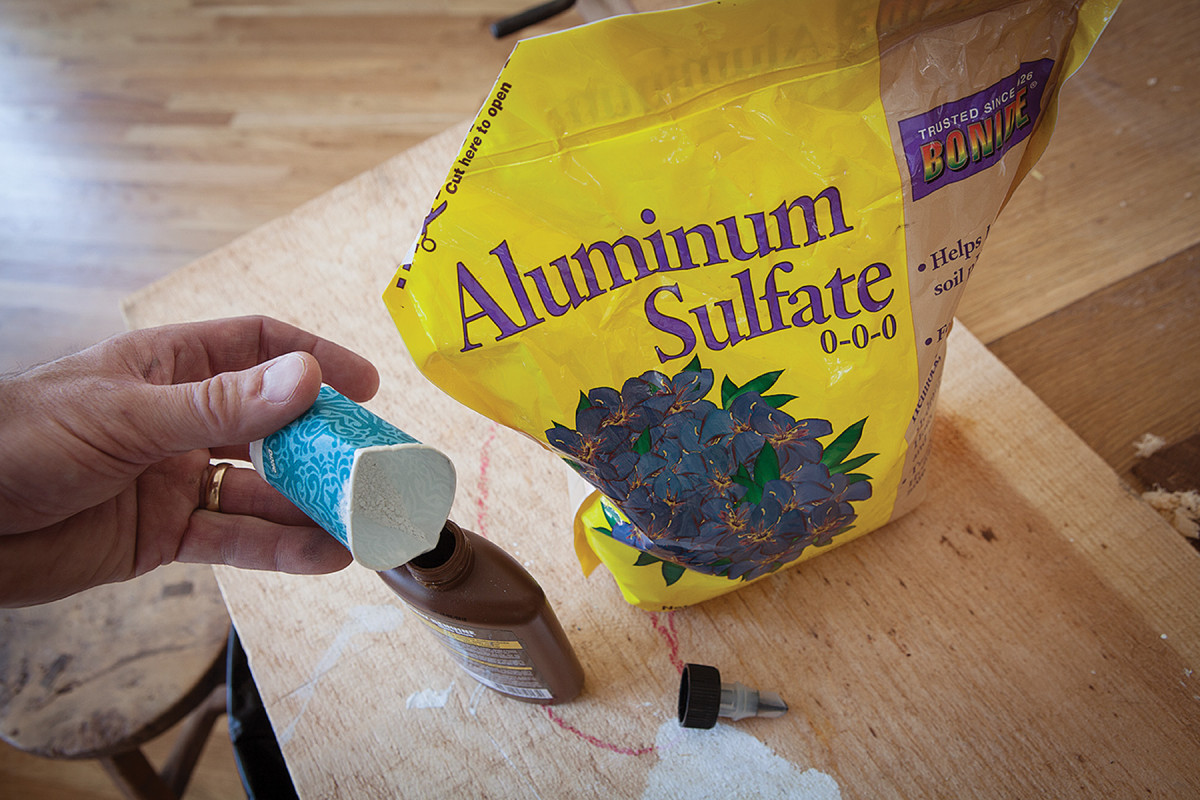
Sticky when wet. By adding a little aluminum sulfate to your liquid hide glue, you can make it water-resistant.
Both standard PVA and hide glue are susceptible to water. Don’t use them for outdoor furniture, cutting boards or anything else that will see more than the occasional splash of water.
If you need glue that is water-resistant or waterproof, you’ll need a special PVA or a different glue entirely, such as epoxy. Most PVA manufacturers make a water-resistant PVA.
And you can make your hide glue water-resistant by adding to the glue a little aluminum sulfate, a chemical that is usually used to adjust the soil acidity of houseplants or in tanning hides. Add about 2 grams of aluminum sulfate (half a teaspoon in the real world) to an 8-ounce bottle of liquid hide glue to make it water-resistant. Note that this additive will also make the bond irreversible with water.
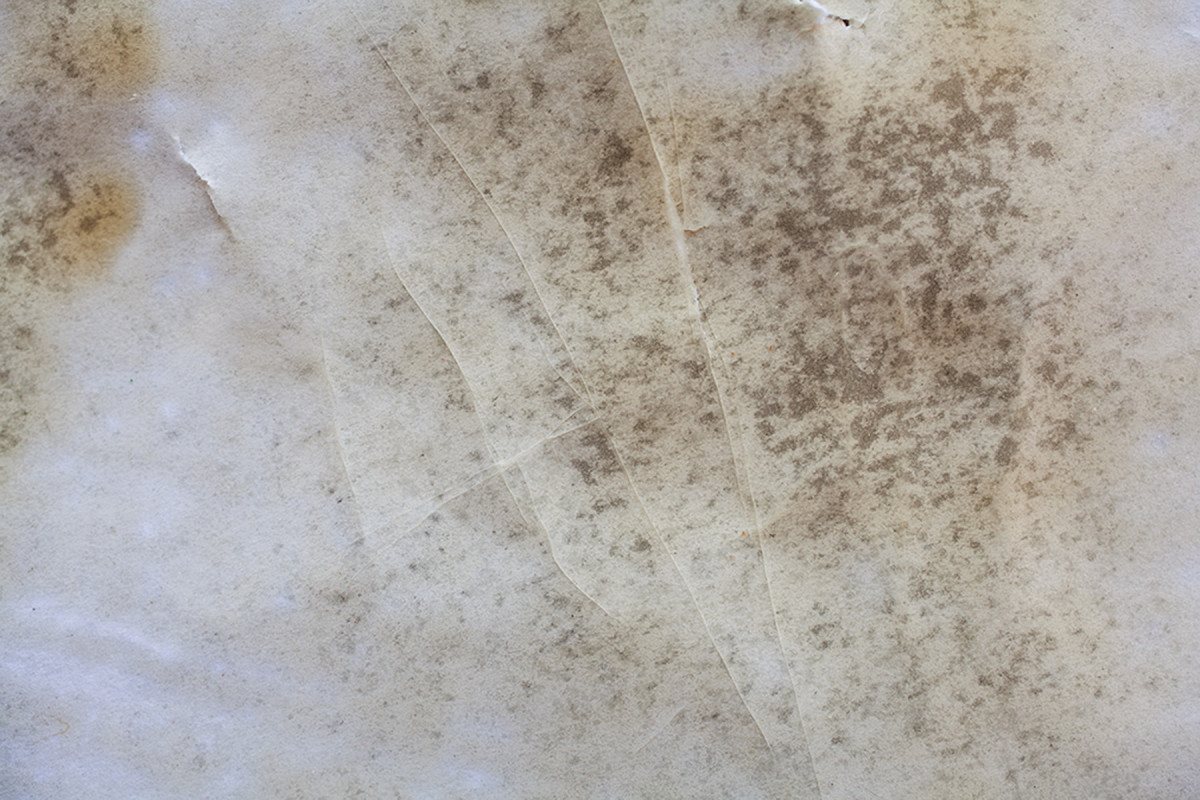
Transparency to Finishes
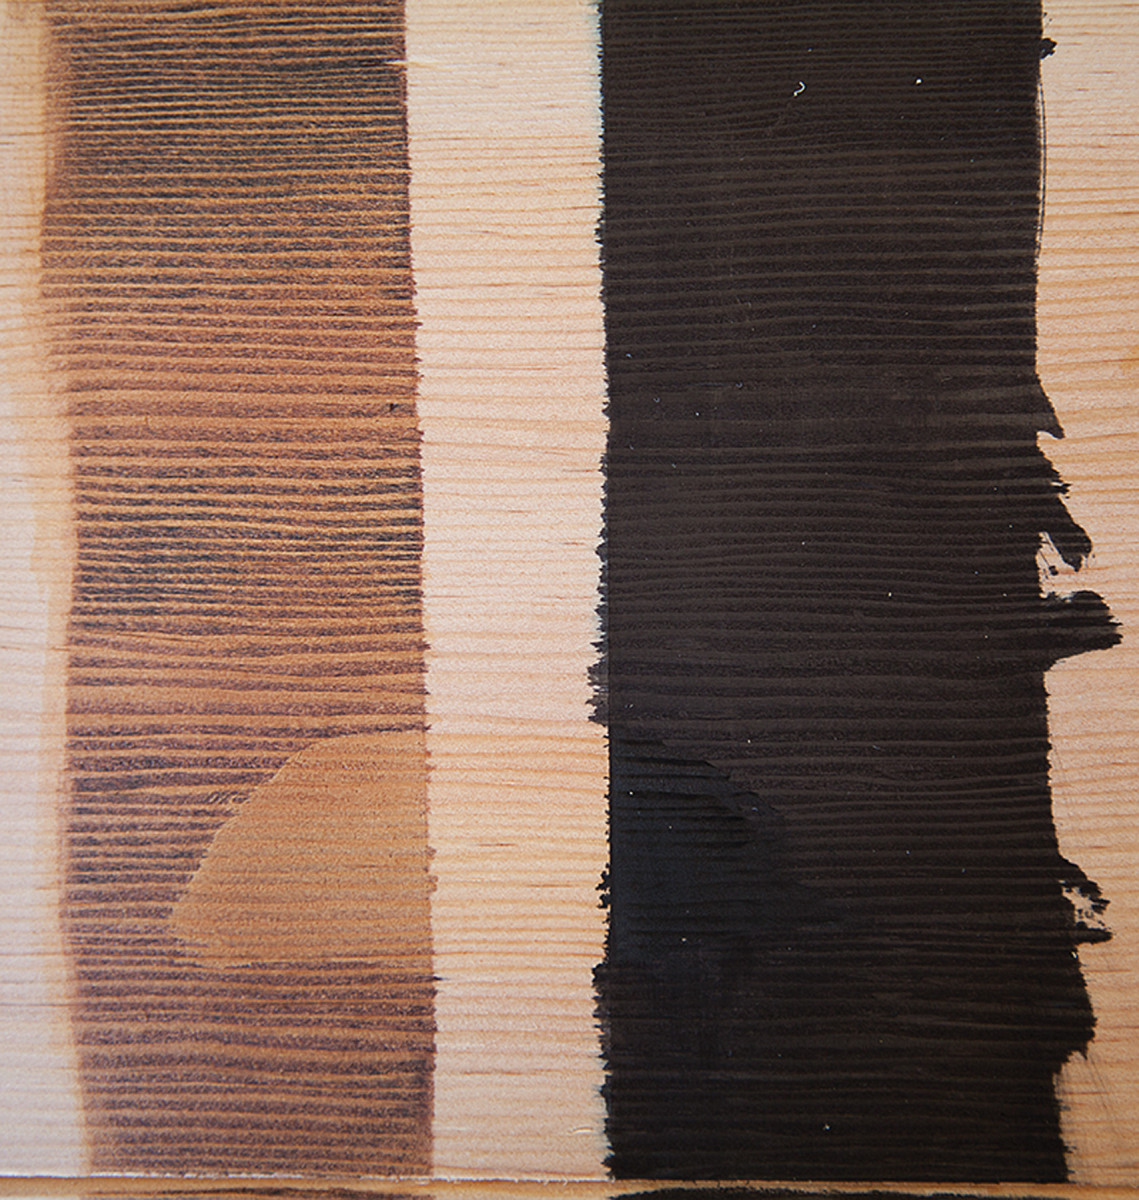
Bye-bye blotches. Small smears of hide glue are transparent to finishes (top) while small smears of PVA show up as white blotches. The left side of the board has a mahogany stain, the middle stripe is bare wood and the right has a black aniline dye.
If you don’t remove all the PVA from the surfaces of a project before applying a finish, the remains will show up as ugly white blotches. Hide glue, however, is transparent to many stains and finishes, including boiled linseed oil, most of the varnishes I’ve tried, lacquer and shellac.
To be sure, if you leave big globs of hide glue behind, your project will look ugly. But small hide glue smears and fingerprints that are invisible before you put on the finish will usually stay invisible.
Joint Lock
Less stress. With hide glue your dovetails are much less likely to lock up during assembly than when using PVAs. The reason is that liquid hide glue has a longer open time. In situations where you have to use PVA, it’s always best to have an assistant for big glue-ups.
One of the struggles with any adhesive is getting a complex assembly together before the glue’s open time expires. A big row of carcase dovetails is a prime example. Many complex joints that go together fairly easily when they are assembled dry will lock up before they are completely closed when glue is added.
I have found that liquid hide glue is much less likely to seize your joints during assembly. While some people have theorized that this is because hide glue has less water in it than PVA does, that’s probably not the reason. The truth is that both glues’ water content is about the same: PVA is 54 percent water; liquid hide glue is 48 percent water, according to glue experts at Franklin International.
The real reason liquid hide glue is less likely to lock up your joints mid-stream is because of liquid hide’s longer open time. Liquid hide glue simply works more slowly than PVA.
Strength
Hide glue and standard PVA have about the same strength at room temperature. You can do all sorts of strength and temperature tests, but the bottom line is this: A good, clean joint made with PVA or liquid hide glue is plenty strong enough for furniture inside a home. Bond strength isn’t a problem with either glue.
One wrinkle to this discussion involves the use of “toothing planes” when using hide glue for veneering. Old woodworking textbooks state that you should tooth all of your veneered surfaces before using any sort of hide glue – liquid or hot. The rationale is that toothing the surface will increase your gluing area and therefore the bond.
While some long-time woodworkers still swear by the advice (and I won’t contradict them), the scientists at Franklin International contend something different. While you will increase the gluing surface with a toothing plane, they say, you’ll also increase the incidence of wood failure when the joint fails because of the shredded wood fibers (and I won’t contradict them, either).
As many veneered surfaces have survived hundreds of years (and others haven’t), you’ll have to draw your own conclusions.
Another thing that can reduce the strength of PVA and hide glue is when the wood has been burnished, usually by a dull cutter in a machine. A burnished surface will generally look shiny and sometimes black. The water in any glue has a difficult time penetrating a burnished surface, and the joint ends up being weak.
How do you test for a burnished surface? Easy. Put a drop of water on the surface to be joined. If the droplet sinks in quickly, the wood is good to go. If the drop stands on the surface for a long time, the surface is probably burnished.
W. Patrick Edwards and ‘Old Brown Glue’
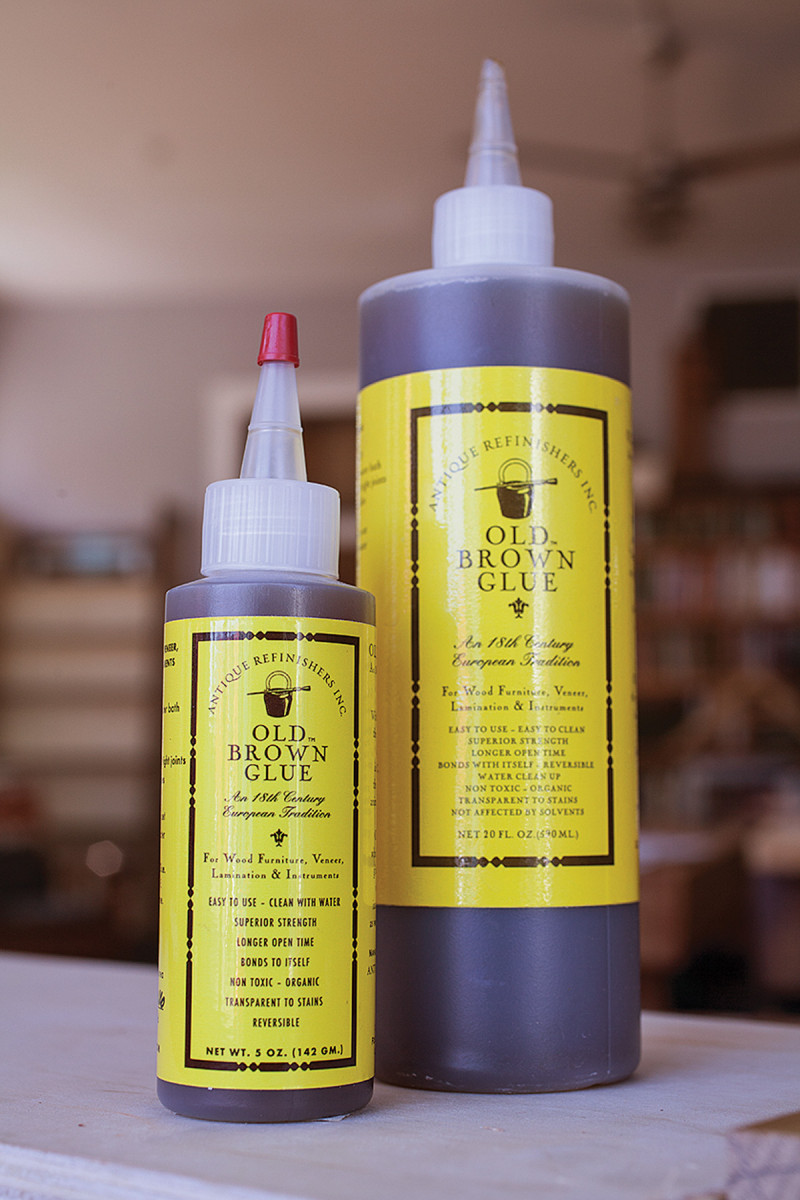
After 37 tries. W. Patrick Edwards cooks up Old Brown Glue in the bathroom of his San Diego shop and ships it all over the world. It is made using only three ingredients: collagen, water and urea.
Most people know W. Patrick Edwards for his stunning marquetry work or for founding the American School of French Marquetry in San Diego. But what few people know is that he also runs a glue empire from his bathroom.
Like any furniture conservator, marqueter or maker of historical pieces, Edwards has long been a devotee of hide glue because of its many furniture-friendly characteristics. But during the early part of his career there was always one task he was trying to accomplish that hot hide glue wasn’t suited for: veneering columns (particularly those with a tight radius).
After studying marquetry and conservation in France in 1992-93, Edwards was invited to join an international marquetry conservation group. And one year the group took up the topic of how to lower the gel point of hot hide glue so it was liquid at room temperature.
The conclusion: Add “thiourea” (a chemical similar to urea but a carcinogen) to hot hide glue and that will lower its gel point so it’s liquid at room temperature.
Edwards knew that thiourea was similar to urea and began cooking up different batches of glue with urea and water back at his shop in California. After 37 different recipes, he found the mixture that had the properties he wanted.
For the next 10 years he used his liquid hide glue in his personal work. He finally veneered his columns (“It worked perfectly on the first try!”) and eventually he began using the glue in about 80 percent of his work.
Then Edwards gave a bottle to chairmaker Brian Boggs. Boggs loved it and told Joel Moskowitz at Tools for Working Wood about it. Moskowitz called Edwards.
“Joel said: ‘I want to sell it,’” Edwards said. “He said: ‘Put it in a small bottle and a big bottle and we’ll sell both.’ The rest is history.”
Today Edwards makes Old Brown Glue in a bathroom of his San Diego workshop using double boilers. It takes him about 90 minutes to fill 200 bottles and he makes hundreds of bottles a month.
“I am a reluctant glue maker,” Edwards said. “I want to build, restore and teach. But (making glue) may be the thing that I do full time after I retire. It’s brainless.”
While the process of making it might seem brainless now, getting to the brainless part required a stroke of both genius and persistence.
Glue Creep
PVAs are flexible, which can be an advantage when you are gluing joints where there is a lot of cross-grain wood movement. A good example of this is an 8″-wide apron for a sideboard that is tenoned into the legs. Flexibility in that joint is good.
But flexibility is bad when it comes to veneering or bent laminations. Flexibility – called “creep” – can cause gaps to open in veneered work or bent laminations to become slightly unbent. These are two examples where hide glue in any form really excels.
How to Measure Glue Strength & Freshness
Don’t be a creep. PVAs are not ideal for bent laminations, such as this leg. The flexibility of the glue will allow the leg to straighten out a bit. Hide glue or a plastic resin glue are superior choices.
Hide glue tends to give off a strong ammonia smell when it has turned bad. But is it possible to judge its freshness and strength before the glue turns totally bad?
Recently I spent a day with two glue scientists at Franklin International – Bob Behnke, the technical service manager for Titebond Products, and Dale Zimmerman, a technical service specialist. While both work for Franklin, both men have always put science first in my experience. They offered two ways to test hide glue to make sure it is still good.
The paper test. If a thin layer of hide glue can cure hard and brittle on a sheet of typing paper, then it’s good to go. Here you can see the cracks in the hide glue from simply flexing the paper.
Method 1: Smear a thin layer of liquid hide glue on a piece of typing paper. To get it to dry quickly, put it on the floor in front of your refrigerator – the warm air expelled from the appliance will speed the drying. Or you can put it in an oven set to 150° F for 10 minutes to see if it will dry.
After trying to force-dry the glue, tap the glue film with your fingernail to see if it is hard. You also can bend the paper to see if the film of glue will crack or pop – those are both indicators that the glue is still good.
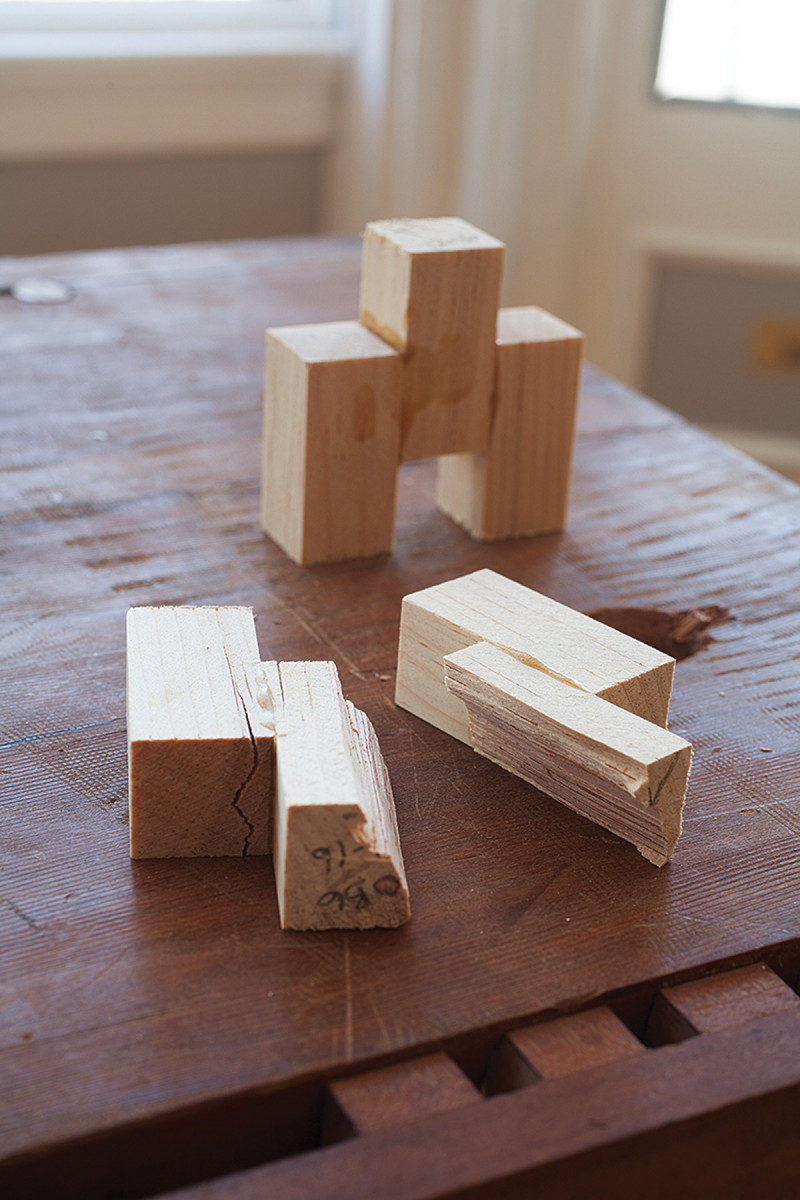
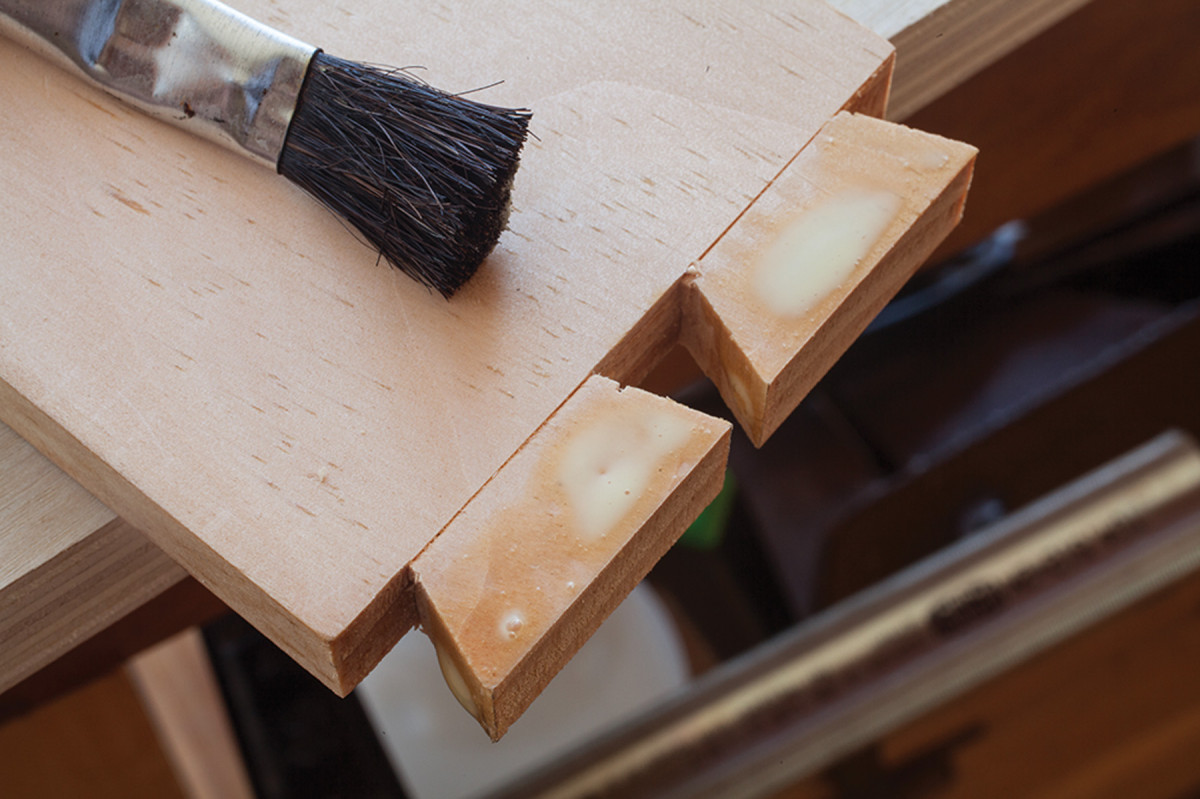
The hammer test. Glue up three blocks as shown. Clamp them up overnight. The next day put the assembly on your benchtop and strike the middle block. If the glue fails, buy some new glue. If the wood fails (as shown in the photo), use the glue in your projects.
Method 2: Take three blocks of wood that measure 3⁄4” x 3⁄4” x 2″. Glue them together edge-to-edge so that the middle block is offset 1″ from the two others (see the photo for details). Clamp up the assembly and let it sit overnight. In the morning, place the assembly on the benchtop and hit the protruding center block with a hammer to try to destroy the joint. You will quickly know if the glue is good (wood failure) or it has gone bad (immediate glue failure).
Conclusions & Personal Notes
It’s difficult to get woodworkers to switch to a new (or very old) glue, even if the facts are persuasive. I’ve spent many years demonstrating the advantages of both hot hide glue and liquid hide glue. The only method that seems to convert people is this: Lock a woodworker in a classroom where the only adhesive available is hide glue. They’ll use it successfully and will then readily accept it into their shop, usually side-by-side with their PVAs.
And that’s OK. As I said before, few of us work in living history museums, so we don’t have to be purists. We can use any glue technology we want to get the job done.
Now because I cannot lock you in a shop with hide glue, you will have to take the first step. Order a bottle and give it a try. It is a small investment (about $8), but the payoff is enormous – especially if you’ve ever accidentally put slot A into tab B.
I know I have.
Video: Watch a hide glue joint being reversed.
Here are some supplies and tools we find essential in our everyday work around the shop. We may receive a commission from sales referred by our links; however, we have carefully selected these products for their usefulness and quality.