We may receive a commission when you use our affiliate links. However, this does not impact our recommendations.
Tips for Finishing Walnut
THERE’S NO DENYING that most walnut looks
great with nothing more than a few coats of oil.
Here we’ll show you some tricks to make your
walnut projects look even better.
by Jeff Gorton
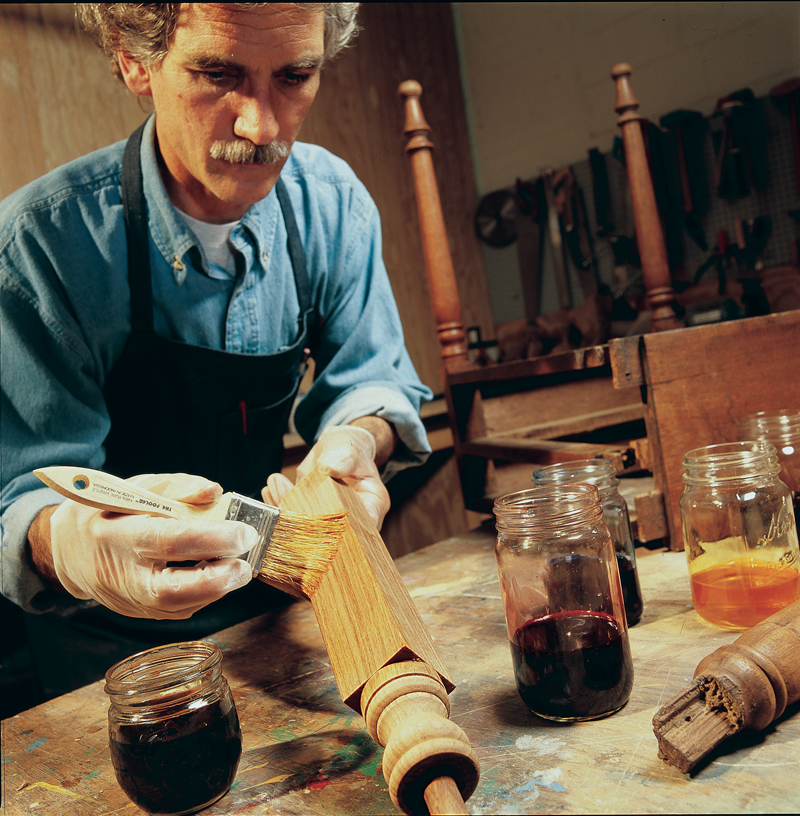
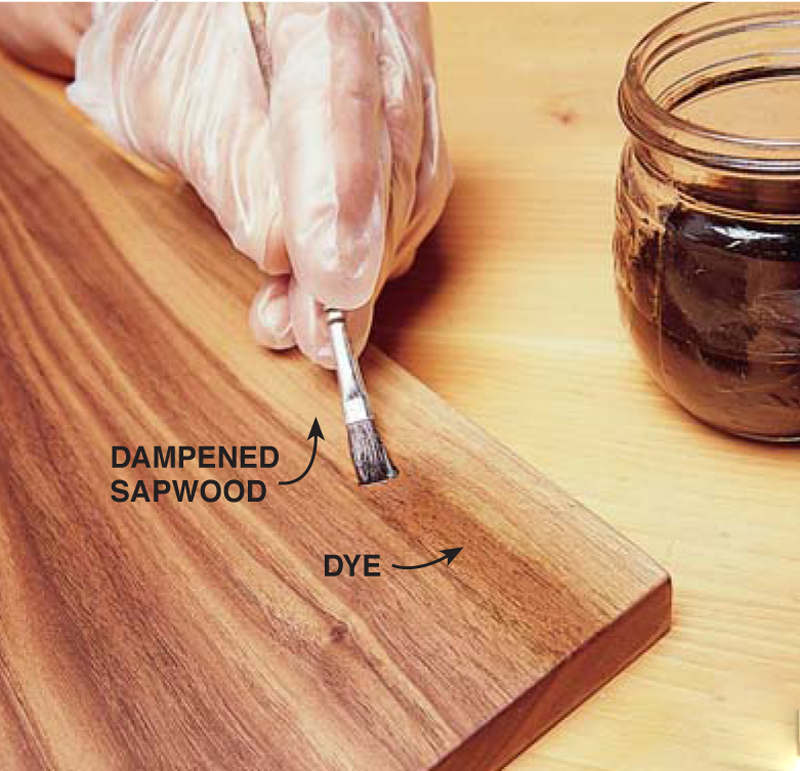
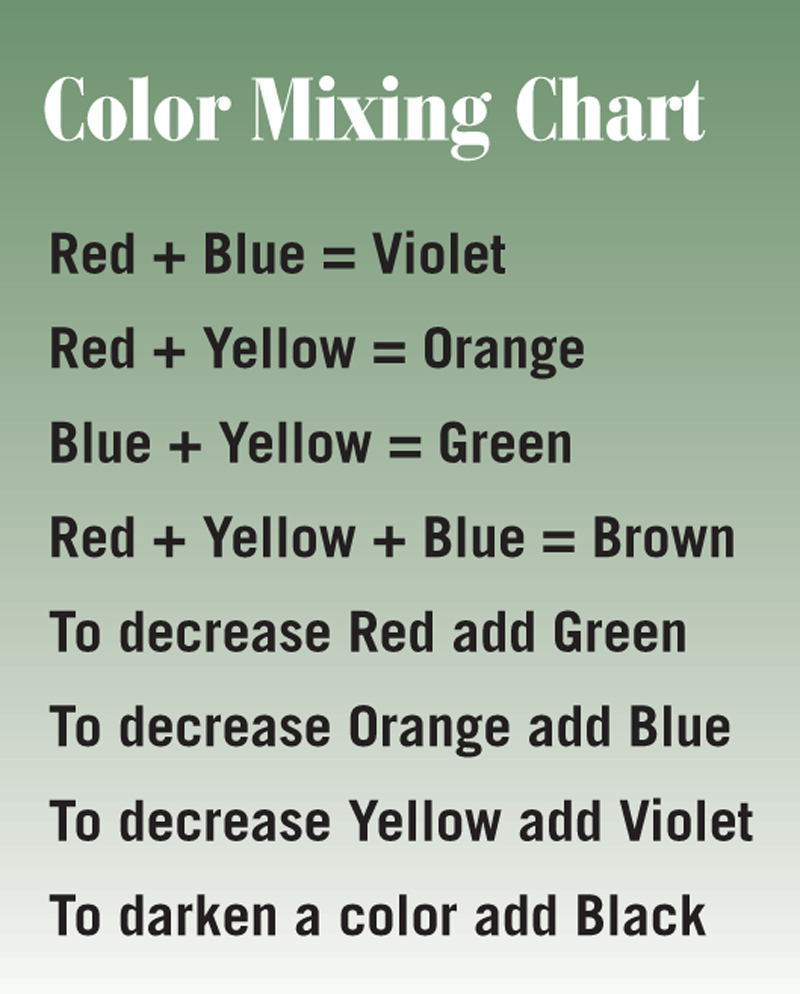
Make Sapwood DisappearEven select walnut boards are likely to contain an Dyeing sapwood looks paint-by-number simple but there are a few tricks. The key We’re using water-soluble dye because it resists fading Here are a few more tips for working with watersoluble – Wet the end grain before dyeing it to keep it from soaking up too – Start with a diluted dye; you can always increase the intensity of the – Adjust the color by adding another layer (refer to the Color Mixing – The color you see when you apply the dye to the wood is close to – Lighten dyed wood by wiping off some dye with a damp rag. If you Allow the dyed wood to dry completely, usually overnight. Then seal Glaze is essentially thinned paint that’s layered over a Complete the process of blending the sapwood by applying Allow the glaze to |
Click on any image to view a larger version.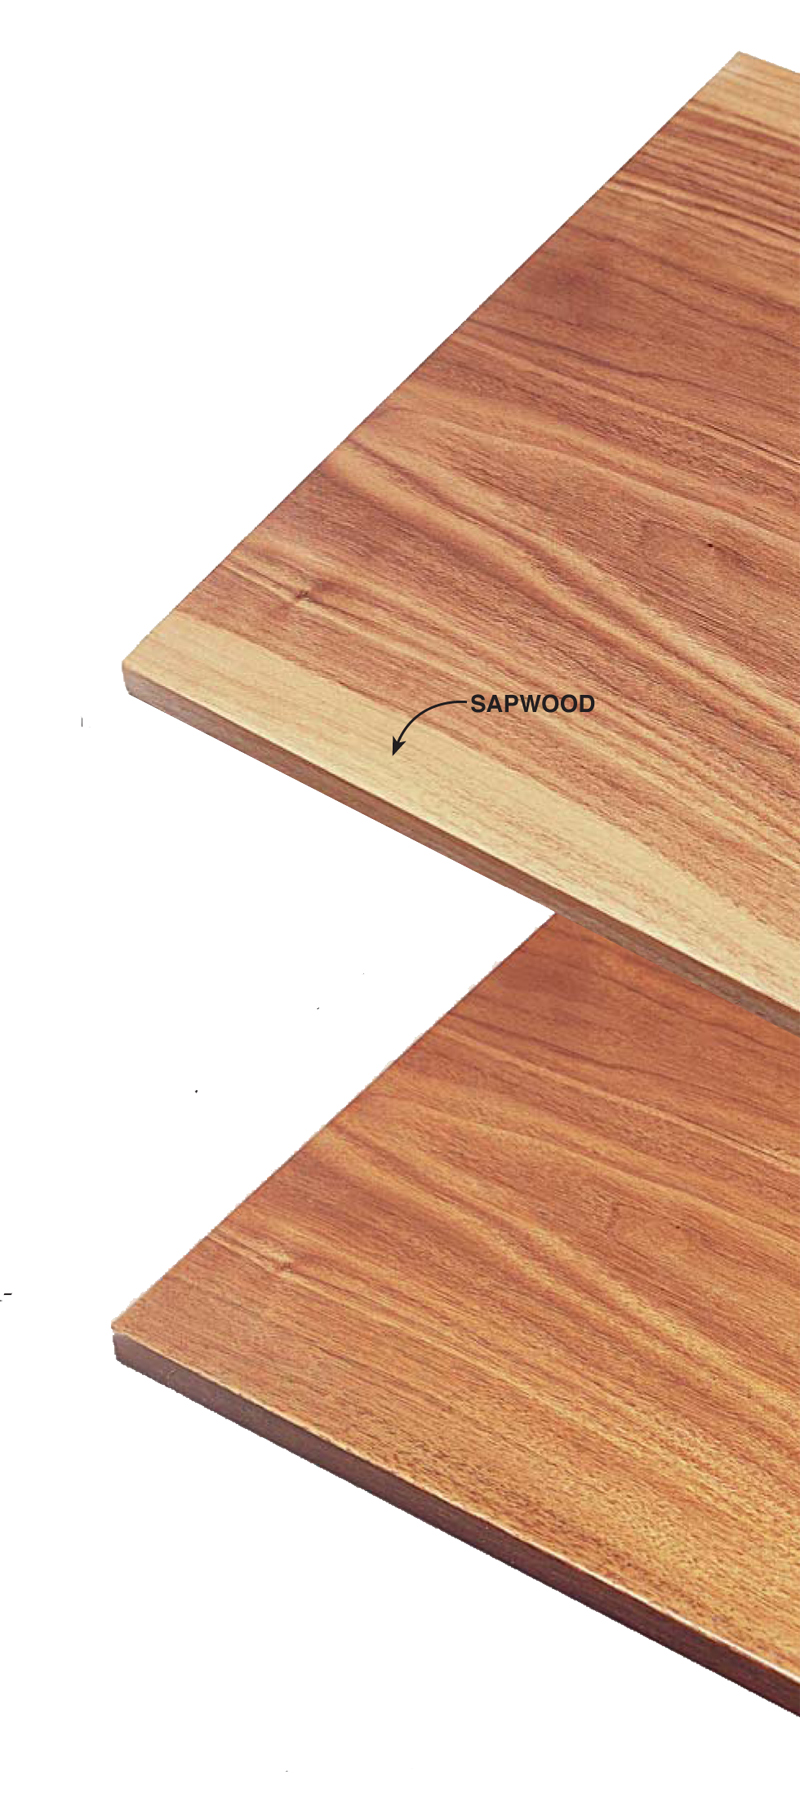
1. Use a small artist’s paint brush to carefully
2. Apply the glaze with a rag or brush. Remove the excess,
|


End Grain Can Be BeautifulEnd grain reveals much about a board’s history and provides |
 |
Matching Old WalnutAs walnut ages its color changes. In most cases the new walnut will have to be lightened Once the wood has been lightened with bleach, mix dye to match the lightest, most |

1. Bleach your replacement part by
2. Dye the bleached wood to approximate
Brush or wipe a thin layer of glaze over
|


Warming Up Colorless FinishesWater-borne varnishes and lacquer are often used on If you plan on using a water-borne varnish or lacquer finish, Sources(Source information may have changed since the original publication date.) Woodworker’s Supply, Inc. Casper, Wyoming 82601 Woodcraft P.O. Box 1686 Parkersburg, WV 26102-1686 Constantine’s Bronx, NY 10461 Supplies
This story originally appeared in American Woodworker October 1999, Issue #75.
|

|


Here are some supplies and tools we find essential in our everyday work around the shop. We may receive a commission from sales referred by our links; however, we have carefully selected these products for their usefulness and quality.