


We may receive a commission when you use our affiliate links. However, this does not impact our recommendations.
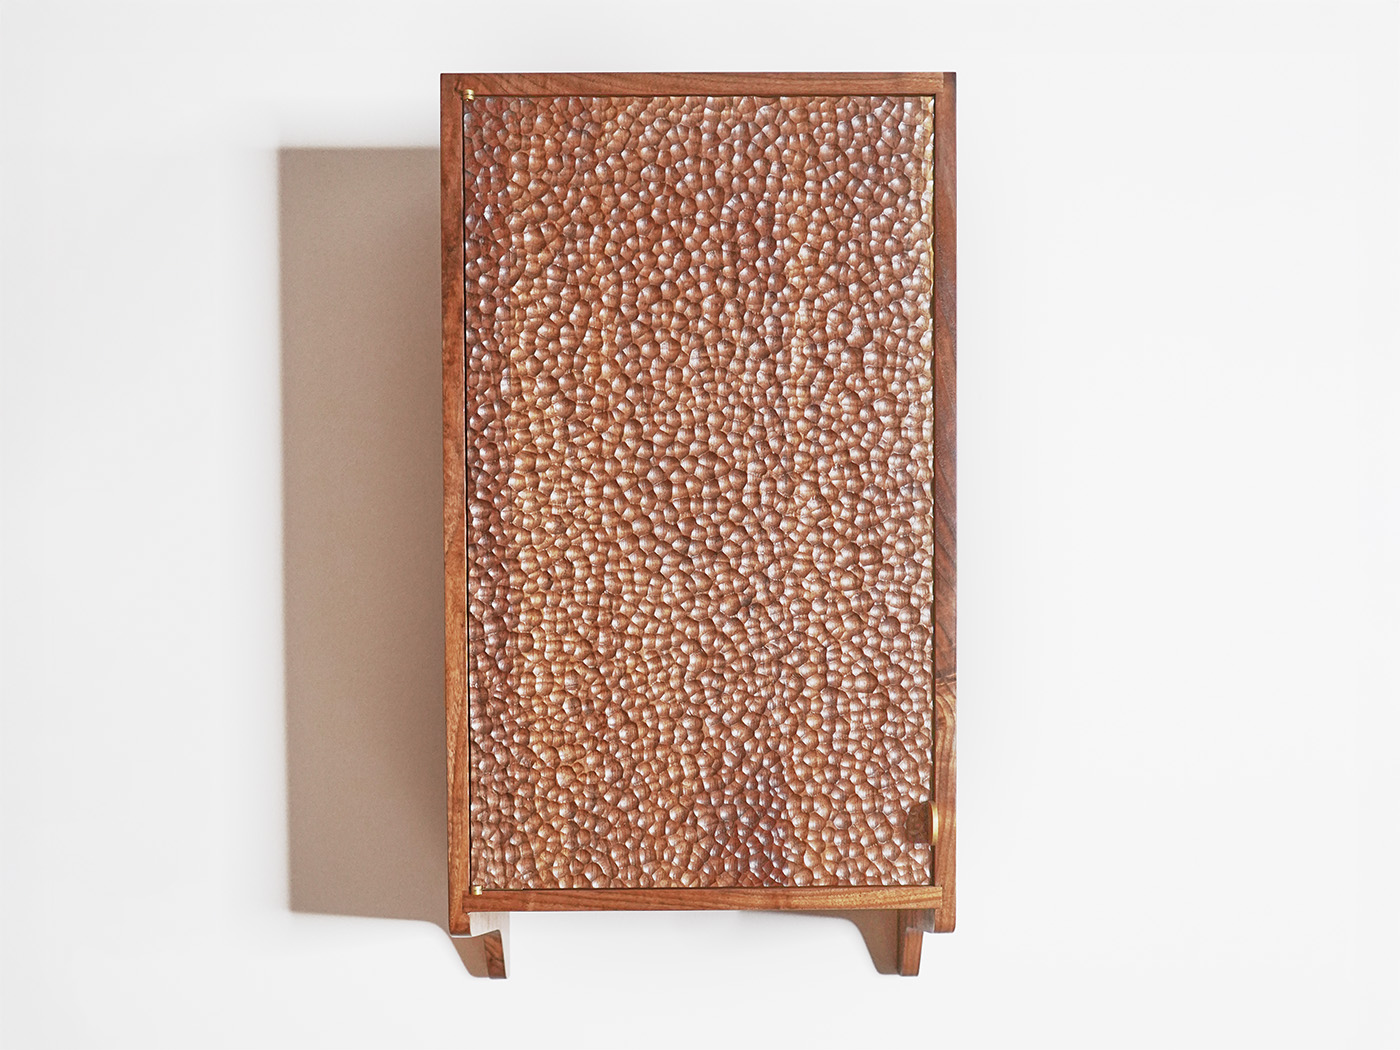
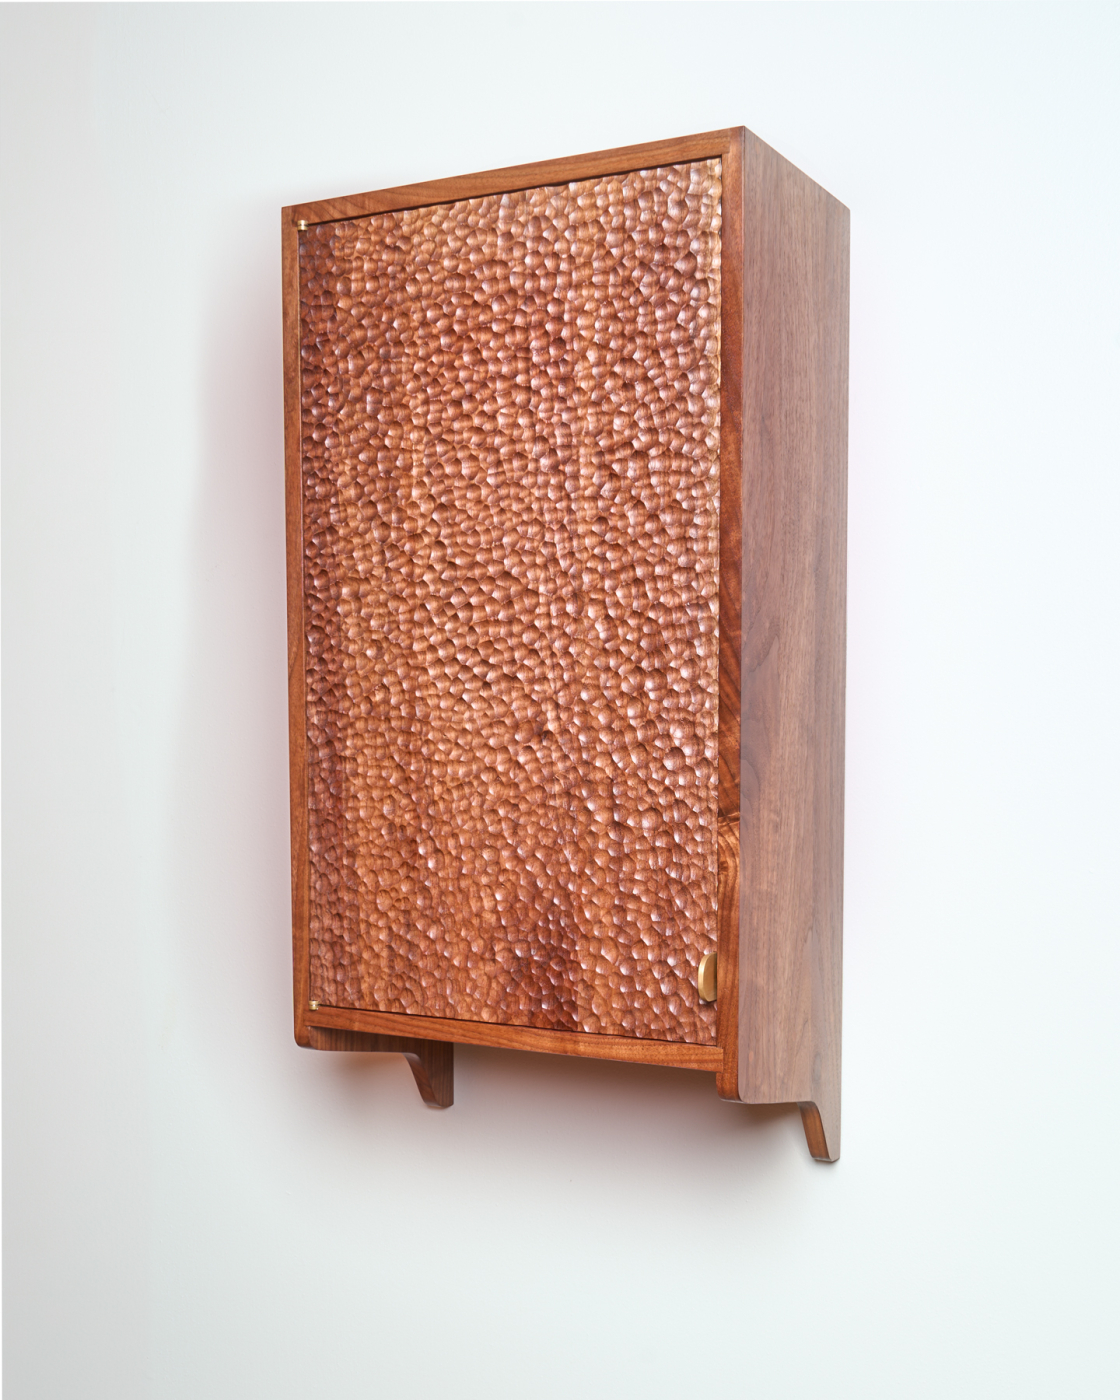
This simple cabinet is elevated by thoughtful details.
When you get right down to it, a wall cabinet is basically a box with a door on it. That doesn’t mean there isn’t plenty of opportunity for creativity though. The design for this one here evolved over time in my sketchbook, but as soon as I started actually building it, I changed almost every single thing… Why? Bits of it were practical, but mostly it was due to the fact that as soon as I started cutting things out, the wood inspired me in a different way than I expected. Some of the core ideas remained intact—I was always going to make it out of Walnut, and a cabinet by Laura Mays inspired the idea of texturing the door, though the choice of texture changed. Some details came into play later, like the shape of the decorative cutout, which is cribbed from a Maloof design.
More mid-century style furniture: Mid Century Modern Articles Online
In our store: Building Techniques in Mid-Century Modern Furniture Video Download
Online Extra: Make a Maloof-style Finish
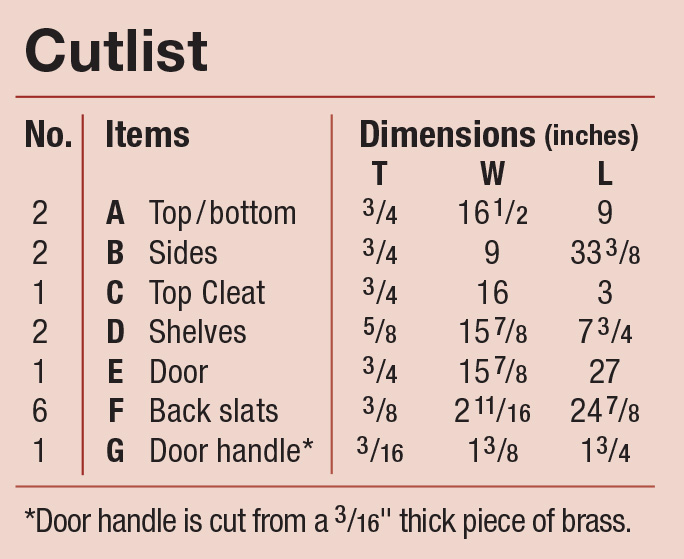
Cutlist and Diagrams
 Hardware:
Adjustable Ball Catch (Woodcraft; item #27H39)
Pair of Offset Pivot Hinges (Brusso; 1-3/4” x 3/8” x 1/8” extended)
8 Shelf Pins; brass finish
Basic Joinery
Speaking of Sam Maloof, the joinery decisions for the cabinet were also closely inspired by him. I’ve been reading his autobiography, and his pragmatic approach really spoke to me when it came to the joinery. Sure, I could have actually used dowels for the joints, but it would have added a lot of complexity with no real upside. Instead, screws with plugs over the top, just like his chairs, work great. The top and bottom are held in a rabbet and dado—but sticking with the straightforward theme, we chose a fool-proof way to cut them.
Prepping Stock
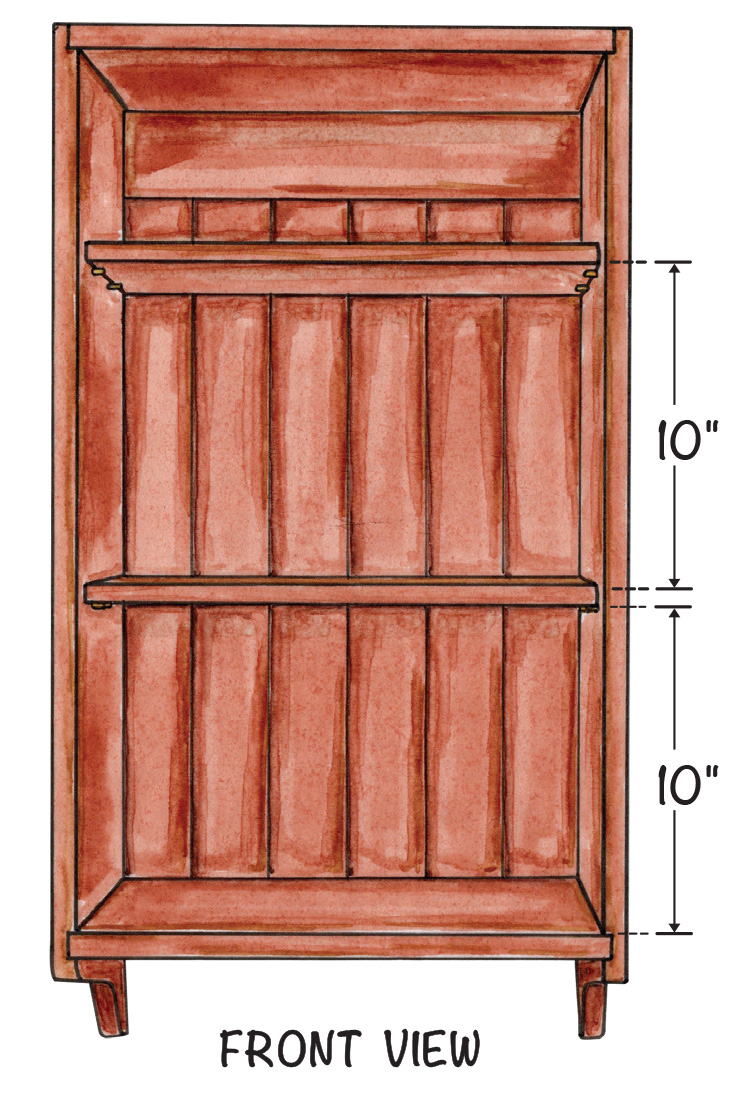
With the size of this wall cabinet (outlined in the measurements on page 51), it was pretty simple to find stock that was wide enough to create all of the case pieces without doing a glue up. But just because you could, doesn’t mean that you should. There is some debate whether alternating growth rings actually helps keep panels flat or not, so what I decided to do was to break apart my stock into equal strips, then match them up for the best-looking panels possible. My goal was to create straight-grained panels where I could, and avoid most of the sap wood (I do, however, use that later on for the back panel).
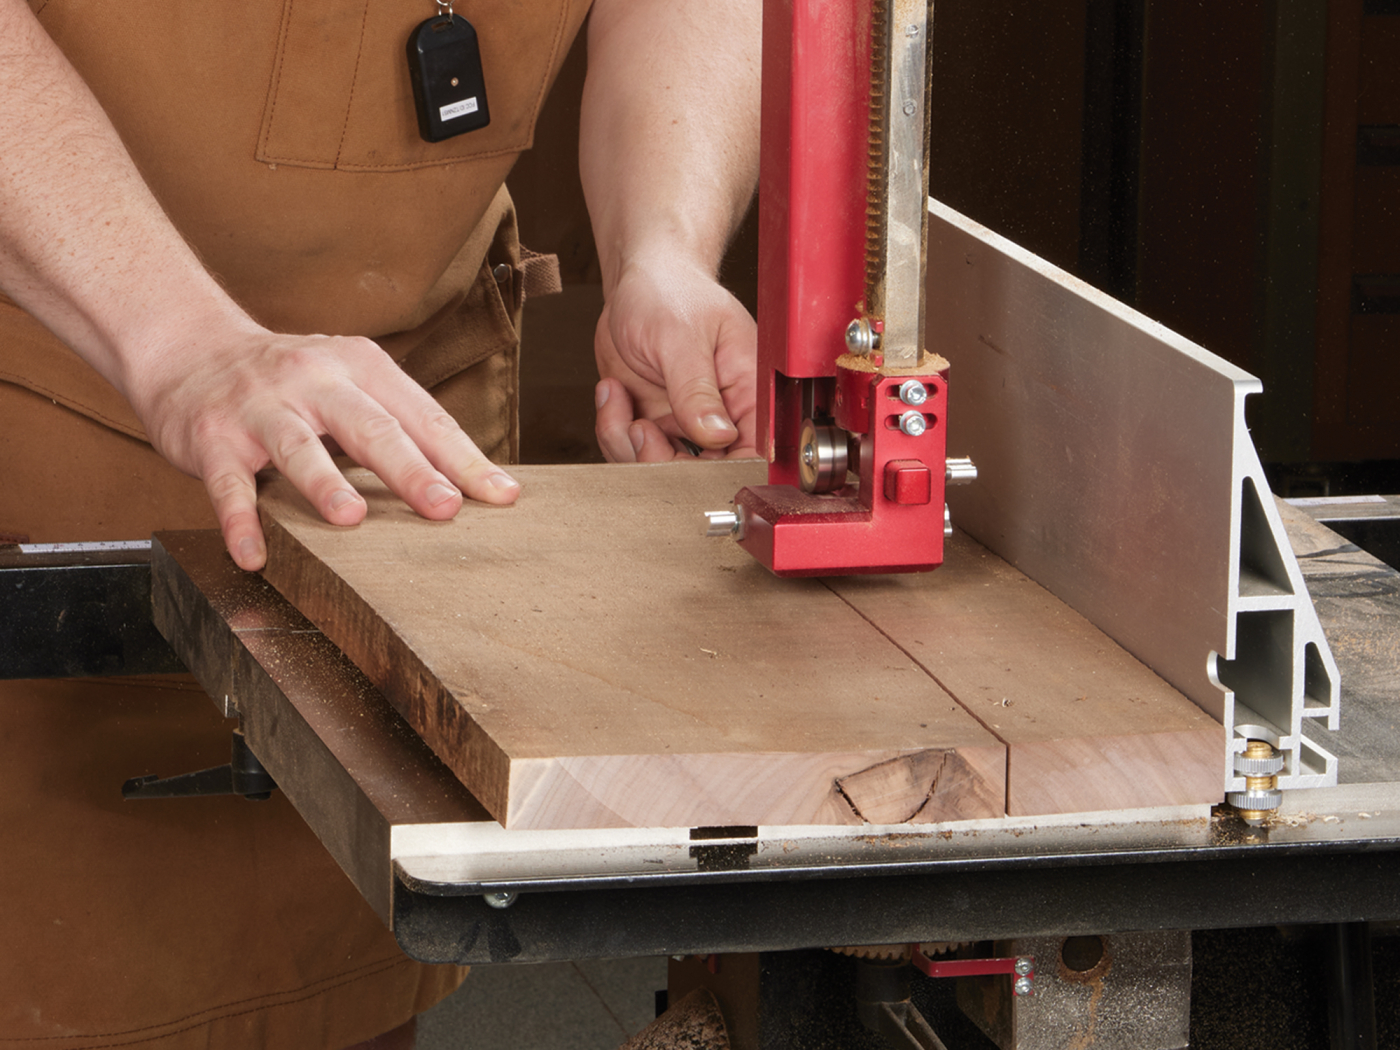
1 The bandsaw is a great way to break down stock. The rough stock isn’t flat, and the band saw can rip the boards apart without much fear of the blade getting pinched during the cut.
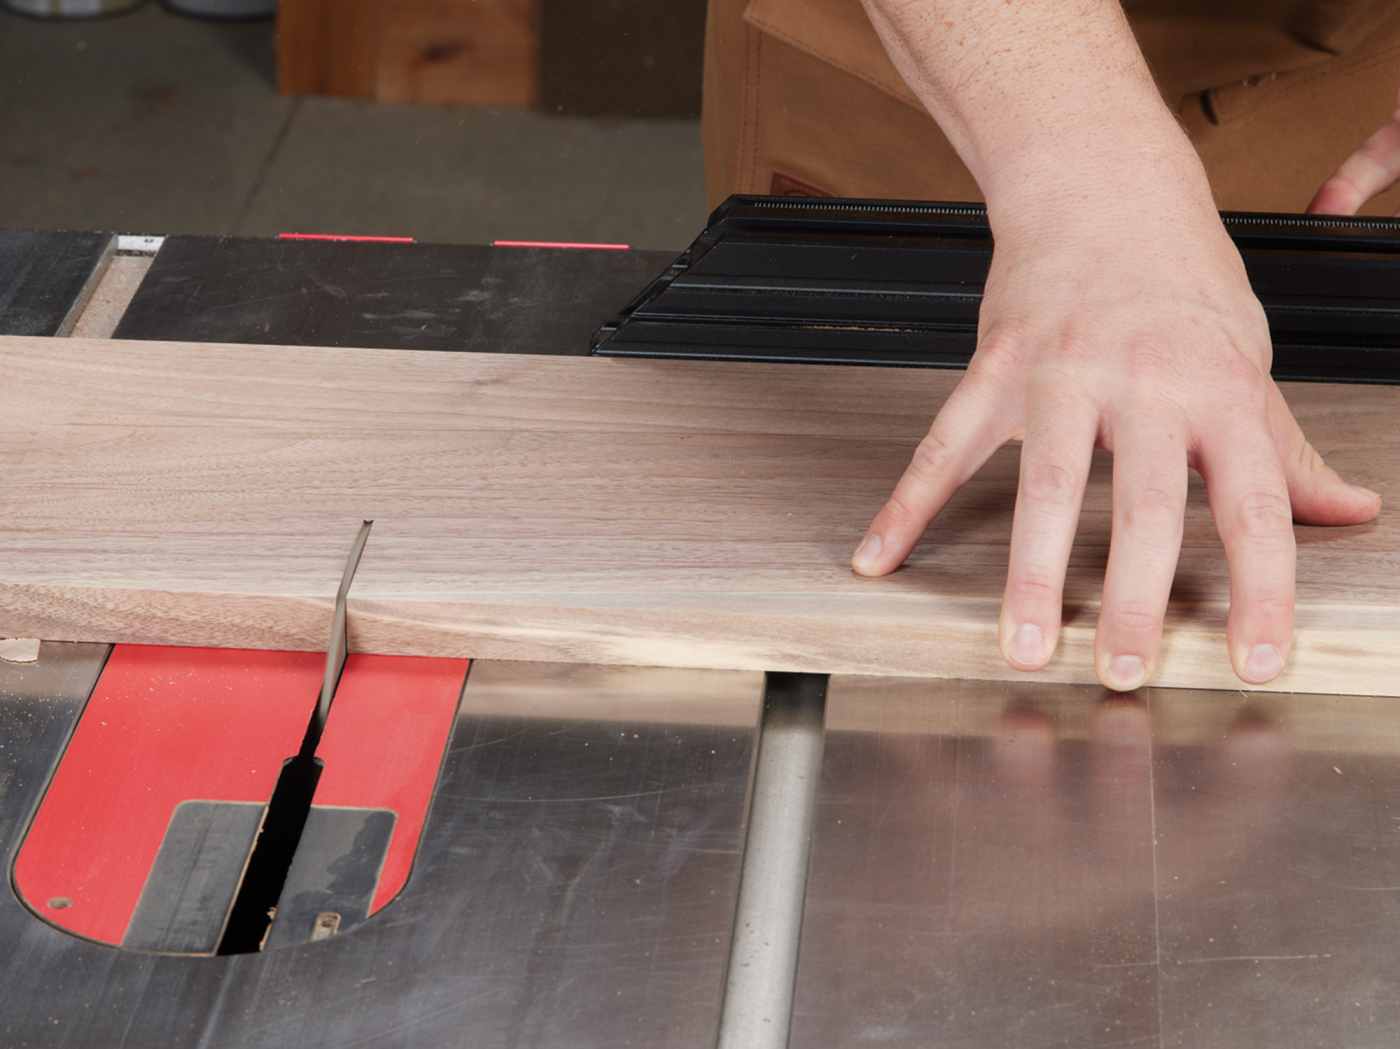
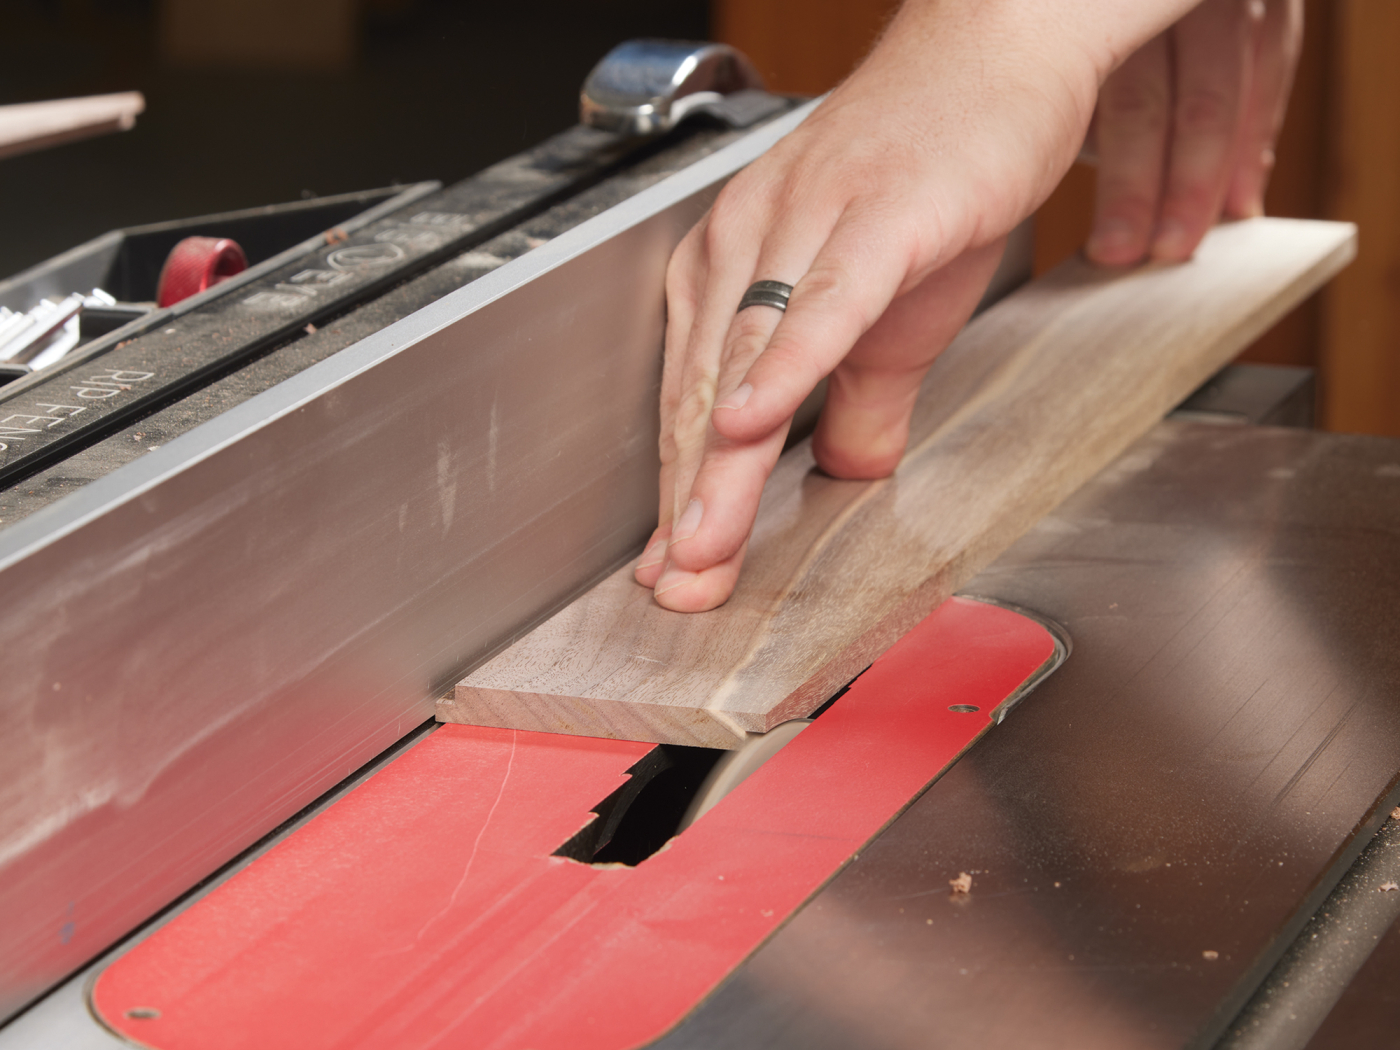
As you can see in the photos above and below, my breakdown process is as follows. Start by ripping the stock to rough width at the bandsaw. Joint a face to clean up the surface and create a flat reference face (and while there, joint an edge as well). Now, head over to the table saw to rip the stock to the same width. The goal here was to create panels that were at the final width, with equal number of boards making up each panel.
2 Joint a face and edge on each workpiece. An obnoxiously large 16″ jointer is not necessary, but is fun.
3 Rip the stock to the final width.
Grain Match & Glue
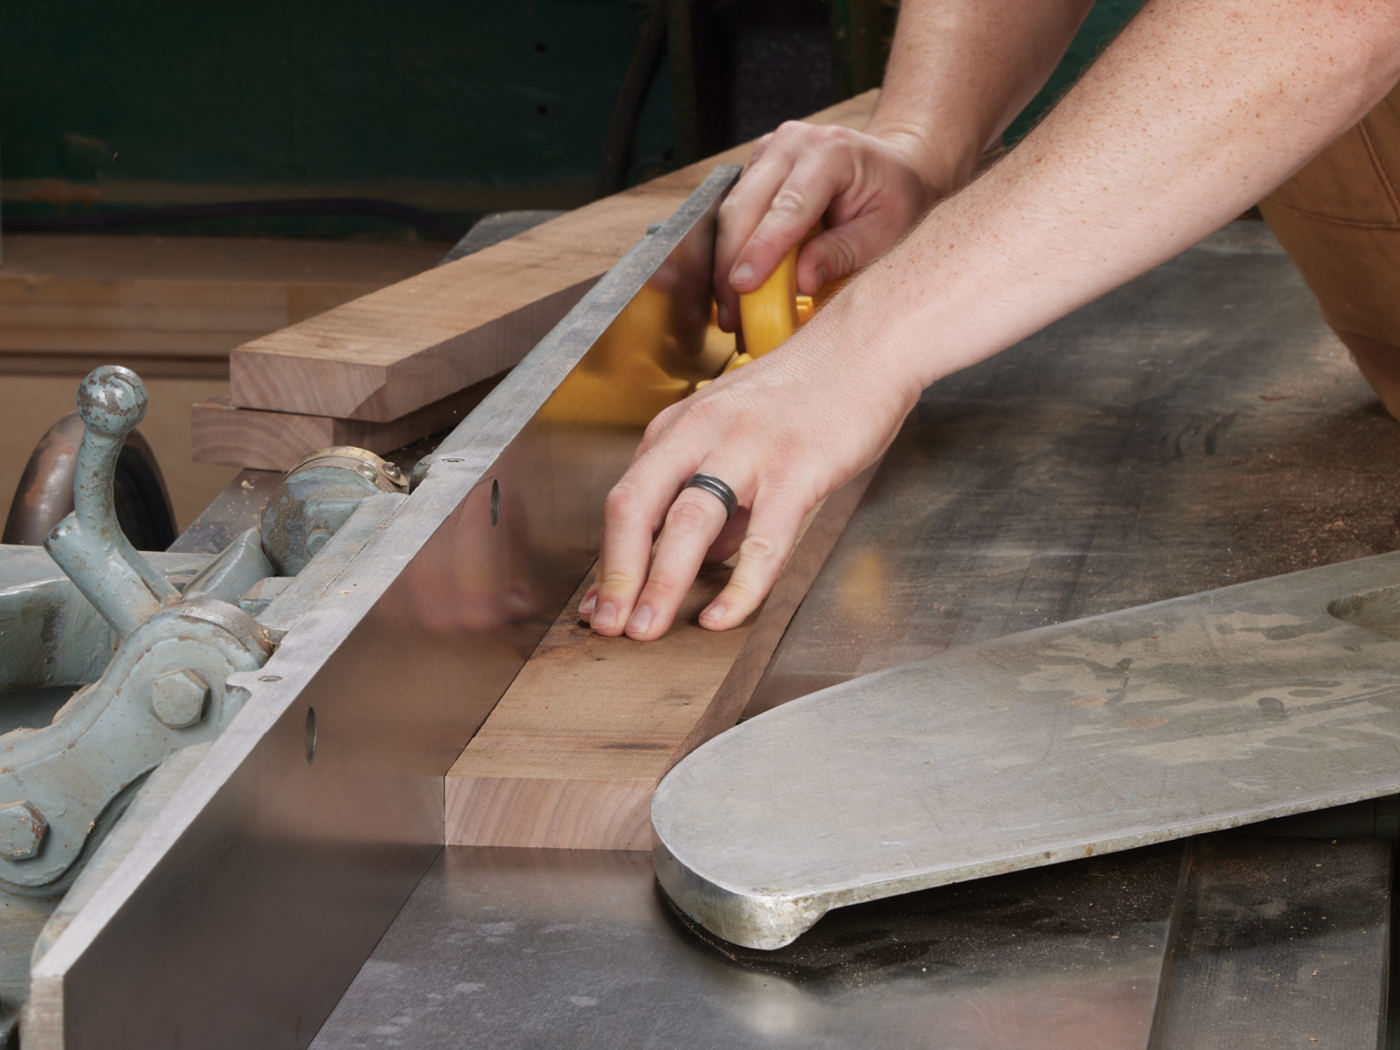
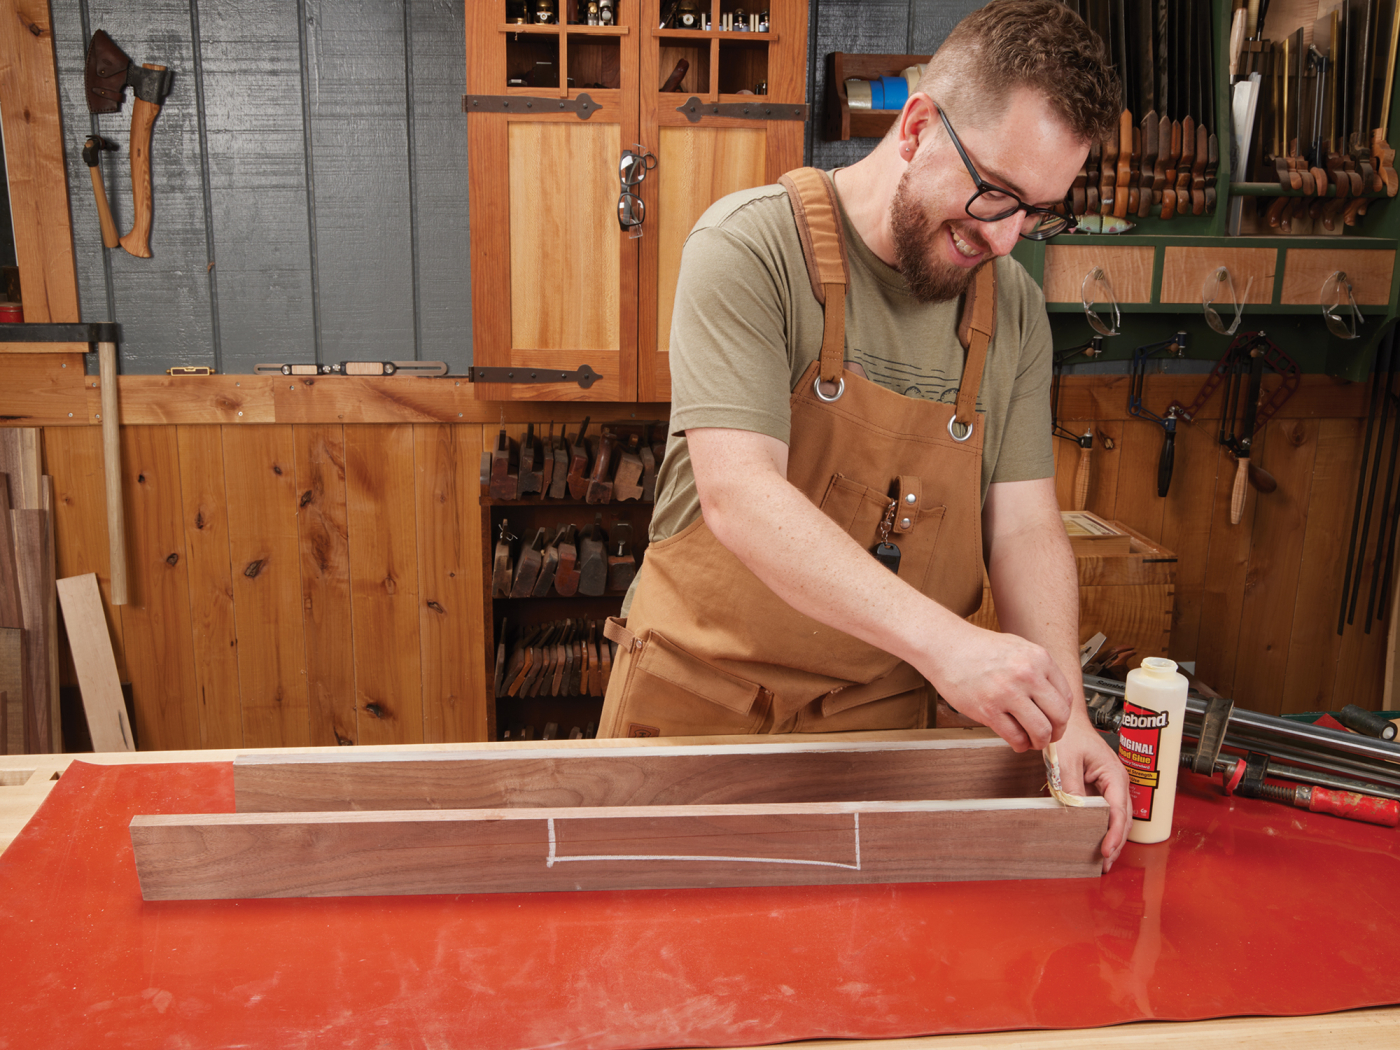
At this point, we’re going to take all of the smaller boards we’ve cut and reassemble them into stable, good-looking panels. Flip the boards around, mix and match, and try different orientations until you’re happy with the appearance of the panel. Mark it using chalk to keep everything sorted, and glue the panels together. For mine, three strips made each panel (top, bottom, and sides).
4 After taking all that time to match up boards for the best grain pattern, spend one extra second to draw a carpenter’s triangle for reference.
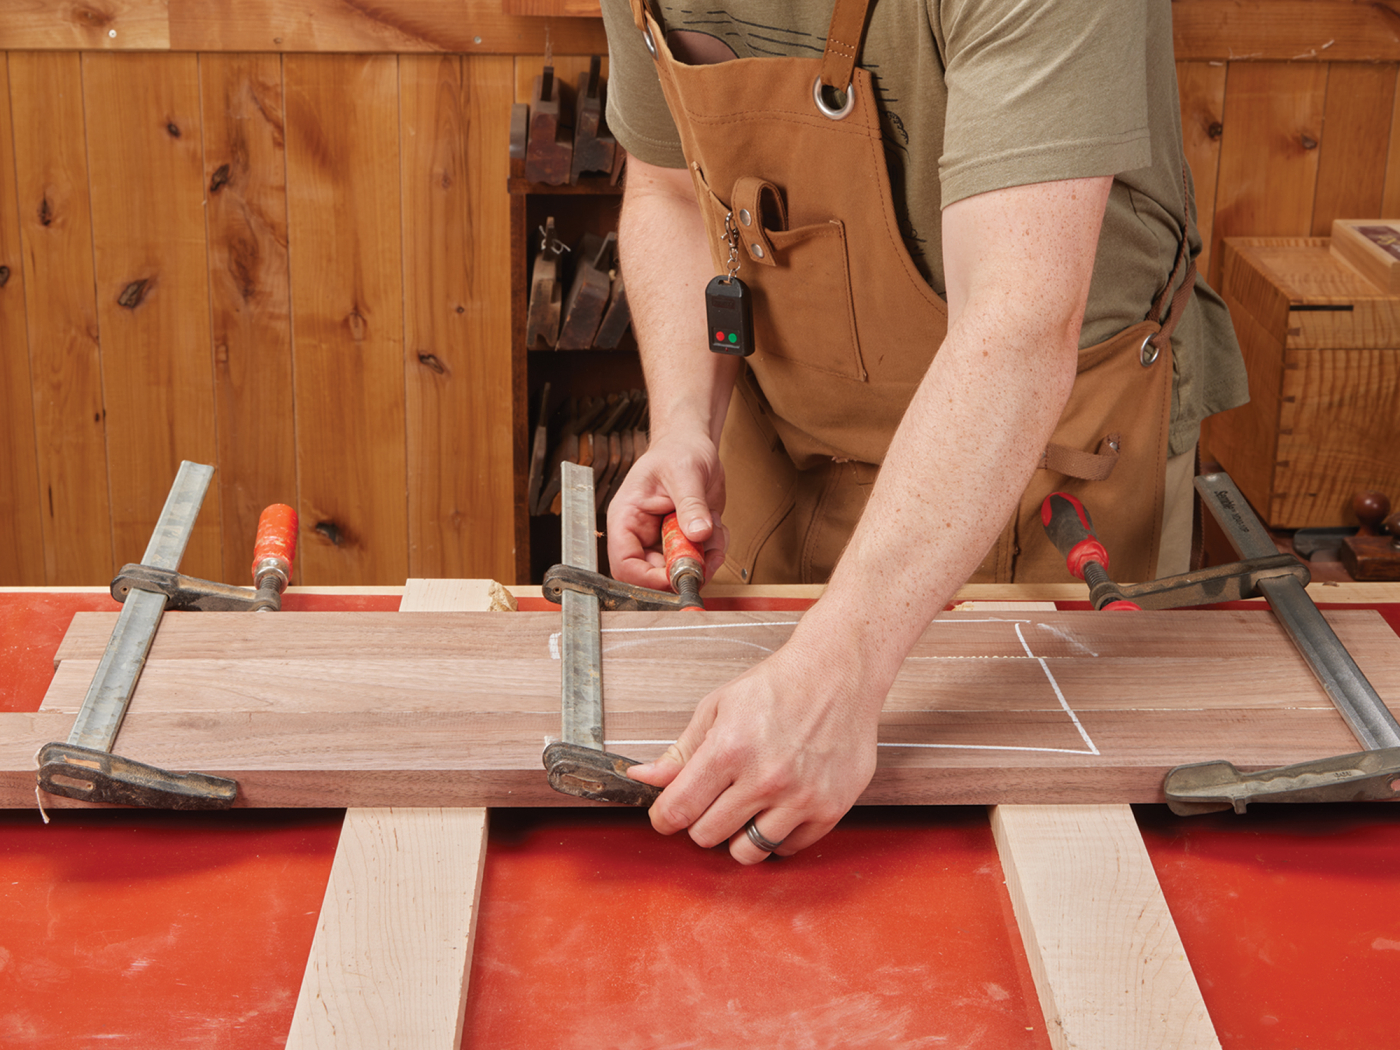
5 Three clamps help spread pressure equally and prevent gaps.
After you’ve given your stock a few hours to dry, you are able to proceed with processing them down. A careful glue up leaves glue joints that just need a few swipes of a plane to level. If you’re less than careful, you can lightly run them through the planer again. Then, trim the panels all to near-final size (photo 6).
6 Once the glue dries, I rough cut the sides to length.
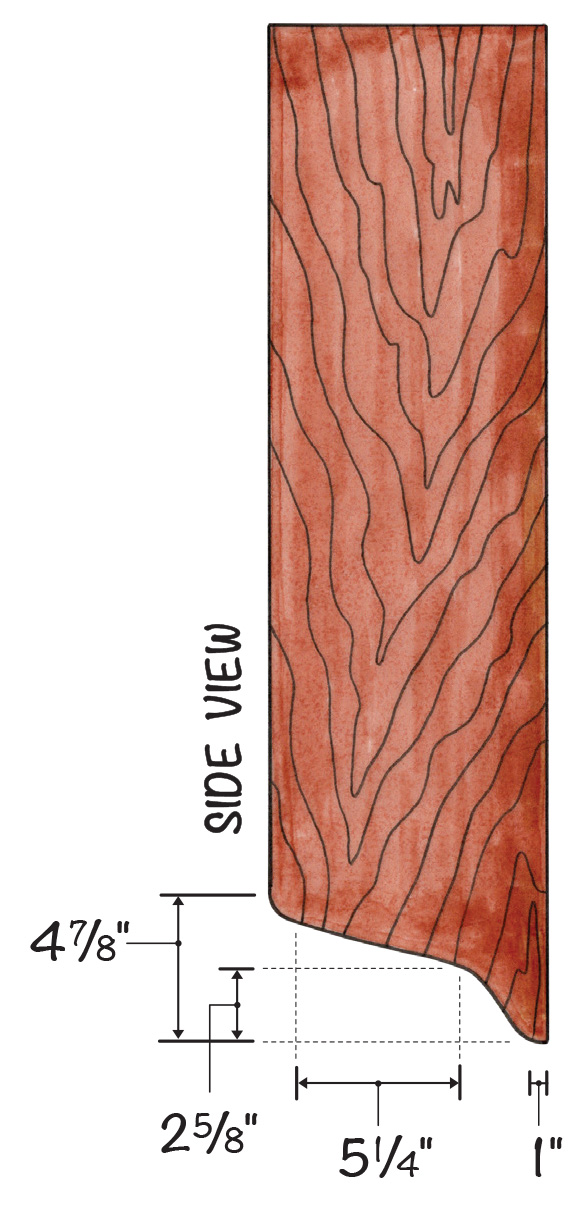
The sides of the cabinet have a decorative cutout on the lower edge. I find it easiest to cut both sides at once. Use double-sided tape to stick the two sides together (photo 7). Create a hardboard pattern of your shape and cut it at the bandsaw. Transfer the shape to your sides, and cut them out.
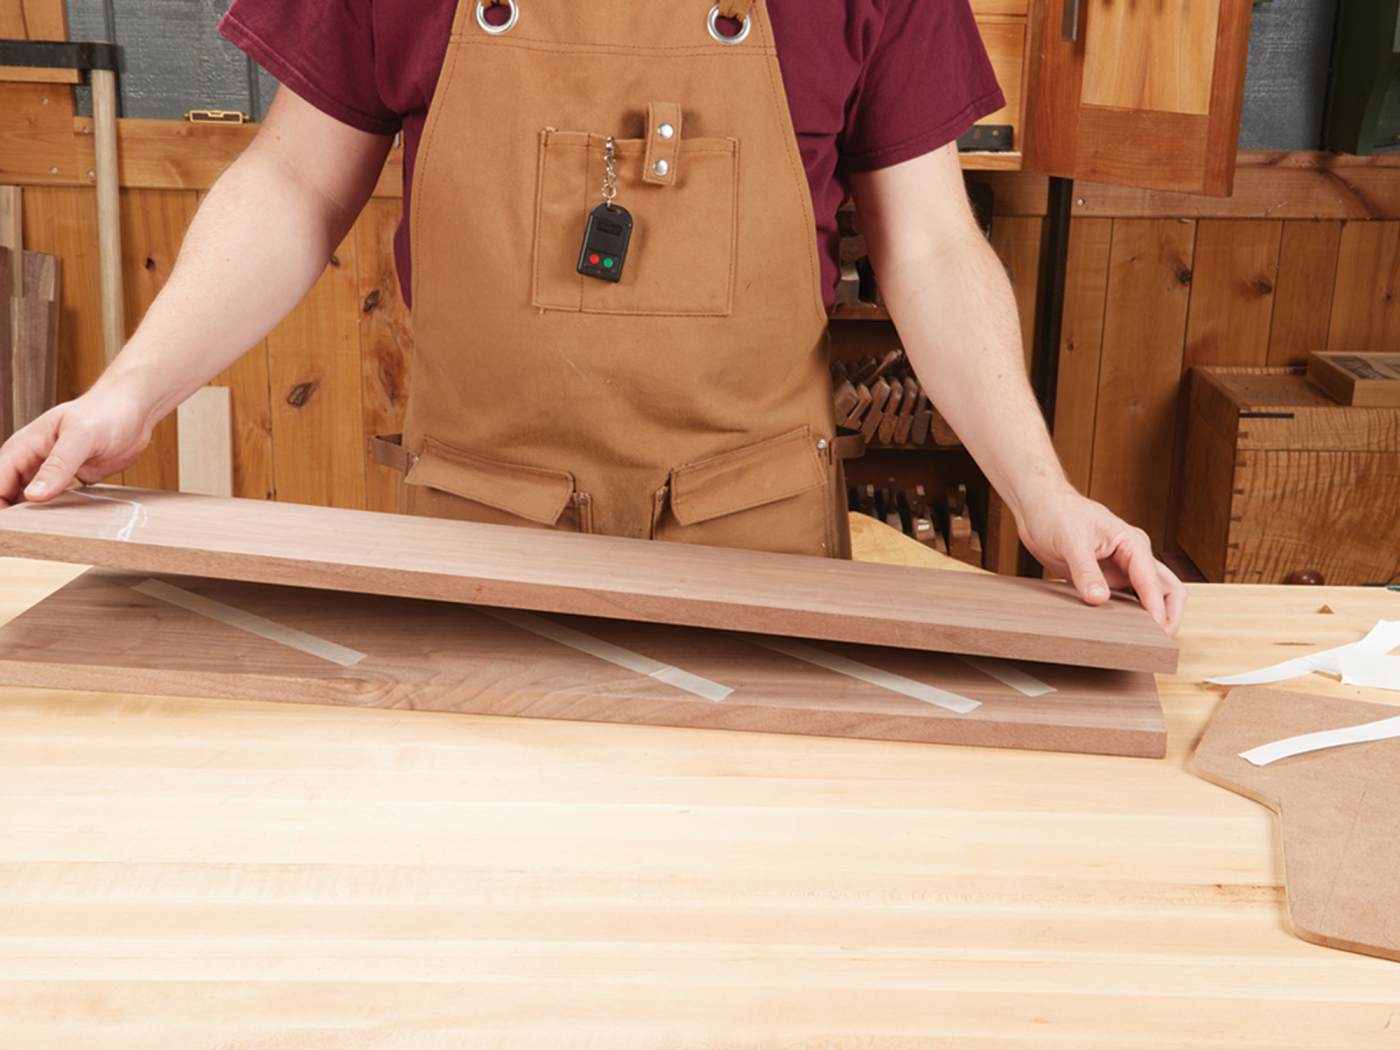
7 I stuck the sides together using some double-sided tape.
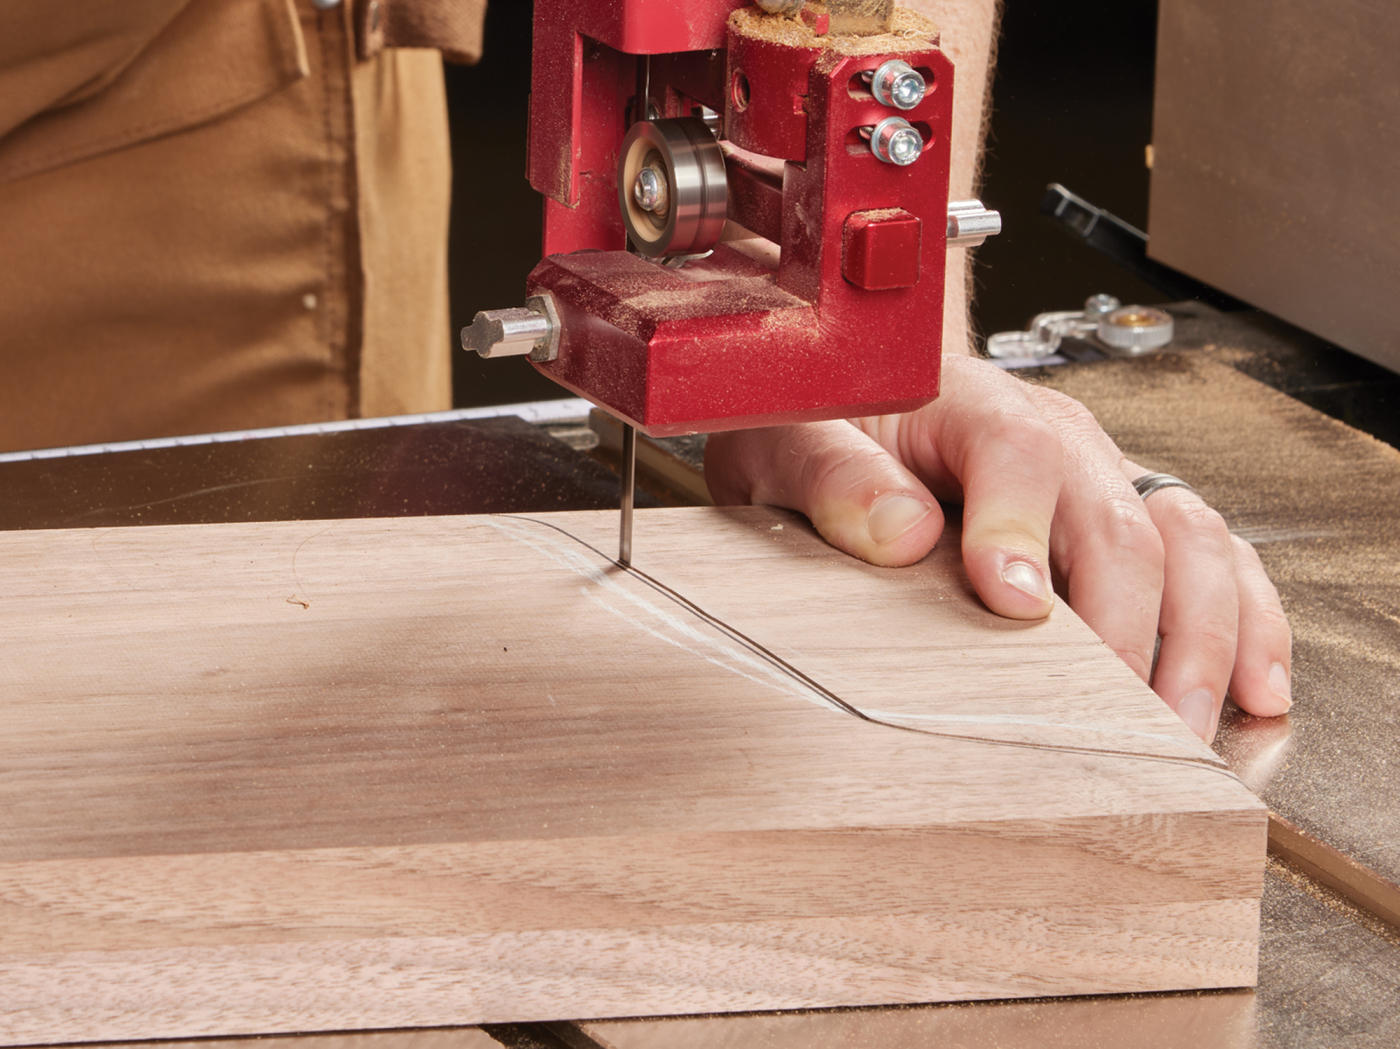
8 Cutting both sides at the same time will keep them identical.
Now, at the workbench, use the hardboard pattern to rout the ends of the cabinets to shape. The pattern guides the bit, and makes both sides the same shape. A sharp bit and a light pass leaves a very smooth surface, even on the endgrain.
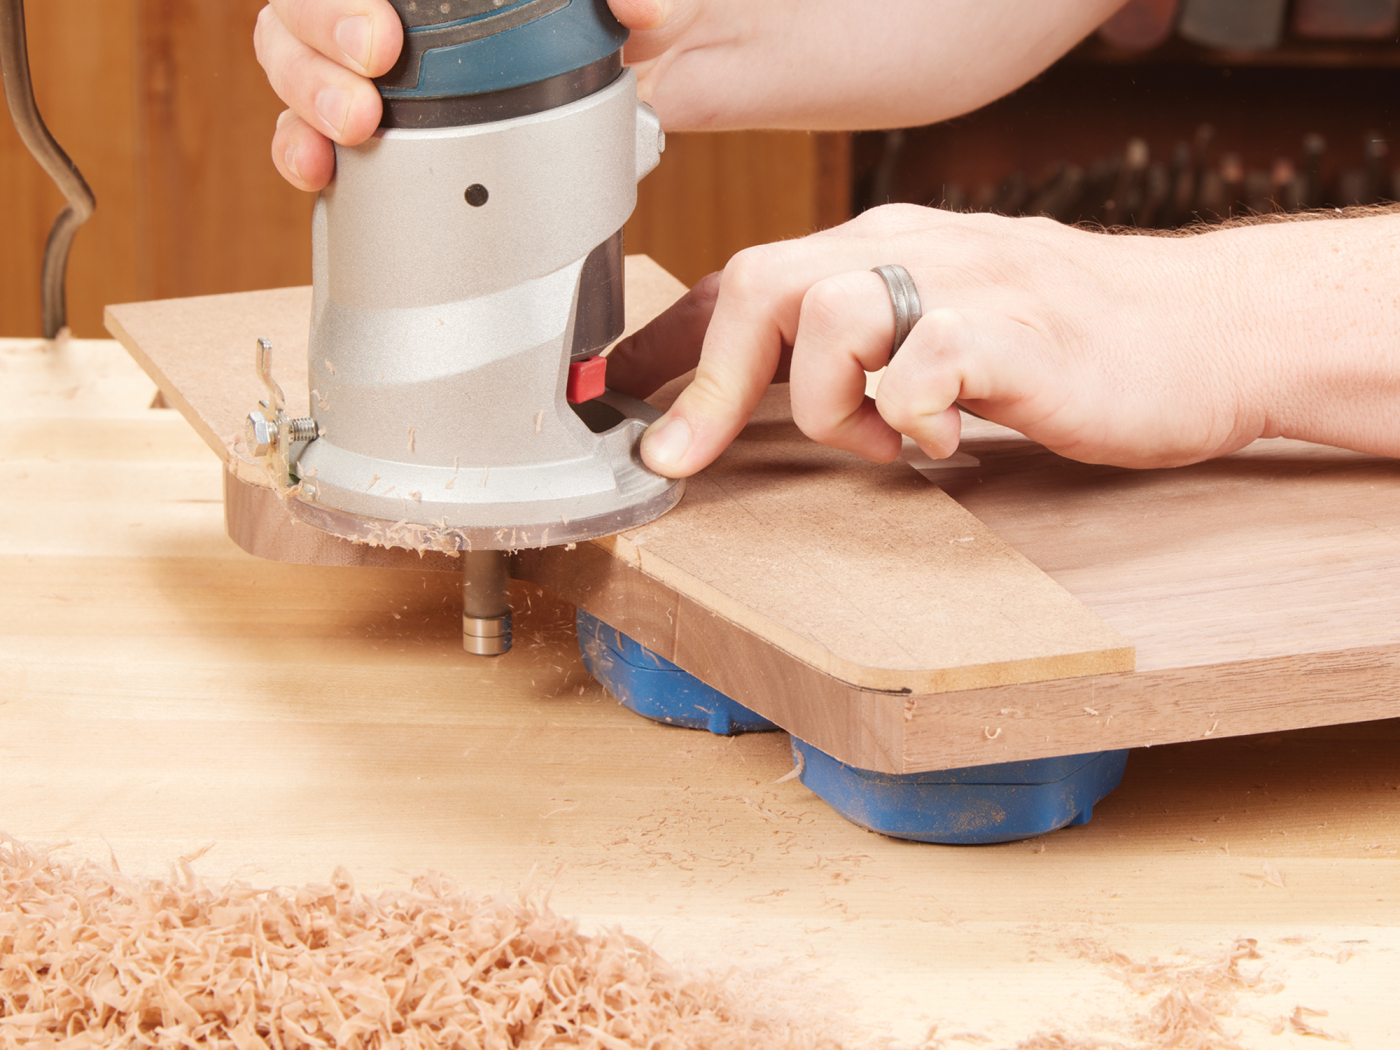
9 Patterns make repeat cuts a breeze.
A Bit of Joinery
As I mentioned earlier in this article, the joinery for the cabinet is simple—a rabbet holds the top of the cabinet, and a dado holds the bottom. These two joints can be cut (easily) at the table saw. However, combining a small dado clean-out bit in the router with a couple of hardboard fences makes this a hard process to screw up. Photos 10-12 show these steps. First, the rabbet. This rabbet is cut along the top edge of the sides. Carefully mark the rabbet locations, and use double-sided tape to stick down a hardboard fence along your layout lines. Then, rout the rabbet in a few passes, until the bearing guides the bit along the fence during the last pass.
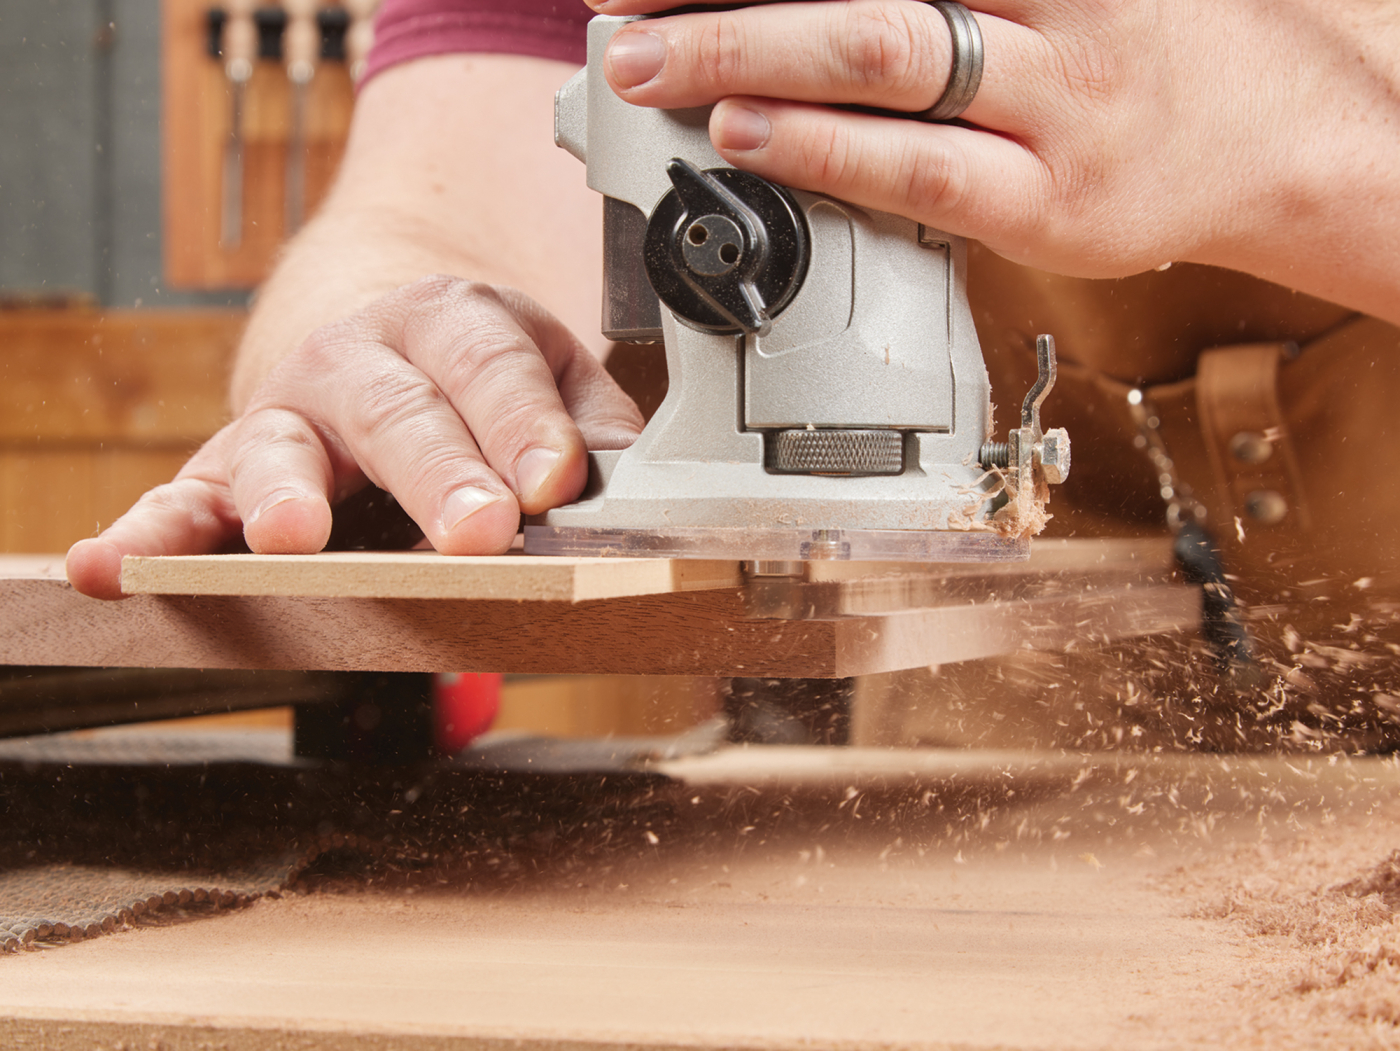
10 Shallow passes help prevent chip out when cutting the rabbet.

11 The hardboard guide for the bottom of the dado is placed first, then the bottom is used to set the second guide.
12 It’s a snap to route a perfect dado using the guides.
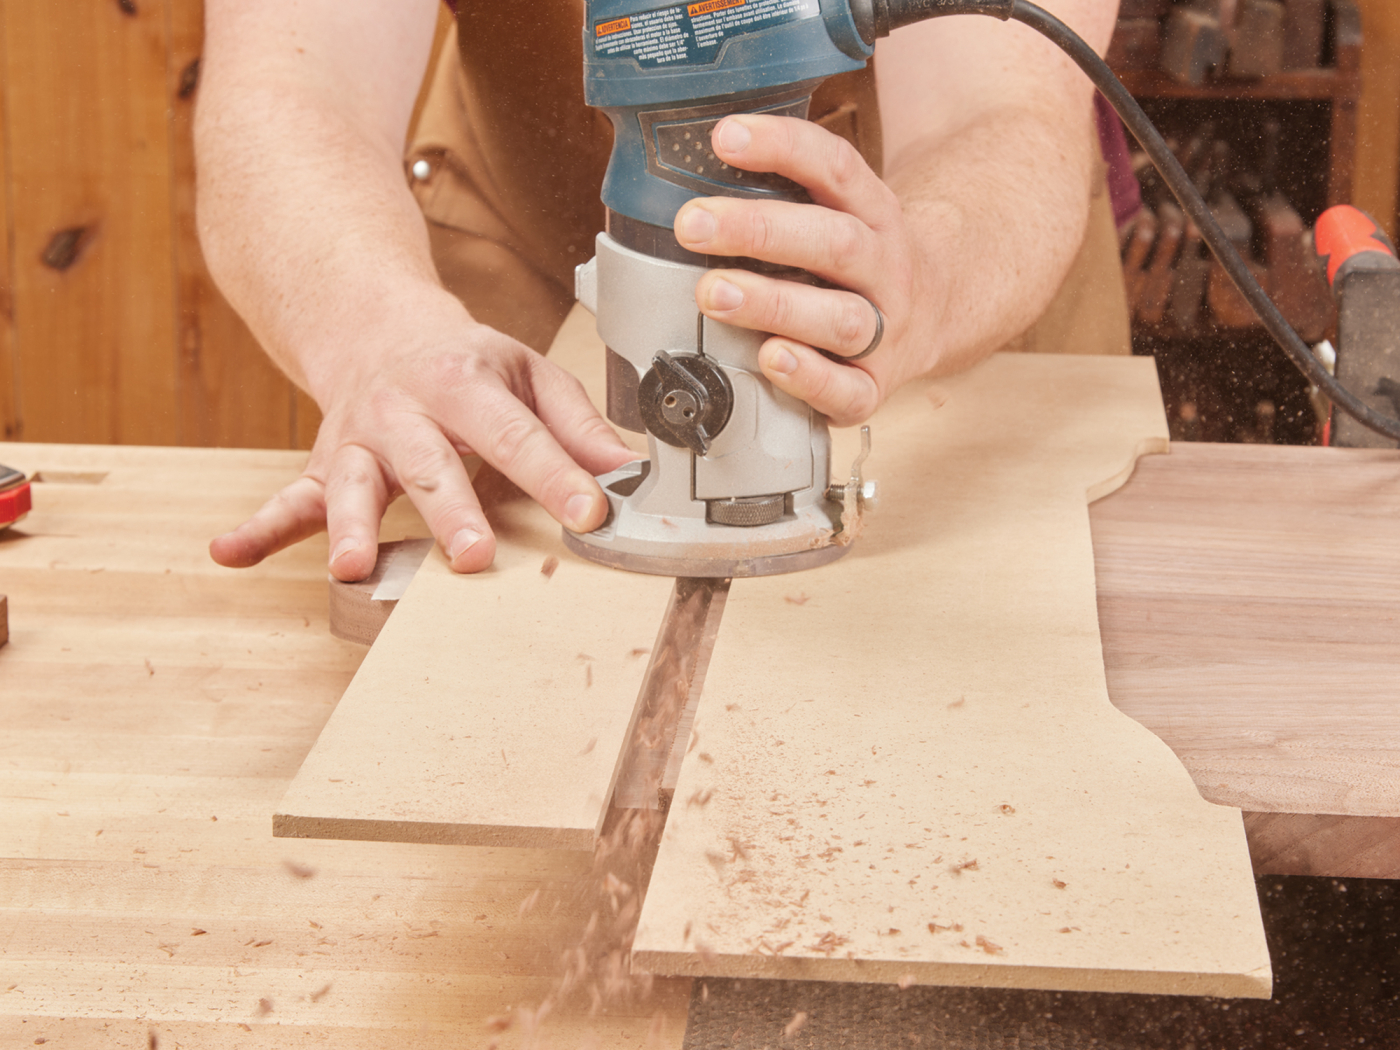
After creating the rabbet, you’ll see that creating the dadoes is done in much of the same way. As you can see in photo 11, the actual bottom is used to space out the hardboard fences that are taped in place. This ensures that the resulting dado is an exact fit for the workpiece. This is a much more straightforward technique for creating one or two dadoes than trying to dial in a dado stack at the table saw. Once the hardboard fences are taped in place, use the same dado clean-out bit to rout the dado in a few passes. Start with a pass down the right-hand fence, then make a pass down the opposite fence. Make sure to keep in mind the rotation of the router bit so that you are not climb cutting. At this point, you can test fit the case together just to see how everything is looking.
Odds-and-Ends
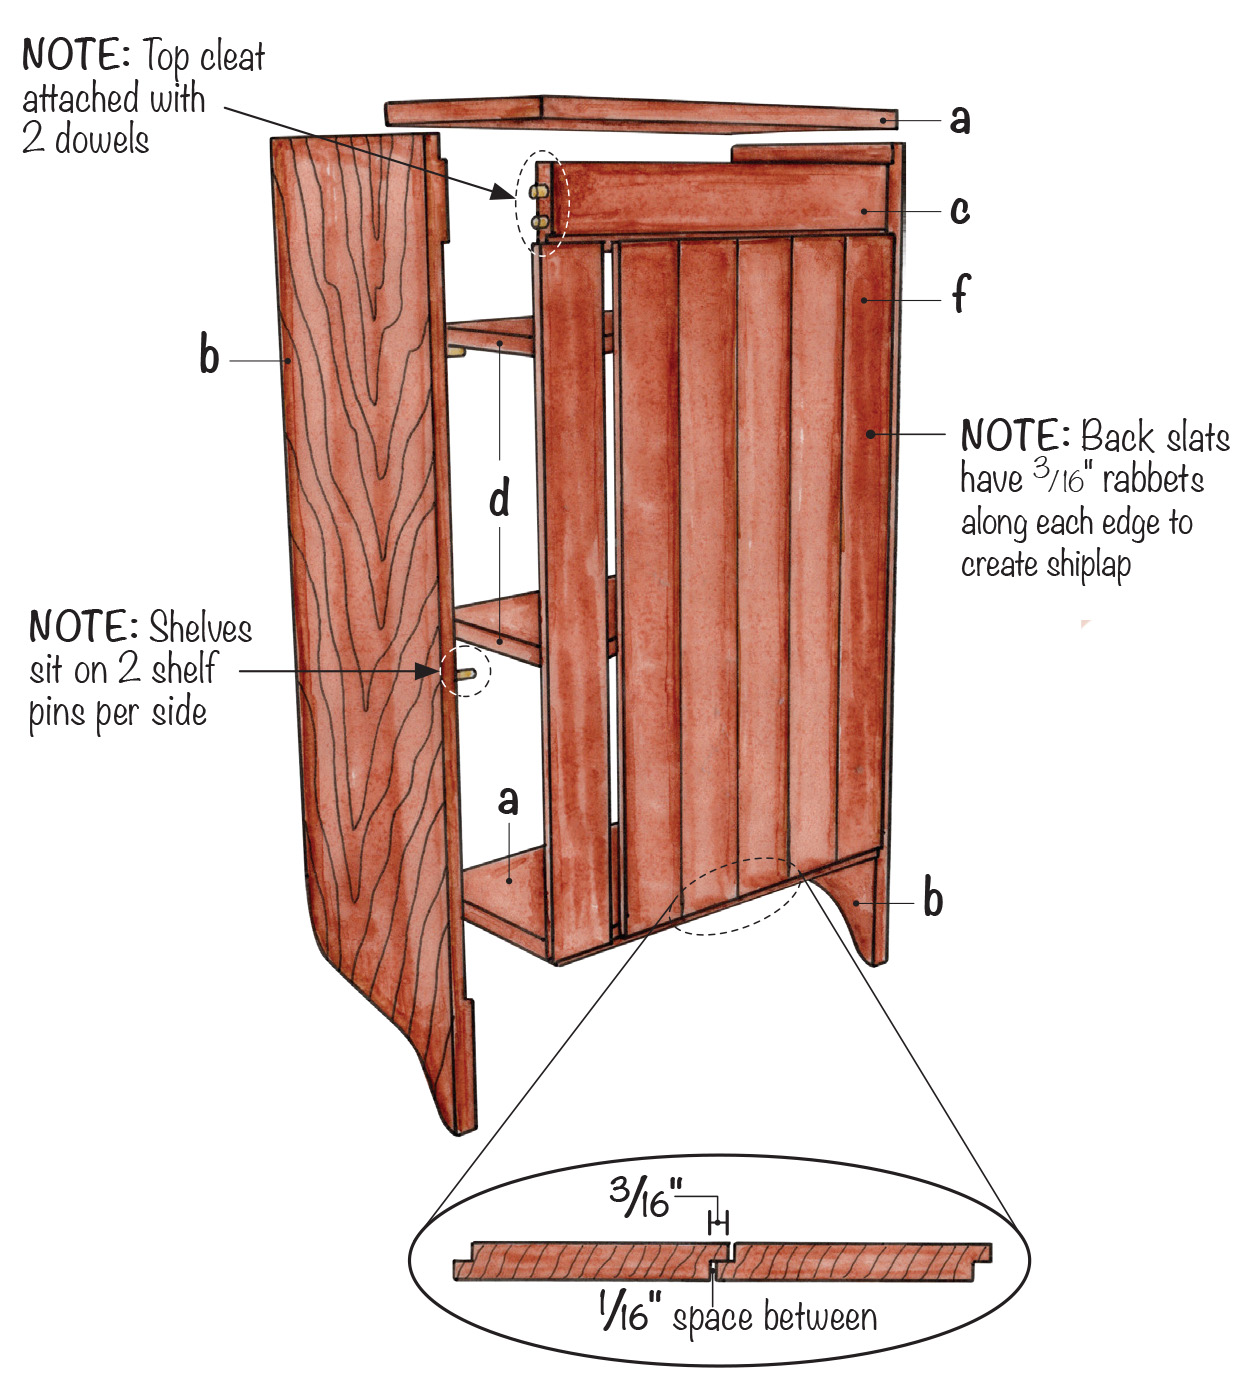
Before gluing together the case, there are a few more tasks to take care of. The first is that I wanted to add a hanging cleat in the back of the case. This allows an attachment point for the cabinet on to the wall. There’s no fancy joinery here—a couple of dowels are drilled into the end of the cleat. Use dowel-centers to transfer the dowel location to the case sides and drill them out.
13 The cleat is affixed to the case using dowels, providing enough strength to hang the cabinet with everything in it.
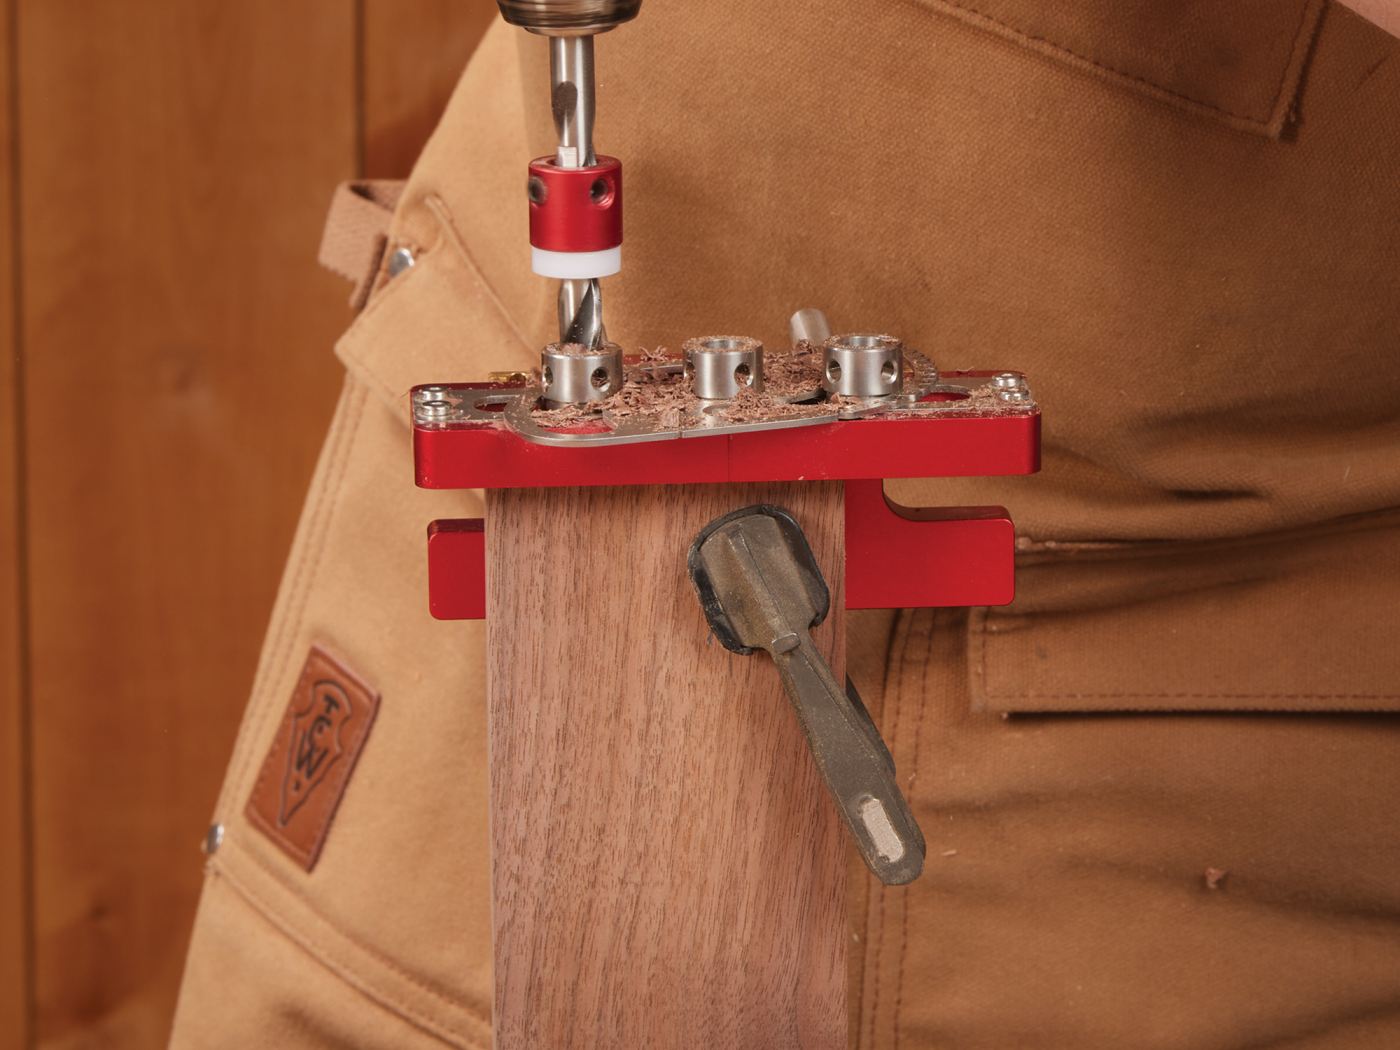
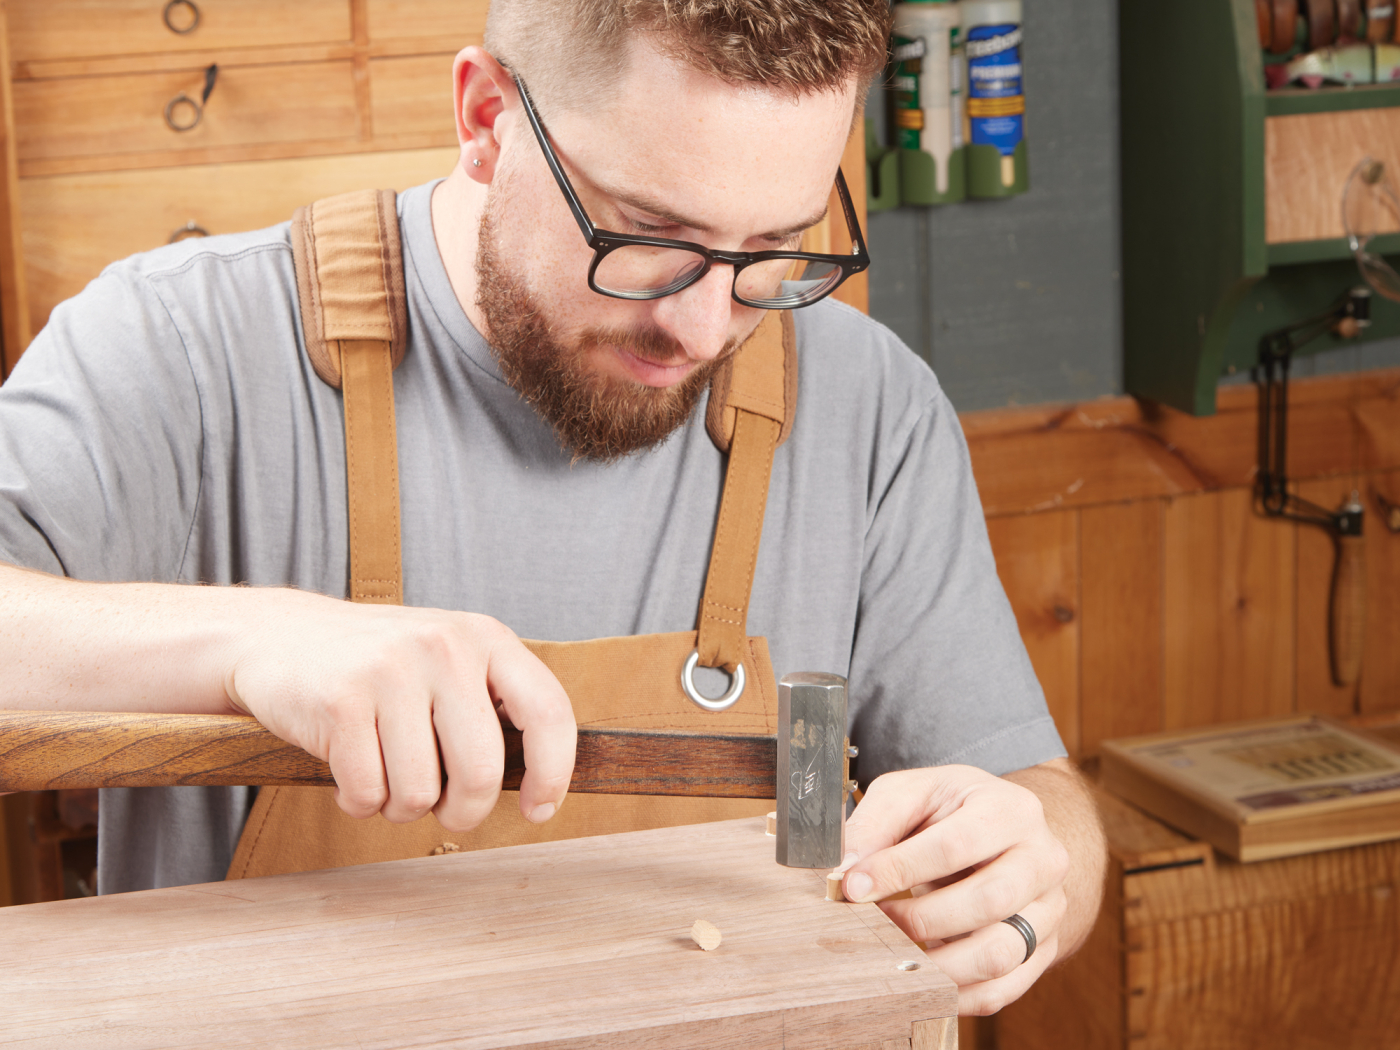
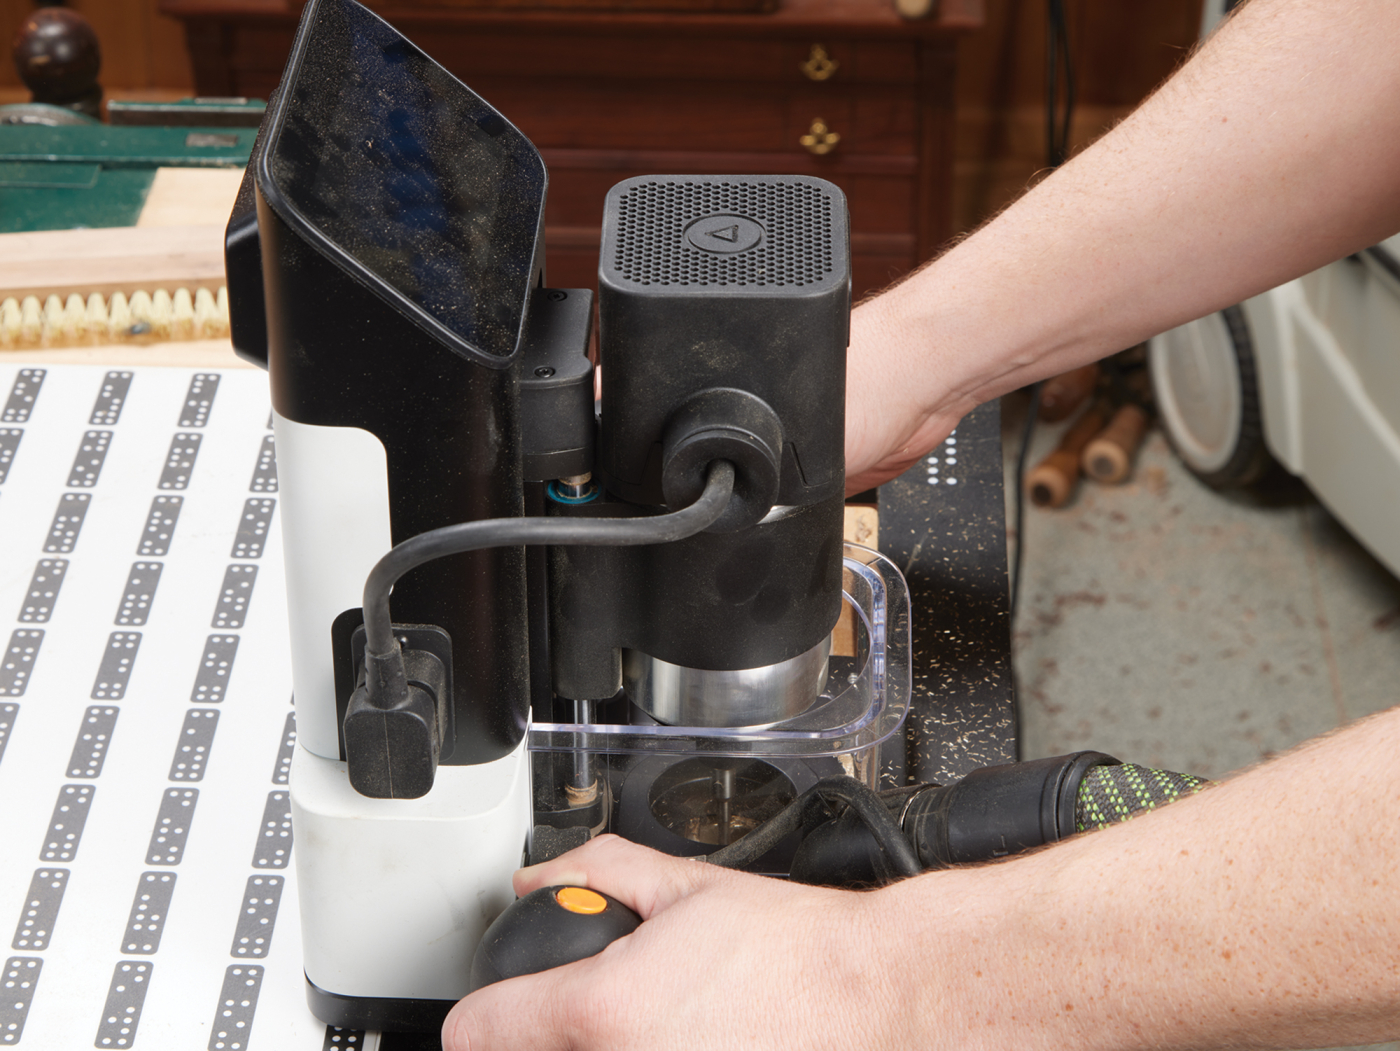
Another thing to take care of is a by-product of the hinges I chose to use. The Brusso knife hinges need to be routed into the top and bottom of the case. This would be nearly impossible to do after the cabinet is assembled, so doing it now makes sense. The Shaper Origin happens to have all of the Brusso hardware pre-loaded into it, so you can simply pull up the SKU of the hardware you ordered and drop it on your workpiece. We used the Shaper Plate (photo 14) with Origin to position the cut. A bit of chiseling to square up the corners leaves a perfect hinge mortise (photo 15). Lastly, pre-drilling the dowel holes that will cover the assembly screws is easier to do now as well. I used a drill guide to simply position a small Forstner bit and drilled these shallow holes. This also helps locate the screws during assembly.
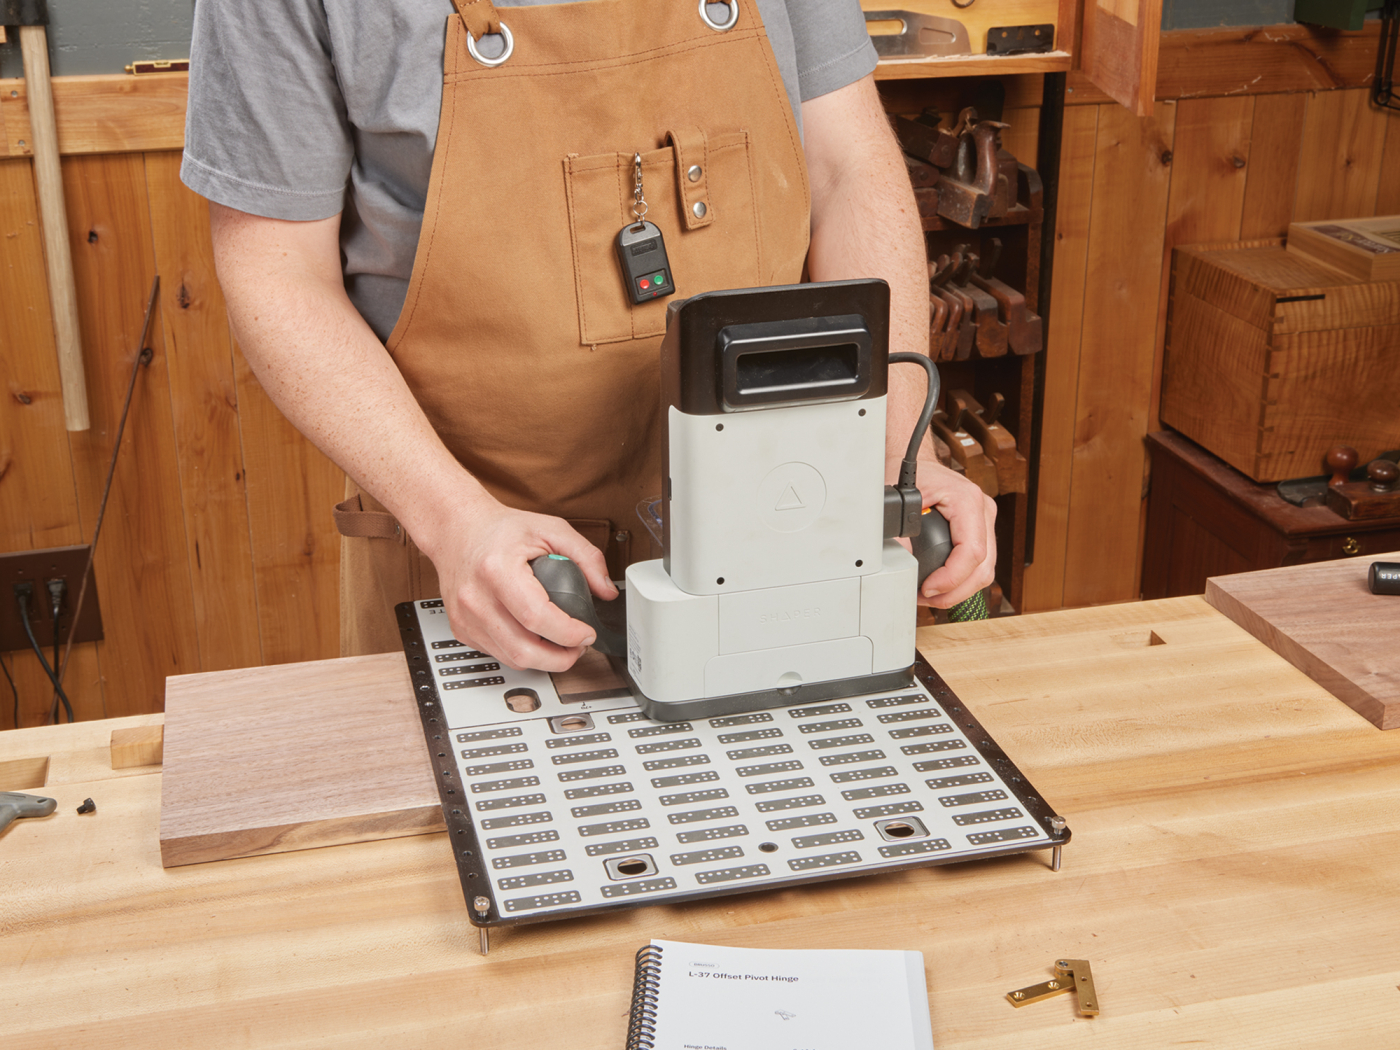
14 The Shaper made quick work of the hinge mortises.
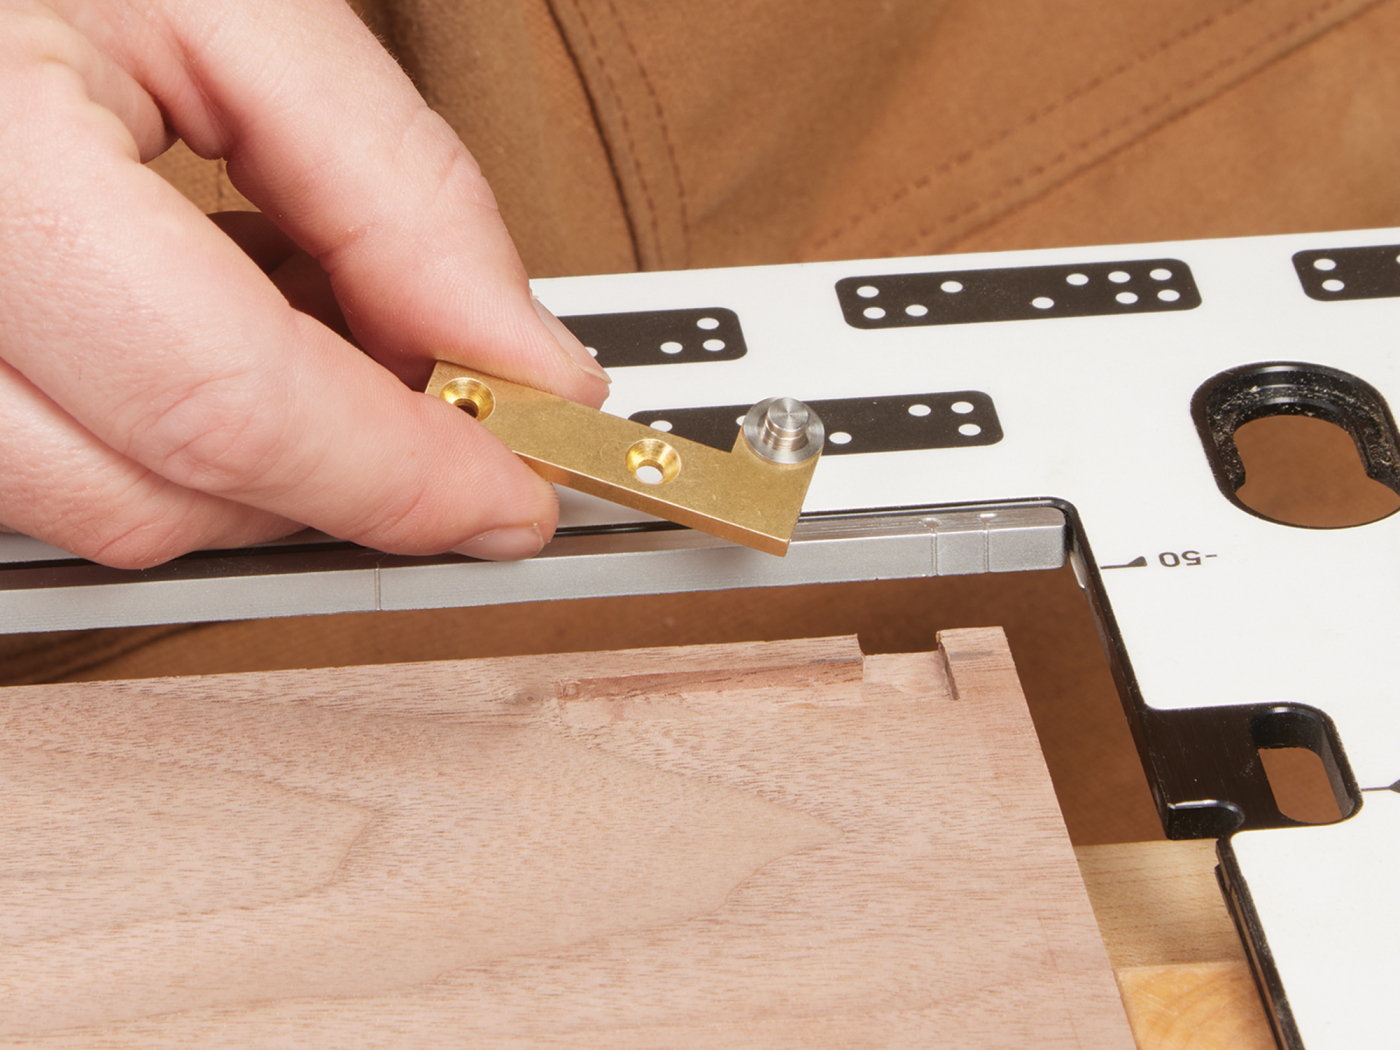
15 Thanks to the hardware specs being programmed to the Shaper, the mortise was exactly the right size.
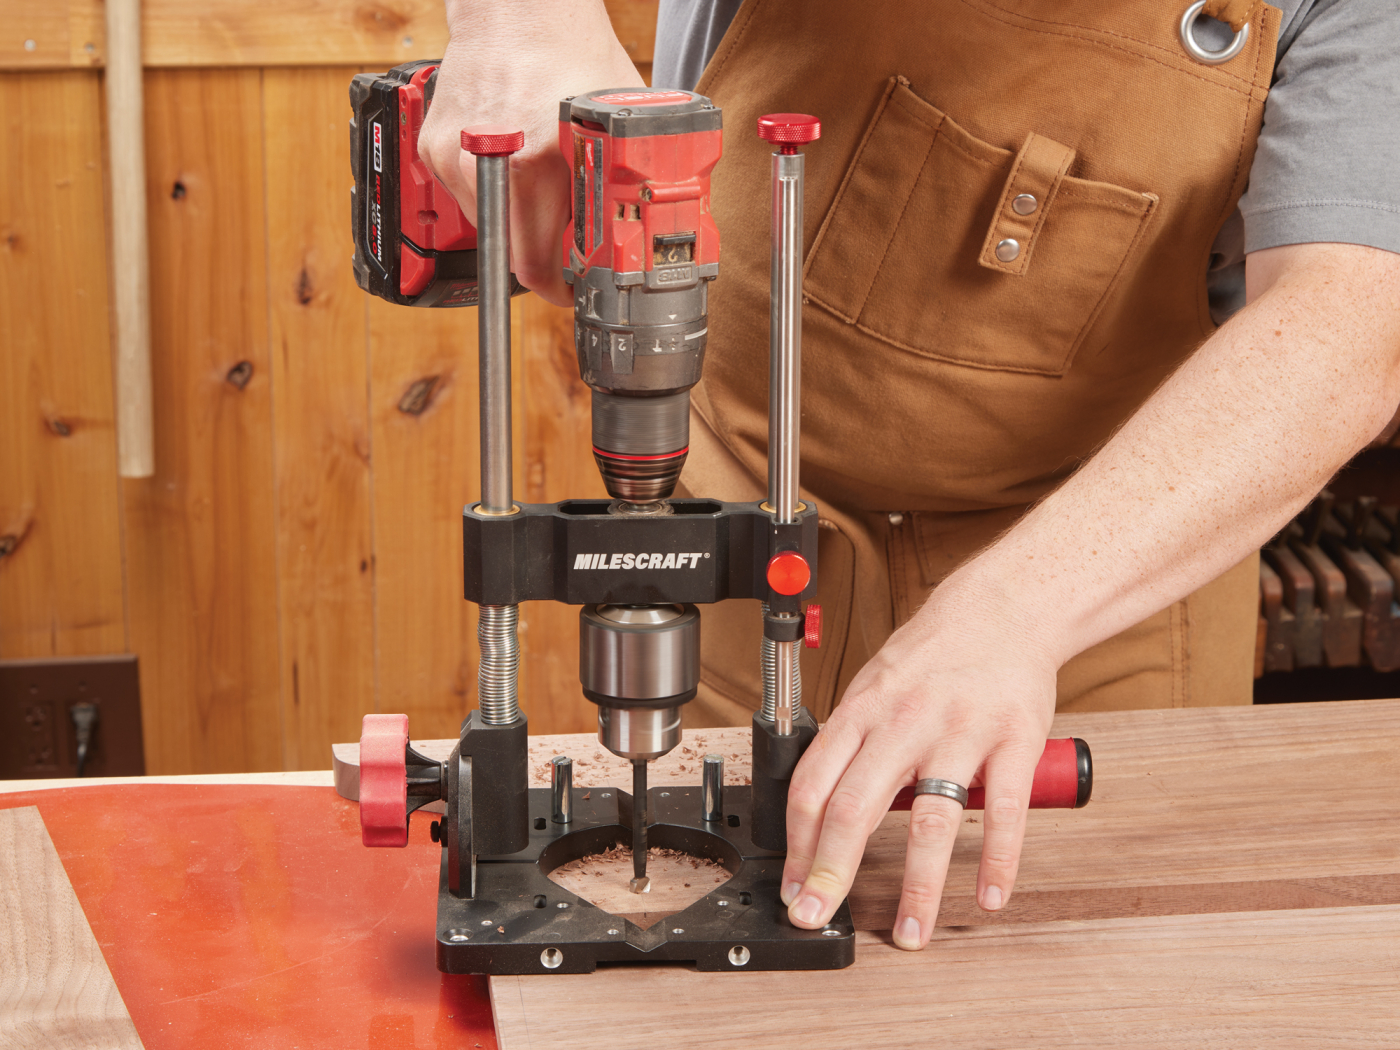
16 A drill guide allowed me to cut the dowel holes perfectly without a drill press.
Sling Some Glue
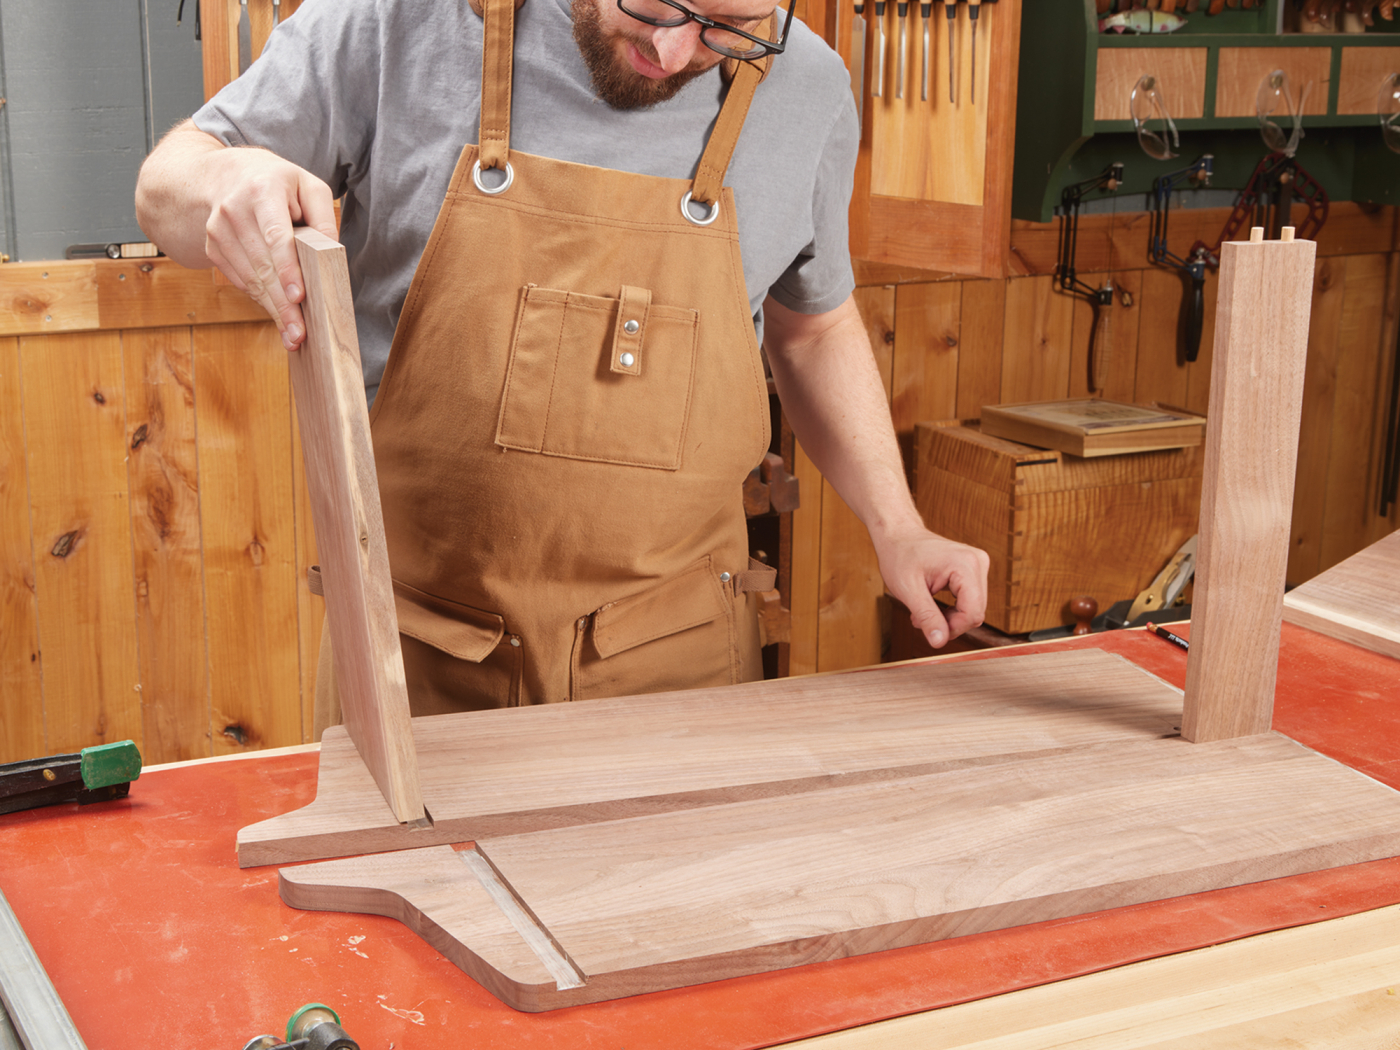
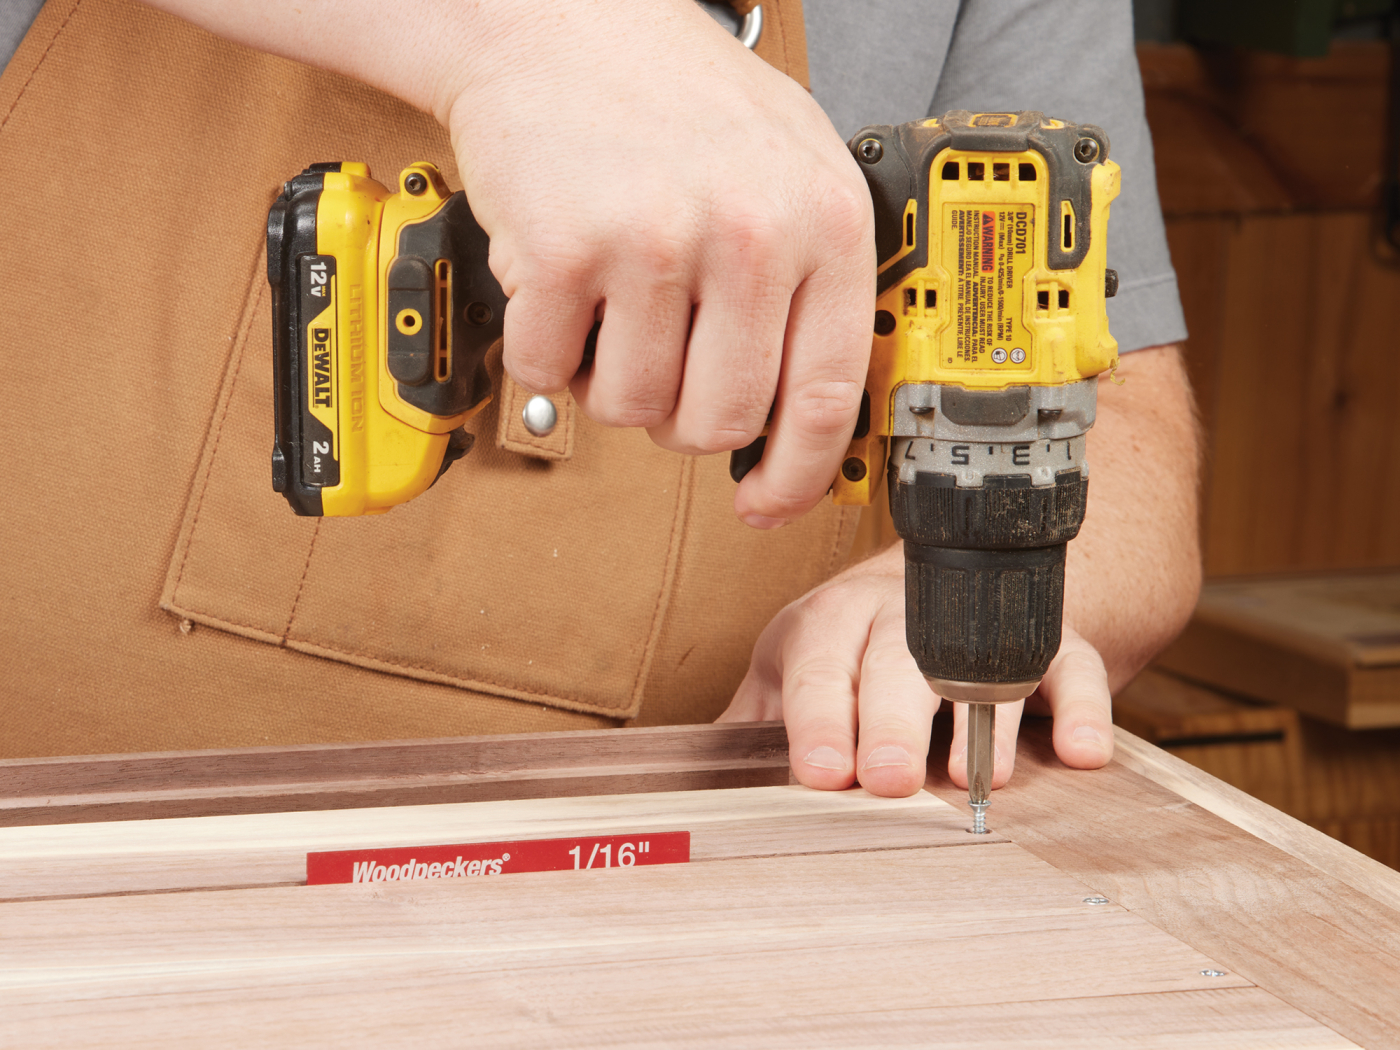
Now, you’re ready to assemble the case. The only things that I glued here were the dadoes and the rabbets. The hanging cleat (shown here in photo 17) is locked between the sides with dowels, so it’s not super necessary to glue it. Spread glue in the dadoes and rabbets, and insert the top and bottom panels. Slap the opposite side in place. Now, here’s the great thing about screws—if you have them ready to go, you can simply drive them home and you don’t have to worry about clamps. Let the screws hold the case together as the glue dries. Viola.
17 The dadoes and rabbets take just a dab of glue.
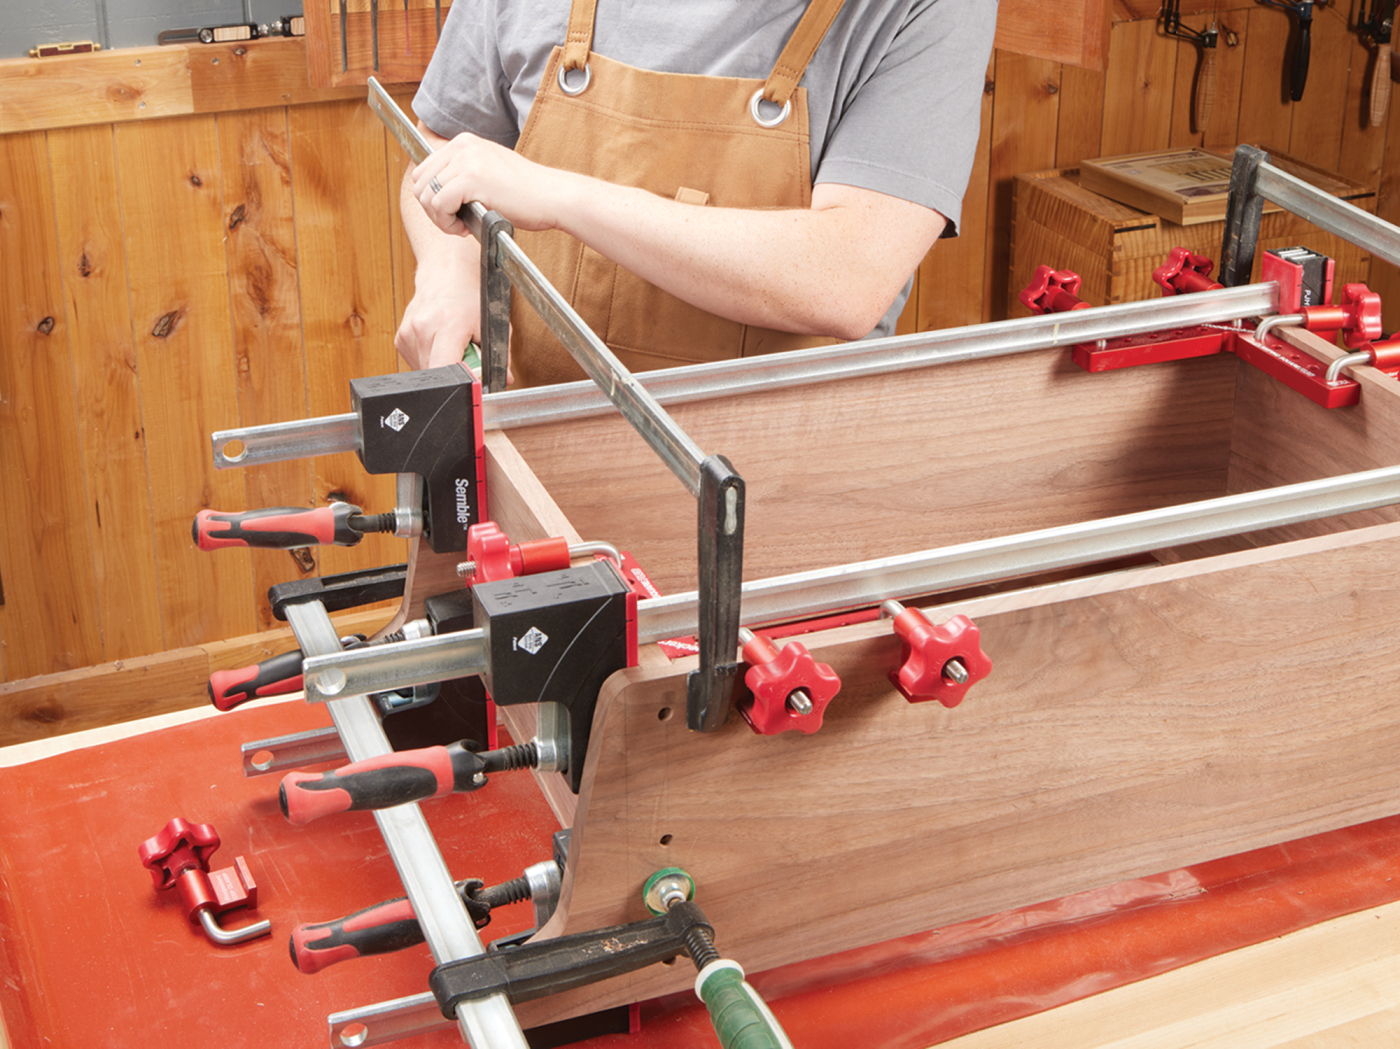
18 The clamps here are to hold the case square. The screws were driven once I was satisfied.
During high school shop class, we were shown how to make matching plugs to mask screw holes. But, in my mind, it always looks like you’re doing exactly that — trying to hide screws. Instead, I liked Maloof’s mentality here, and made it a feature. Contrasting dowels add a small design detail, and if you didn’t know they hide screws, they would just look nice. Cherry dowels plug the screws in this case. When you’re choosing your plug wood, remember this however—because the dowels will be showing endgrain, they will appear a bit darker than what you might think. They soak up a bit of finish and darken. The cherry endgrain ends up a few shades lighter than the surrounding walnut.
19 Cherry plugs are another Maloof design homage.
A Fancy Back
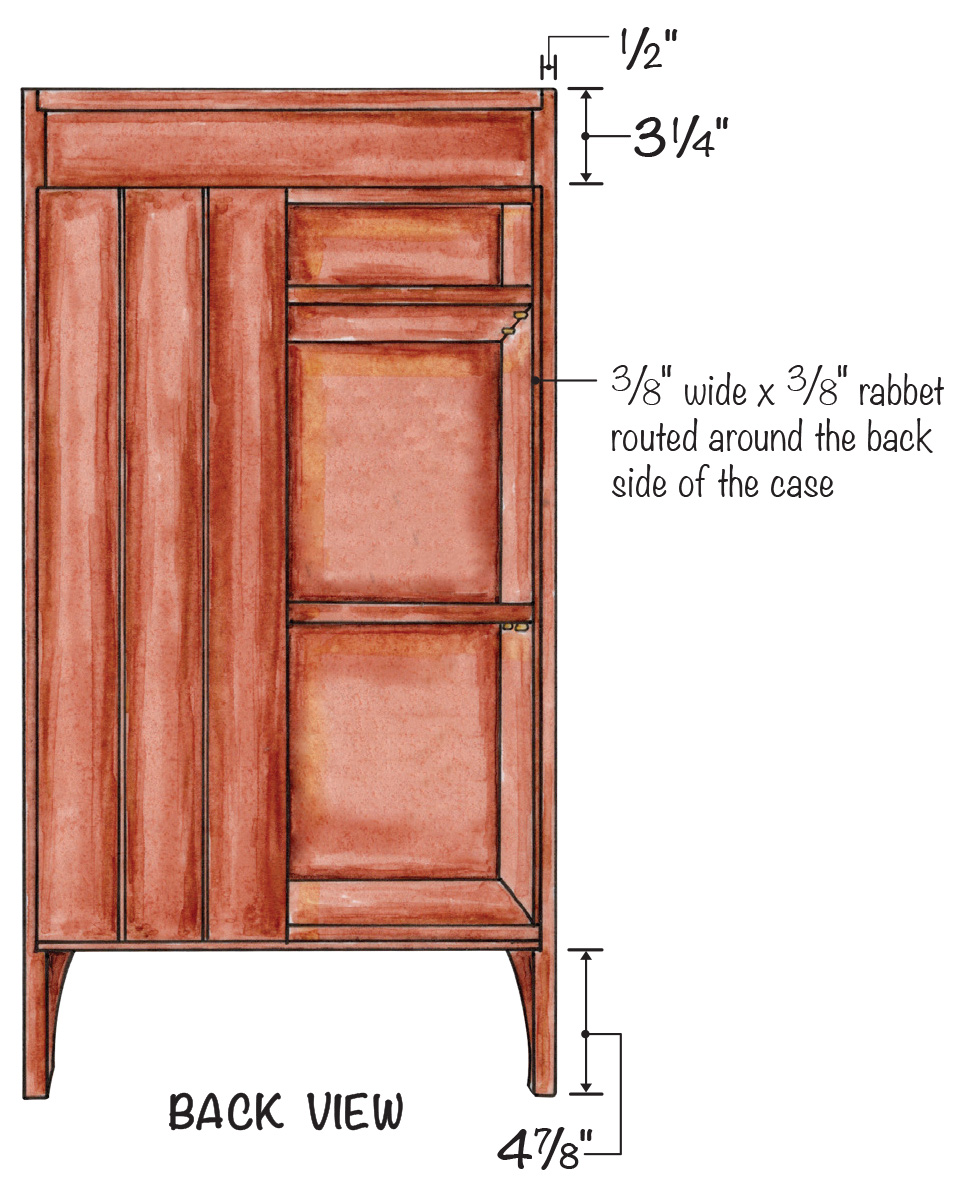
The back of the cabinet is going to be made up of hardwood shiplap. I thought this was a nice place to use the sapwood, particularly in a contrasting pattern (more on that in a little bit). The shiplap sits in a rabbet that’s cut all the way around the back of the case.
The size of this case makes it pretty simple to use a rabbeting bit in the router table. Place the case over the router table, and fire it up.
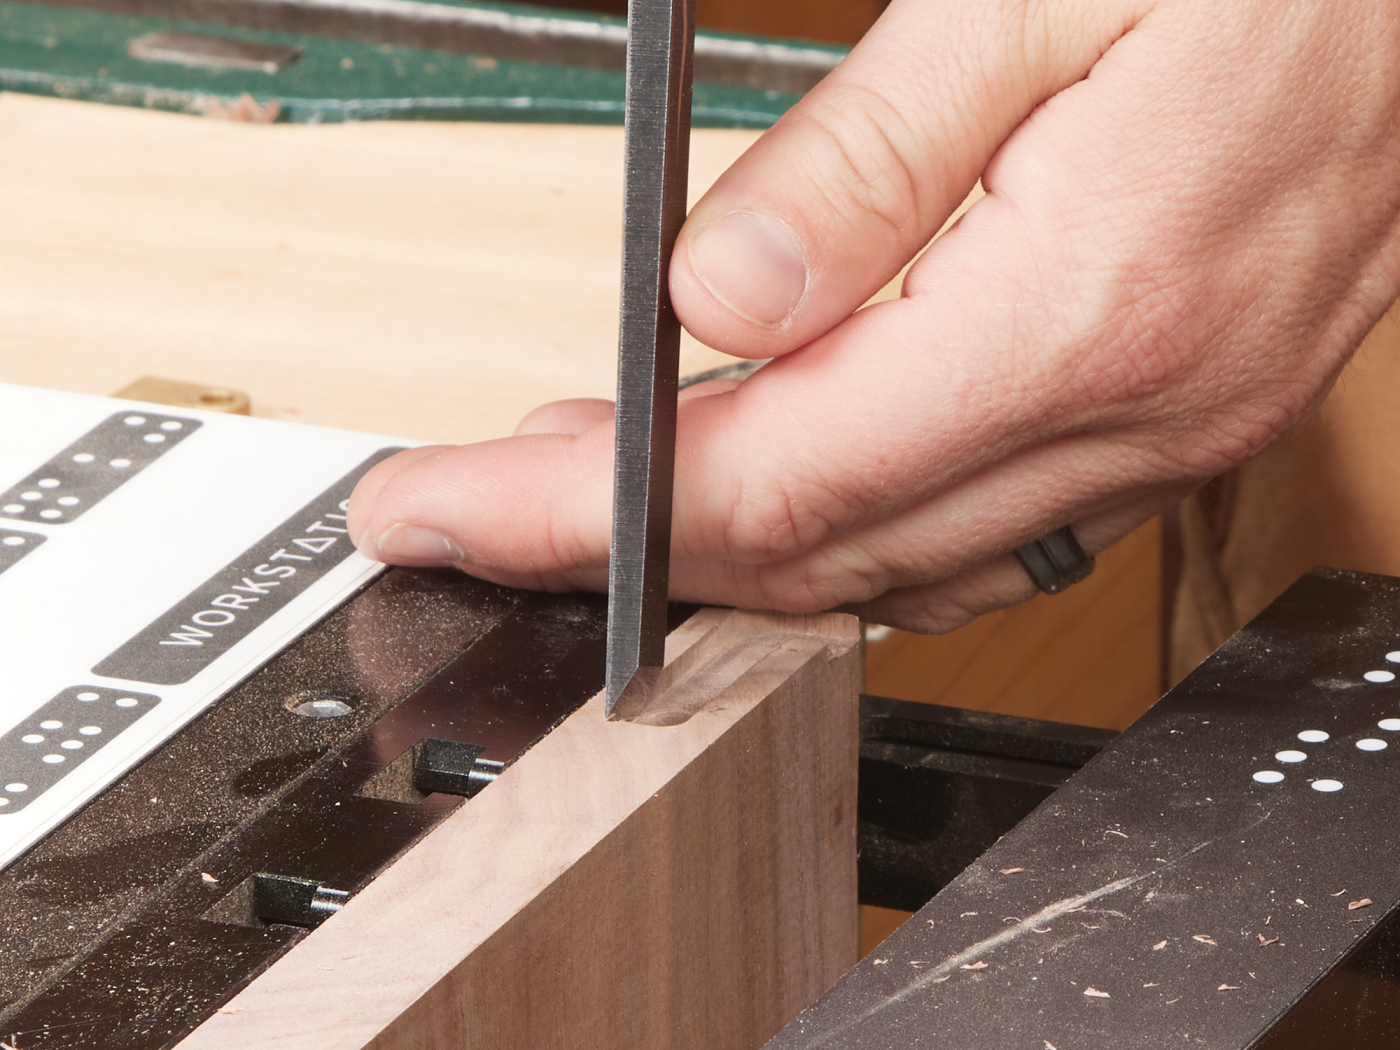
Run the rabbet bit around the perimeter of the case (on the inside). This creates a rabbet around the sides, bottom, and along the bottom edge of the hanging cleat. Square up the corners of the rabbet with a chisel. You don’t need to be super pretty in the corners, but just get them clear so you can fit a piece of shiplap tight up against the sides.
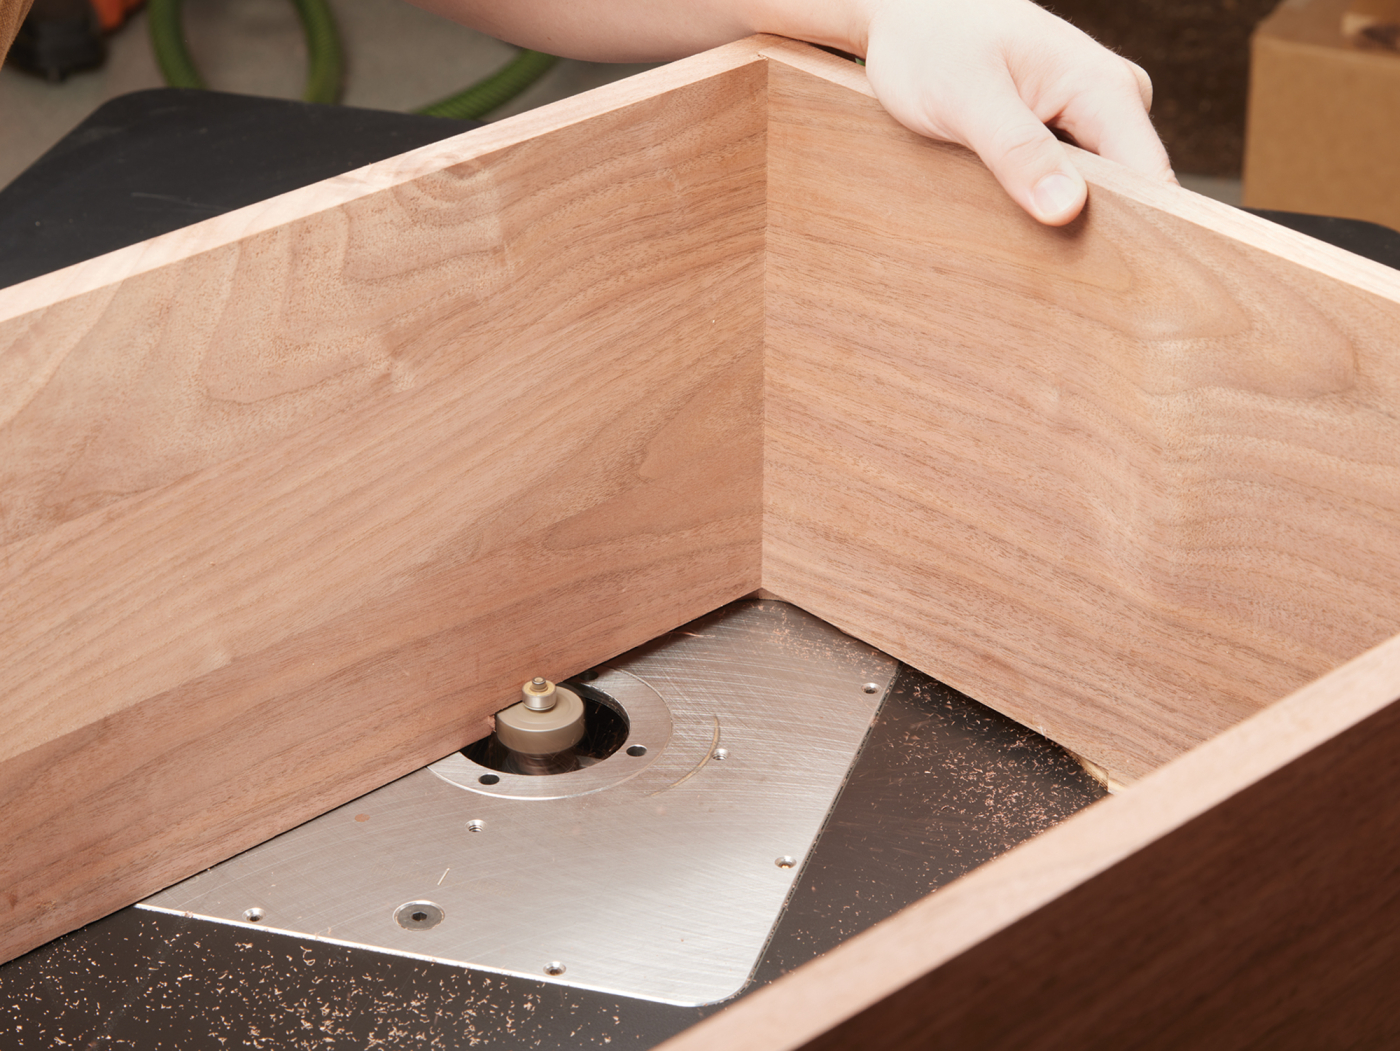
20 The rabbet was cut on the router table.
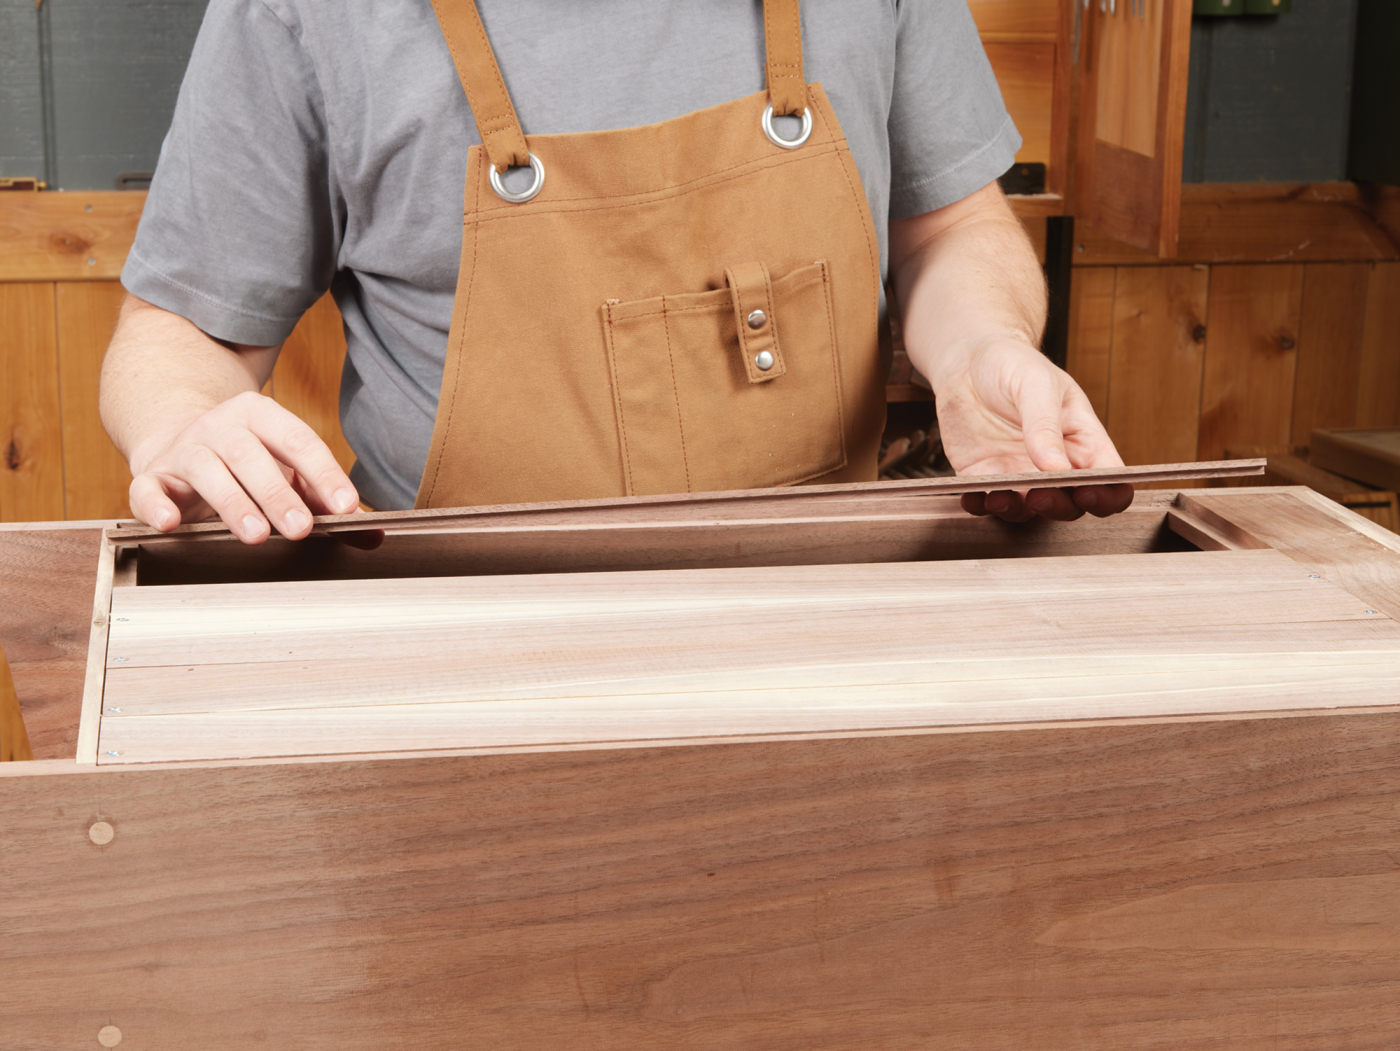
The shiplap panels are thin pieces of hardwood. They become shiplap with the addition of a rabbet along each of the long edges, on opposite faces. I took the time to resaw some of the sapwood offcuts from the initial stock breakdown for these pieces of shiplap. The resawn blanks can be book-matched, and in turn the book-matched panels can be oriented into a hounds-tooth type pattern inside the cabinet. It’s just a fun little detail that you only see when you open up the cabinet.
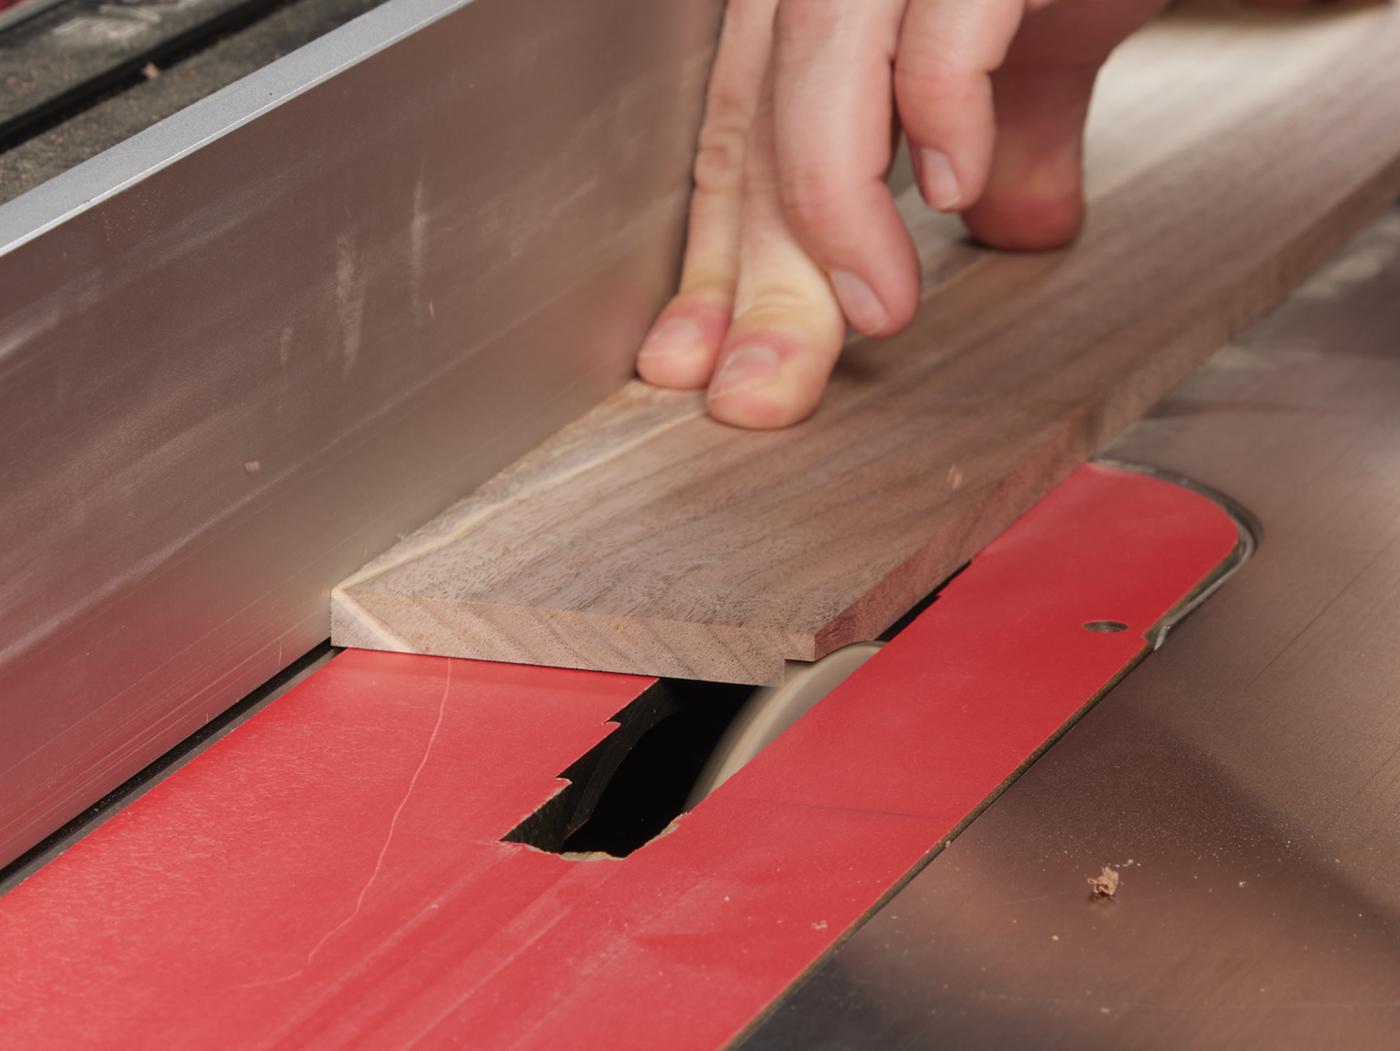
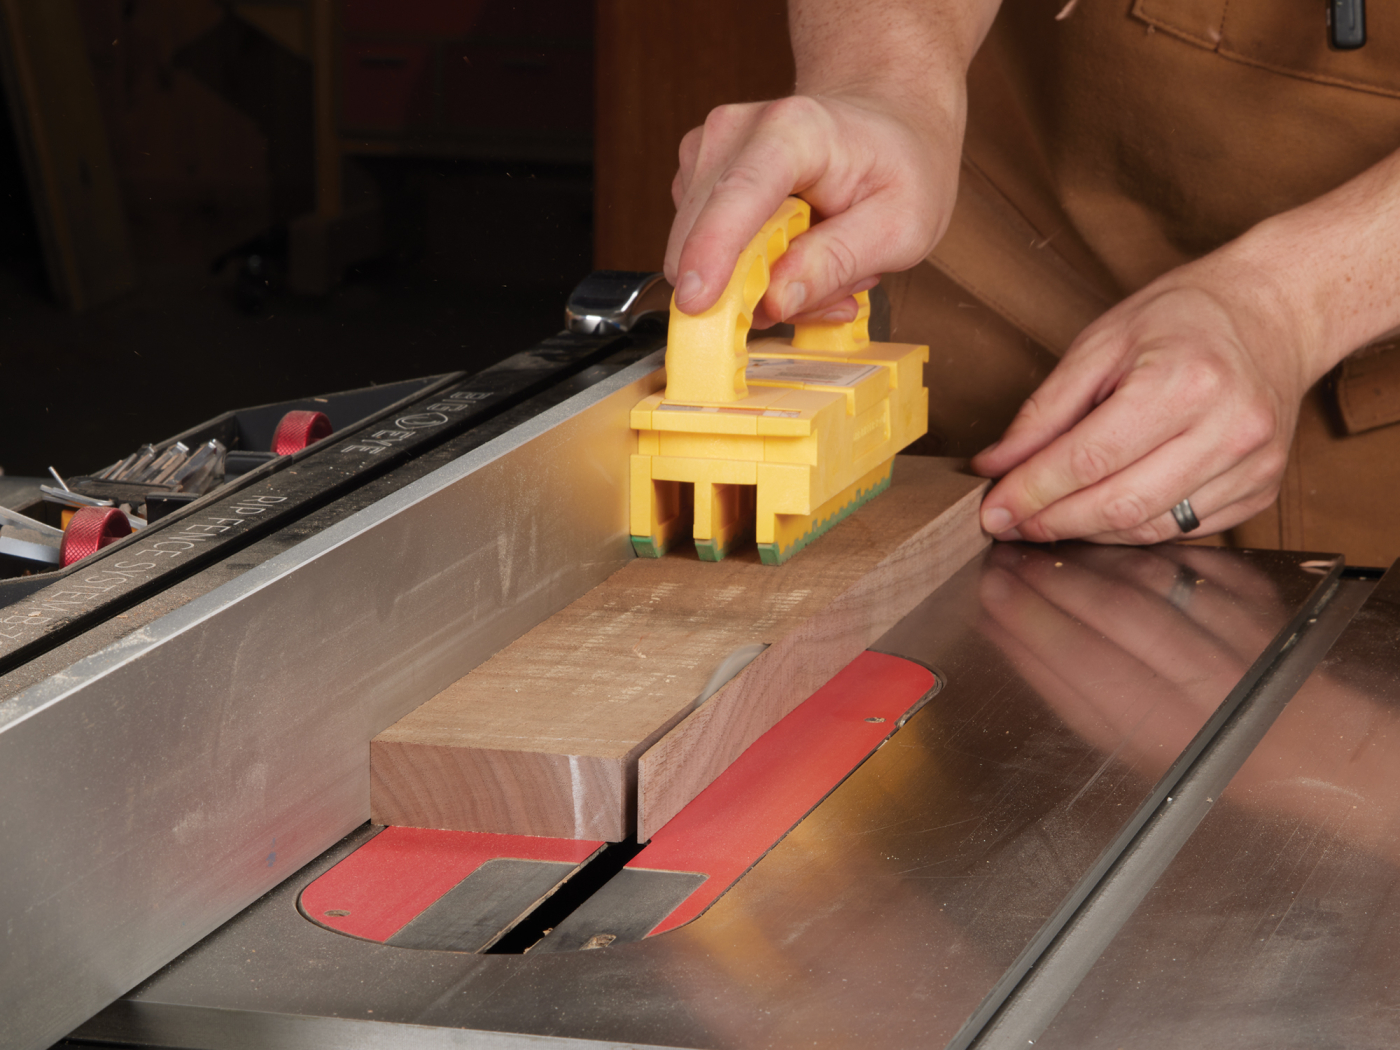
21 Two quick passes on the table saw cut the alternating rabbets without having to make any setup changes.
22
The ship lap is rabbeted at the table saw. Then, it’s laid in place on the back of the cabinet. Because of the opposite rabbets on each successive piece, only one screw is necessary on each piece (one screw on the top, and one on the bottom). The previous piece holds the prior piece down. You do want to make sure you space out the shiplap however. The hardwood will expand and contract, and you want to give it plenty of room to do so. You can see in photo 24 that I’m using a set up block as a spacer while installing it. A short screw is driven into a pre-drilled and countersunk hole to attach the back.
23 I started in the middle and worked my way towards the edges. The two shiplap pieces on the ends were ripped down to exact size.
24 A set up block helped me get perfect spacing when installing the shiplap.
A Slab Door
The door on this cabinet is a big, glued-up piece of walnut. I wanted to use the door to explore the addition of some form of organic texture. We’ll get to that in a bit, but my point here is that I didn’t pay as much attention to the grain on the door, as I knew it would be disrupted with some form of carving.
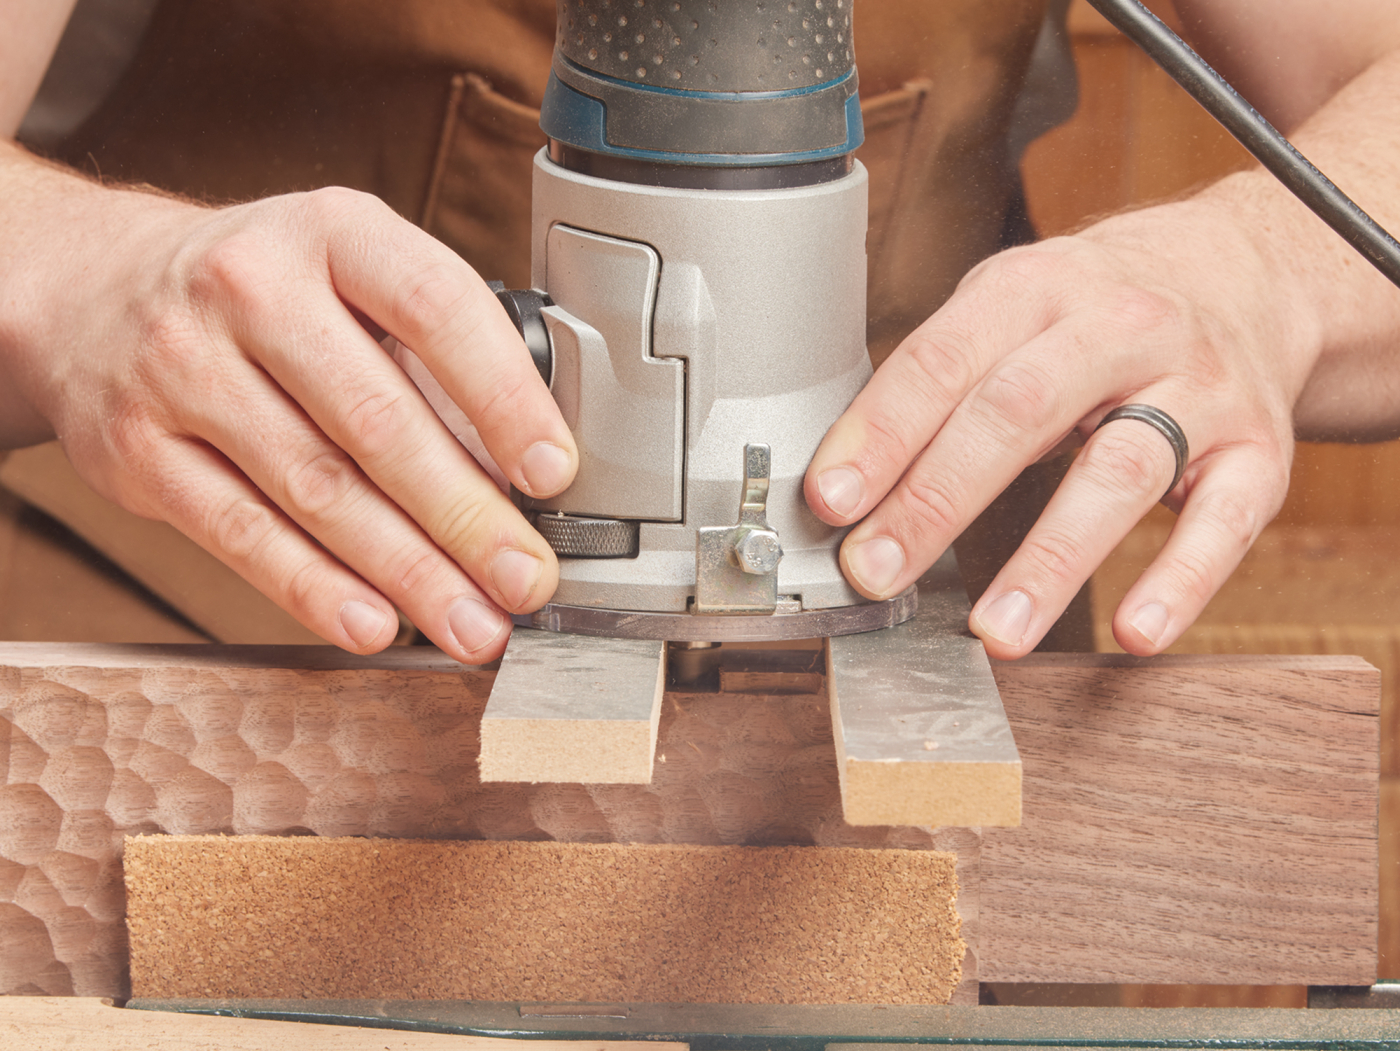
The first thing to manage with the door is the hinge locations. Much like the hinge pockets routed in the top and bottom of the case, the door gets the mating pocket for the other half of the hinge. These are done on the ends of the door, so I held the door in the Shaper Workstation to make these cuts. Again, a bit of clean up is required with the chisel to make the round router bit path squared off.

25 The Shaper was pressed into service again on the doors.
26 It’s very satisfying to clean up the corners with a chisel.
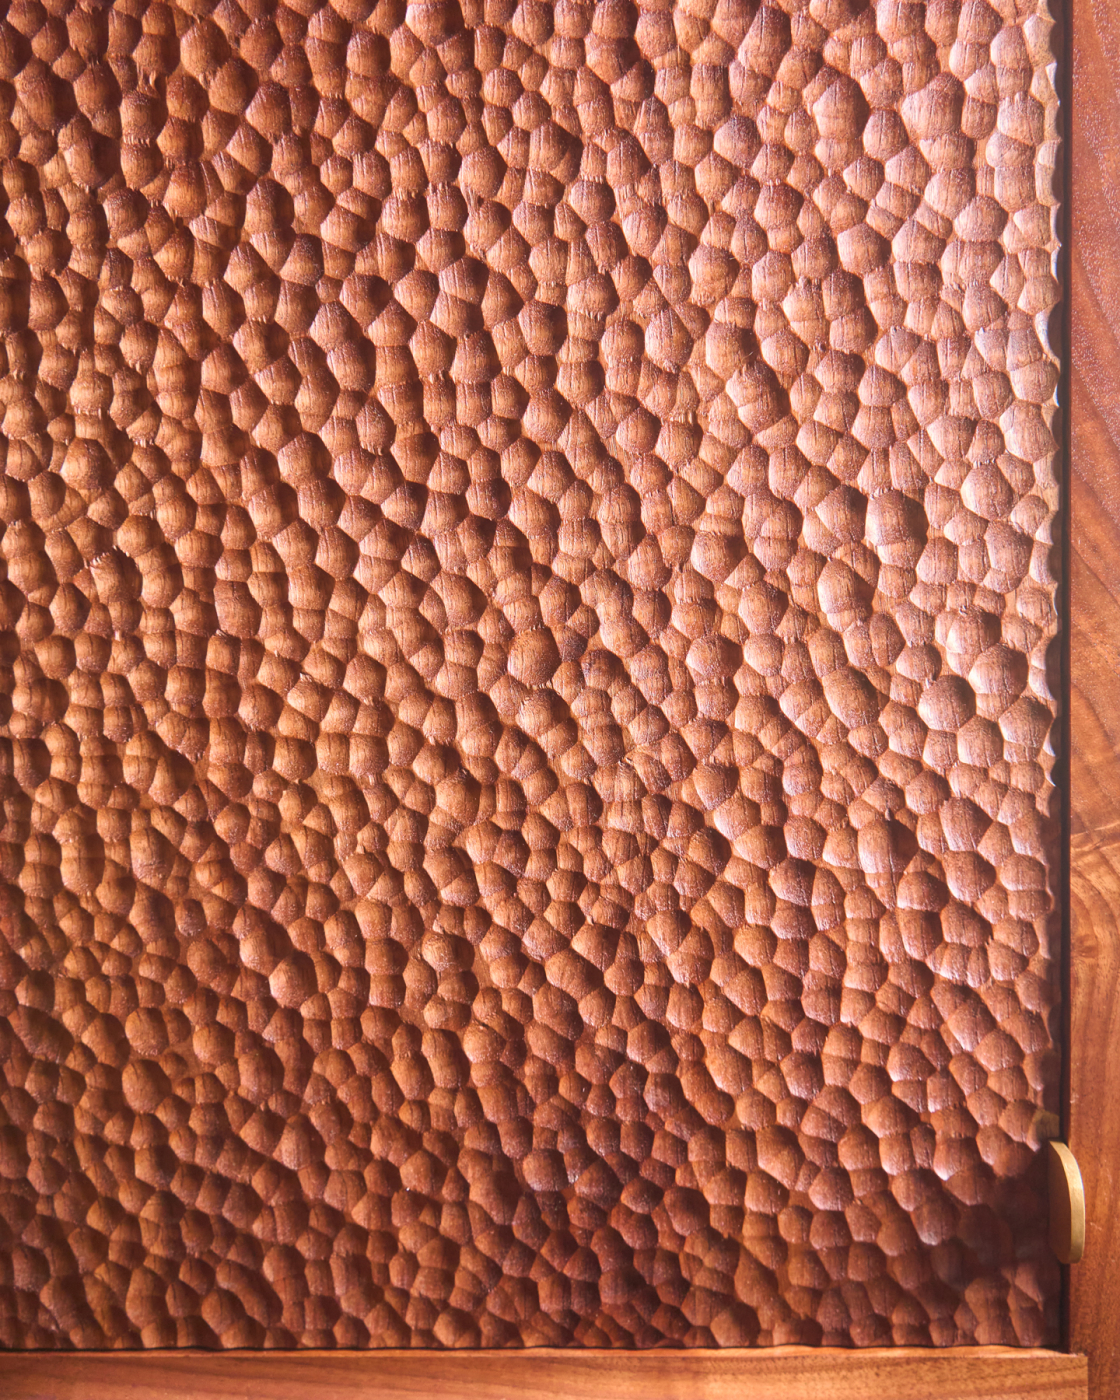
The texture on the door is created using an Arbortech power carving tool. In particular, it’s the Arbortech Ball Gouge (30mm). The gouge is a spinning blade that limits the depth of cut (so you have control) and it attaches to their Power Carving Unit. Texturing the door is not a fast process, but it is rewarding. The biggest task is trying to force yourself to be as random as possible with the pattern, and tap the surface. You can come back with chalk to highlight any flat areas and hit those again with the gouge. To clean off any fuzz, a flap disk in a drill worked really well to smooth it out. Overall, it left a really nice surface, and one that I want to work with more in the future.
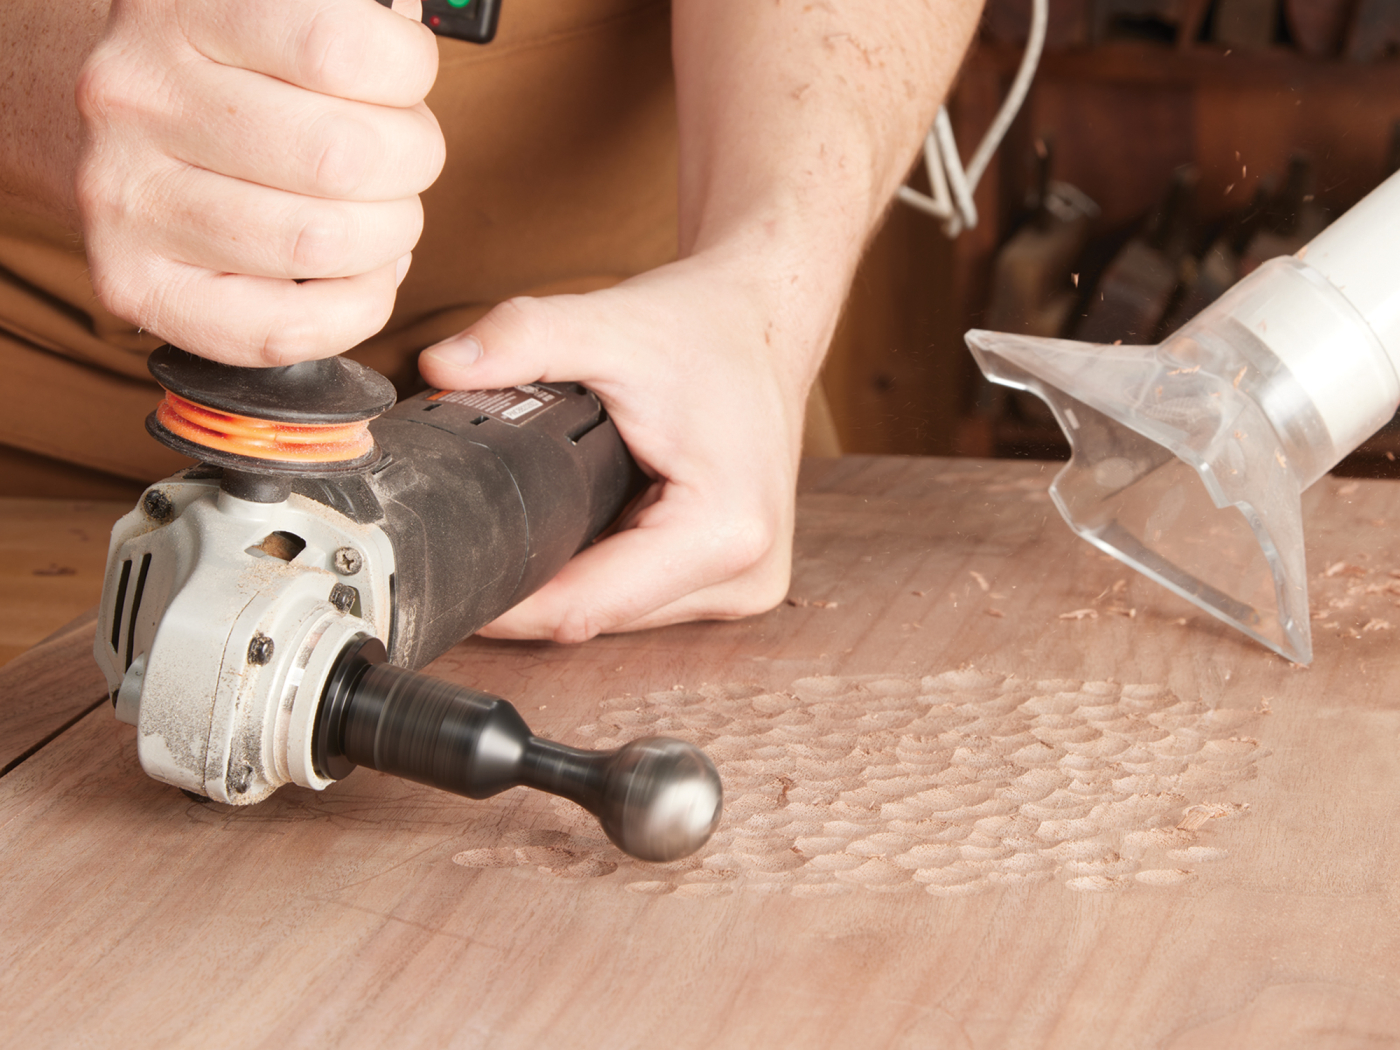
27 It actually takes a bit of focus not to make accidental patterns when carving a large panel.
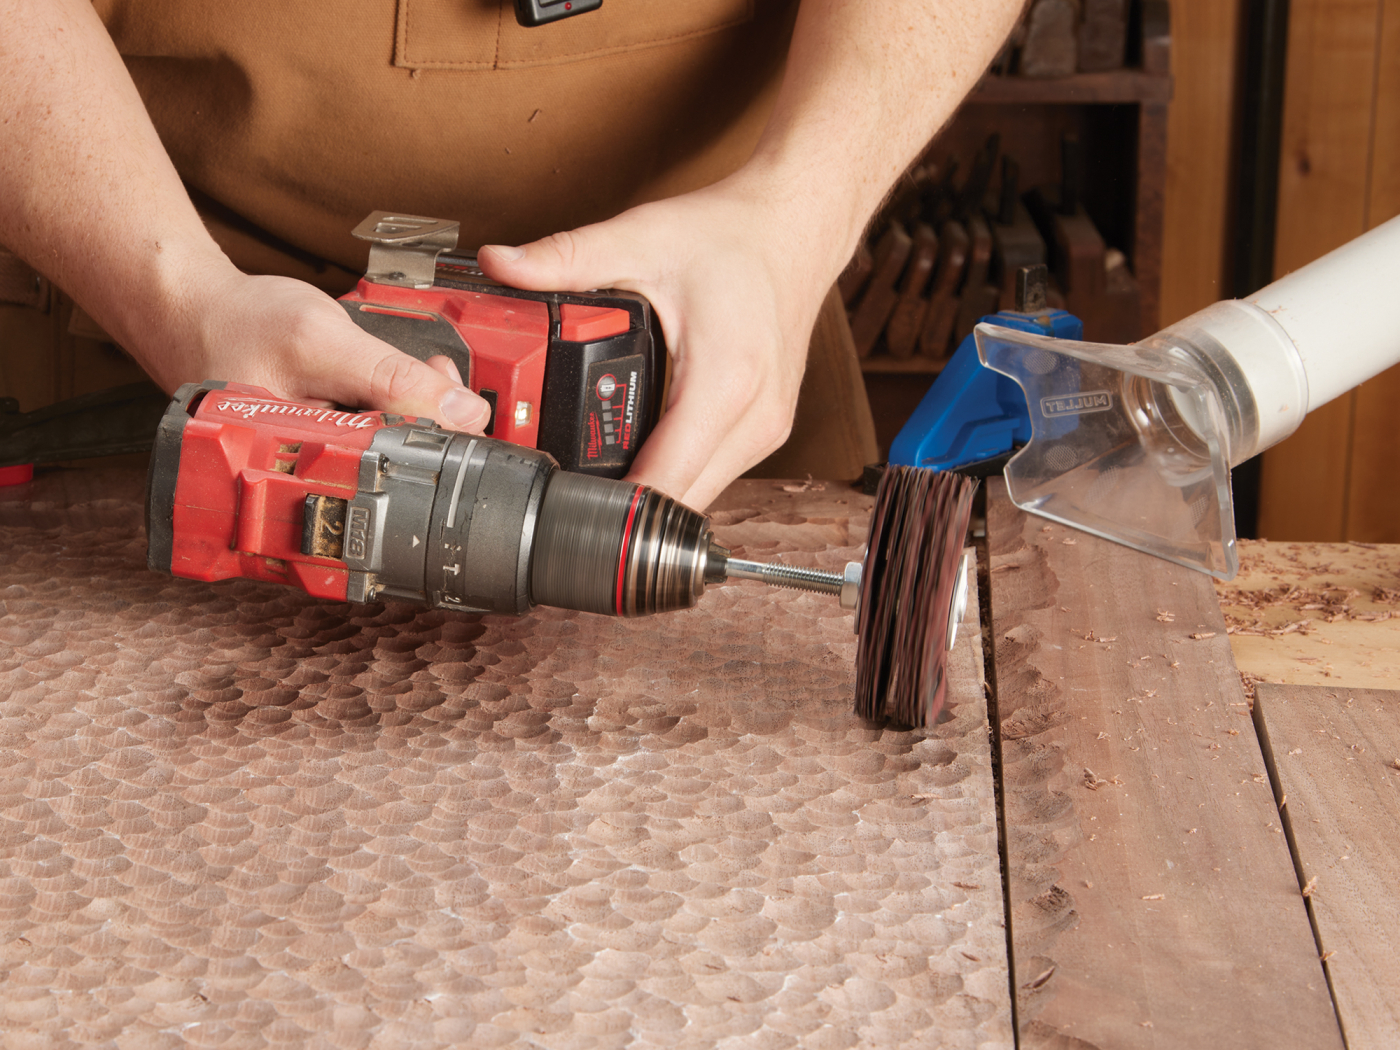
28 The flap disc knocks down the rough edges without dulling the texture.
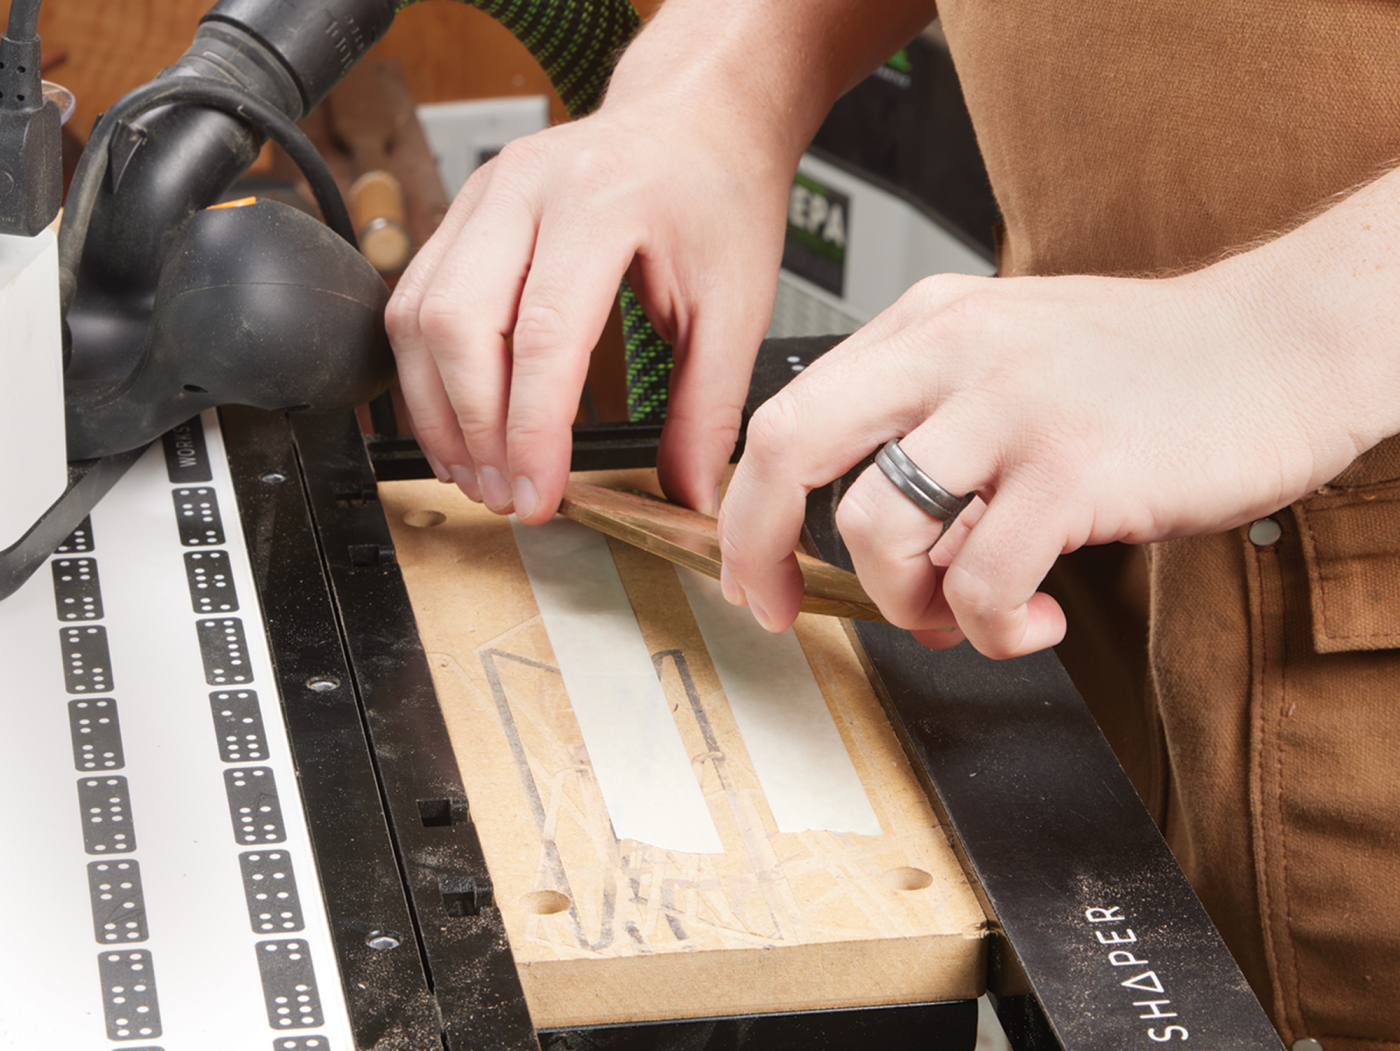
The original plan for the door was to create a wood pull that was integral to the door. However, a simple brass pull seemed to fit the bill better. Plus, I had used the Shaper Origin a bunch on this project, so I figured why not use it to cut a simple tab-shaped brass pull.
29 Affixing the brass to a larger work surface makes it easier to work.
30 The Shaper Origin is also great for cutting brass.
After cutting the pull to size, I spent a few minutes with a sanding block to surface the pull and create a nice matte look. Countersinking a few screw holes is easily done with a hand drill. Notching the edge of the door can be done with a handsaw and a router plane— you’re just making a little notch to fit the pull. A couple of brass screws complete the look.
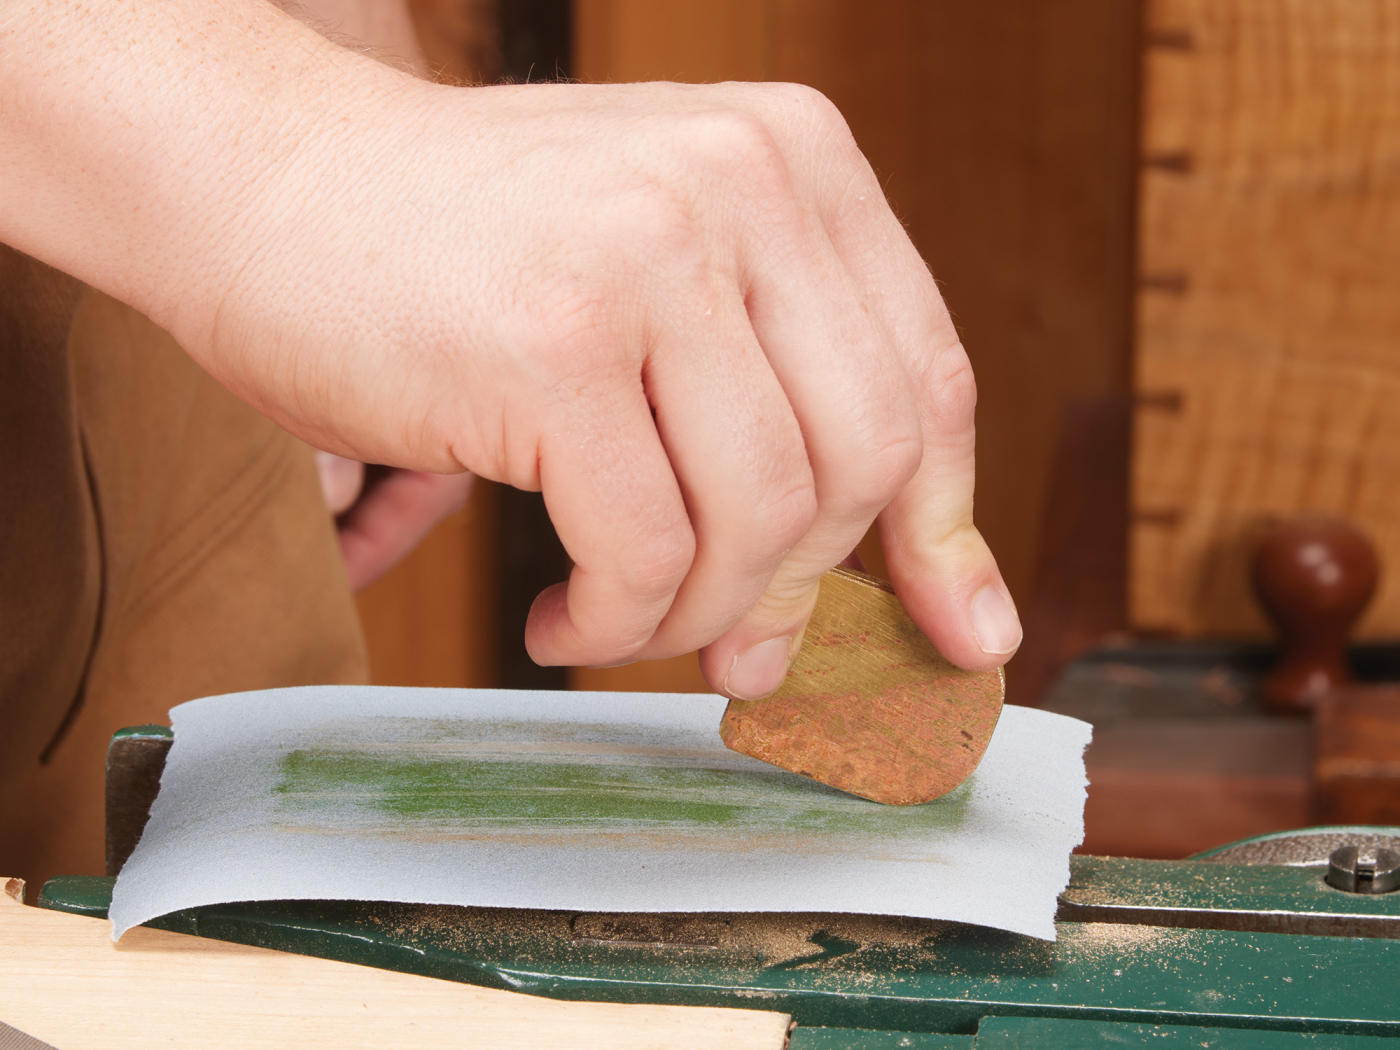
31 Adhesive-backed sandpaper helped me clean up the edges and buff off an old chemical discoloration.
32 The notch is cut in the same way we cut the dadoes earlier.
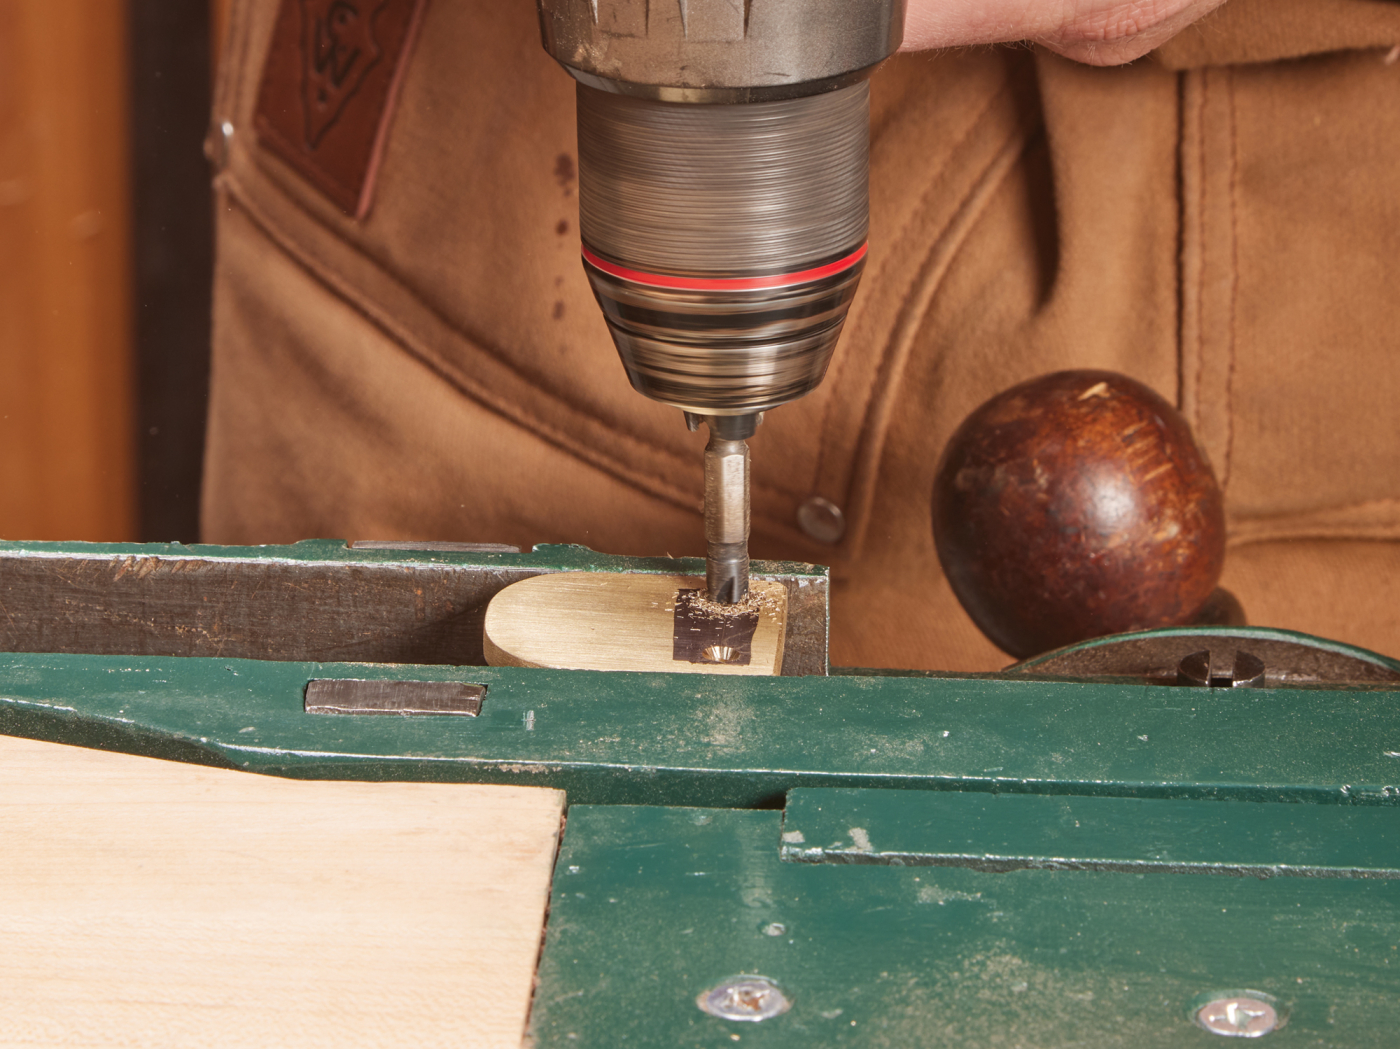
33 A countersink bit works as well on brass as wood.
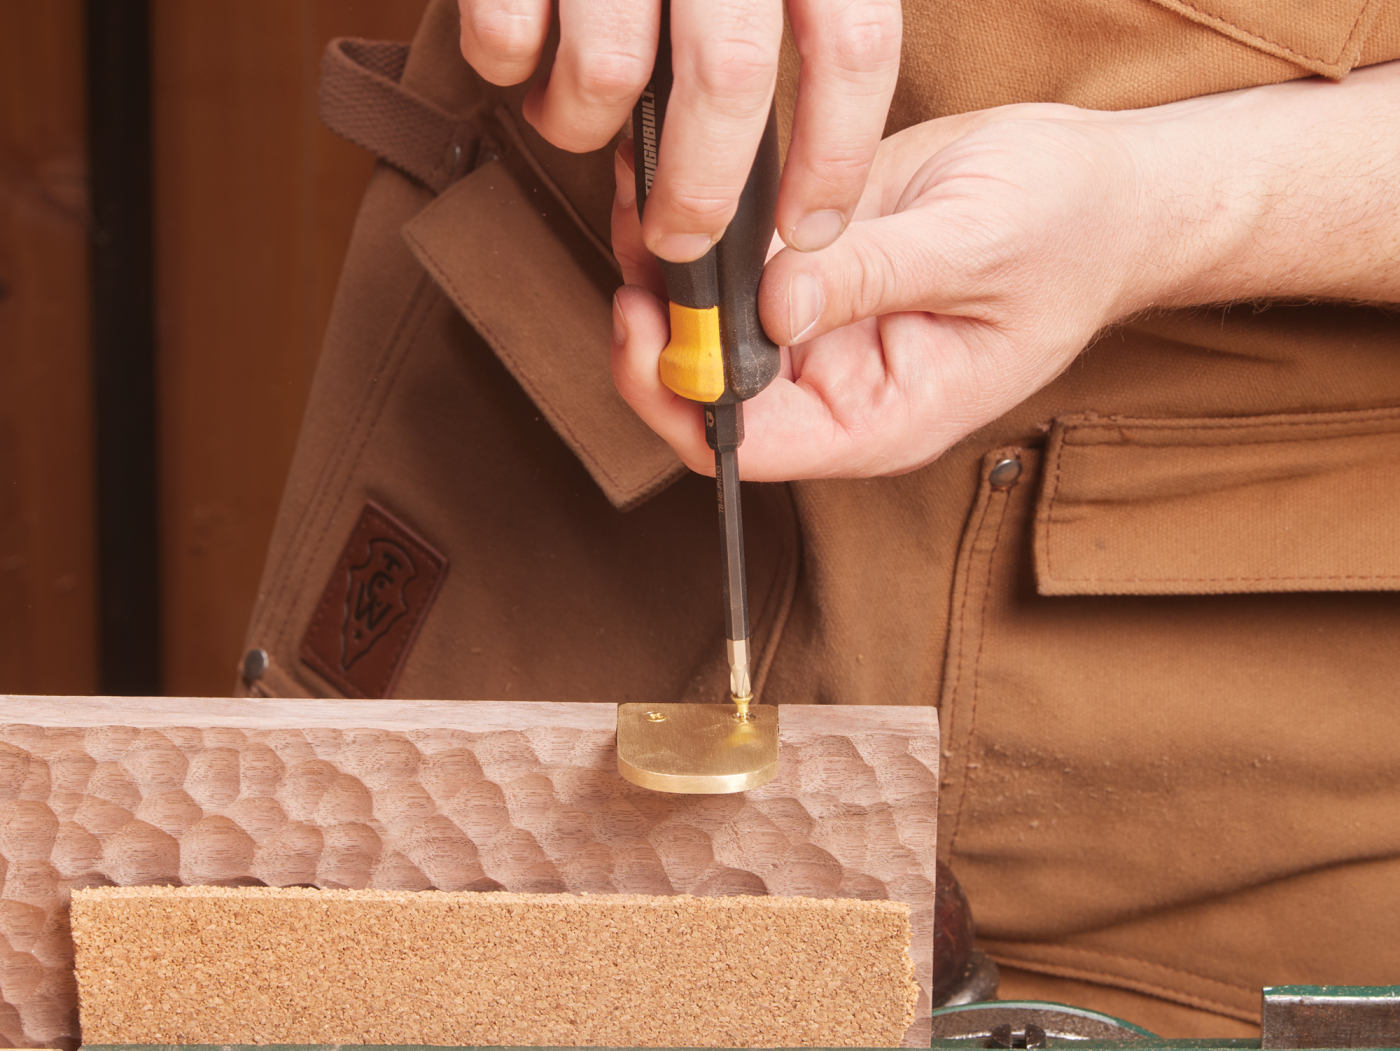
34 The final pull is perfectly integrated into the edge.
Finally, you can attach the door by sliding it over the hinges (mounted in the cabinet) then screwing them in place on the top and bottom edges of the door.
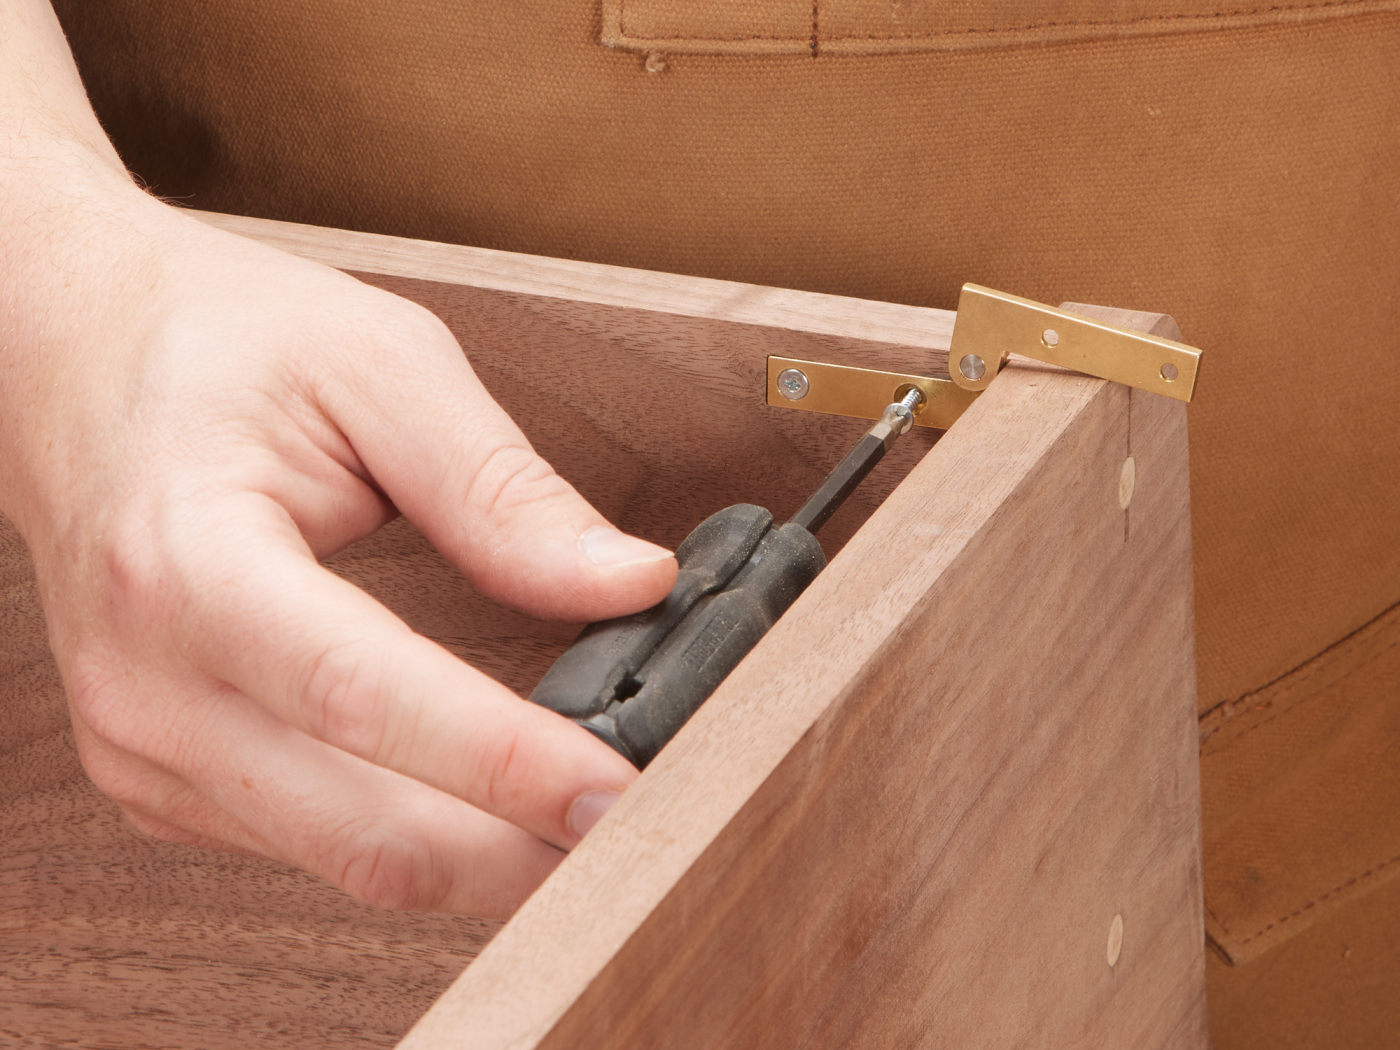
35 Hinges were mounted to the body first, and the doors slid on.
For the finish, I made my own homemade Maloof-formula base finish and topcoat. Full details of that process can be found in the online extras.


