


We may receive a commission when you use our affiliate links. However, this does not impact our recommendations.
Template Routing Tips
By Randy Johnson
??If you want to get the most from your router, you need to master template routing. Once you learn the basics you can spend a lifetime exploring its many possibilities. You’ll be able to build more kinds of projects, more accurately and more easily.
Template routing has two big benefits. The first is repeatability. With template routing you can make one or 100 parts that are exactly alike. Second, template routing simplifies the job of making curved or complex shapes.
A midsize fixed- or plunge-base router is fine for most template routing. We prefer router bits with a 1/2-in. shank for their strength but many 1/4-in. shank bits will do a good job as well.
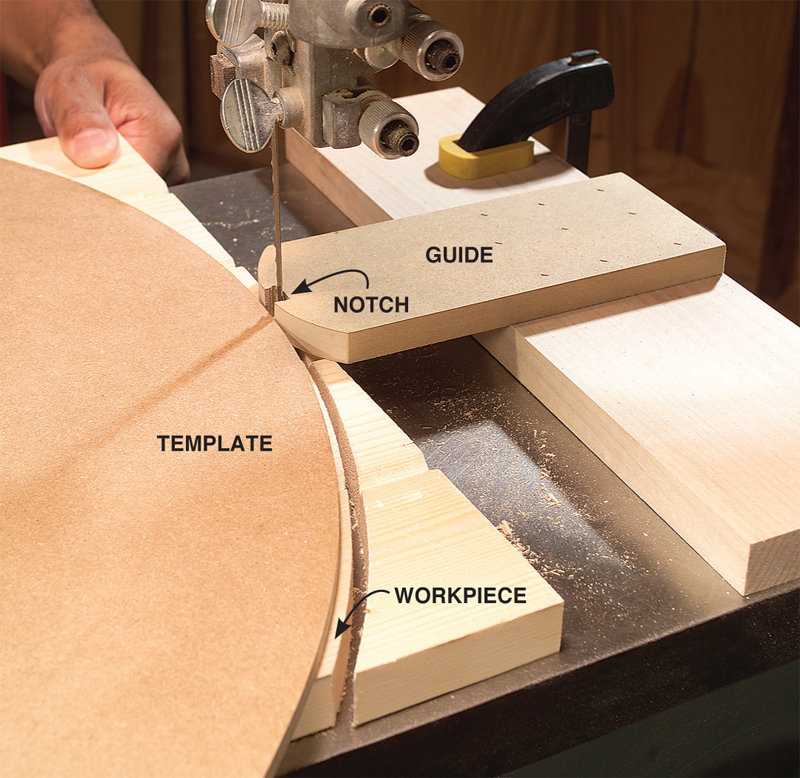
Bandsaw guide
|
Click any image to view a larger version.
|
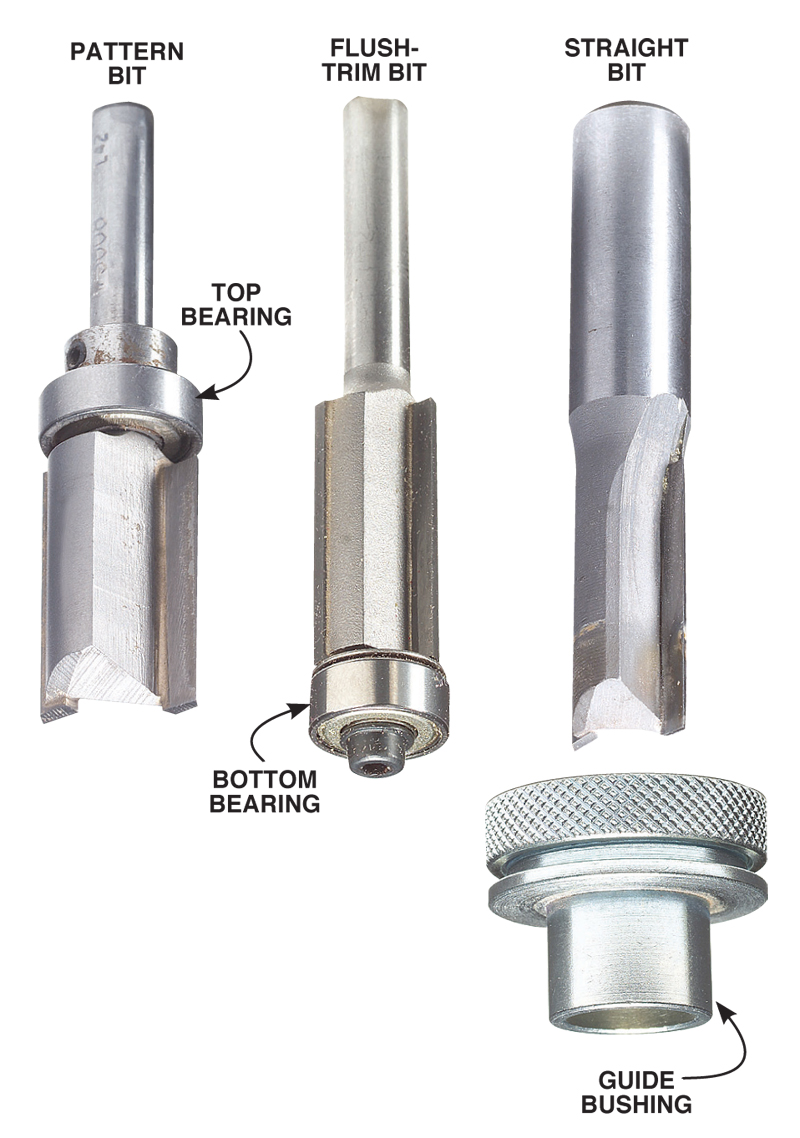
Use the right bitThere are three basic template router bits: a pattern bit with a top bearing, a flush-trim bit with a bottom bearing and a straight bit combined with a guide bushing which fits in a router’s baseplate. When possible, use the largest diameter bit that your router, template or wallet can handle, because large diameter bits are less likely to burn, chip or chatter. The diameter of the bearing on the pattern bit and flush-trim bit equal the cutting diameter of the bit. This simplifies template design because the template is made the same size as the finished workpiece. Using a guide bushing for template routing requires the template to be bigger or smaller than the final shape of the workpiece, depending on whether you rout on the inside or the outside of the template. |
 |
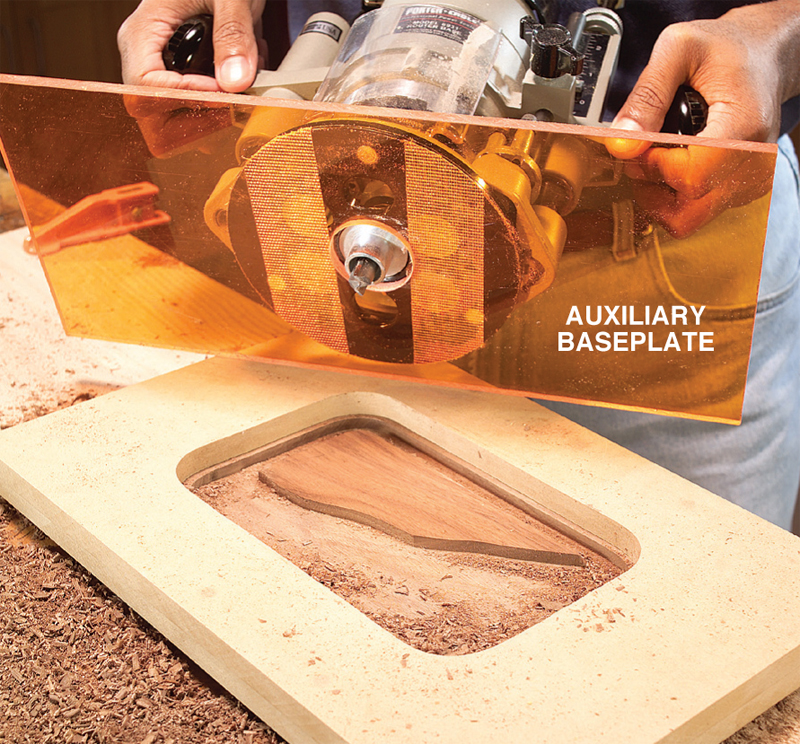
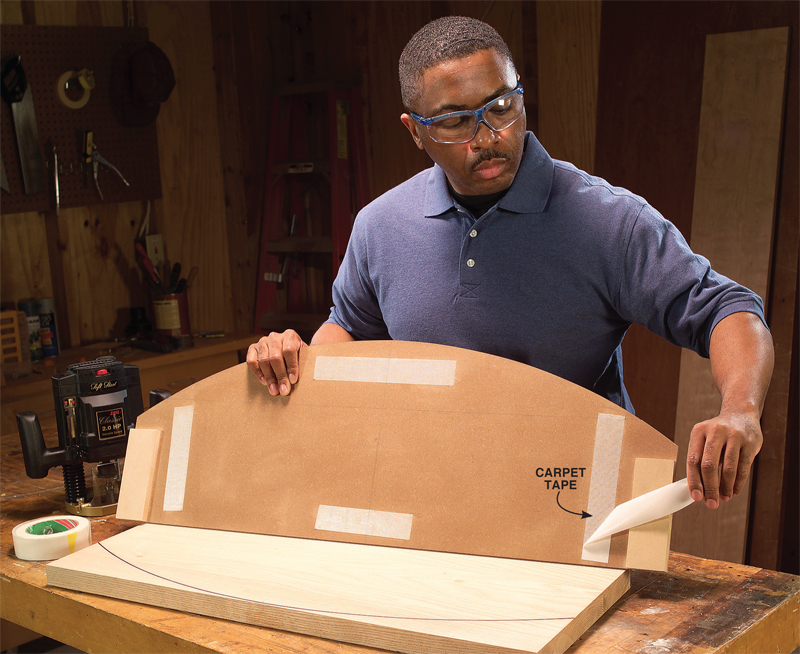
Span the areaA wide auxiliary baseplate is the best way to span open template spaces. It can be made of plastic or wood and should be long enough to prevent the router from falling into the template opening. Double-faced carpet tape works well for attaching the auxiliary |
 |
Tools for template shapingThe two most useful tools for shaping and smoothing router templates are a disc sander for outside curves and an oscillating spindle sander for inside curves. A drum sander on a drill press and a belt sander also work well. |
 |
Peel-and-stick templateCarpet tape is a quick way to attach a template when you are only making one or two parts. Make sure your parts are dust-free so the tape sticks tight. Once the template is in place, give it a few raps with a mallet. This will also help the tape take hold. When you’re done routing, use a putty knife to pry the pieces apart. Carpet tape sometimes leaves a residue, but it’s easily cleaned off with mineral |
 |
Clamp it downToggle clamps are hard to beat for their ease of use. They hold the work securely and make it easy to change parts. They are available in various sizes but the 6-1/2-in.-long style shown is a good size for most router jigs. |
 |
Screw it with screwsScrews are a very secure way to attach a template. They do leave holes but that’s not a problem if one side of the workpiece won’t be seen, as in the case of this chair seat. |
 |
Use a starting pin for safe startsUse a starting pin with templates that require routing all the way around. This reduces the chance of kickback and gives you something to bear against, much like a fence does for straight cuts. To use the starting pin, push your rough-cut workpiece against the pin and then slowly rotate the workpiece into the router bit until it starts cutting. When the bearing of the bit completely contacts the template, you can swing away from the starting pin. Rout around the workpiece in a counterclockwise direction. Keep a good grip on your workpiece while routing. Don’t let go of the workpiece while it’s in contact with the router bit or your project may turn into a high-speed flying object! |
 |
Oops!Here’s an easy fix if you accidentally put a gouge in your template with the router bit. Use auto body filler to repair the damage. Apply excess filler to the damaged area and after it’s hardened, rasp and sand it to final shape. |
 |
Ramp-up for easier startsA starting ramp provides a safe place for the router bit to contact the template before it starts cutting. A ramp eliminates the need for a starting pin, so build a ramp into your jigs whenever possible. An exit ramp on the other side of the template provides the same advantage at the end of the cut. |
 |
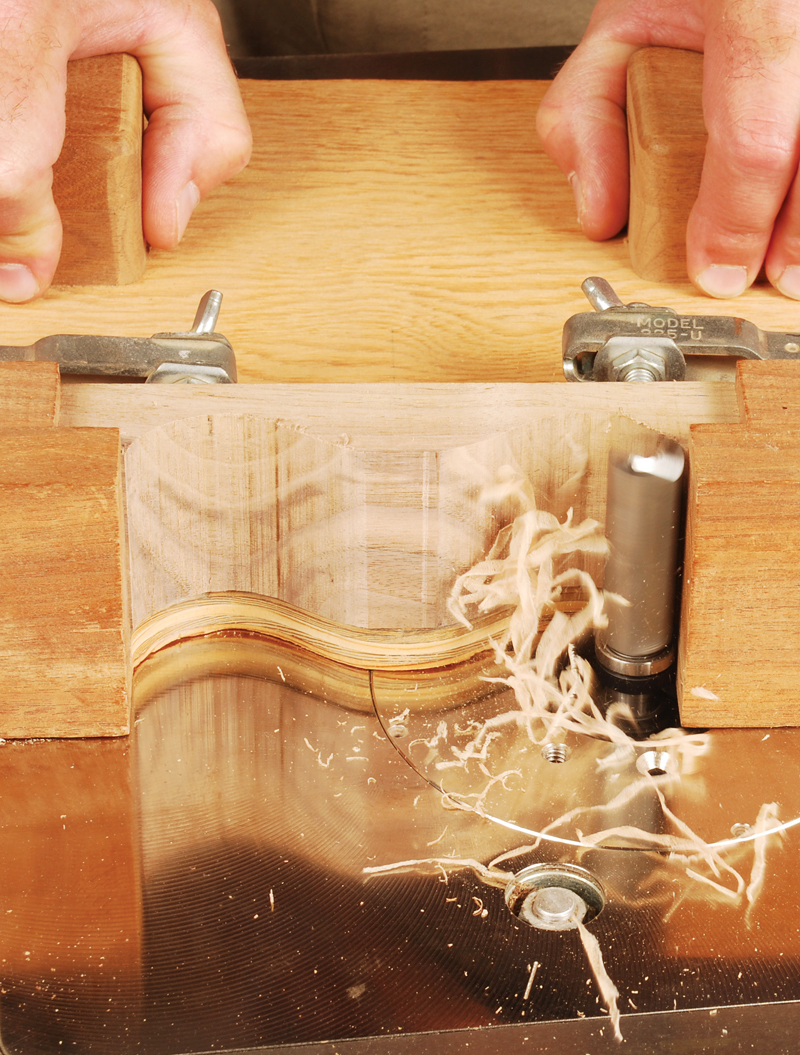
Shape thick parts in two steps
| Step 1: Use a top-bearing pattern bit and template-rout the bottom half of the thick part. |  |
| Step 2: Use a bottom-bearing flush-trim bit to rout the top half of the thick part. The bearing rides on the surface created in Step 1. The thick part is removed from the template jig and clamped to the table for this step. |  |
Double-duty templateA two-sided template is a great way to rout multiple parts that need to be shaped on two sides. The trick to building the jig is to make one side (A) 1/8-in. wider than the other side (B). That way side A has room for the rough-cut inner edge of the workpiece. Side B is made to final width. Before using the template, bandsaw the workpieces oversize by about 1/8 in. on each side. Then clamp one workpiece in side A and make the first pass. Next move that part to side B and rout the second side. |
 |
Source(Note: Product availability and costs are subject to change since original publication date.) Amazon.com, #MS1-225D Toggle Clamp. This story originally appeared in American Woodworker March 2004, issue #106.
|

Here are some supplies and tools we find essential in our everyday work around the shop. We may receive a commission from sales referred by our links; however, we have carefully selected these products for their usefulness and quality.


