We may receive a commission when you use our affiliate links. However, this does not impact our recommendations.

Shaker Sewing Cabinet
Machine-cut
dovetails add
a new twist.
By Tom Caspar
|
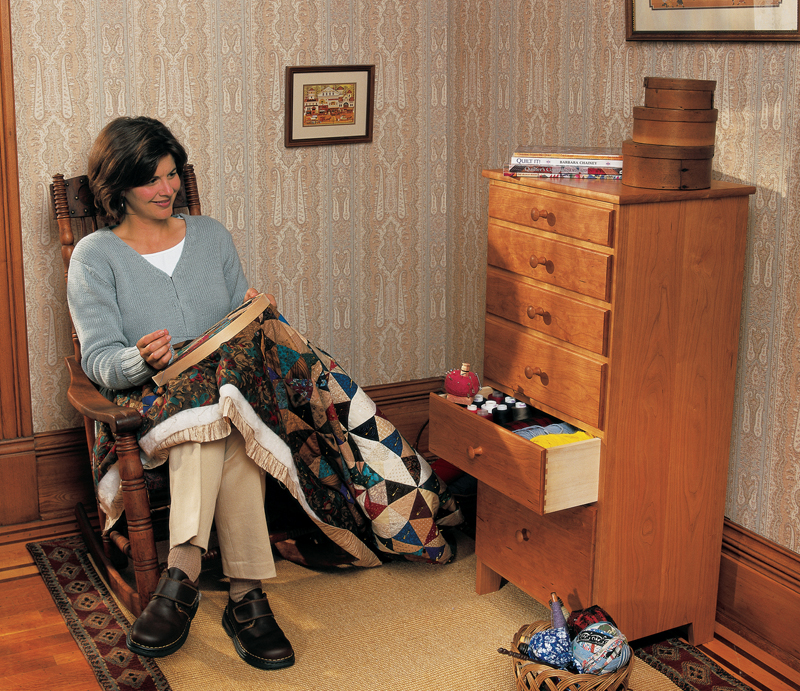
You can find a place for every
conceivable sewing notion in this
Shaker-inspired chest of drawers.
Mix 'n' match modular trays fi t perfectly
in the middle drawers. Store patterns or
magazines in the large lower drawer.
There’s enough compartments for a
complete sewing kit.
You’ll make the most out of your
router and half-blind dovetail jig when
you build this cabinet. Not only are the
drawers dovetailed, but the case is as well!
All the joints are modern variations of the
dovetails made by Shaker cabinet-makers
150 years ago.
|
|
You may also like…
Shaker Table
Shaker Stand
Shaker Sideboard
Shaker Blanket Chest
|
|
Cut dovetails in the sides and top rails. Each side of the
cabinet is composed of two pieces that are glued together
after the dovetails are cut because the complete side is too
wide to fit in a basic dovetail jig.
|
|
Click any image to view a larger version.
|
|
Cut biscuit slots in each half of one side. Use biscuits or
splines to align the two halves when you glue them together.
|
|
|
|
Glue the side together. Align the ends with a clamp
placed lengthwise. With biscuits in the glue joint, you’ll need the
force of a clamp to shift the boards. Once the ends are aligned, remove the long clamp and check
the side for flatness. Flat sides are necessary for the next step
to succeed!
|
|
|
|
Rout dovetailed grooves in the
sides. Align the jig with center
marks on the edge of the side. Screw the
jig directly to the side; the screws will
hold down the far side of the jig, where
clamps can’t reach. The screw holes are
invisible in the finished case.
|
|
|
|
Cut dovetails in the ends of the
dividers. Rout equally from both sides of
the divider so the dovetail is centered.
Clamp the narrow workpiece to the jig
so it doesn’t slip down into the opening
of the router table.
|
|
|
|
Dovetail the drawer supports. It’s basically the same
setting as in Photo 5. You may have to move the fence to cut a
fraction deeper, because the fit over a longer distance needs to
be looser.
|
|
|
|
Cut slots in the ends of the drawer supports for #0 biscuits.
Line up all the supports and make, in effect, one continuous slot.
Biscuits align all the pieces that support the drawer so the drawer
will slide smoothly, without hitting any uneven edges.
|
|
|
|
Assemble
the case
one piece at
a time. That’s
the beauty of
dovetails! You
don’t have to
clamp a dozen
pieces at once.
|
|
|
|
Glue the drawer supports to the front dividers. The
drawer supports are only glued at the front, not in the groove,
so the case side is free to expand and contract.
|
|
|
|
Drill screw holes for the top from inside the case. That way
you know the holes will be accessible when you install the top.
|
|
|
Product Recommendations
Here are some supplies and tools we find essential in our everyday work around the shop. We may receive a commission from sales referred by our links; however, we have carefully selected these products for their usefulness and quality.