We may receive a commission when you use our affiliate links. However, this does not impact our recommendations.
 It’s a crate. It’s a cabinet. It’s useful shop furniture.
 It’s a crate. It’s a cabinet. It’s useful shop furniture.
Editor’s note: This article originally appeared in the February 2014 issue of Popular Woodworking Magazine.
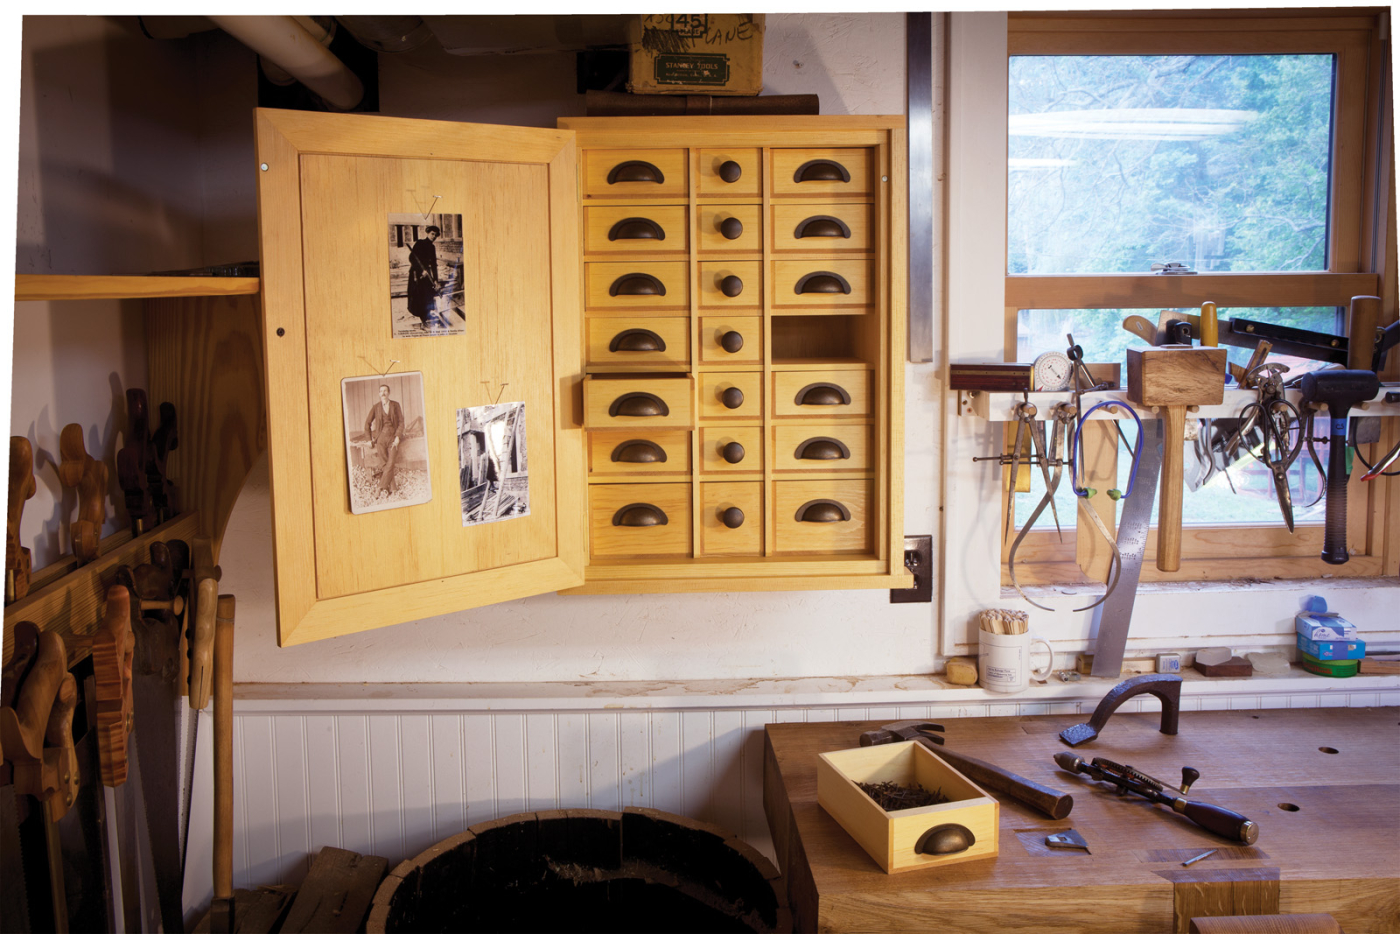
One of the enduring features of Roy Underhill’s “The Woodwright’s Shop” PBS television show is the familiar and rambling backdrop of former projects, parts, tools and wood that frames most episodes. My favorite item in his shop is his nail cabinet – a pine wall-hung cabinet tucked in the far back corner.
On the inside of the door of the cabinet, Roy has hung a print of a lovely lady holding a bock beer alongside an admiring goat. And while that’s some nice lens candy for the television cameras, I’m more attracted to the 21 drawers on the right side of the cabinet. These drawers are more useful to the married woodworker.
Nail cabinets show up frequently in traditional workshops of many trades, and they are illustrated and discussed in books about traditional shops. These cabinets stored the screws, nails and bolts that a workshop might need. And because these fasteners were valuable, many of the cabinets would have a lock.
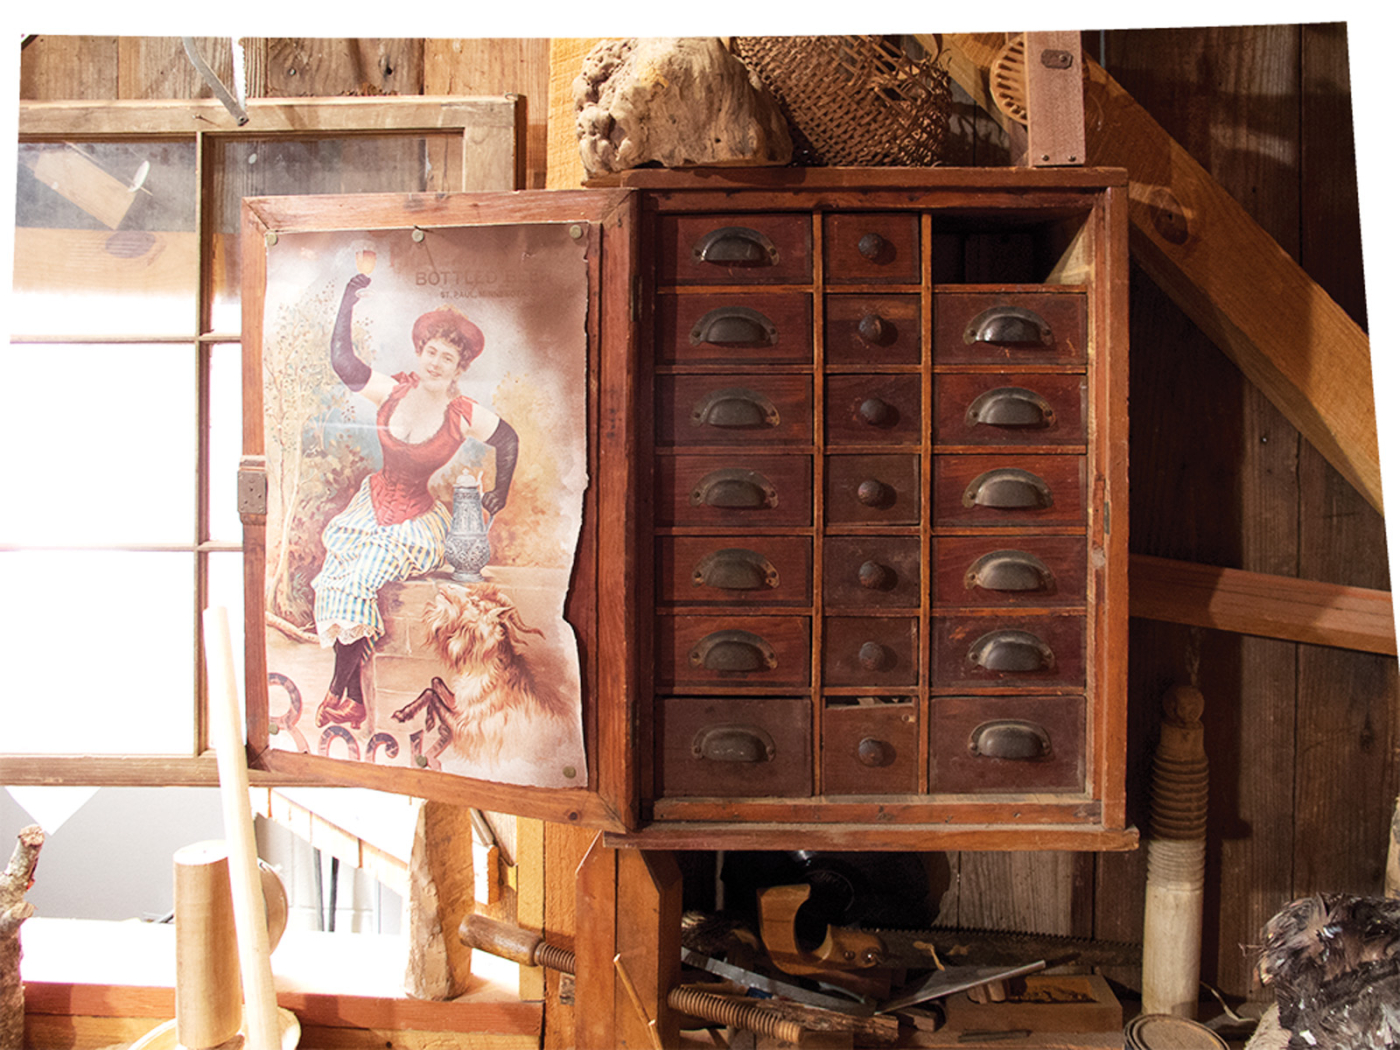
On the set. Roy Underhill’s nail cabinet is a converted crate. The cabinet has seen a lot of use and has held up pretty well.
The last time I visited Roy, I asked permission to measure and reproduce his nail cabinet, which he purchased during a yard sale in Washington, D.C. As I measured the piece, I was bemused by its unusual construction – it was a finger-jointed carcase covered in nailed-on battens.
Then Roy showed me the reason for the odd construction: The cabinet was built from an old crate for Ohio Blue Tip Matches made by the Ohio Match Co. of Wadsworth, Ohio (1895-1987). For me, this made the project even more fun: I had to first build a crate and then turn it into a wall cabinet.
As a result, some of the construction techniques might seem a bit odd. If you don’t like them, feel free to change them. My goal was to make a respectable reproduction of this charming cabinet because I’ve always liked the one on Roy’s show.
Construction Overview
The original is made entirely of pine – probably Eastern white pine – though any dry softwood will do. The carcase of the original crate is joined at the corners with finger joints (though I opted for dovetails on my version). The back of the carcase is nailed-on 3⁄8“-thick boards that are shiplapped.
The assembled carcase is covered with narrow 1x battens to make the “crate” easy to grab and lift. These battens conceal the joinery on the corners of the carcase.
Once you have your “crate” built, you can turn it into a cabinet. The interior is divided into 21 spaces using thin pieces of pine that are joined with an egg-crate joint. The drawers are simply glued and nailed together; the only thing difficult about the drawers is that you have to build 21 of them.
Finally, the entire cabinet is fronted by a door with mitered corners. The panel of the original door was simply nailed to the inside of the mitered door frame. The panel had cracked over time, so I chose to make my panel float in grooves plowed into the rails and stiles.
The whole thing is finished with shellac and hung on the wall with a French cleat.
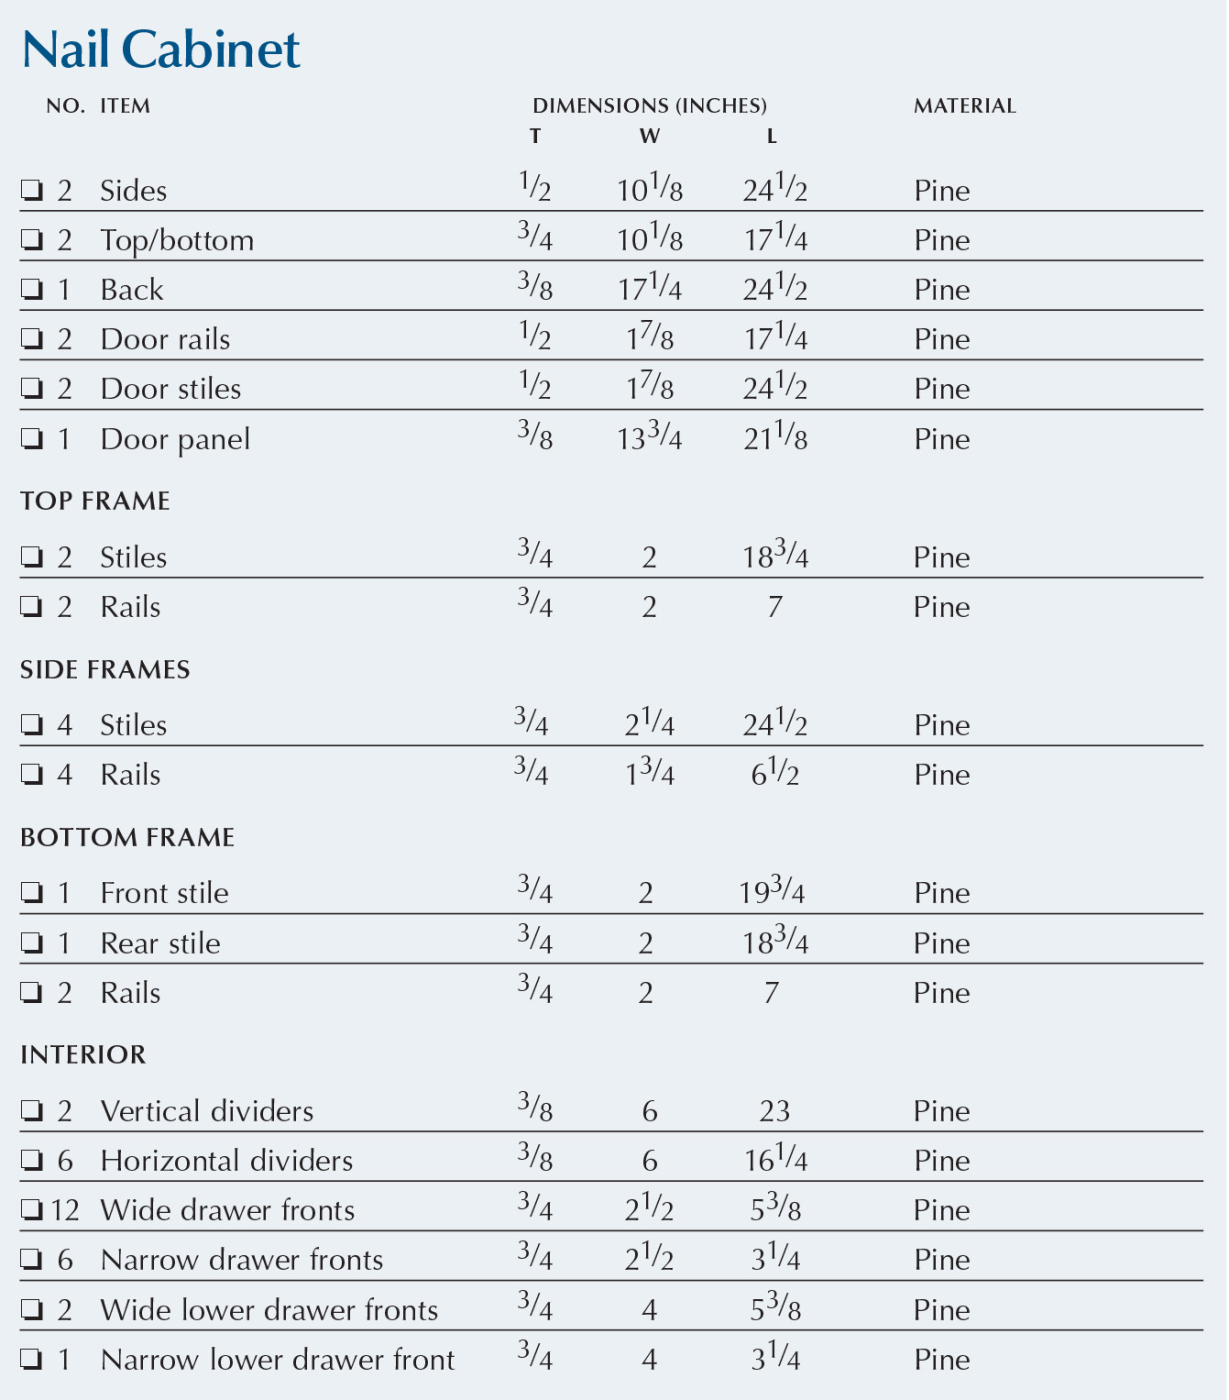
Nail Cabinet Cut List and Exploded View
 The Walls of the Crate
As mentioned above, the walls of the original crate were joined at the corners by narrow finger joints (you can see the joints from the inside where they have separated a bit). I don’t have the jigs or desire to make narrow finger joints here, and cutting this machine joint by hand is just silly.
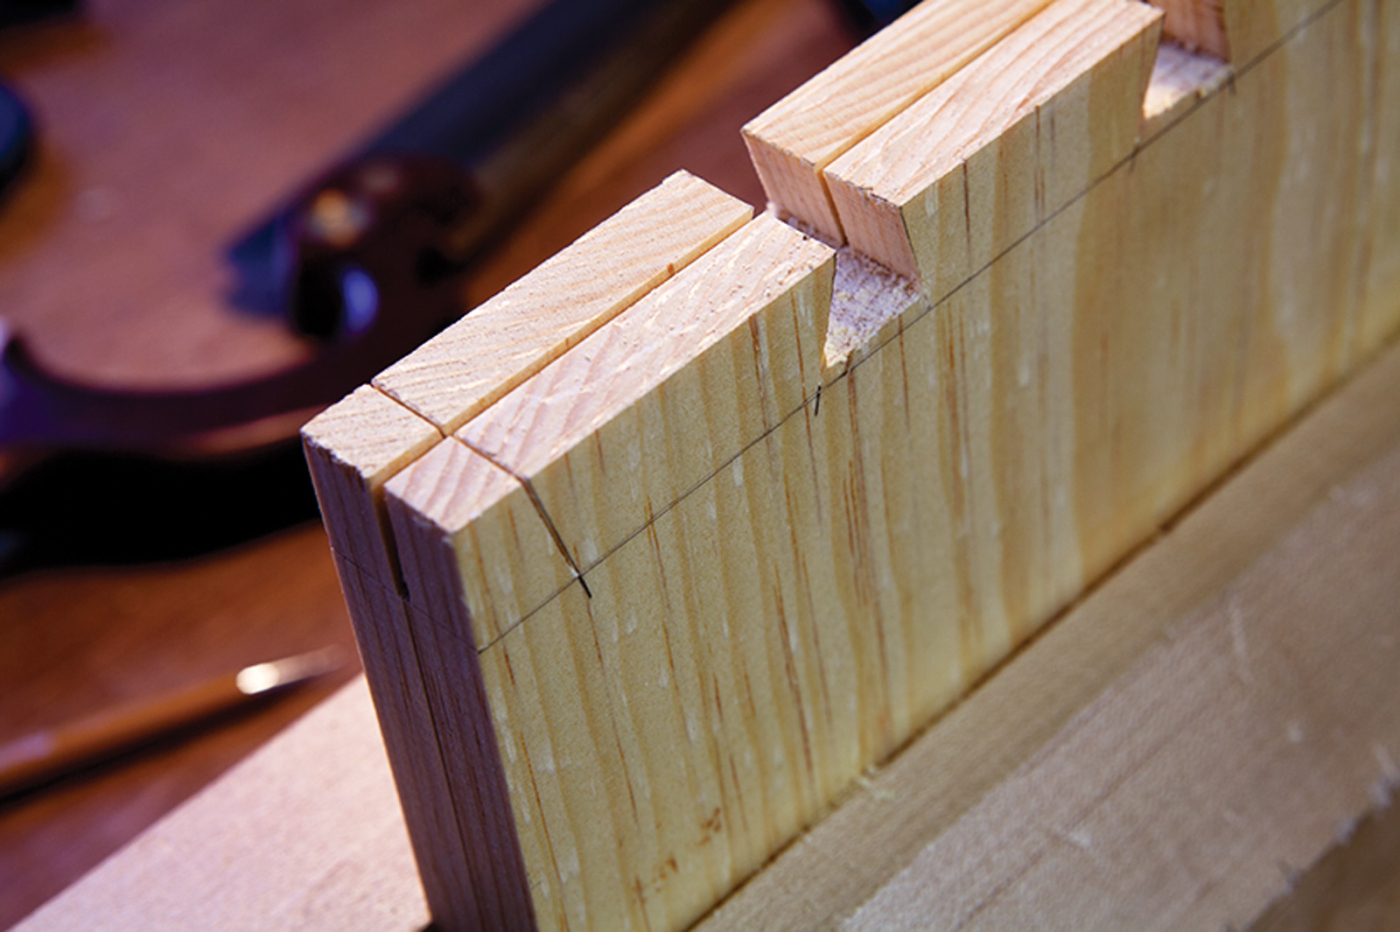
Gang-cut tails. Whenever possible, I gang-cut my tail boards, which saves time and (in my opinion) makes it easier to keep the saw 90° to the face of the board. A shallow rabbet on each tail board makes it easy to keep things square during transfer.
So I joined the case sides, top and bottom using through-dovetails. The joinery is all covered by battens in the end, so the end result looks the same as the original. For strength, I put the tails on the case sides; the pins are on the top and bottom bits.
Glue up the carcase, paying close attention to keeping the corners square at both the front and rear of the case. I use hide glue for joints like this because it’s reversible.
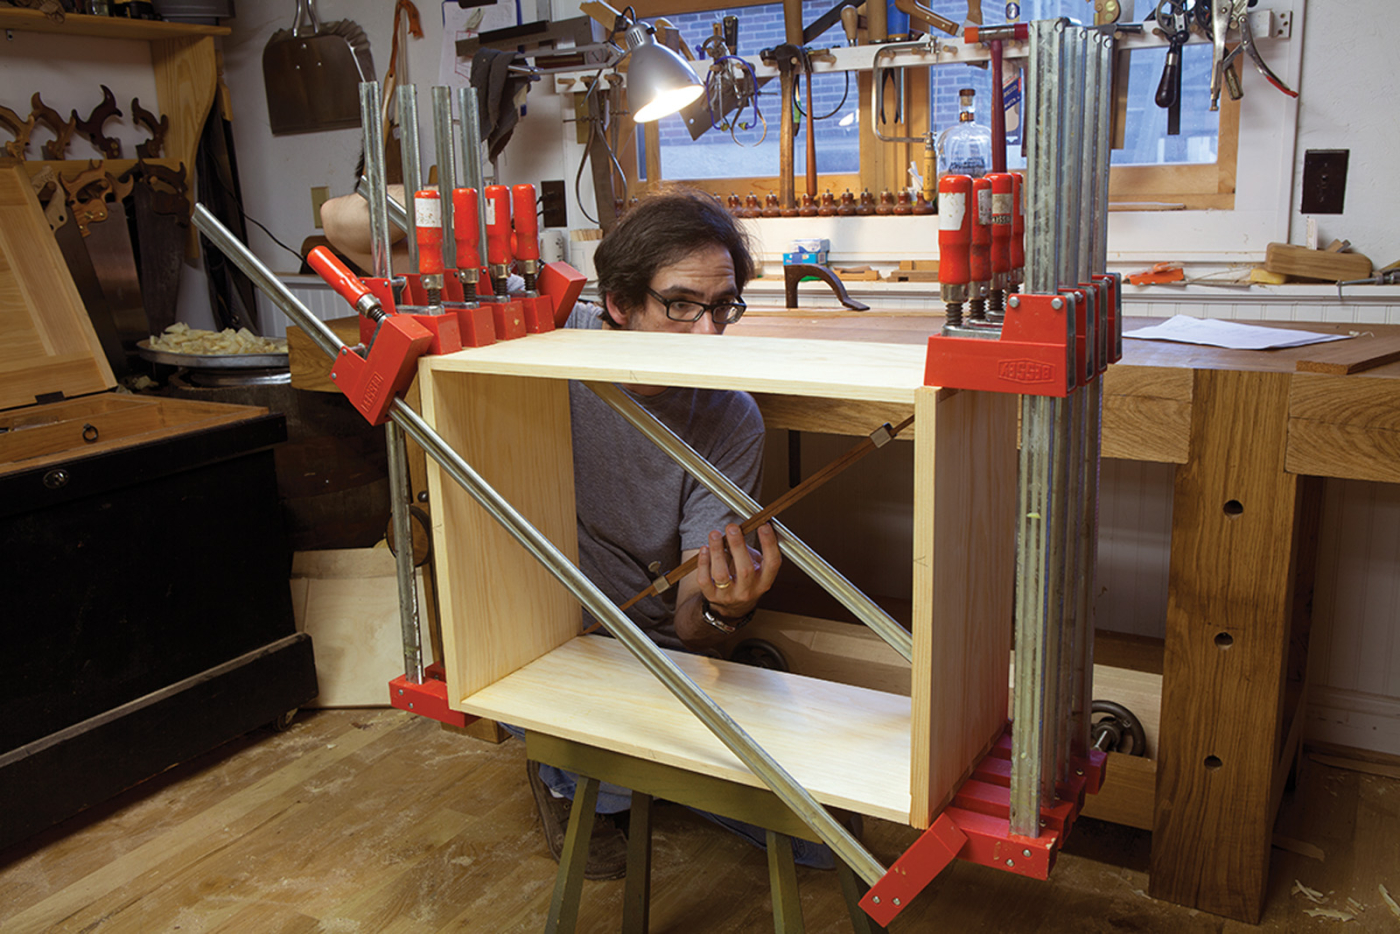
As square as possible. Take extra pains to get the carcase square at glue-up. It will save you frustration later when you fit the door and the 21 drawers.
If you can’t get the case perfectly square at glue-up, you have one more chance to pull it square with the backboards. The backboards are 3⁄8“-thick boards of pine that are shiplapped on their long edges and nailed to the back of the case.
Hide the gap. The shiplapped joints on the long edges of the backboards hide any gap that would open up when the boards shrink in the dry season.
I used 3d cut fine finish standard nails to affix the back, though 4d will do.
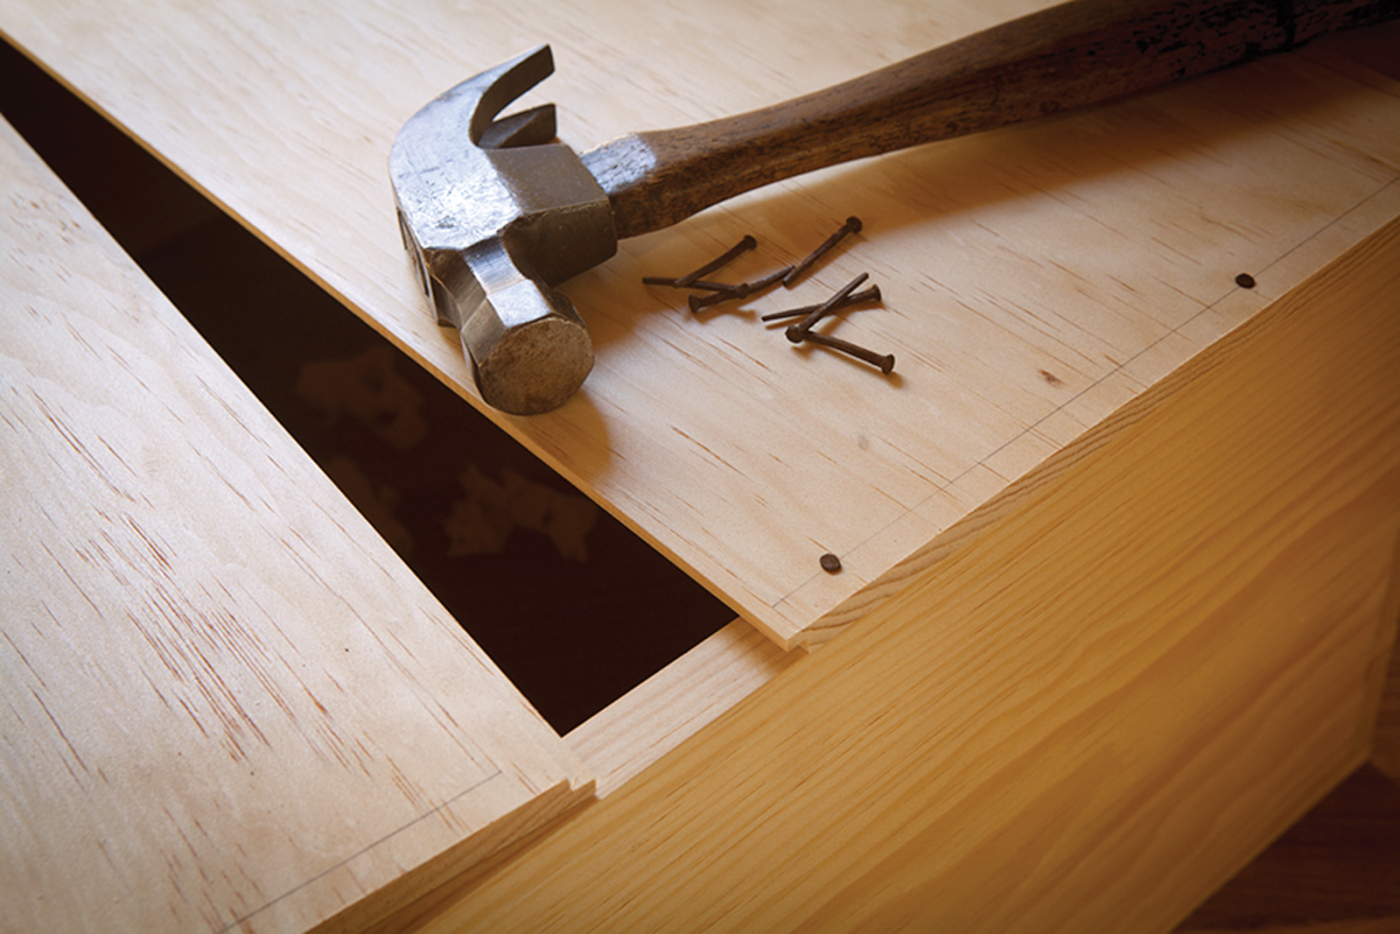
Nails, no glue. Nails will bend, allowing the back to expand and contract without splitting the backboards. Be sure to use nails with a pronounced head to hold the backboards in place.
If your case is out of square, pull the case square with a clamp diagonally across two corners, then nail the backboards in place. This usually helps if the case isn’t too racked.
The Interior Dividers
The interior drawer dividers of the original nail cabinet were obviously built up using miscellaneous scraps that were nailed and glued on to get the job done. Some parts were rough-sawn; some were different species.
Instead of replicating every odd scrap in the cabinet, I simplified the construction while still maintaining its look and function. On the original, the horizontal and vertical dividers are joined with egg-crate joints, and so I used that same joint for my dividers.
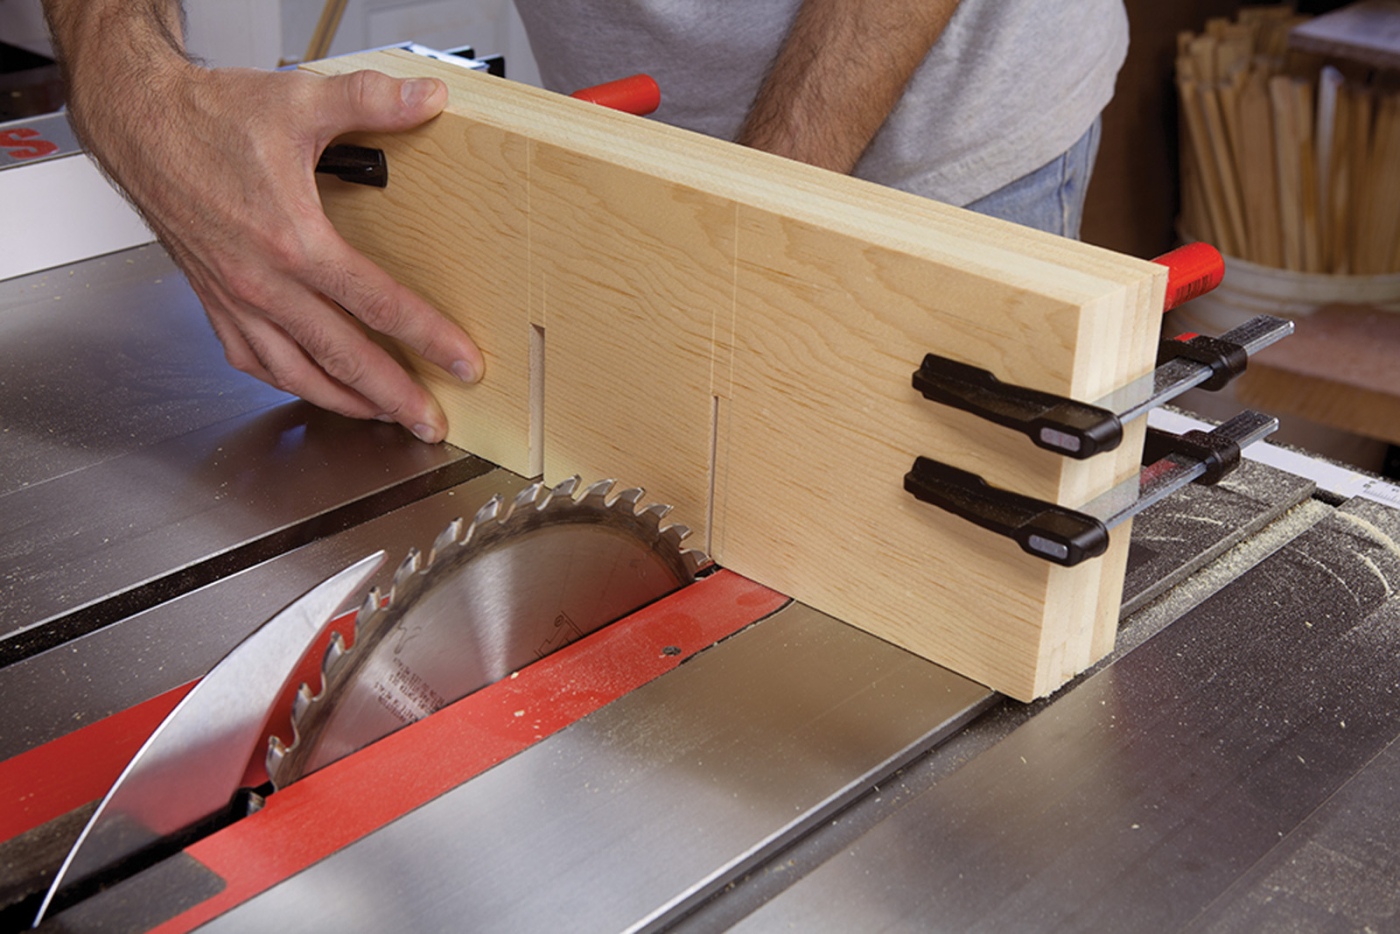
More gang-cutting. Lay out the slots on one board, clamp all the dividers together and make the cut in one go. Here on the table saw, I’m using the saw’s miter gauge and a high fence to push the dividers through the blade.
The dividers are all 3⁄8” thick and 6″ wide. Every divider has 3⁄8“-wide slots cut into it. The slots on the horizontal dividers are 27⁄8” long. The slots on the vertical dividers are 3″ long. When the dividers are knocked together, they will be offset by 1⁄8” at the front, just like the original.
Lay out the locations of all the slots using the drawings as a guide. I used dividers to step off the drawer sizes, and I used an actual piece of the drawer divider to lay out the width of the slots. Note that the three bottom drawers are taller than the others.
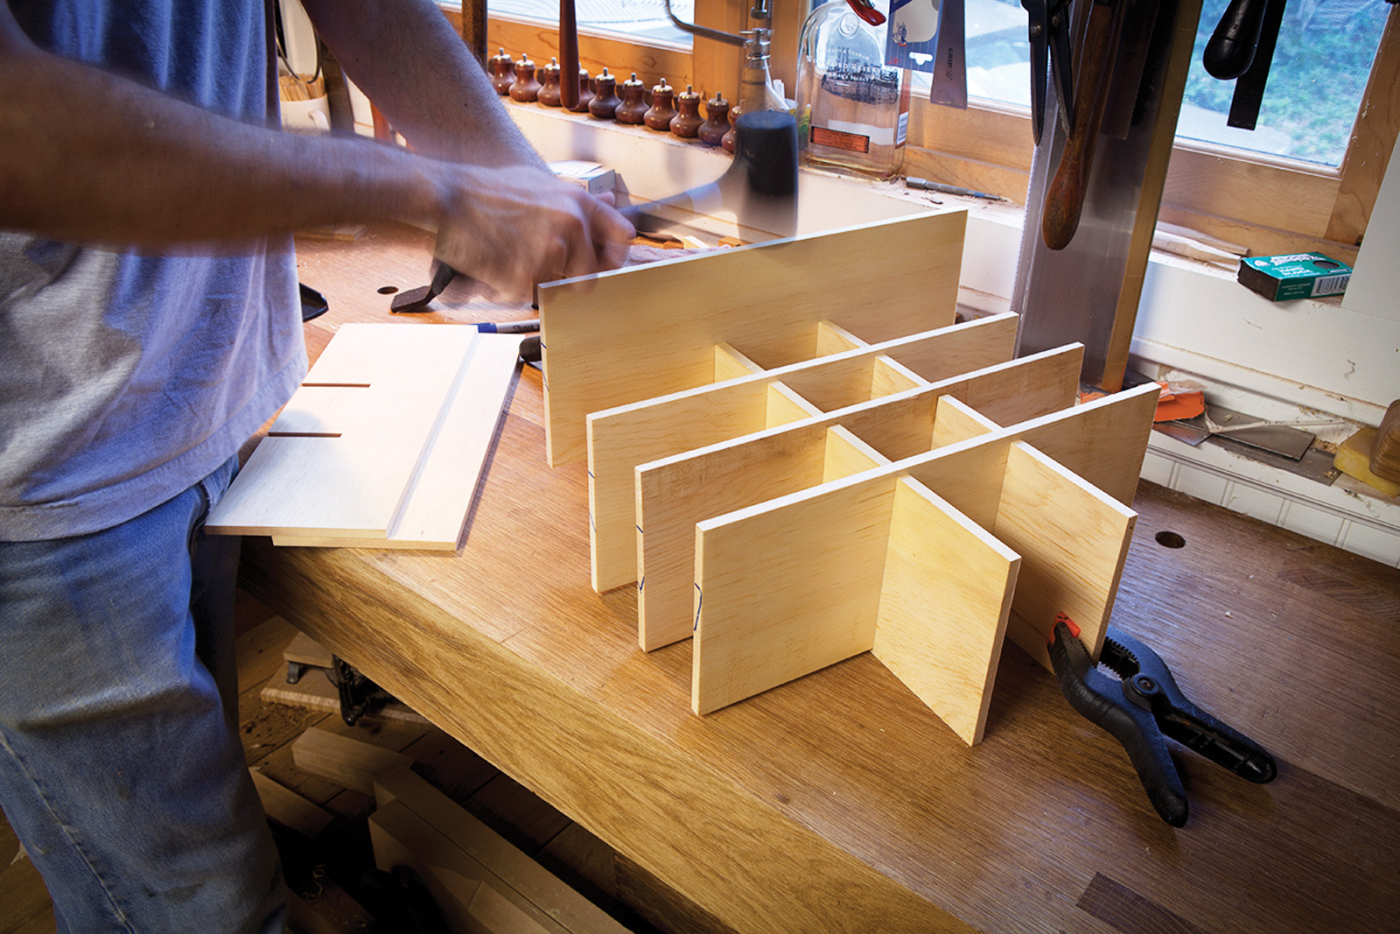
Friction & pins. You should have to knock the joints together with a mallet. Then pin all the intersections with 1″-long headless brads. You’ll have to nail them in diagonally to secure them.
I cut the slots on a table saw, though they are easy to cut by hand or on a band saw. After cutting the slots, knock the dividers together and pin the joints by toenailing them with headless brads.
With the dividers together, knock the assembly into the carcase. The front edge of the horizontal dividers should be located 11⁄2” from the front edge of the carcase. That spacing allows room for the bin pulls and knobs on the drawers.
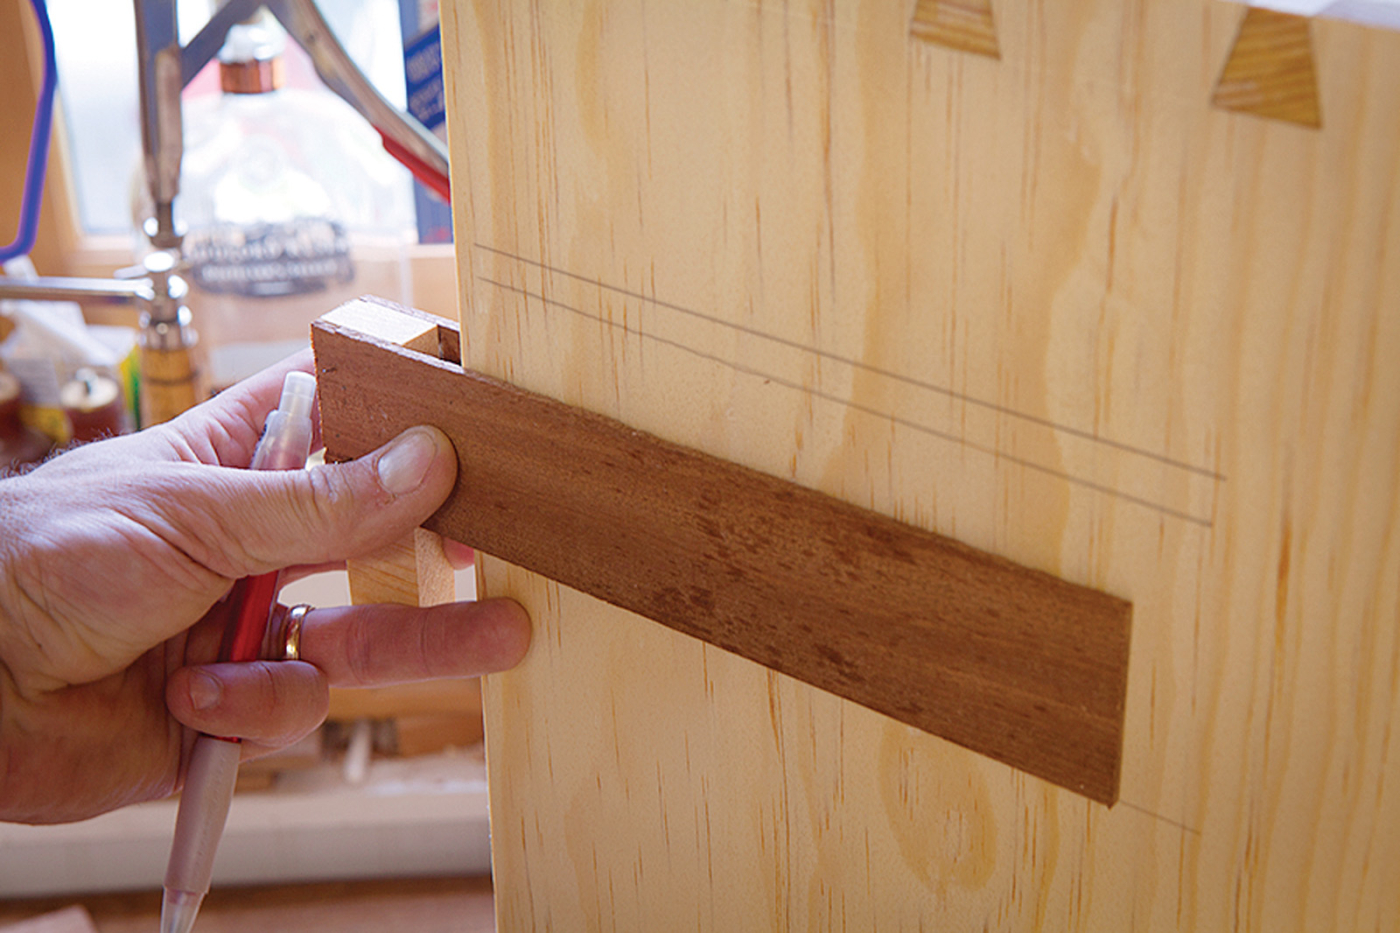
Nailing jig. This scrap-wood jig helps you locate exactly where the horizontal dividers are located. It is made using two thin pieces of scrap that are nailed to a scrap of 1⁄2″-thick pine. Slip the jig onto the carcase and press one of the thin slips against the dividers inside the case. Trace its location on the exterior. Repeat.
The next step is to nail the horizontal dividers to the carcase. This is done easily with a simple jig that makes it (almost) impossible to miss with your nails. (See the photo above for details on the jig.)

Affix the dividers. With the lines drawn on the carcase sides, drive in the cut headless brads and set them 1⁄16″ below the surface.
Use 4d headless brads to secure the horizontal dividers to the carcase. There’s no need to nail the vertical dividers to the carcase; gravity and friction are sufficient.
Making it a Crate
The fun part of this project is taking this nice carcase and turning it into a packing crate. You do this by nailing on 1x battens so they look a bit like rails and stiles. There is no other joinery between the battens – just glue and nails.

Piece by piece. The battens form the rails and stiles that frame the exterior walls of the crate. As on the original, they are simply nailed and glued to the carcase – there’s no joinery between the rails and stiles. So this is fast work.
Cut the battens to the sizes shown in the cutlist. The easy way to install these is to first attach them to the carcase sides, trim the pieces flush to the top and bottom of the case then finish up the work on the top and bottom.
The important thing to remember is that the battens should extend out 1⁄2” (or a tad more) from the front lip of the carcase. This 1⁄2” lip creates the opening for the door. Before you attach the battens, make sure their position works with the hinges you have purchased for the door. If the hinge leaf is wider than 1⁄2” you have to shift the battens forward a little on the case so the hinge can open and close.
All the battens are attached with brads and glue.
Mitered Door
With all the battens attached, you can determine the final sizes of your rails and stiles for the frame-and-panel door. The corners of this light-duty door are joined by miters that are glued and nailed, just like the original.
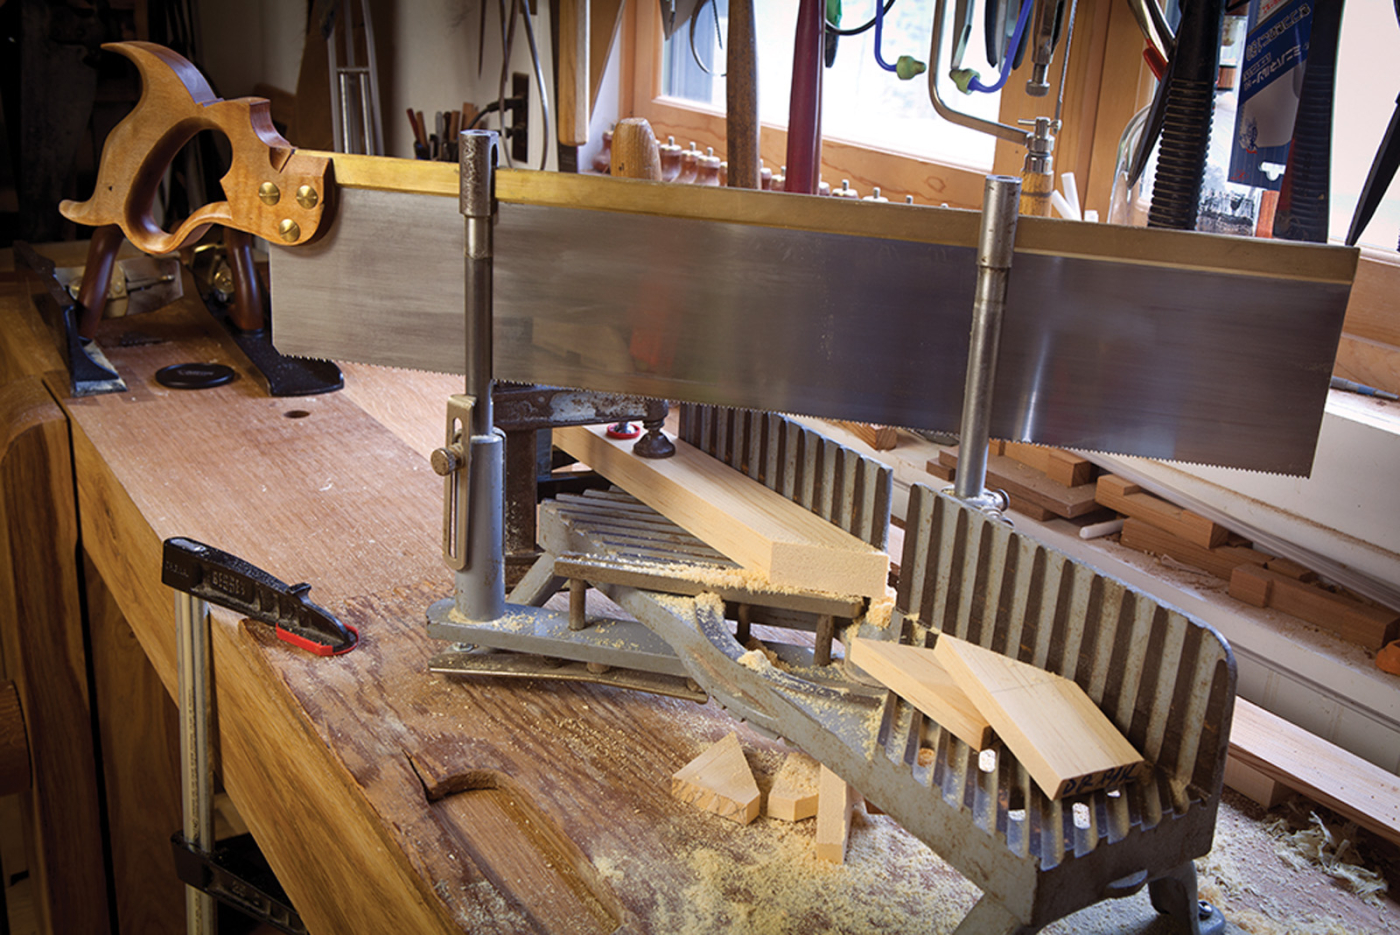
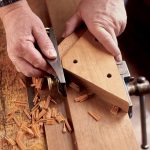
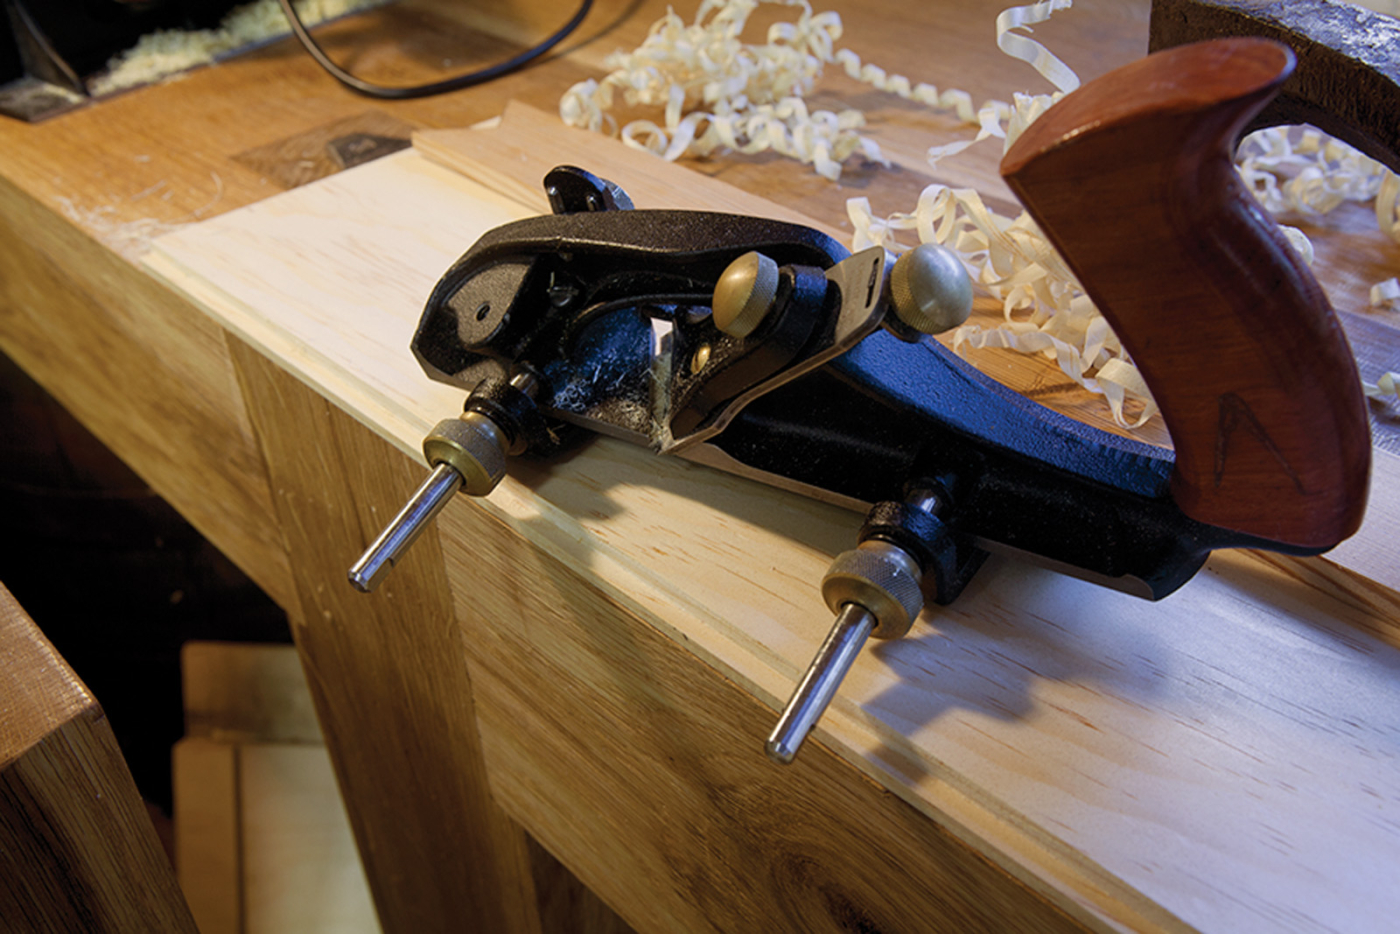
Inaccurate. The 45° setting on my iron miter box is off by about half a degree. But I don’t mind. That’s because I shoot my miters, which allows me to sneak up on the perfect length and angle.
When I cut miters, I saw them first then trim them to a perfect length and a perfect 45° with a miter shooting board and a handplane.
Even if you love your chop saw, I encourage you to give this a try sometime. I’ve found no easier way to cut perfect miters. By shooting the miters with a handplane you can control the length of your rails and stiles in .001″ increments. And you can hit dead-on 45° with ease.
Once the miters are cut, plow a 3⁄16“-wide x 3⁄16“-deep groove on the inside edge of the rails and stiles. The 3⁄8“-thick panel fits into the groove thanks to a rabbet cut on all four edges of the panel. Be sure to size the panel so it has a little room for expansion and contraction in its width.
I don’t own any fancy clamps for gluing mitered corners – most band clamps are fairly frustrating to use – so I glue up miters, corner by corner.
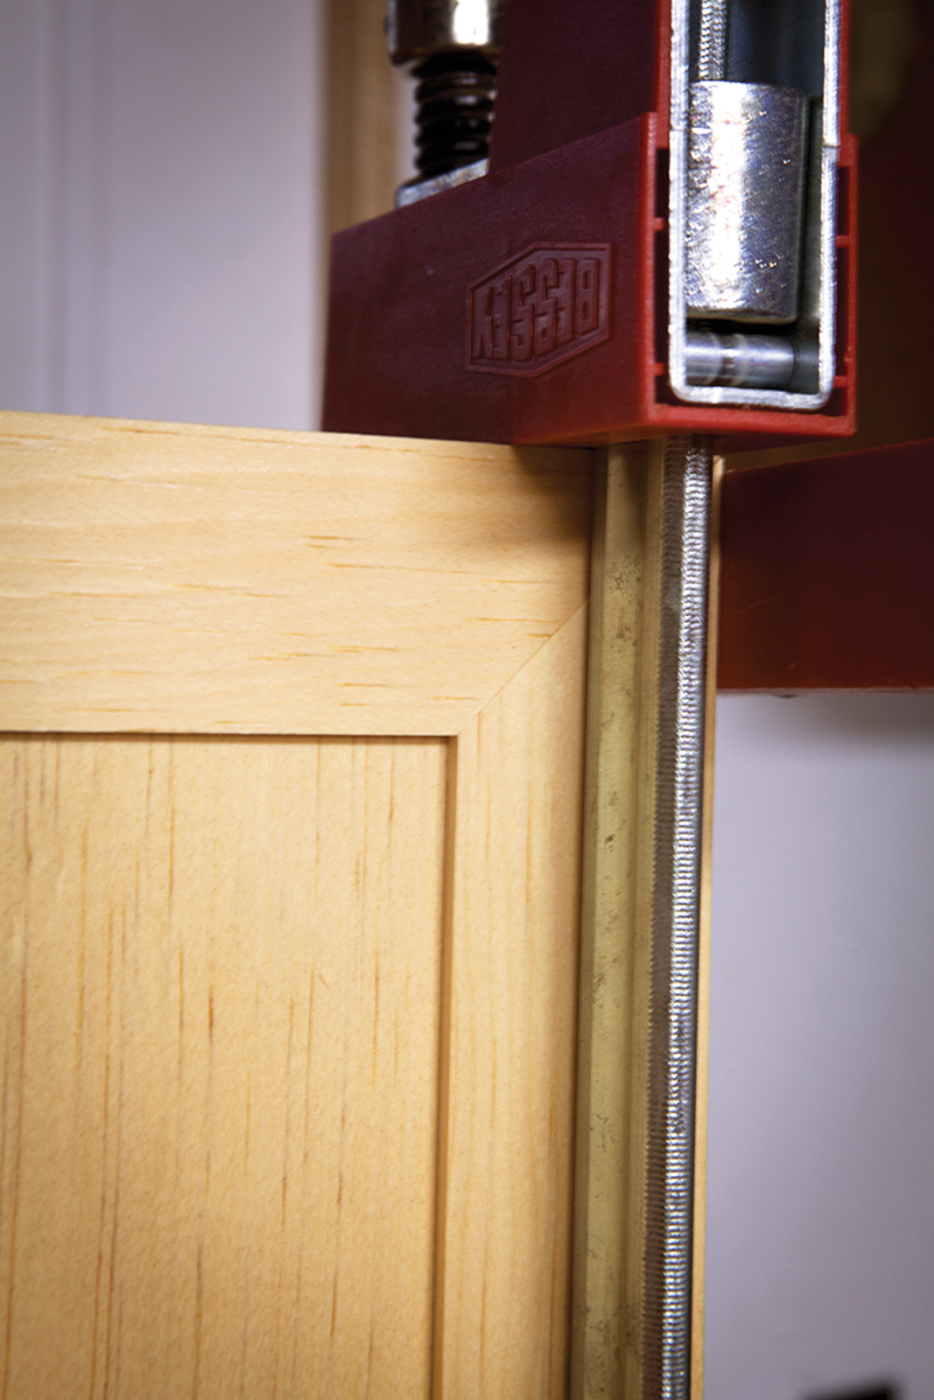
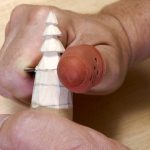
Nail the miters. A single nail through the stile and into the rail prevents things from sliding around as you clamp up this mitered joint. This was, by the way, how the original door was assembled.
First I spread a little glue on the two mating surfaces of the miter and let them dry for a minute. Then I add more glue to the joint. I press the two pieces together and drive a single nail through the stile and into the rail.
I repeat this process for each corner (don’t forget to slide the panel into the frame before adding the last piece). Then I clamp up the joints using four ordinary bar clamps. The nails prevent the miters from sliding as you apply pressure at the corners.
21 Drawers
Because this is a cabinet for nails, it’s appropriate that the drawers are nailed together. All the drawers are constructed in a simple manner: The front and back are captured by the sides. The bottom is then nailed on.

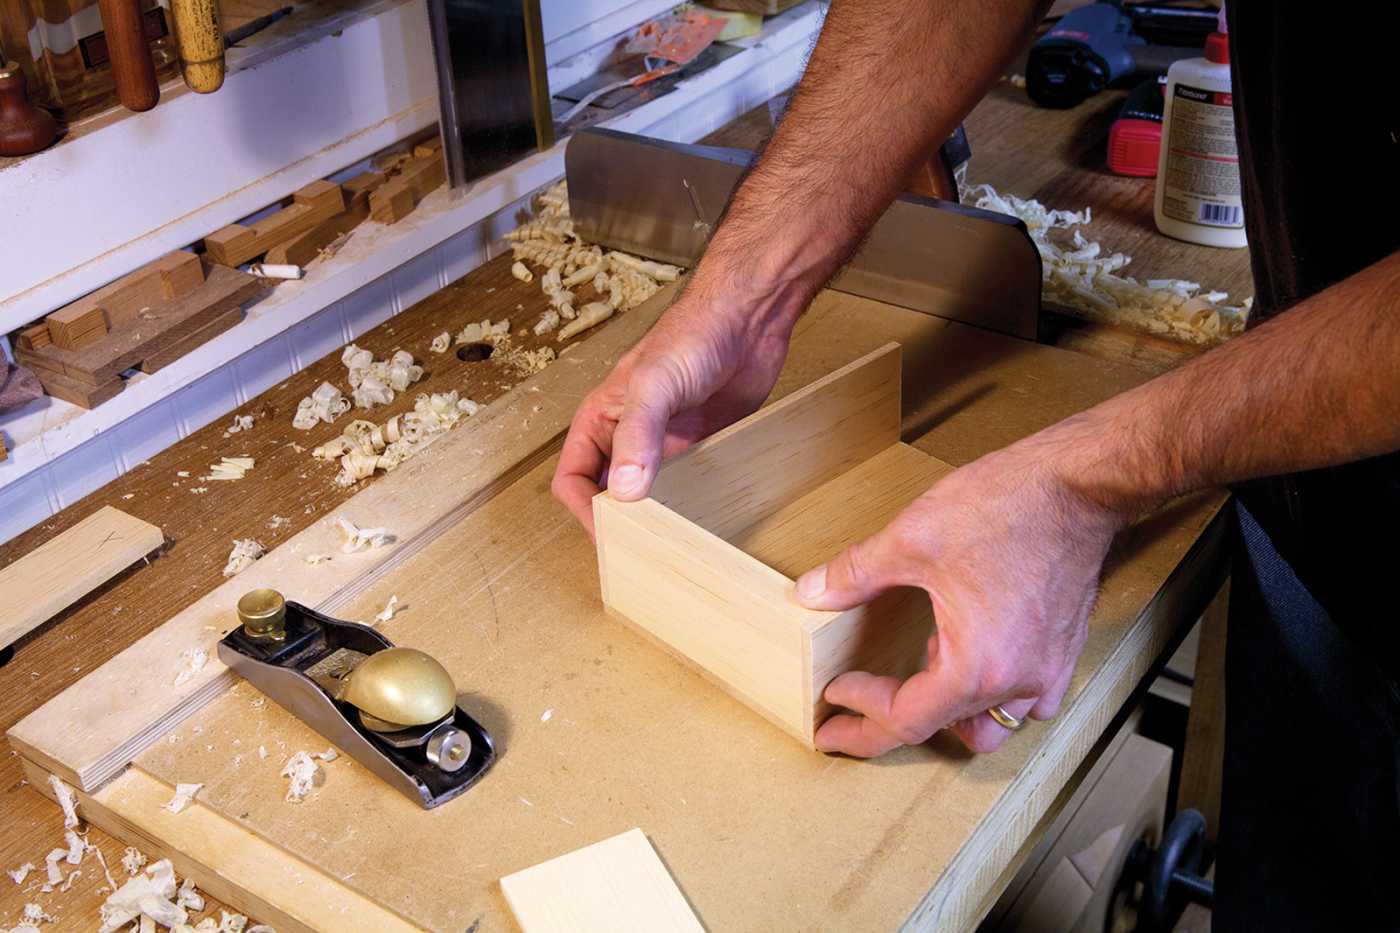
Begin with the bottom. Get each bottom board to slide in and out of its opening before sizing the other drawer parts. If the bottom binds, the assembled drawer will bind.
The drawers look a little odd – the end grain of the sides and bottom is visible on the drawer front. But they are acceptable for a piece of shop furniture – and the drawers in the original have survived many years of use.
Glue the bottom. Because the parts are all softwood, which doesn’t move much once it’s dry, you can get away with both gluing and nailing this cross-grain joint.
Begin by fitting all the drawer parts for each opening. I try to do as much fitting as I can before assembly. This usually means the drawer will require little or no tweaking after assembly. First I fit each bottom to its opening. Then I fit the sides, front and bottom. Then I begin assembling the drawer.
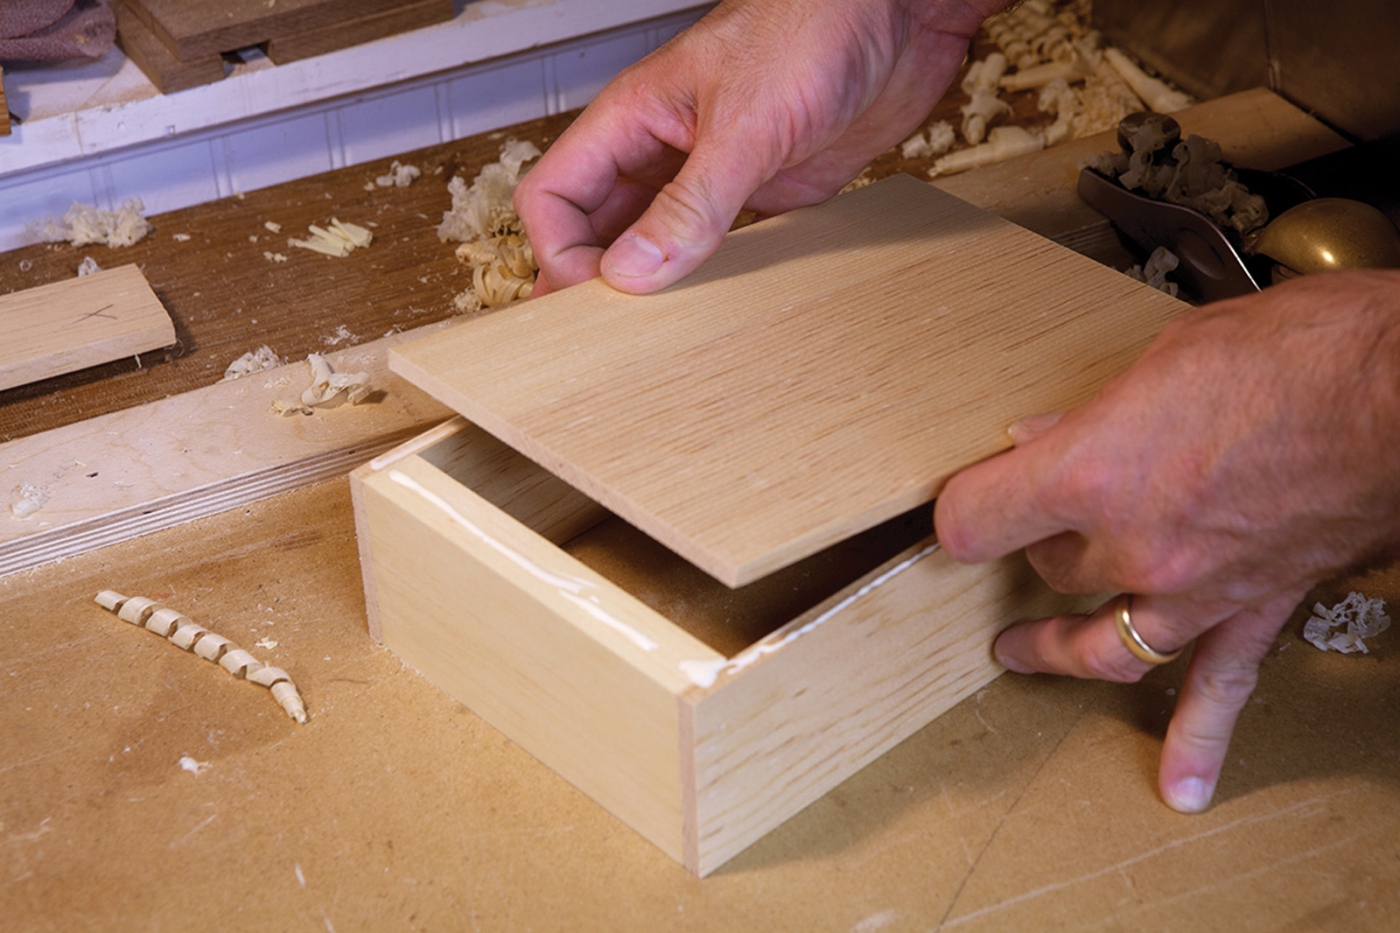
Too long? Dry-assemble the drawer to feel if the drawer front is too long.
To do so, place the front and sides in position on the bottom. Feel if the drawer front needs to be reduced in length so the sides are flush to the bottom. If you need to trim the drawer front, trim the back by the same amount.

Shoot it. If the drawer front is too long, shoot it to perfect length with a plane on a shooting board. Count your strokes. Then reduce the length of the drawer back by the same number of strokes, provided your original lengths were the same.
Glue and nail the sides to the front. Then glue and nail the back to the sides. Finally, glue and nail the bottom to the drawer. Fit each drawer to its opening, numbering the drawer and its opening as you go.
Hardware & Finish
As on the original, I used bin pulls for the larger drawers and knobs for the smaller drawers in the center. To ensure I got the bin pulls located correctly, I made a quick drilling jig that I clamped to each drawer front. The jig ensured I didn’t make a layout error.
The knobs are located dead center in the fronts of the smaller drawers.

Insurance. When I have to do something 14 times, you can bet I’m going to make a jig to ensure my mind doesn’t wander and cause me to make a fatal error at this stage of the project. This simple jig locates the holes for the bin pulls in the correct place. For the taller drawers on the bottom, I set the jig 3⁄8″ lower on the drawer front.
Were I to make changes to this cabinet, it would be with the hardware. While I like the bin pulls, it would be more helpful to have pulls like an old library card catalog; the card could tell you what type of fastener is inside the drawer.
To solve this problem, Roy simply wrote what is in each drawer on the bin pull. I think he did it with pencil – it’s almost impossible to see on camera.
Another thought: Add 2″ of depth to the cabinet and you can hang hammers, screwdrivers and other accoutrements of fastening and unfastening on the inside of the door.
Install the hinges and knob on the door. I used a magnetic catch to hold the door shut. Because I’m the only person who works in my shop, there’s no need for a lock.
I finished the nail cabinet with two coats of garnet shellac, sanding between the coats. The cabinet hangs on my shop wall with a French cleat made from 1⁄2“-thick material.
And now comes the fun part: Emptying my tackle boxes of nails and screws and putting them into their new drawers, which are located conveniently above my workbench. Oh, and I guess I’ll have to look for a picture of a lady and a goat.
Blog: Read about the fasteners the author recommends for a traditional shop.
Plan: Download a SketchUp model of Roy Underhill’s nail cabinet.
Blog: “Hey, is that a ‘Nib’ on Roy’s Nail Cabinet”
Here are some supplies and tools we find essential in our everyday work around the shop. We may receive a commission from sales referred by our links; however, we have carefully selected these products for their usefulness and quality.