We may receive a commission when you use our affiliate links. However, this does not impact our recommendations.
 Create a classic in an afternoon.
 Create a classic in an afternoon.
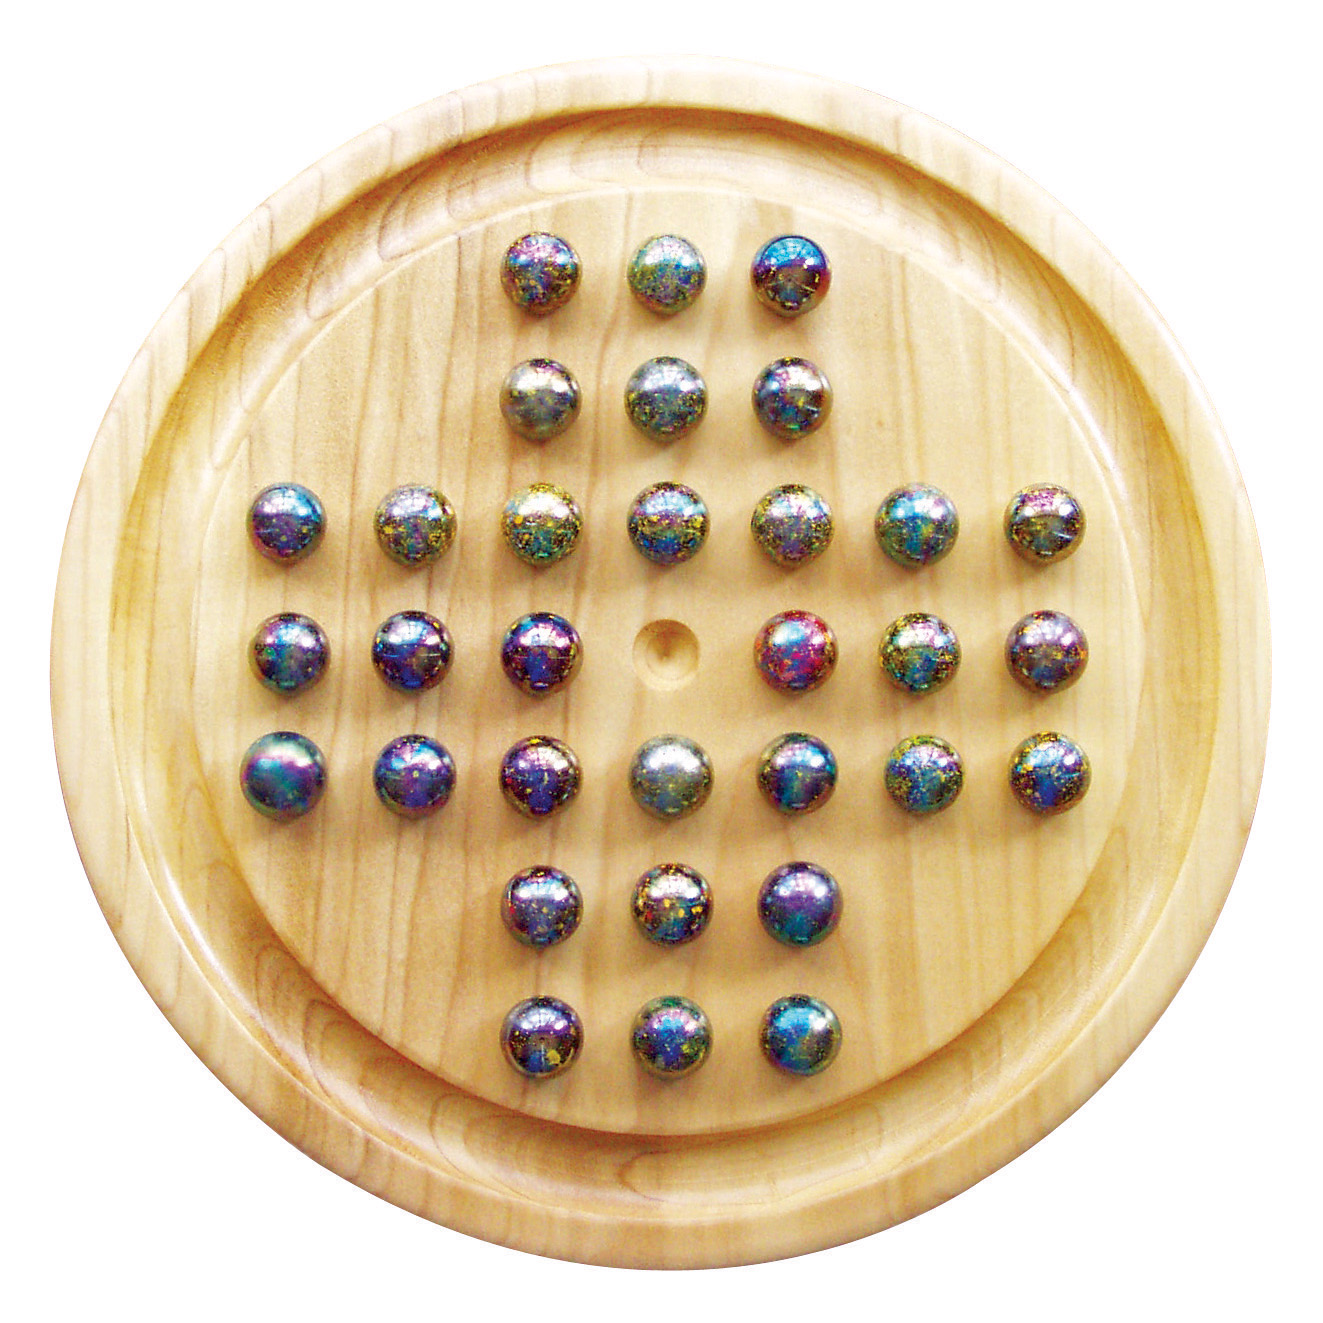
Whenever I visited my grandmother, I got to play a game with marbles on a round wooden board. My grandmother called it “Marble Solitaire.” You may know it on your PC as “Hi-Q” or something else.My grandmother’s wooden board disappeared long ago, but I’ve kept the tradition alive by making wooden boards for my own grandchildren, as well as for other relatives and friends.The game’s appeal is universal—young and old alike enjoy its vexing simplicity. I make these game boards in two sizes, 9-3/4″ dia. and 14” dia. (see Figure A for dimensions). The small board is similar in size to my grandmother’s original board.
It’s made to work with 5/8″ marbles.The large board has wider spacing that makes it easier for adult-size fingers to move marbles without jarring the ones next door. This board works with 1″ marbles. Both marble sizes are available in bags or as singles in most toy stores or online.
You can make one of these game boards in less than a day: Saw the round shape, rout the trough, plunge-rout the marble pockets, round the edges and apply the finish.You’ll need a tablesaw, a bandsaw, a plunge router and three ordinary router bits.
Cutlist and Diagrams

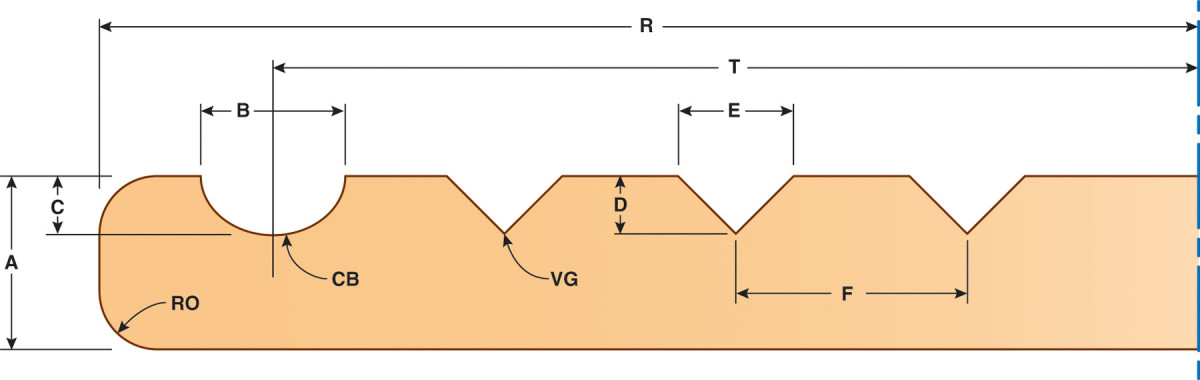
Fig A

Create the Round Board
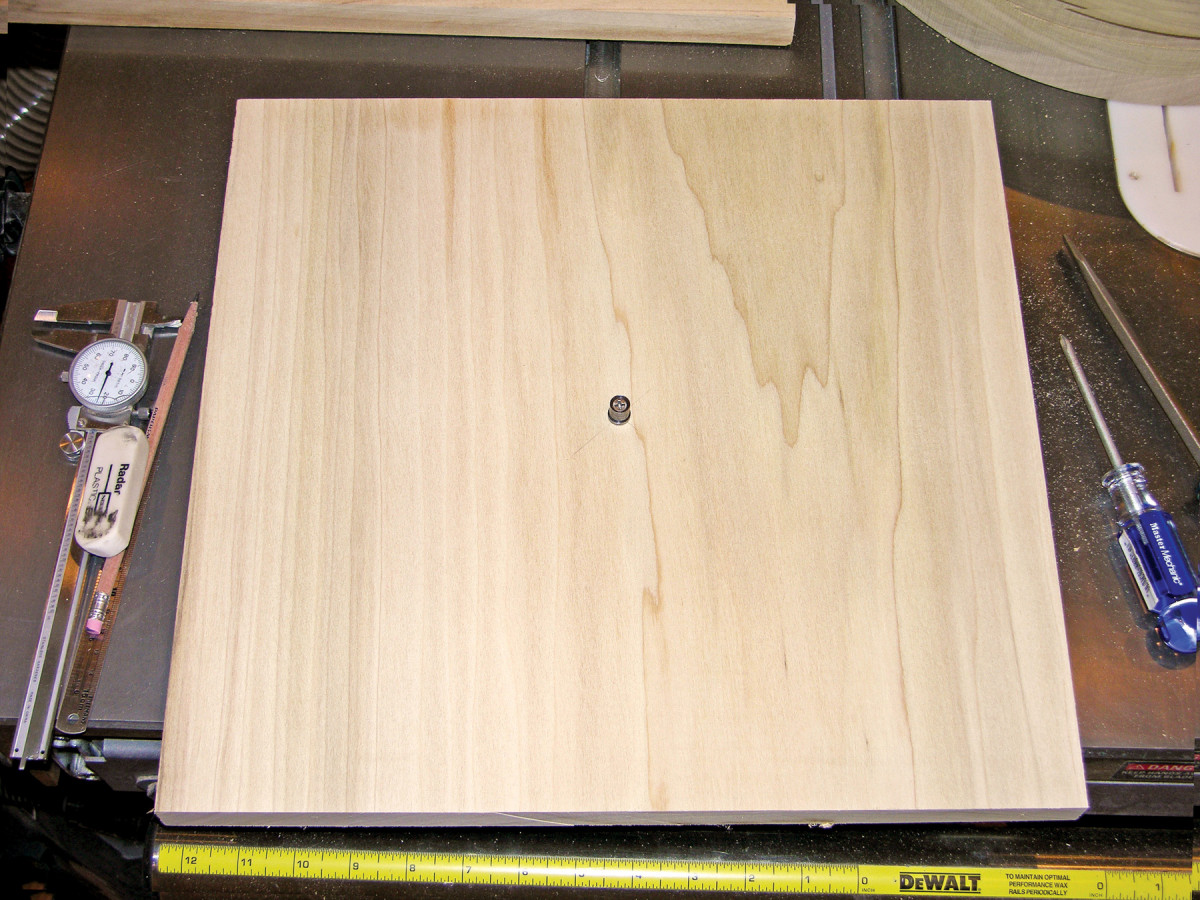
Photo 1. Start by cutting a square blank slightly larger than the game board’s diameter. Install a nail or pin at the center for use with a circle-cutting jig. The nail hole will disappear when you rout the center marble pocket.
Whether you glue up several pieces of wood or use a single piece, the project starts with a 3/4″ thick rectangular blank with a minimum diameter slightly larger than the final game board (Photo 1). I make my blanks from wide boards, so they showcase continuous grain patterns instead of glue lines. Using the bandsaw, cut the circular shape freehand or with a circle-cutting jig (Photo 2). If you cut freehand, use a compass to draw a circle of the desired diameter.Mark the centerpoint the compass leaves (you’ll use this point in a later step). Saw oversize and then sand to the line.
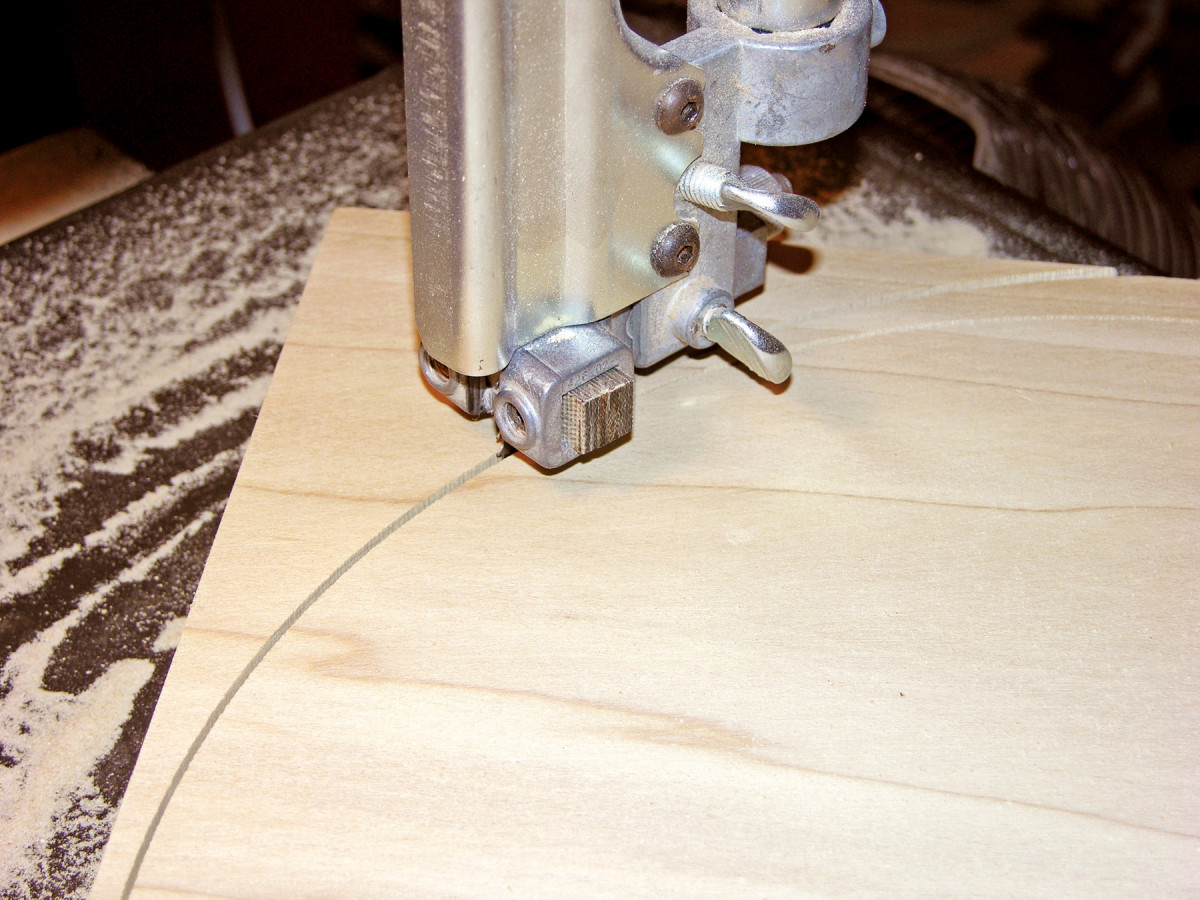
Photo 2. Saw the round board using the bandsaw and the circle-cutting jig. I usually make two passes around to make sure no high spots remain. Use a disc sander to remove the saw marks from the edge.
I usually make boards in multiples, so I use a jig. Set the jig to cut the board about 1/8″ oversize in diameter. After cutting, sand the edge to remove the saw marks and reduce the board to its final diameter.
Rout the Trough
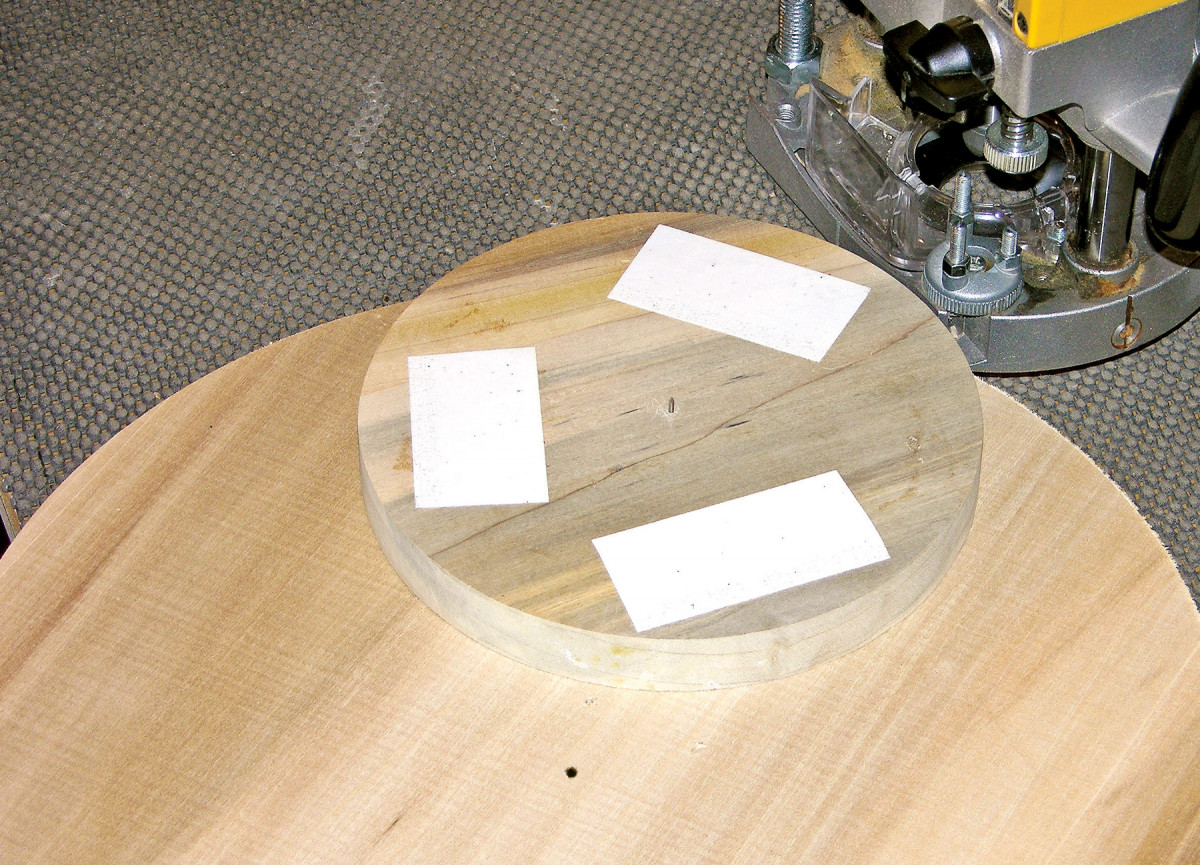
Photo 3. Use a template and a plunge router equipped with a core box bit to rout the board’s trough. Center the template by installing its pin in the board’s nail hole.
I use a round template to guide the router when I rout the trough (Photo 3), but a circle-cutting jig made for use with a router would also work.
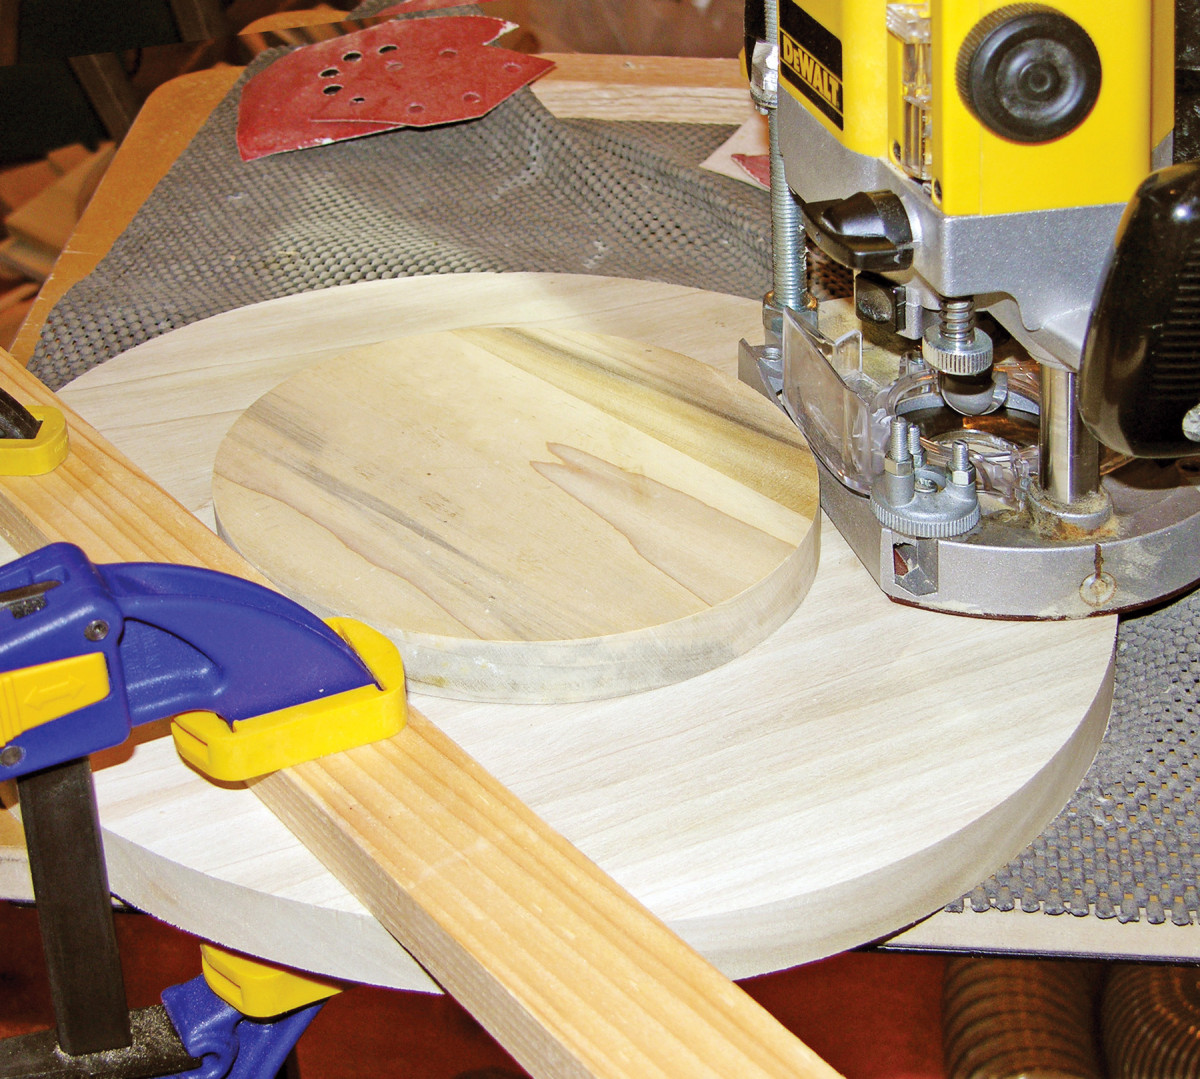
Photo 4. When routing the trough, always bear against the template from the same point on the router’s edge. To help keep the router oriented correctly, complete the trough by routing several arc-shaped segments.
You need to know two measurements to calculate the size of the template: 1) from the center of your game board to the center of its trough (see T, Fig. A); and 2) from the edge or your router’s baseplate to the center of the bit. To determine the template’s radius, simply subtract measurement 2 from measurement 1. Create the template the same way you created the round game board. Center the template on the board and secure it with double faced tape.
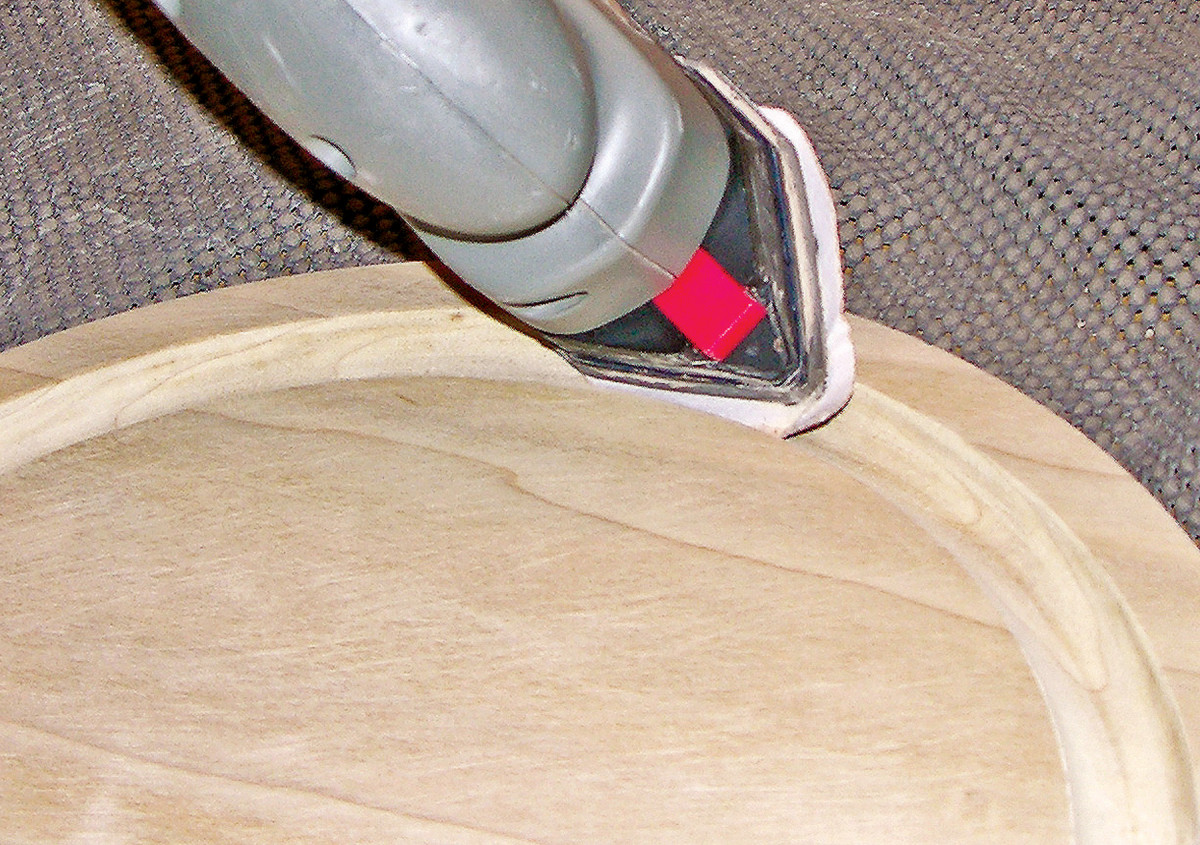
Photo 5. Sand the trough and soften its sharp edges. To reach the trough’s bottom, I fold an oversized sheet of hook and loop paper around the edges of my detail sander’s pad.
Install the appropriate core box bit and set the plunge depth (Fig. A). It’s easiest to rout the trough by making four or five arcs to complete the circle (Photo 4). Making two or three passes to reach the final depth minimizes bogging down the router and burning the wood. Sand the trough by hand or with a detail sander to ease the sharp edges left by routing (Photo 5).
Rout the Marble Pockets
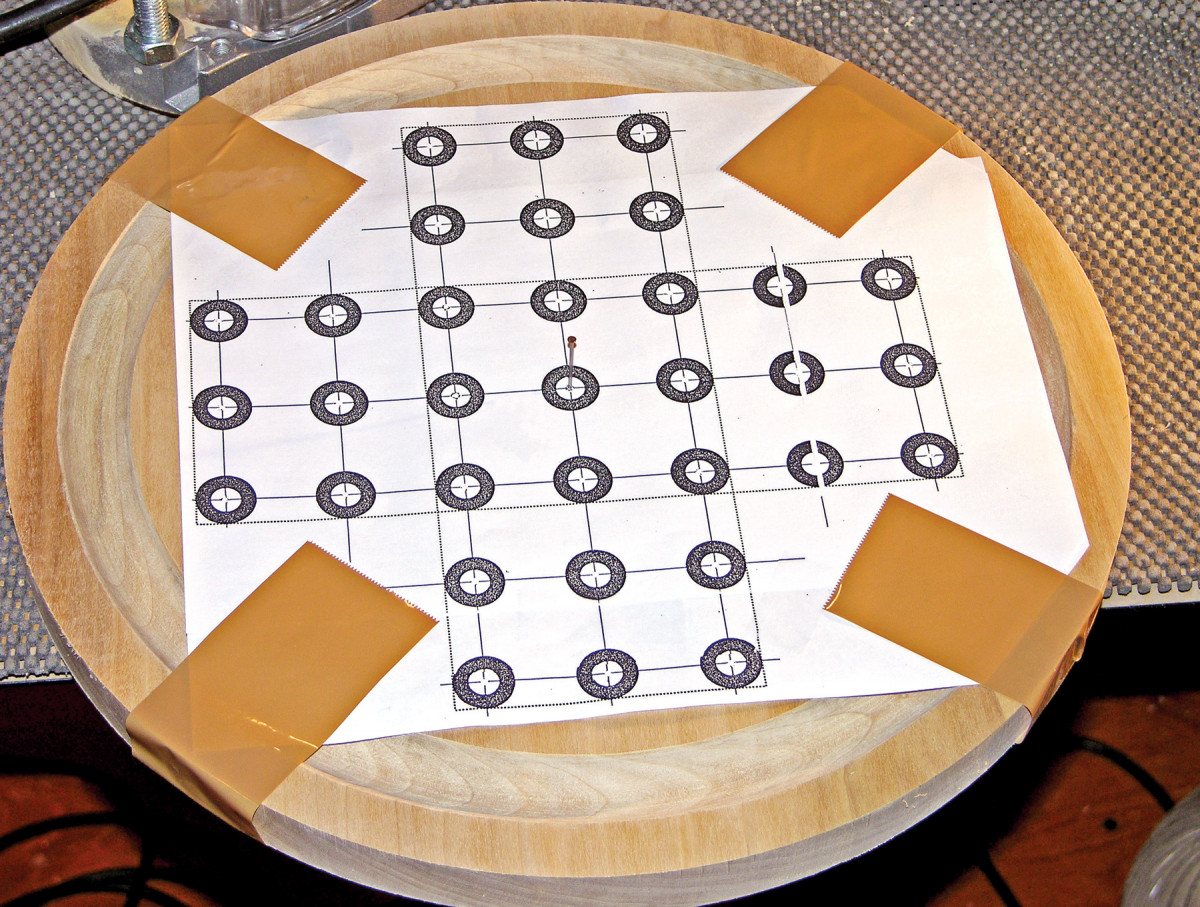
Photo 6. Center the marble pocket pattern and tape it to the game board. Poke a nail through the center of the pattern and into the center hole on the board.
Create pockets for the marbles by making plunge cuts with a V-groove router bit. The pockets are arranged in a simple grid pattern (Fig. B). Their diameter, depth and pitch (distance between adjacent centers) depends on the game board you’re making (Fig. A). Use a photocopier to enlarge the pattern and attach it to your game board (Photo 6). You’ll need a separate pattern for each board you make. For a small board, the pattern’s grid should measure 1″ square; for the large board, it should measure 1-1/2″ square. For the best accuracy, measure your enlargements across all 6 boxes (the target measurements are 6″ or 9″). The enlarged pattern for the large board requires oversize paper. If your copier is limited to 8-1/2″ by 11″ paper, enlarge one half of the grid and tape two copies together.
Before you rout the pockets, remove the nail used to center the pattern on the board. Install the appropriate V-groove bit and set the plunge depth. To avoid burning the wood, I set the router’s plunge stop to the final depth, but complete the pocket by making two or three plunges.
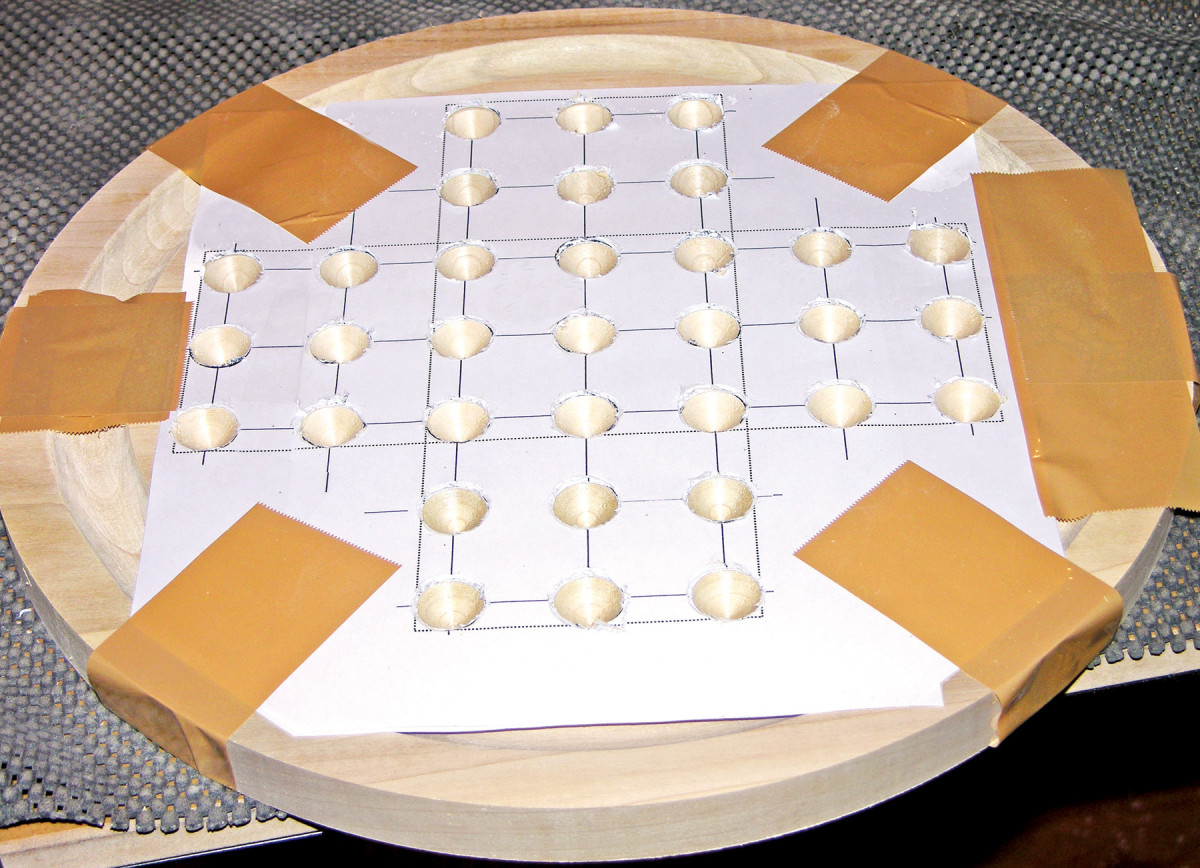
Photo 7. Create the marble pockets by making plunge cuts with a 90˚ V-groove bit, centered on each target. To complete the board, remove the pattern and round over the outside edges.
Position the router so the bit’s point is centered over the first target. Hold the router steady and plunge-rout the pocket. Repeat the process to create the other 32 pockets (Photo 7). Then remove what’s left of the pattern.
Finish the Board
Finish-sand the board after rounding over its outside edges. I use a two-step finishing process. First I apply a pre-stain wood conditioner. Then I spray on 3 light coats of semi-gloss polyurethane.
Playing the Game
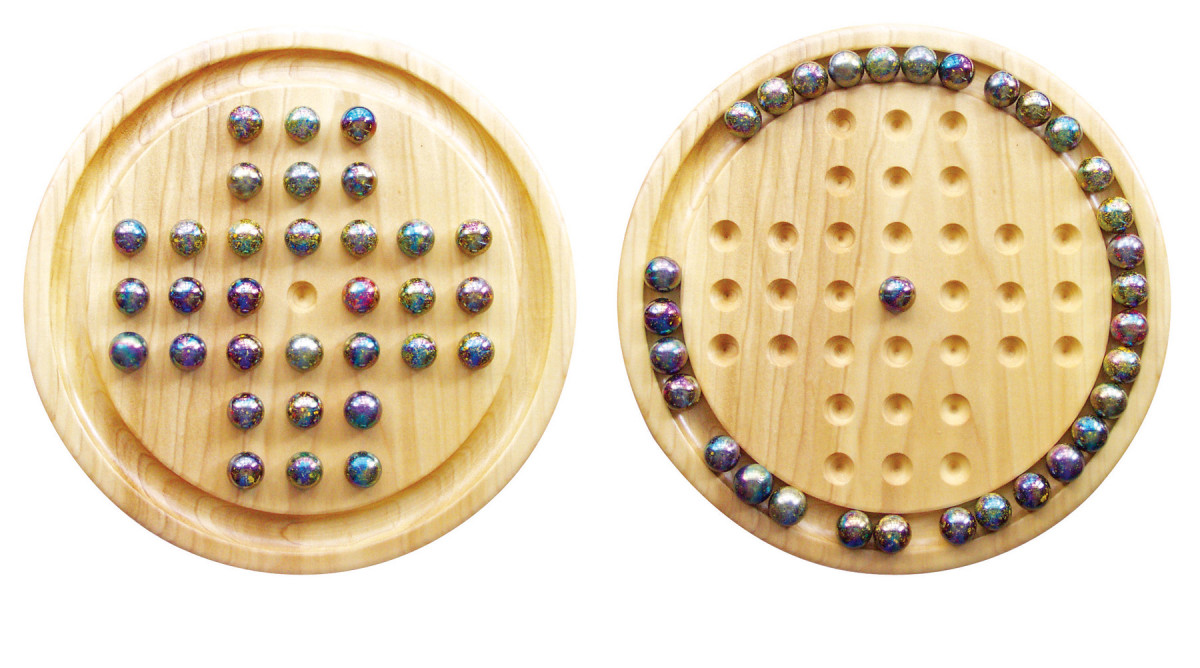 Marbles come in a wild assortment of colors and designs. My favorite is named “Jupiter,” made by Mega Marbles. These marbles have a textured surface that I find easier to grip. You may have a bag of cat’s eye marbles from your youth. In any event, you’ll need 32 marbles to play the game.
Start with the marbles in all the pockets except the center. The goal is to remove all the marbles by jumping, until only one marble remains, preferably in the center pocket. Allowed jumps are over adjacent marbles, left, right, up and down, to any unoccupied position. Diagonal jumps are not allowed. Jumped marbles are stored in the trough. The game ends when there are no more allowable jumps. -Jim Church
Here are some supplies and tools we find essential in our everyday work around the shop. We may receive a commission from sales referred by our links; however, we have carefully selected these products for their usefulness and quality.