


We may receive a commission when you use our affiliate links. However, this does not impact our recommendations.
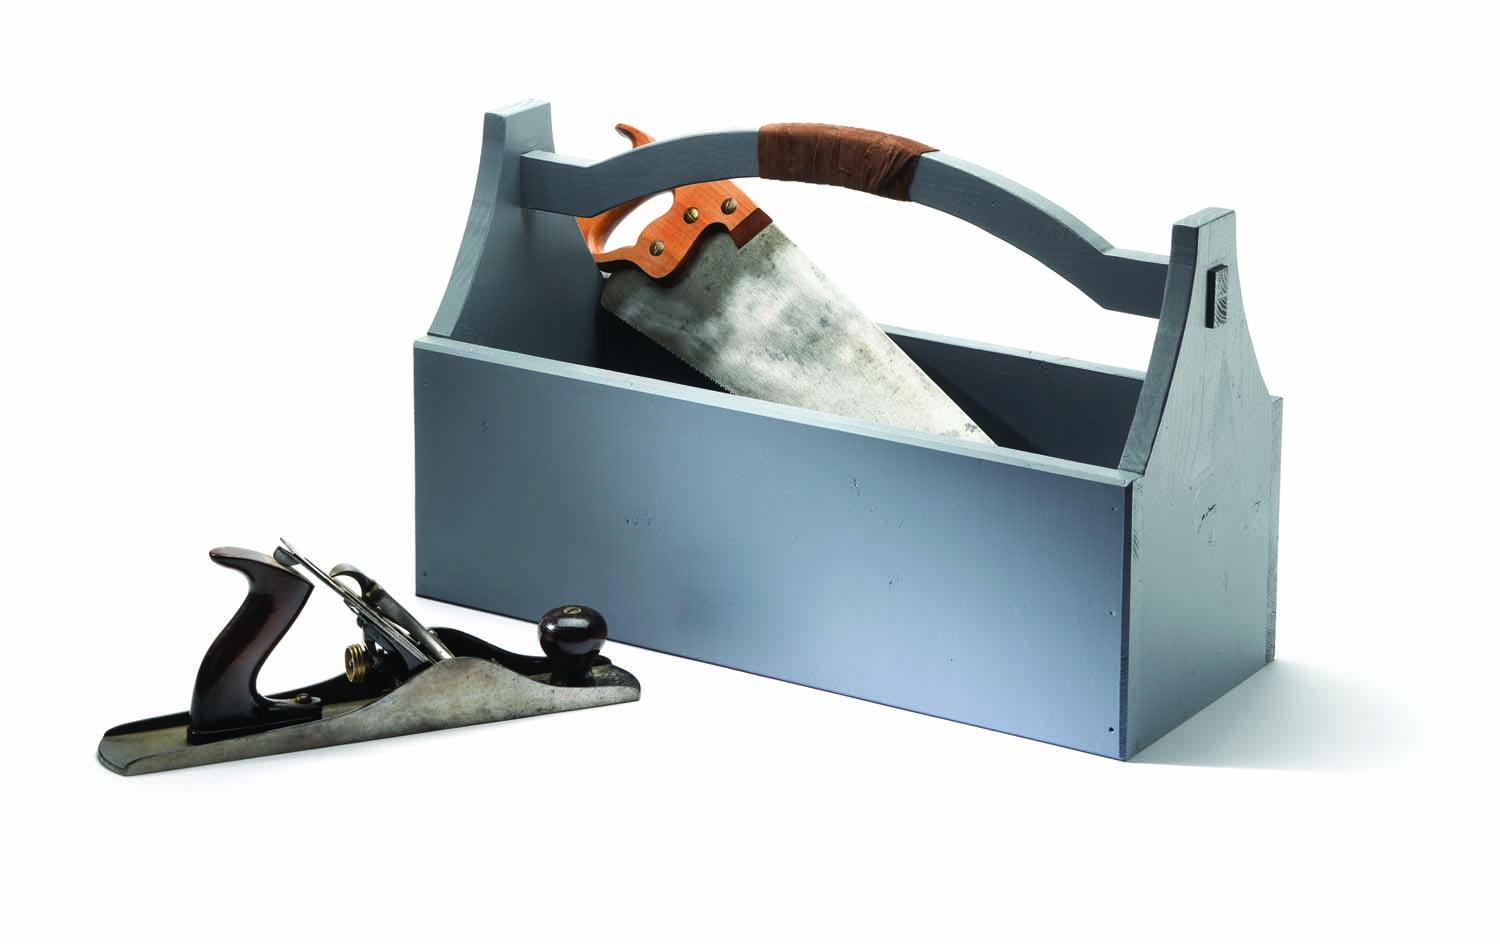
A handy tote. No matter what you decide to put in it, a tote is always useful.
Whether you’re using it for woodworking tools or garden tools, a tote is a simple and quick project. It’s so simple, in fact, that I decided to add a wee degree of difficulty with a curved handle secured in place by wedged through-tenons. And, I wrapped the handle with suede for a more comfortable and secure grip.
A Quick Trip to the Lumber Aisle
Like all our I Can Do That projects, this tote is made from dimensional S4S lumber, available at any home center. I chose pine for this project because a) it’s inexpensive, b) the poplar looked like beavers had gnawed it to size, and c) red oak is too heavy – especially after you load the tote with tools.
You need to buy only two pieces of wood: a 10′-long 1×8 and a 2′-long 1×4. While it’s always best to pick through the rack for the straightest, best-looking lumber you can find, in the case of this 1×4, it’s particularly important because it will be hard to fit the through-tenons if the handle stock isn’t straight.
An Exercise in Chamfering
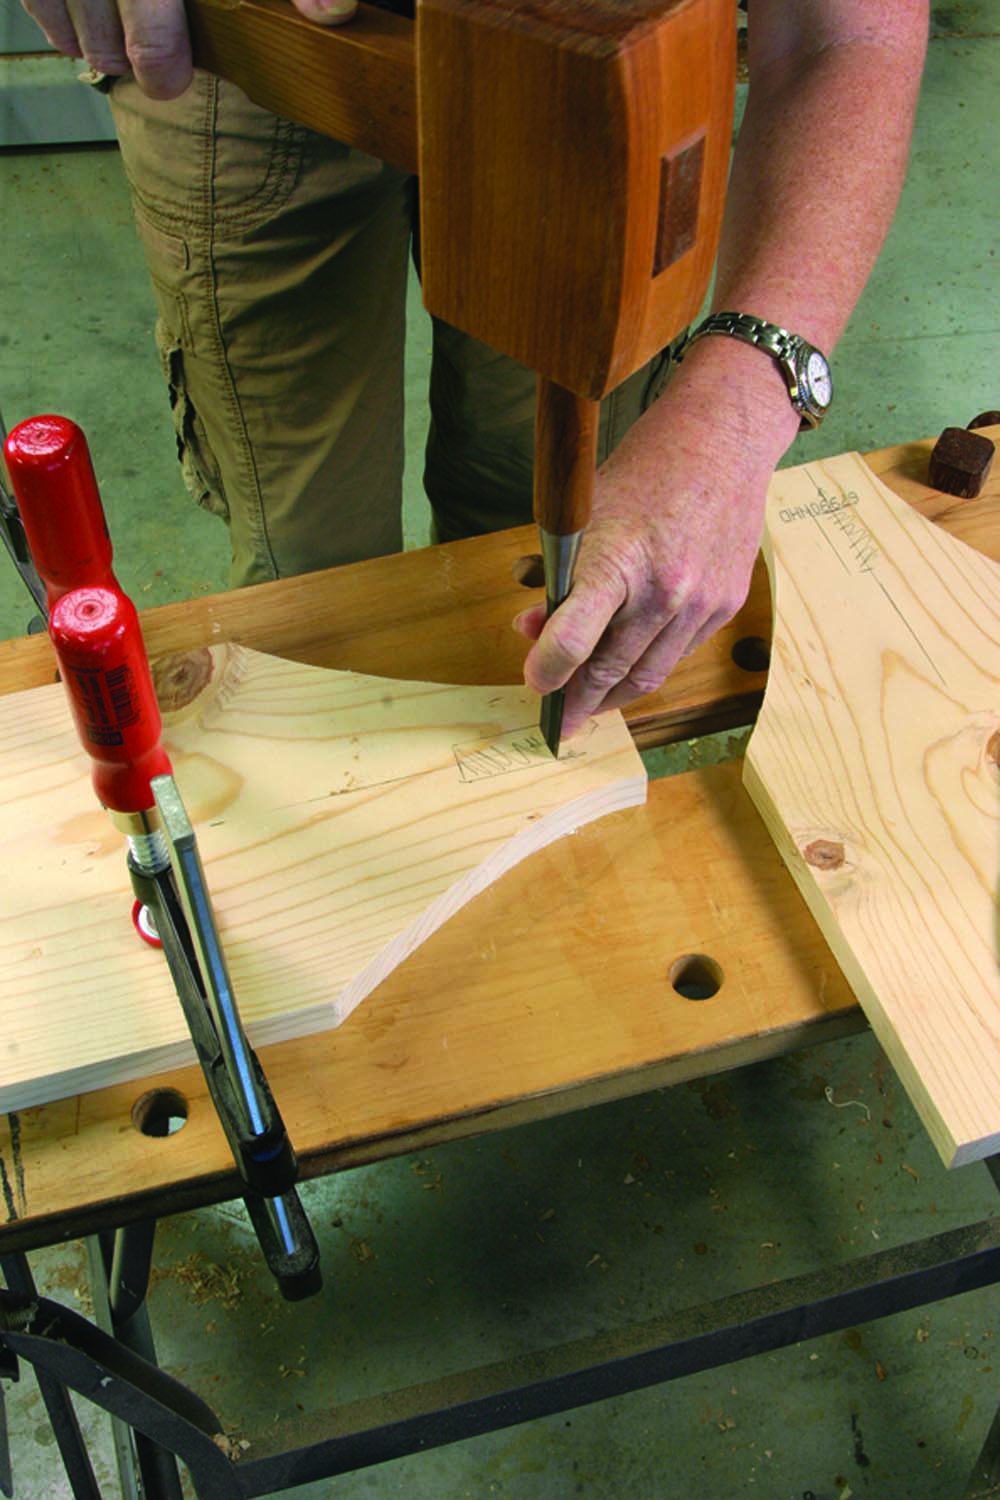
Chop chop. First, use light taps to define the edges of your mortise then lift out a thin wafer of waste. Now, chop around the mortise working halfway through your workpiece and remove the waste. Flip the workpiece over and repeat.
First, set up a stop-block at the miter saw to cut the two side pieces to 22″ in length. Then move the stop-block and cut the two 13″-long ends. Cut the handle stock to 22 1⁄4″ in length.
Now, pick the show face of your sides and use your block plane to chamfer each edge – first knock off the four corners to avoid spelching. This is a tool tote – not a piece of furniture – so it’s a good opportunity to practice “freehand” chamfering. Hold your block plane at a consistent angle and keep making passes until you like the way the chamfer looks.
If you simply must have perfect chamfers (and don’t trust your freehand skills), mark a line 1 ⁄ 8″ back from the corner around the edges, and again around the face, then plane down to your layout lines on both.
Next, lay out the through-mortises and curves on your two end pieces. First, strike a centerline. The 3 ⁄ 4″ x 1 1⁄2″ mortise is centered side to side, and starts 1 1⁄4″ down from the top edge. Mark it on both sides of the workpiece. The top point of the curve on my sides starts at a point 1″ to either side of the centerline, and terminates flush where the side pieces will join the end pieces (so that’s 7 1⁄4″ from the bottom). Join the two points with a curve that looks good to your eye (I used a 5-gallon bucket as a template).
With the layout complete, cut the curves with a jigsaw and use a rasp to refine the shape as needed before sanding smooth.
Through-mortises
Clamp the workpiece flat on your Workmate and lightly define the edges of your mortise with a chisel, then lift out the shallow chip of waste (the beveled side of the chisel should always face the waste area). Now chop halfway through the workpiece, remove the waste, then flip and repeat until your mortise meets in the middle. Do the same on end two.
Wedgie. After using a handsaw to cut a kerf in the center of each end of the handle, paint your wedges with glue and tap them in. After the glue dries, trim the wedge flush with the end of the handle.
When working with 3⁄4″ pine and on such a small mortise, I see no benefit to drilling out the majority of the waste.
Pine is easy to chop – I can be done in the time it takes me to find the proper size bit and drill a series of holes.
Get a Handle on It
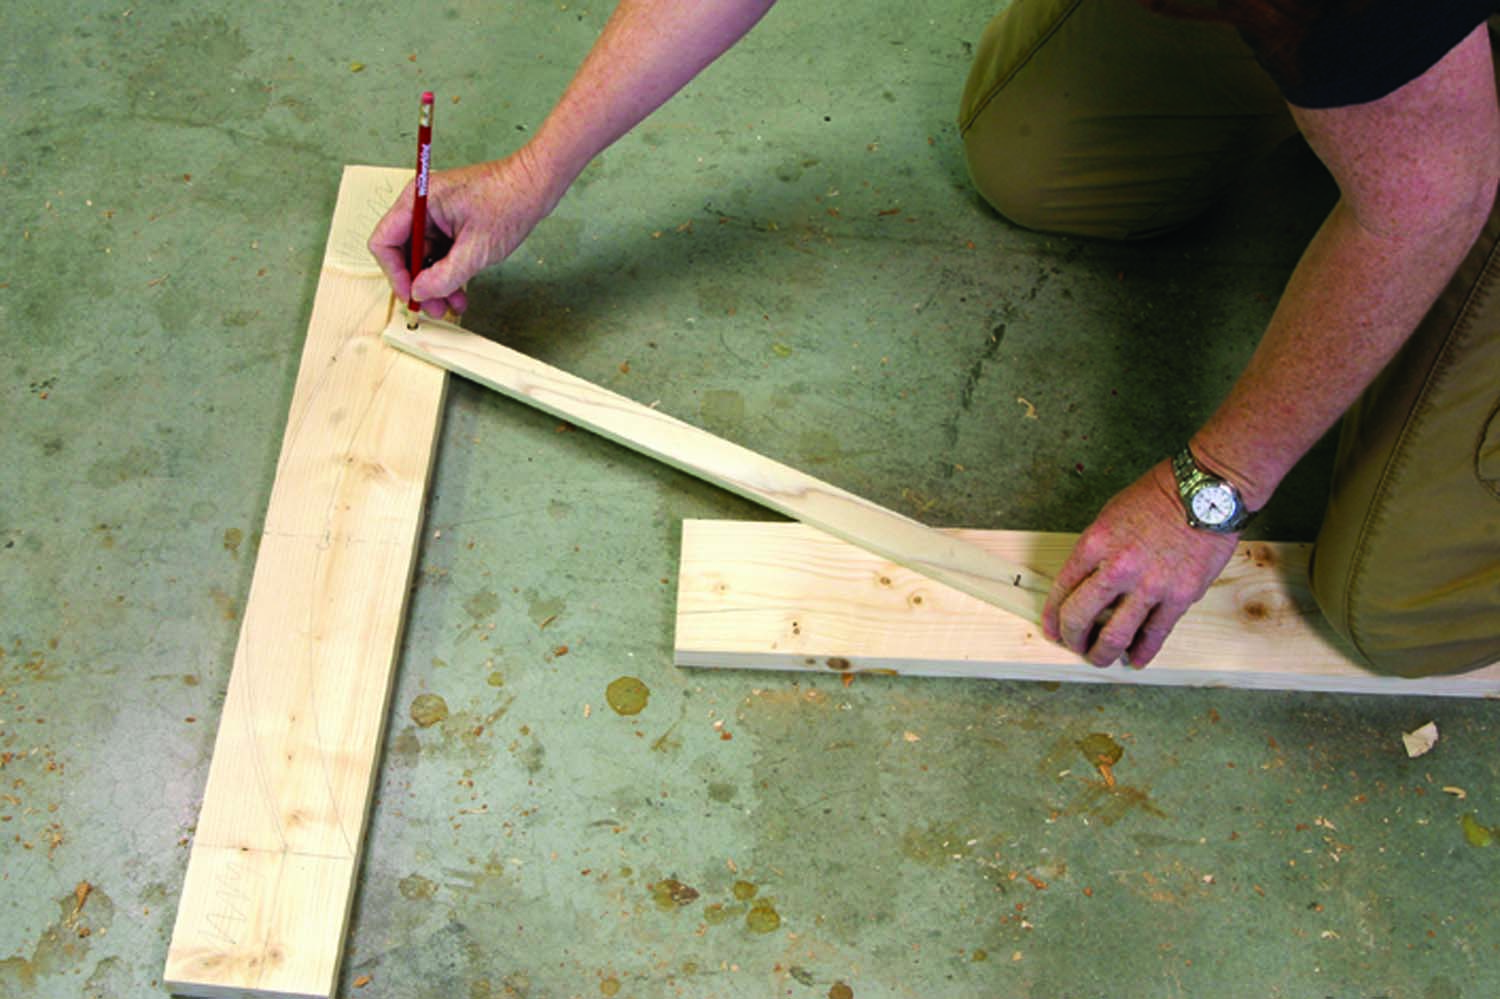
My handle is 1 1⁄2″ in width along the entire length and the straight area at both ends is 3 1 ⁄ 8″ long. But before you lay out your handle, measure your mortises and adjust the handle width to fit. The curved portion is an arc of a 16″- diameter circle – too big for my compass. So, I made a down-and-dirty trammel to mark the curve (see the photo above). You know what comes next: Cut out the handle using your jigsaw, then use a rasp and sandpaper to refine the shape. (Clamp a straightedge to the work to use as a sawguide for the straight cuts.) Dry-fit the ends through the mortises, using your block plane or sandpaper to adjust the tenons as needed. They should go in with light hand pressure. With the tenons fit, remove the handle and saw a 5 ⁄ 16″-deep kerf across each end.
Cut wedges from a scrap of 3⁄4″-thick hardwood using your handsaw.
Assemble
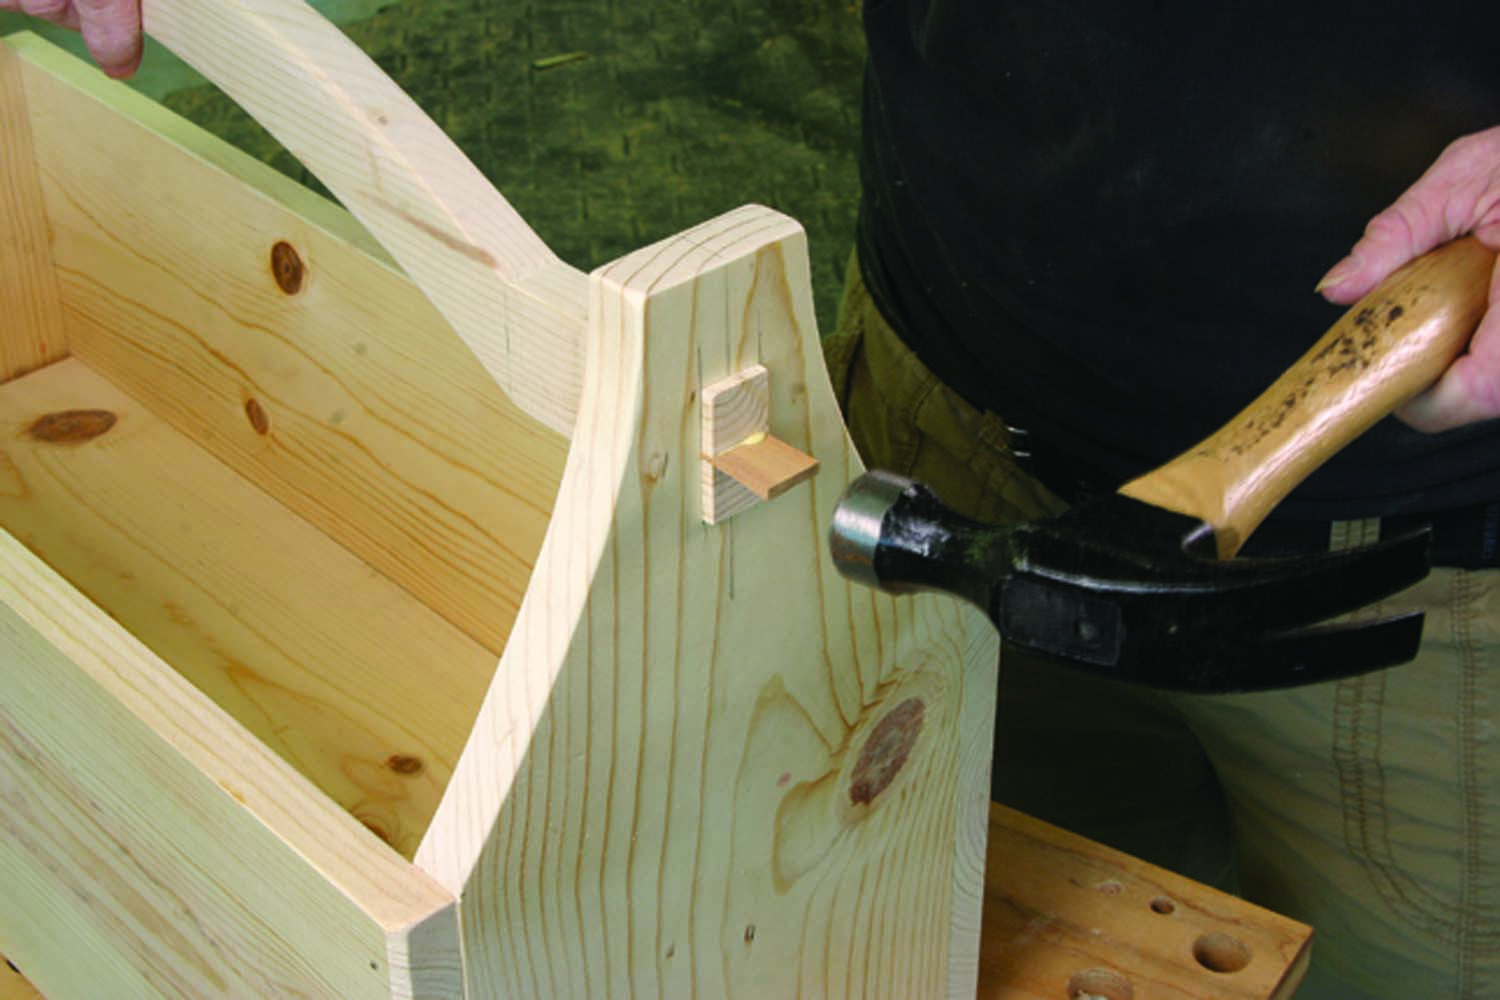
Wedgie. After using a handsaw to cut a kerf in the center of each end of the handle, paint your wedges with glue and tap them in. After the glue dries, trim the wedge flush with the end of the handle.
Glue and nail a cleat at the bottom interior edge of each side piece. Now make sure the handle ends are inserted through the mortises, line up the sides and ends so everything is flush, and clamp the box together. Drill three pilot holes at each corner, then nail the box together with 6d finish nails. Paint glue on the thin end of the wedges, insert them in the kerfs at either handle end then alternate ends as you tap the wedges until they’re fully seated (this will help keep the handle centered in the box). After the glue dries, cut the wedge flush with the tenon. Cut the bottom to fit, and slip it in place (take a few passes with your block plane along one long edge as needed). Sand to #120 grit and paint, then wrap the handle with some suede. Now your tools can travel in style.
Tool Tote Cut list
| Item | T | W | L | Material |
| 2 Sides | 3/4″ | 7 1/4″ | 22″ | Pine |
| 2 Ends | 3/4″ | 7 1/4″ | 13″ | Pine |
| 1 Bottom | 3/4″ | 7 1/4″ | 20 1/2″ | Pine |
| 1 Handle | 3/4″ | 3 1/2″ | 22 1/4″ | Pine |
| 2 Cleats | 3/4″ | 3/4″ | 20″ | Scrap |
- View the PDF
- Download the free SketchUp plan for the Tool Tote.
Here are some supplies and tools we find essential in our everyday work around the shop. We may receive a commission from sales referred by our links; however, we have carefully selected these products for their usefulness and quality.


Great project ideas, easy to follow, great shopping list for materials. Thank you. Well done