


We may receive a commission when you use our affiliate links. However, this does not impact our recommendations.
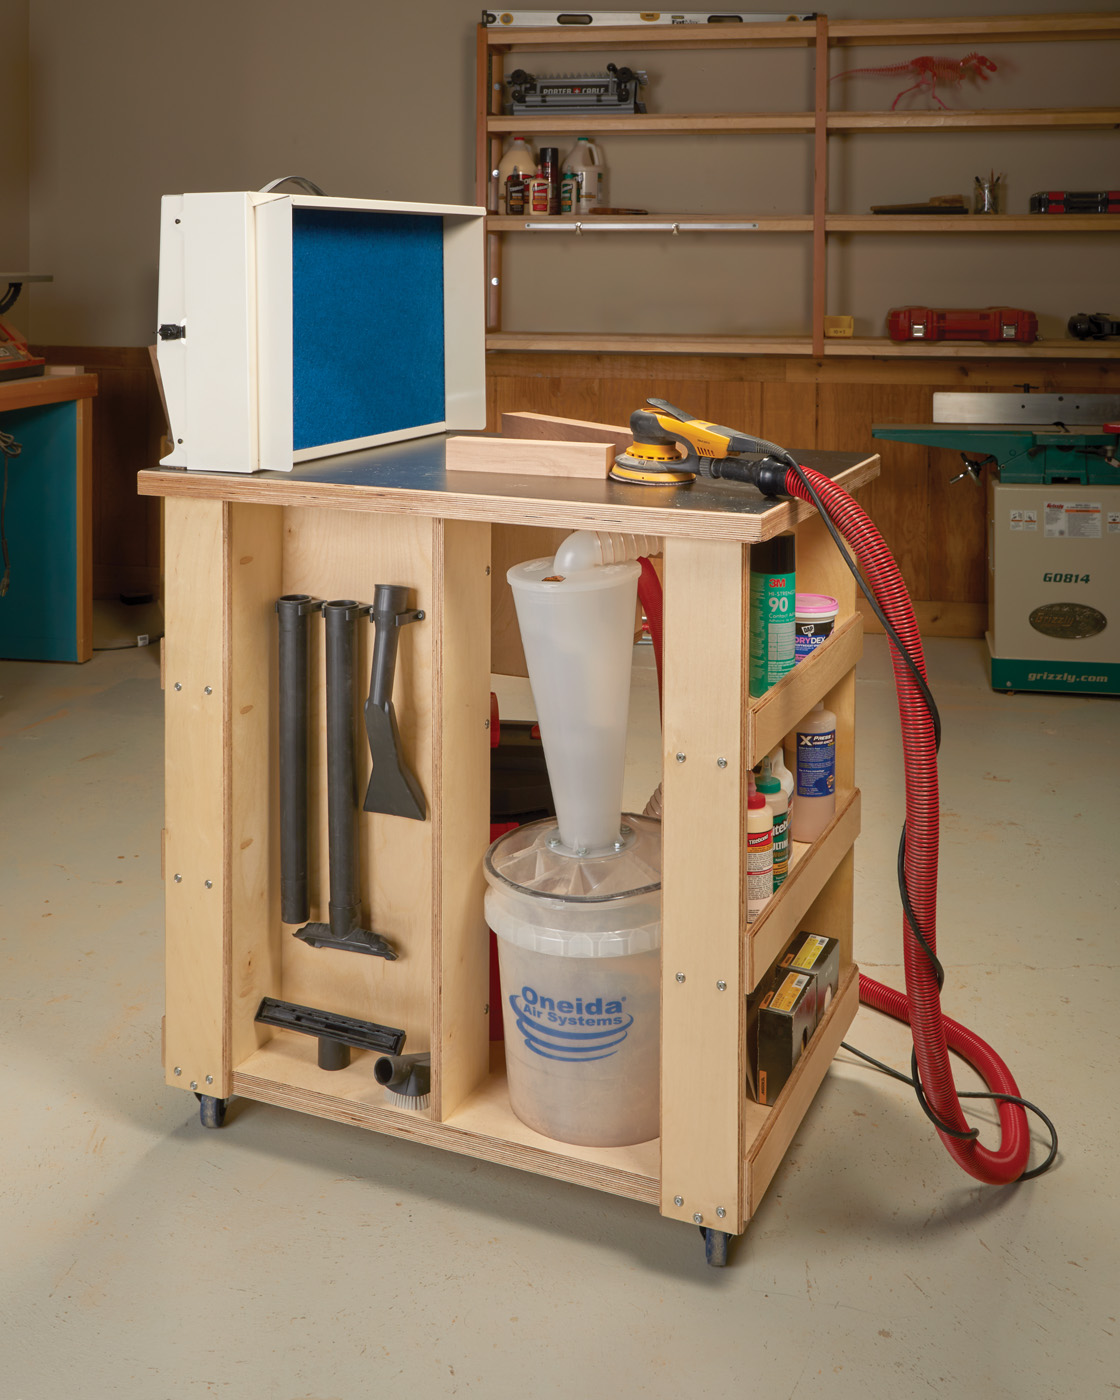
This dust collection cart houses a vacuum and cyclonic dust separator for an efficient, clean workstation.
Project #2509 • Skill Level: Beginner • Time: 2 Days • Cost: $180
Every inch of space in a shop is precious. That is why I’m not a big fan of unitasker tools and equipment. When it came time to design a dust collection cart for my shop vacuum and Dust Deputy, I faced a dilemma: Do I try to minimize the overall footprint, or get maximum functionality out of the cart itself? Most of the designs I found online were smaller, but didn’t include any useful space on top for storage or working. At the same time, they were too tall to fit under a standard workbench or shop table, which meant they would always be taking up precious floor space.
 After weighing the pros and cons, I decided that turning the cart into a full-on sanding station would be the best option for my needs. I would optimize every inch possible for storage while still allowing for a highly portable workstation. The work height of the table is higher than usual, but it’s perfect for sanding flat pieces or small projects (assuming you’re a 95th percentile male). With my design direction chosen, it was time to start building.
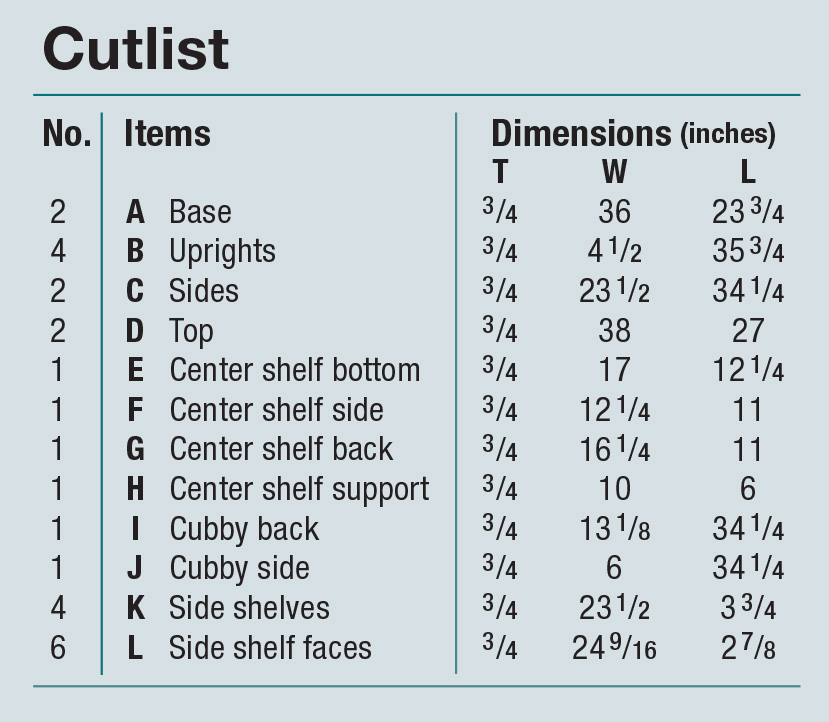
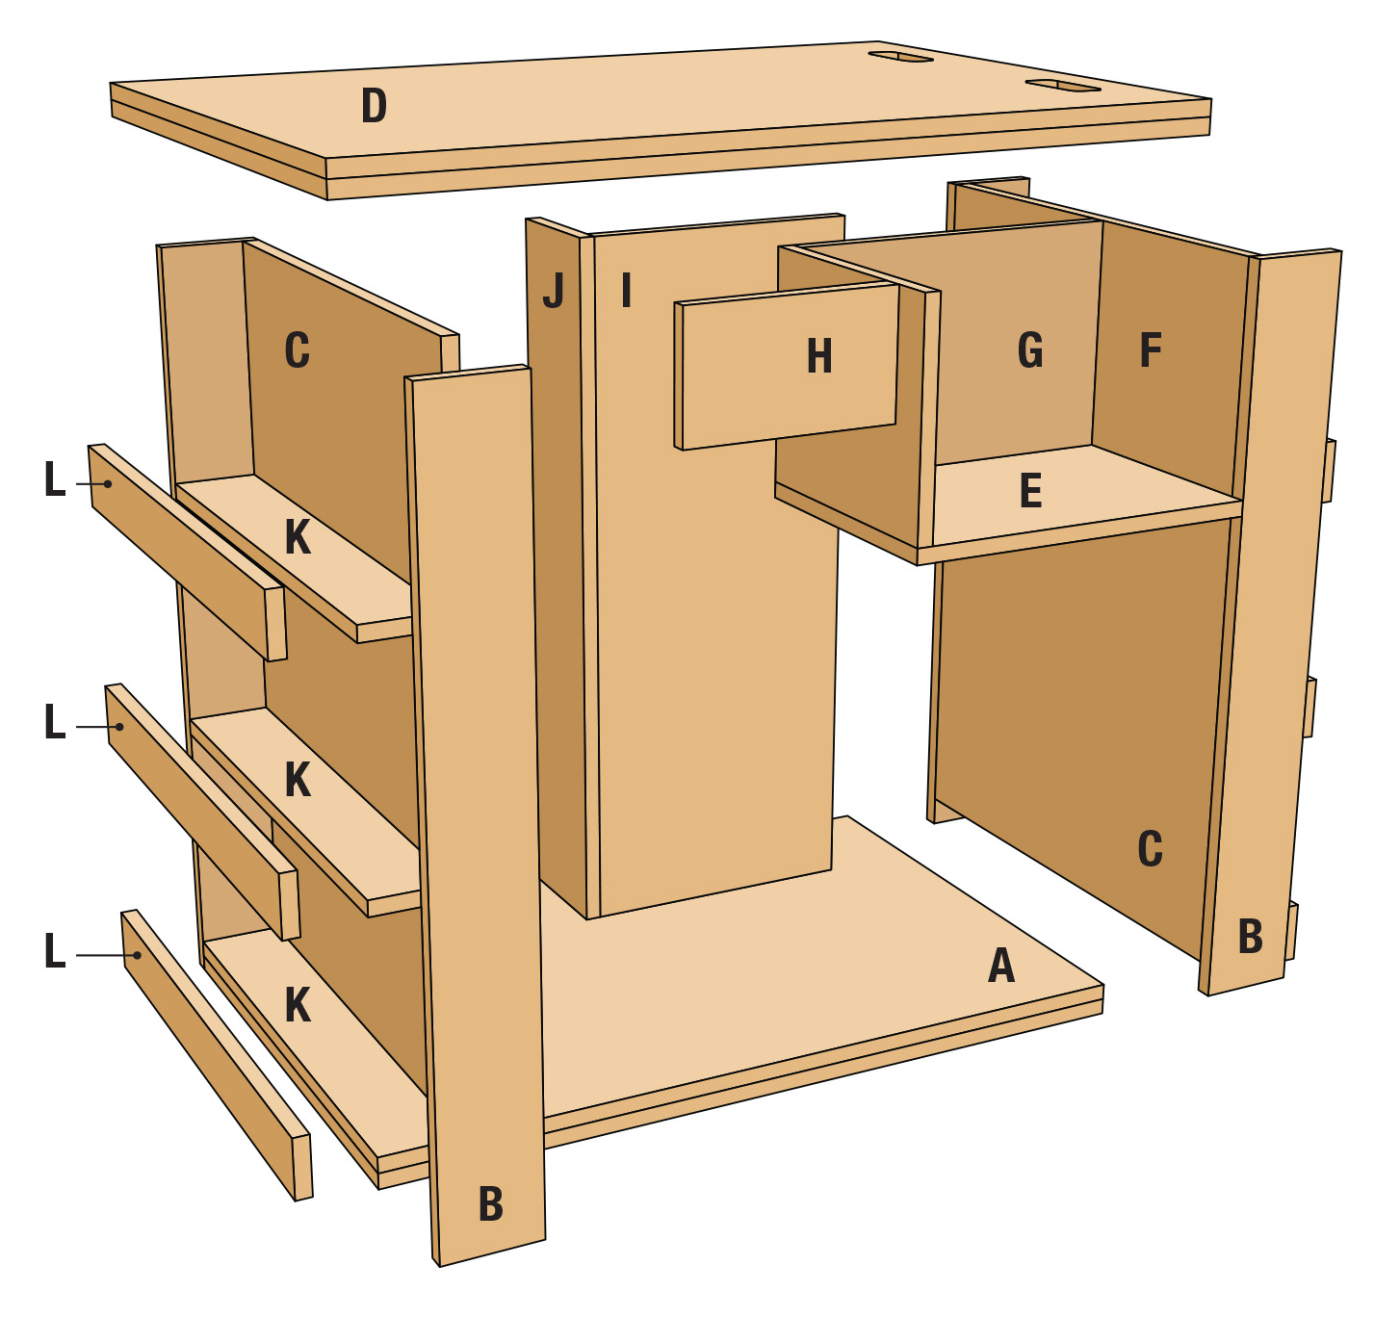
Cutlist and Diagrams

Solid Foundation
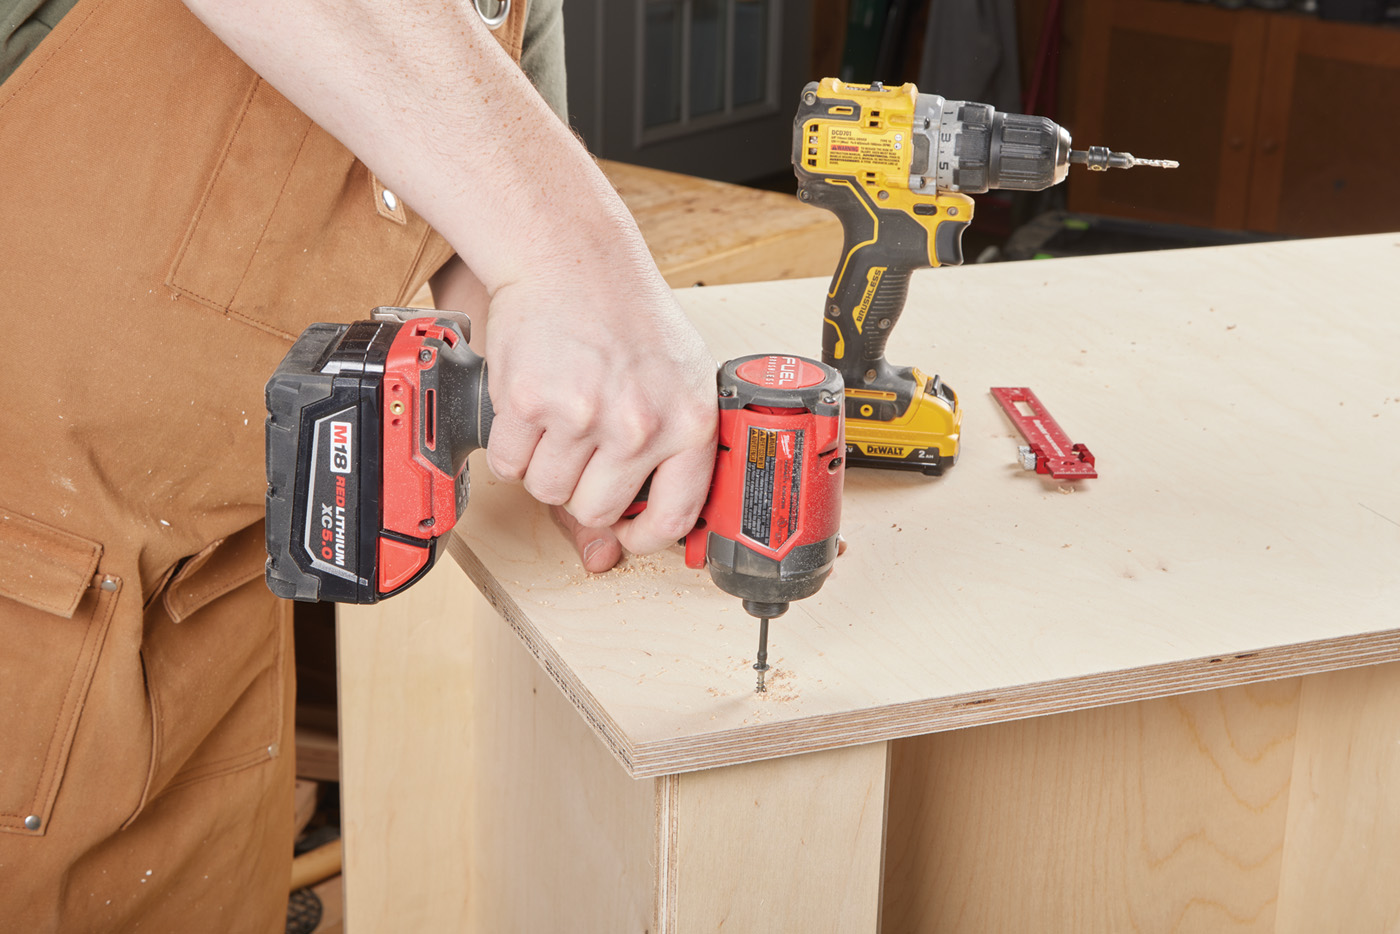
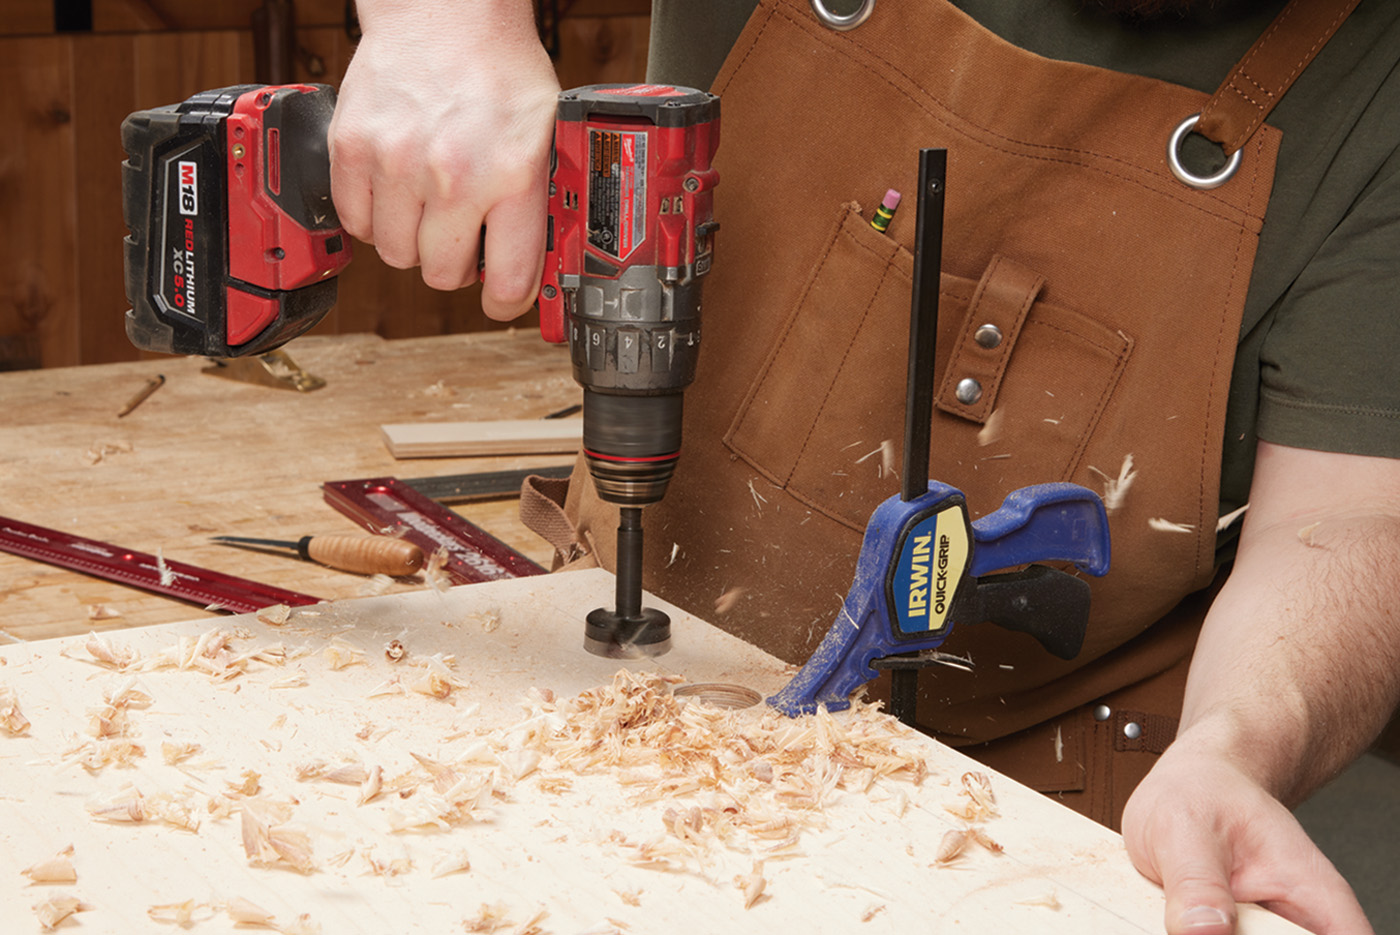
As usual, you’ll start by cutting everything to size first. I prefer a track saw for this type of work. Not having to wrestle sheet goods on the table saw saves your back and gives you more accurate cuts anyway.
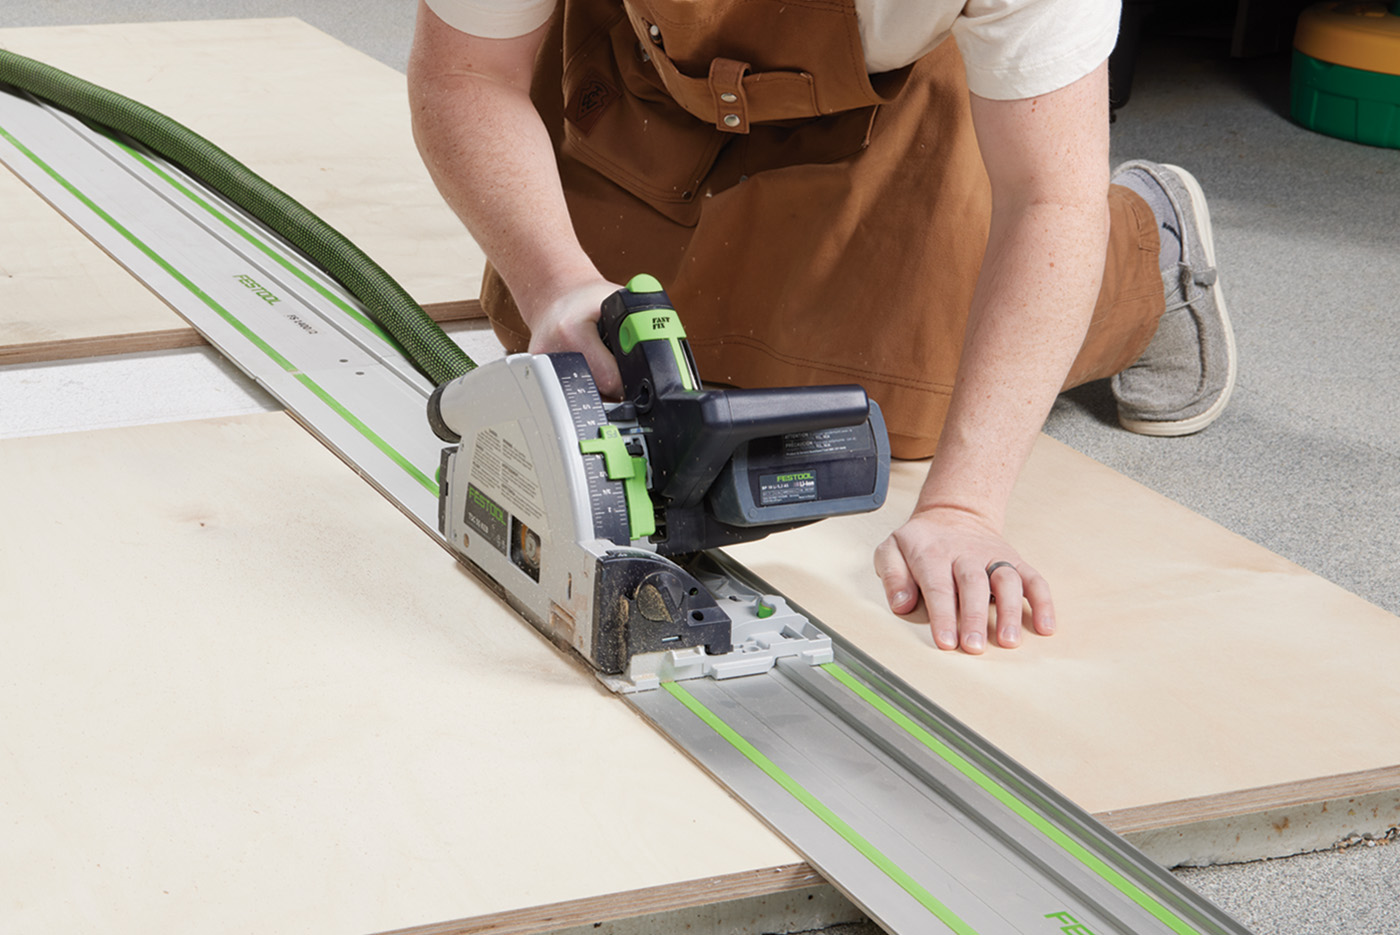
1 A track saw and a sheet of foam are all it takes to give you easy, accurate sheet good cuts.
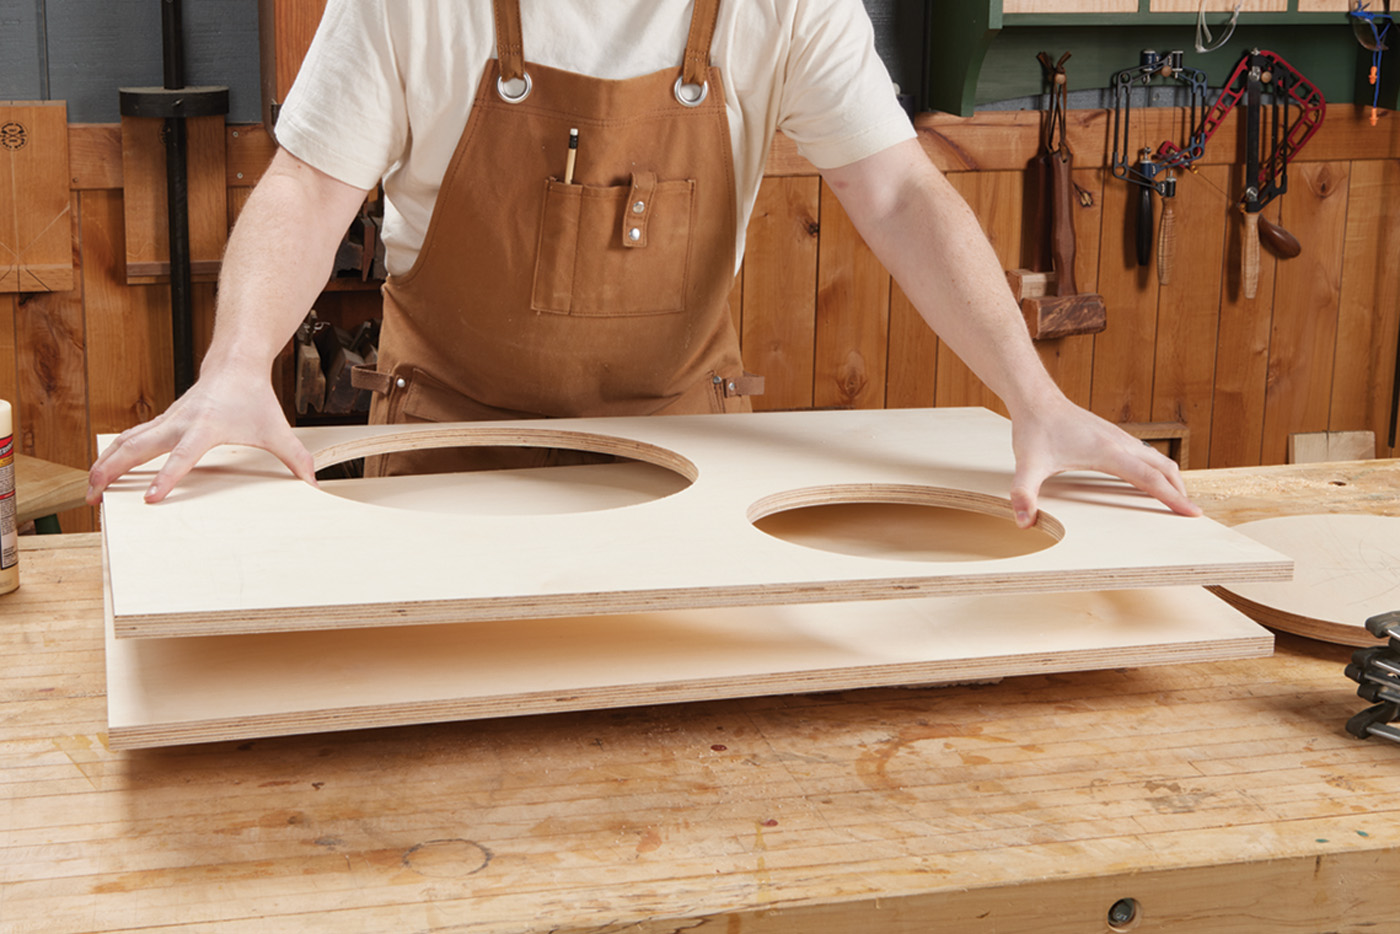
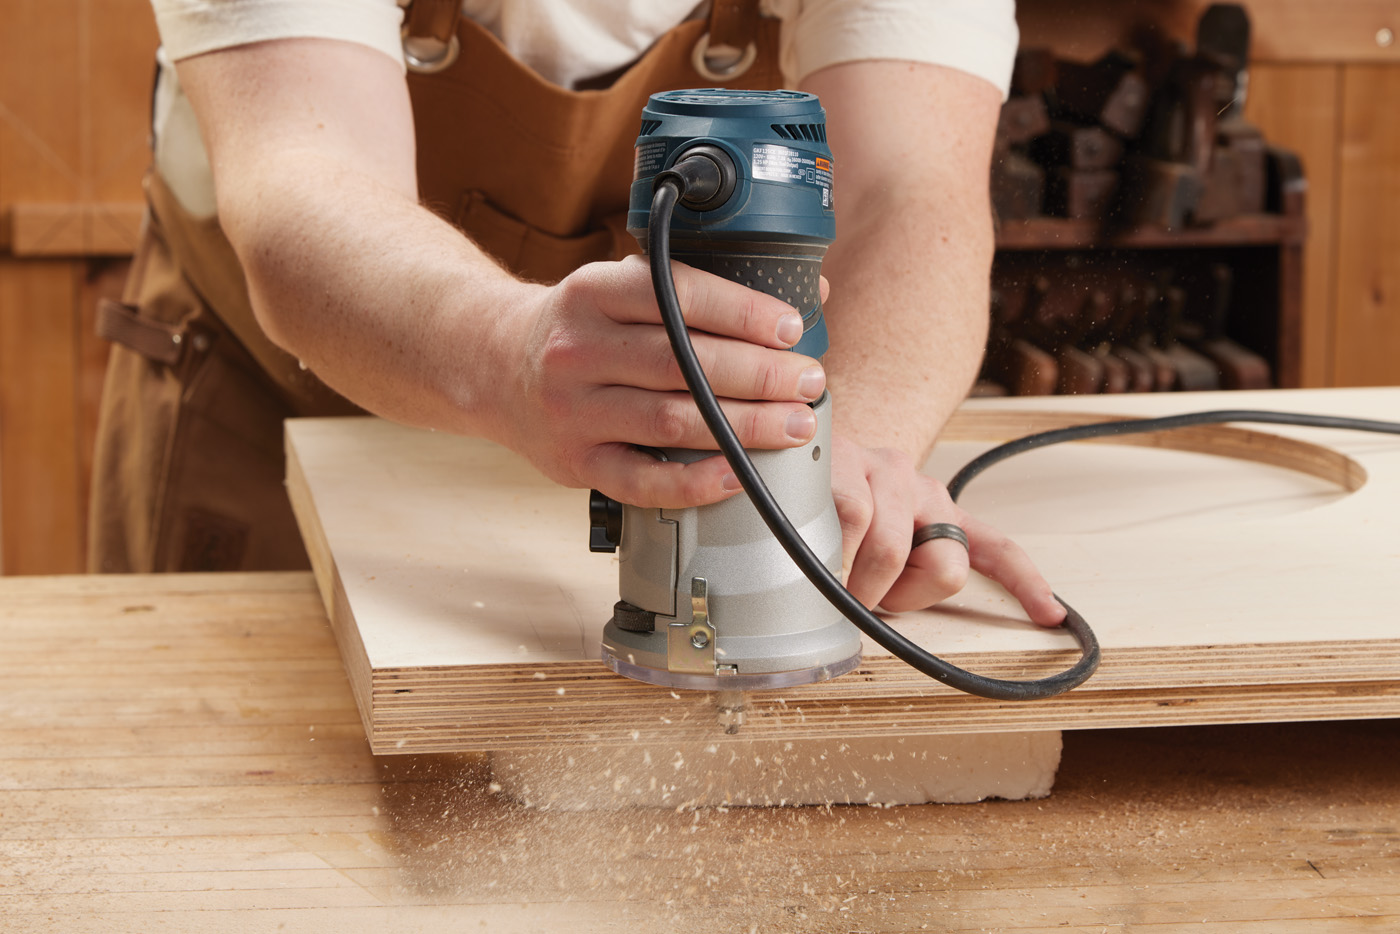
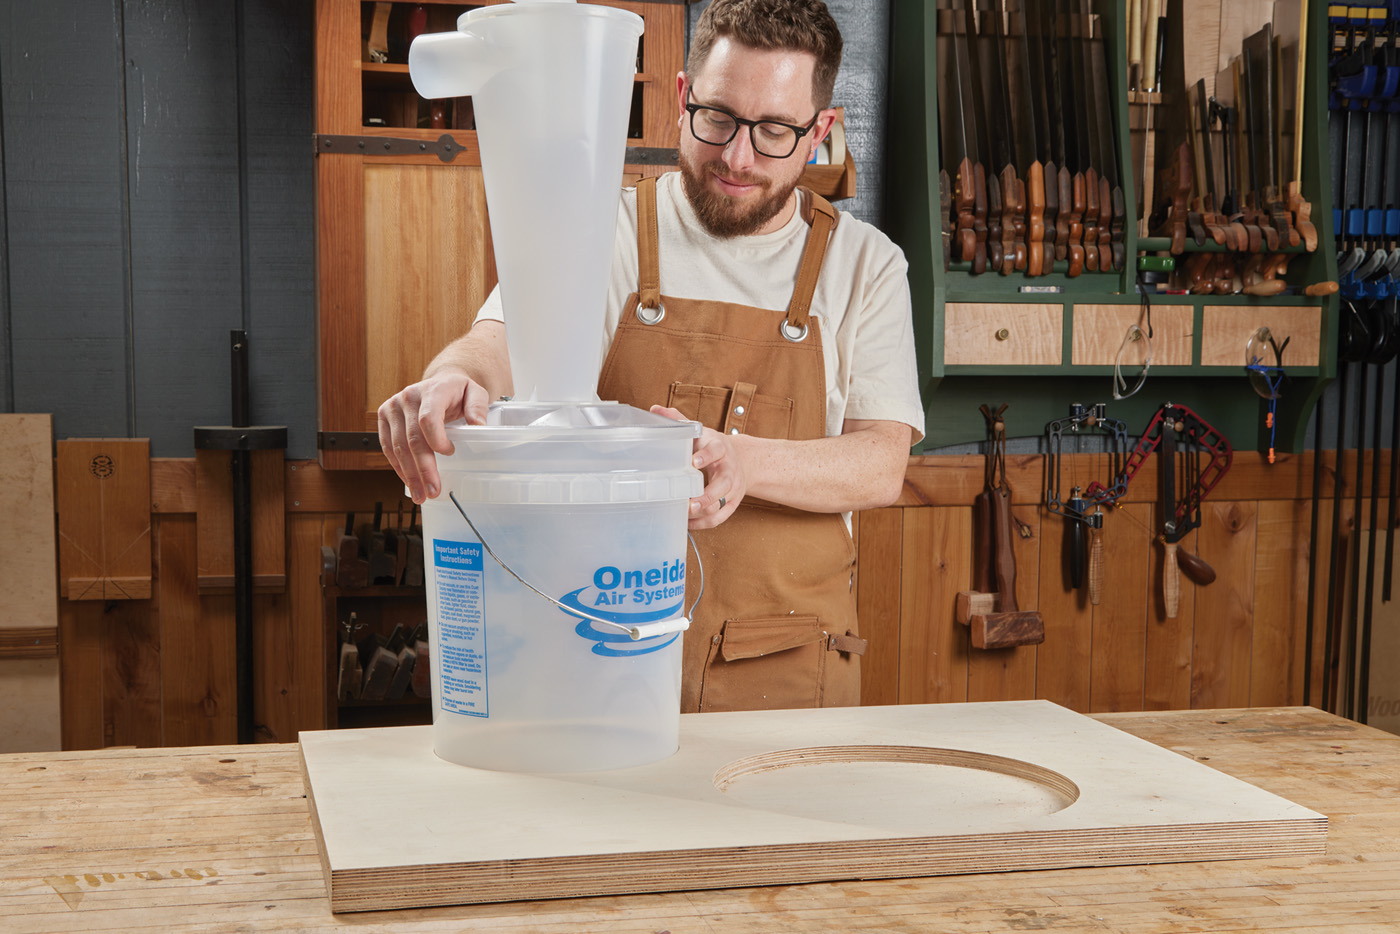
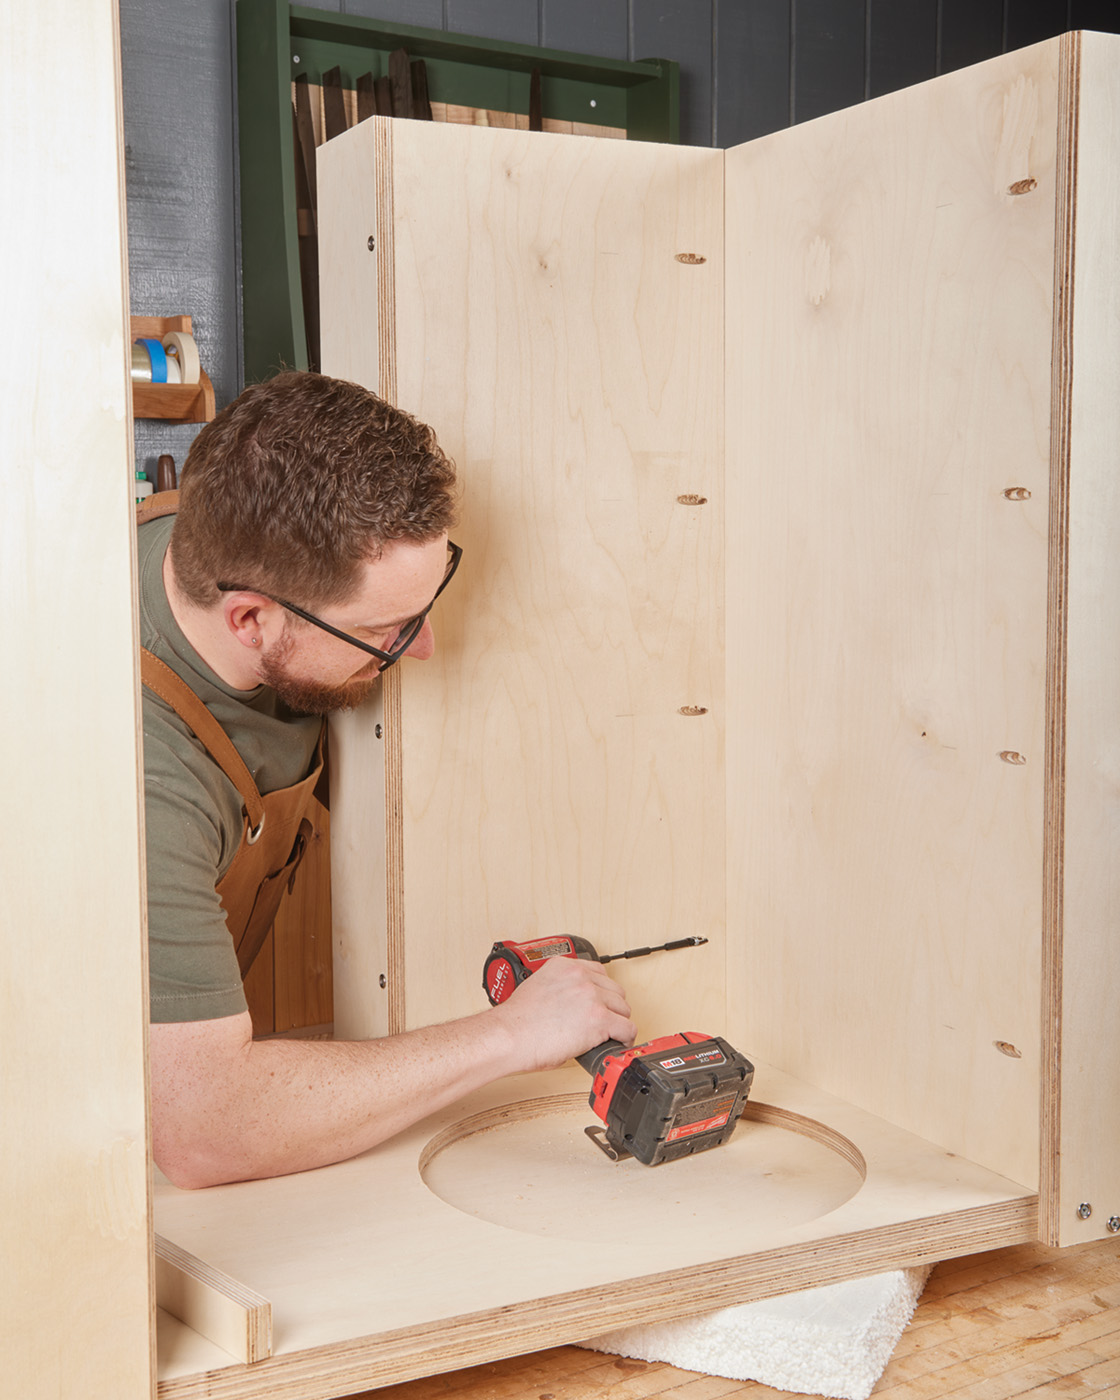
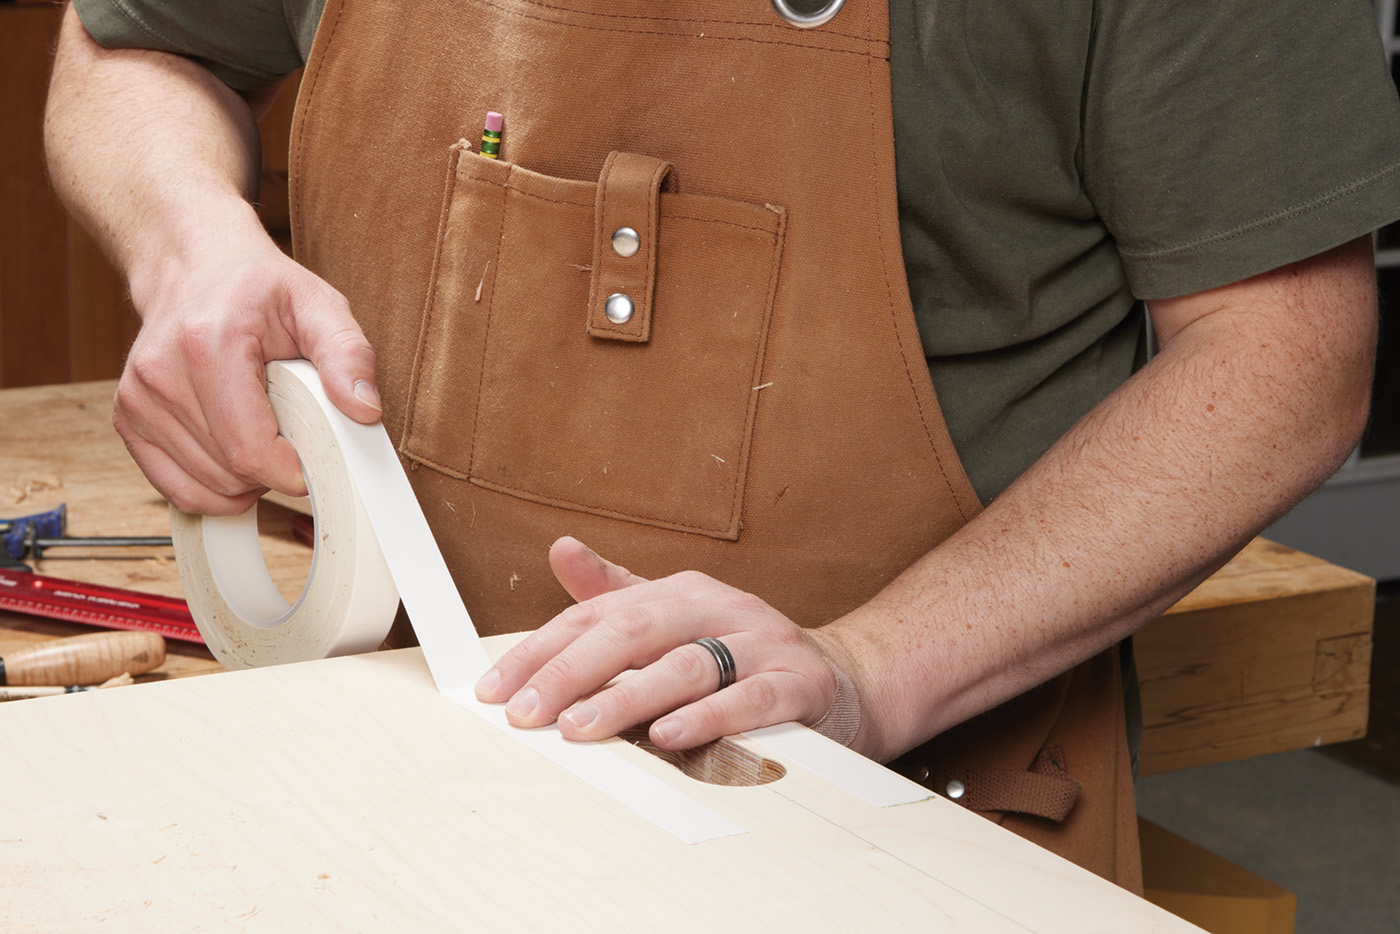
I wanted my vacuum and Dust Deputy to nest in the cart. This would help hold them in place as I moved things around. By laminating two sheets of plywood, I could simultaneously strengthen the base and provide that functionality with a few circular cutouts.
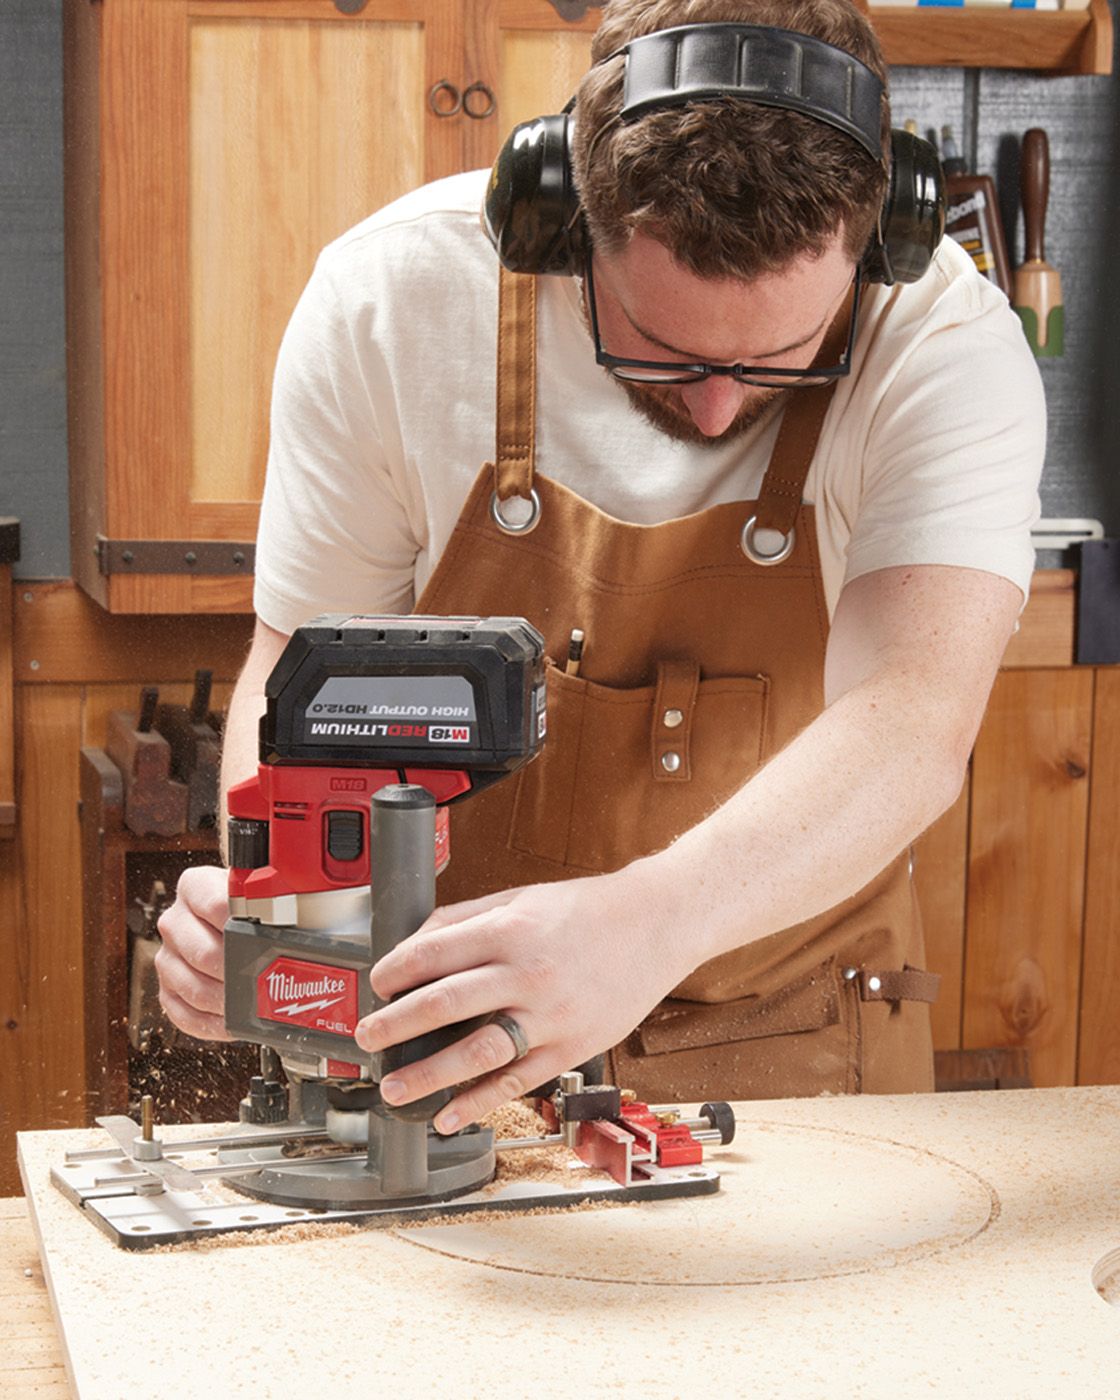
2 I used the Woodpeckers Multi-Function Router Base to cut the circles in the base.
Of note—you’ll want to lay out your specific dust vac with your dust bucket to figure out the location of the cuts. If you have an especially large vacuum, you’ll want to do this early on and adjust the overall size of the cart before even breaking down the plywood.
3 The base is laminated for extra strength.
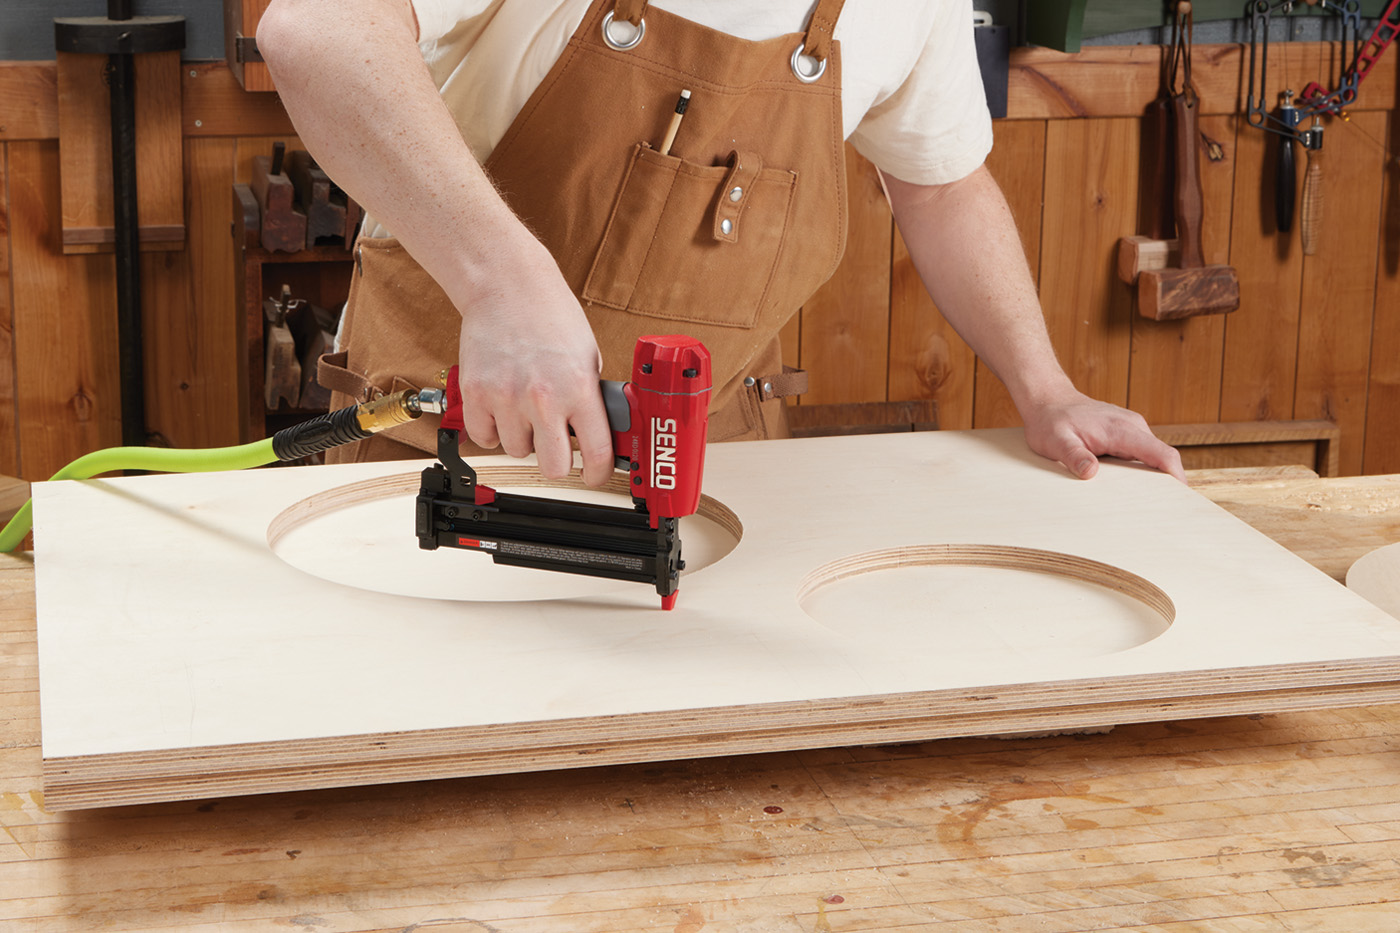
4 I used a pin nailer to help keep the base from shifting, and to hold the middle tight.
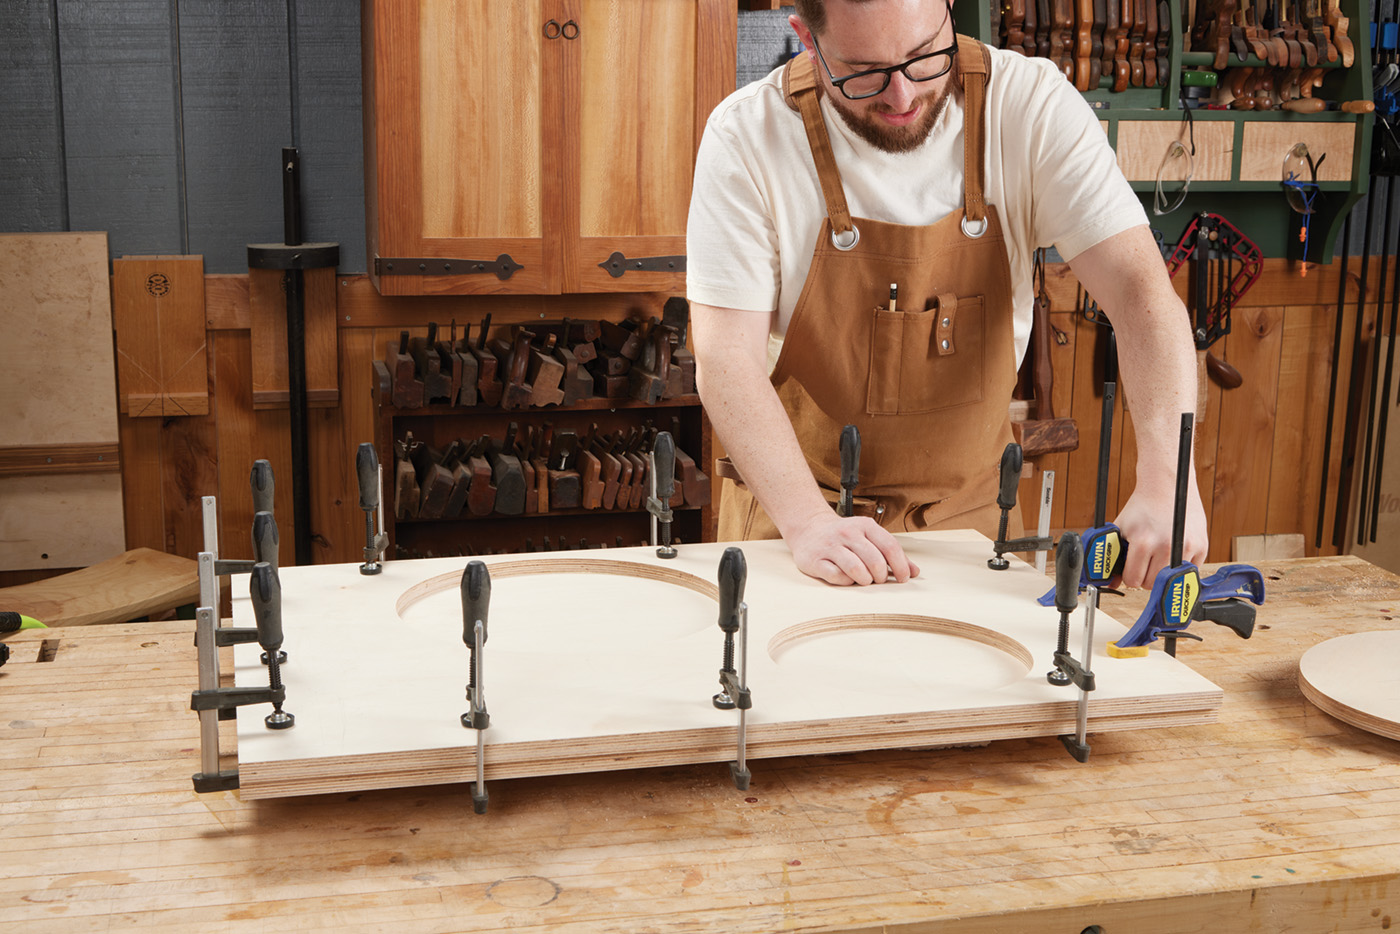
5 Then I clamped around the edges.
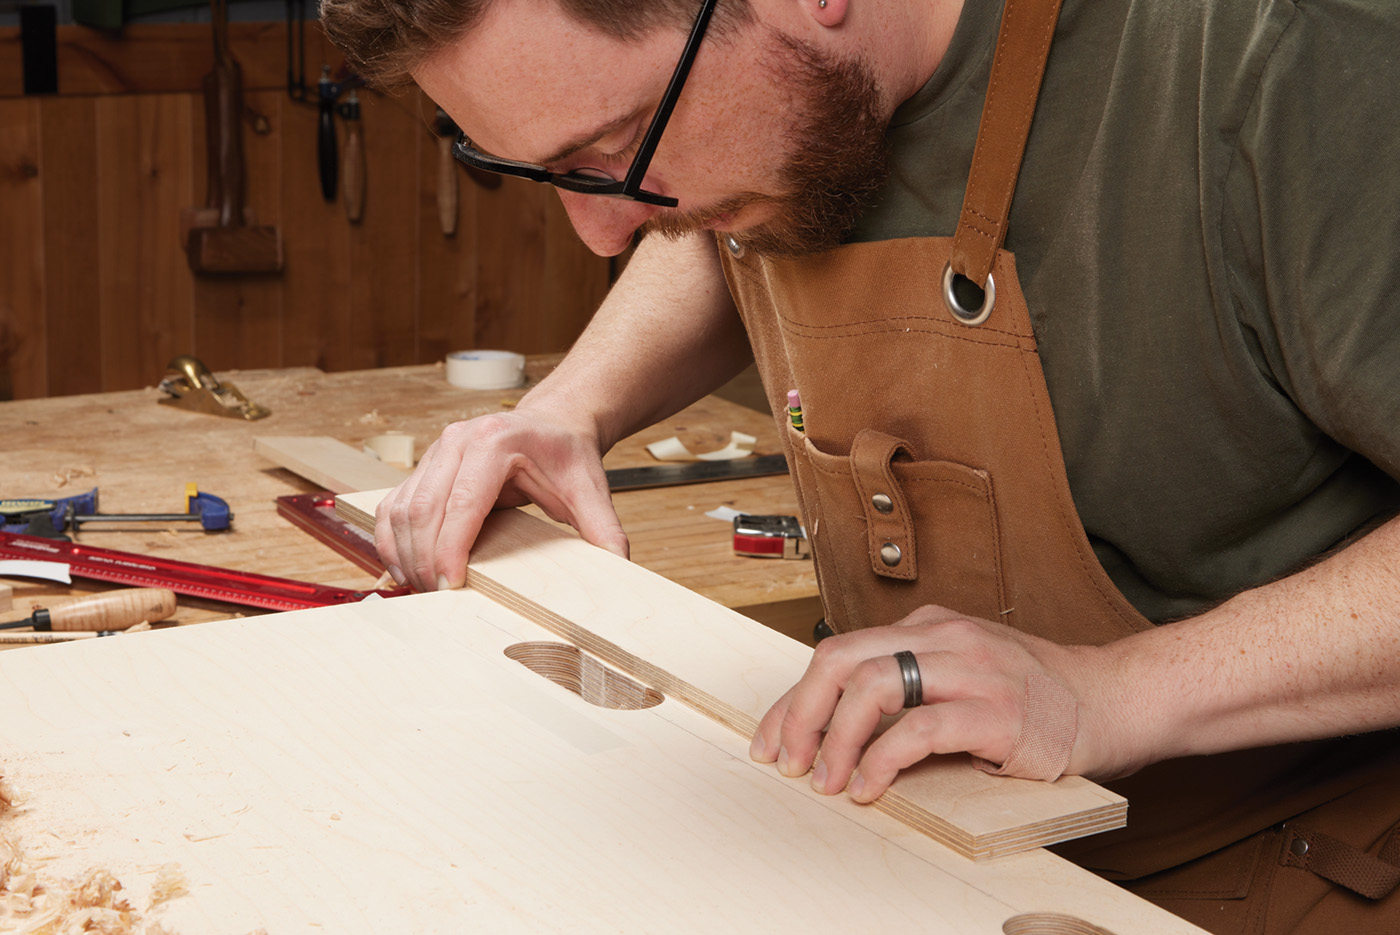
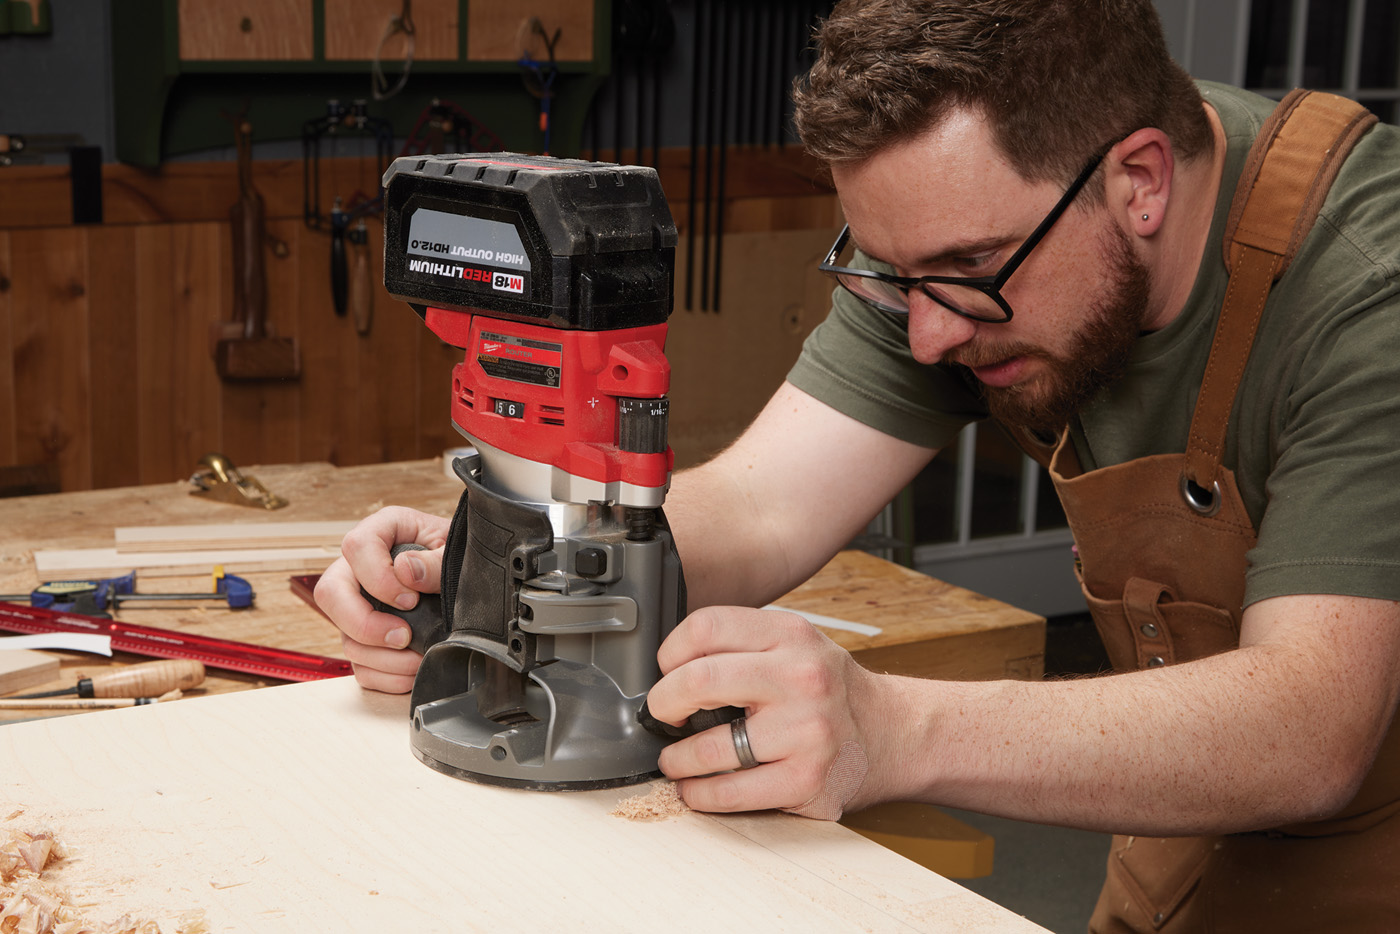
Once I knew where my cutouts needed to be, I used a router circle-cutting jig to make the actual cuts. A large piece of foam elevated the plywood above the workbench and provided support during the cutting process. After the holes were cut, I laminated the two sheets of plywood for the base. A handful of pin nails helped hold things down in the center, then I used clamps around the outside edges. Once the glue had dried, I returned with a flush-cut bit to clean up the outside edges of the base.
6 A flush trim bit was used to clean up all around the base.
Pay Attention to Details
I want to defend plywood projects. Plywood has numerous benefits, as it’s inherently stable, generally affordable, and easy to work with. Plywood is an ideal choice for shop projects like this. Don’t let a stigma about a material make you take less care in your work.
7 With your base all figured out, you can determine the dimensions for the rest of the cart.
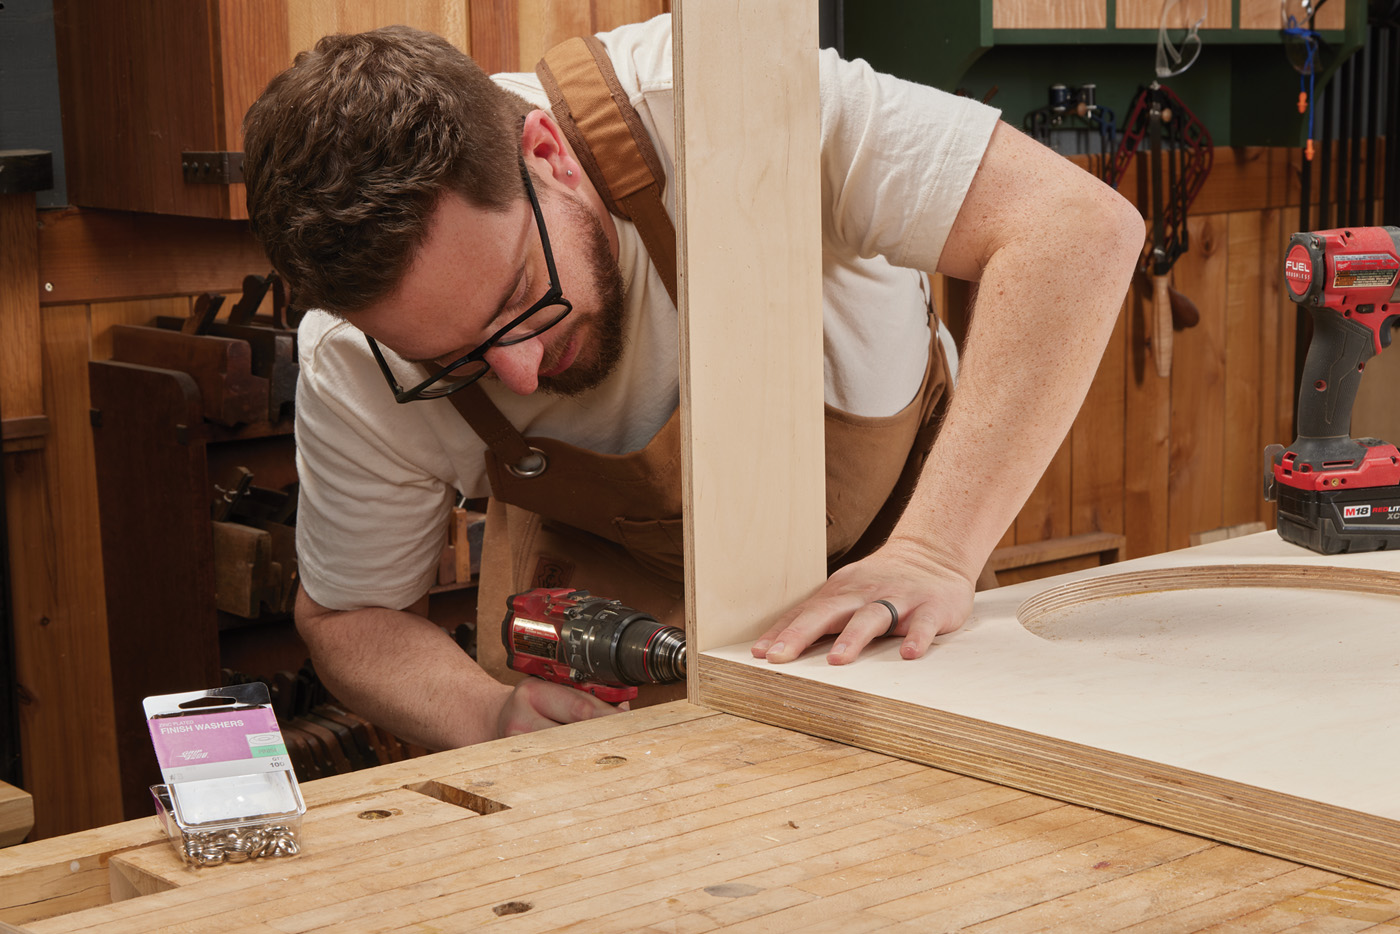
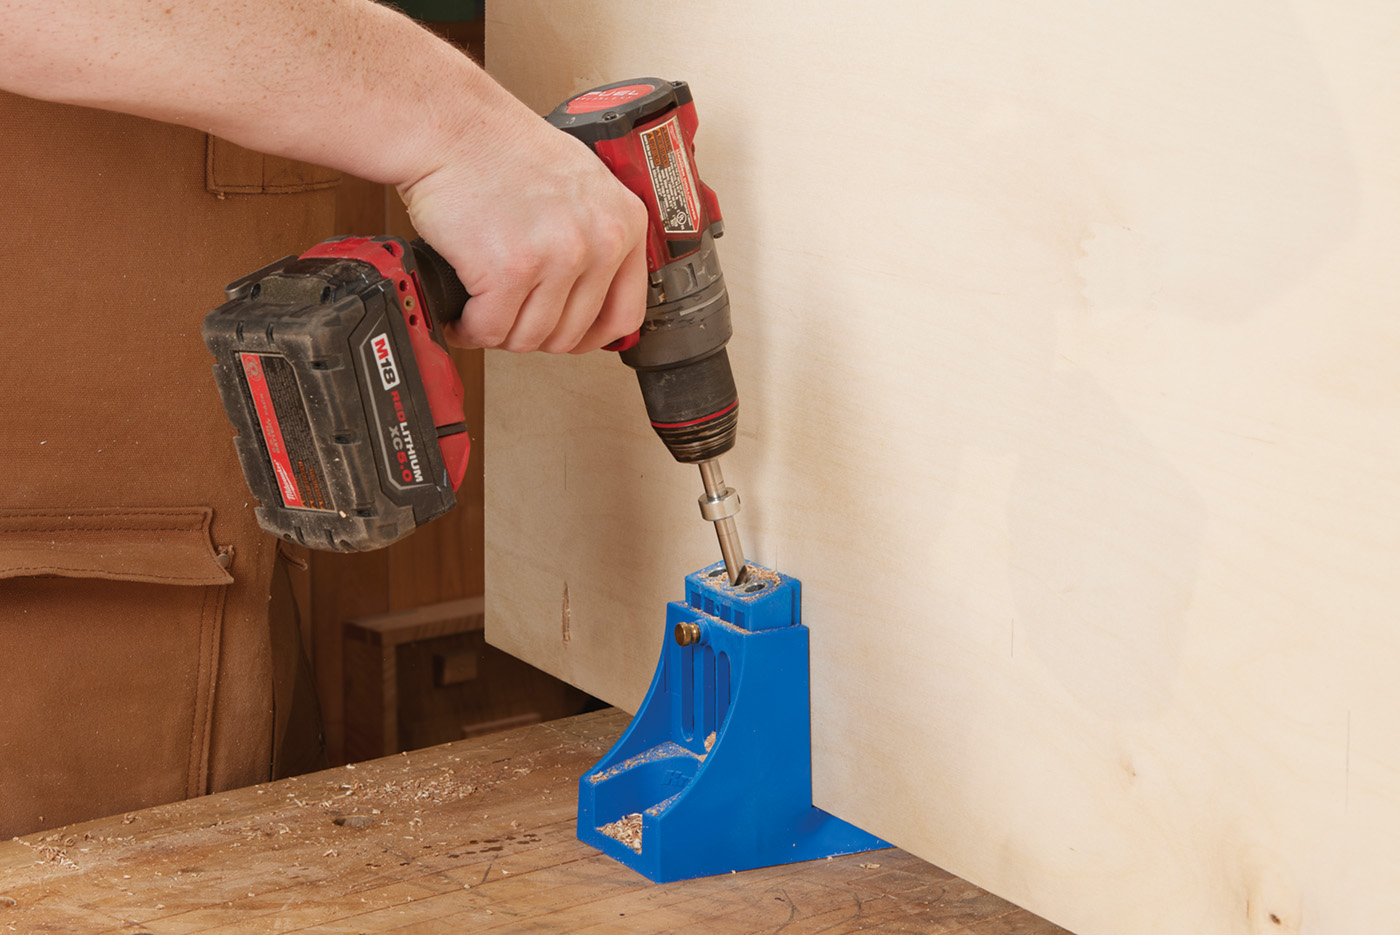
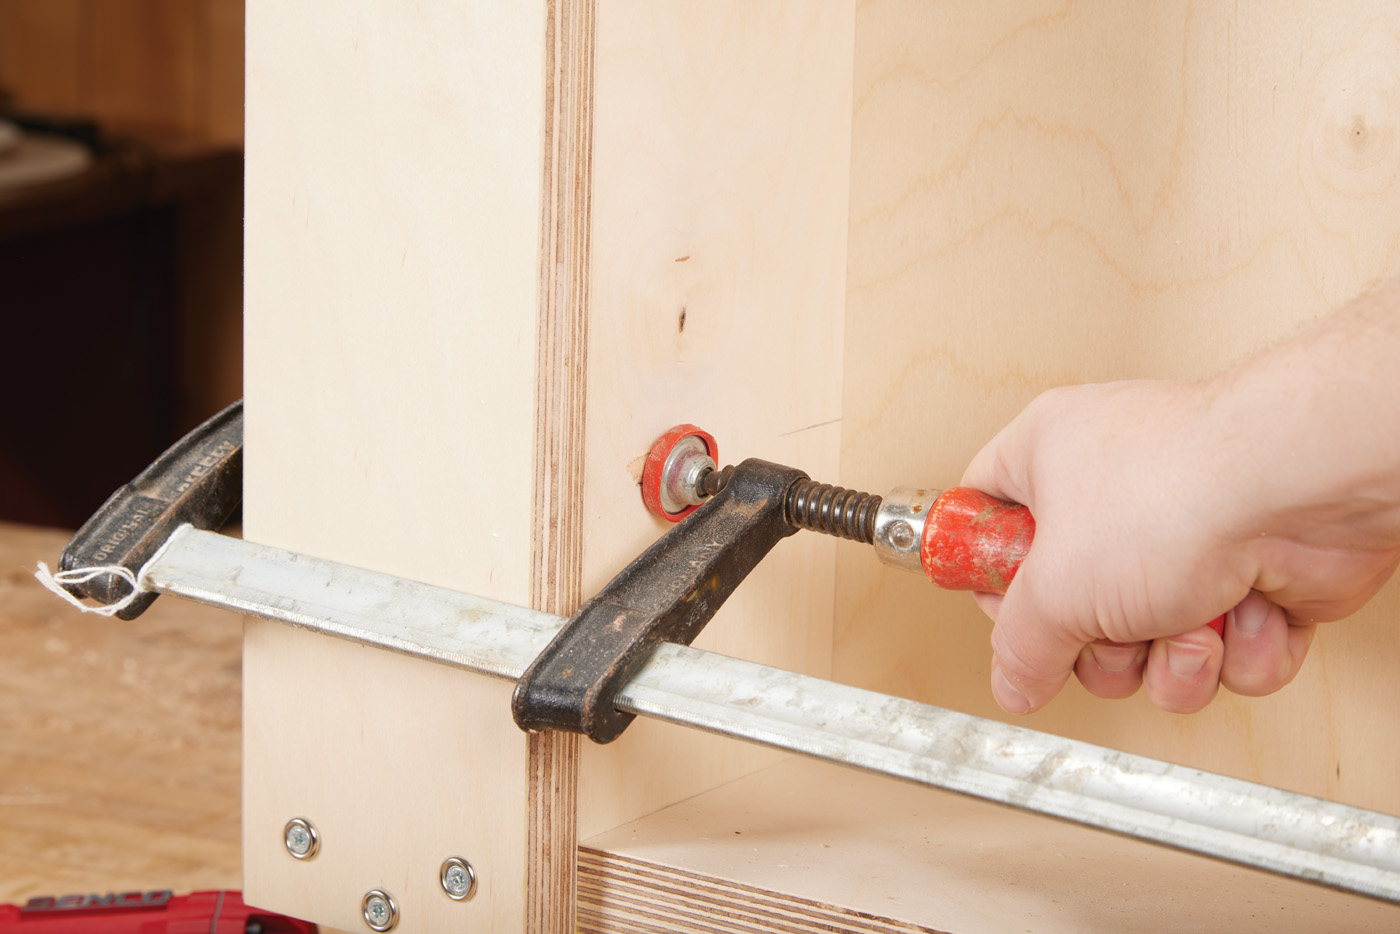
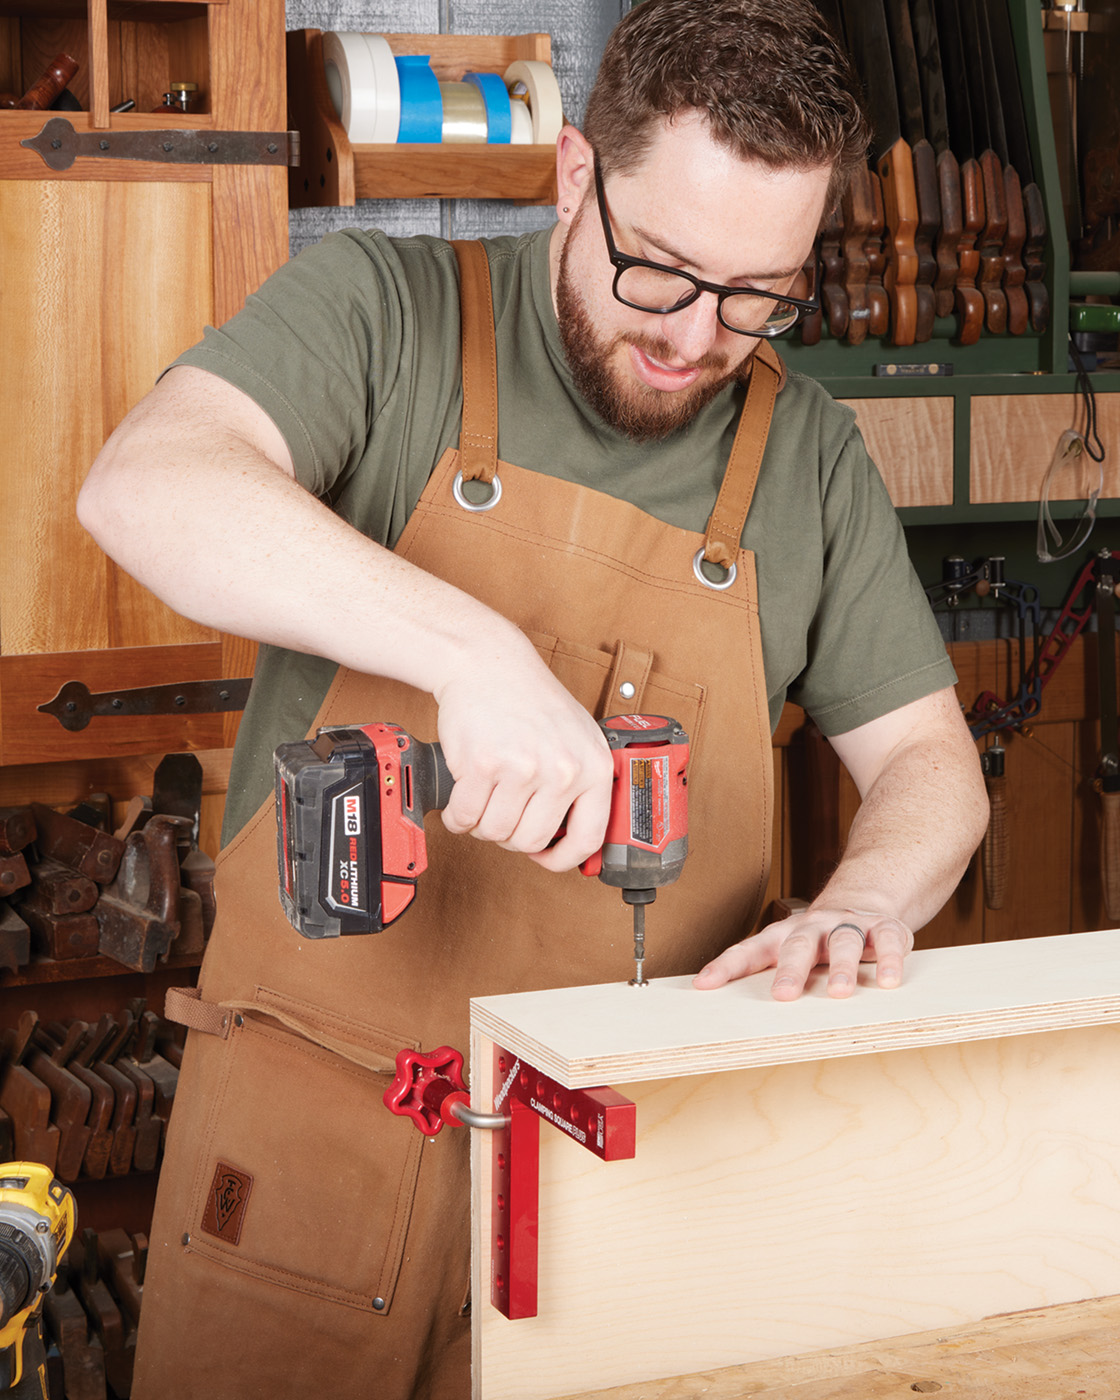
Likewise, the casework for the cart is as unpretentious as it gets; screws and pocket holes are all it takes. And again, even with simple forms of joinery, it doesn’t mean you should make a halfhearted effort. I marked out the locations of each hole before I started drilling. Even if it’s never seen, I wanted the screws to be equidistant from the top and bottom, as well as side-to-side. I also used finish washers throughout the project for any visible screws. As the name implies, they do double duty, acting as a washer and providing a cleaner final look.
8 I used finish washers for a cleaner look.
Speaking of things looking clean, I did use pocket hole plugs in some of the more obvious locations. You can purchase these or make them yourself with dowels, which is nice when using less common woods. The plugs are glued and clamped into place, then cut flush with a chisel before being sanded.
9 Pocket holes are easy to do, and are plenty strong.
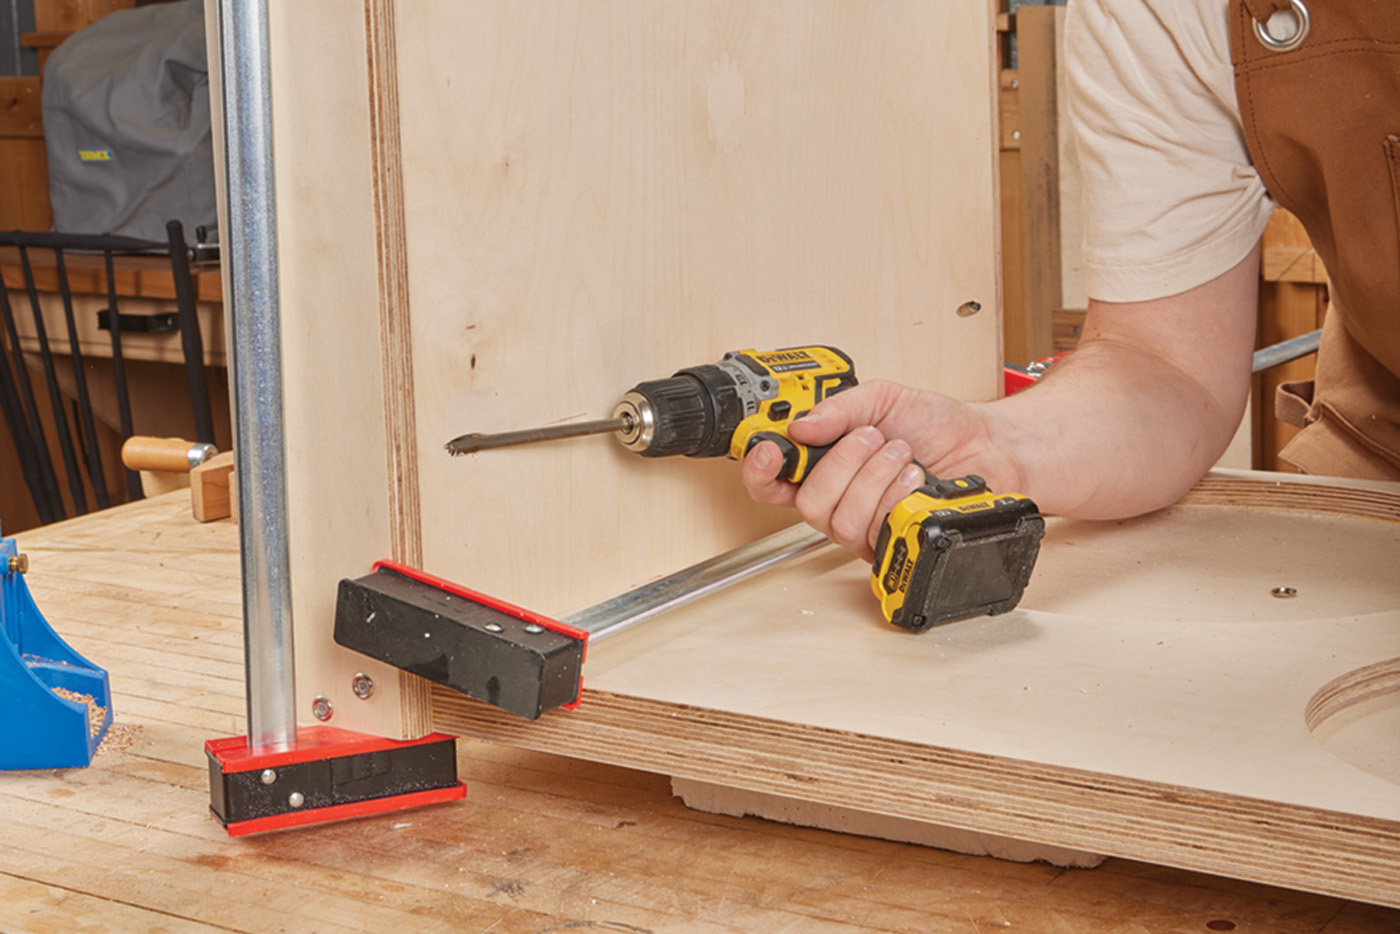
10 I clamped the panel into place so it wouldn’t shift when driving screws.
Strictly speaking, glue isn’t 100% necessary for most of these joints if you’re using enough fasteners. The amount of force that would be required to snap the screws is pretty hight. What it does do, though, is hold everything nice and firm. A case assembled with screws only will start to squeak and shift eventually. The glue will keep it rock solid.
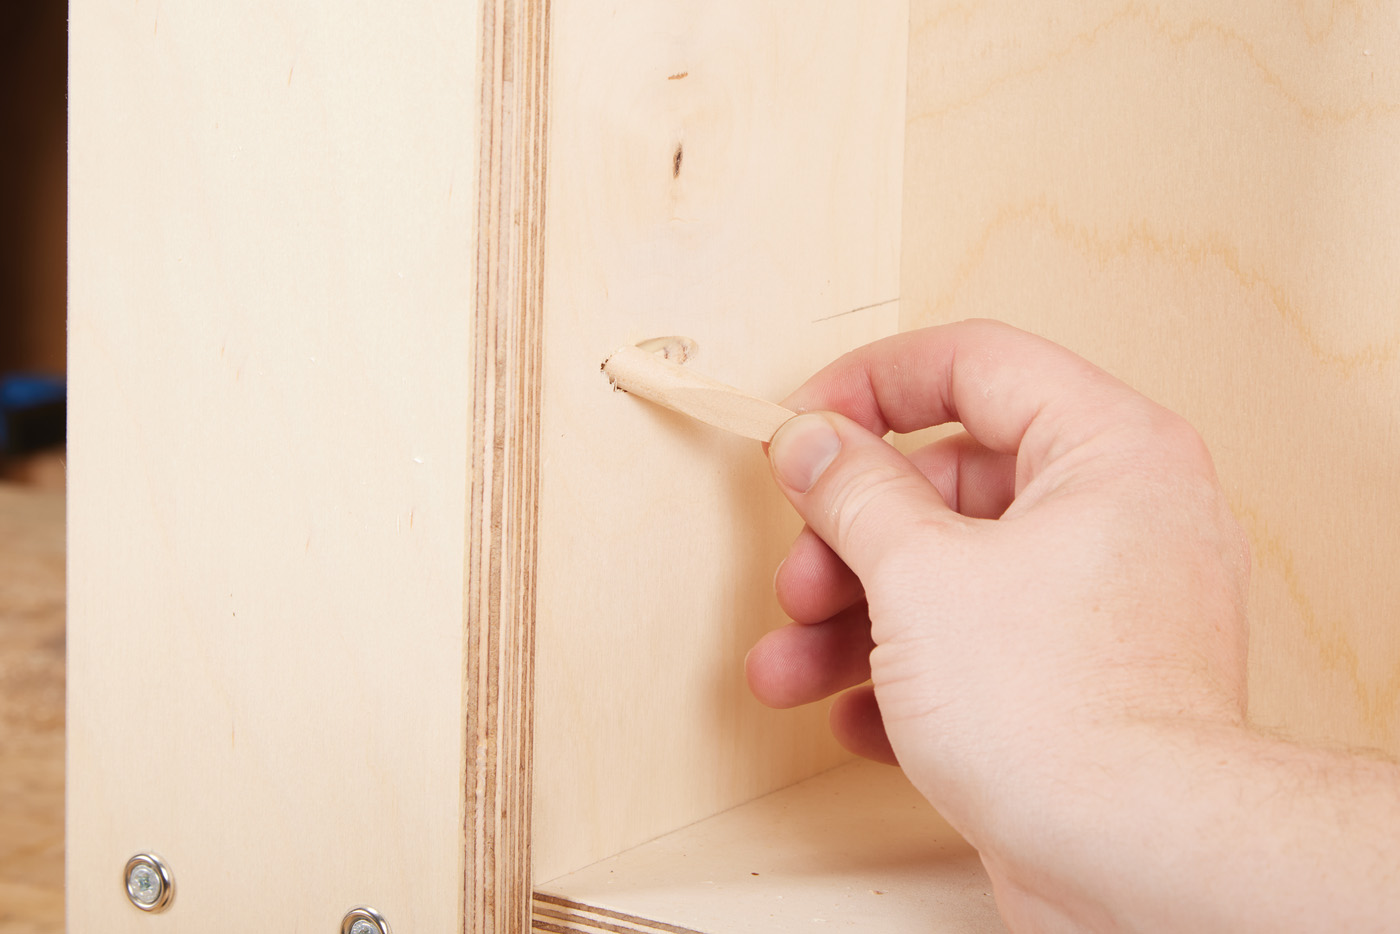
11 Plugging the pocket holes is easy to do, and leaves a much nicer finished look.
12 Clamp the plugs firmly in place.
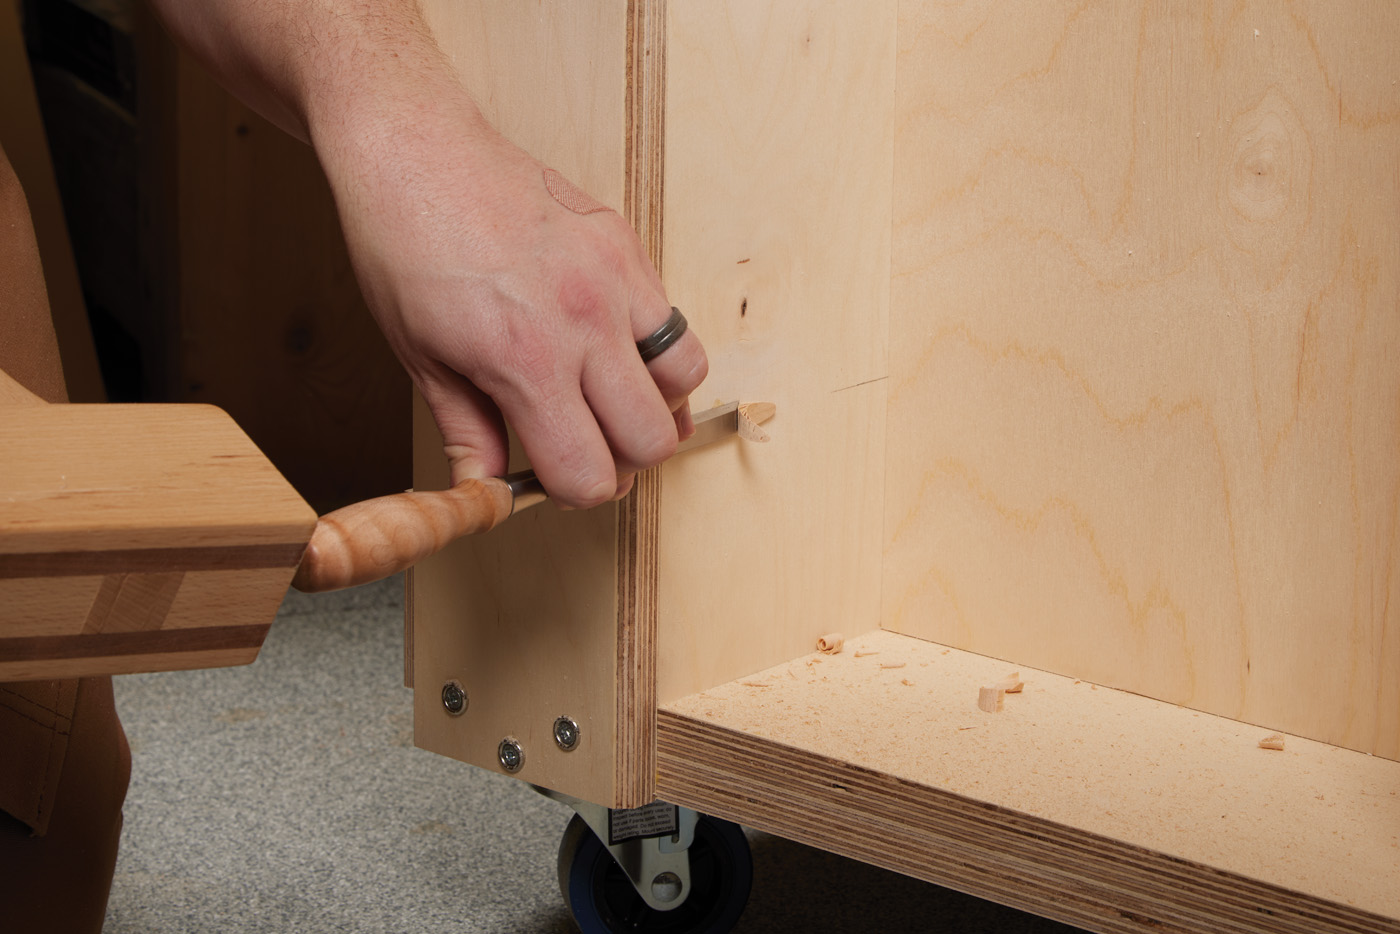
13 Once the glue dries you can trim the plug flush.
Make Space
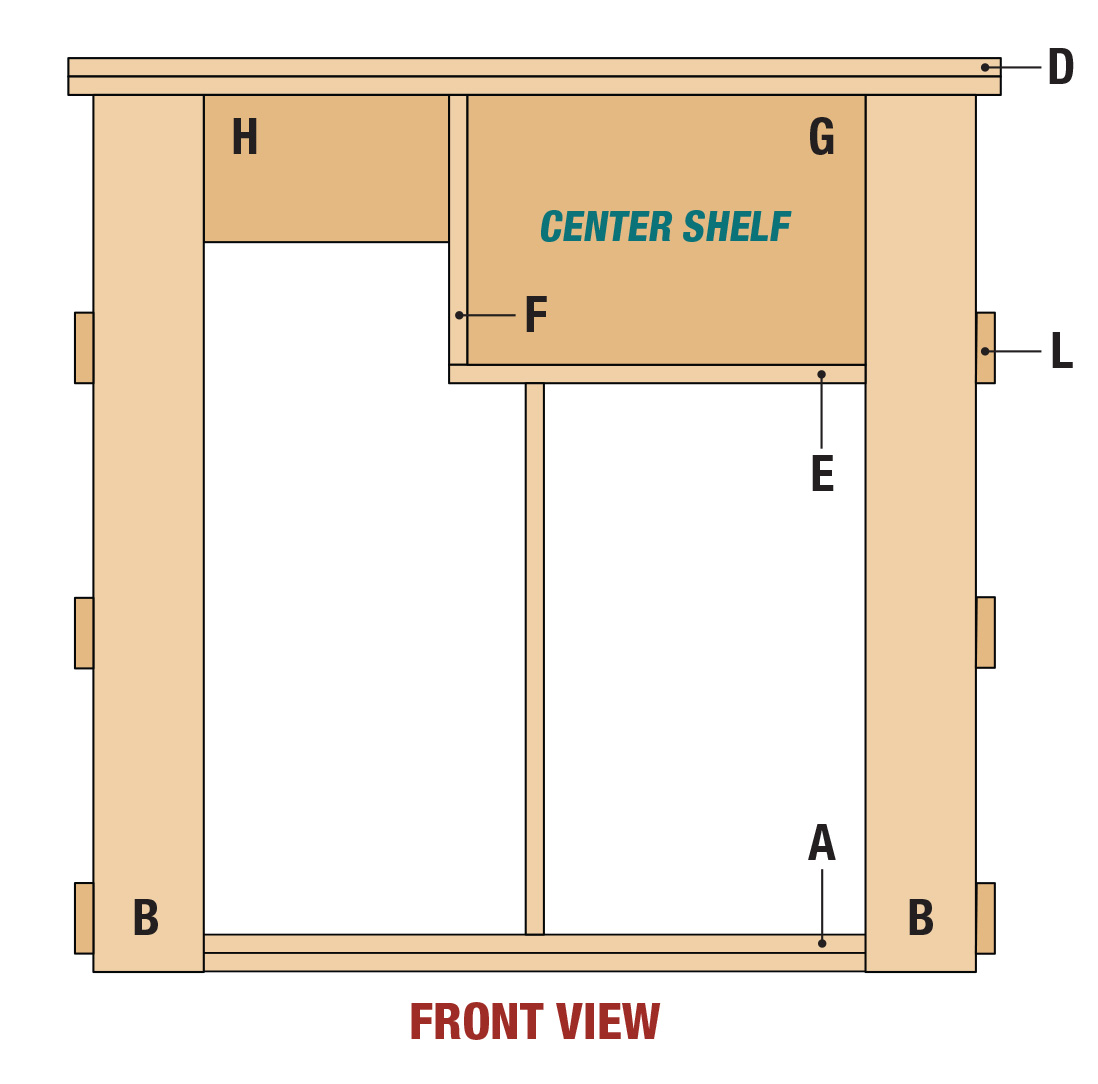
From the get-go, I wanted to utilize every inch of space in the cabinet. That meant adding a few extra inches on both ends to make room for shelves instead of a flat surface that didn’t serve any function. These were the first parts of the case built.
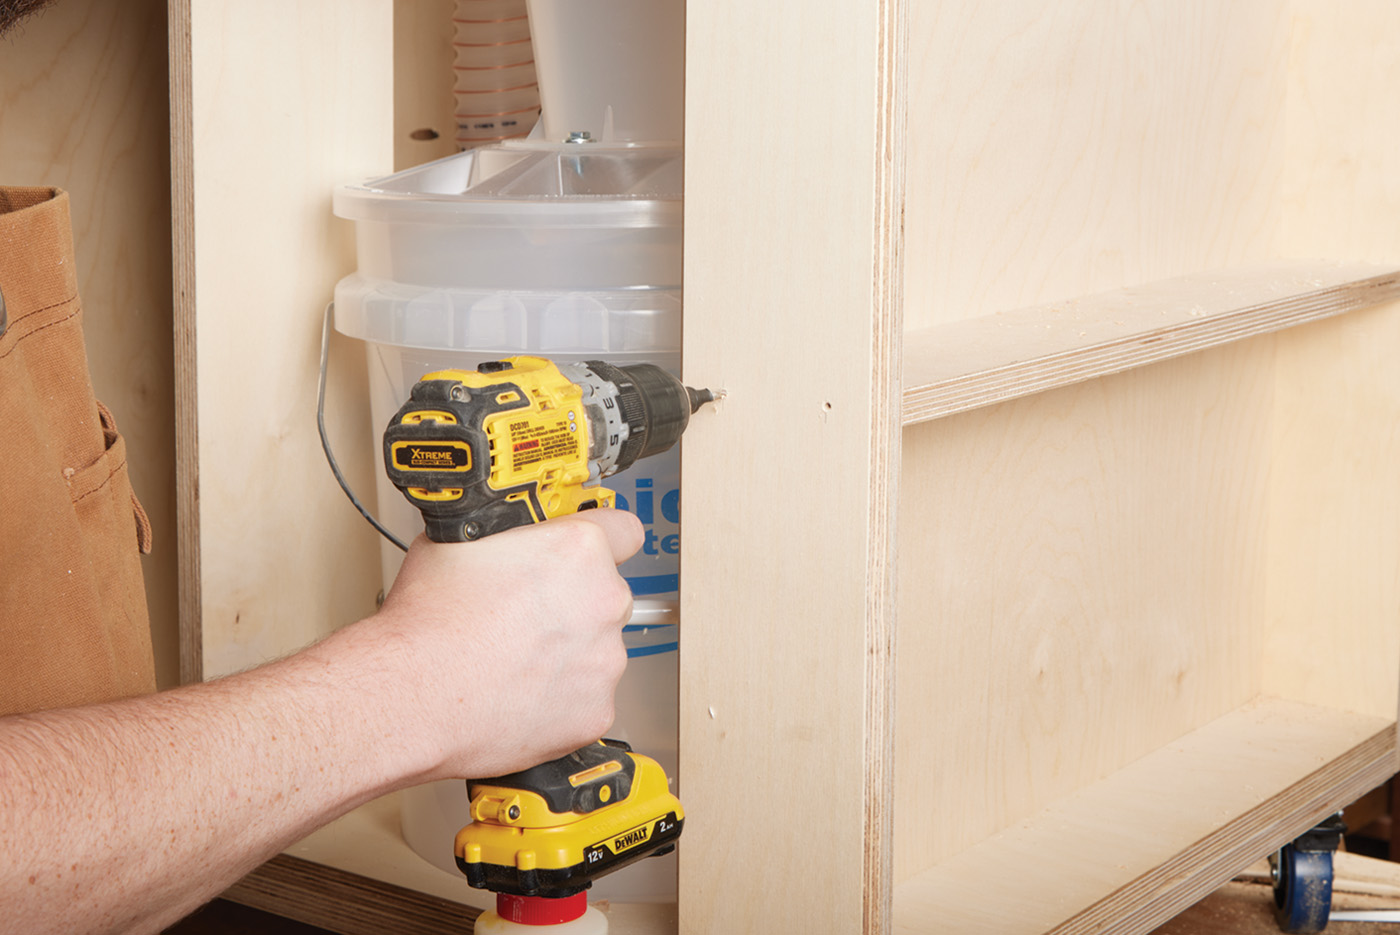
Sticking with my mantra of paying attention to detail, I chamfered the edges of the shelf uprights after cutting them to size. This is, of course, entirely optional. The added benefit of the laminated base becomes immediately noticeable during assembly; I was able to utilize it as a structural element I could drive screws into. I drilled the bottommost screw in first. Then used a square to ensure the upright was perfectly perpendicular before driving in the remaining screws.
The shelf backs came next. There is no reason I couldn’t have just screwed it into place from the outside as well, but I thought that the pocket holes would provide a cleaner look. Pocket holes can have a tendency to shift a bit when installing the screws, which I did not want. I made sure to clamp everything firmly in place to prevent that from happening, as well as to make sure everything was completely square.
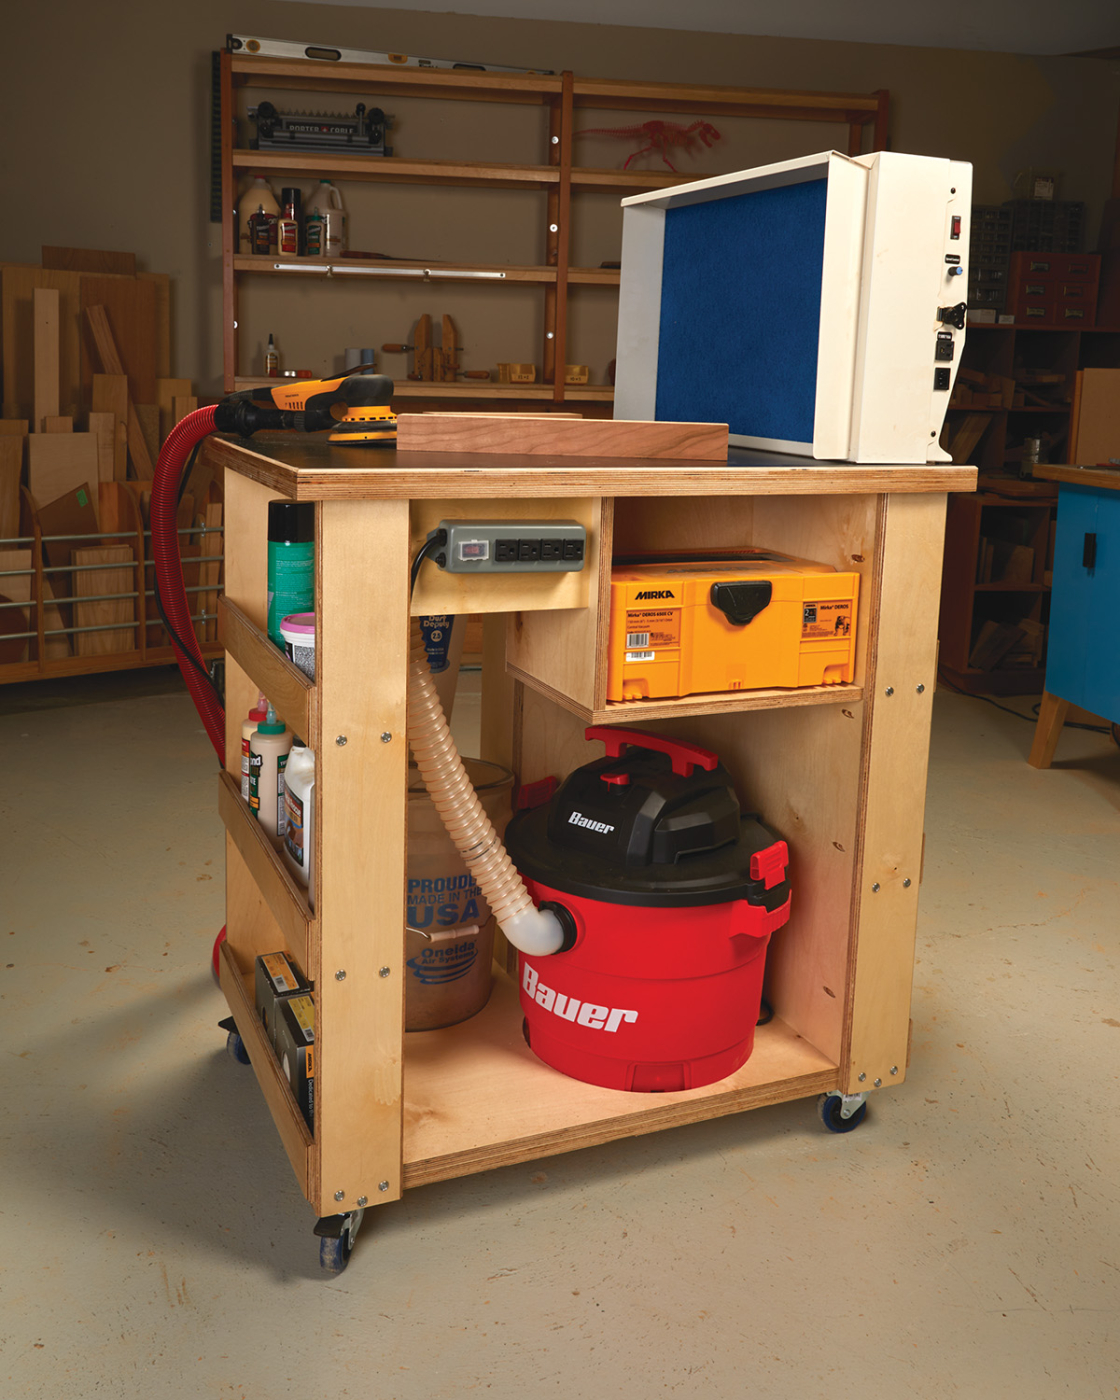
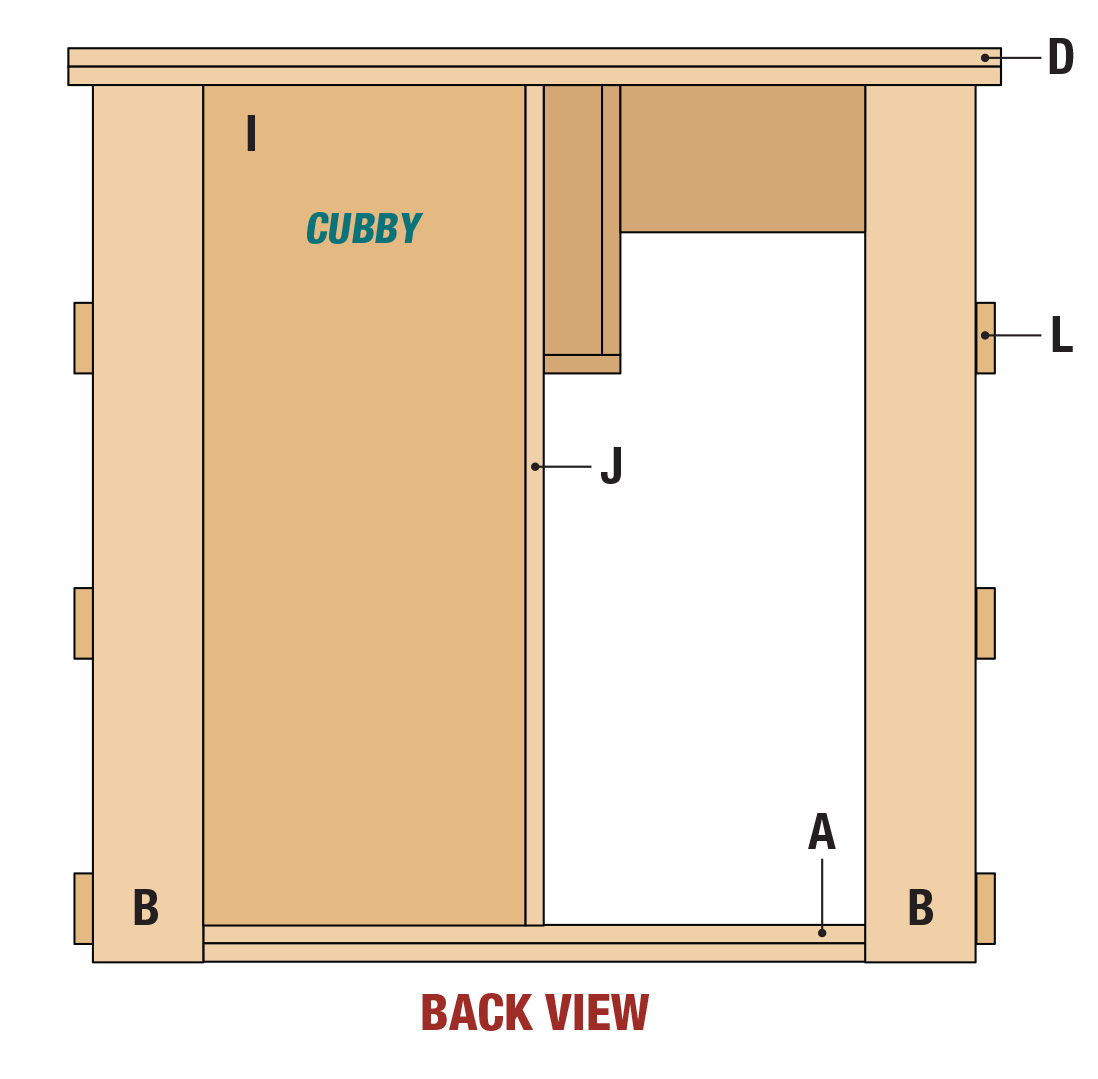
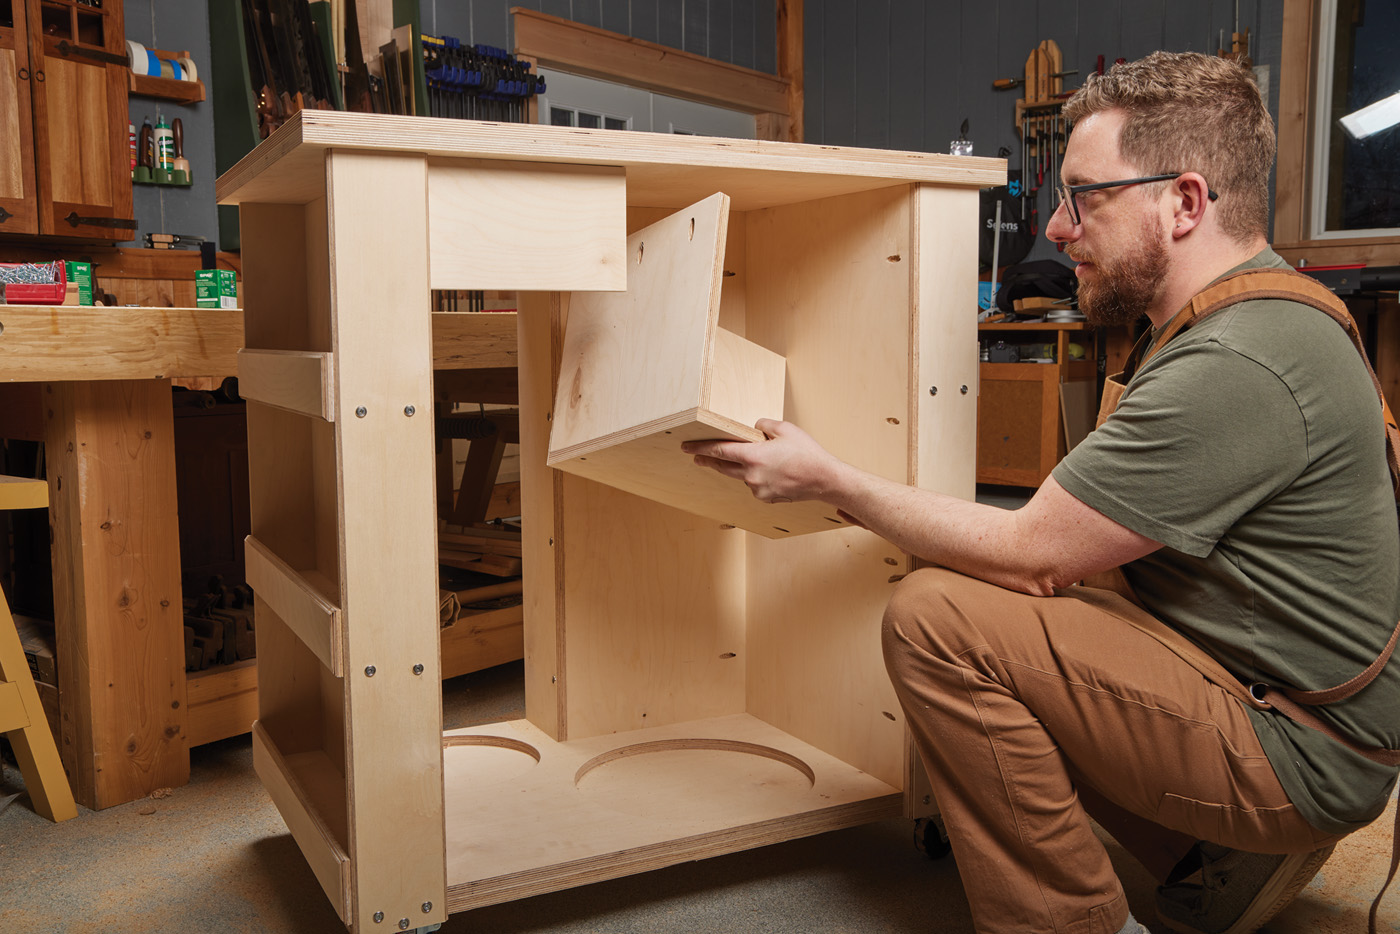
With the ends taken care of, I had to decide what to do with the front and back. I decided that one more tall recess would give me space to store the vacuum extensions. With the vacuum in place, I used a large framing square to determine exactly how big a cubby I could install.
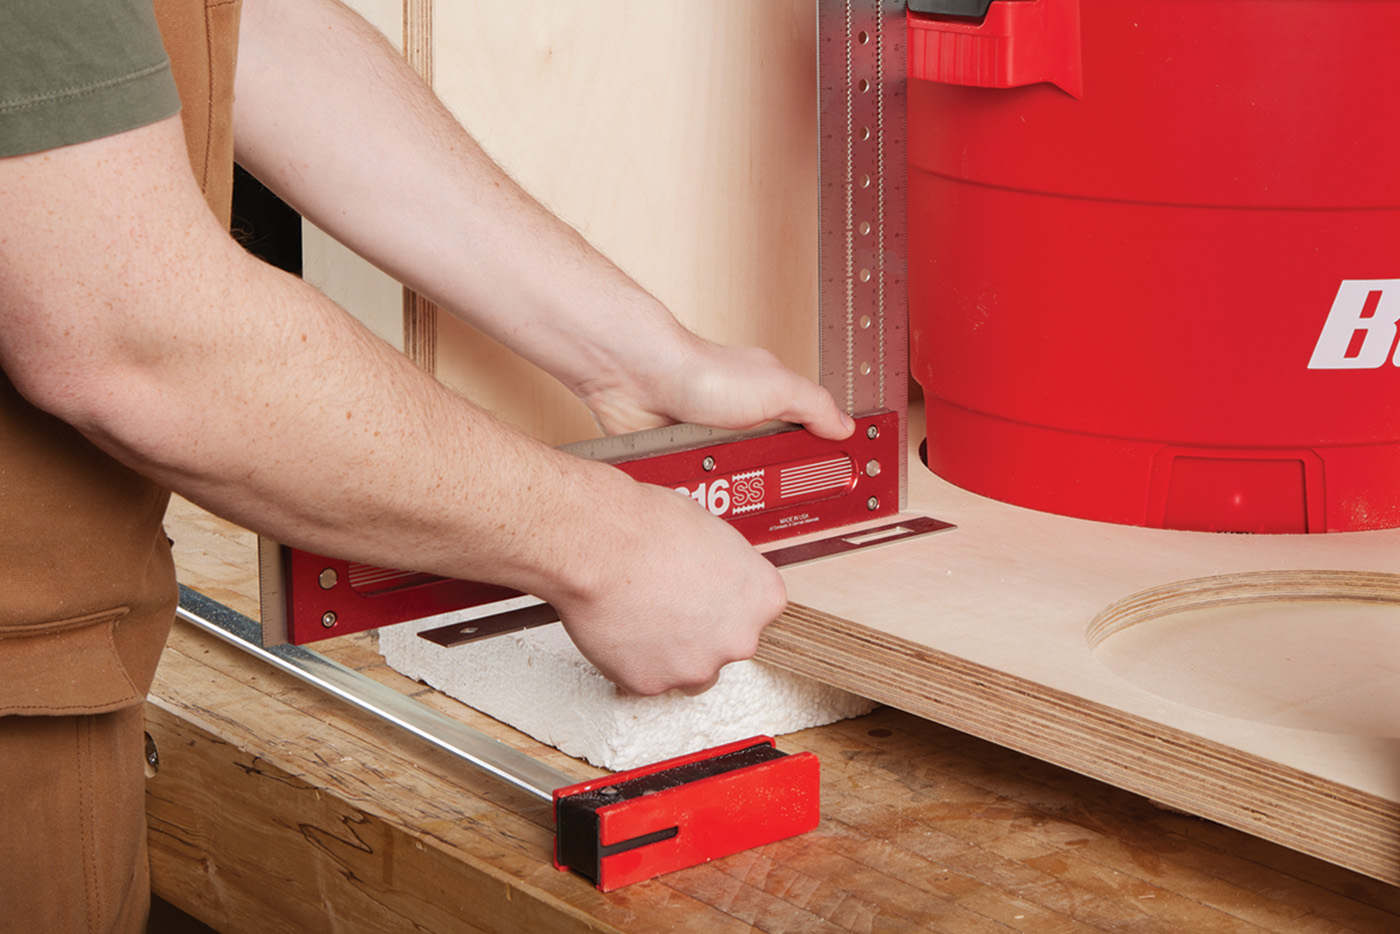
14 The rear cubby was exactly sized for my dust vacuum.
15 I used some right-angle clamps to keep everything square.
16 Pre-assembling the cubby made installation easy.
With my dimensions figured out, I cut the plywood and pre-attached the edge to the back. It can be tough to align things for assembly when you only have two hands. To solve this, I clamped the larger back piece in my face vise, then attached some right-angle clamps to support the other part. This saved me the trouble of trying to balance anything. All I had to do was hold the side panel in place to drill the holes and drive the screws.
Doing Flips
With the case looking good up top, it was time to get to the bottom of things. Driving screws from underneath adds a lot of strength and helps prevent the structure from shearing when exposed to uneven forces.
17 The screws are countersunk into the bottom.
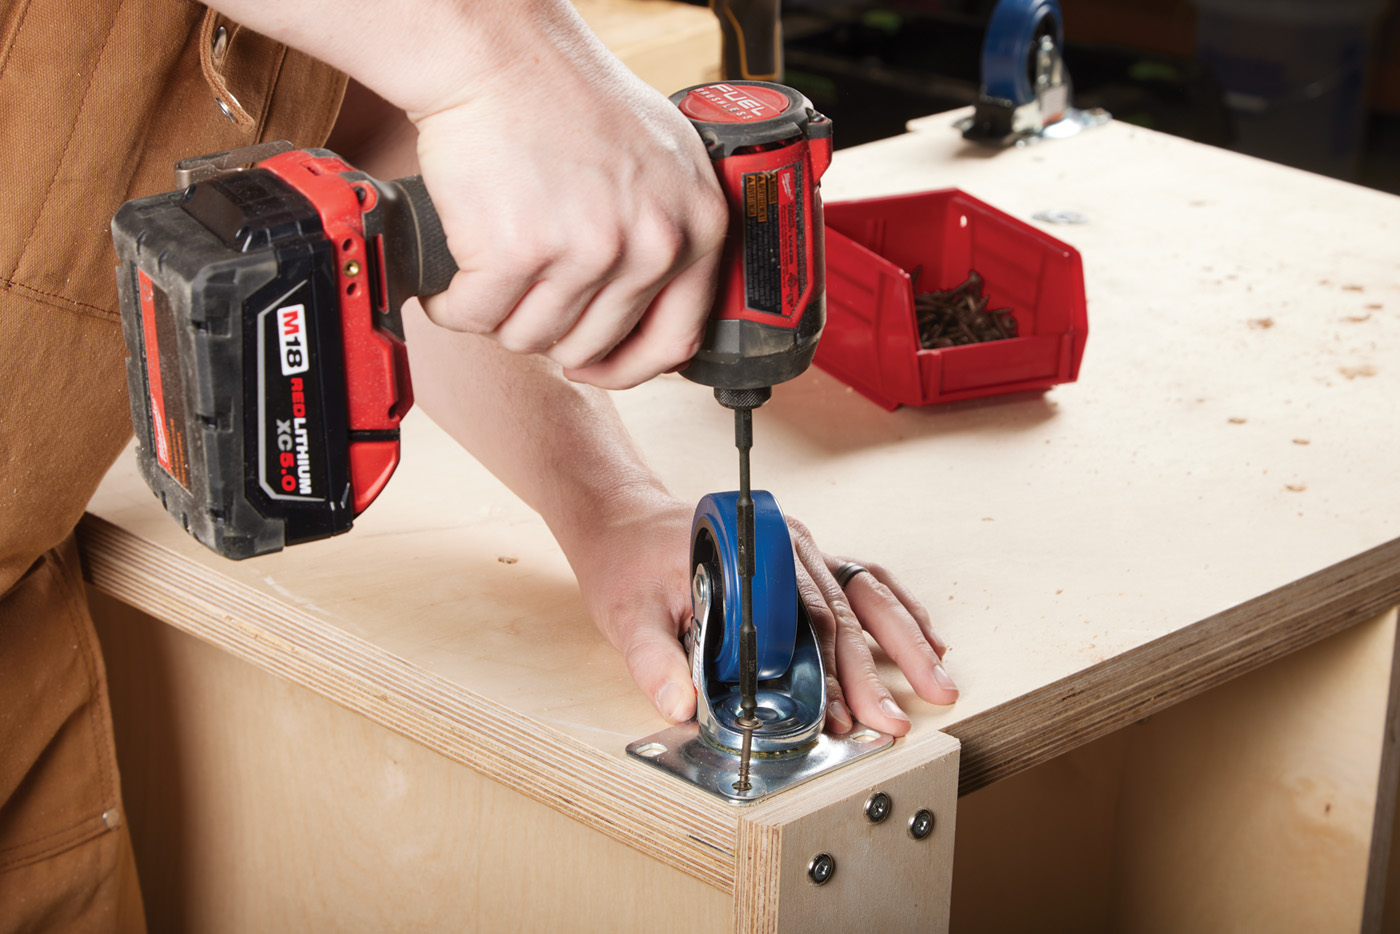
18 After I drove the screws from the underside, I went ahead and installed the casters.
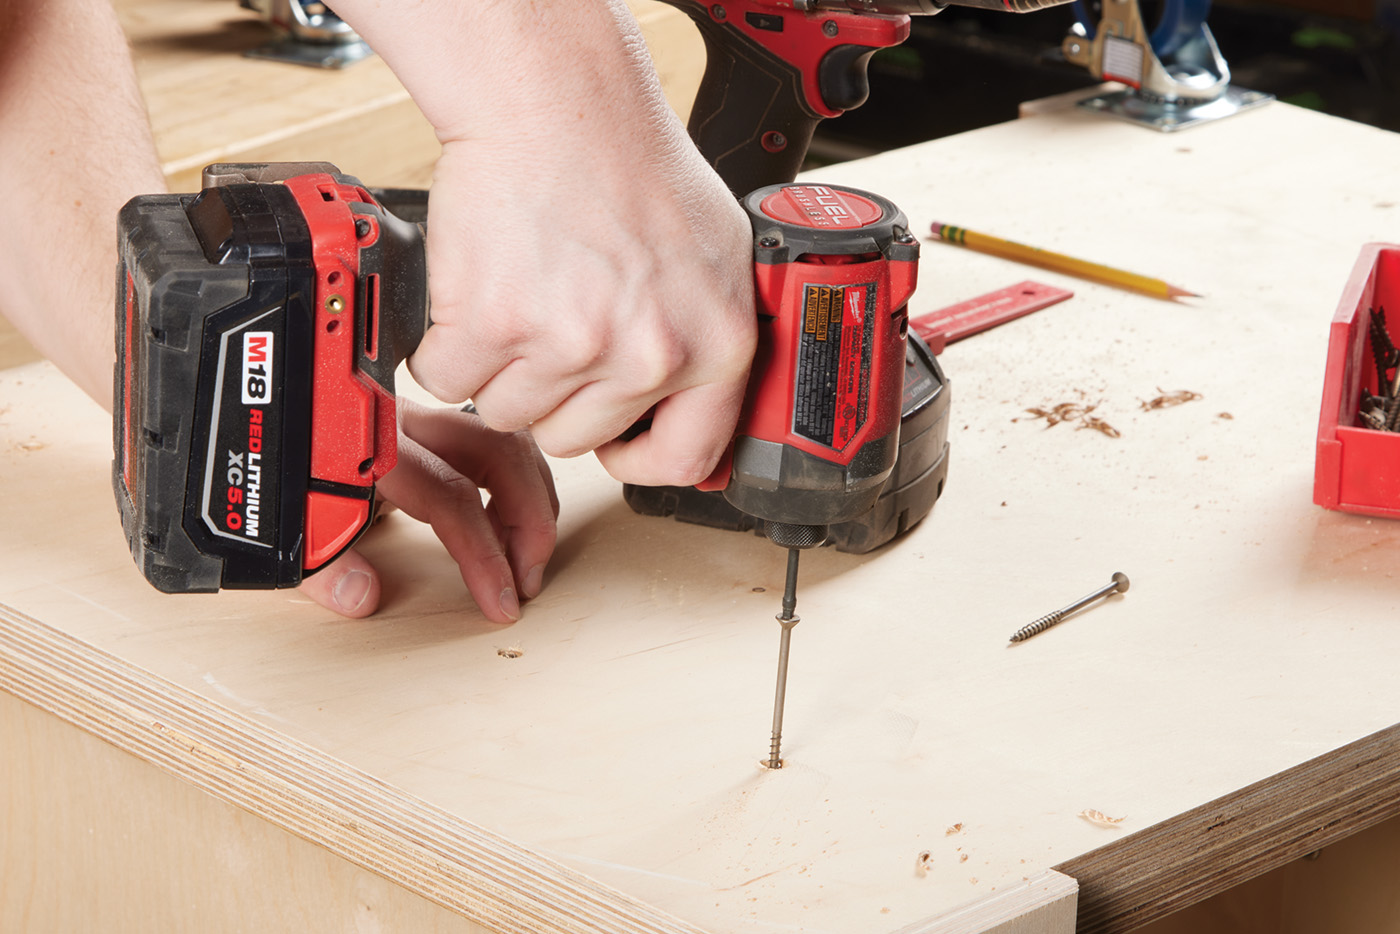
Getting the screws lined up correctly from the bottom just takes a bit of planning. I used a ruler with a depth gauge to set the distance for my screw holes from the sides and ends of the case. This worked perfectly each time but one, where I got a bit overconfident and tried to eyeball without the benefit of a ruler when adding one extra screw. Lesson learned. With everything laid out, I used a countersink bit to pre-drill all the holes, then drove all the screws firmly home with an impact drill. Since I already had the cart flipped over, I took advantage of my access to the underside of the case to add the rubber casters before returning it to an upright position.
19 The same process is used to secure the lower part of the cart top.
Tip Top Shape
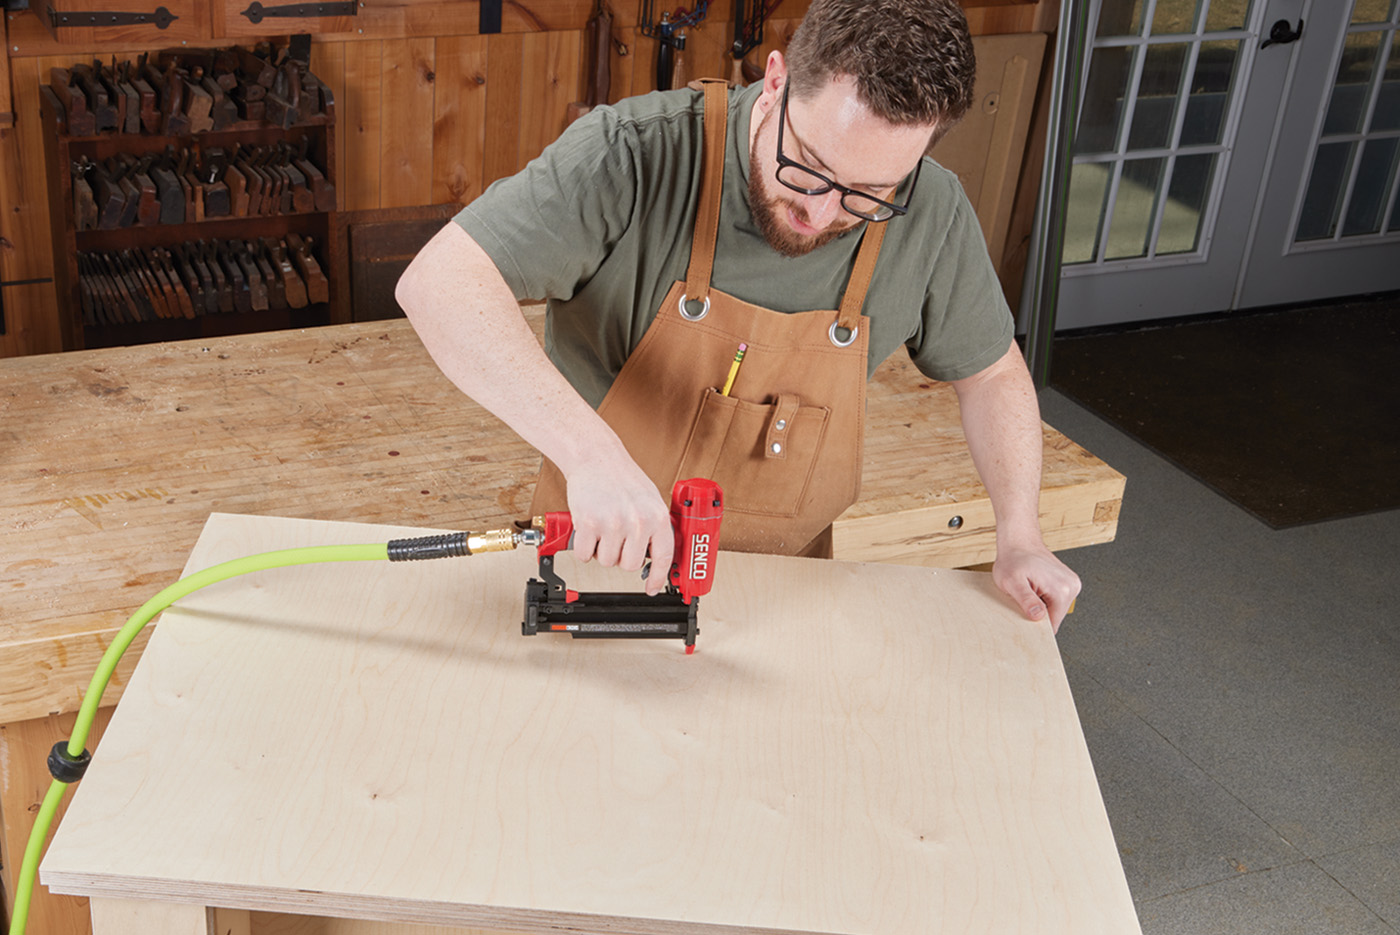
The main casework is almost finished, with just the top remaining. I made mine slightly oversized, as I think it just looks better. I aimed for a 1“ overhang on all sides, so I cut my top pieces 2” oversized. I centered the lower layer of the top on the case with a bit of help from the depth gauge again, getting it just right. This part was intended to be structural, so I drove screws down into the case in the same fashion as I had with the bottom. I made sure to sink the screw in deep enough that they weren’t protruding at all. Next, I installed the upper layer of the top. I spread glue on the entire surface, then tacked/clamped it. Make sure all your nails are fully seated. Otherwise, you might chip out the laminate later. Once the glue was dry, I came in with the flush trim bit again to clean up the outside edges.
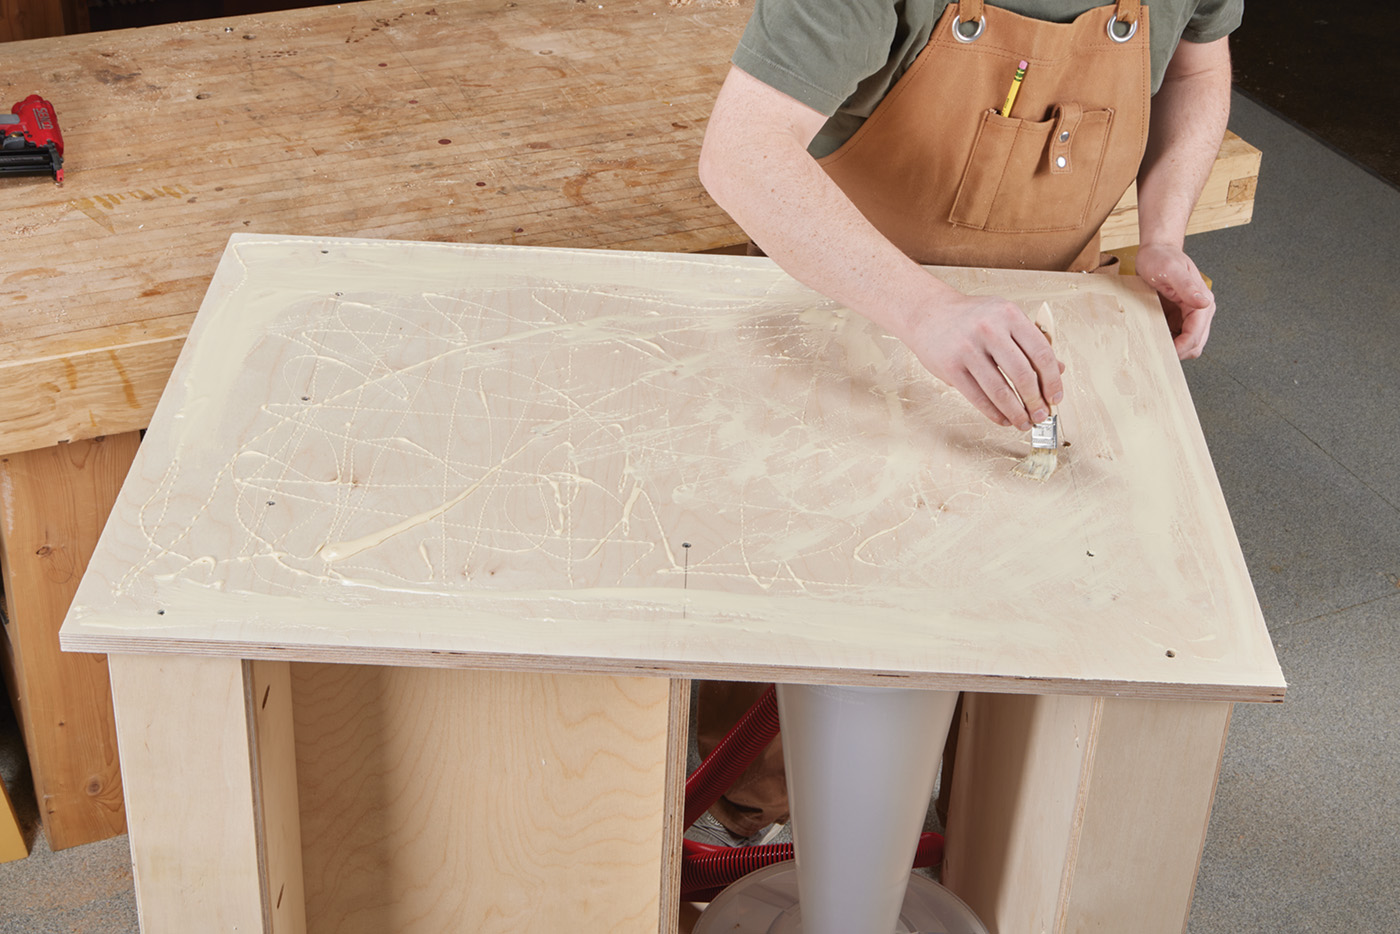
20 To laminate the two sheets of plywood, I spread glue all around before nailing and clamping again.

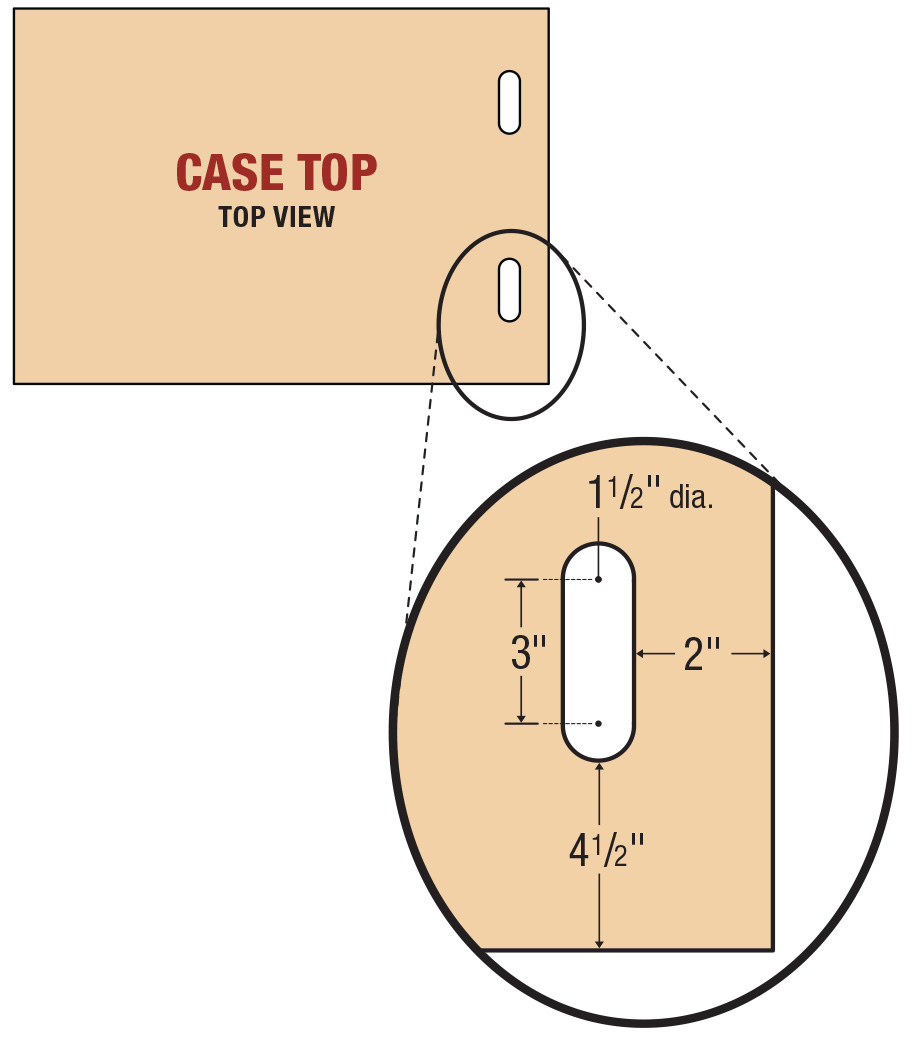
21
22
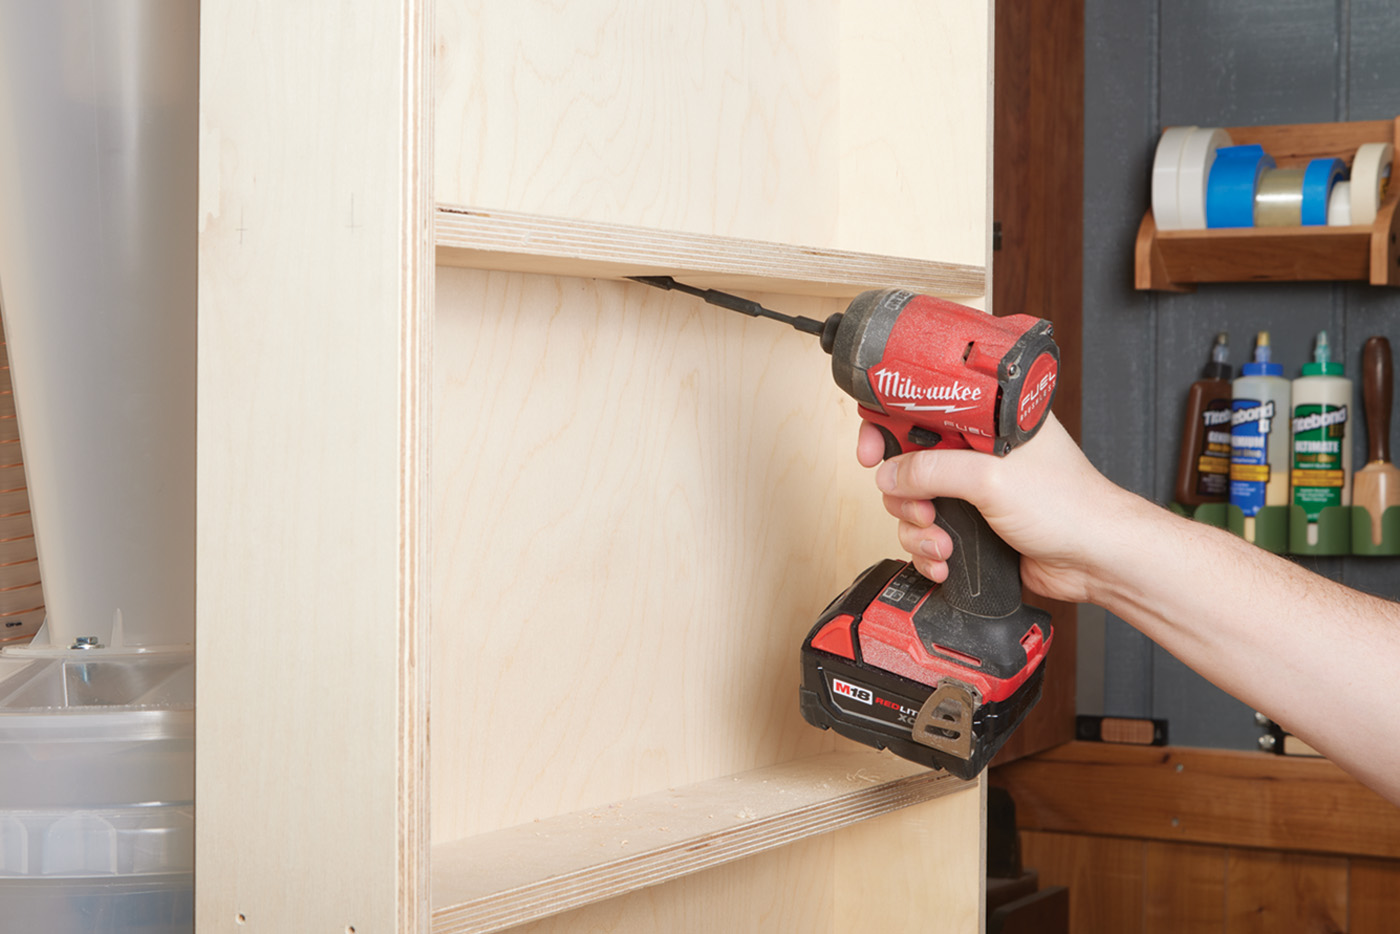
Shelves and More
At this point, it was time to start installing shelves and making some final decisions. After measuring some boxes of sandpaper and a bottle of glue for reference, I settled on three shelves about 11“ apart. This is a great time to think of any specific needs you might have and make the height taller or shorter for your cart.
23 I cut the shelves tightly enough that they friction fit, which made it easy to drill holes
The shelves are affixed from the ends with screws, with a pocket hole in the middle to prevent sagging. I used a bit of 1/2“ plywood scrap for the front of the shelves, pinned into place. Routing a chamfer on all four edges of these shelf fronts cleans up the look, and avoids any edges that can chip during the cart’s life.
24 A single pocket hole in the middle prevents sagging.
25 The finish washers really make a difference.
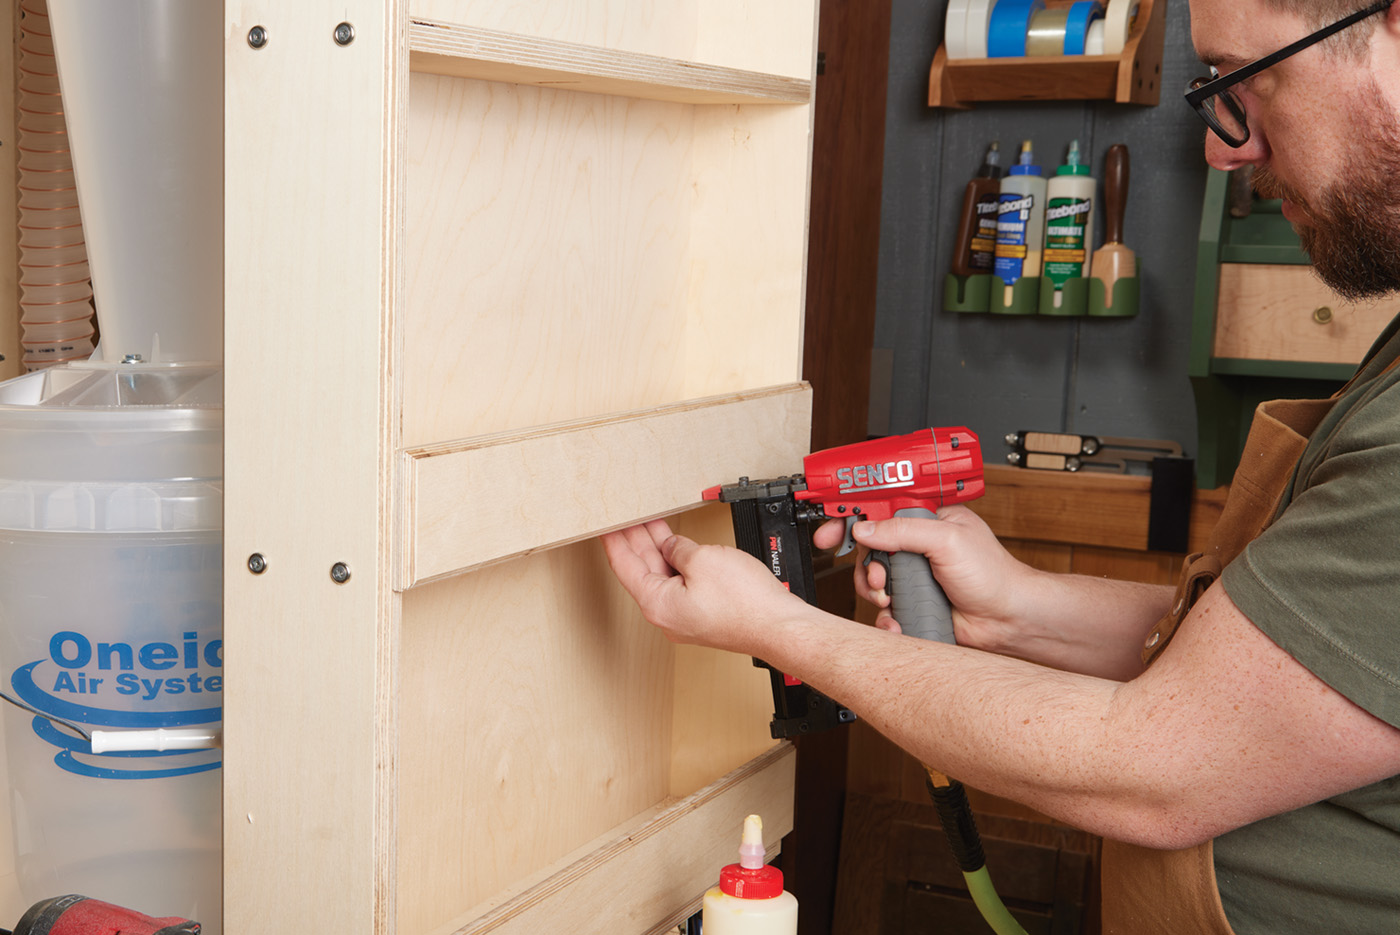
26 The fronts were simply glued and pinned into place.
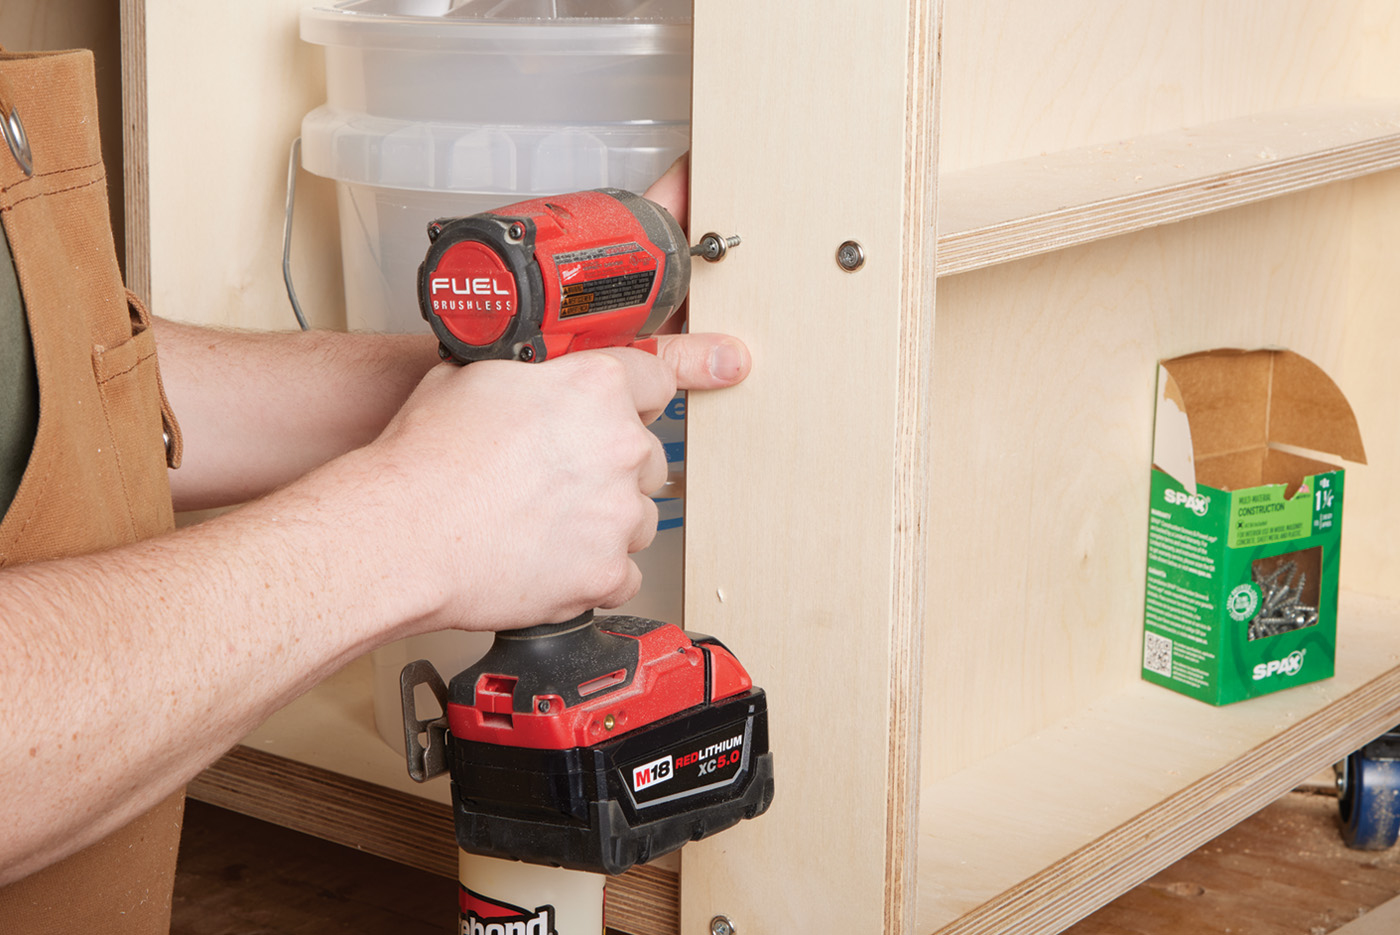
I went back and forth a bit on what to do with the space above the shop vac, deciding between a drawer and a cubby. I decided to make it a cubby for now, and I could always come back later and add a drawer if I wanted one. I plumbed the Dust Deputy with the wet/dry vac to ensure I had space for the hoses without pinching anything. You can see in the final shots that it was the perfect size for my sander case, which was entirely intentional and not an accident. To make the cubby, I effectively built three sides of a box. Before I assembled my partial box, I drilled the pocket holes I would need for installation later.
27 The cubby was pre-built to make installation easier.
The other thing I wanted to include in the front of the case was a power strip. Having it in an easily accessible place would be great if I needed to plug a sander or anything else in. To mount it, I used an extra piece of scrap, strategically installed with some more pocket hole screws.
Get a Grip
The workstation top needed a bit more finessing to get it the way I wanted it. Since the cart was meant to be mobile, I decided some handholds would make it easier to push and pull. Instead of making a routing template, I tried a new method for cutting the grips. The first one turned out a little wonky, but I quickly got the hang of it.
You’ll naturally start by marking the basic location of each handle. I went in with a Forstner bit and bored out the ends of the opening. I used a ruler and a marking knife to bridge the space between the holes where the hand would go. I then took a jigsaw and, making sure to stay inside the line, removed most of that waste in the middle. Next, I placed a dead-straight piece of scrap right on the line using some double-sided tape. This becomes the reference point for the bearing on the flush trim-bit. I made a single pass to give a definitive edge to that half of the grip, then moved the straight edge to the opposite side and repeated the process. This gives me a perfectly cut opening to work with going forward. Then I removed the straight edge altogether. I made the additional passes with the router to complete the process. Was this faster than creating a template? Possibly, though any advantage disappears if you have to make more than a handful of cutouts.
28 A Forstner bit creates the two ends of the hand holds.
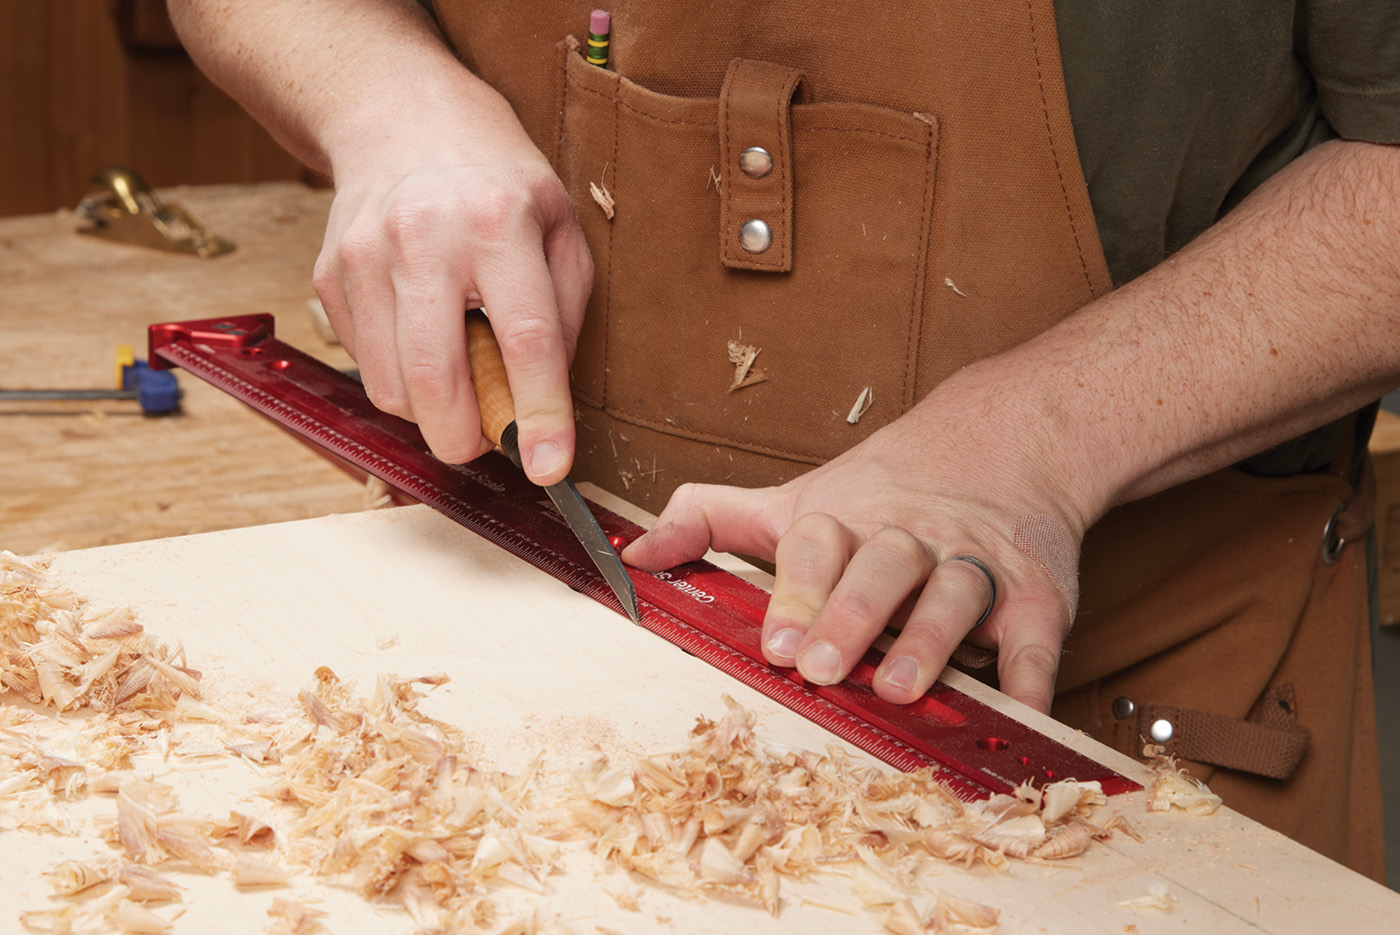
29 Use a making knife to define the rest of the opening.
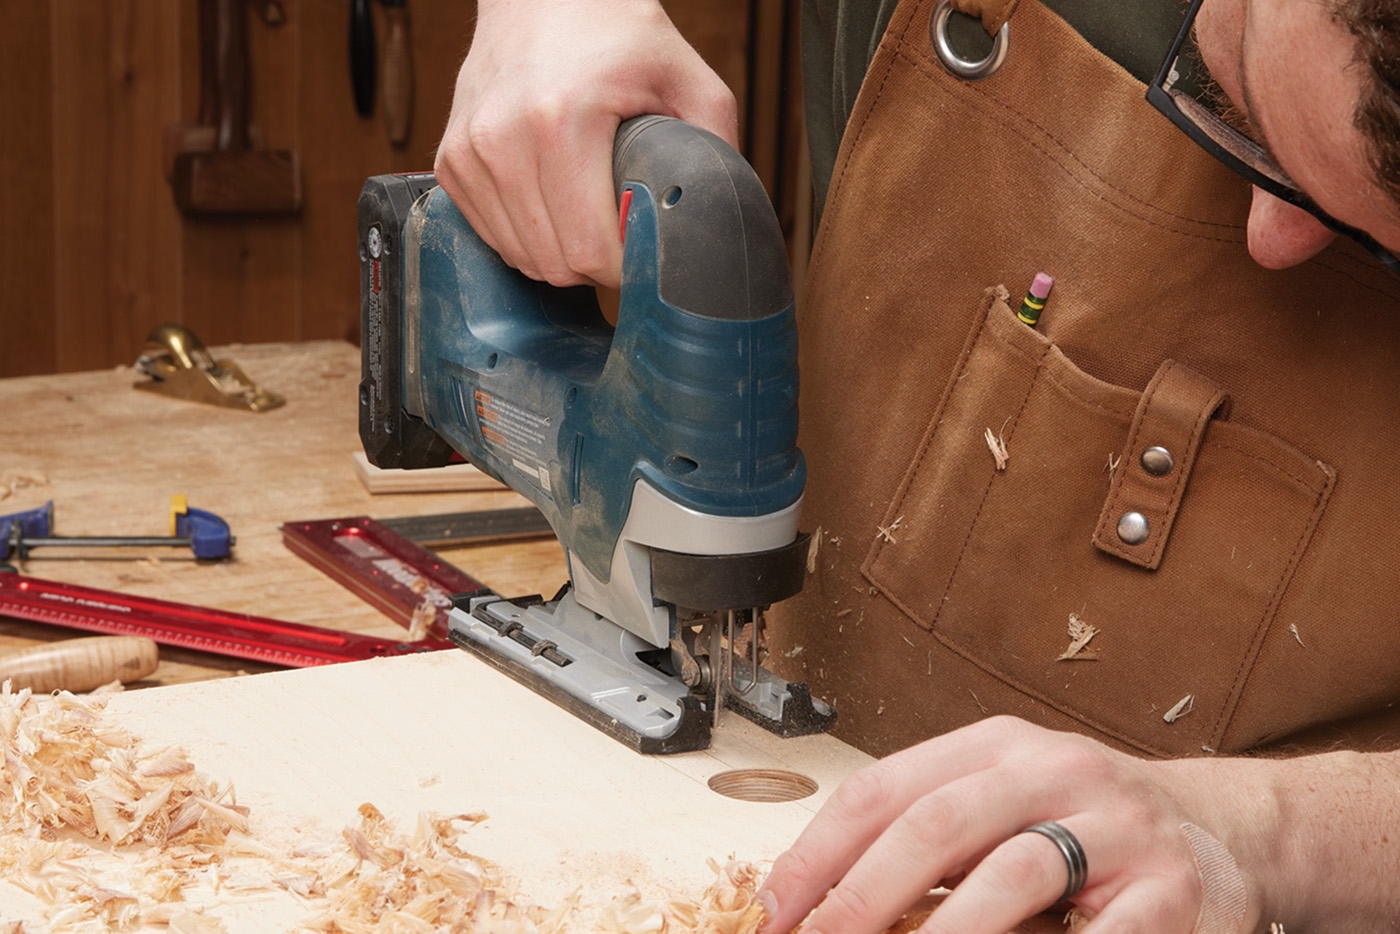
30 A jigsaw makes quick work of the rough opening.
31 Make sure your double-sided tape is sticking well.
32 Carefully line up your straight edge to bridge the gap.
33 Cut your final opening with a flush trim bit.
Lamination
With everything assembled and handholds cut, the top can be laminated. Using a paint roller, apply contact cement to both the laminate’s underside and the cart’s top. Allow to dry as per the instructions on the can, usually 15-20 minutes. It will still be tacky. You only get one good shot at installation, so a second set of hands is useful. You want to sort of “roll” the laminate into place instead of setting it down flat. This will help prevent air bubbles from being trapped underneath. Use a j-roller to push out bubbles and provide a nice, firm adhesion.
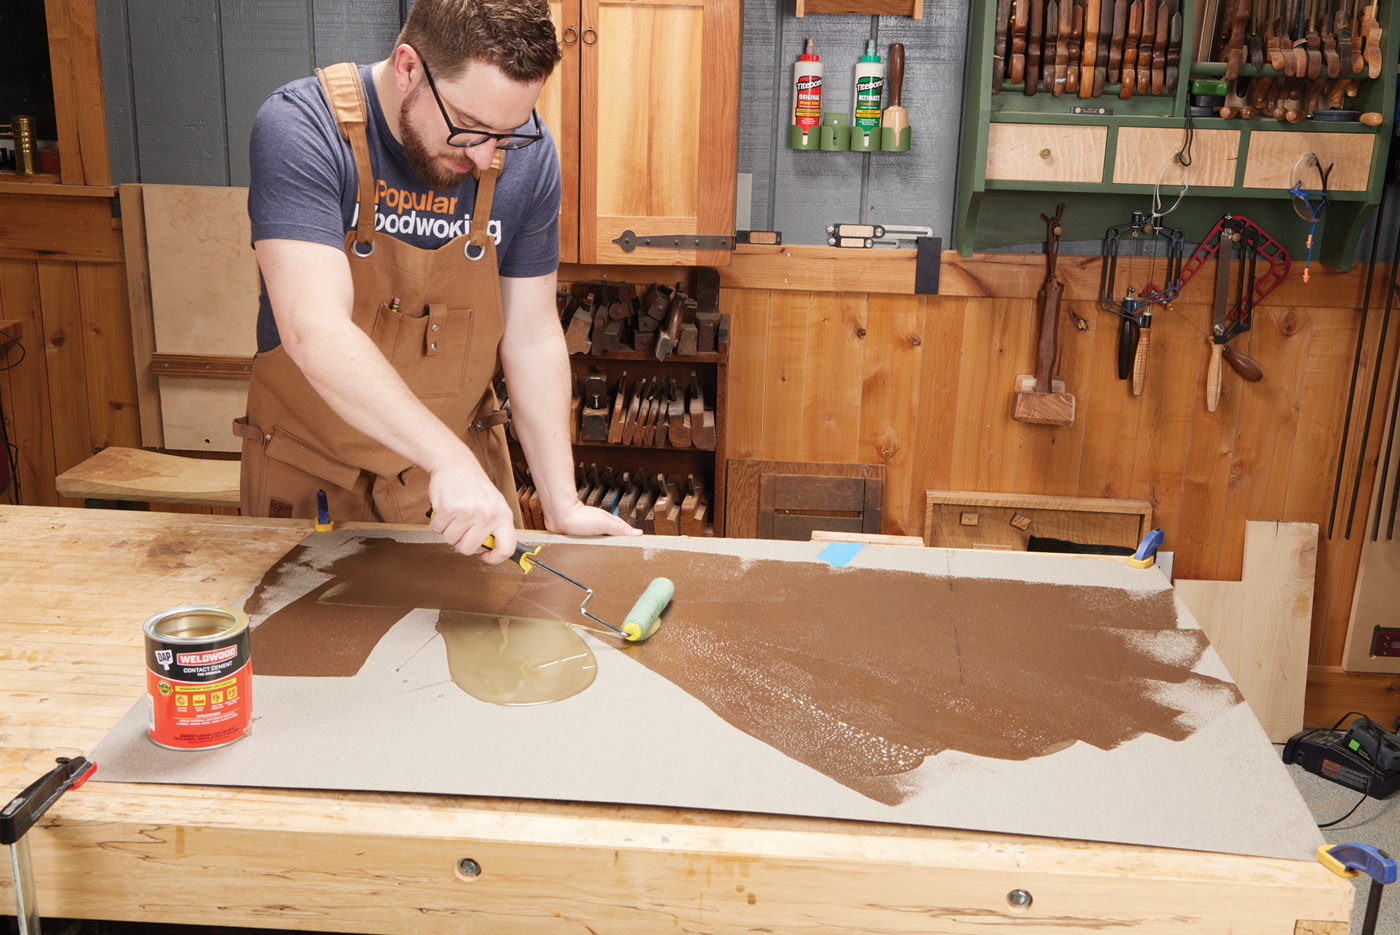
34 The contact cement must be spread across both surfaces and allowed to dry completely.

35 A j-roller helps press out any air bubbles.
If you are alone, you can suspend the laminate above the plywood top with dowels, ensuring the two glued surfaces don’t touch. Once the laminate is aligned to your liking, Stick the center down, and work towards the edge, removing the dowels one by one. Finally, make sure it’s firmly attached with the roller.
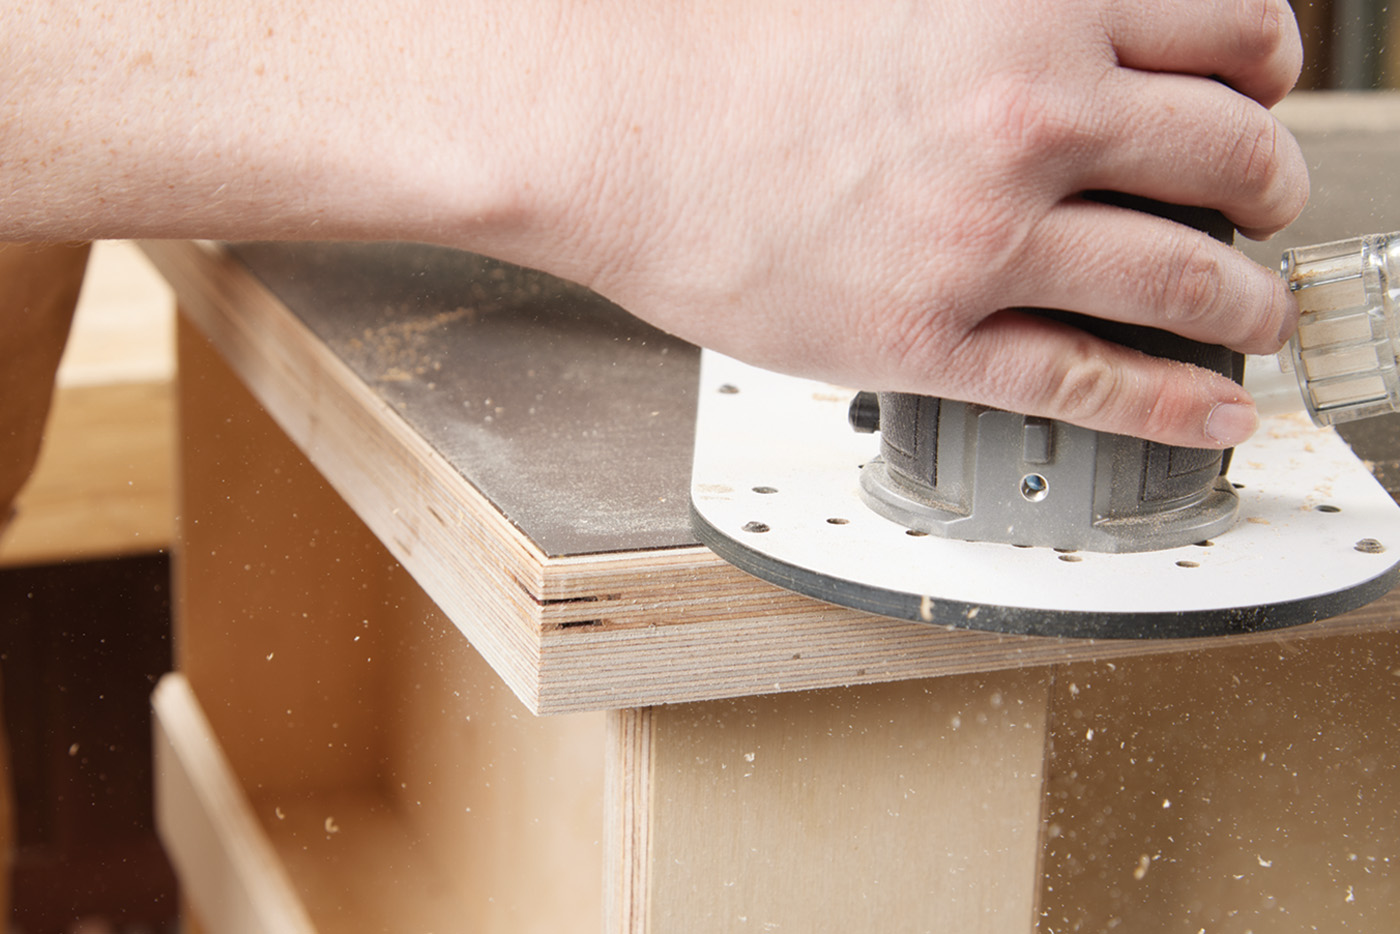
36 The final step was chamfering all around the top for a professional look.
The final step is usually trimming the edge with a laminate flush trim bit, but I decided to go a step further and chamfer the edge, too. It looks nicer and will wear better with time. Lastly, I finished the cart with a few coats of lacquer and added some 3D-printed accessory holders.


