We may receive a commission when you use our affiliate links. However, this does not impact our recommendations.
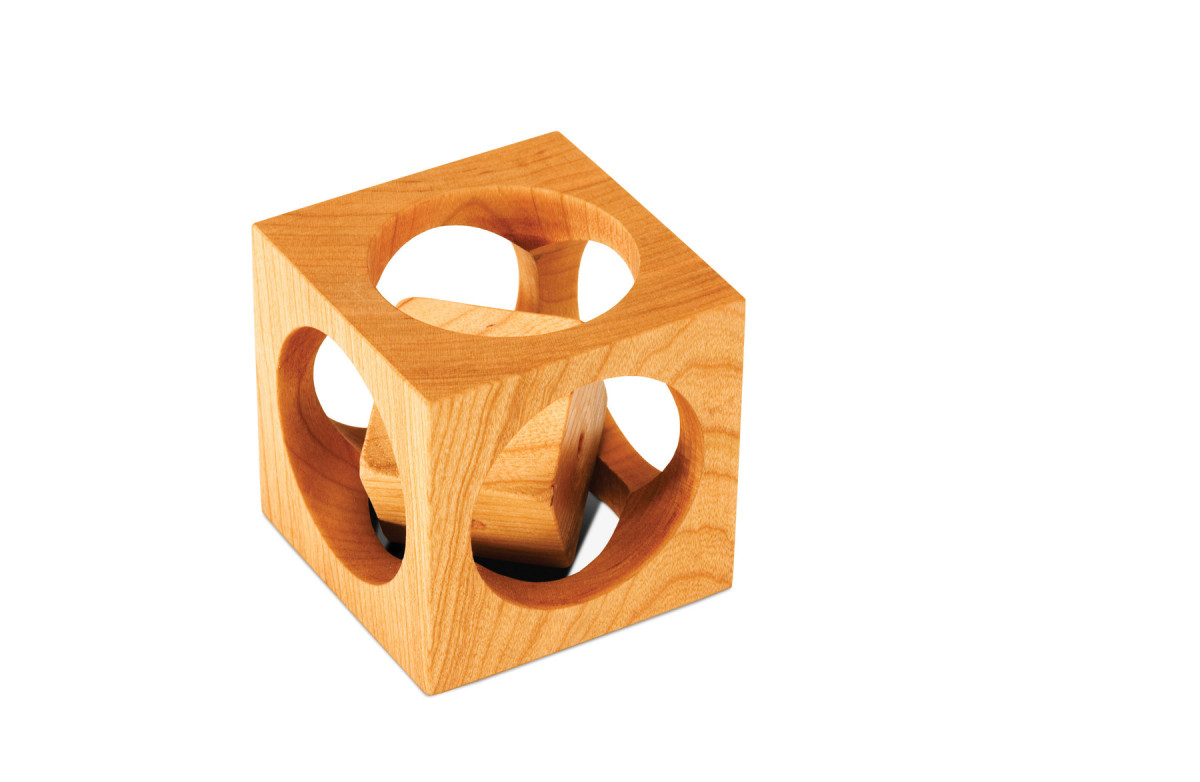
 “Kids play with it like a toy, but it drives adults nuts. They think it’s a puzzle. They’re sure there’s some way to get the little cube out of the big cube. You can’t.”
 “Kids play with it like a toy, but it drives adults nuts. They think it’s a puzzle. They’re sure there’s some way to get the little cube out of the big cube. You can’t.”
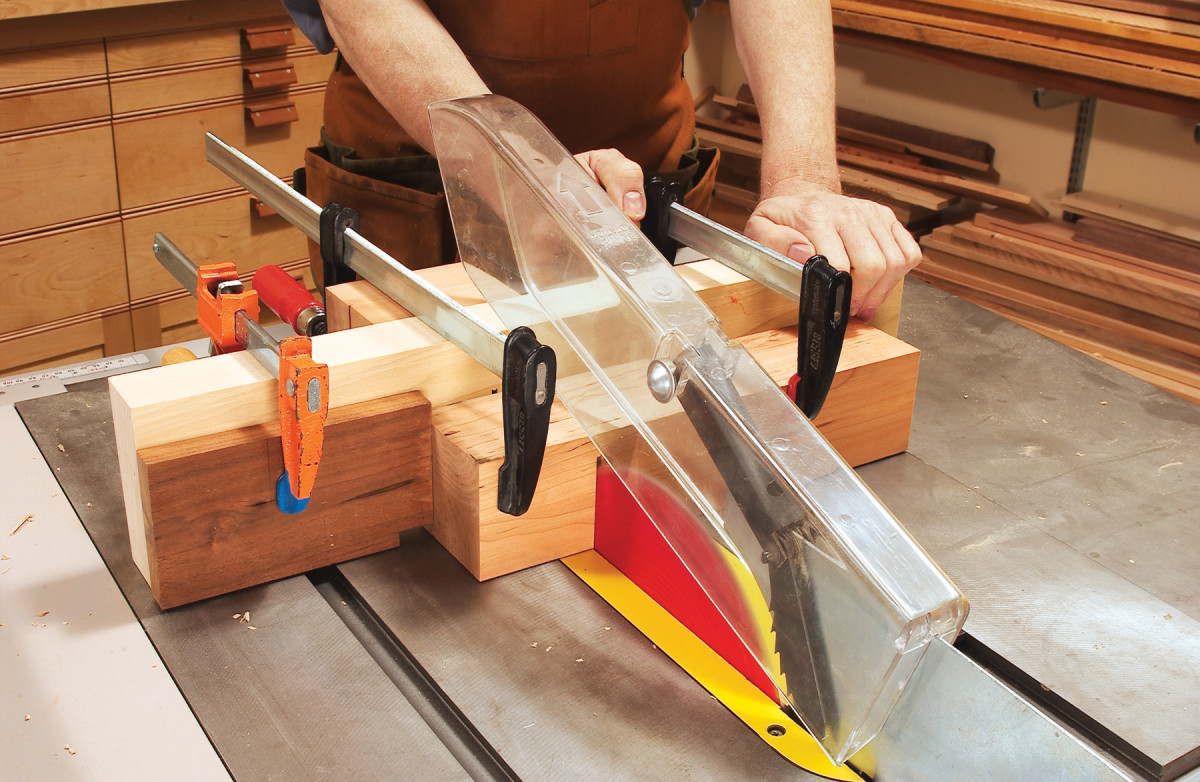
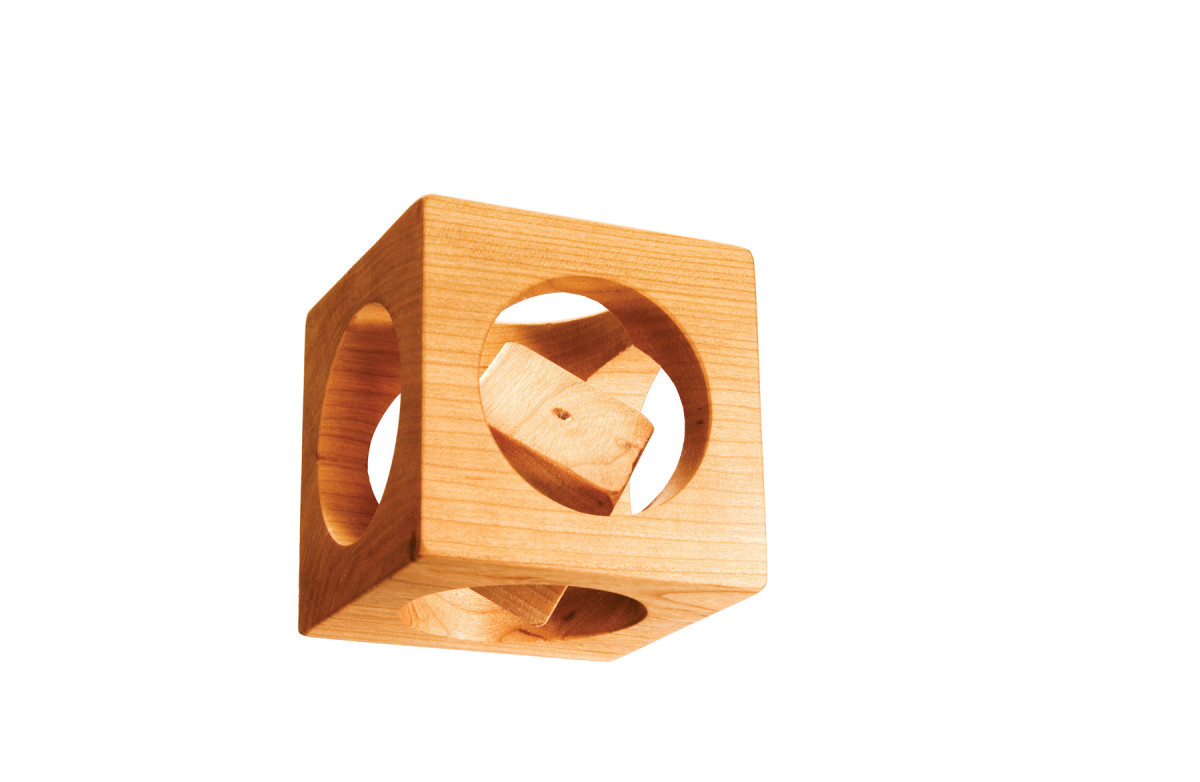
1. Crosscut a 3x3x14-in. blank into four cubes. Solid wood is best, so it doesn’t look like you put the little cube in the big cube by gluing parts together. Table-leg stock works well, but you can make the cubes from smaller stock if you want.
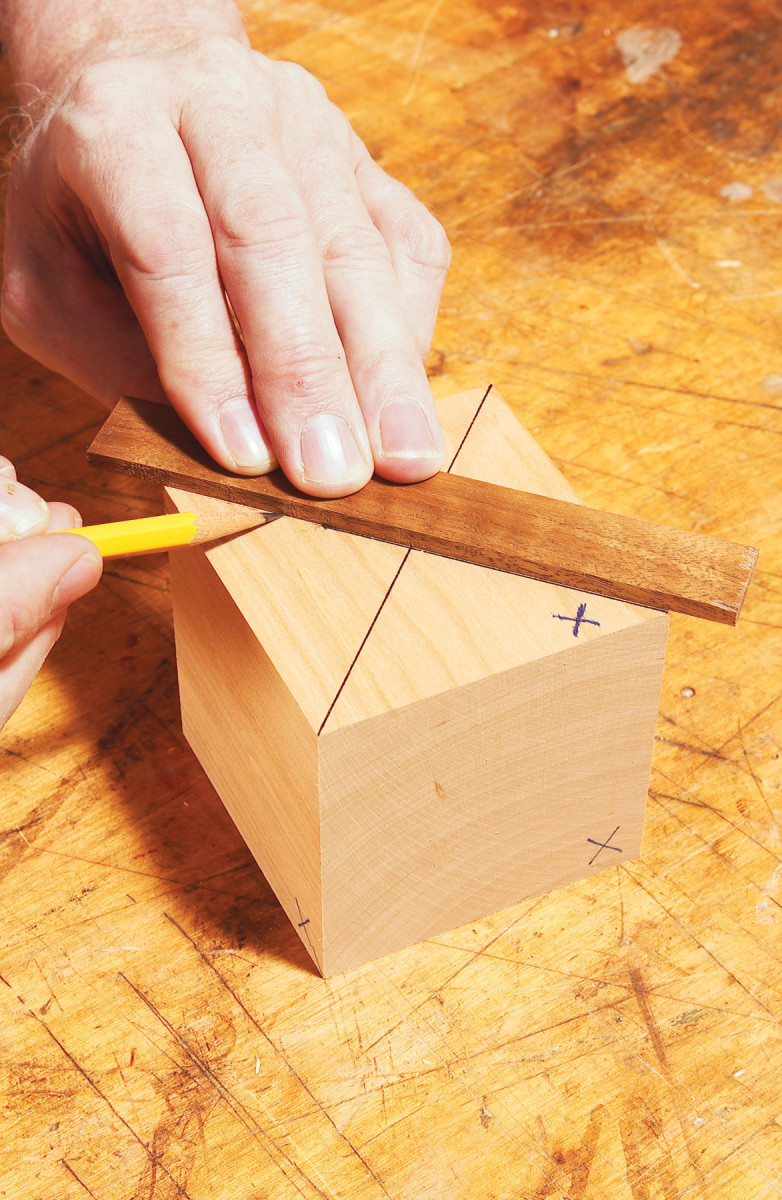
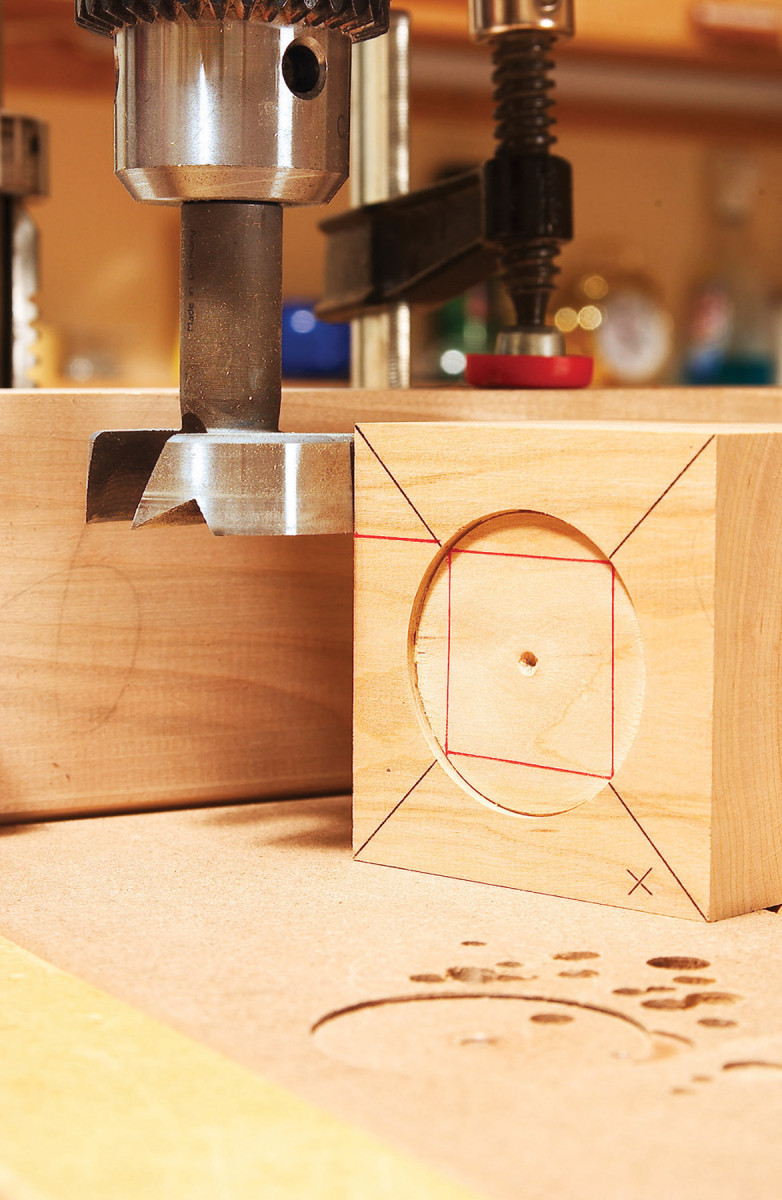
2. Mark centerlines on one face. Mark one corner of every face with a small X. You’ll be drilling each hole more than one time.The X’s will help register the cube in the same orientation on the drill press.
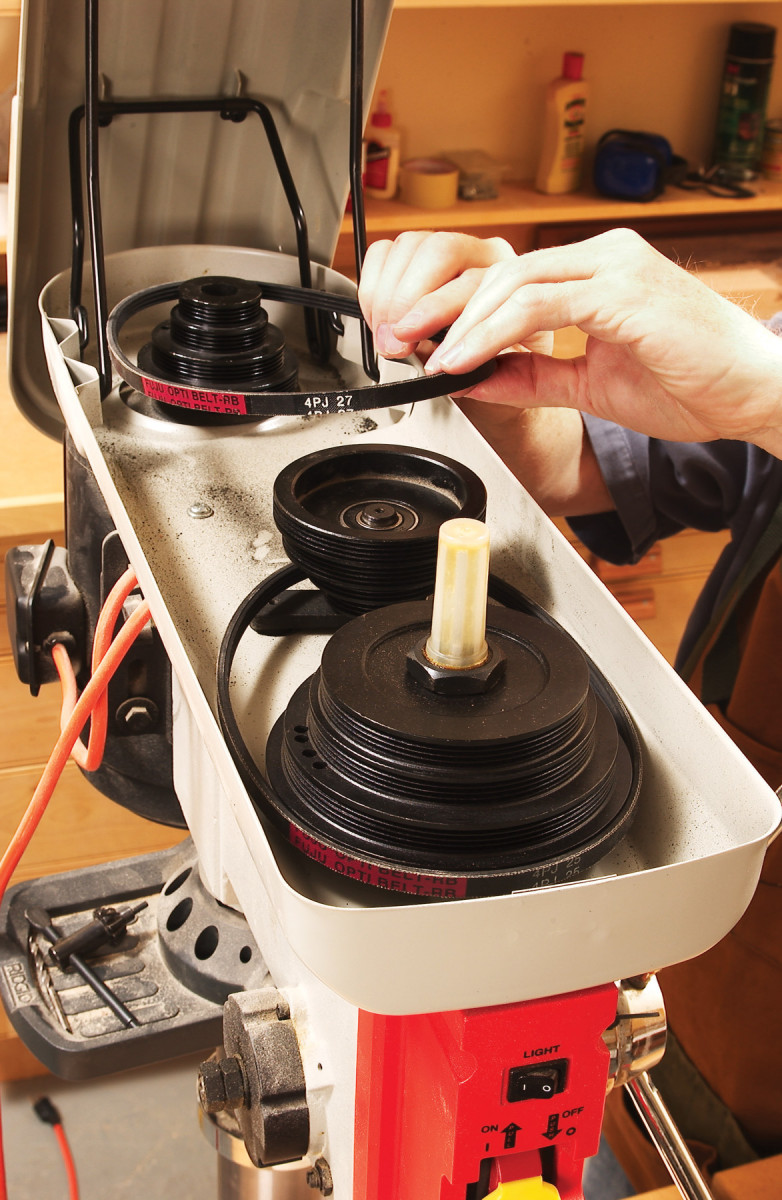
3. Set your drill press to run at its slowest speed. Arrange the belts so the smallest diameter drive pulley turns the idler pulley. Connect the idler to the largest diameter spindle pulley.
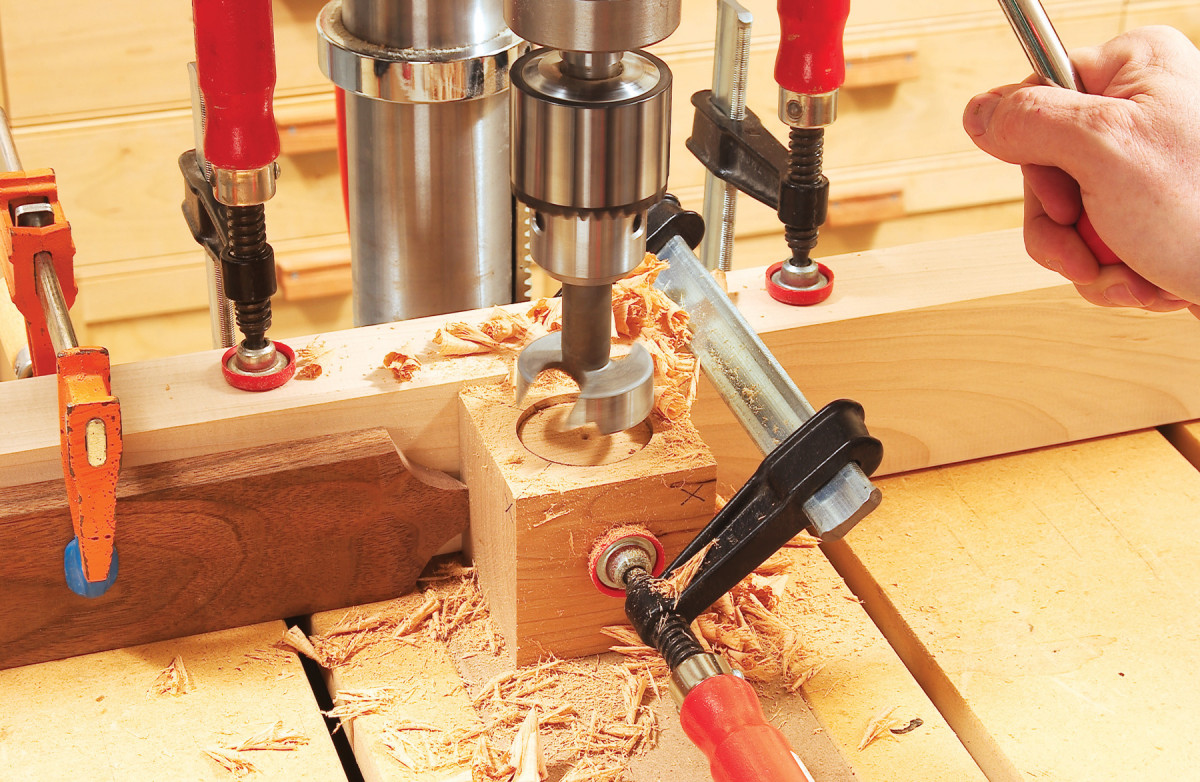
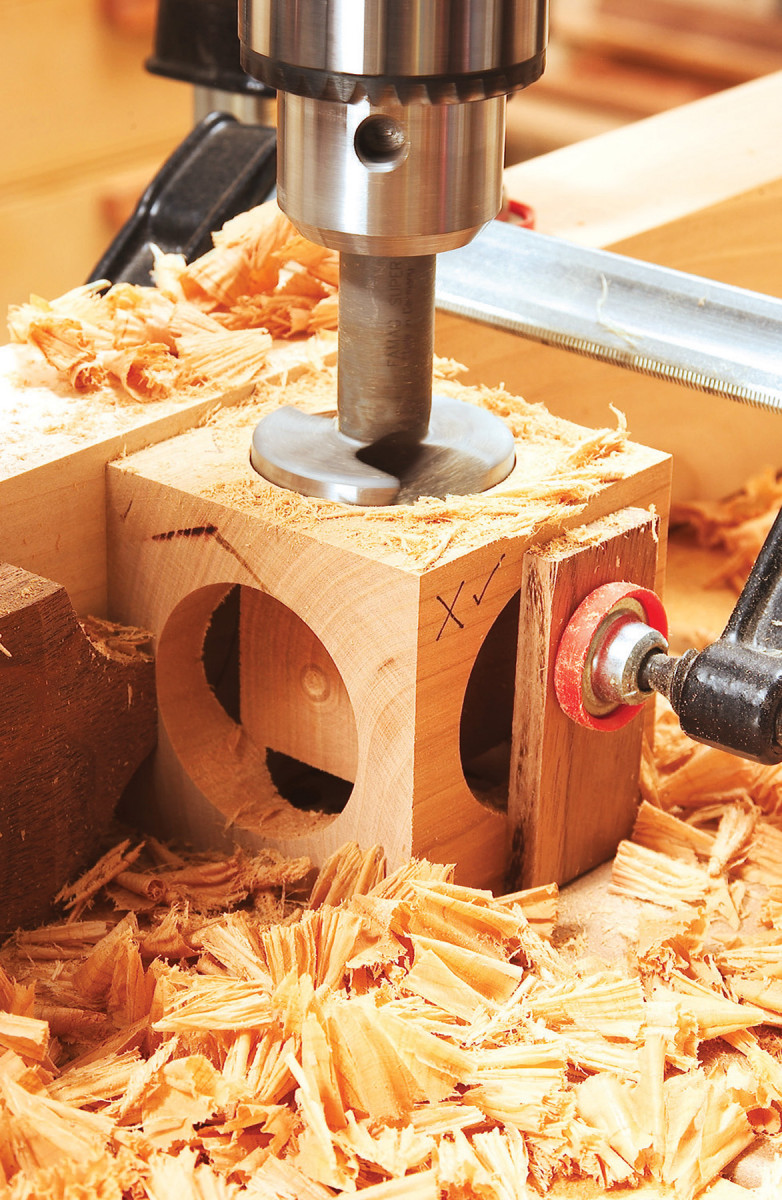
4. Set up your drill press with a 2 in. Forstner bit. (Use a smaller bit with a smaller block.) Position a fence and stop block so the bit drills exactly in the cube’s center. Drill one hole about 1/16-in. deep.
5. Set the bit’s depth of cut. Draw a line from the point where a diagonal intersects the hole you made. Adjust the drill press so the bit stops about 1/16 in. above this line. This method works for any size cube and any size hole. (I’ve drawn the smaller cube so you can see how this works.)
6. Drill holes in the end-grain sides first. Then drill the other four faces. Always place the X’s in the same corner relative to the fence and stop block.
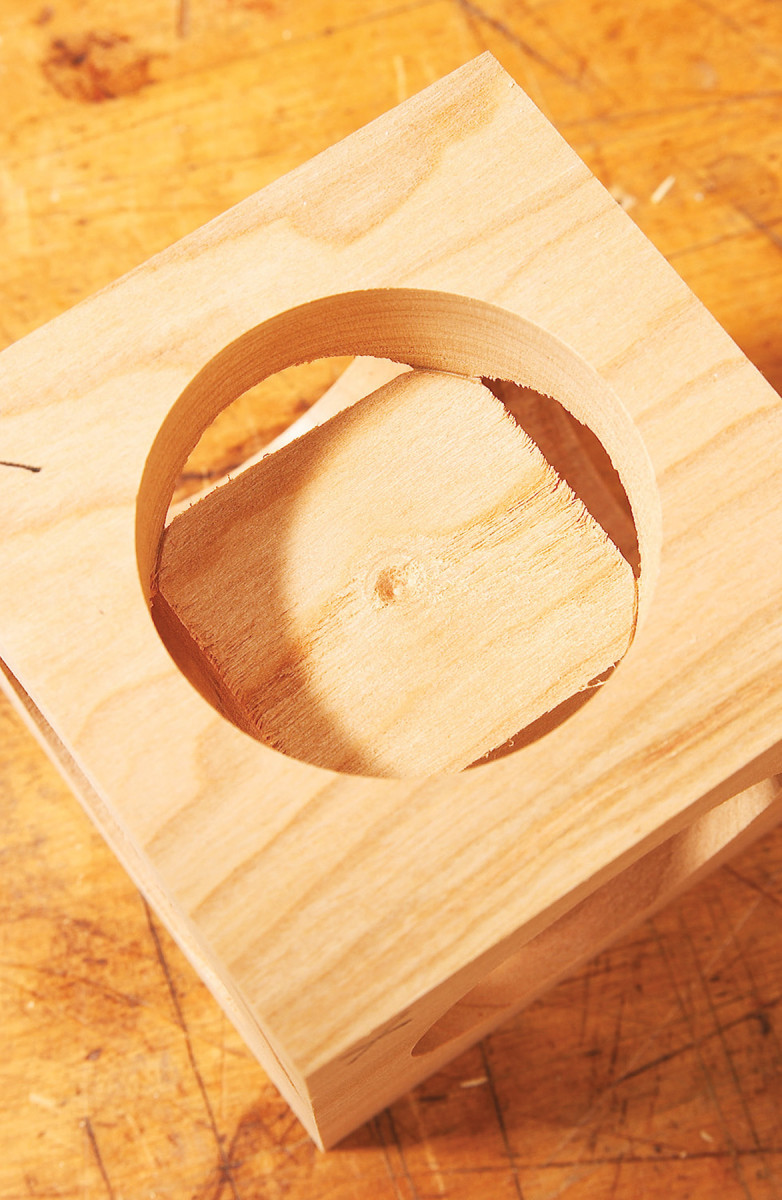
7. Drilling all six faces produces a cube in a cube. The inner cube is attached to the outer cube by a thin section of wood. The reason for drilling the end-grain faces first is to avoid breaking these weak attachment points. End-grain drilling requires more downward pressure than face-grain drilling.
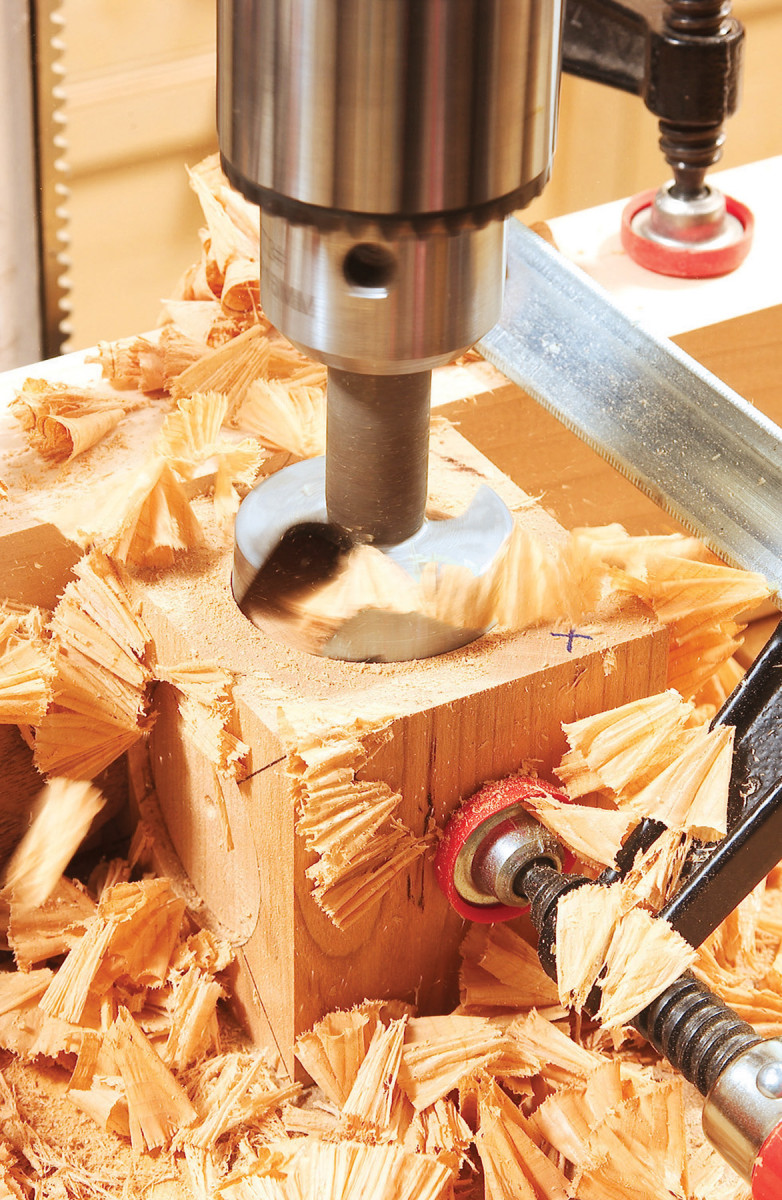
8. Set the drill bit 1/32-in. deeper and repeat drilling all the holes. Again, drill the end-grain faces first. Use light pressure to avoid breaking the attachment points.
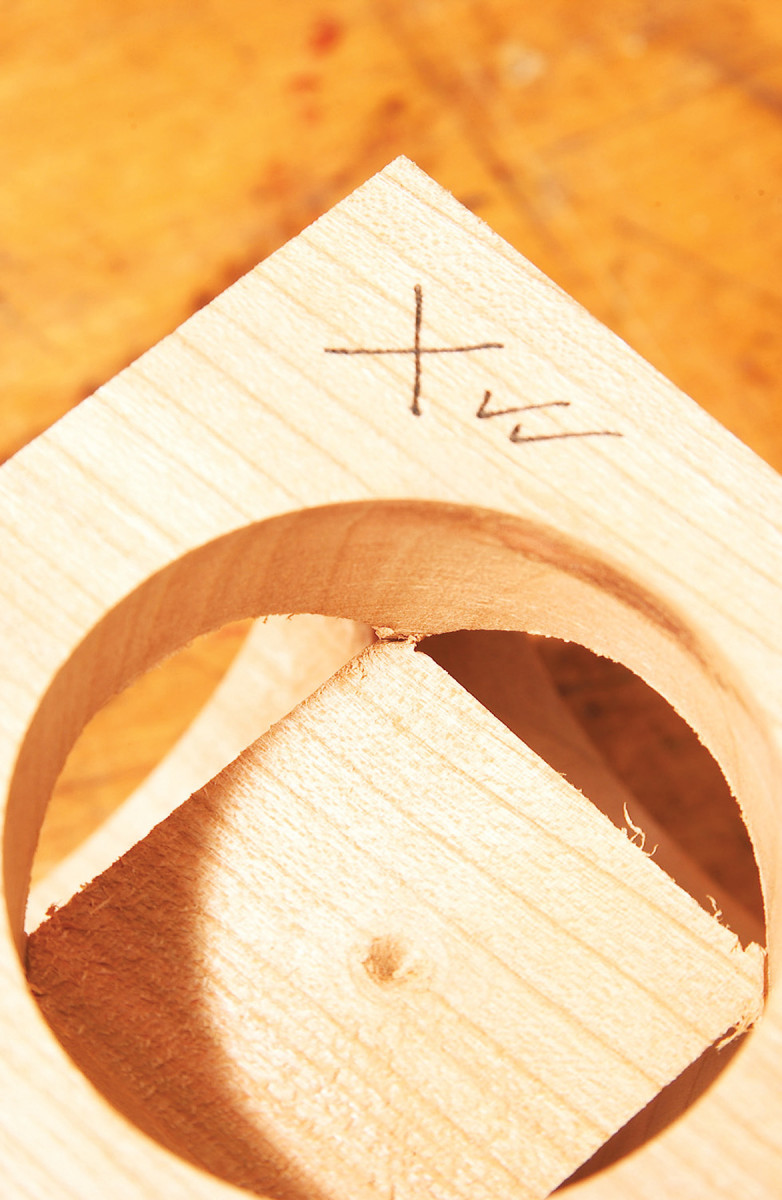
9. As you drill, check the thickness of the attachment points. Your goal is to make them as small as possible, to the point where the inner cube almost releases itself. This may require drilling some holes a tiny bit deeper. Draw check marks to show how many times you’ve drilled each hole.
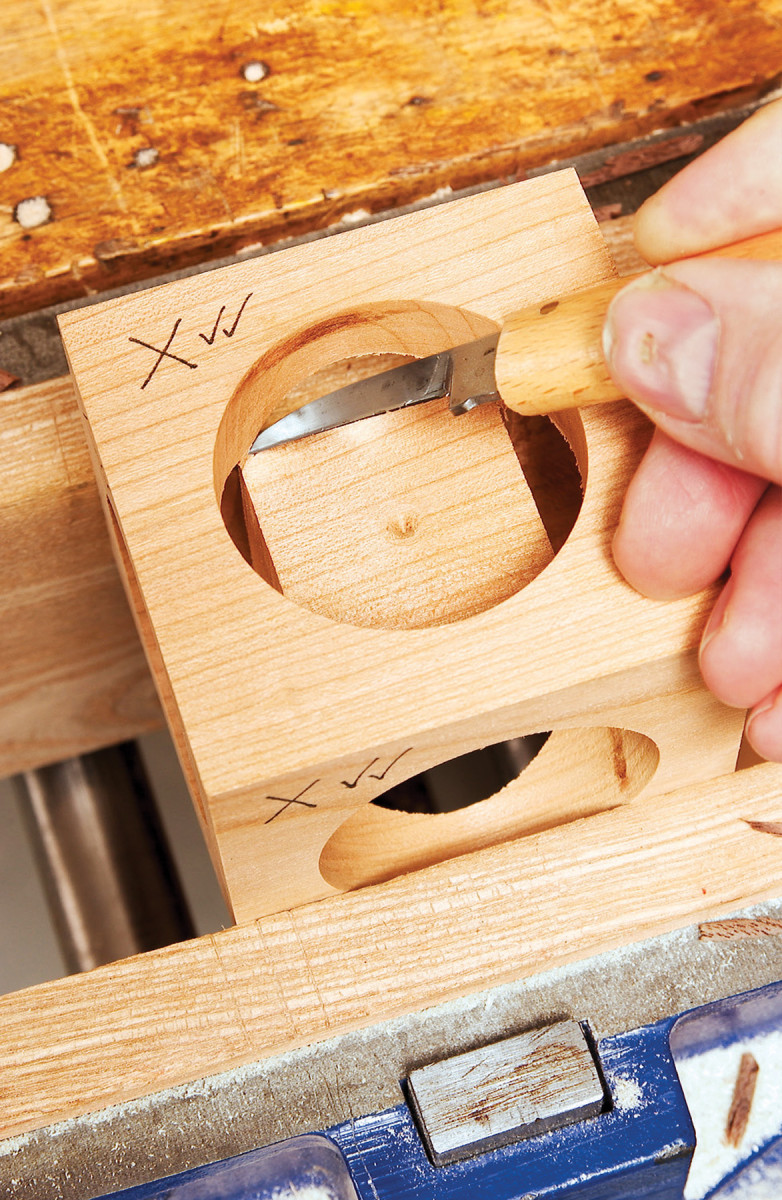
10. Release the inner cube by cutting the attachment points with a thin knife, going with the grain. After cutting all eight corners, the inner cube will drop free. But it won’t come out!
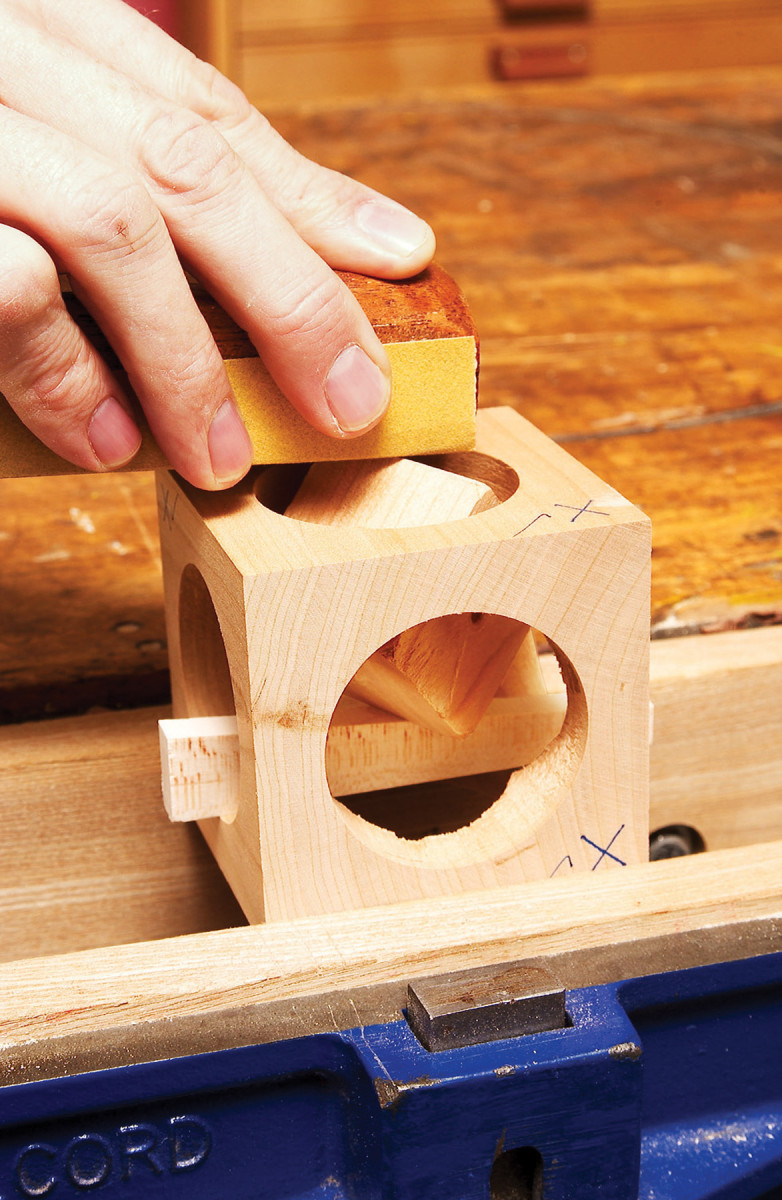
11. Sand the corners of the inner cube. Raise the inner cube above the outer cube by positioning the inner cube at a diagonal. Prop it up with a wedge or your fingers.
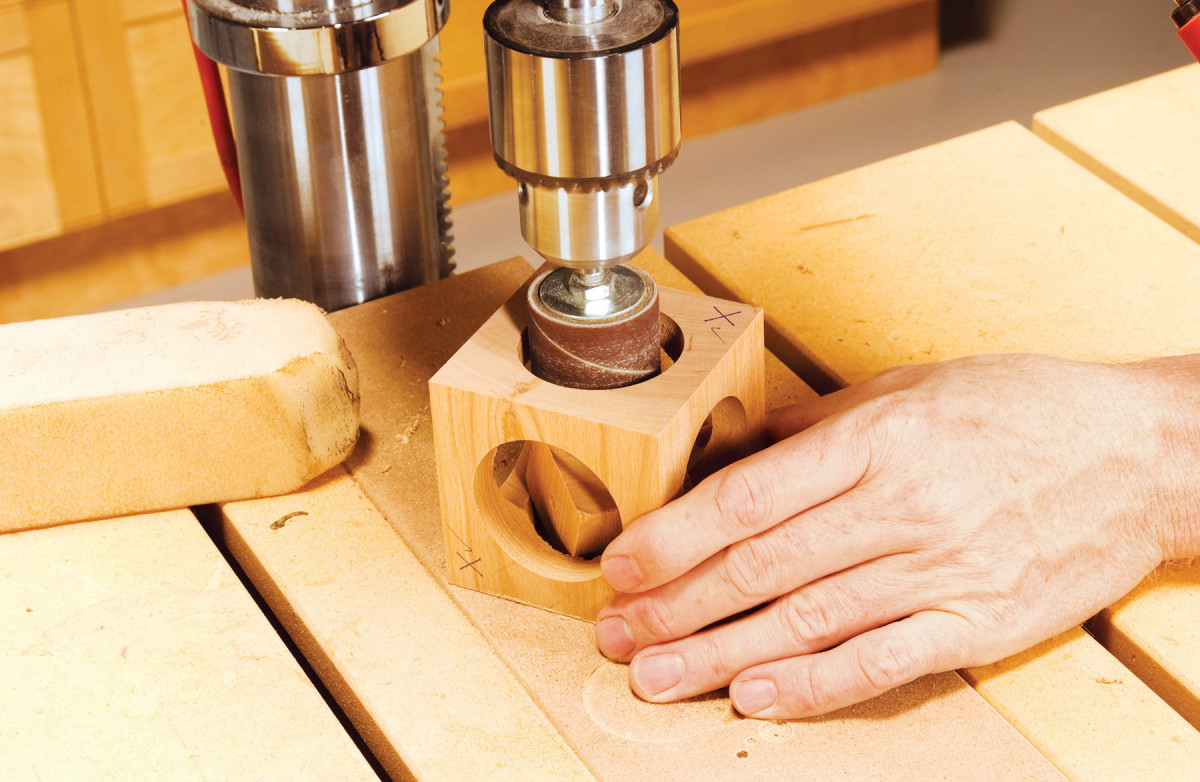
12. Sand burn marks or rough grain with a fine-grit drum-sanding attachment. Rub the drum with a crepe-rubber belt cleaner now and then to keep the drum working efficiently.
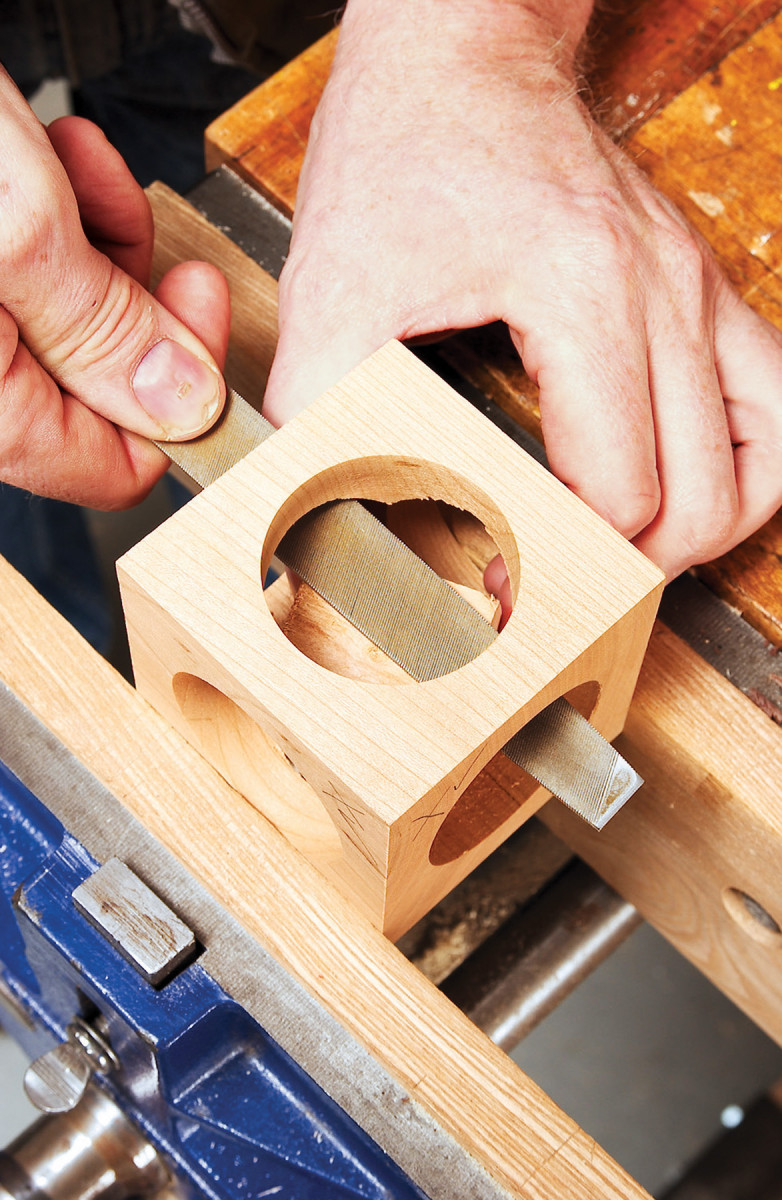
13. Smoothing the faces of the inner cube is tough, because they’re hard to get to. I usually just leave them alone, but if you must do some clean-up work, use a file to start, then switch to sandpaper.
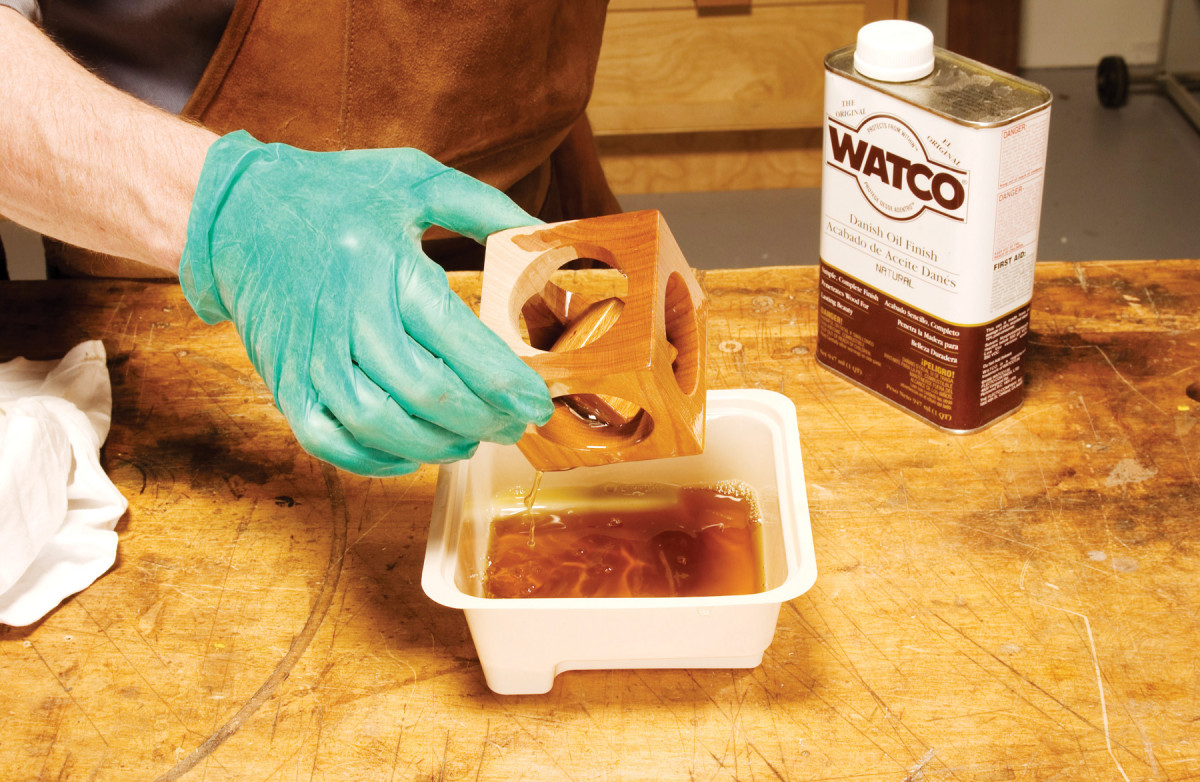
14. Dip the cube in oil to finish it. Rub thoroughly with a rag to remove the excess oil, and you’re ready to play!
“I’m a carver. I’ve always admired whittled curiosities like balls trapped inside a cage, but never wanted to spend the time to make them. I figured there must be some way to make a similar object with a drill press.”
Here are some supplies and tools we find essential in our everyday work around the shop. We may receive a commission from sales referred by our links; however, we have carefully selected these products for their usefulness and quality.