We may receive a commission when you use our affiliate links. However, this does not impact our recommendations.
Discover how to join oblique sides with through-dovetails.
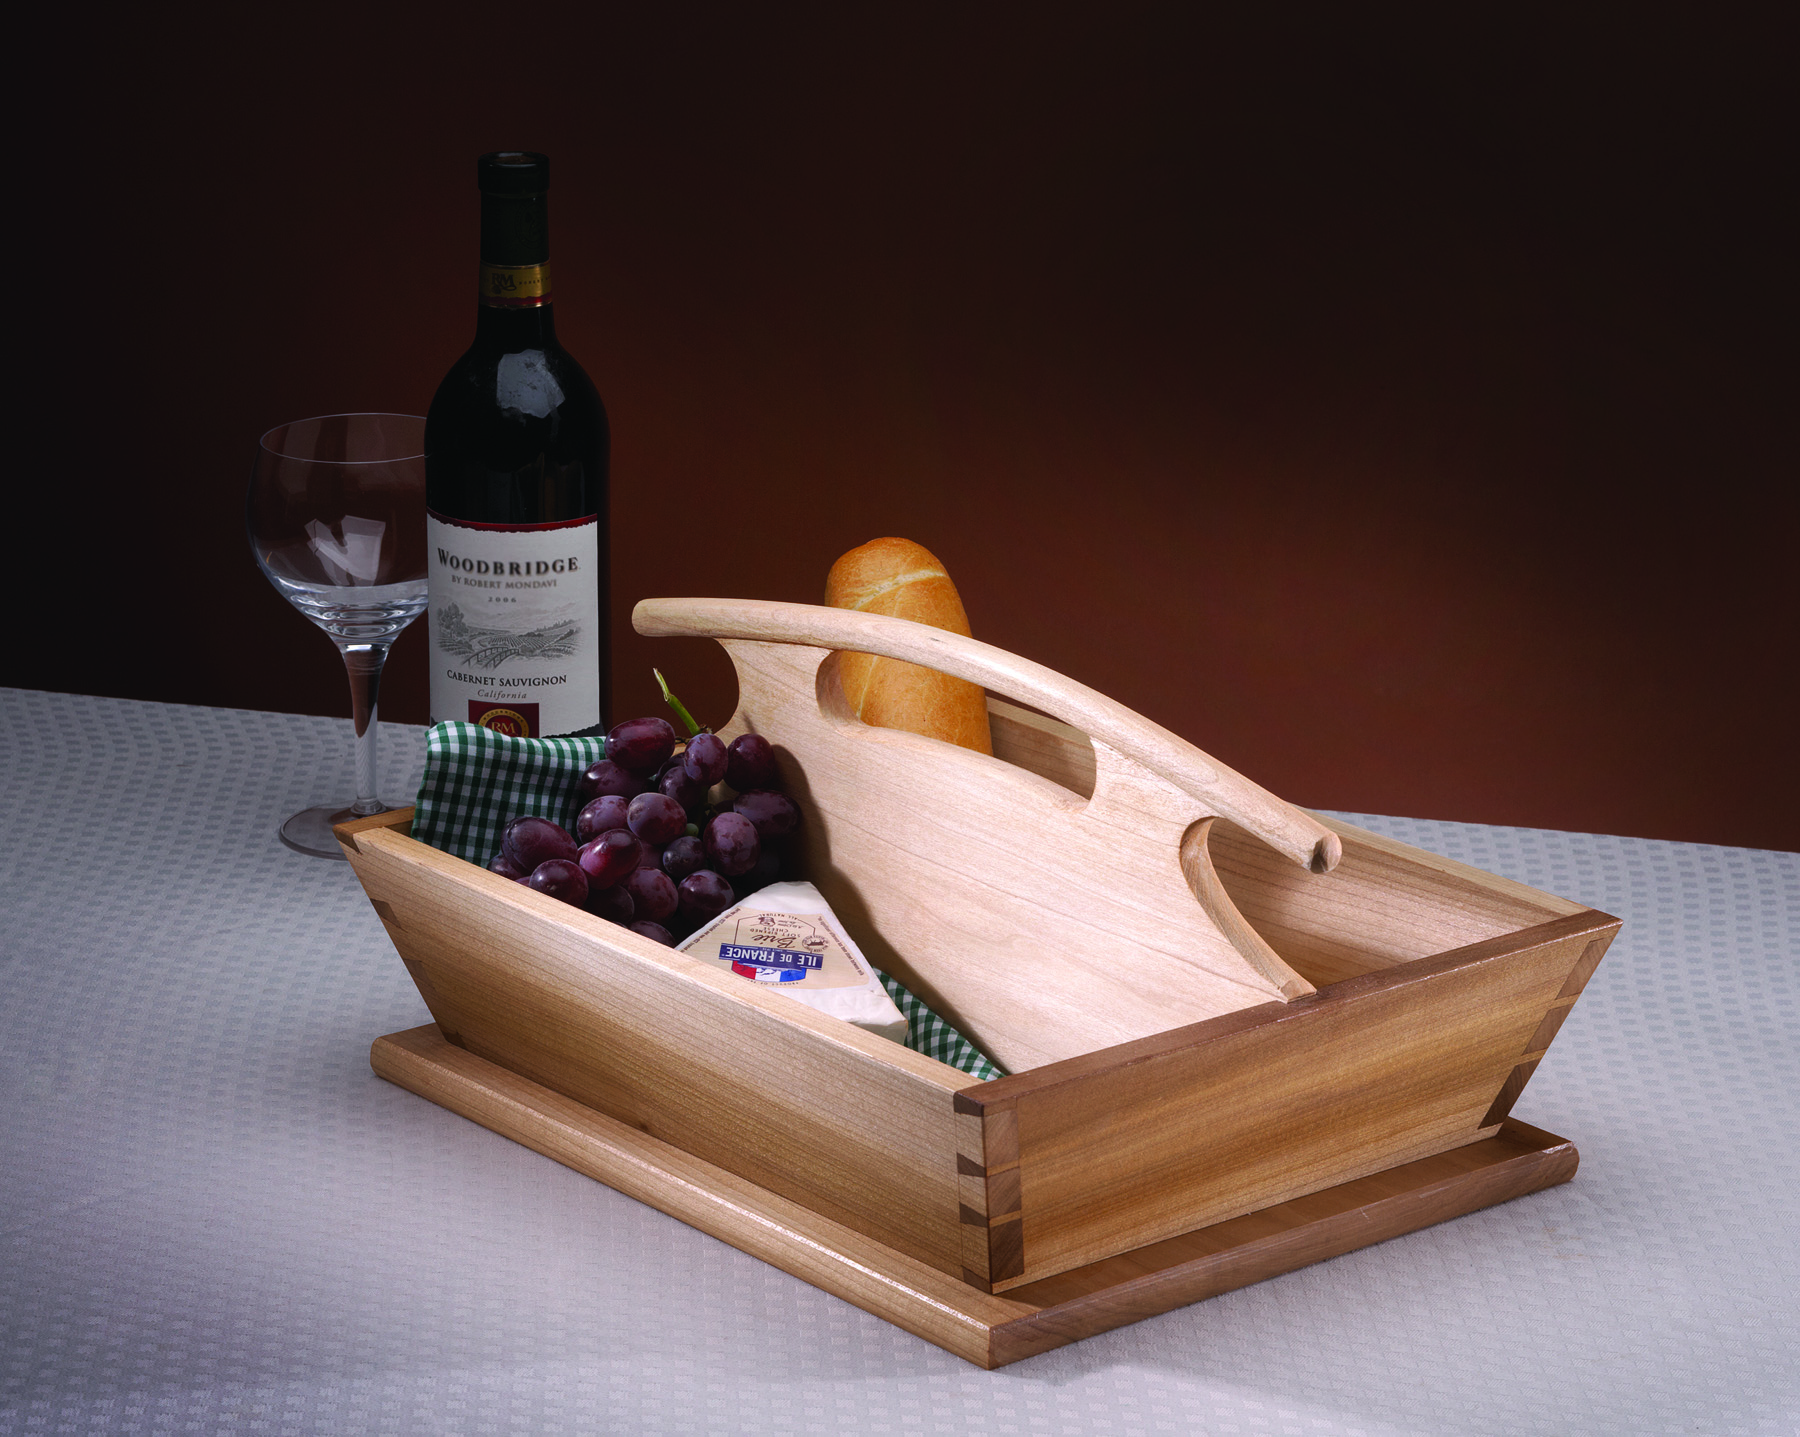
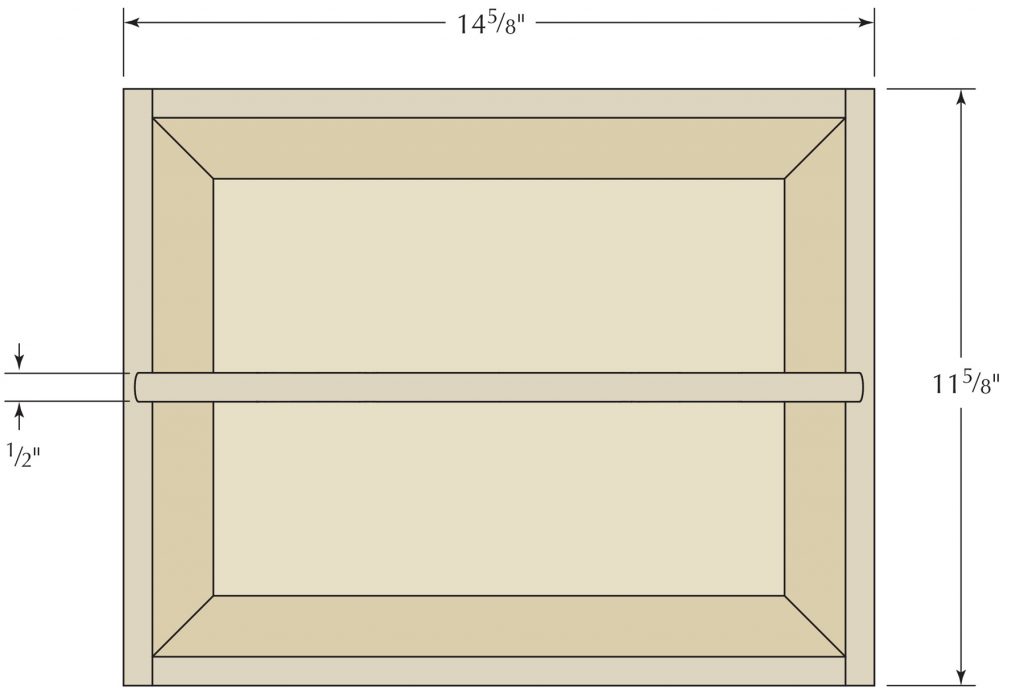
As an avid sailor and full-time furniture maker, I’ve always wanted to make a proper sea chest replete with rope beckets and a compass rose inlay. The compound-angle dovetails are the only tricky aspect of the sea chest so I designed this little handled tote to practice oblique dovetails. This tote tray is useful around the house and fun to build. The angles of the oblique dovetails offer a challenge.
The first step in building the tote is to mill the lumber to thickness and width then rip the bevels on the top and bottom edge. Tight-fitting dovetails begin with accurate compound-angle butt joints. The tray in the opening photo has three tails, but for your first attempt, you may choose to make two tails as seen in the step photos.
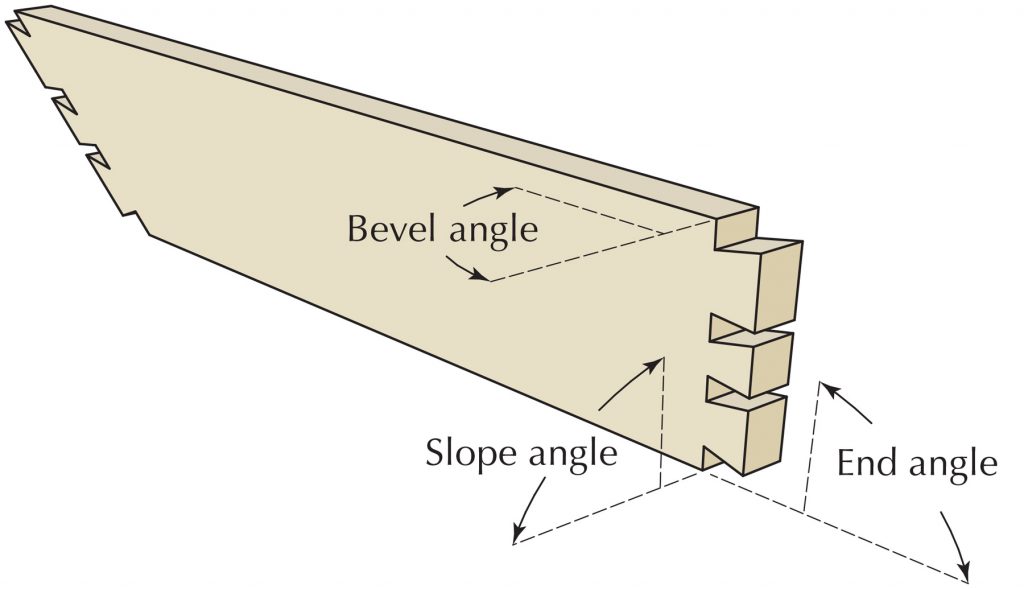
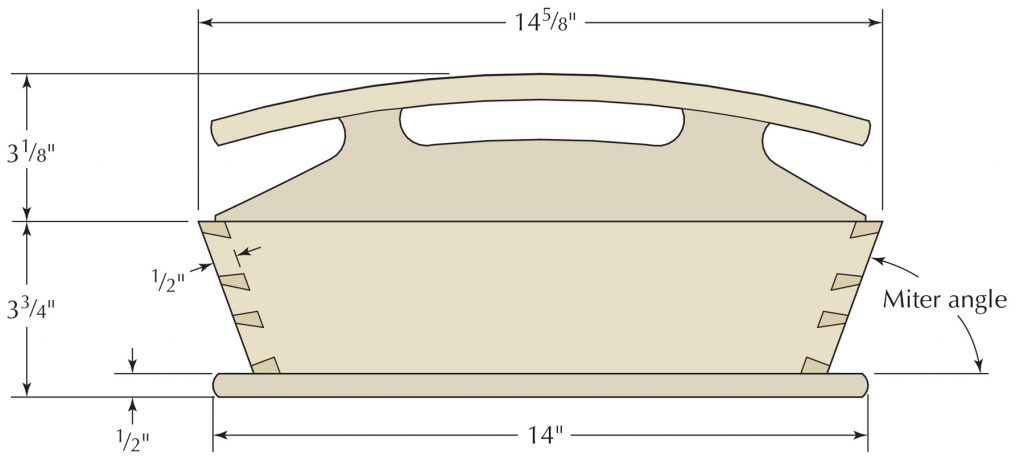
When cutting the ends it’s important to note that the bevel angle will be directed in the opposite way of what you might think. On a mitered box the angle will be directed toward the inside of the box. This is not the case for this project; the angle is directed toward the outside of the tray.
After cutting the four tray sides to length with the proper compound cuts on each end, make a “paring block.” The paring block is used to trim the dovetails to their baseline and it acts as a stable platform when transferring the tails to the pin board. The paring block should be made from a hard, closed-grain wood such as maple. Make the paring block from 8/4 stock that is roughly 8″-10″ long and slightly wider than the sides of the tray. Each end of the paring block gets a compound-angle cut representing the left- and right-hand angles on the tray sides.
Lay Out & Cut the Dovetails
Paring block. A thick block cut to the correct angles will help in paring the sockets after they are cut. It also serves to lay out the tail angles.
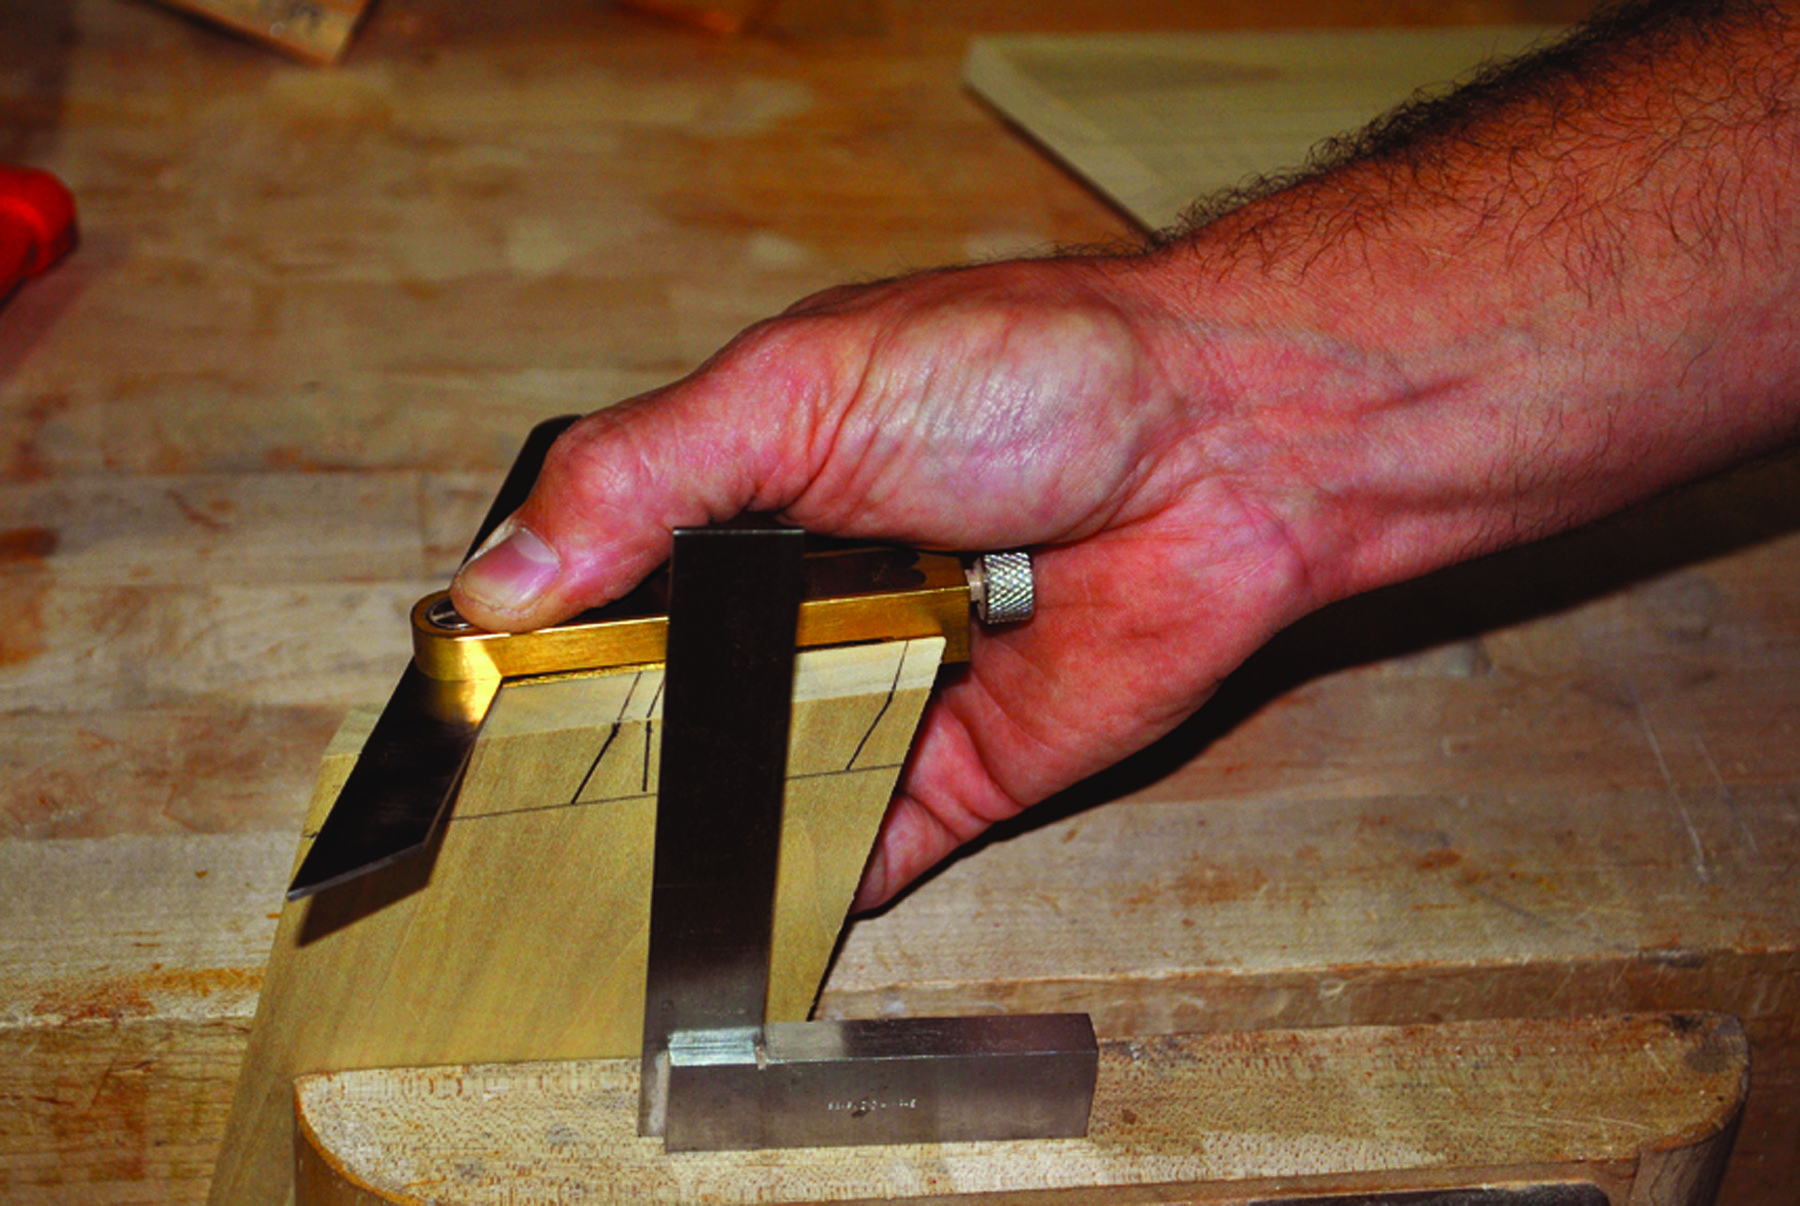
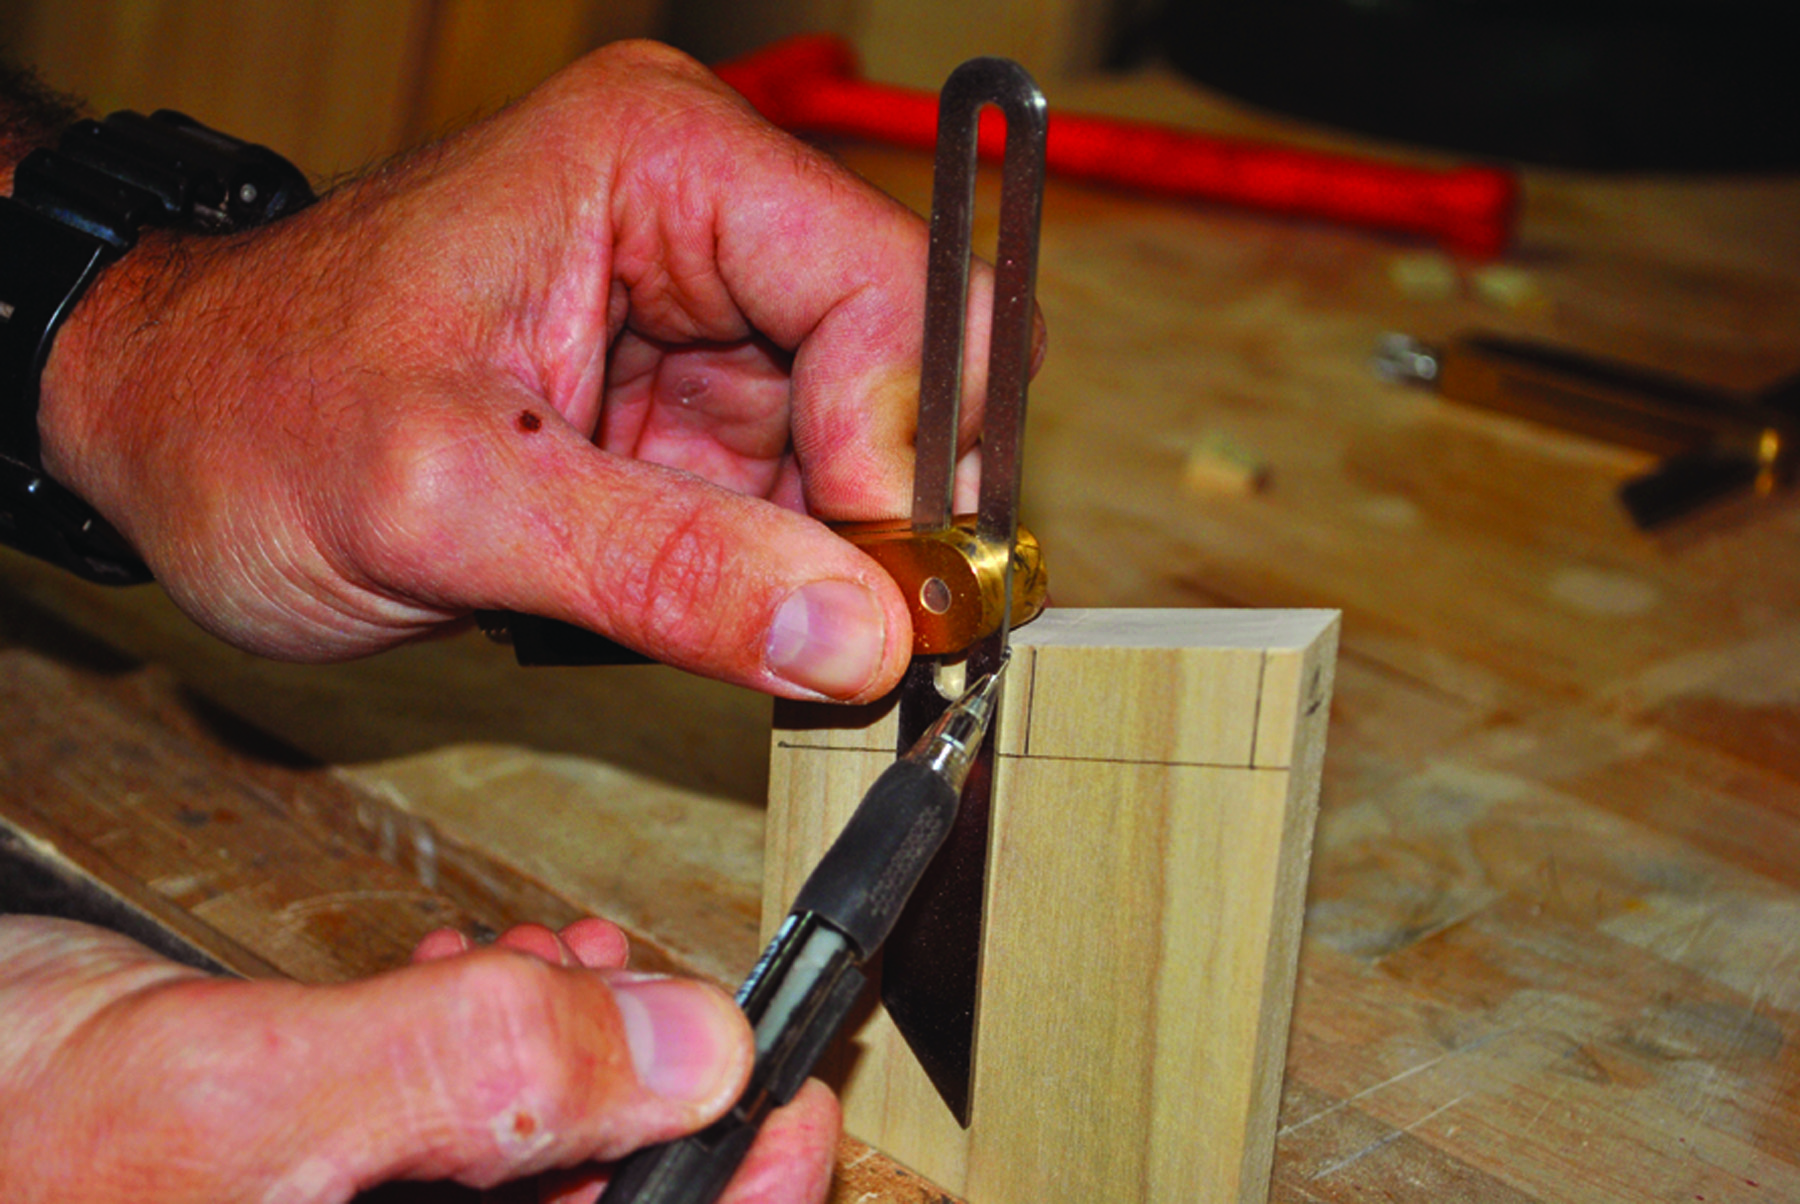
Mark the baseline on both the pin boards and tail boards. I recommend using a cutting gauge instead of a marking gauge for this. A cutting gauge produces a finer line and the blade can be adjusted to compensate for the beveled ends. The baseline is referenced from the end cuts on the sides. The fence must be held tight against the end grain. Set the depth to a little over the thickness of the sides (around 1⁄32“).
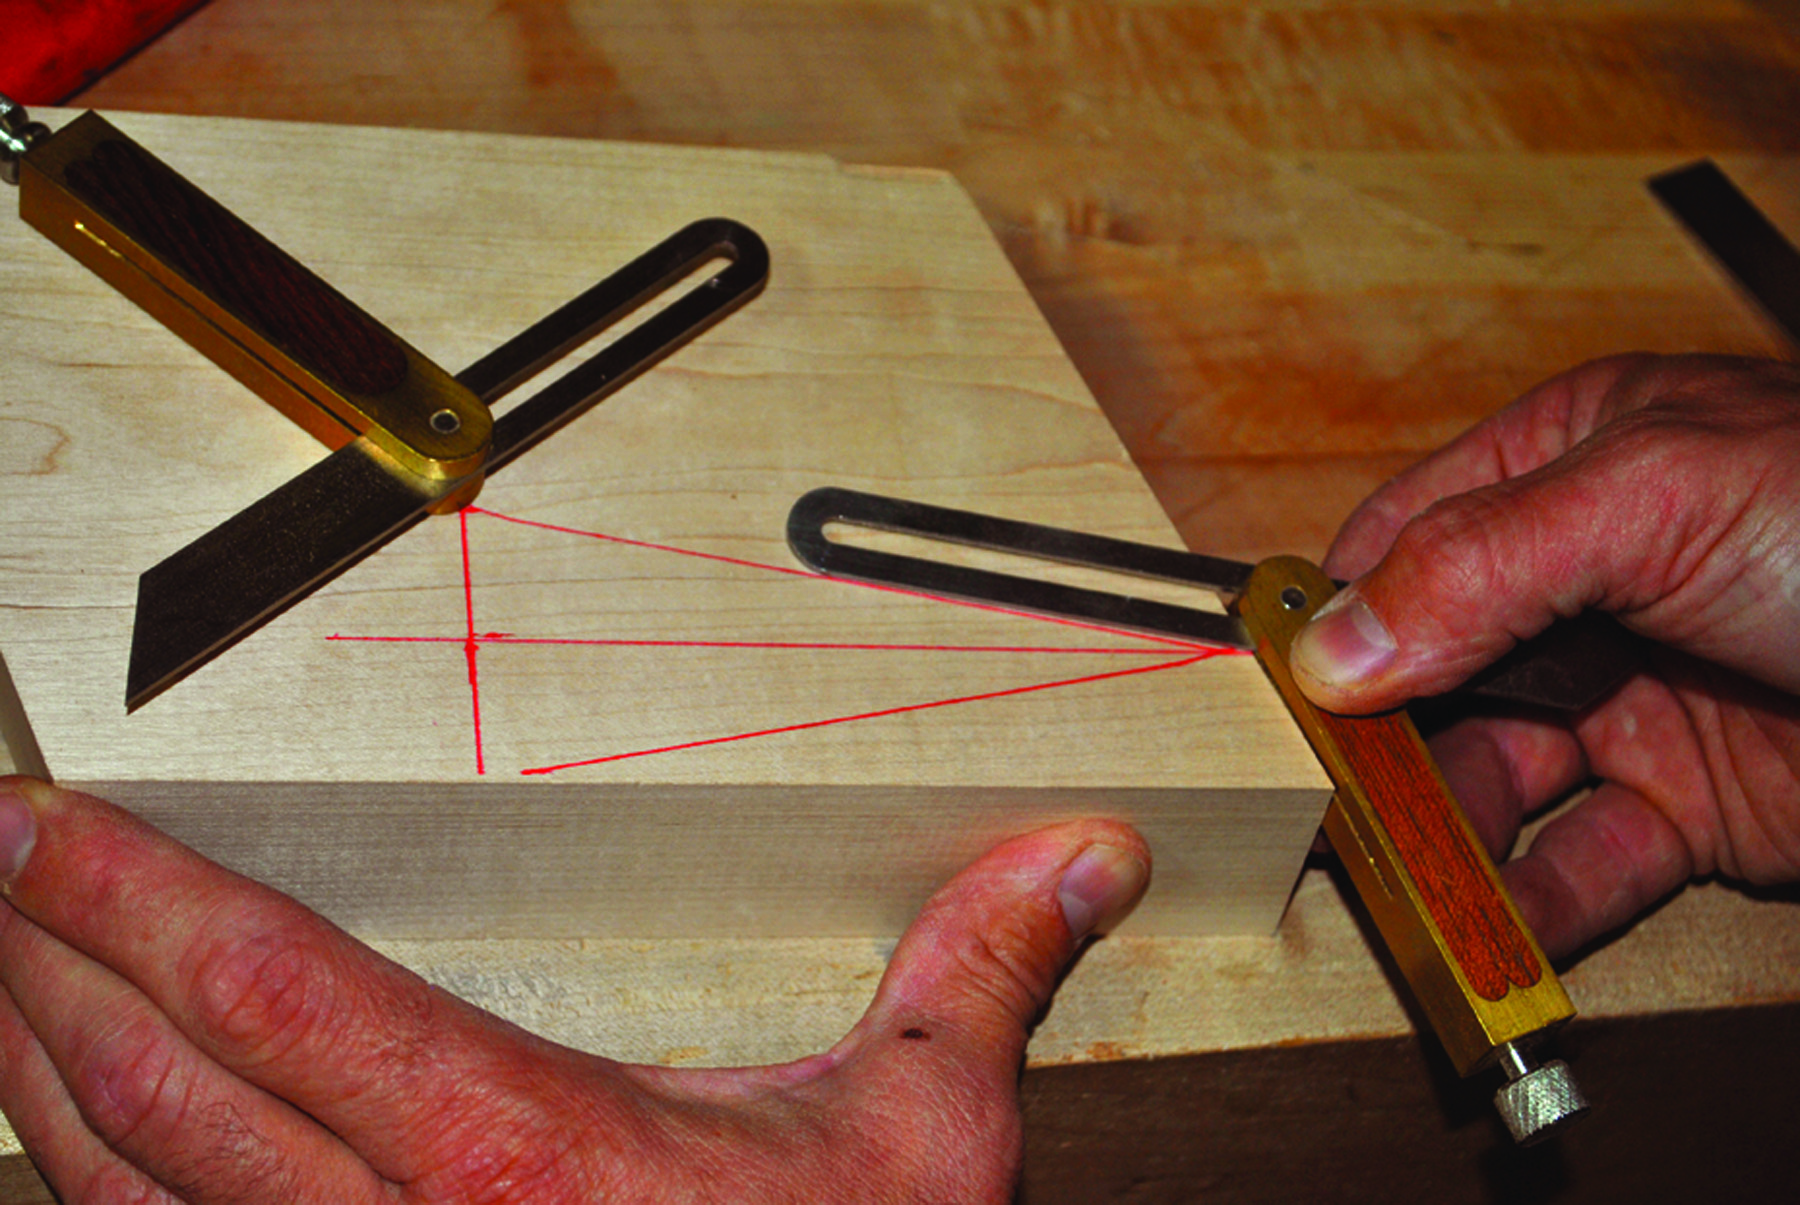
The dovetail angle in the step photos is a 1:5 slope. The dovetail angle is referenced along the grain of the wood and not the mitered ends. To set the bevel gauge to the proper dovetail angle, first lay out the angles on the paring block (above). Draw a line that is parallel to the bottom and approximately 11⁄2” up. Square a line from the bottom edge 5″ in from one of the compound cuts.
On the perpendicular line measure up 1″ and down 1″ from the baseline and mark these offsets. Draw diagonal lines from where the baseline intersects the compound cut to the 1″ offsets. Use these lines to set the sliding bevel gauges. Set up one for the lower edge of the dovetail angle. Set up another to the upper angle. It is easy to mix up the tools, so clearly mark each for its intended angle.
Lay out the tails on the face of the tail board with a half pin in each corner using the sliding bevels that were set for the upper and lower angles. Leave at least 1⁄4” between the tails. (If the spacing is too fine, it will be difficult to clear the waste.) Set another bevel to mark lines across the end grain that are parallel to the top and bottom edges of the tray (not square to the face).
Set this angle by lining up the blade with the top edge of a tray side and holding the body parallel to the angled end of the tray side. Check all the lines to confirm that they look right and then saw the sides of the tails to the baseline.
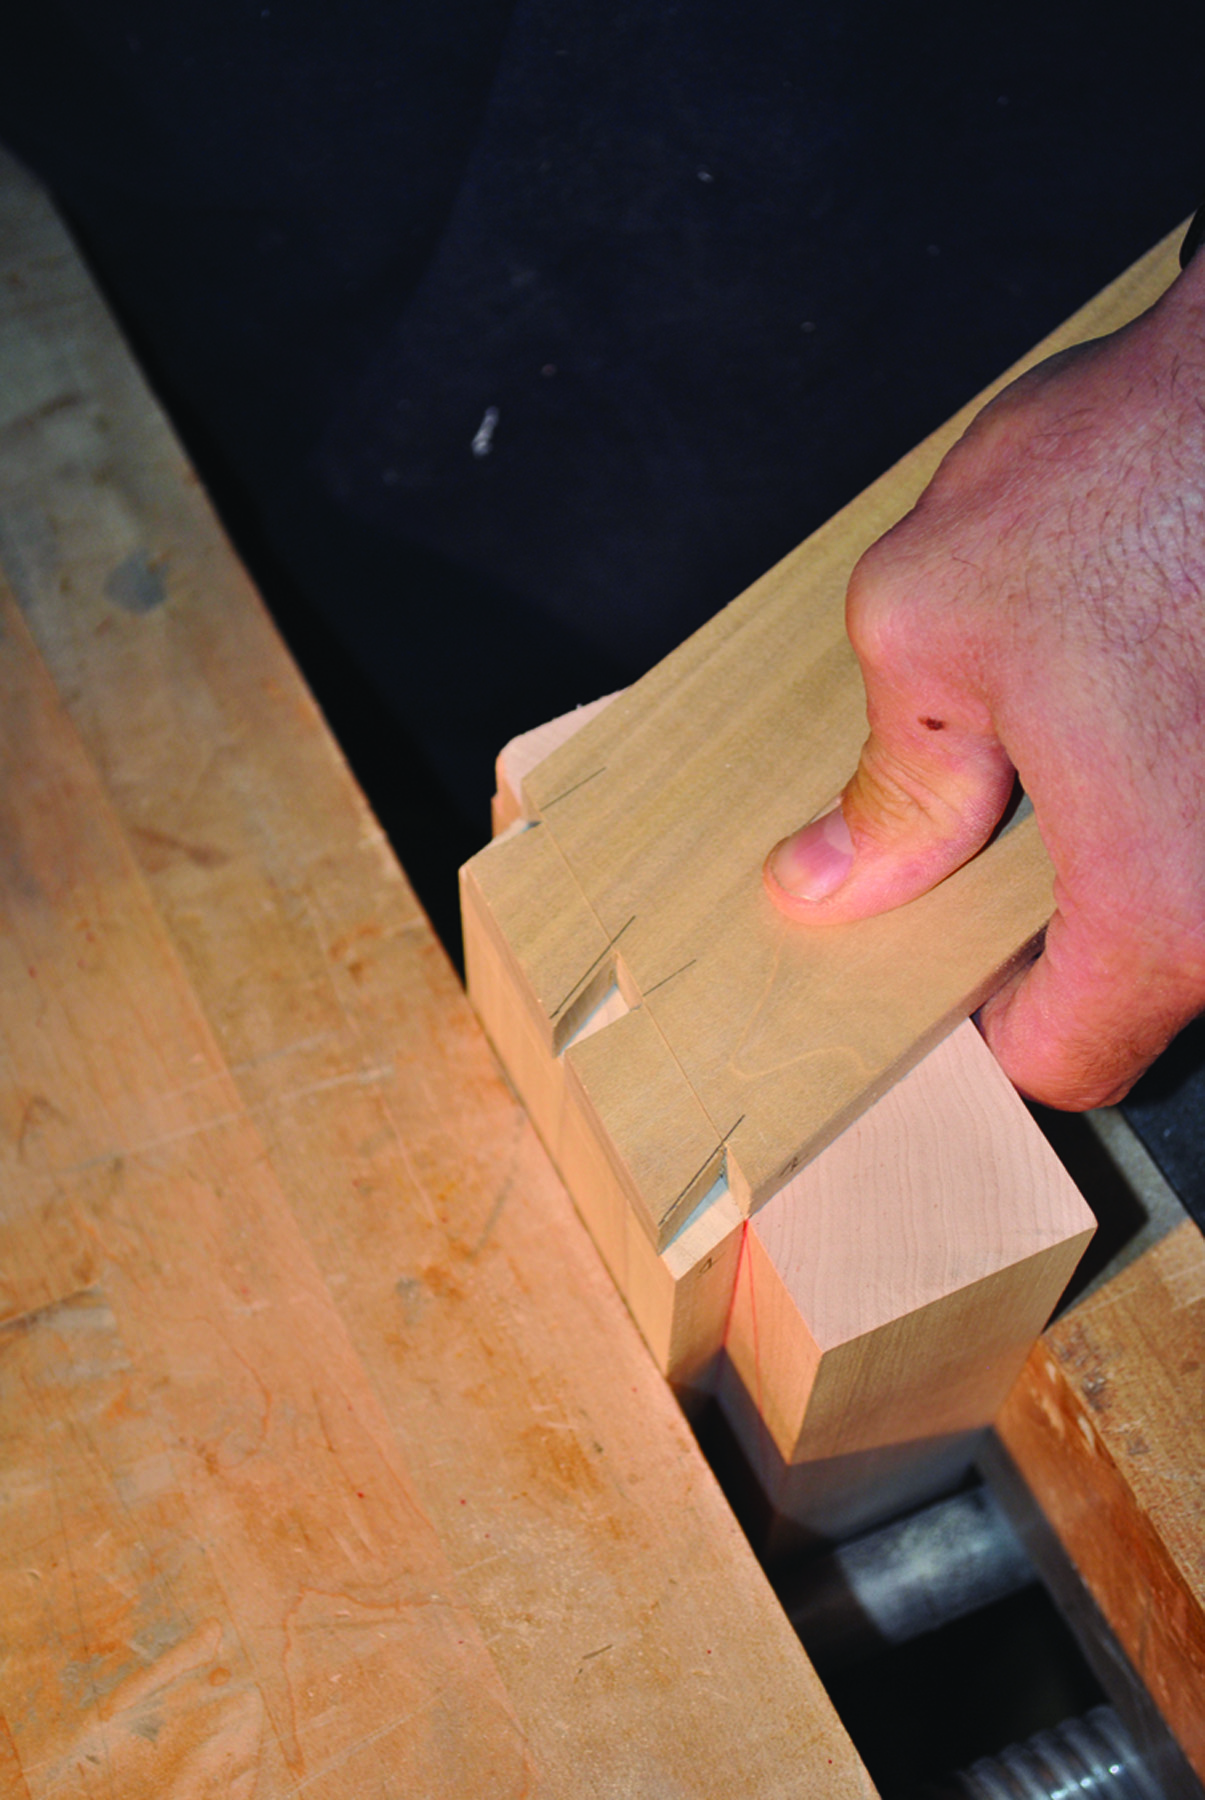
Remove the bulk of the waste with a coping saw. Match the end of the paring block with the angle on the side. With the paring block in the front, align its end with the baseline on the tail board so that the “ramp” is directed upward. This will allow you to more easily pare to the correct angle. Clamp the two pieces in a vise and add a backer block on the far side to avoid blowout.
Carefully pare to the baseline by nibbling away the waste. Then lay the chisel flat on the paring block for the final slices. Use one hand to keep your chisel flat on the paring block and use the other to push with. It is important to keep your fingers out of danger behind the cutting edge. All it takes is one slip with a sharp chisel to ruin your day.
Compound Angles
 This chart gives the necessary angles (in degrees) to make four-sided boxes with butt joints, the first step in cutting the parts to make oblique dovetails. The miter angle listed is the setting for the miter gauge on the table saw, and the bevel angle is the tilt of the table saw blade. There are calculators available online that will generate angles for other slopes and more sides.
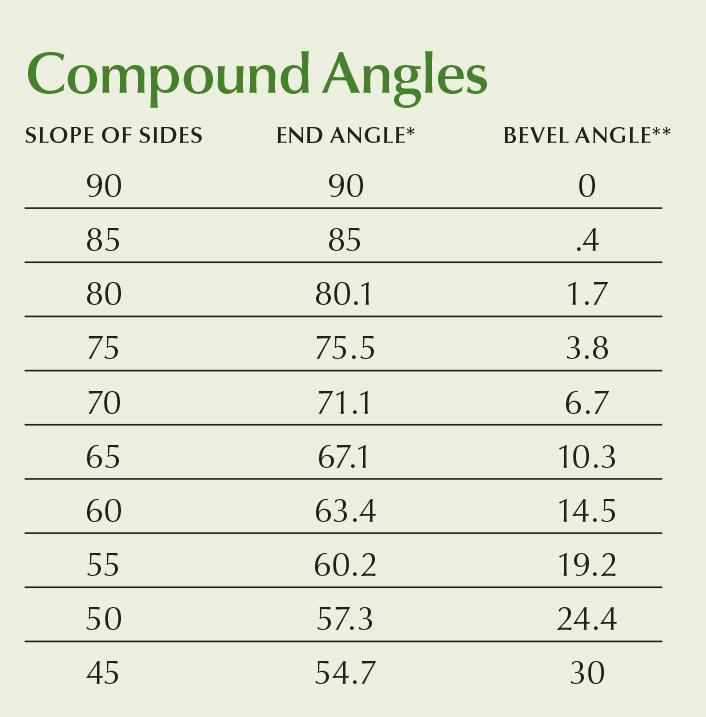
*Angle of miter gauge or miter box to crosscut ends **Tilt of blade when cutting ends
Transfer the Tails
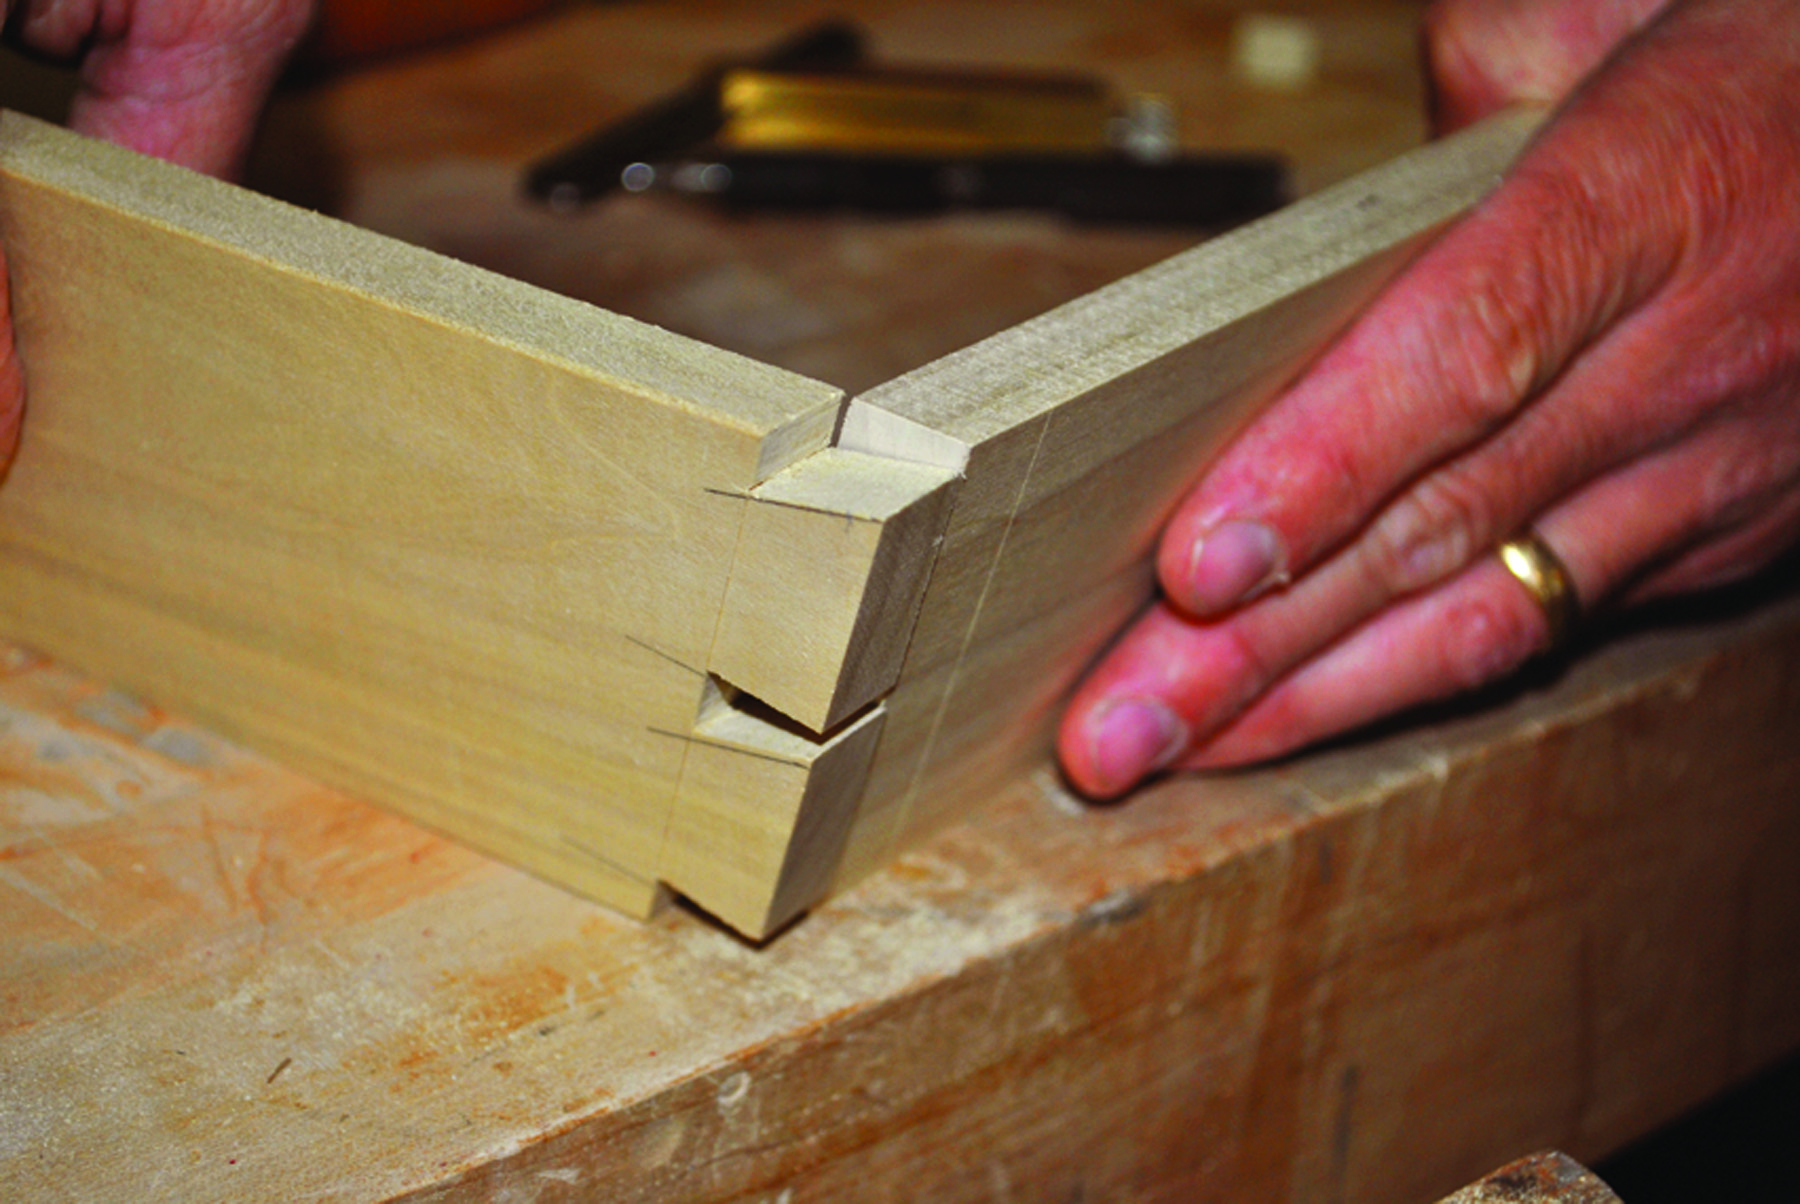
Tail end. Lines across the end grain are parallel to the top and bottom of the sides and ends. Placing the piece in the vise with the cutlines vertical will aid in sawing the tails.
Arrange the sides to form the tray and mark each corner to maintain proper orientation. I recommend using the paring block to aid in the transfer of the tails to the pin board. It provides a solid clamping surface that will align the corners when scribing the tails to the pins. Orient the paring block with the pin board so that the angled ends match and clamp the blocks in a vise. Place the tail board on top and align its baseline with the inside edge of the pin board. Transfer the tails to the pin board with a marking knife.
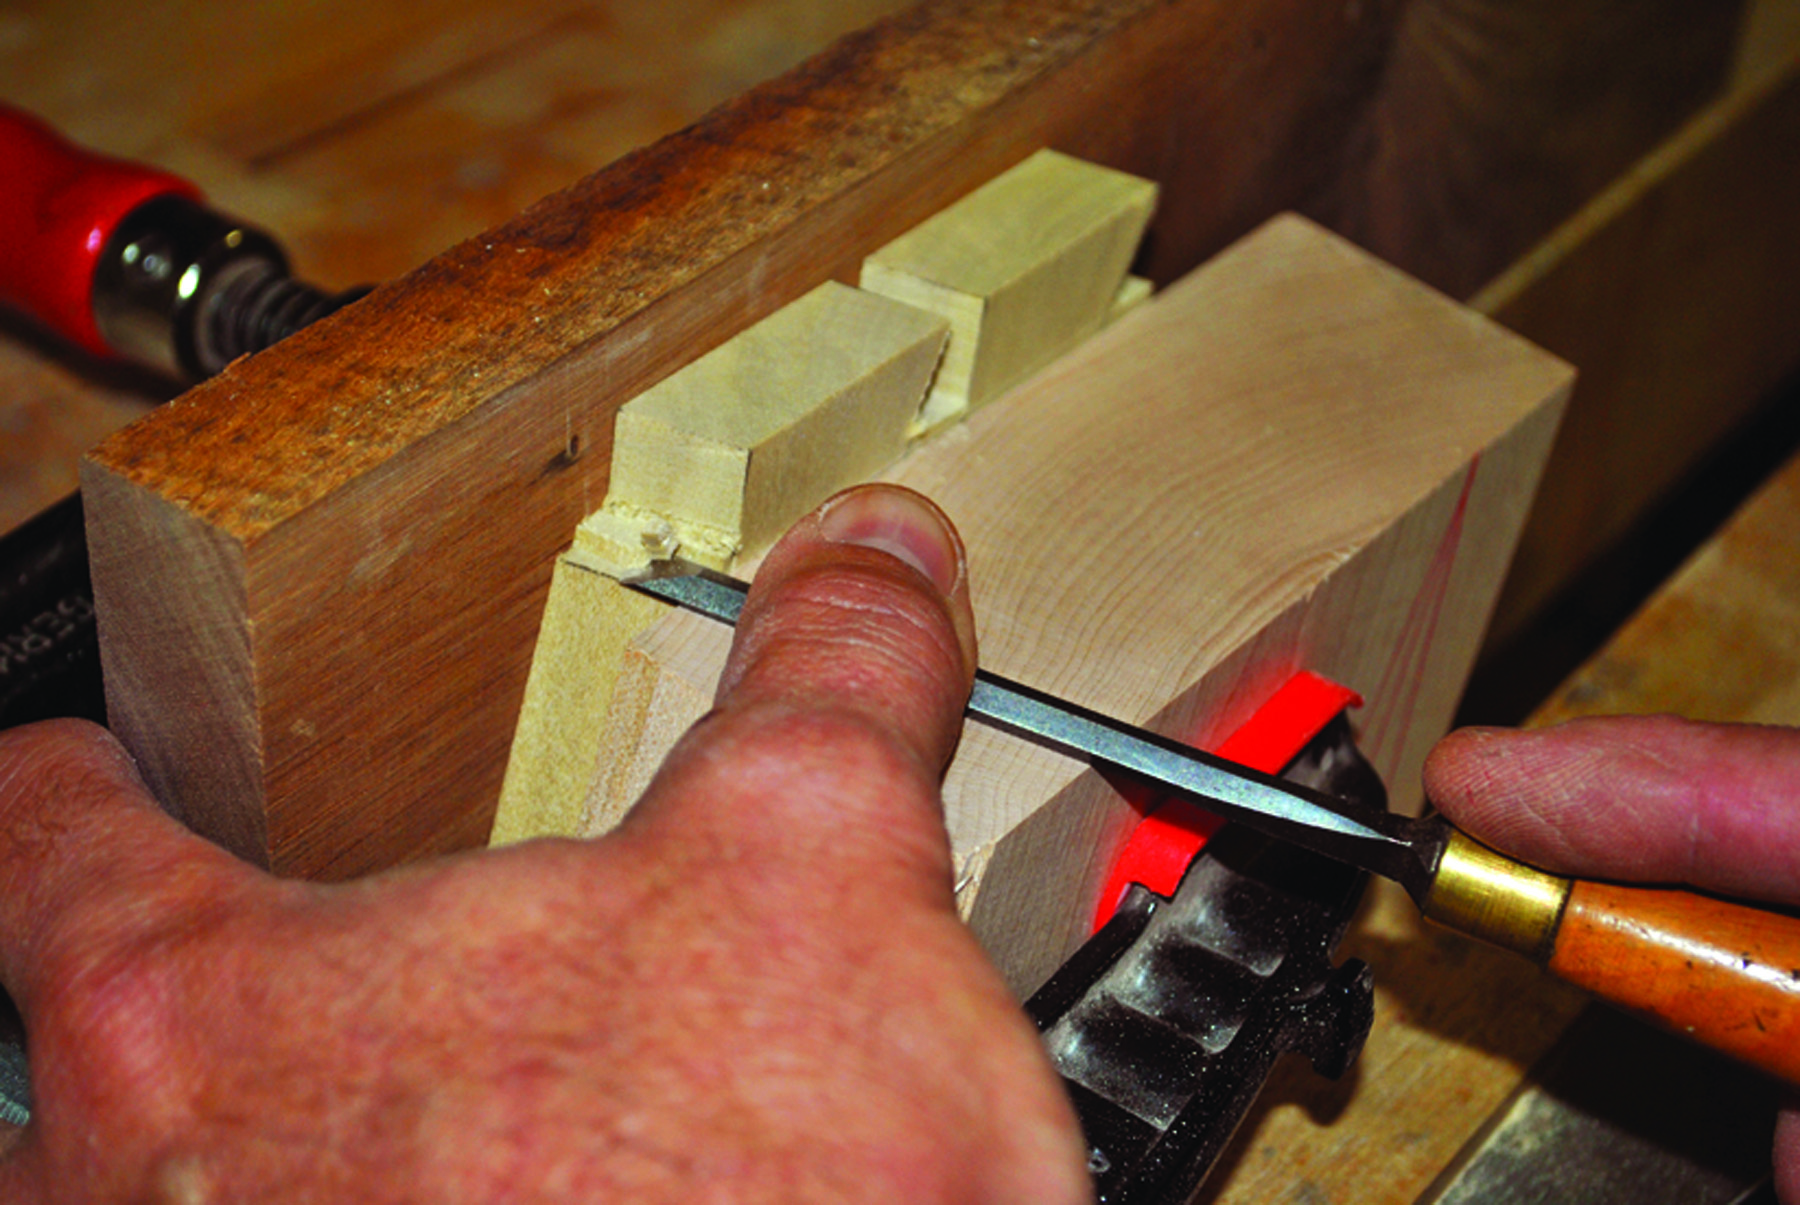
Sandwich. The side is clamped in the vise between a scrap and the paring block. Resting the back of the chisel on the paring block guides the cuts to the proper angle.
Set a sliding bevel to the end angle of the pin board and use that to transfer the lines down the face grain to define the sides of the pins. These lines are parallel to the top and bottom edges. Next, saw out the pins to the baseline. Saw directly on the waste side of the line. The goal is to avoid having to trim the joints because due to the angles, it is difficult to judge where the joints aren’t going together.
Maker’s mark. Align the two parts of each corner and mark the mating pieces before transferring the tails to the pin boards.
A standard clamp will slide on the angled parts, so make some clamping cauls to pull the joints together. Angled blocks glued to each end of a piece of scrap plywood make a simple but useful caul. The blocks should have the same compound angle as the ends of the sides. Cut four blocks with the left-hand angle and four with the right-hand angle. One end will have the compound angle and the other end will be cut at 90°. Make them roughly 1″ long. The scrap plywood should match the shape of the sides and be approximately 1″ shorter to ensure the caul does not interfere with the joints closing up.
Double duty. The paring block is used to support the side while the socket locations are marked with a knife.
Orient the blocks on the end of the plywood so the straight cuts are facing out. Firmly attach the blocks to the plywood to form a square clamping surface. I recommend a dry-fit before gluing to ensure that nothing interferes with the joints closing up. The cauls tend to shift when pressure is applied, so use small C-clamps to prevent that. If the dry-fit is successful, release the clamps and knock the joints about halfway open.
Parallel pins. On the pin board, the lines across the end grain match the miter angle on the end of the board, parallel to the top and bottom edges.
Apply a little slow-setting glue (such as liquid hide glue) to the outside of the joint and clamp it. With the mechanical nature of the dovetail joint, it is not necessary to use a lot of glue. Adding glue to the outside instead of the inside, will make it much easier to avoid squeeze-out on the inside of the tray where it is difficult to clean up. Allow the glue to cure overnight then clean up the joints with a block plane and level the top and bottom edges.
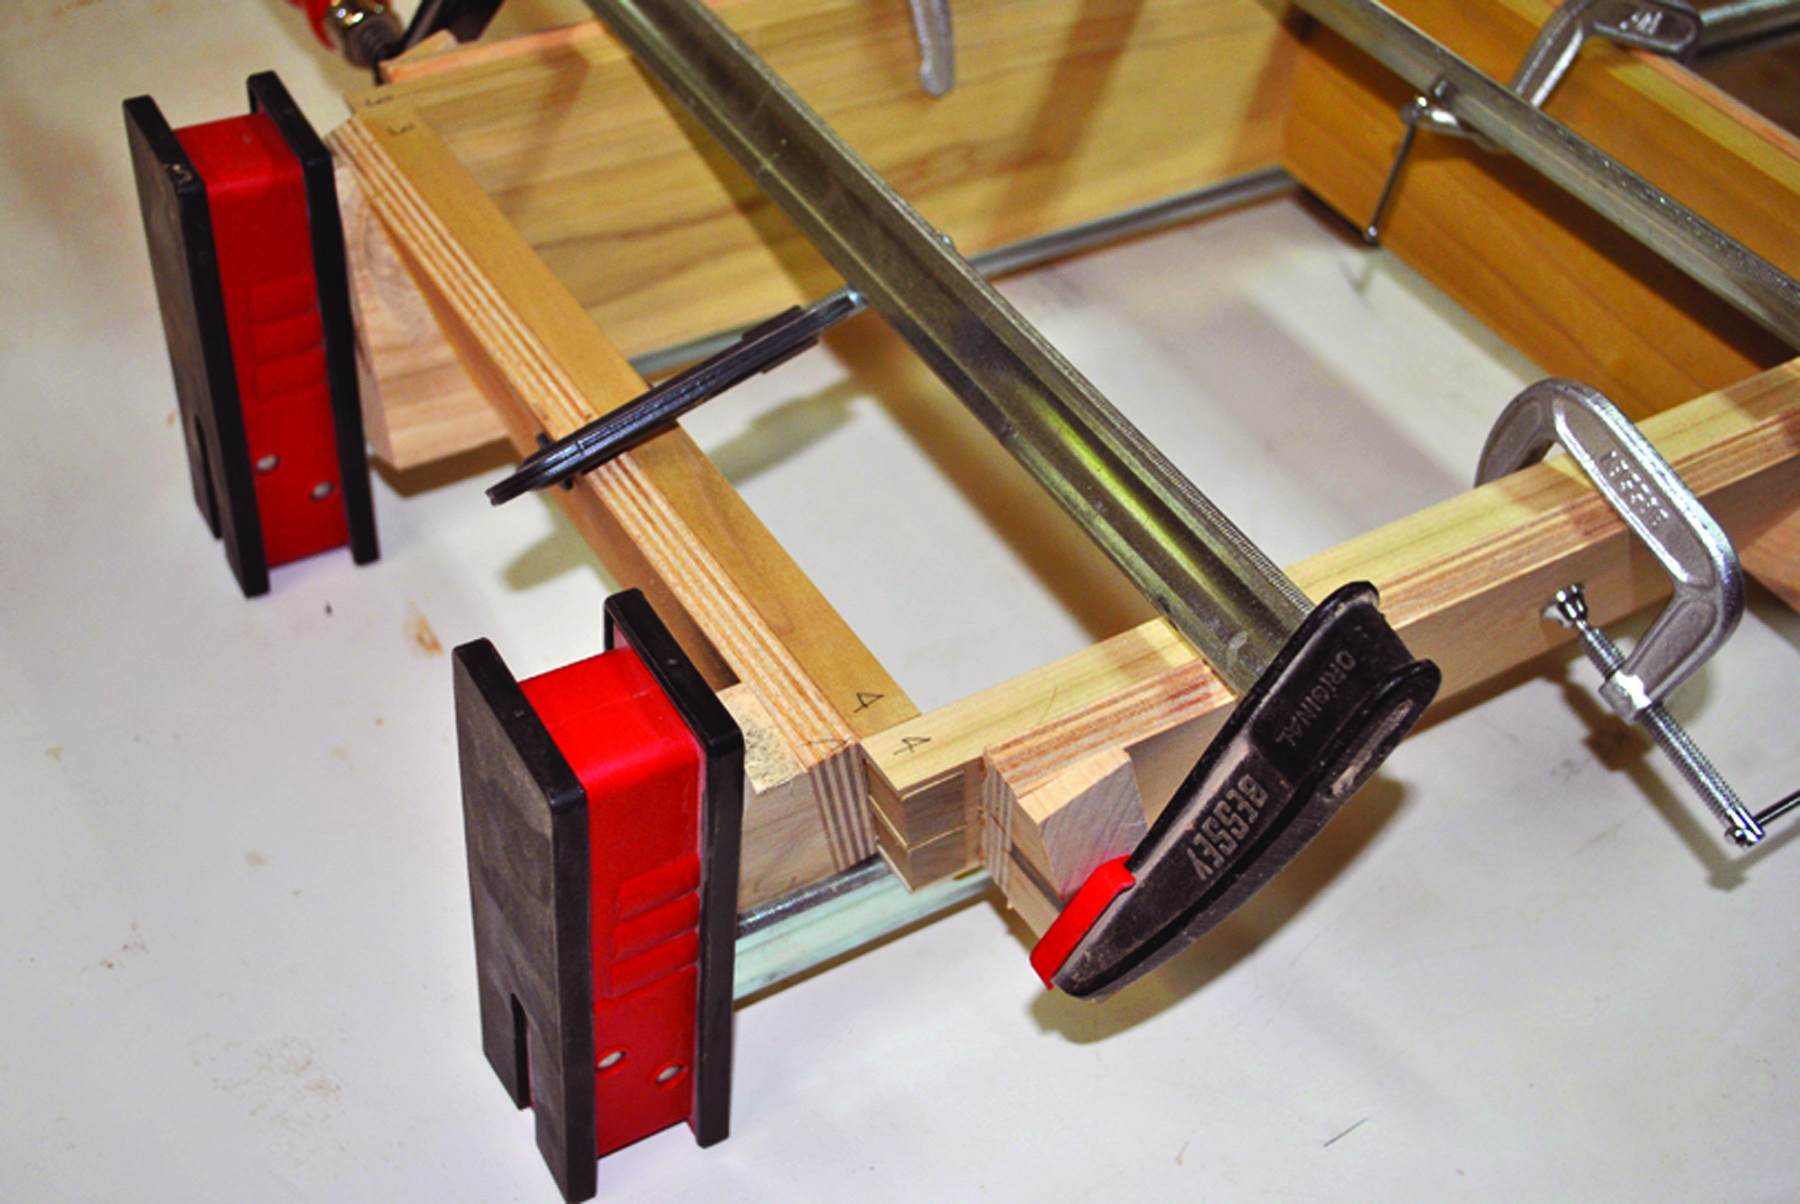
No slip. These cauls keep the clamps from sliding on the sloped surfaces and keep clamp pressure in line with the joints.
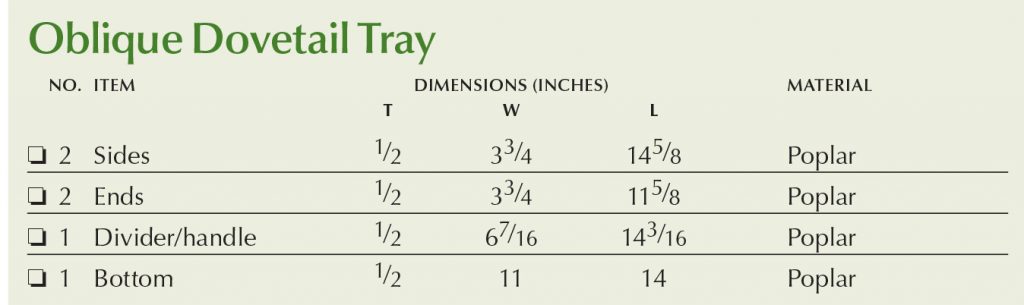
Oblique Dovetail Tray Cut List
Tray Handle & Bottom
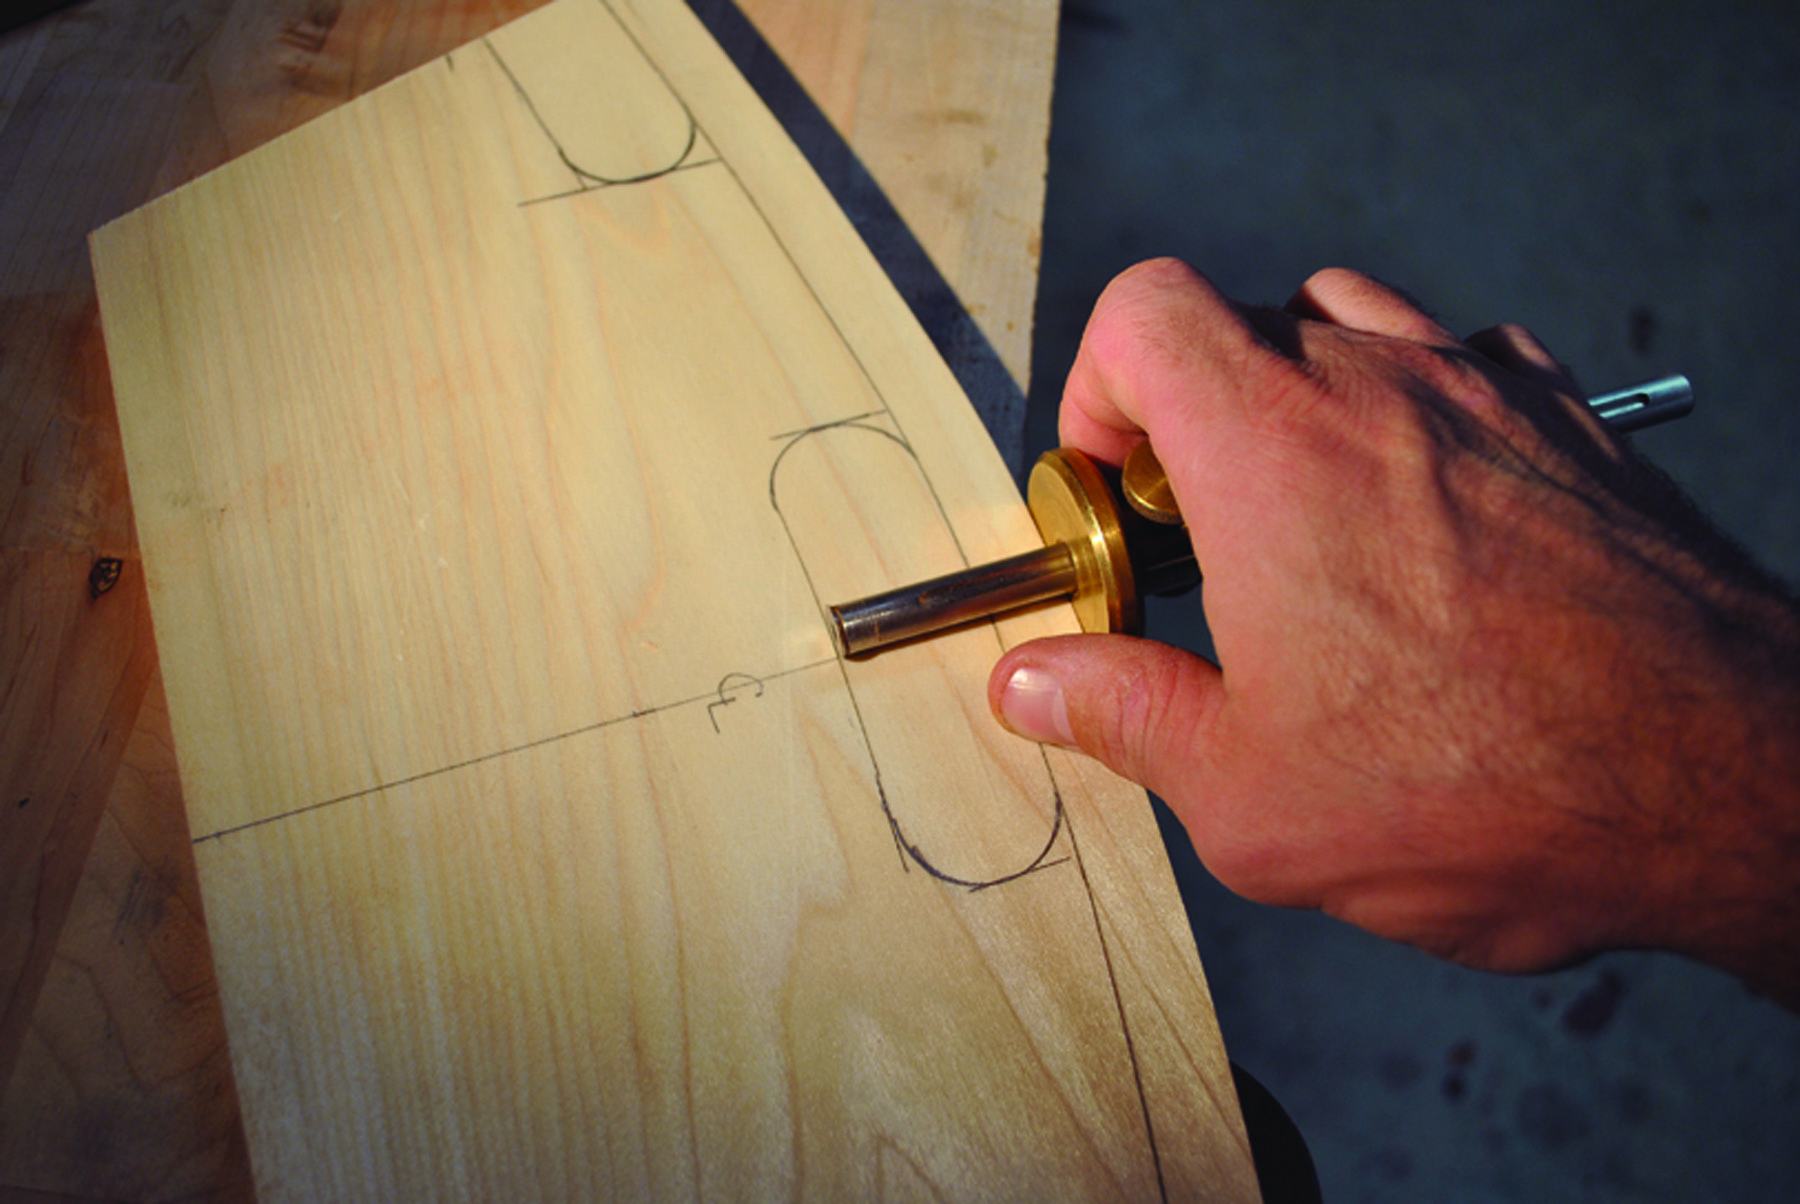
Ahead of the curve. Use a gauge to score lines parallel to the curved top of the vertical divider. The upper line defines the round portion and the lower line the edge of the cutouts.
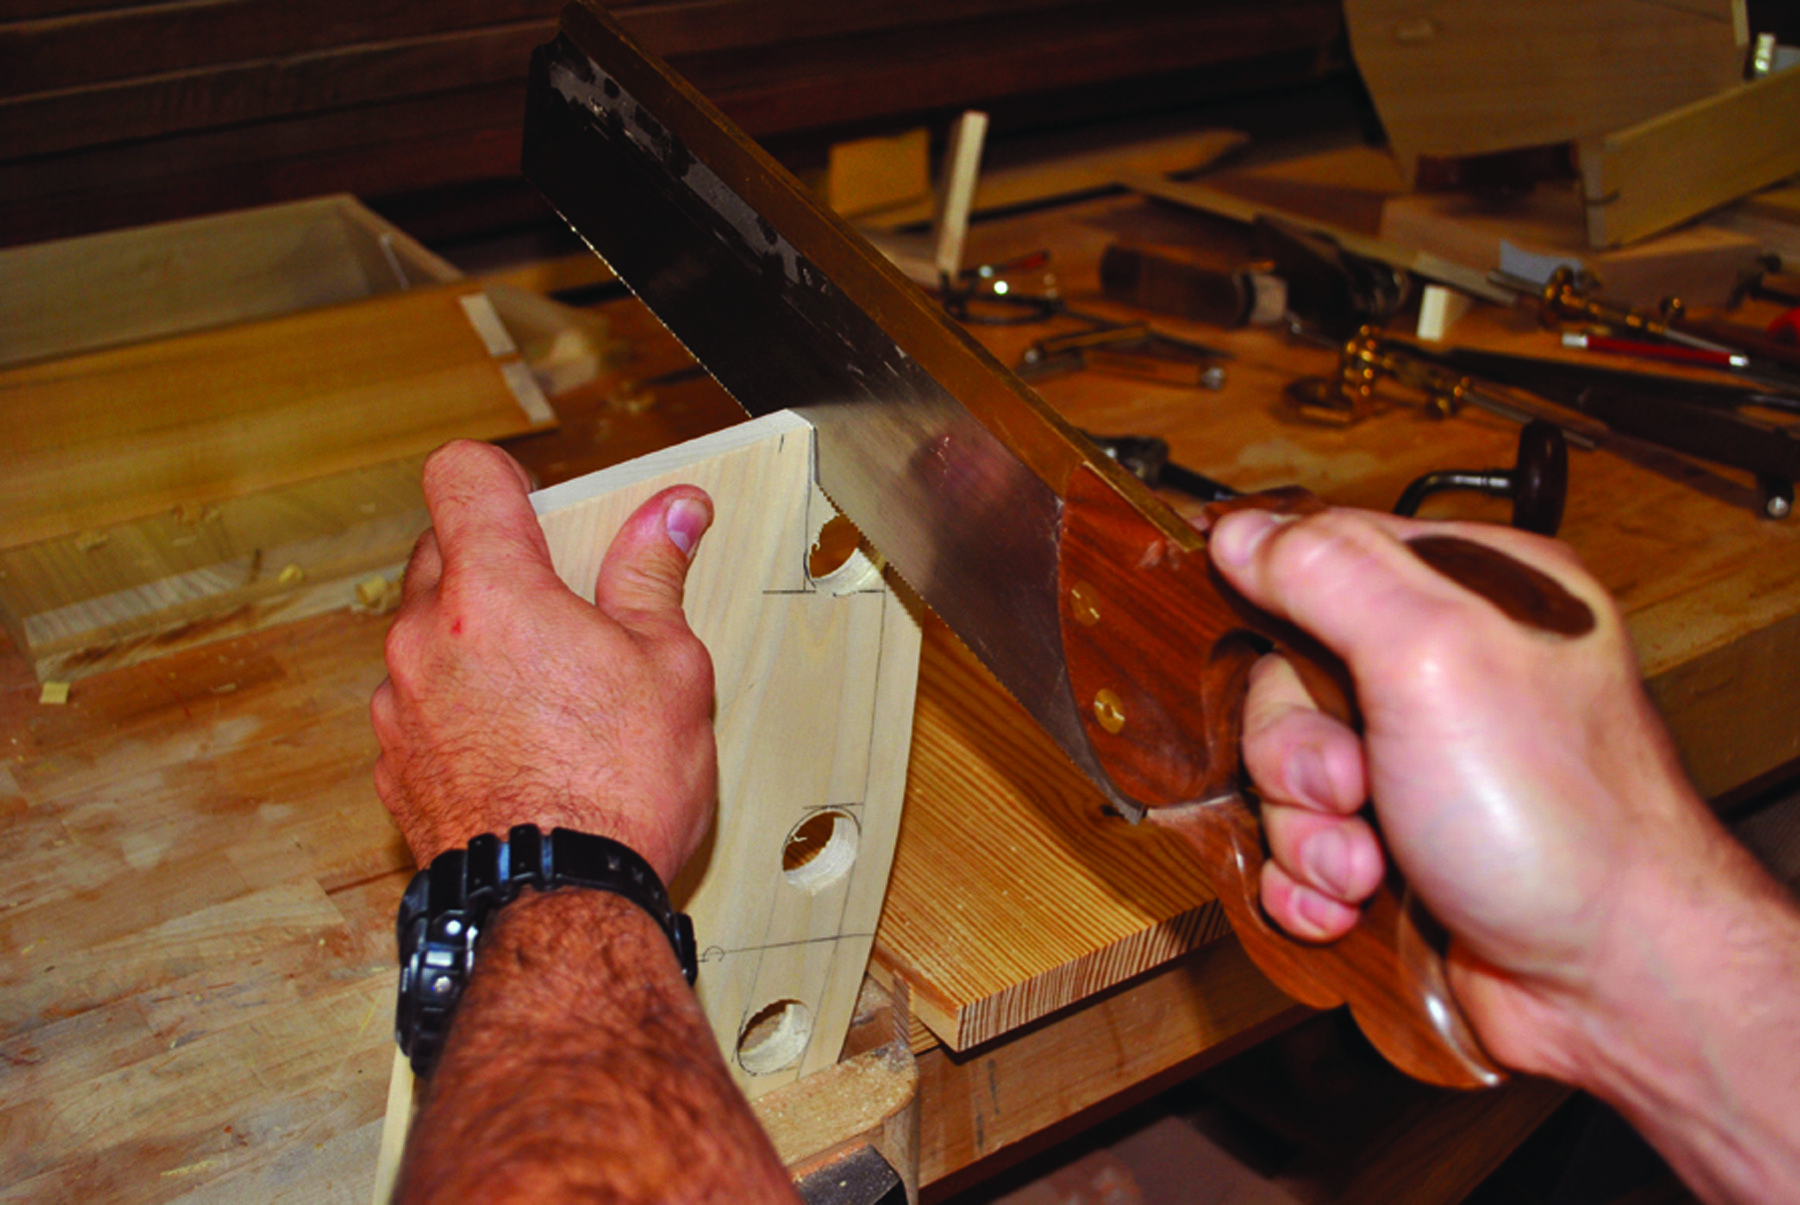
Start with a 1⁄2“-thick board that is a little longer than the width of the tray at the top and about 4” taller. The handle is housed in 1⁄8“-deep dados in the ends of the tray. Cut the dados with a backsaw and a chisel followed by a small router plane. (Be careful to keep your fingers out of the way of the chisel.)
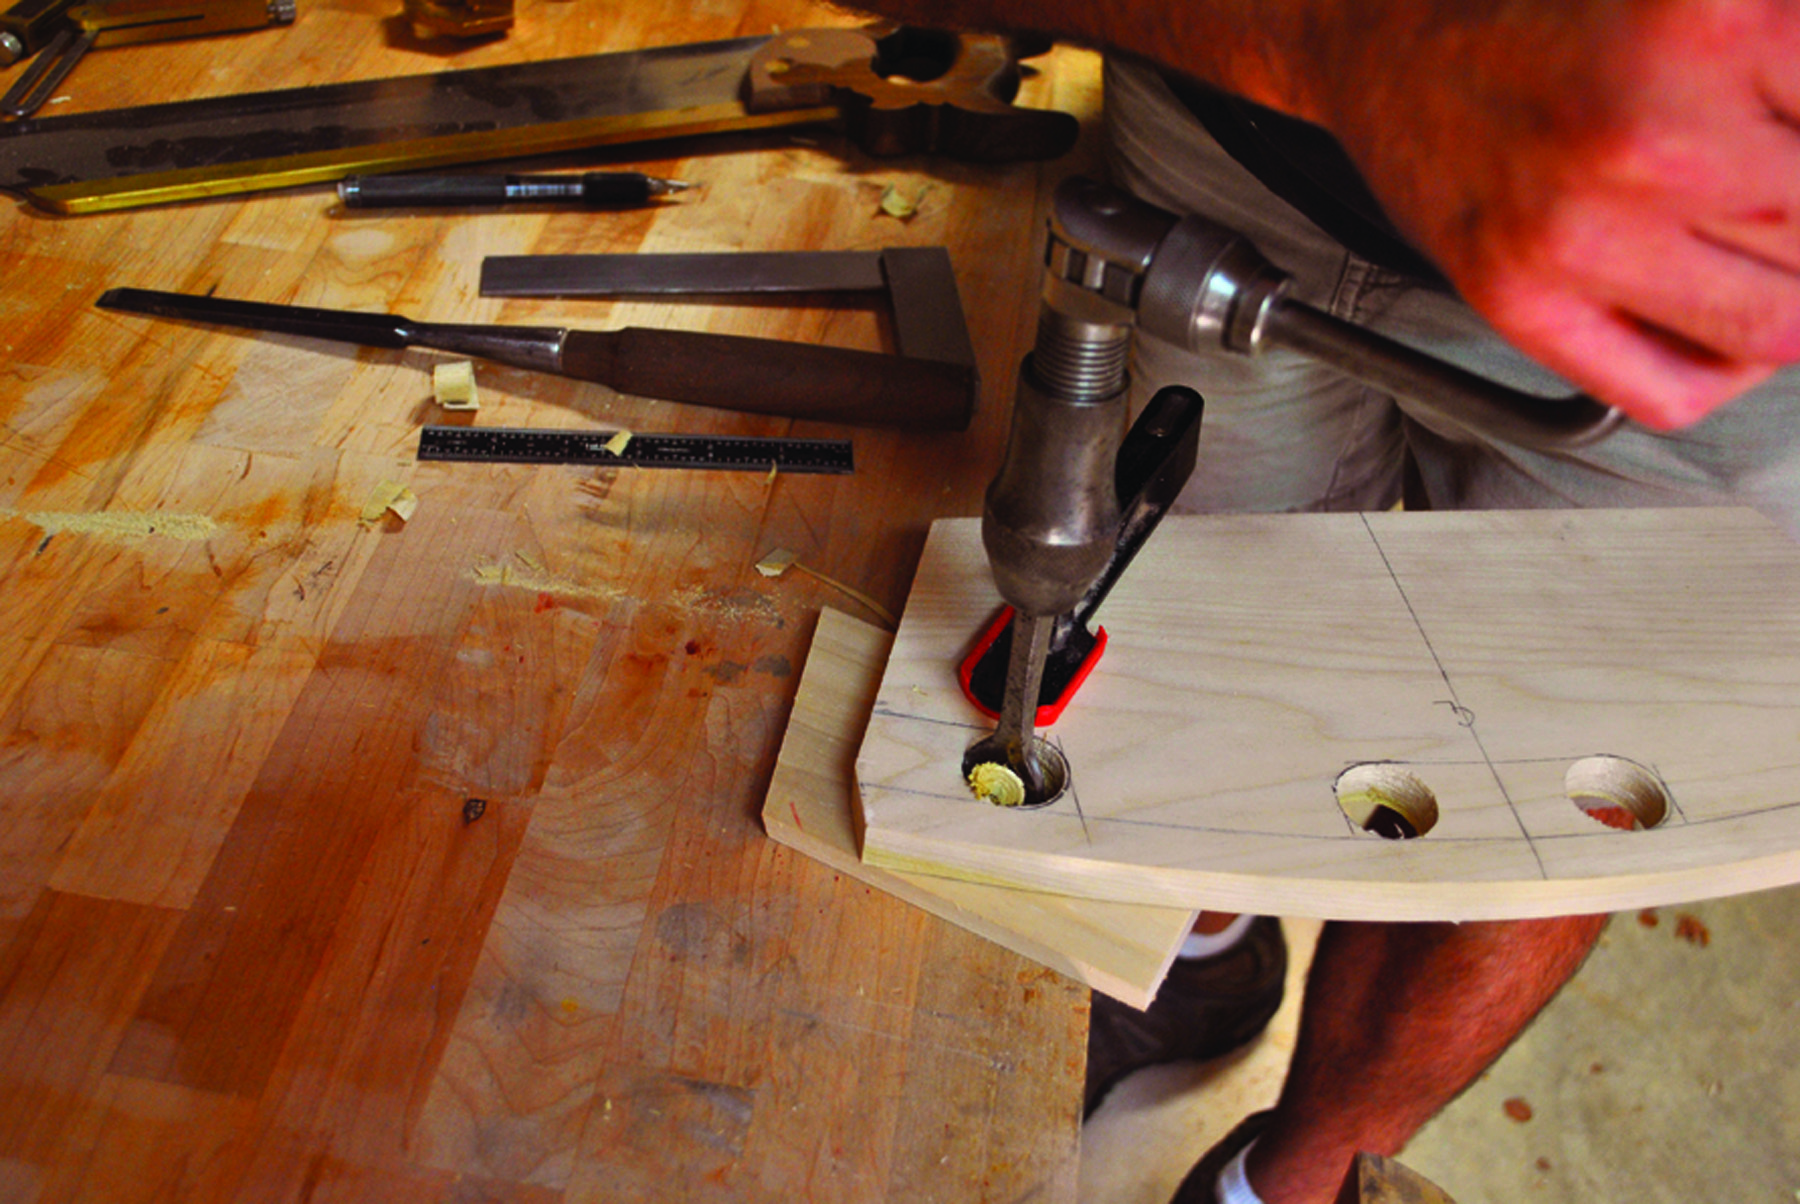
Begin at the end. Bore holes to define the ends of the cutouts in the handle.
Measure the length of the handle between the dados at the base of the tray. Cut each side and test the fit. If the handle does not make it all the way to the bottom, trim one of the ends. If it goes too deep, trim the lower edge after the handle is attached. After getting a good fit between the handle blank and the dovetailed tray, draw the curves for the top edge, handhold and the side reliefs.
Saw then shape. Rough cut the ends with a back saw and use a coping saw to remove material in the center cutout. Then use a rasp to remove the saw marks.
Bore holes to define the rounded ends of the cutouts, then saw to the edges of the holes. The end cuts can be made with a backsaw; the center cut can be made with a coping saw. Clean up the sawn edges with a rasp.
The dowel shape of the handle is formed by scoring the offset to define the diameter with a marking gauge. Follow up with scratch stocks, rasps, files and carving tools. With the round shape established, reduce the thickness under the “dowel” with a flat gouge or a wide chisel. You need only make the relief cuts deep enough to create a strong shadow line – about 1⁄16“.
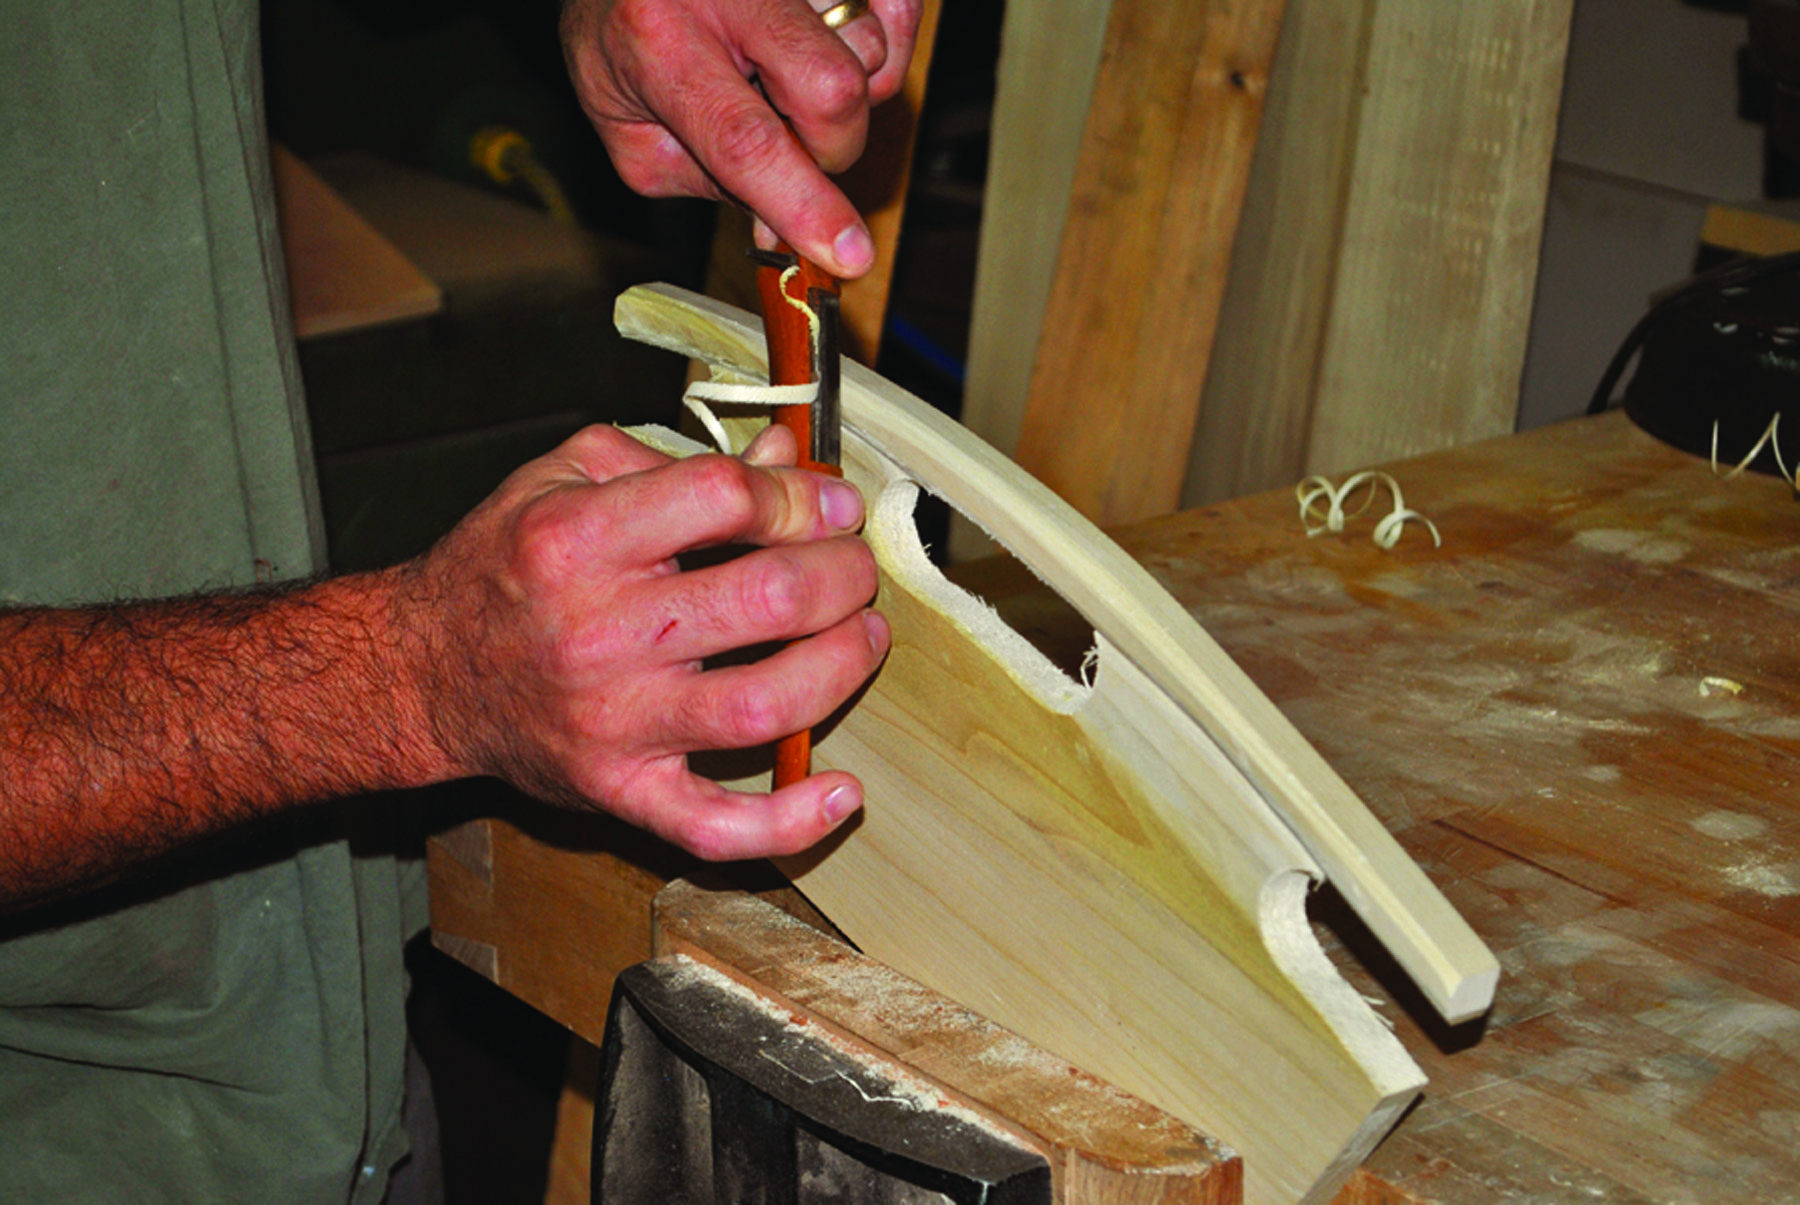
Carve then curve. After defining the line at the bottom of the handle with a chisel, use a spokeshave to form the rounded surface.
Cut the bottom to size and plane a bullnose profile on the edges. Work the end grain first then plane the long-grain sides. The handle and bottom are nailed on with 1″ cut nails. When nailing on the bottom, place the nails toward the outside edges of the tray and angle them slightly so that they do not break through the tray sides. Apply a few coats of shellac and the tote is ready for storing mail, carrying a picnic or keeping the remote controls organized.
Pattern: Download a full-size PDF pattern for the tray divider/handle: Tote_Handle
Web Site: Here’s a good compound angle calculator.
Tom is a woodworker and toolmaker in Chapel Hill, N.C., and teaches at The Woodwright’s School.
Here are some supplies and tools we find essential in our everyday work around the shop. We may receive a commission from sales referred by our links; however, we have carefully selected these products for their usefulness and quality.