We may receive a commission when you use our affiliate links. However, this does not impact our recommendations.
It’s all made from one sheet of plywood.
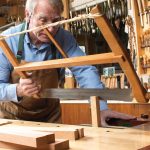
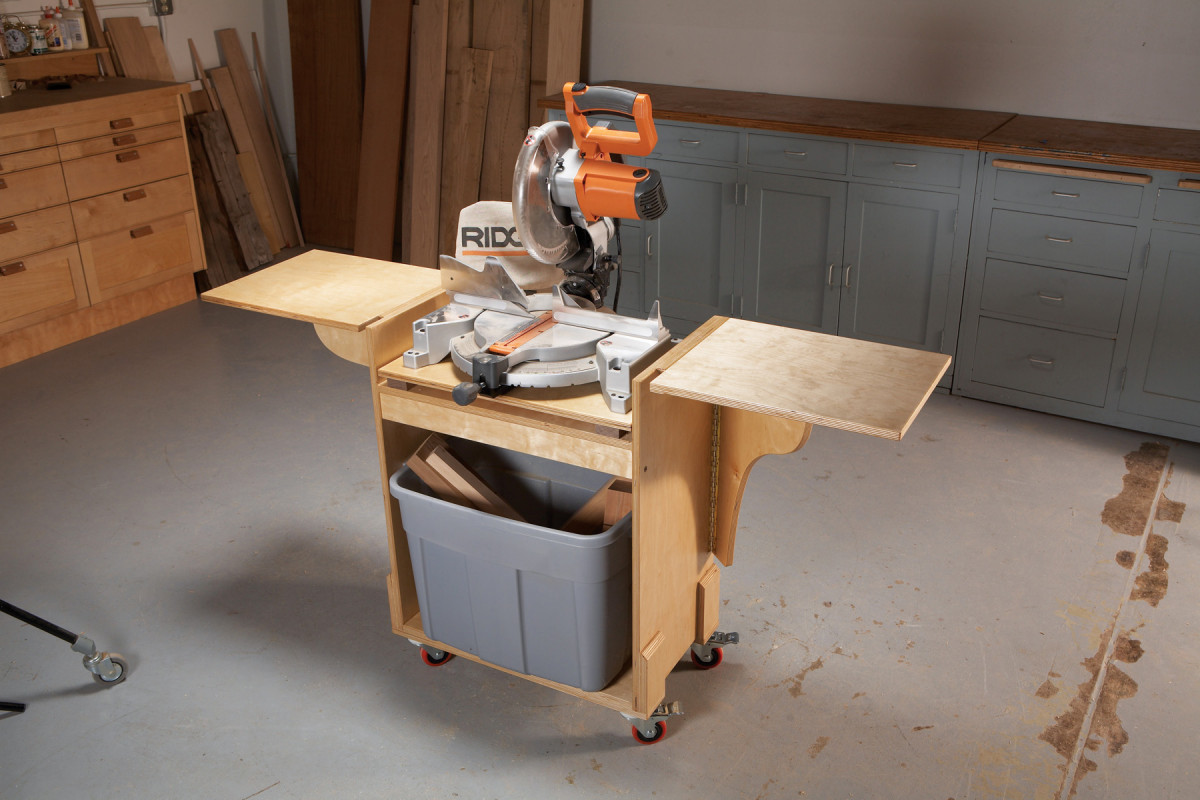
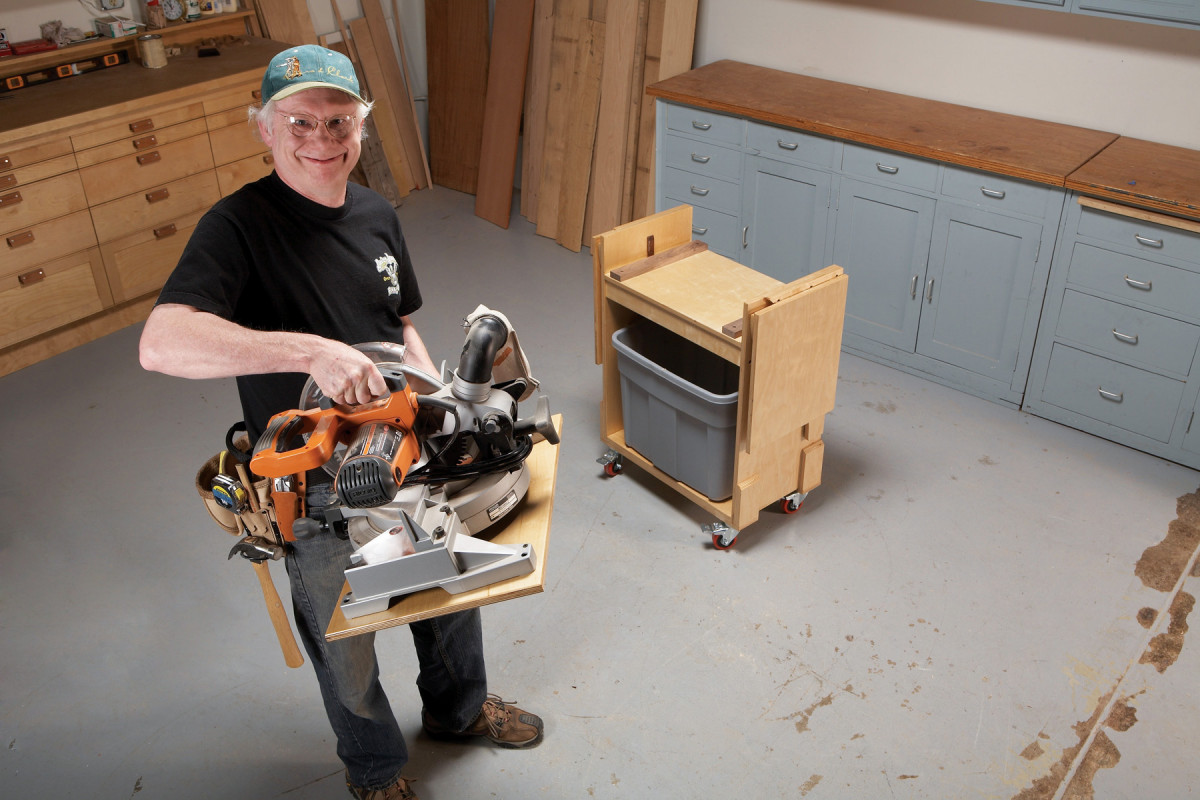
Space is at a premium in my small shop. Everything goes on wheels and is as compact as possible–including this miter saw stand. I made the stand quite strong and stiff, so it can withstand being pushed and pulled around my cracked and uneven concrete floor.
I put a bin for cutoffs underneath the saw, but you could use this space for shelves or drawers, instead. The stand could also be easily modified to accommodate a mortising machine or other benchtop tool simply by changing the thickness of two spacers under the saw’s platform. Or, you could make it into a shop cart, with a drawer above and doors below.
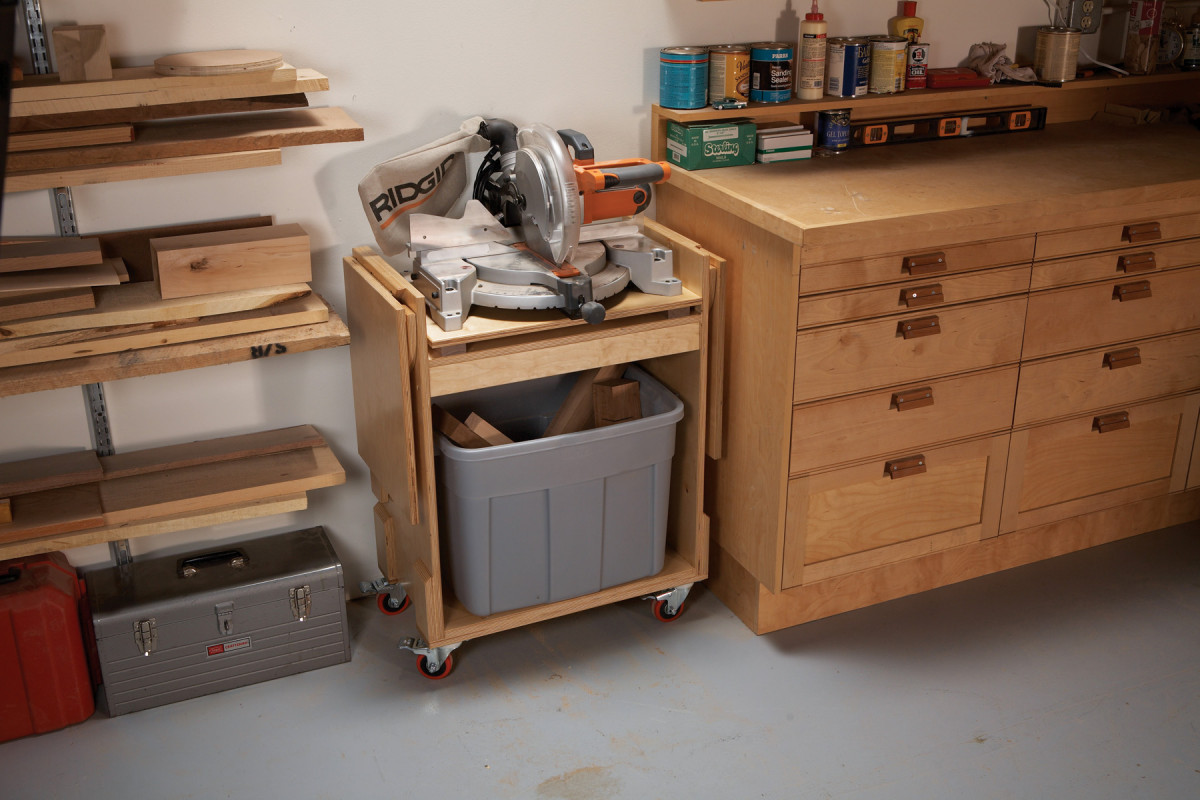
Conveniently tucks away to save valuable floor space.
I built the stand from one sheet of 3/4″ Baltic birch plywood, which is composed of 13 layers of birch veneer. Baltic birch is great for shop projects because its edges are ready to go right off the saw. That’s a big advantage over other types of plywood, whose edges should be protected with banding. Without that banding, the outer veneers of most plywood will splinter and fray with use.
Baltic birch comes in 5×5 sheets. I designed the stand to make the maximum use of one sheet. If you can’t get Baltic birch, or if you want to cut the cost of this project, you can certainly build the stand from a different type of plywood. There’s plenty of material for all the parts in a standard 4×8 sheet.
Most 10″ or smaller miter saws should fit this stand, but you would probably have to build a wider and deeper version to accommodate a 12″ saw or a sliding miter saw. In any case, check your saw’s dimensions before you build the stand to make sure the saw will fit.
Compact Miter Saw Stand Cut List
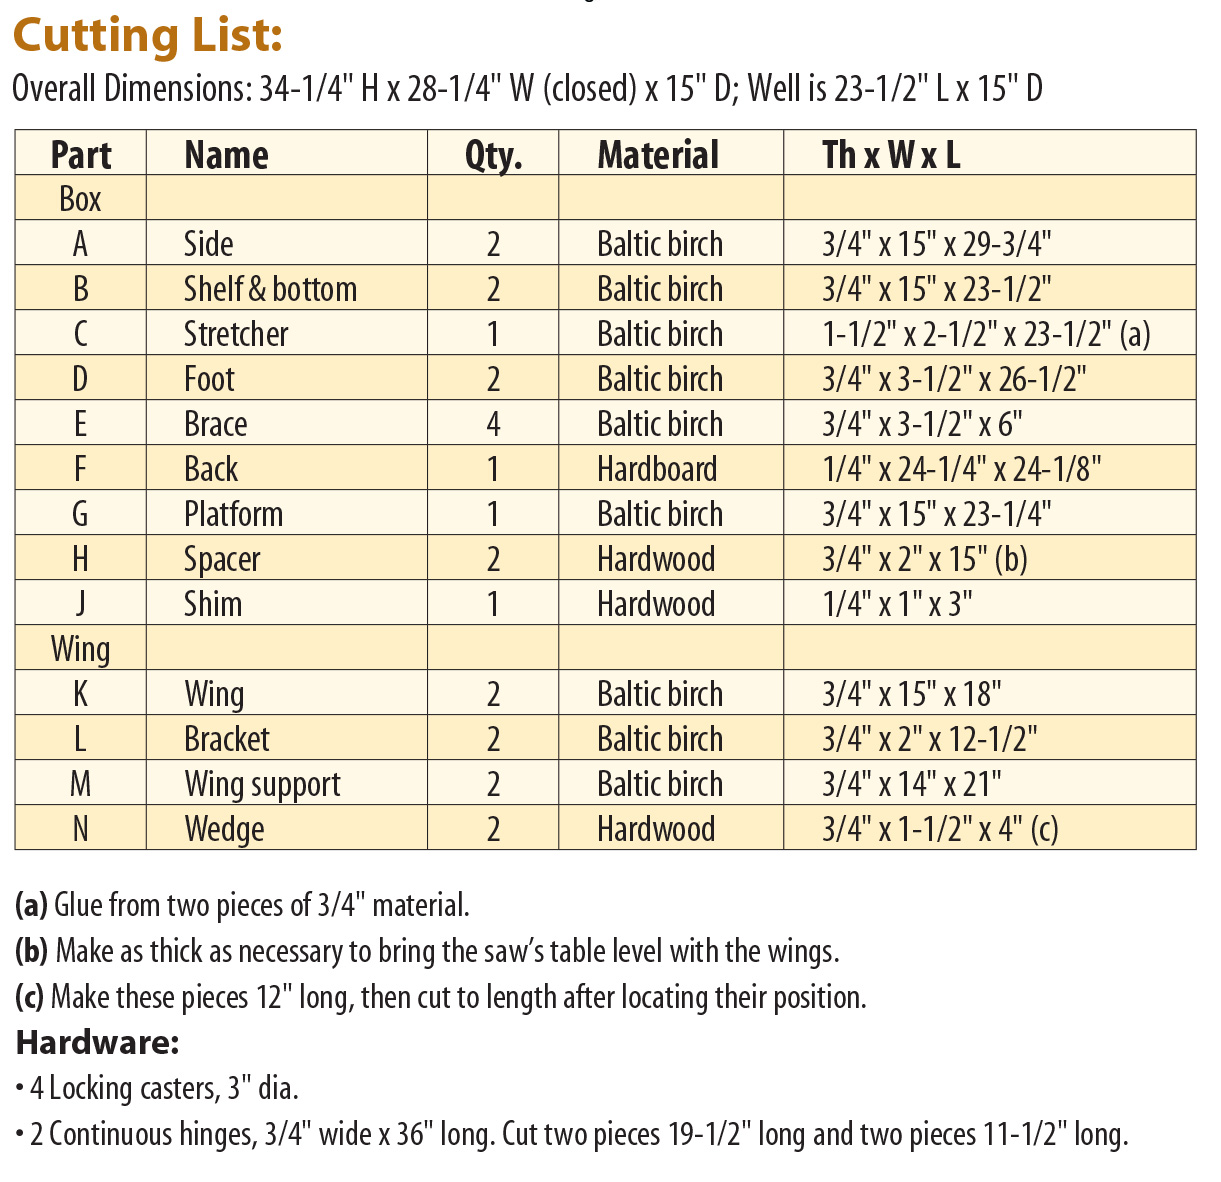
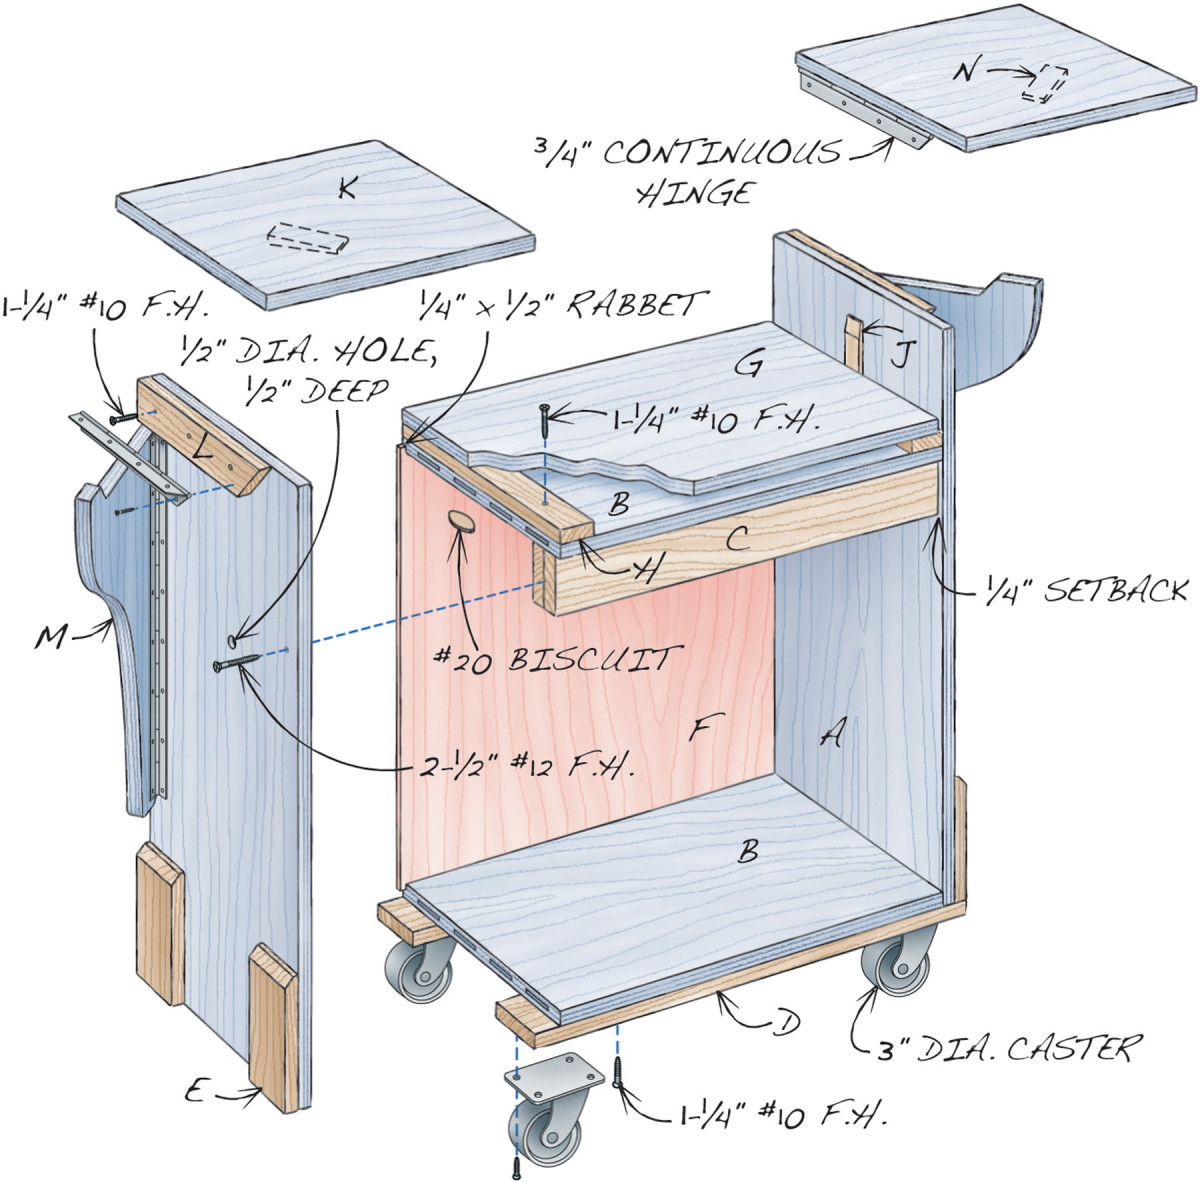
Fig. A) Exploded View
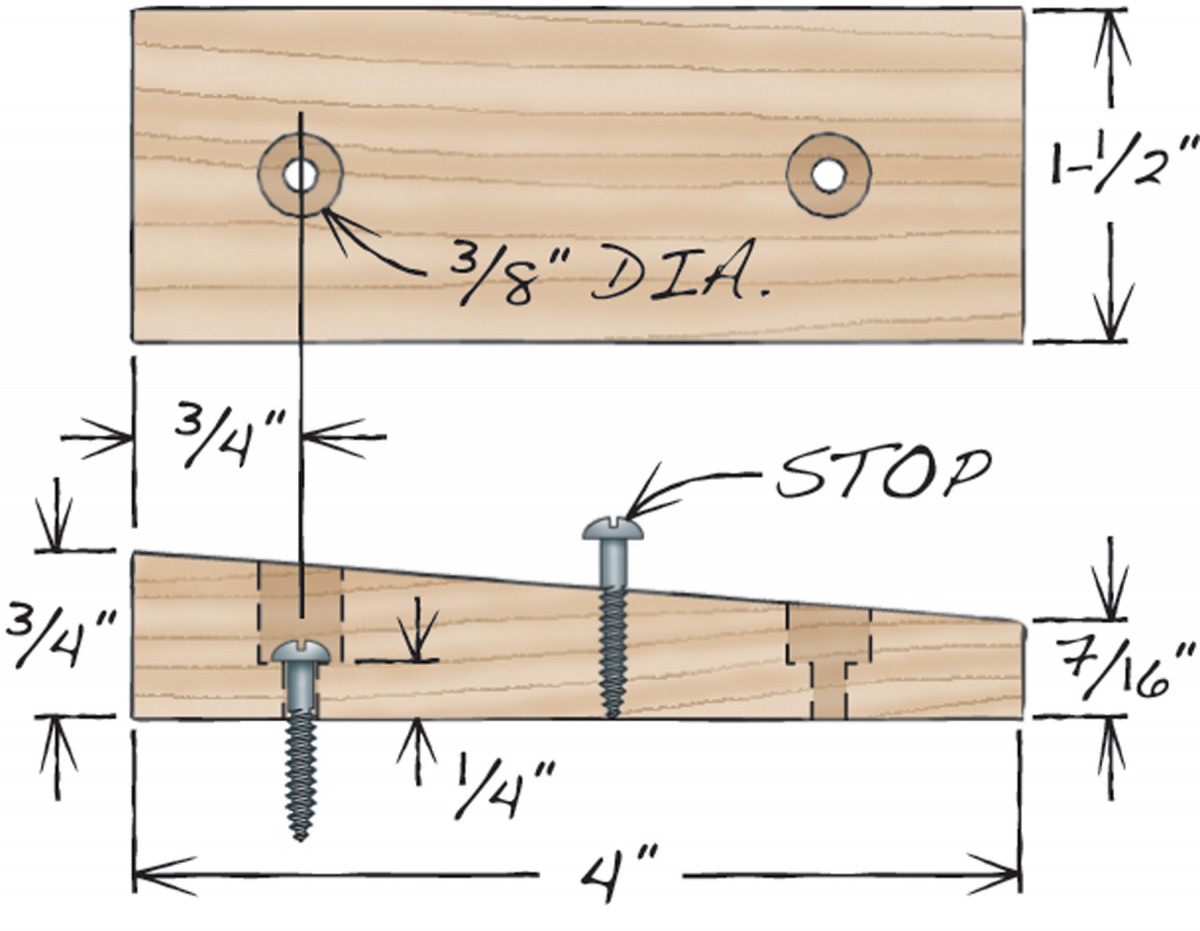
Fig. B) Detail of Wedge
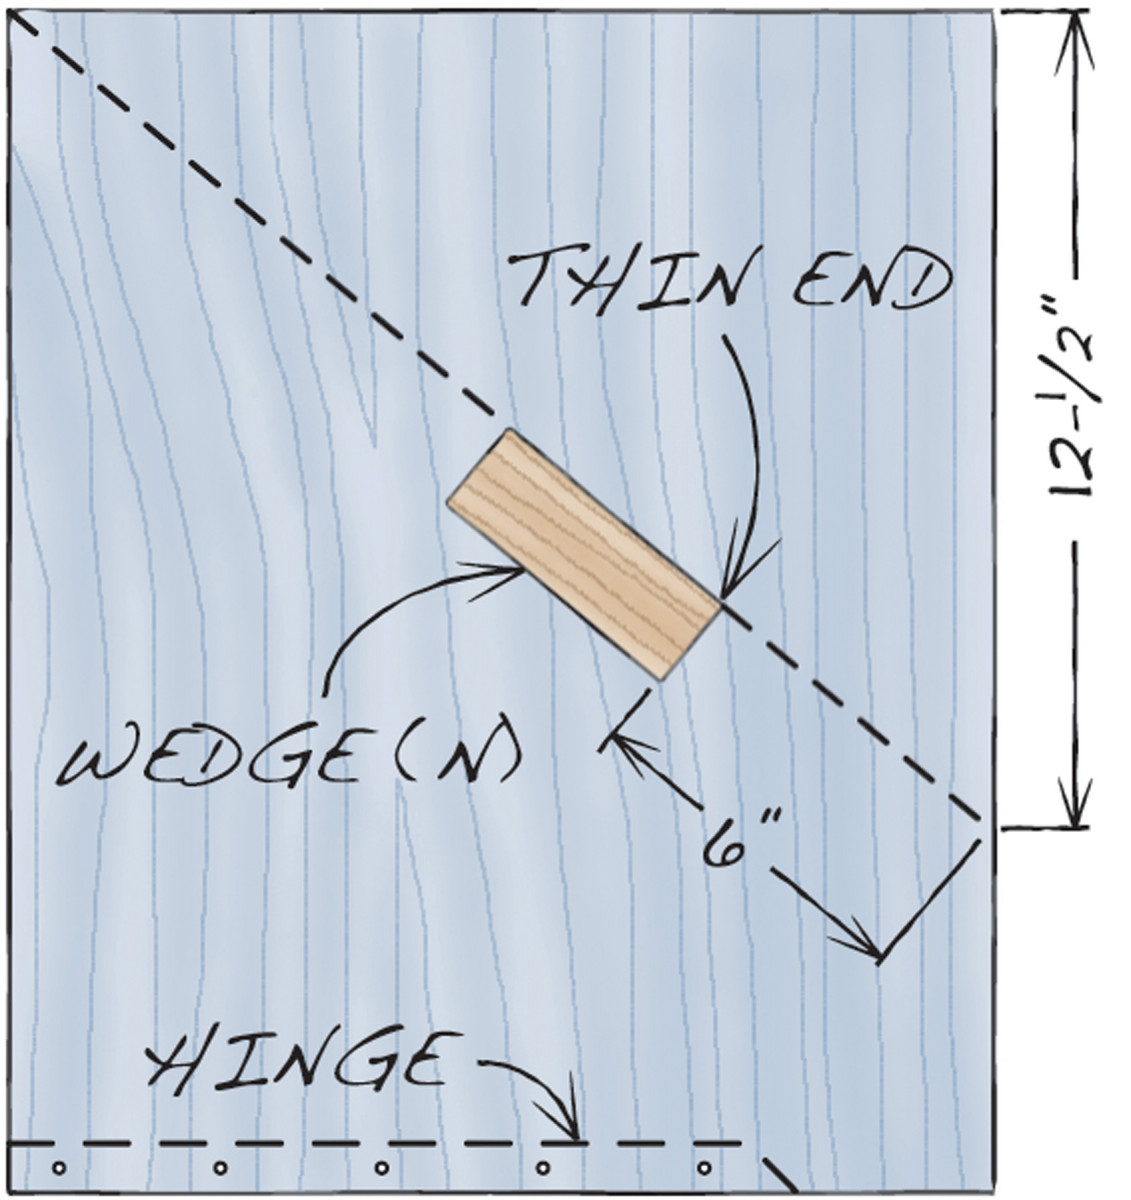
Fig. C) Location of Wedge
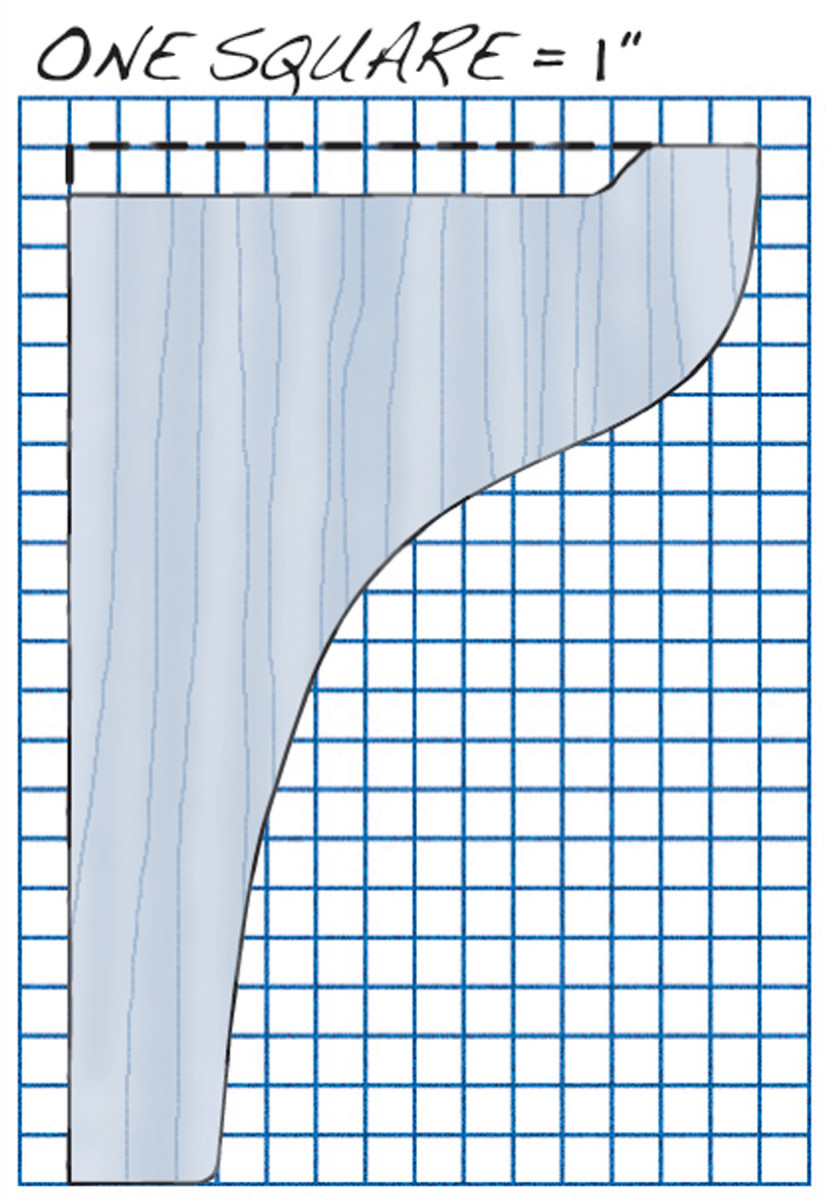
Fig. D) Wing Support Pattern
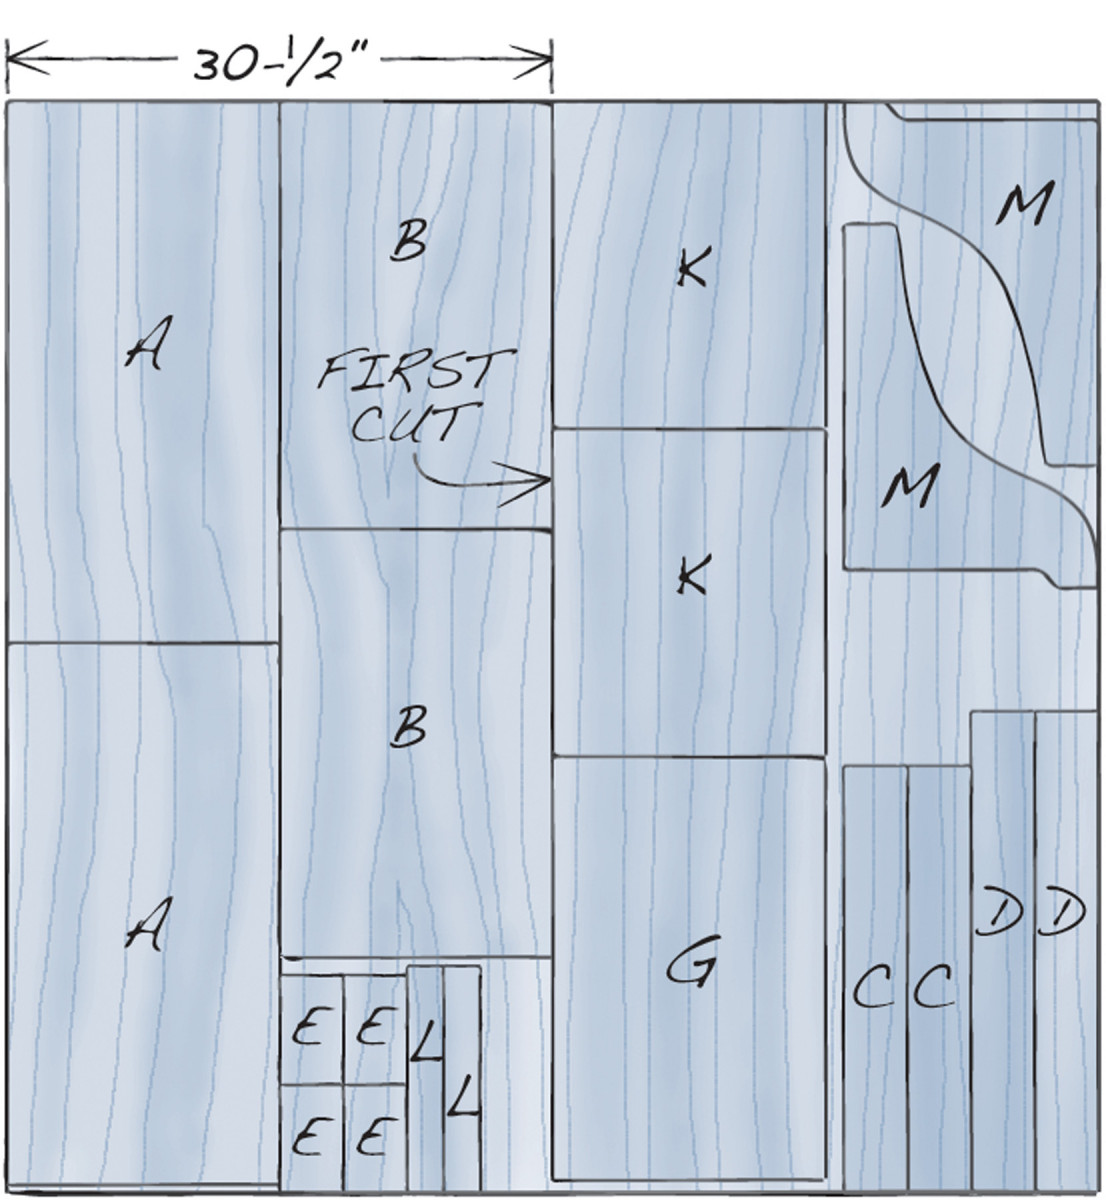
Cutting Diagram for 5’ x 5’ Baltic Birch
Hardware:
• 4 Locking casters, 3″ dia.
• 2 Continuous hinges, 3/4″ wide x 36″ long. Cut two pieces 19-1/2″ long and two pieces 11-1/2″ long.
Cut the parts
1. Rip the sheet approximately in half, at 30-1/2″ (see Cutting Diagram, page 52). Rip the 30-1/2″ section into two 15″ wide pieces. Rip the other section into one 15″ piece and one 14″ piece. From the three 15″ pieces, cut the sides (A), shelf and bottom (B), platform (G) and wings (K).
2. Crosscut the 14″ piece to make the two wing supports (M). From the remainder, cut two pieces to make the stretcher (C). Cut these pieces 1/4″ extra wide and 1″ extra long. Glue them together to make a blank that’s 1-1/2″ thick. Once the glue is dry, rip this piece to final width, but leave it extra long.
Build the case
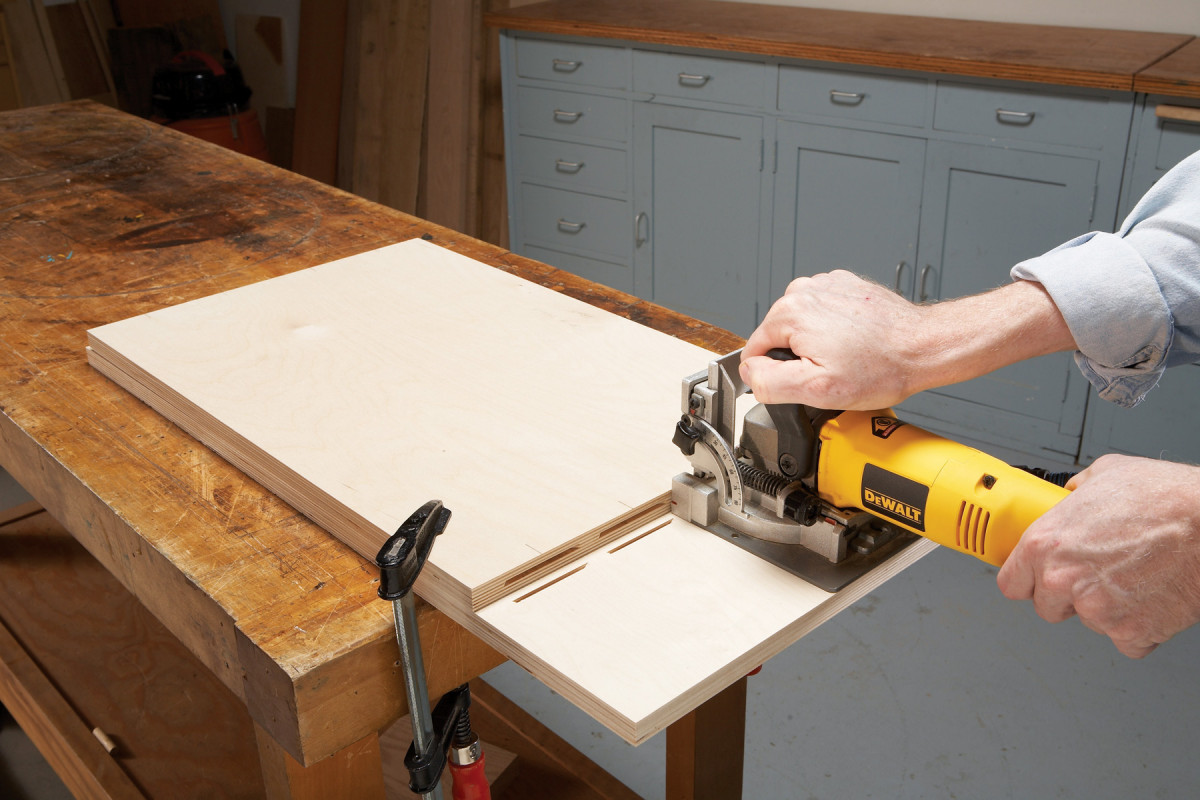
1. Cut biscuit slots to join the case together. This stand is made from Baltic birch plywood, which doesn’t require edging.
3. Cut biscuit slots to join the sides, shelf and bottom (Photo 1). Glue the parts together (Photo 2).
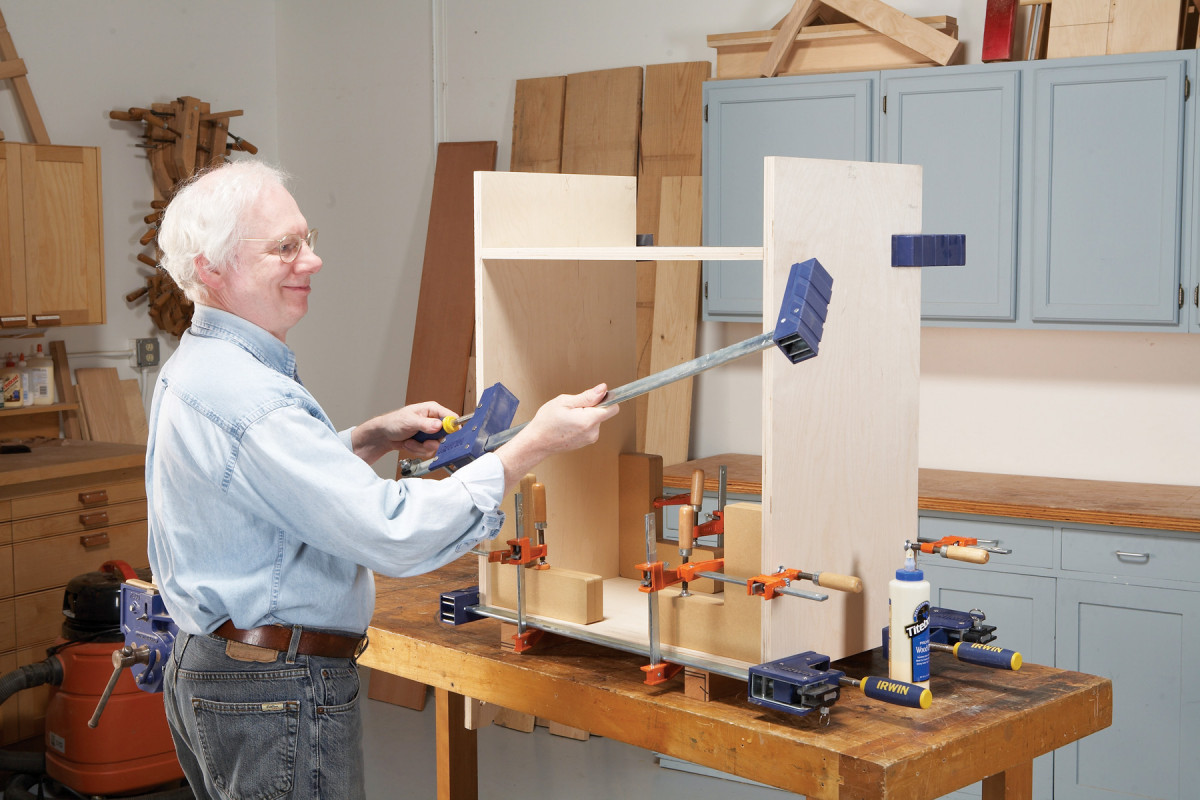
2. Glue the case, using large L-shaped blocks to ensure that it’s square.
4. Cut the stretcher to exactly fit the space between the two sides. Glue the stretcher to the bottom of the shelf, set back 1/4″ (Fig. A). From the outside of the case, run screws into the stretcher.
5. Cut the feet (D) and braces (E). Glue the braces to the case first, using spring clamps to make alignment easier, then add the braces. Add screws under the feet for additional strength. The feet and braces stiffen the front of the case and provide a wider stance for the casters.
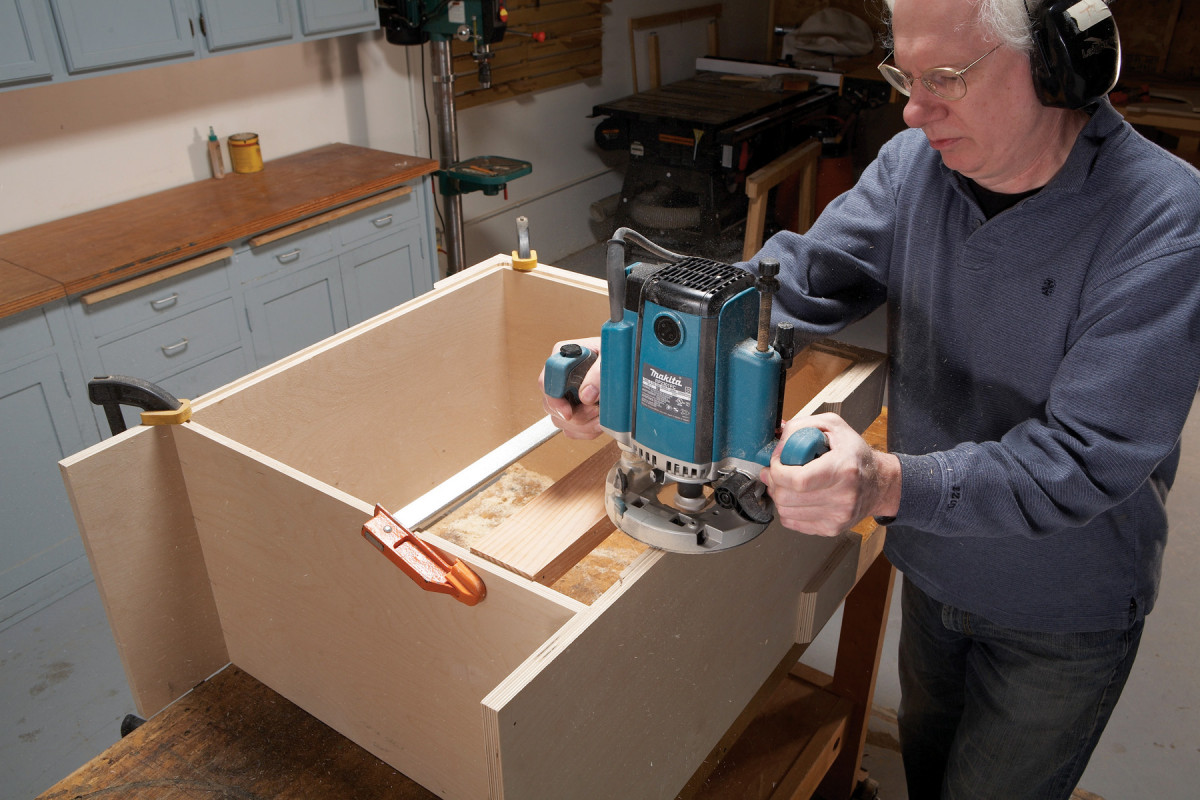
3. Rout a rabbet for the back. Support the router by clamping a board inside the case, level with the case’s upper edges.
6. Rout a rabbet for the back (F) using a rabbeting bit and bearing (Photo 3). Square the corners with a chisel, or leave them round and shape the back to fit. Cut the back to size and screw it to the case, using 5 screws per side.
Add the wings
7. Cut the brackets (L), miter their ends, and glue and screw them to the sides of the case. Position the brackets about 1/16″ above the sides, then trim them flush with a router.
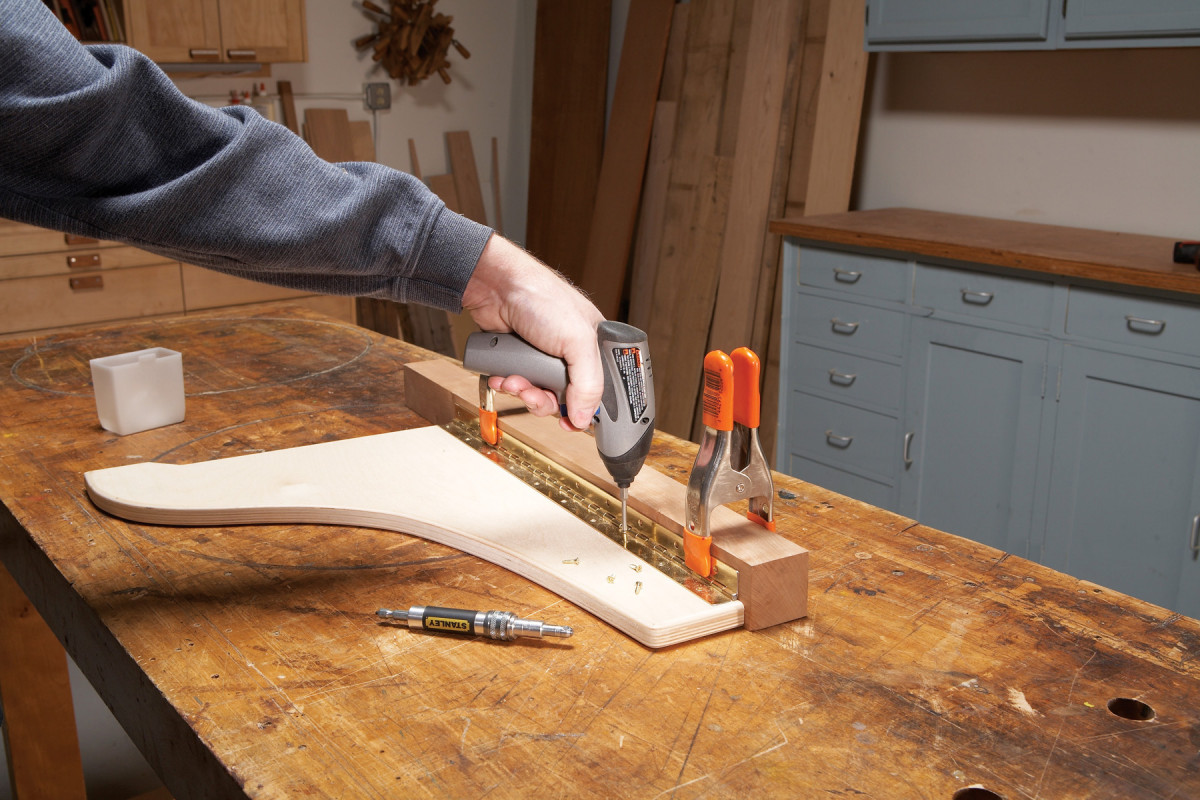
4. Fasten a continuous hinge to each wing support, using a long, square block for alignment. Drill pilot holes using a self-centering bit.
8. Cut two 36″ long continuous hinges with a hacksaw to make two hinges for the wing supports and two for the wings (see Cutting List). Miter the ends of the short pieces, to match the brackets.

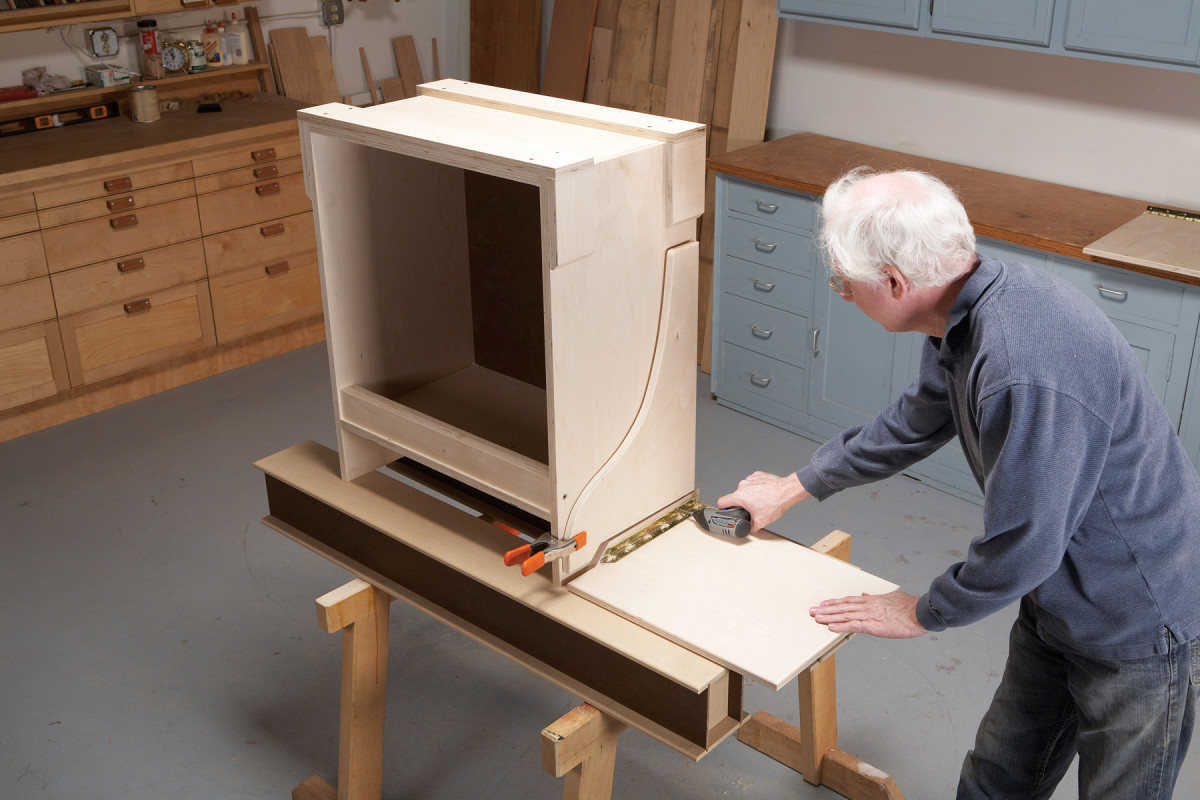
5. On a flat surface, place the case on its back. Position the wing support 2-1/4″ down from the top of the case, then fasten the support to the case.
9. Cut the wing supports using a jigsaw or bandsaw (Fig. D). Round over the top edge of each wing support with a rasp and sandpaper. Drill pilot holes and fasten the long hinges to the wing supports (Photo 4). Place the stand on its back and install the wing supports (Photo 5 and Fig. A).
6. Turn the case upside down and attach each wing.
10. Fasten the short hinges to the wings, then turn the stand upside down and install the wings (Photo 6).
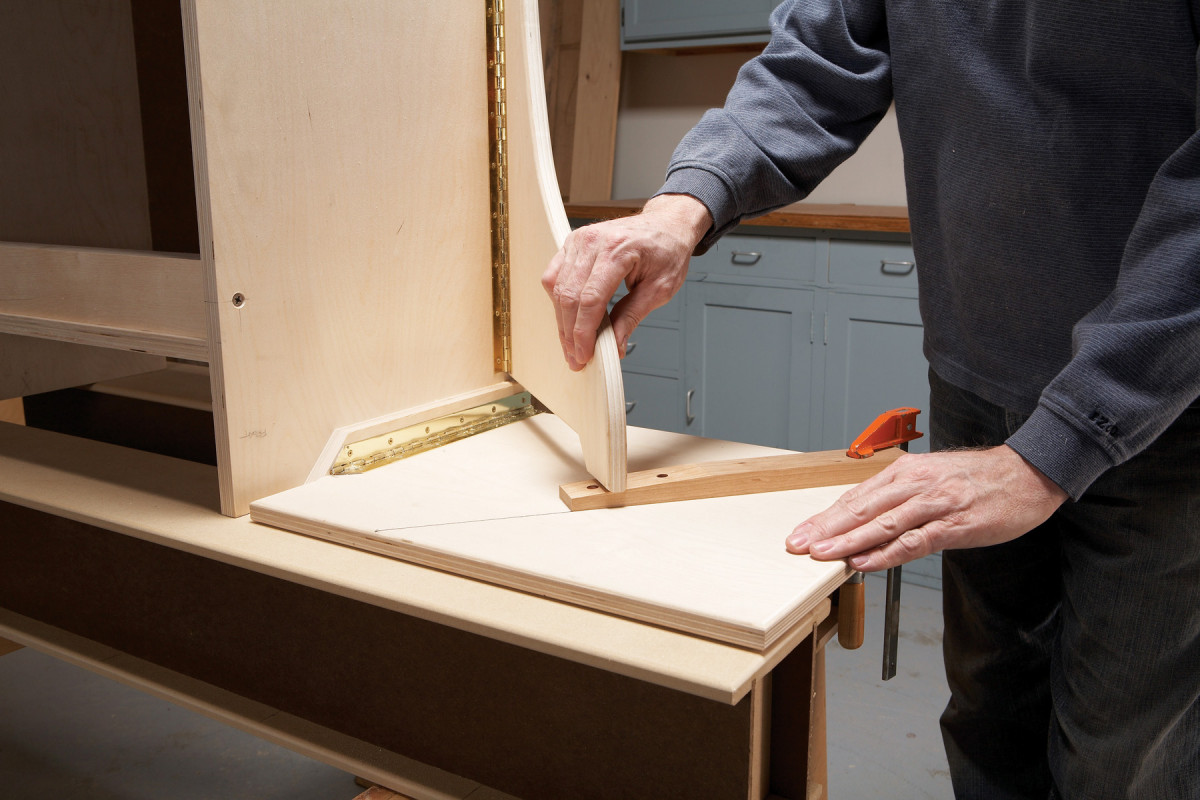
7. Open the wing support about 50°. Position a wedge-shaped block under the support and clamp it to the wing. Fasten the wedge to the wing.
11. Make the wedges (N), leaving them extra long for now. Counterbore and drill holes for the screws that will fasten the wedges to the wings, then cut and smooth a ramp on the end of each piece (Fig. B). Clamp each wedge blank in approximate position (Fig. C). Open each wing support and fine-tune the wedge’s position until both wings are level with each other (Photo 7). Each wing support should open about 50° and stop about halfway up the wedge’s ramp. Once you’re satisfied with each wedge’s position, screw the wedges to the wings. Add a screw to each wedge to serve as a stop for the wing support. Drill a hole in each side of the case for this screw to nest in.
Mount the saw
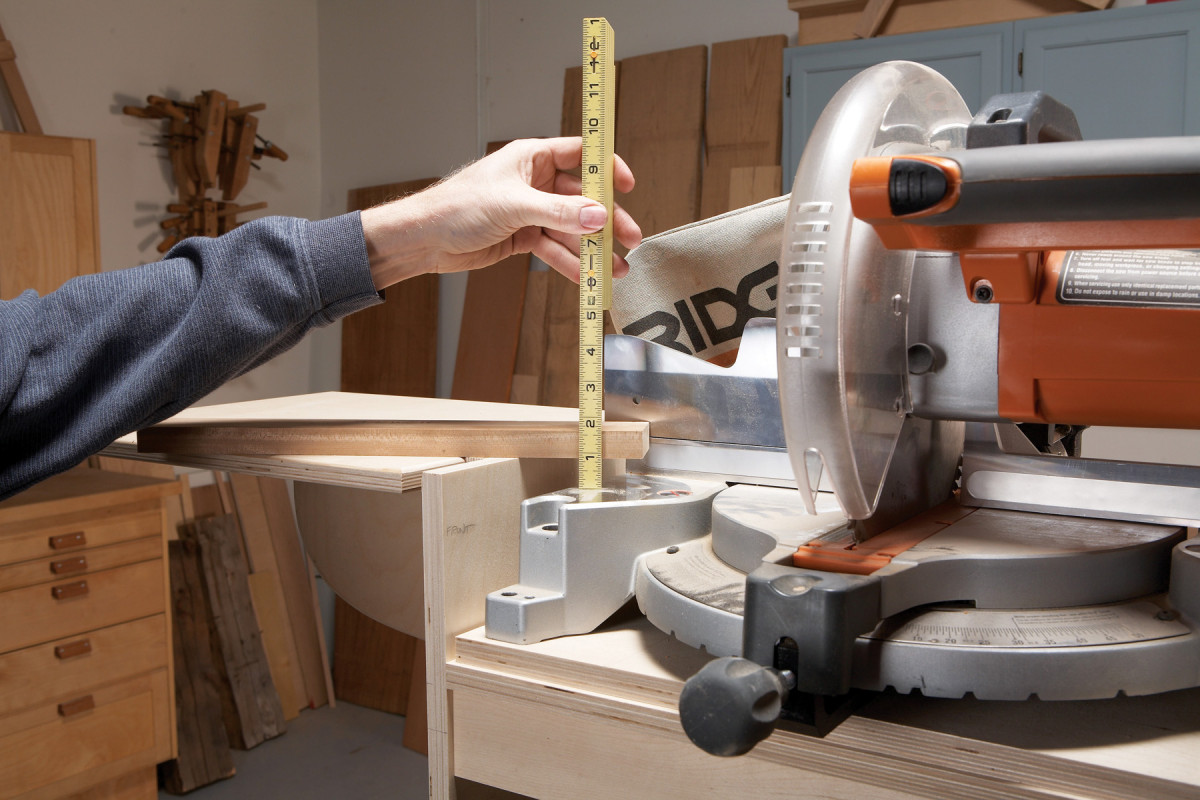
8. Flip the stand and place your saw on a platform. Measure the distance to the top of the stand. Make spacers equal to this thickness–they’ll go under the platform.
12. Place the platform on the stand’s shelf. Place your saw on the platform and measure the distance from the saw’s table to the top of the stand (Photo 8). This distance will be the thickness of the spacers (H) that go under the platform. Fasten the spacers to the shelf and replace the platform and saw. Check to make sure that the saw is level with the stand’s sides. Reduce the spacer’s thickness or add shims as necessary.
9. Fasten the saw to the platform. This arrangement allows you to easily move the saw outside the shop, to work on your house or around the yard.
13. Nail a tight-fitting shim or two (J) to the sides to prevent the platform from wiggling. Taper its upper end to make the platform easy to remove and drop in place (Photo 9).
14. Remove the wings, wing supports, hinges and back. Round over all edges of the case and other parts with a router and a 1/8″ roundover bit. Apply a polyurethane finish to all the parts, except the back. Re-attach the wings and wing supports, re-fasten the back, and add the casters.
Here are some supplies and tools we find essential in our everyday work around the shop. We may receive a commission from sales referred by our links; however, we have carefully selected these products for their usefulness and quality.