We may receive a commission when you use our affiliate links. However, this does not impact our recommendations.
![]()
Linker Logs Project
Have fun while learning to fabricate with plywood.
By Randy Johnson
Although linker logs are made with the aid of a computer—
once complete, they’re a great way to get kids (and
parents) off the computer for an afternoon of old-fashioned
fort building and pretend. The techniques shown here—
including pre-finishing the plywood, programming correct
joint tolerances, arranging parts, locating hold-downs and
placing tabs—can also be used for other plywood projects.
Th e inspiration for making these building planks comes
from a story titled “Plywood Play Planks” that appeared
in the December 1953 issue of Mechanix Illustrated magazine.
Th e original designers used 3/4″ plywood and a dado
blade to cut the joints. That technique can still be used,
but using a CNC provides more freedom when designing
the shape of the planks. Bill Young (a ShopBot guru from
Virginia) adapted the idea for the CNC by creating a wide
variety of planks, all with a standard notch spacing. The
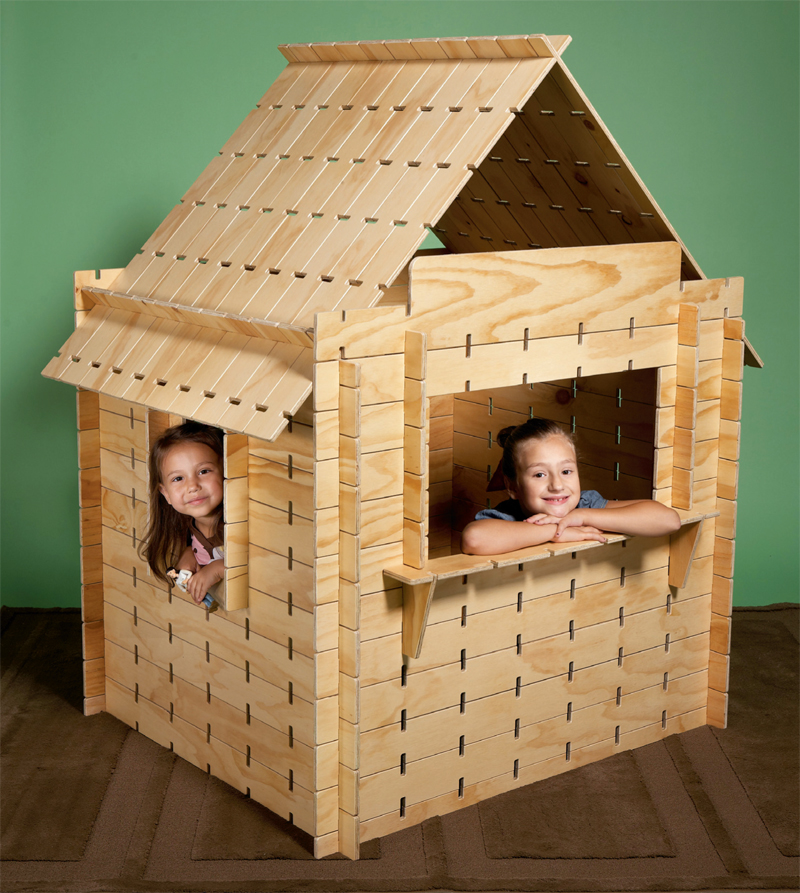
playhouse shown below is similar to the original Mechanix
Illustrated design—but I added the puppet theater window
and marquee board. Also check out the Blanket Hut below, with with its custom barrel vault roof.
Start by finishingA coat of shellac followed by a water-based topcoat provides |
Click any image to view a larger version.
|

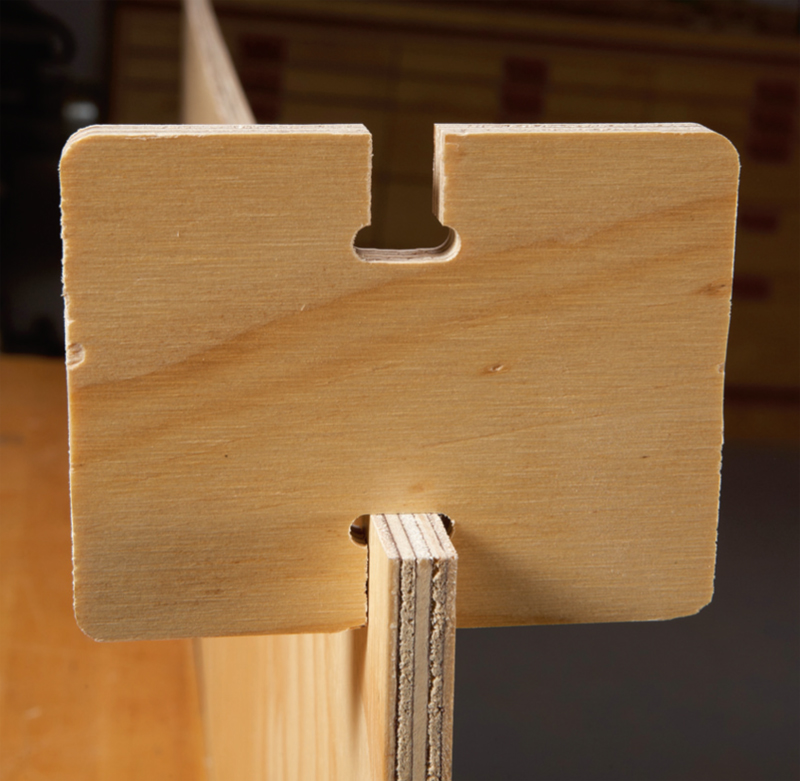
Measure the plywoodThe thickness of the plywood must be consistent so the cross-lap |
 |
Cut a single part to test the jointRout a test part. When you test the fit in the next step, the |
 |
Check the joint’s fitA mechanic’s feeler gauge works well to measure the gap |
 |
Nest parts and locate screwsMost CNC design programs include a “parts nesting” feature PROJECT PLANS ARE AVAILABLE AT THE BOTTOM OF THIS PAGE. |
 |
Add connecting tabsThe next step is to add tabs between the parts to keep them |
 |
Secure the plywood with screwsProgram the CNC to mark the location of each anchoring screw |
 |
Use a down spiral bitA down-cut spiral bit pushes the wood down while cutting, |
 |
Separate and roundover in one stepRemove the connecting tabs. A straight flush-trim bit |
 |
Combo Puppet Theater and Play HouseA combo puppet heater and play house that all kids seem Project plans, Vectric Aspire, .dxf, and SketchUp files for the two playhouses can be downloaded at the bottom of this page. Additional plank designs that included angles and curves |
 |
Alternate T-bone notchIf you want to keep the plywood edges square, use a |
 |
![]()
![]()
Download Vectric Aspire, DXF files, and SketchUp files here. These are all in one zipped folder.
See more Linker Log ideas at www.LinkerLogs.com
| This story originally appeared in American Woodworker October/November 2012, issue #162.
|
|

Here are some supplies and tools we find essential in our everyday work around the shop. We may receive a commission from sales referred by our links; however, we have carefully selected these products for their usefulness and quality.