We may receive a commission when you use our affiliate links. However, this does not impact our recommendations.
A Delaware Valley foot and a Pennsylvania ring-and-vase turning combine to develop a period-style design.
Years ago, when I first began my business as a period furniture maker, a close friend and mentor jumped on board to help kick off my backlog of work. He was a widely known collector of William & Mary furniture – his home was touted as the “mini-Winterthur” – and while he had no personal woodworking experience, he did know 17th- and 18th-century American furniture better than anyone I knew.
Best face forward. Once the foot blanks are sized and your pattern is drawn, transfer the profile onto two adjacent faces so the rear edges of the profiles meet at a corner.
He should have, considering he began his collection immediately following World War II. His initial project for me was to create a piece that is currently nonexistent in the antiques world. He wanted a Pennsylvania William & Mary wing chair.
With his passing earlier this year, I’ve reflected on that project with great fondness. We spent hours together researching period frames, turnings and foot variations. We felt strongly that wing chairs existed in Pennsylvania during this time period. These chairs were found in other regions of the Colonies; certainly they would have existed in Philadelphia. This city was the center of the Colonies for wealth, education and furniture making. Yet no chair of this type has ever been offered for sale on the antiques market.
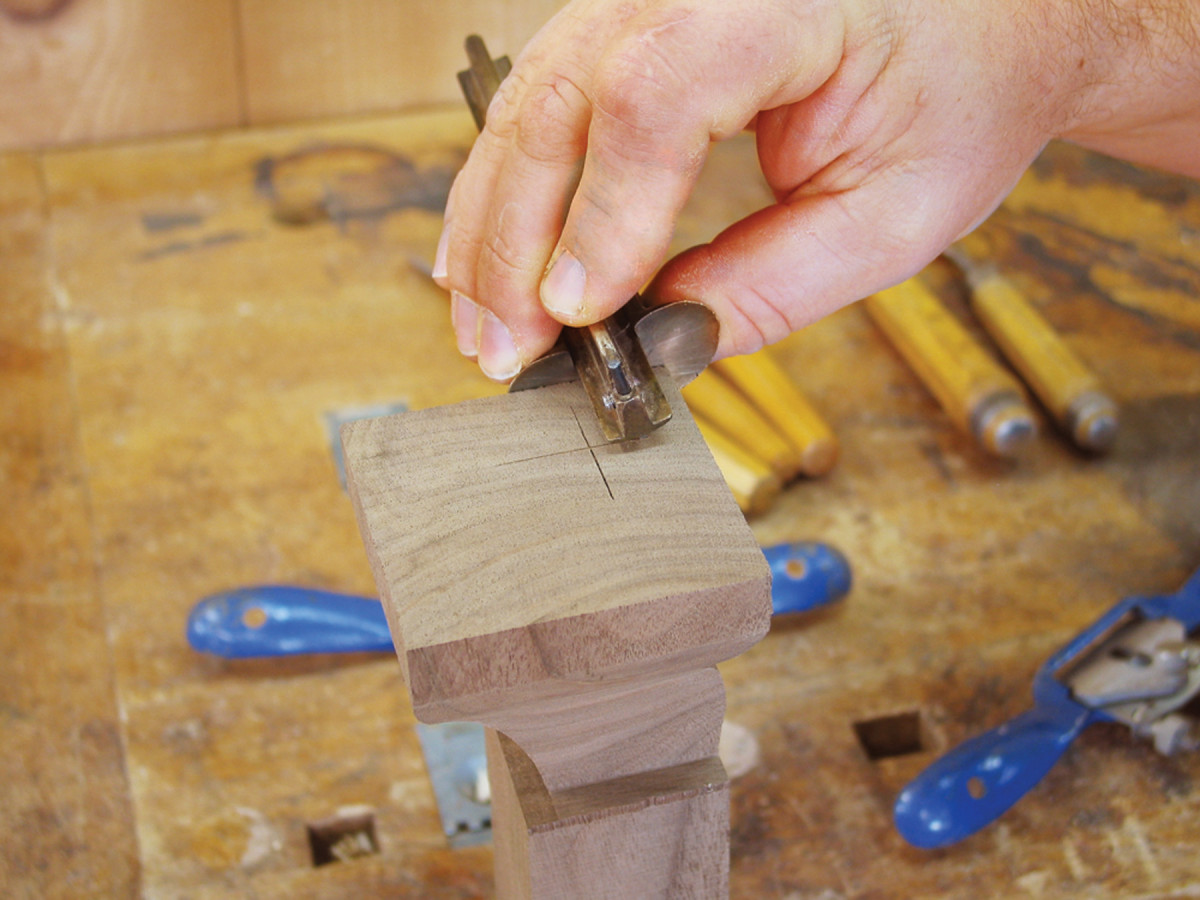
Set, mark and turn. Offsets in the design cause the turning center of the foot bottom to be shifted away from the foot front. A marking gauge set off the top center is the best method to locate this point.
With the help of some of the East Coast’s leading collectors, antique dealers and museum curators, we came up with a design that represents what could have been made in Philadelphia in the late 17th century. We settled on a distinctly Delaware Valley version of a Spanish foot with concave flutes that form the “toes” that, while bolder and more dramatic than their New England counterparts, are fairly simple to carve. And we’ve adapted this design to use for a footstool.
Stock Preparation

Transition details. The ring-and-ball design is very prominent in Pennsylvania furniture and adds a regional influence to the foot design.
Walnut was commonly used throughout the Colonies during the William & Mary period because it was plentiful and locally available. It looked and worked much like mahogany. Each blank starts out as a 23⁄4” square that is 14″ long. That sounds a bit short for a footstool or an easy chair, but you have to remember there’s upholstery on top of the completed base.
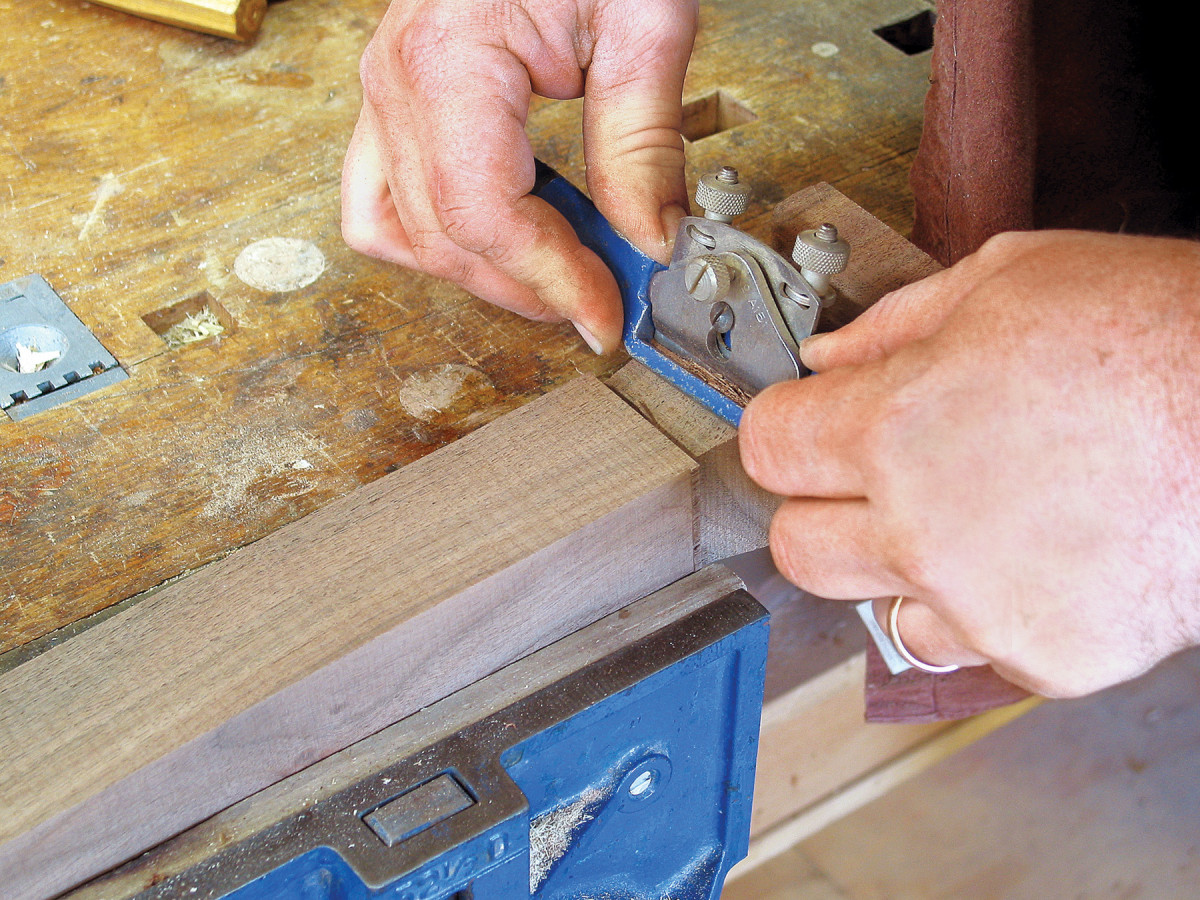
Straighten up. A spokeshave is quick to level and flatten any rough surface areas left from the band saw.
Next you need to create the pattern to which the legs will be sawn – they are cut at a band saw just as you would a cabriole leg. I use thin plywood for my pattern so I can repeat the layout any number of times. If you draw the design, it should be as though you are looking at the leg directly from the front. This results in a long rectangular section at the top with the profile of the foot at the bottom.
I begin by examining my leg blanks to determine which faces will be toward the outside of the stool (the show face) and which will receive the mortises for the rails. I try to match the quartersawn grain on two of the surfaces that will be facing me as I look at the stool from the front or the back. When you start with those, you naturally match the flat-sawn grain on the ends of the stool.

Round that toe. The cross-grain cutting action with a gouge leaves a clean toe area, but just rough in this curve. There’s more carving to do.
Once you have determined your inside and outside faces, lay the pattern on an inside surface with the back of the pattern flush with the inside corner of the blank. Trace the design onto the blank. Then flip the pattern to the other inside surface and keep the back of the leg pattern flush with the same inside corner. When you look at the inside surfaces of the blank, you’ll see your tracings with the leg back against the inside corner of the blank.
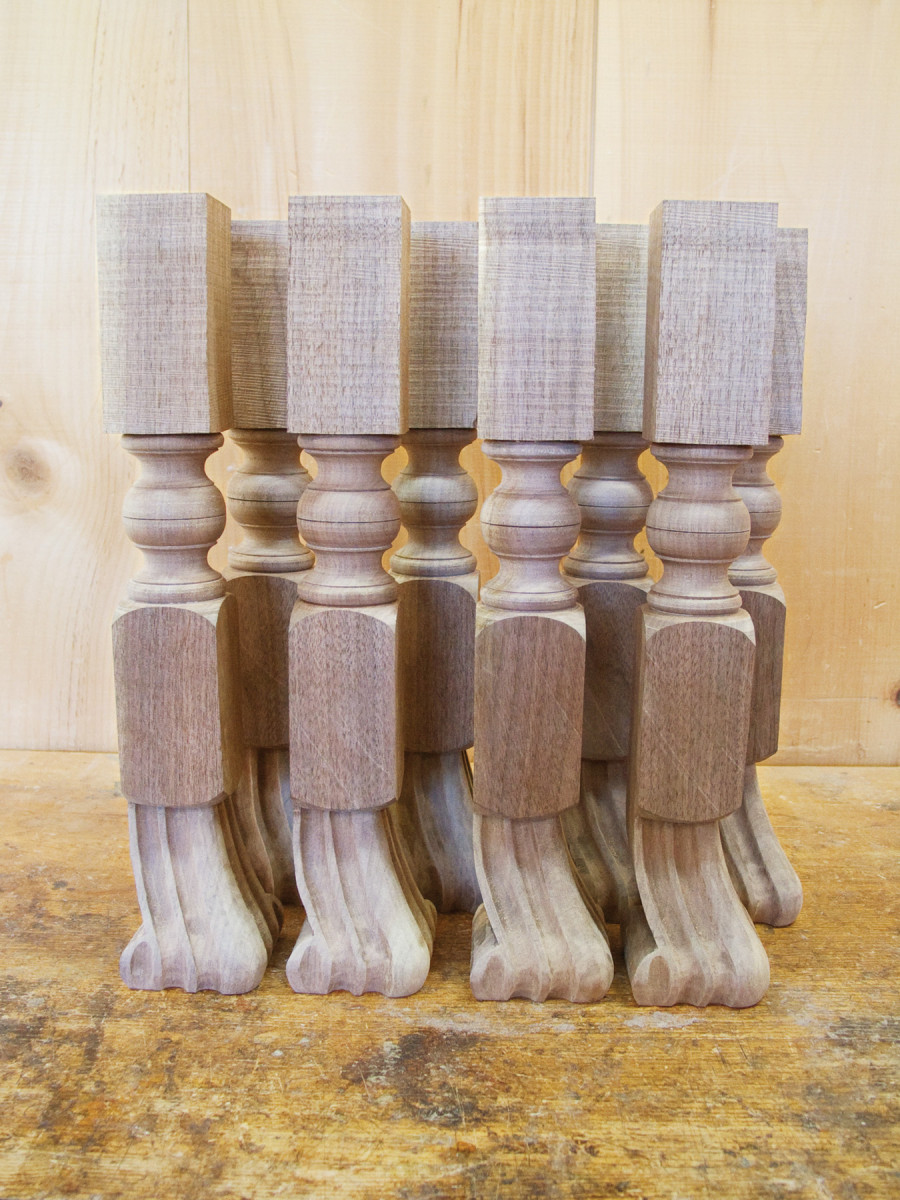
Turned Transition
Layout begins. Mark out a flat area that’s 1⁄8″ from the edge of the profile, then continue the line along the back edge of the foot matching the curve of the foot.
At a band saw, cut to the lines, but leave a bit of material holding the waste in place to form a bridge. Cut the opposite face allowing the stock to fall free, then complete the cuts on the first side, pulling the design from the blank. Repeat these steps for each leg.
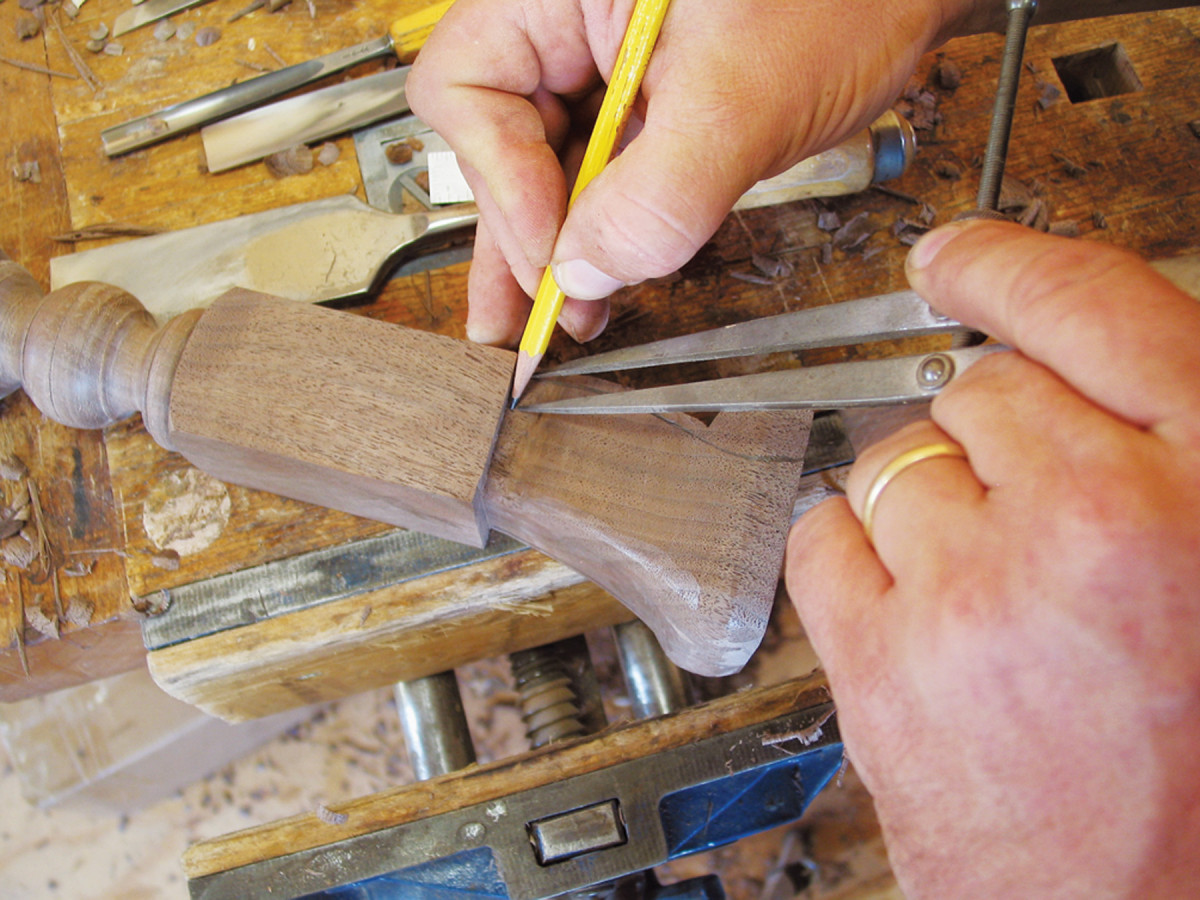
Divide and conquer. Use a pair of dividers to lay out the first fluted area; mark a flat area 1⁄8″ off the flute, then repeat. Extend the lines to the bottom of the foot, parallel to the outermost flat.
With the band saw work complete, locate and mark the center of each end of the stock. Find the center of the top of the leg by marking from corner to corner. Set a marking gauge off the inside surfaces to the center point, then work off the same inside surfaces using the marking gauge to scribe the “center” onto the bottom of the foot. The bottom center will not be centered on the foot, but it will be the same center as that of the square stock.
After extensive research, it was decided to apply a Pennsylvania ring-and-ball turning as the transition area between the foot and the balance of the leg. Chuck the piece in the lathe and turn the transition following the provided profile. Make sure to ease the top edge of the square portion of the block at the base of the ring-and-ball turned area.
Clamp the blank in your vise, then flatten the sawn surfaces of the square stock with a chisel or spokeshave.
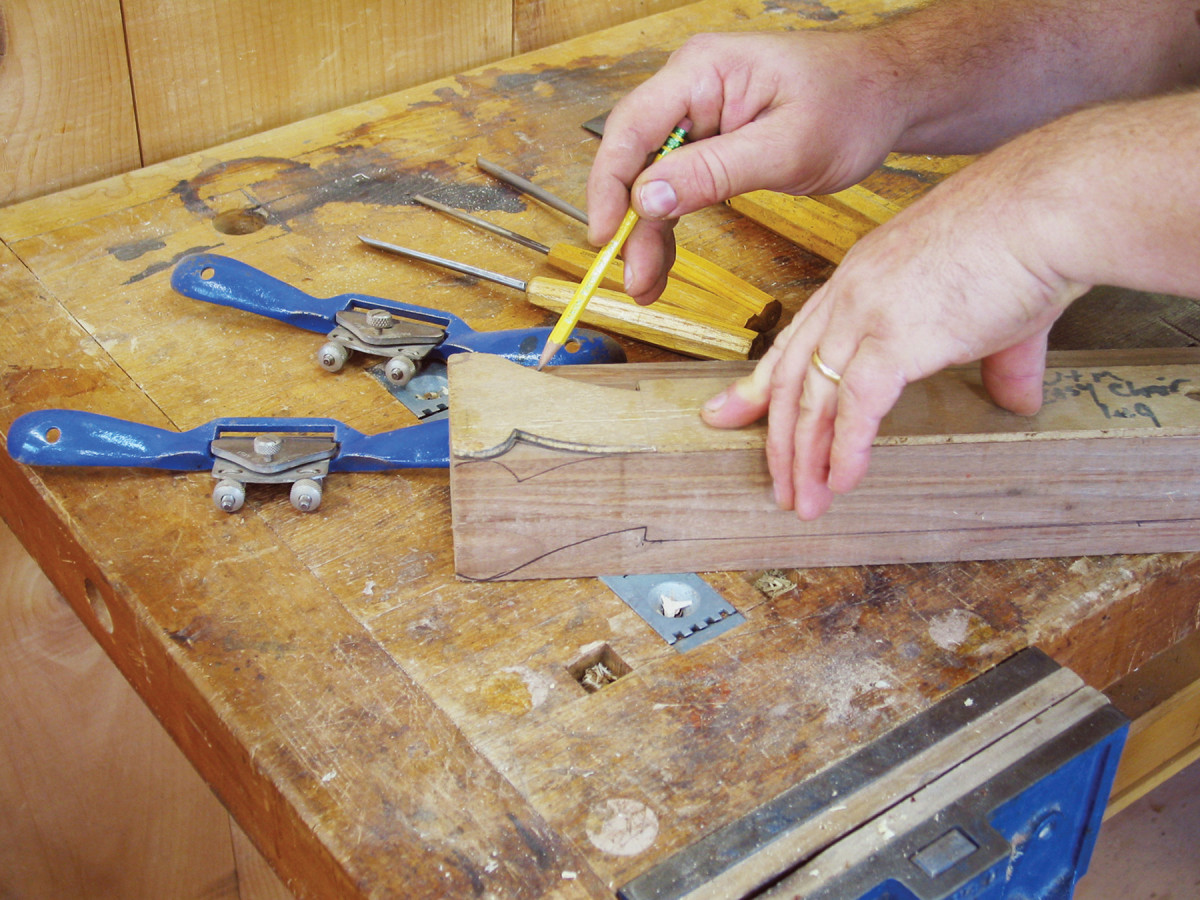
Carving the Details

Time to carve. Use a #7 gouge to carve a shallow trough between the flat areas. Pay particular attention to those flat areas – try to keep a consistent width.
The front toe is pretty heavily rounded off. A spokeshave or an inverted carving gouge works well for this. I use a #3 or #5 straight gouge that’s 25mm in width.
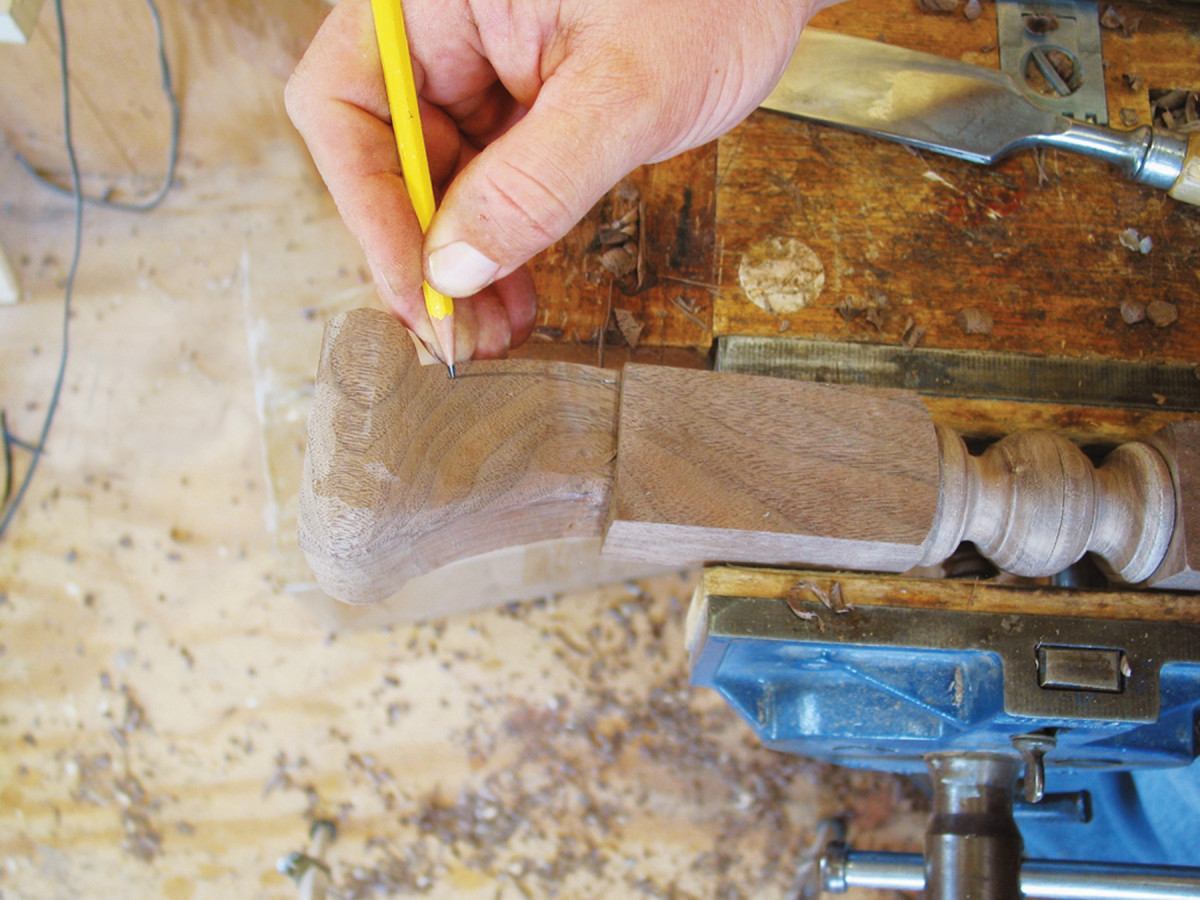
As with any carving, the better the layout, the better the end result. Start by marking off the first flat at 1⁄8” from the back edge of the leg just where the foot meets the square stock. Use your finger as a guide to extend that line down to the scroll of the foot. As you can see in the photo at the top, the line curves back slightly at the scroll. A little freehand sketching brings the line down to the bottom.

Three equals one. With one face completed (save for a bit of touch up), rotate the foot to flute the second face. Don’t forget to carve the partial flute on the toe.
With a divider set at approximately one-third the width of the foot measured just below the square stock, mark the edge of the first concave flute. Extend that line just as you did on the initial line. Lay out and mark a second 1⁄8” flat area, extending that line to the bottom of the foot as well. Use the dividers one last time to mark the area for a second flute. Before putting down your pencil, sketch a curve on the lower end of the block just above the foot that matches where the square stock meets the top edge of the turning.
Grab a #7 gouge about the size of the flutes you’ve drawn, I use either a 12mm or 14mm gouge depending on which best fits the layout, and begin to carve a shallow trough from the peak of the scroll up to the square stock. Carve from the opposite direction to finish the flute from the scroll to the bottom of the foot.
As I carve the flutes, I try to adjust any drawing errors made in the layout. The trick is to pay attention to the width of the flats between the flutes. As you carve, you may find it necessary to adjust your course to keep the flats a uniform size. Three more full-length flutes and you’ve got a Spanish-style foot.
At the curved line where the square block transitions into the foot, use a 2″-wide bench chisel to pare away waste until the curve is smooth. A little sanding, a few mortises and you’re ready to build a wing chair, a footstool or any project on which you’d like to use Spanish feet. These feet can add a bold flair to many different projects and they’re fun and easy to make. You may even do a little research of your own and try other regional variations.
Here are some supplies and tools we find essential in our everyday work around the shop. We may receive a commission from sales referred by our links; however, we have carefully selected these products for their usefulness and quality.