We may receive a commission when you use our affiliate links. However, this does not impact our recommendations.
Butterfly Inlay
Make a perfect fit with a shop-made template.
By Tom Caspar
Don’t you just love it when something that looks extremely difficult turns out to be oh-so easy? Making butterfly inlay with a plunge router is a good example. The technique is very easy to learn. All it takes is a set of router accessories and some 1/4-in. plywood or hardboard to make your own template.
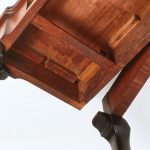
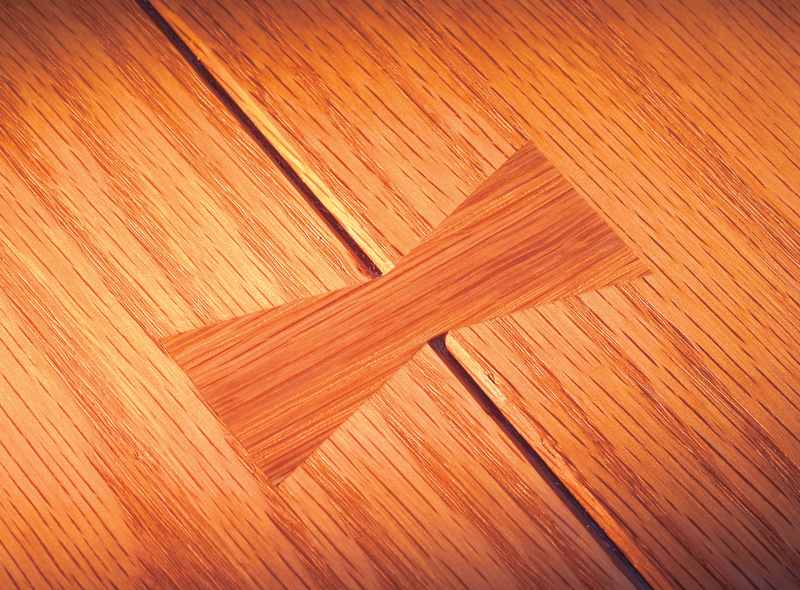
Butterflies appear to bind two pieces of wood together, but they’re really just for show and are only 1/8-in. thick. Few pieces of authentic Mission-style furniture were dressed up with butterflies, but in recent years they’ve become a common decorative theme in reproduction Mission furniture, adding a light touch to heavy-looking pieces.
Your router
The easiest way to make inlay is with a plunge router, but it’s possible to use a fixed-base router instead. The only problem with using a fixed-base router is that you’ll have to tip it into the cut by hand, which takes some practice. This technique may also put a good deal of stress on a fragile router bit.
Whatever kind of router you use, its base must accept a Porter-Cablestyle template guide. This is a stationary ring that screws onto the router base. If your router’s base doesn’t have a hole sized for a Porter-Cablestyle template guide, you can buy an adapter base.
The inlay kit
Inlay kits are available from several manufacturers, but they’re all very similar. You get a template guide, a 1/8-in.-thick collar that snaps onto the guide and a 1/8- in. solid-carbide bit. The bit is usually a spiral downcut that cuts exceptionally clean, chip-free edges.
The inlay set we used also includes a centering pin for installing the template guide in your router base. If the guide isn’t centered, the inlay may not fit well in the recess.Click any image to view a larger version.
This kit has everything you need to make both the inlay and the recess it fits into:

1/8″ Bit

Snap-on collar

Template guide

Guide-mounting ring
Make the template
All you need is one template to make both the inlay pieces and the recesses they fit into. Our shop-made template produces perfectly symmetrical, straight-sided butterflies, but you can modify the template for any shape or size butterfly you want. You can also buy a template that has seven different sizes of butterflies (see Source, below).
The material you make the template from should be 1/4-in. thick. If it’s thinner, the router’s template guide will bottom out on your workpiece. Most of the material you probably have on hand, such as plywood or hardboard, is actually less than 1/4-in. thick. You can use it, however, if you add a shim, as shown in Step 4, below.
Cutting List

1. Make two rectangles of 1/4-in. material (A) and cut them in half at a 15-degree angle. 2. Flip one half of each rectangle over and glue it to the other half. You don’t have to clamp them. Simply apply a thin bead of glue to one edge and rub the two pieces together. Pull the joint tight with a piece of masking tape and set them on a flat, non-stick surface, such as a piece of melamine or waxed paper.
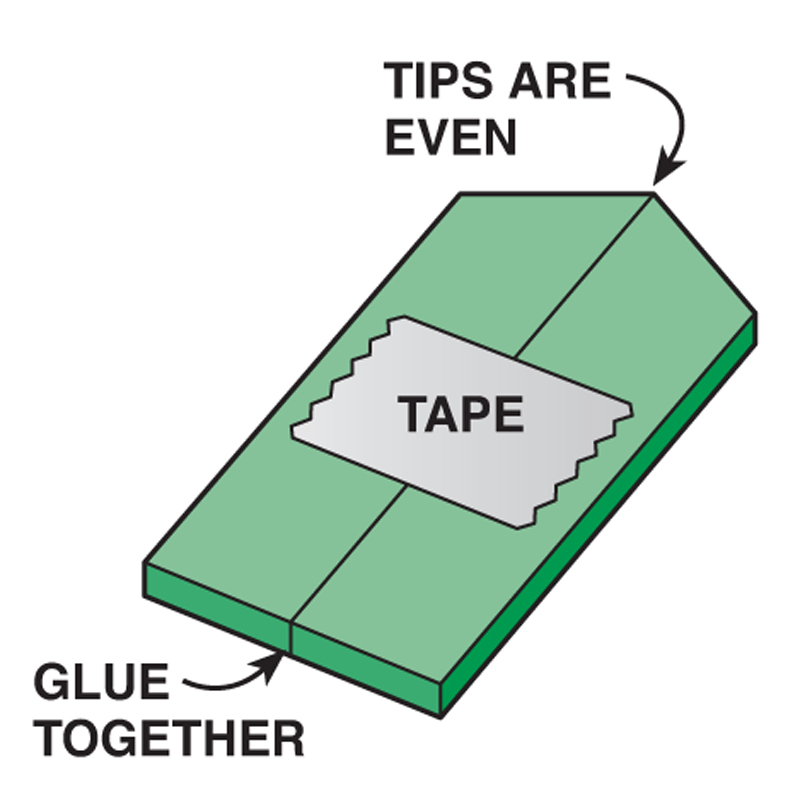 3. Cut two larger rectangles (B) from the same material and glue all four pieces together. Use the same rub-and-tape technique. Make sure all the top surfaces are even.
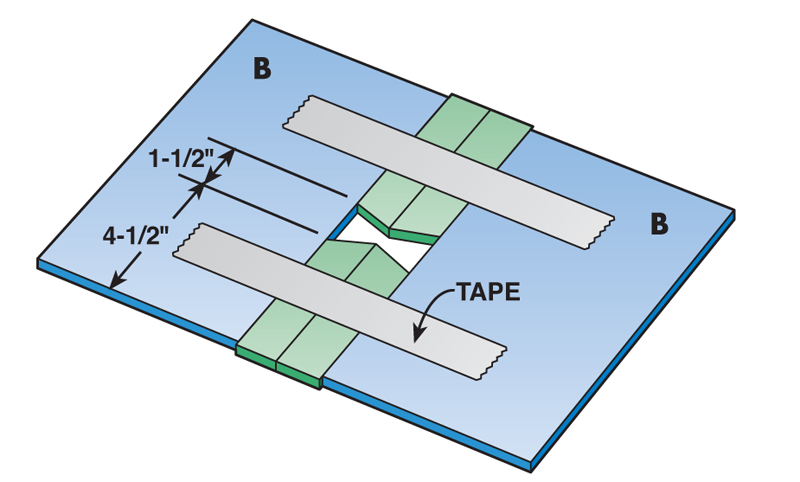 4. If your material is less than 1/4-in. thick, shim the template with cardboard, plastic laminate, mat board or whatever you have on hand. The total thickness of the template and shim should not exceed 5/16 in. Cut a hole in the shim that’s about 1/8-in. larger than the hole in the template. Glue or tape the shim to the template.
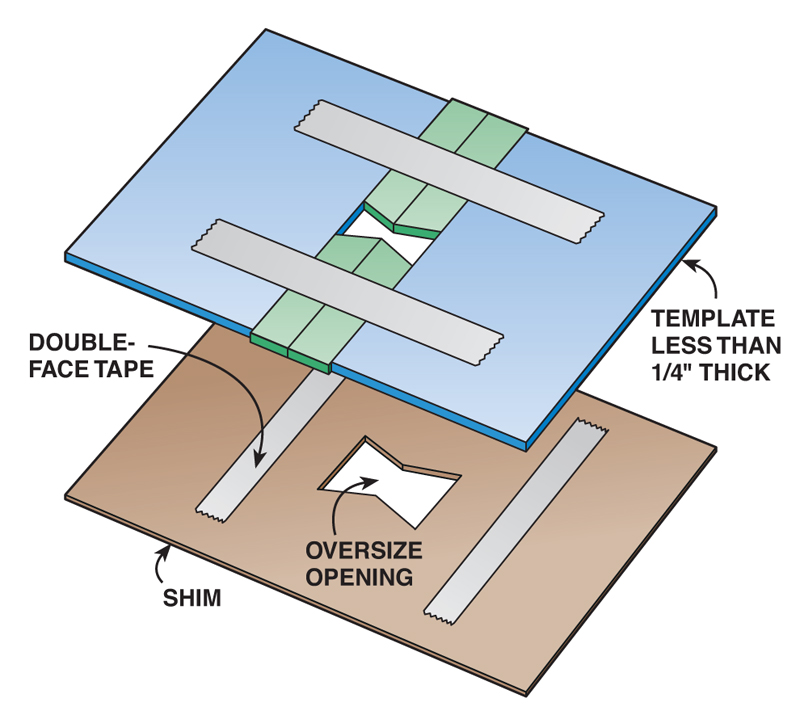 5. Draw centerlines on the template. (If you’re using dark hardboard, first apply a dab of white correction fluid to make these lines more visible.) Cutting the corners off the template makes it easier to clamp the template to a workpiece.
Rout the butterflies
Prepare some straight-grained blanks 3/4 in. x 1-1/4 in. x 16 in. It’s a good thing to have a little bit of contrast in color or grain pattern between the butterflies and the surrounding panels. Butterflies made of white oak go well with panels made of red oak, for example.
Attach the template guide to your router base and install the bit. Adjust the plunge depth of your router so it cuts 1/8-in. deeper than the template and shim.
Clamp the template to a blank. You can center it by eye. To cut butterflies near the ends of the blank, support one side of the template with another piece of 3/4-in. wood. Set the router on the template and butt the guide against one of its inside edges. Plunge the bit and follow the pattern clockwise.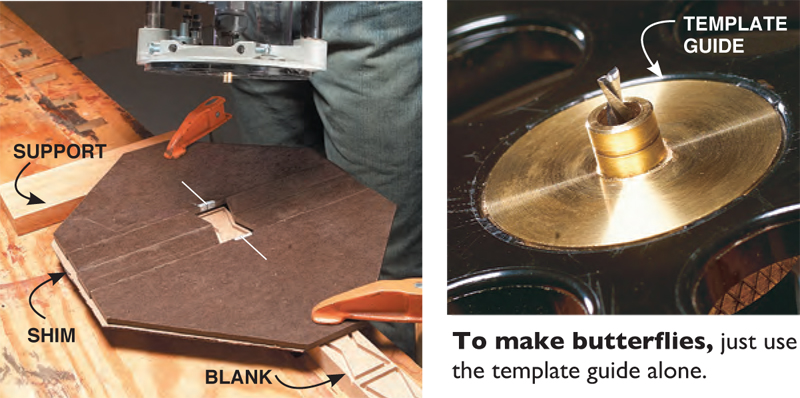
Cut the butterflies
Stand the butterfly blank on edge and glue it to a backer board about 6-in. wide. Run a piece of tape along the top of the butterfly blank. Then put a zero-clearance insert in your tablesaw, which is essential to make this cut safely. Rip a 1/8-in.-thick strip from the blank, remove the tape, and you’ve got six identical loose inlay pieces.
Rout the recess
Put the collar on the template guide. Adjust the plunge depth of your router to cut a recess 1/32 in. to 1/64 in. shallower than the thickness of the butterfly inlay.
Clamp the template to the workpiece. For vertical alignment, match the template’s center glue line with a centerline drawn on the workpiece. For horizontal alignment, match the centerlines on the template with layout lines on the workpiece.
Rout the recess. Take it easy, because the 1/8-in. bit is fragile.
Glue the butterflies
Cut the corners of the recess with a chisel or knife. They’ll be rounded after routing, but they must be cut to acute angles so the inlay fits.
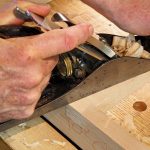
Spread a thin layer of glue in the recess, put in the inlay, scrape off any glue squeeze-out, and cover the inlay with a small piece of white paper. Clamp a thick board over the inlay and let the glue dry. The paper will absorb any further glue squeeze-out. After the glue dries, remove stuck pieces of paper by lightly wetting them. Level the inlay with a block plane or by scraping and sanding.
Source
(Note: Product availability and costs are subject to change since original publication date.)
Woodcraft, woodcraft.com, 800-225-1153, Router inlay set, #09I16; Replacement 1″ bit, #09I17; Router adapter baseplate, #144931 (fits routers by Sears, Ryobi, Makita, Bosch, Porter- Cable, Milwaukee, Hitachi, DeWalt, Fein, Elu and Freud); Butterfly inlay template, #146903.
This story originally appeared in American Woodworker March 2003, issue #99.

Here are some supplies and tools we find essential in our everyday work around the shop. We may receive a commission from sales referred by our links; however, we have carefully selected these products for their usefulness and quality.