


We may receive a commission when you use our affiliate links. However, this does not impact our recommendations.

Make Crown Molding on the Tablesaw
By Tim Johnson
Finding factory-made crown molding to match your cherry or walnut dream project isn’t so easy. Most lumberyards only stock crown molding in pine and oak. Ordering by mail is slow and expensive, especially if you only need a few feet of molding. And there’s a good chance the molding you receive won’t match the color or the grain of the wood in your project.
The solution to these problems is simple: Make your own crown molding. Then you’ll be able to say, “I built this project by myself,” without thinking, “Well, almost.”
I’ll show you how to make classic crown molding on a tablesaw, using a general-purpose blade to shape the profile. Finishing requires a scraper, a block plane, a length of PVC pipe, sandpaper and elbow grease.
You can create almost any molding profile using this method. The molding shown here crowns the “Grand Bookcase”.
A simple procedure
To make the molding, you simply draw its profile on the ends of a blank and then cut away the waste, using the drawn-on profile to set the fence and blade height for each cut. Ideally, the cuts barely score the profile line. Planing, scraping and sanding finish the job. Cuts made too deep would require additional sanding that slightly changes the profile.
Create curved shapes by passing the blank over the blade at an angle or by adjusting the blade’s height between adjacent passes. Create flat surfaces by tilting the blade. Some cuts require turning the molding end for end or feeding it on its edge.
My saw has a left-tilting blade. If your blade tilts to the right, work from the opposite side of the rip fence and reverse the orientation of the blanks.
Transfer the profile
Make a full-size pattern of the molding (Fig. A, below) by reducing it to 78 percent on a photocopier. (Adjust the percentage, if needed, to match the pattern to your blank’s length and width.)Use this pattern to draw the molding’s profile onto both ends of all of your molding blanks, including a couple extra blanks for test-cutting. Your blanks must all be the same width and thickness. Lengths can vary.
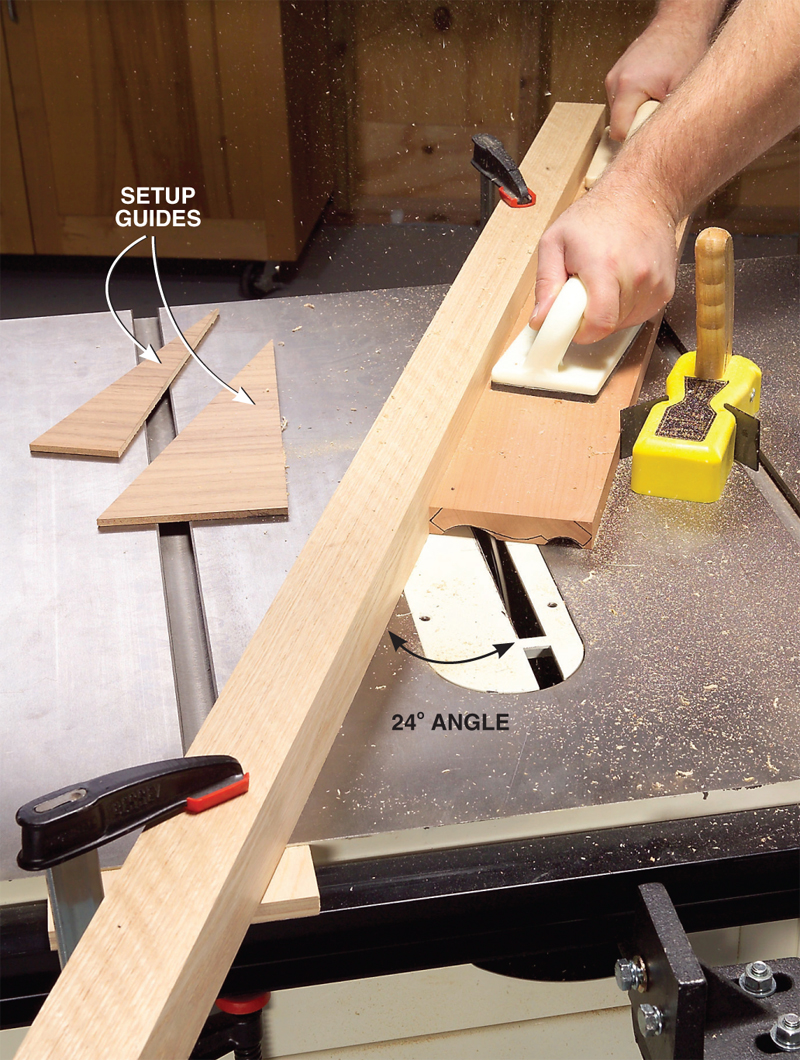
that match the concave curves. These cuts require a fence clamped at an angle and several passes, with the blade raising 1/16 in. each time. Cut the cove at the bottom of the molding with the blade set at 1/4 in. and the fence at 18 degrees. Cut the large cove at the top of the molding with the blade at 9/32 in. and the fence at 24 degrees. make it easy to position the fence. Raise the blade, lay the guide against the blade’s side and lay the fence against the guide. from the blade. Raise the blade to the correct height and then align two points: On the molding blank, the fence-side starting point of the cove’s profile, and on the throat plate, the point where the outside edge of the blade’s leading tooth enters. blank forward along the angled fence until it meets the blade. Adjust the fence—while keeping it at the correct angle—until the two points align. Clamp the fence to the saw table and lower the blade to 1/16 in. for the first pass. |
Click any image to view a larger version.
 |
2. Cut the fillet using your rip fence. The fillet angles 52 degrees,
|
 |
|
3. Clean the fillet with a card scraper, using the V-shaped groove as a |

 |
|
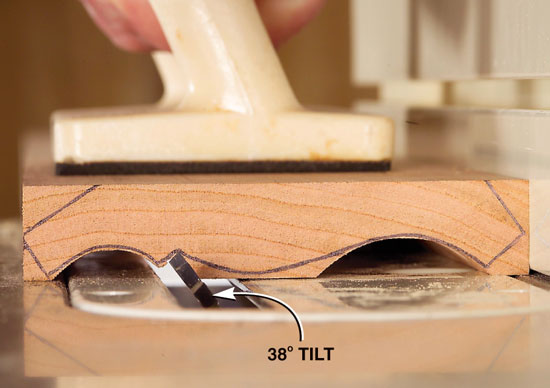
4. Make a series of stepped, angled cuts to refine the shape of the |

 |
|
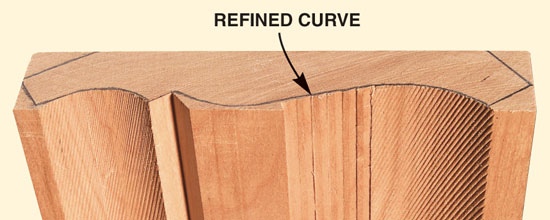
5. Turn the molding end for end and continue making angled cuts to form |

 |
|
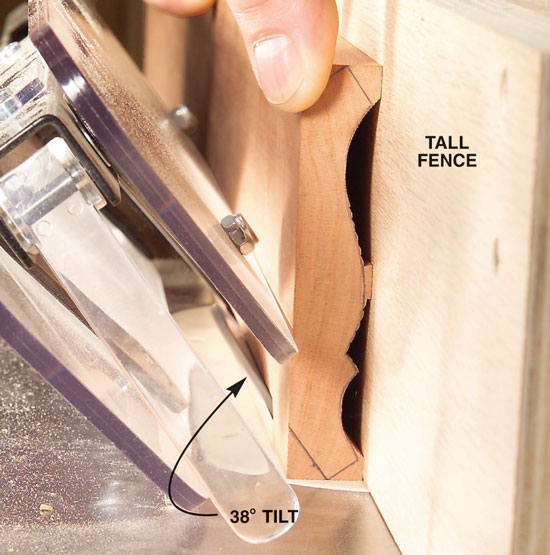
6. Install a tall fence to cut the spring angle bevel on the back of |
 |
|
7. Cut the molding’s top fillet at the same angle, so it matches the |

 |
|
8. Cut the top edge with the molding flat on the saw. Rotating the |

 |
|
9. Cut the bottom edge square by moving the fence to the other side of |

 |
|
10. Remove the support ridge and shape the top of the convex curve |

 |
|
11. Smooth the concave curves with coarse sandpaper wrapped around PVC |

 |
Fig. A: Crown Molding Profile

|
This story originally appeared in American Woodworker November 2005, issue #118.
|
|

Here are some supplies and tools we find essential in our everyday work around the shop. We may receive a commission from sales referred by our links; however, we have carefully selected these products for their usefulness and quality.


