We may receive a commission when you use our affiliate links. However, this does not impact our recommendations.
Our staff offers simple, strong and fast ways to make this important furniture component.
In woodworking magazines, books and plans there’s almost always an omission that’s big enough to drive a truck through: How to build the drawers for the project.
Usually the woodworking author (always well-intended, I can assure you) writes instructions such as: “Build the drawers using your method of choice.”
Well that’s all well and good unless you’re like a lot of woodworkers who have never actually chosen a method of drawer-making. To remedy this problem, we’ve come up with four good techniques for building drawers that our editors have refined after years of shop work.
Each method has its pros and cons. But based on your skill level and your particular set of tools, there is likely something here you can use for your woodworking. Before we discuss the differences of each method, here are the similarities.
Drawer Basics
When designing a drawer and coming up with a cutting list, here are some rules we follow.
In general, the drawer front should be 3⁄4” thick – unless it’s a drawer with a “false front.” False-front drawers are a simple drawer box with the front screwed to the box. It’s a handy way to fit drawer fronts in projects where the drawers run on metal slides.
The sides and back of the drawer should be 1⁄2” or 5⁄8” thick. Use thinner stock for smaller drawers and thicker stock for big ones.
The bottom is usually 1⁄4“-thick plywood for small drawers or 1⁄2“-thick material for bigger drawers, or drawers that will hold heavy objects.
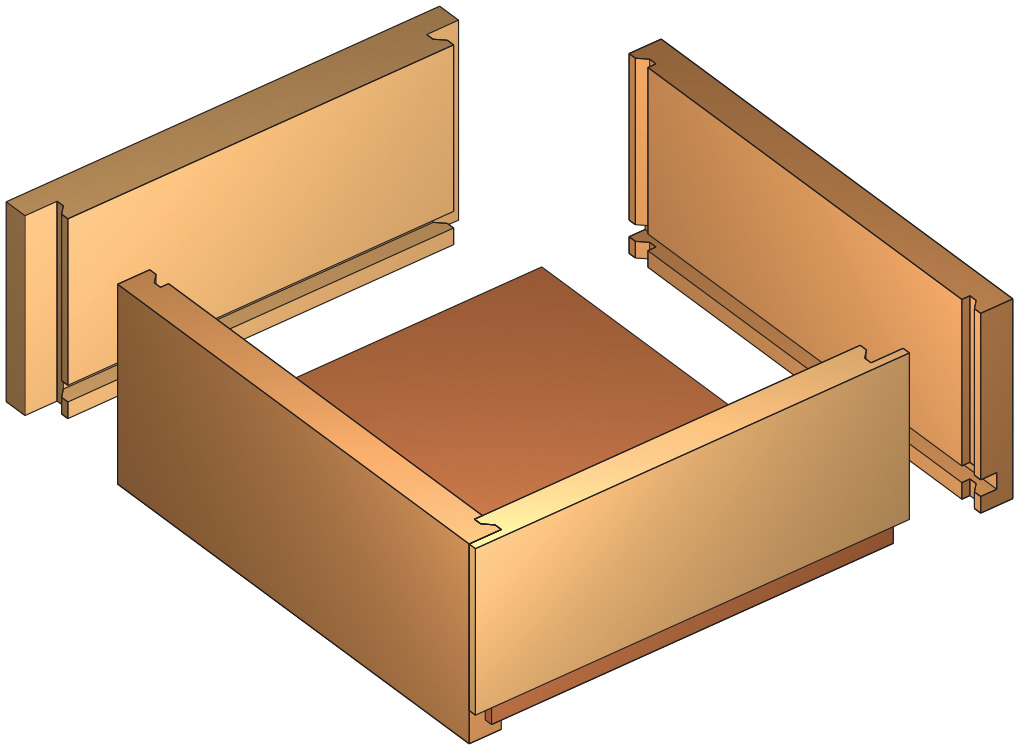
The bottom should slide into the drawer in 1⁄4” x 1⁄4” grooves milled in the sides and drawer front. If the bottom is thicker than 1⁄4” you’ll need to cut a bevel or rabbet on its edges. The back of the drawer should be 1⁄2” narrower than the sides to allow the bottom to slide into place at the rear.
Sliding Dovetail Drawers
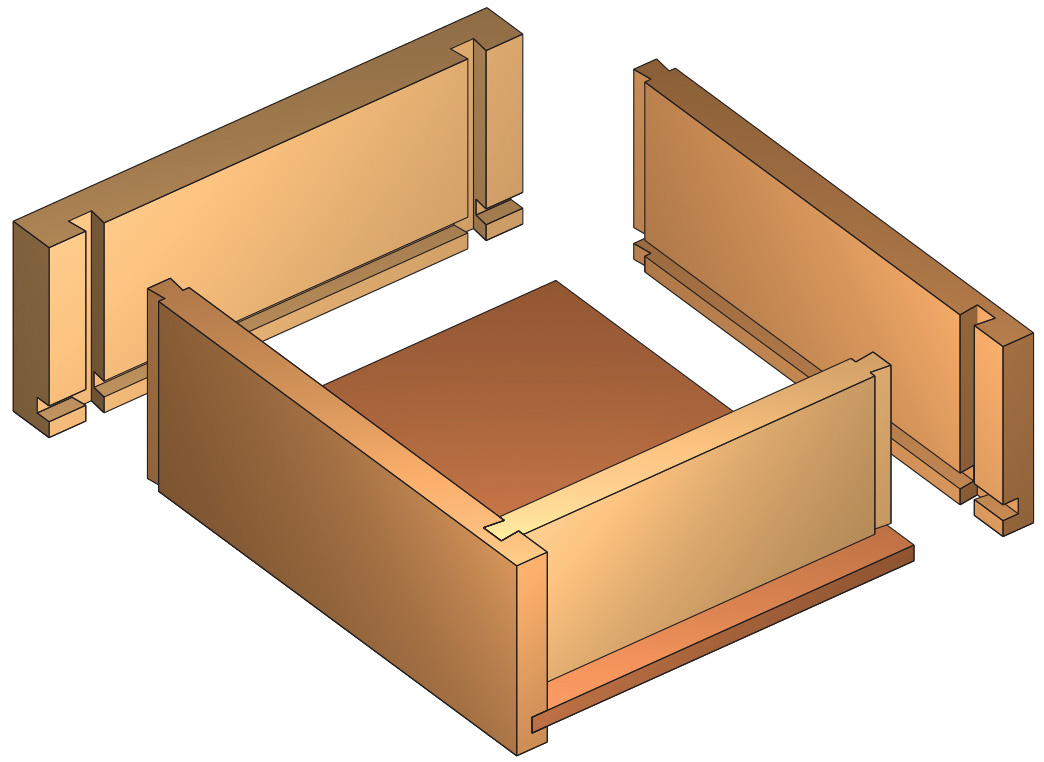 Sliding dovetails aren’t just for building bookcases. This technique works extremely well for constructing drawers that will be mounted with mechanical drawer slides.
When you follow these instructions you’ll end up with an inset drawer that has a perfect 1⁄2“-wide space for a drawer slide. By merely putting the socket in a different place you can create an overlay or lipped drawer, too.
A couple notes on this technique: You need the right-size bit for the joint. The common 1⁄2“-diameter dovetail bit is too big when using 1⁄2“-thick drawer sides. You’re better off with a 3⁄8“-diameter dovetail bit, which is commonly available.
Also, you need to take some care when making the test cuts on the male portion of the joint. If your drawer uses a different species of wood for the sides than for the front, check the fit of the male portion of the joint in a socket in both species. This might sound a bit odd, but different species react differently to a cut. It might just be .002″ difference or so on each side of the joint. But with sliding dovetails, even small amounts matter.
Finally, cut all your parts 1⁄16” wider than your finished size. The router bit will tend to blow out the grain when it exits the work. After you mill all the joints, run each long edge over your jointer to remove the inevitable tear-out. — CS
Sliding Dovetails Step-By Step
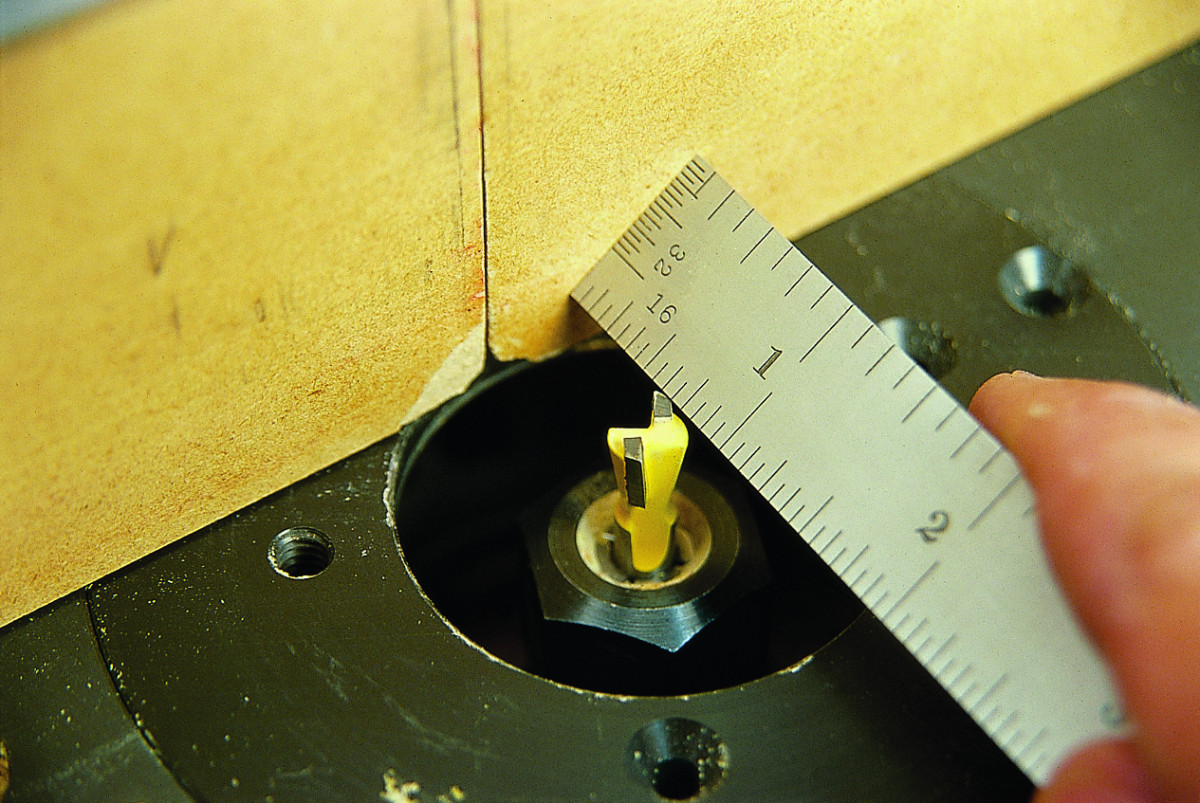
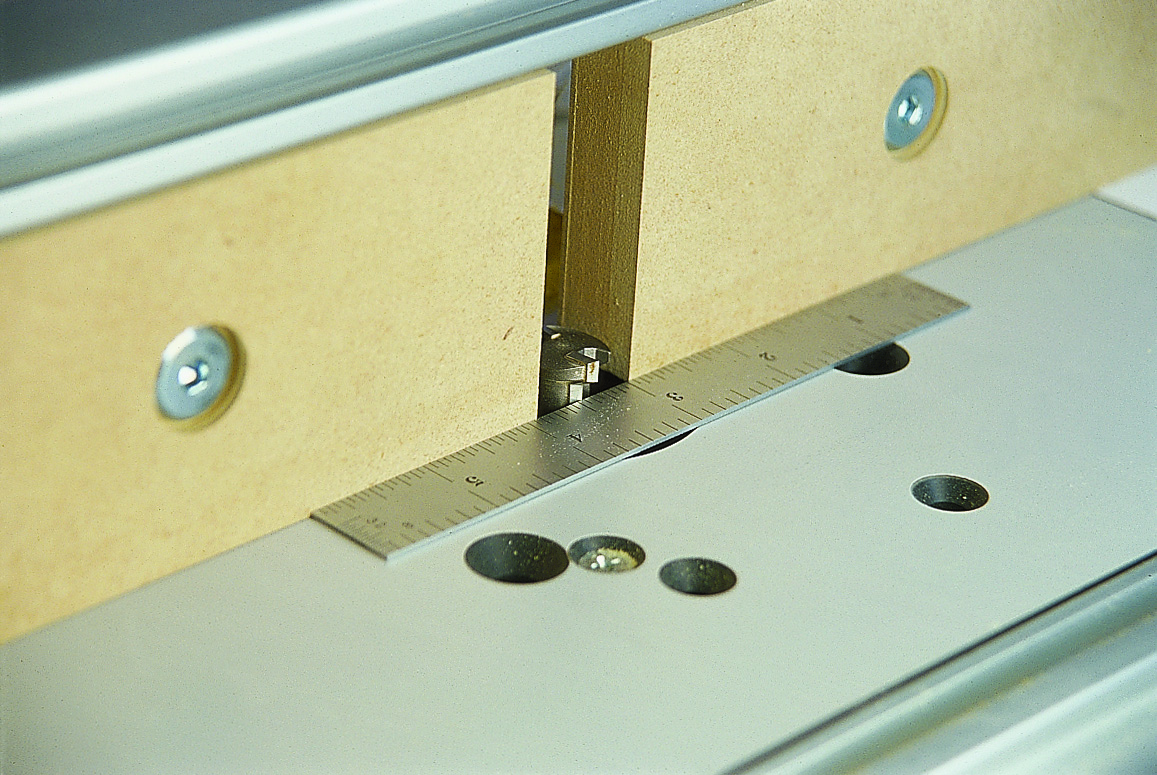
1. To cut the socket, set your 3⁄8″ dovetail bit so it protrudes 5⁄16″ above the top of your router table. Set the fence so there is exactly 9⁄16″ of space between the bit and the fence. Make a test cut to confirm your settings.
This tricky technique uses only two setups on your router table to cut very strong drawers that are perfect for a project that uses drawer slides. That’s because it automatically creates a 1⁄2” space for side-mount drawer slides.
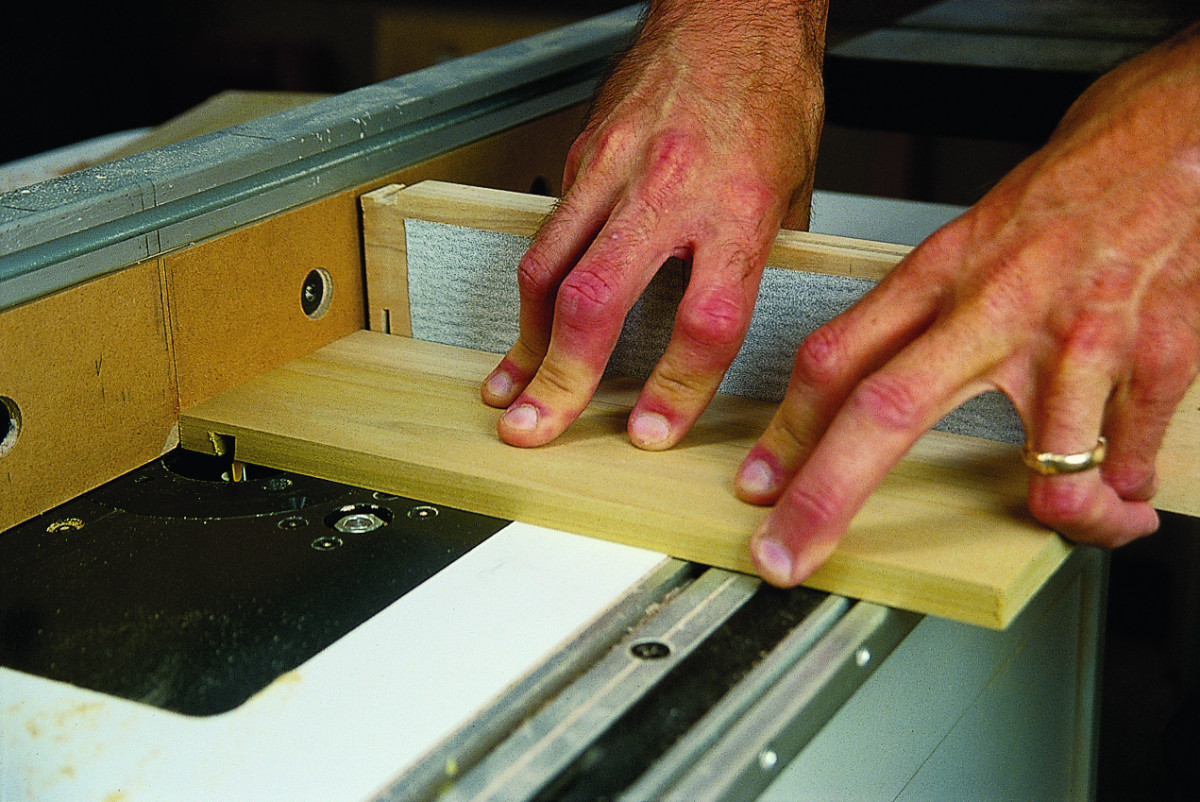
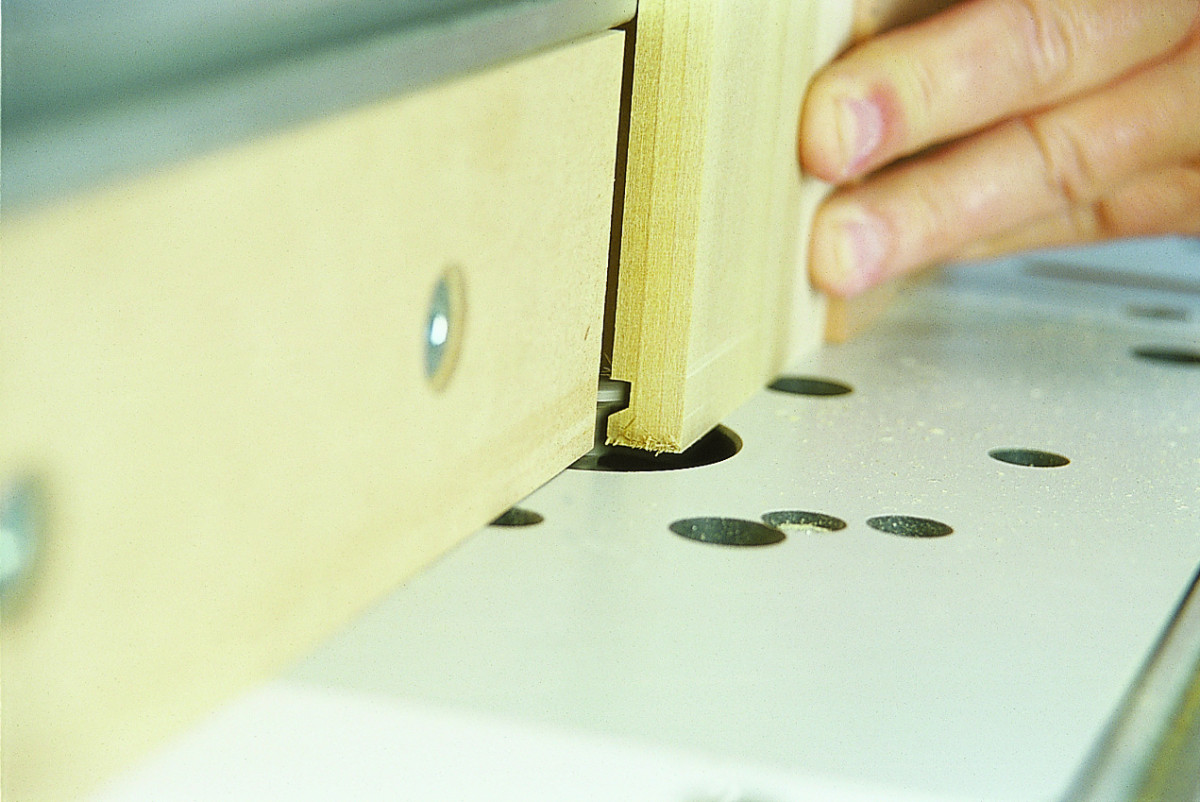
2. Cut the sockets on both ends of the drawer front. Note that I use a backing board faced with sandpaper. This minimizes tear-out when the bit exits the work. The #220-grit sandpaper keeps the work in place during the cut.
The drawers go together like a puzzle, and the interlocking nature of the joint ensures their longevity. The downside to the technique is that you need to be very persnickety in setting up your tools; sliding dovetails do not suffer fools lightly.
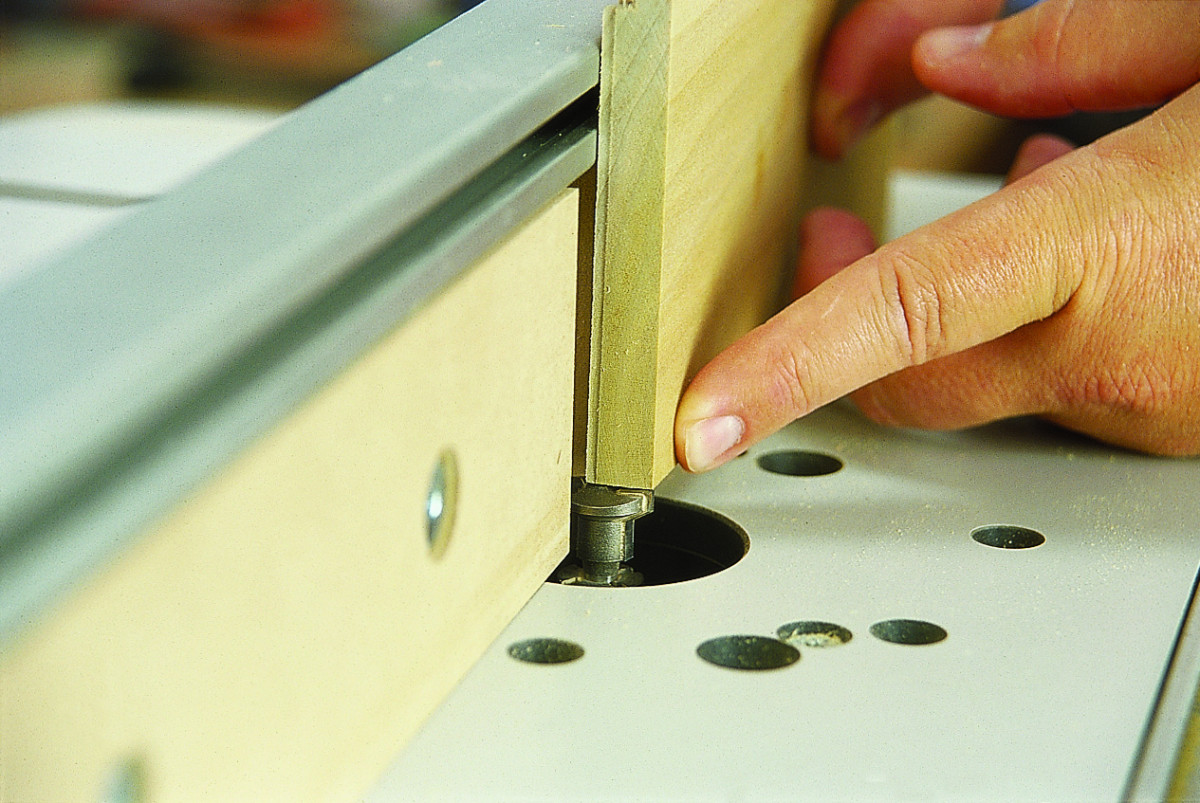
3. Using the same setting, cut the socket on the back end of the side pieces. This socket holds the back in place.
The thickness of your materials must be dead on (check it with a dial caliper) and you must make a couple more test runs on scrap with this technique than the others. But once you master it, watch out. You’ll use it all the time.
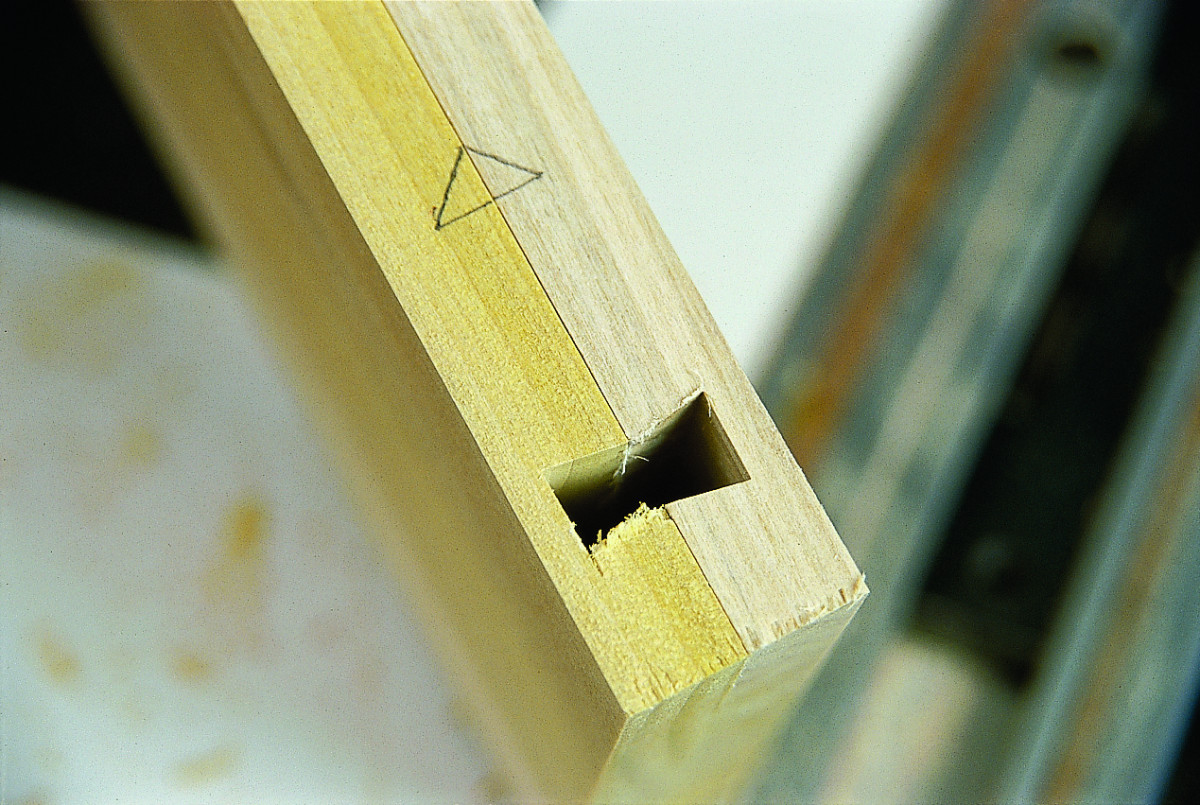
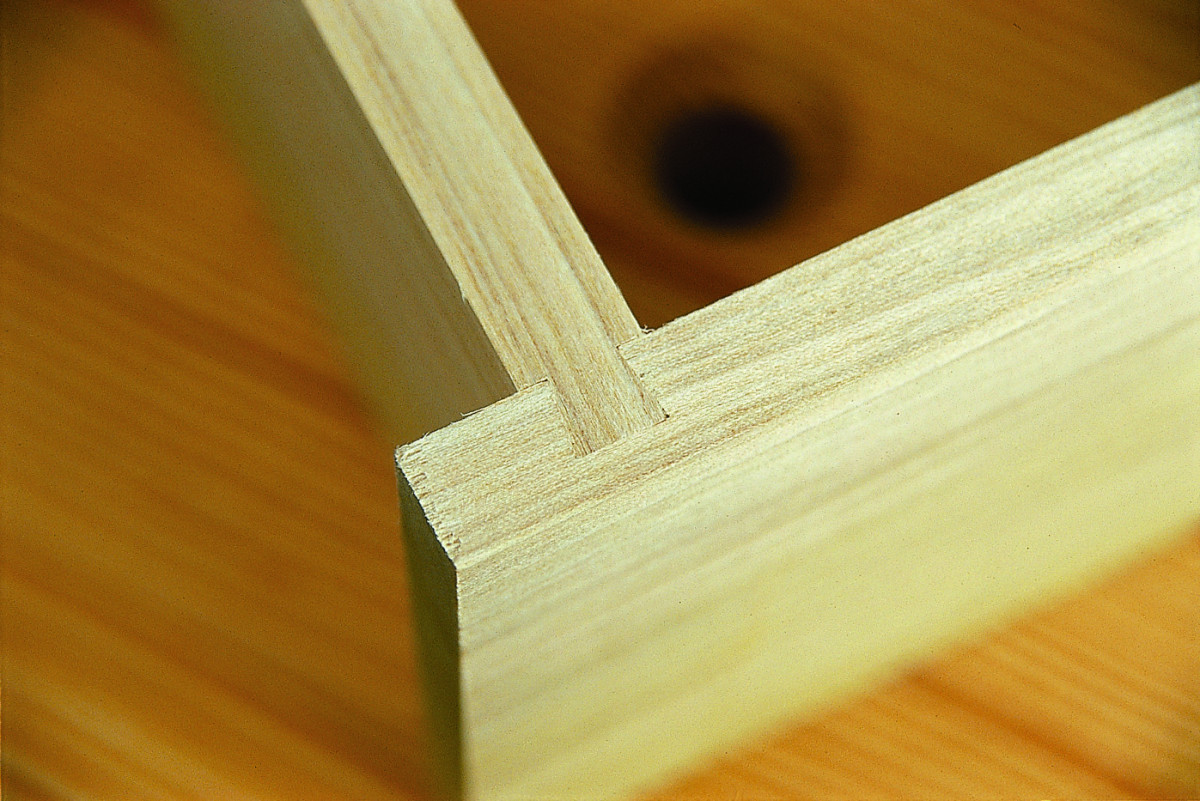
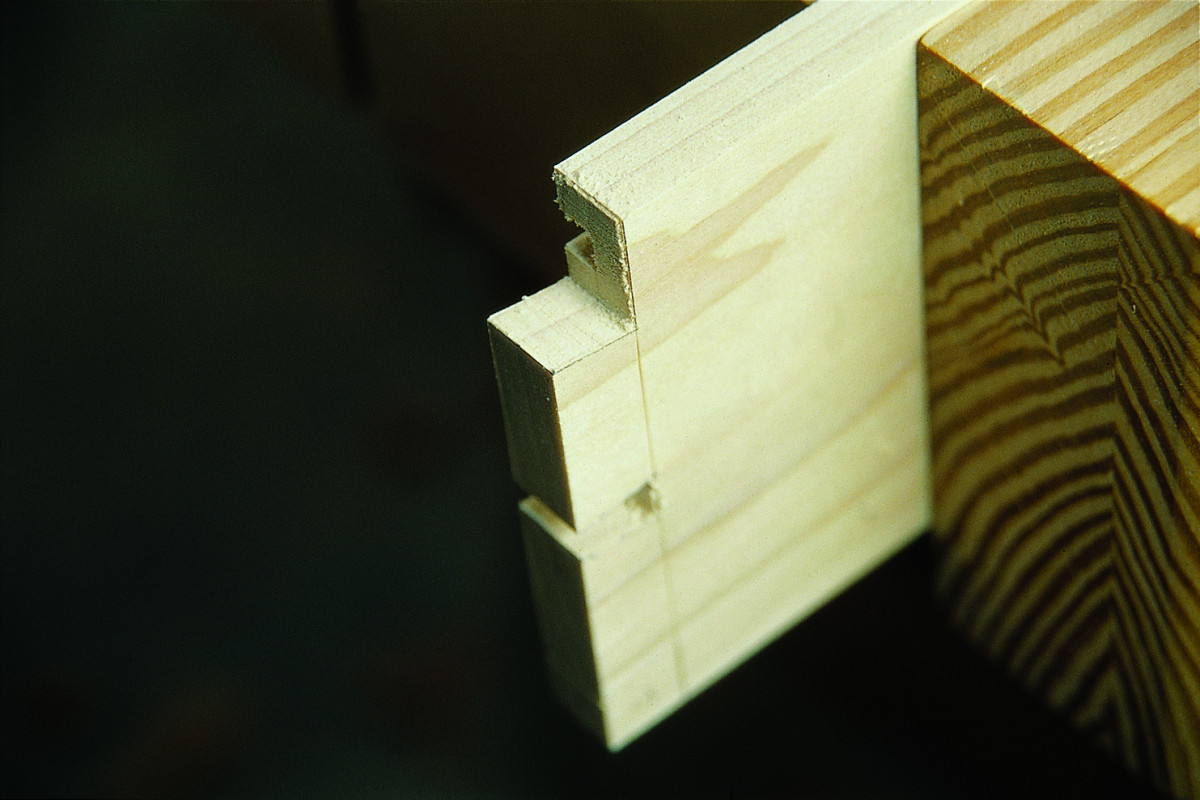
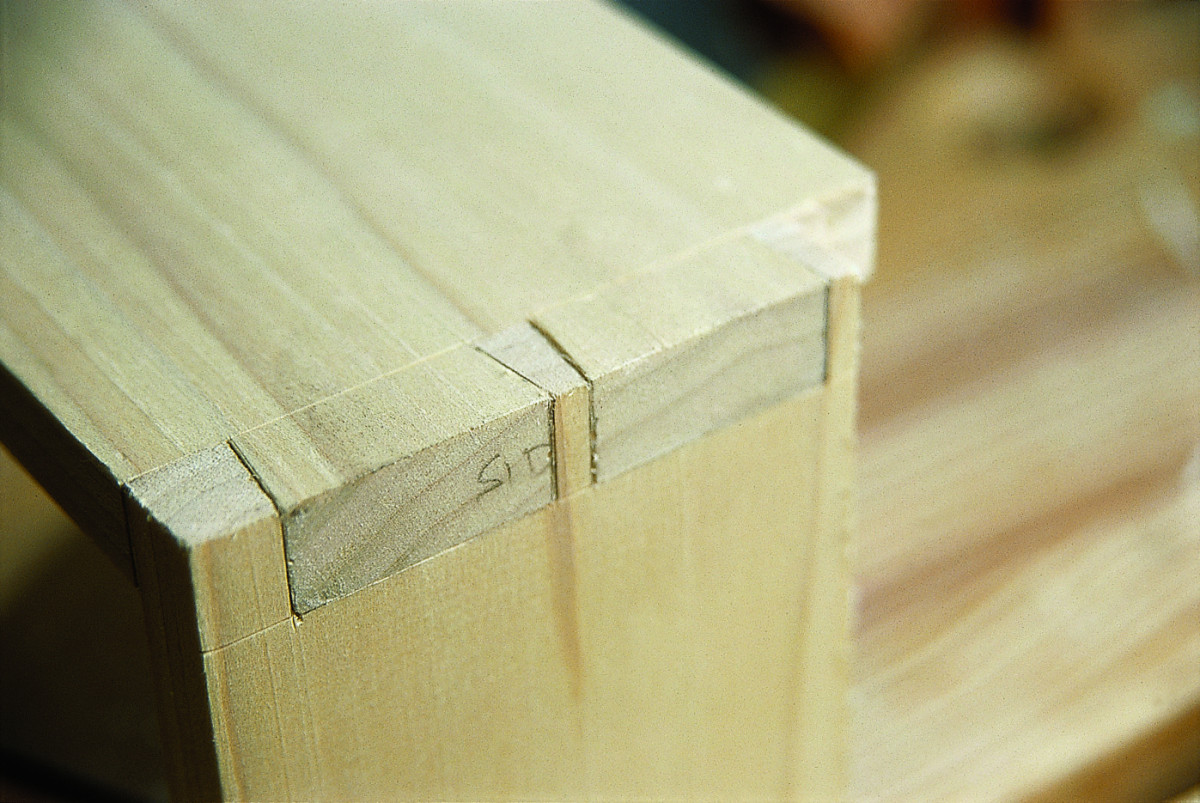
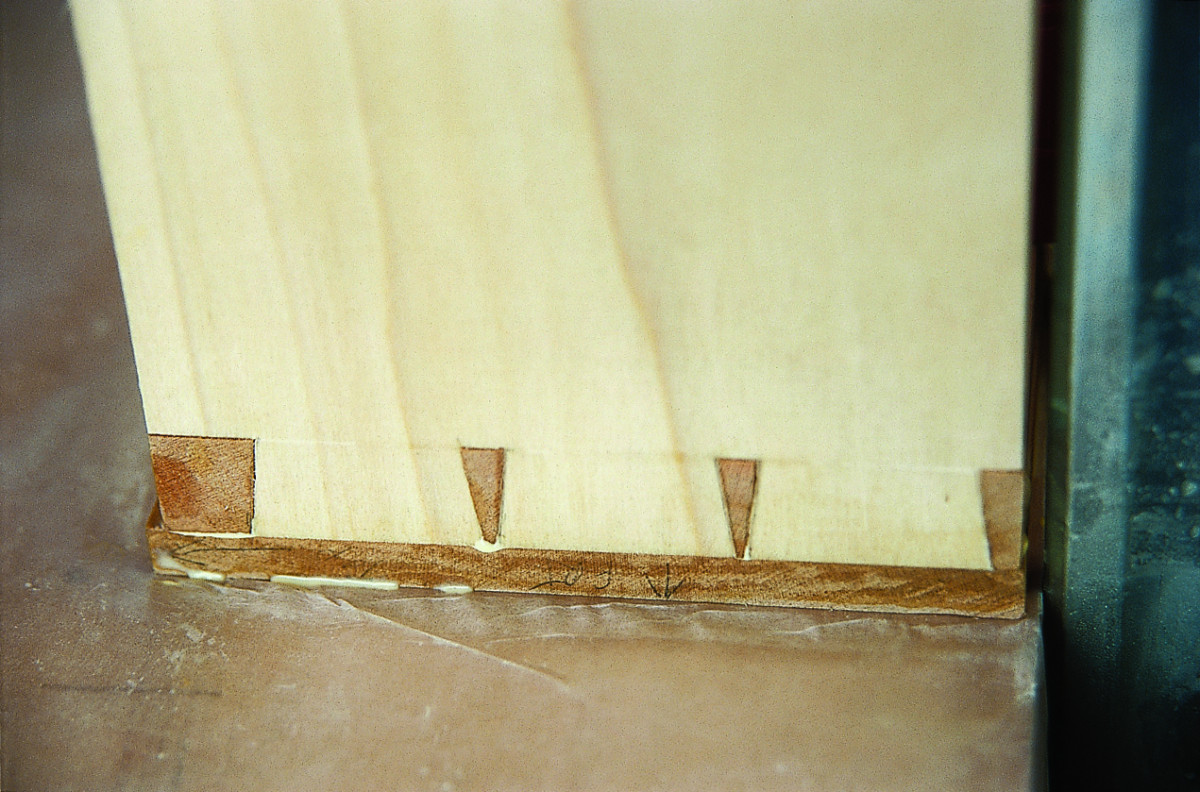
4. The finished result. You can see the tear-out on one of the joints. Also note the “cabinetmaker’s triangle” drawn on the edges. This reminds me of which way my parts will be oriented as I machine and assemble them.
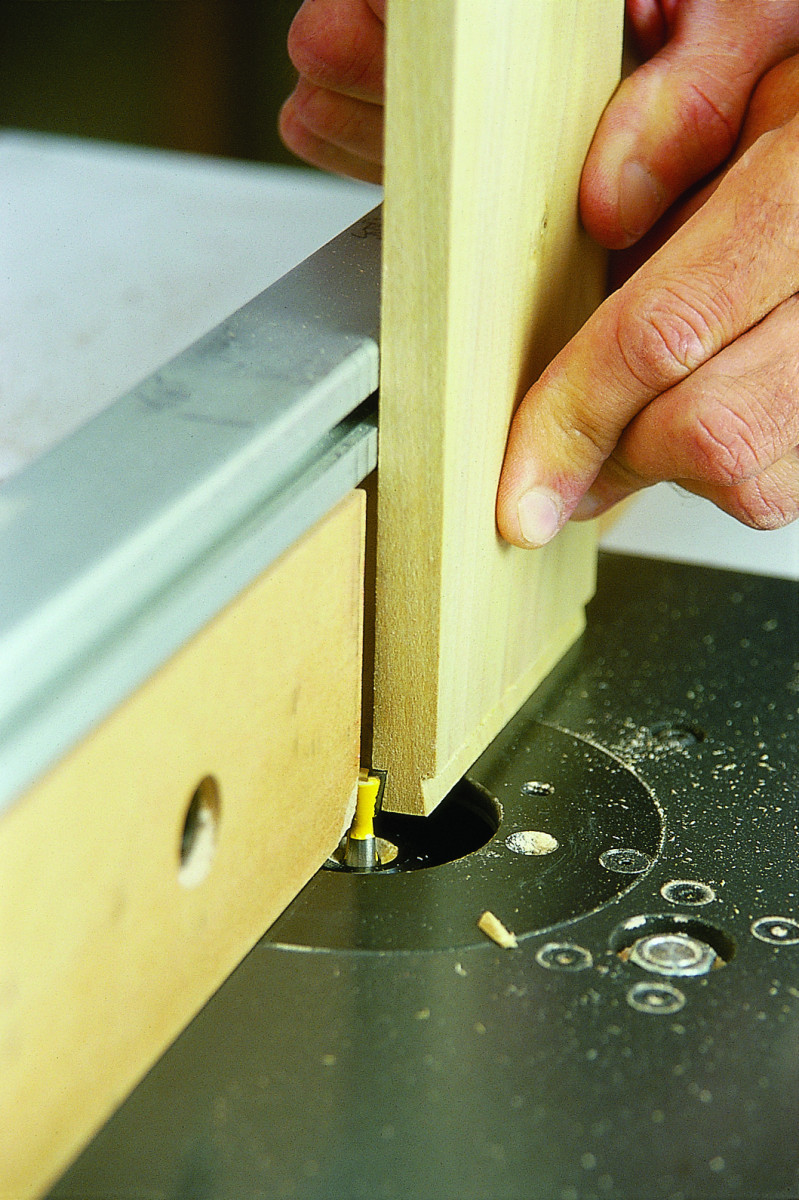
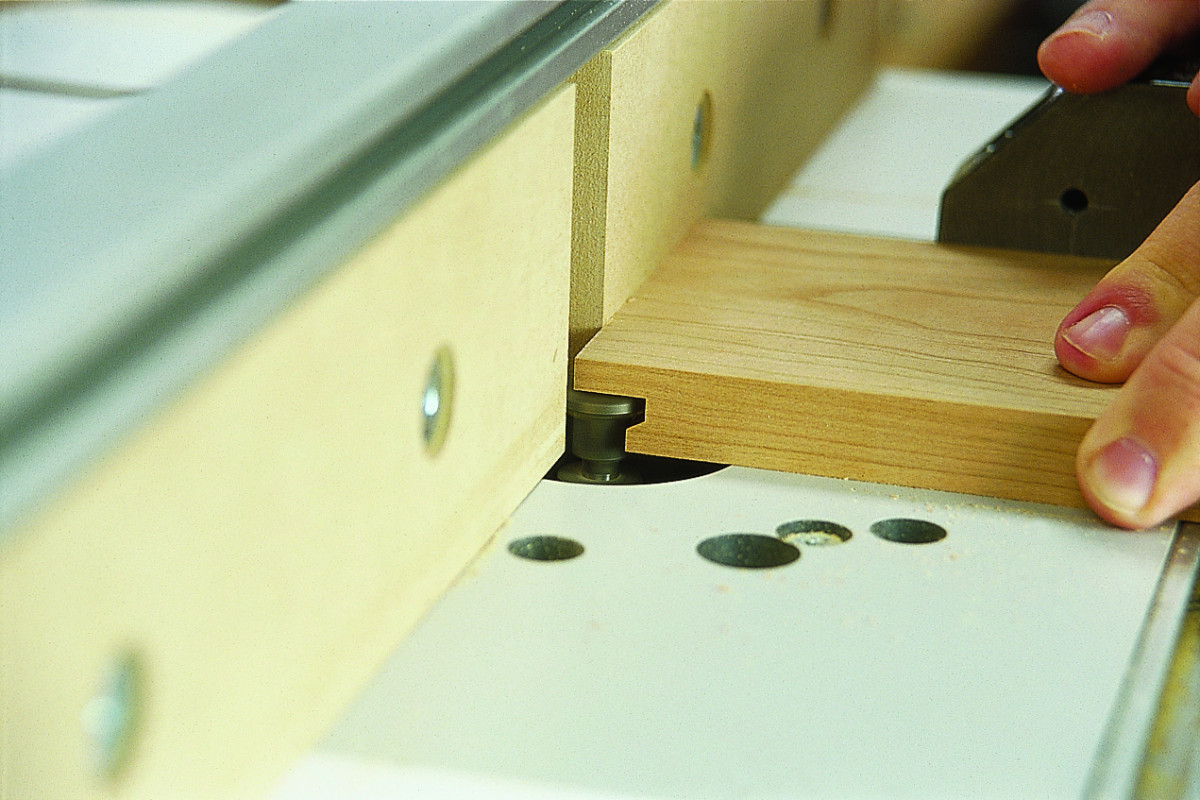
5. To cut the male portion of the joint, leave the height of the bit the same. Shift the fence so only 7⁄64″ of the bit protrudes from the fence. This measurement worked for my Oldham bit, which measures .275″ at its smallest point. Your bit may vary.
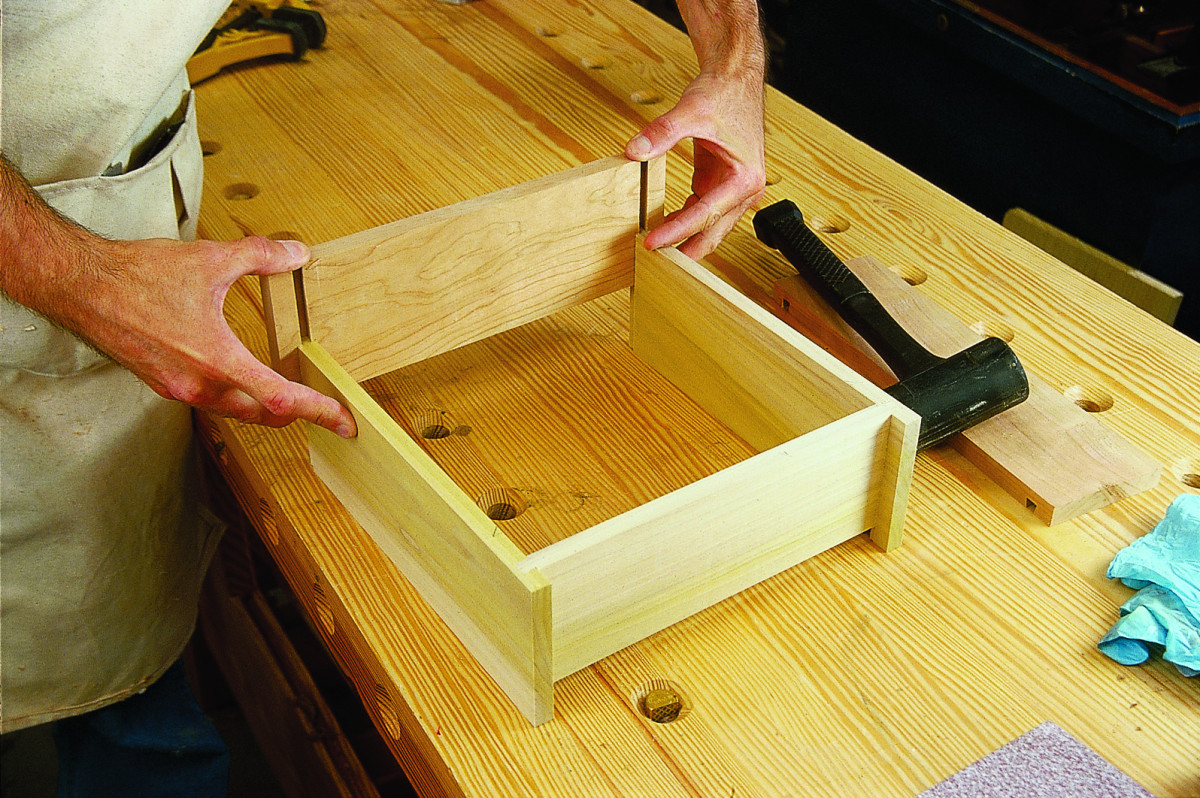
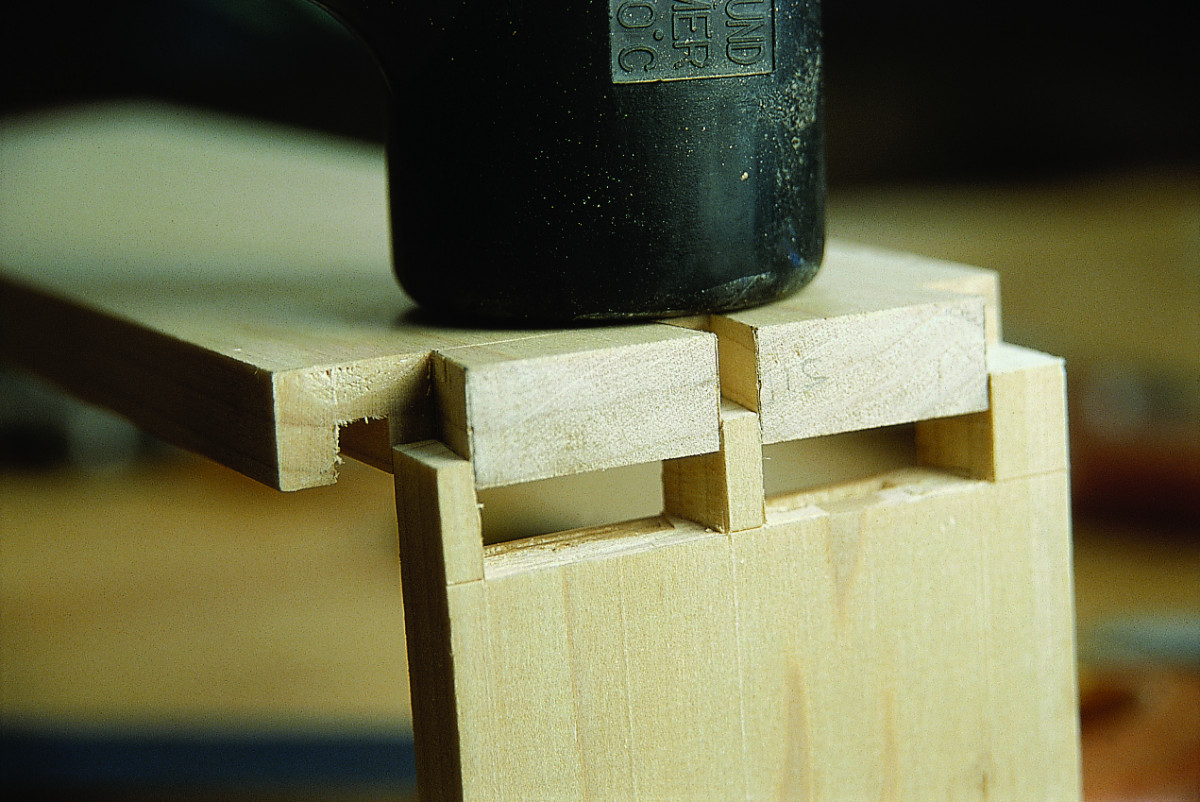
6. Make a test run before cutting the groove in the sides and front for the drawer’s bottom. The parts should slide together easily and require just a couple taps from a mallet to seat them firmly.
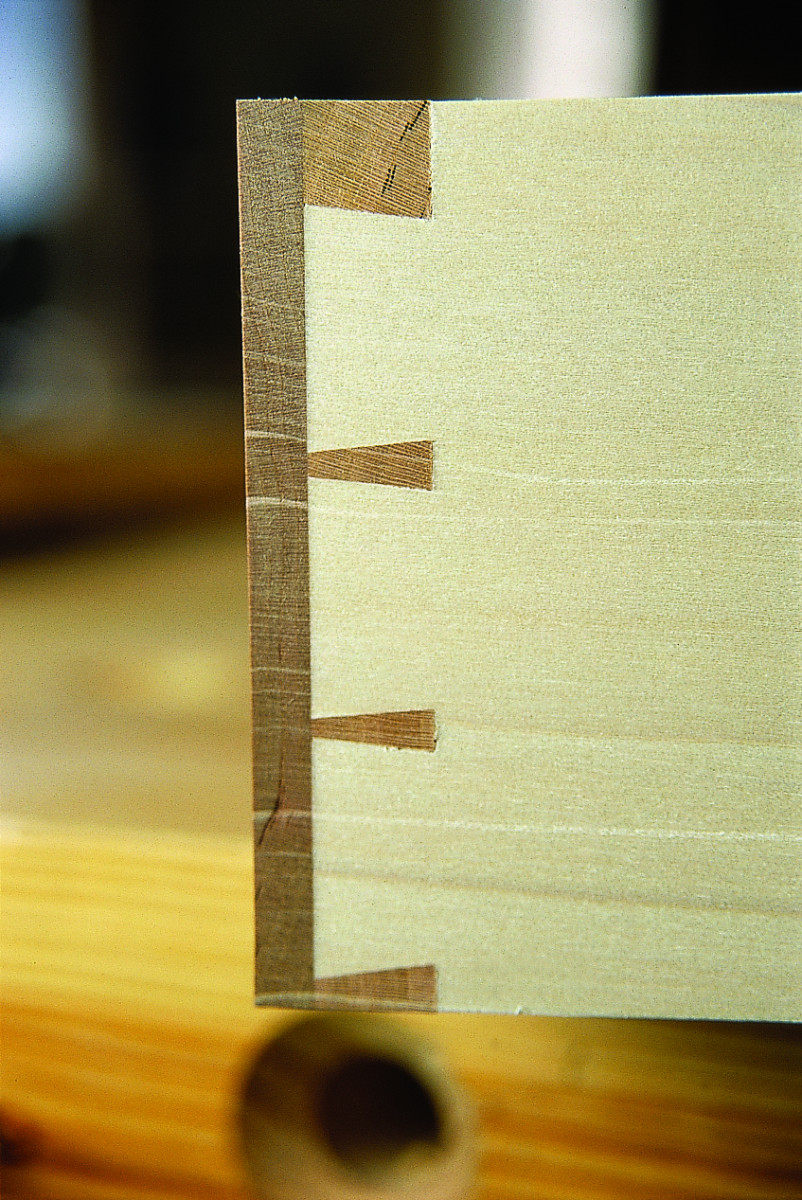
7. In the end, this technique produces a wicked-tight mechanical joint with just a couple tool setups. It’s one of those few techniques that is both fast and strong.
Hand-Dovetailed Drawers
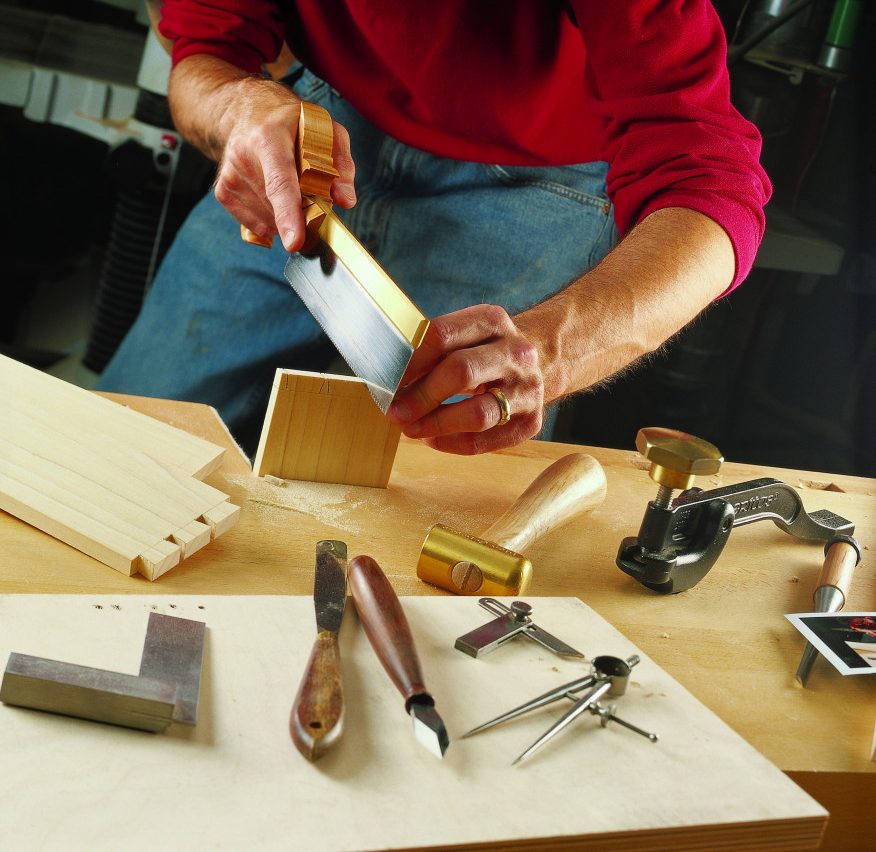
 This is a time-consuming but rewarding way to make a drawer. There is no stronger, beautiful or individual technique than cutting dovetails by hand. Like all good things, it requires practice. But once you have a couple drawers built, you’ll find your saw and chisel skills improve exponentially.
A couple notes on this technique: There are entire books written about dovetailing, so we couldn’t possibly cover everything that’s involved. However there are a few basic principles and tricks that make the process easier.
Use good tools. A sharp well-tuned saw and chisel make all the difference. Cheap, inaccurate or dull tools will make the learning curve much steeper. Before you try this technique on a drawer for a project, try it out on some scraps first. Even experts need to “warm up” with a test joint or two when dovetailing.
Hand-Dovetailed Drawers Step-By-Step

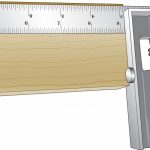
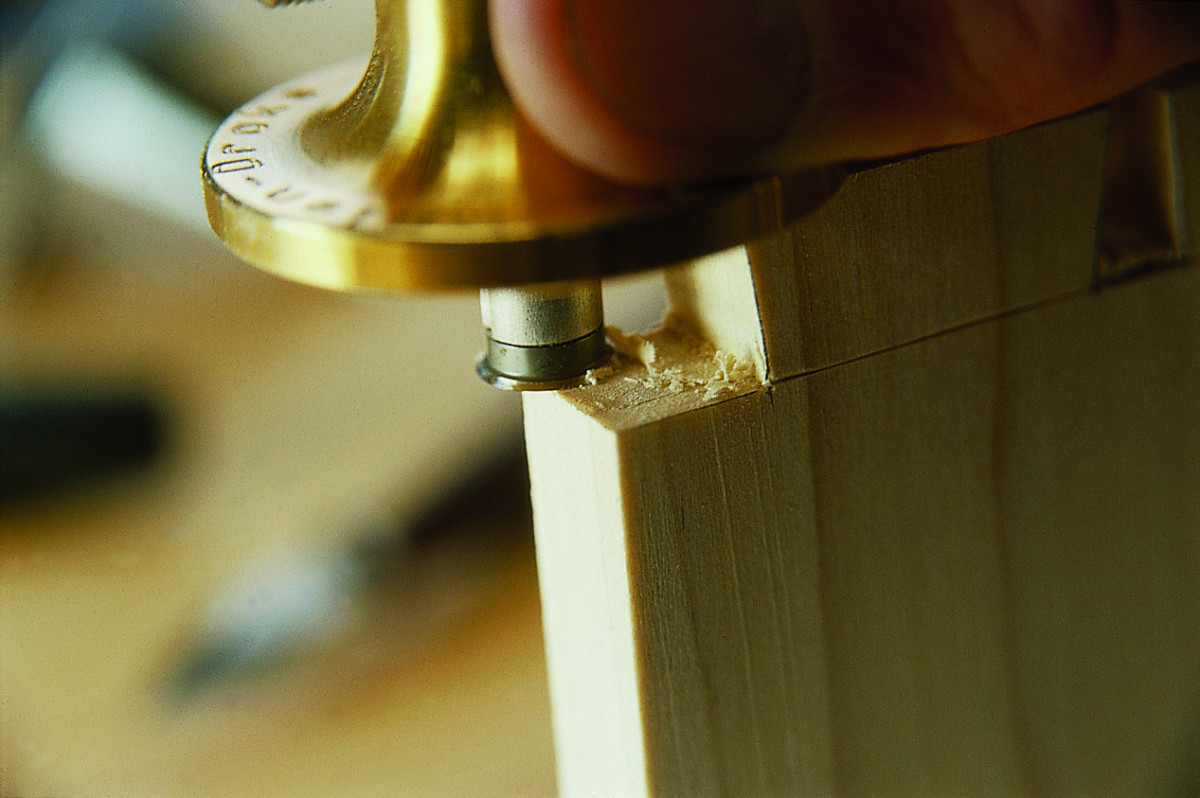
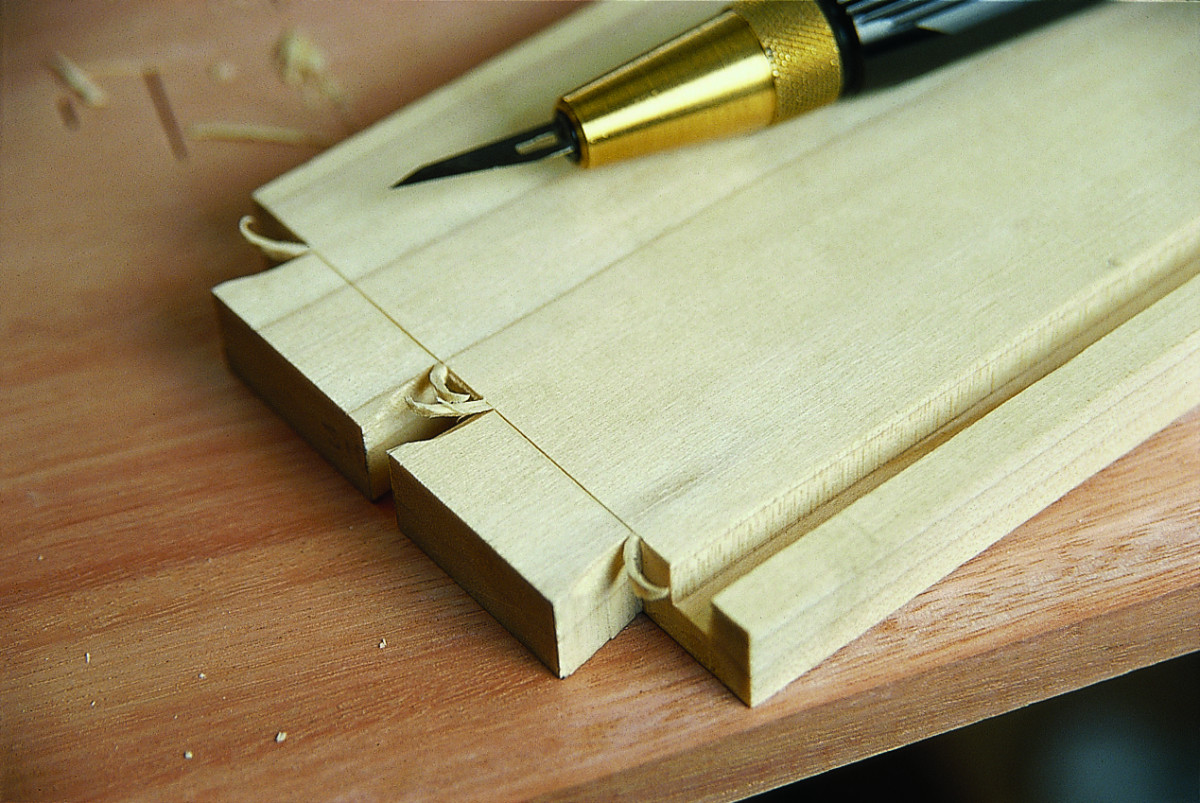
1. A sharp and high-quality cutting gauge, such as the Tite-Mark, makes lines that are easier to see than with a scratch gauge, which uses a pin.
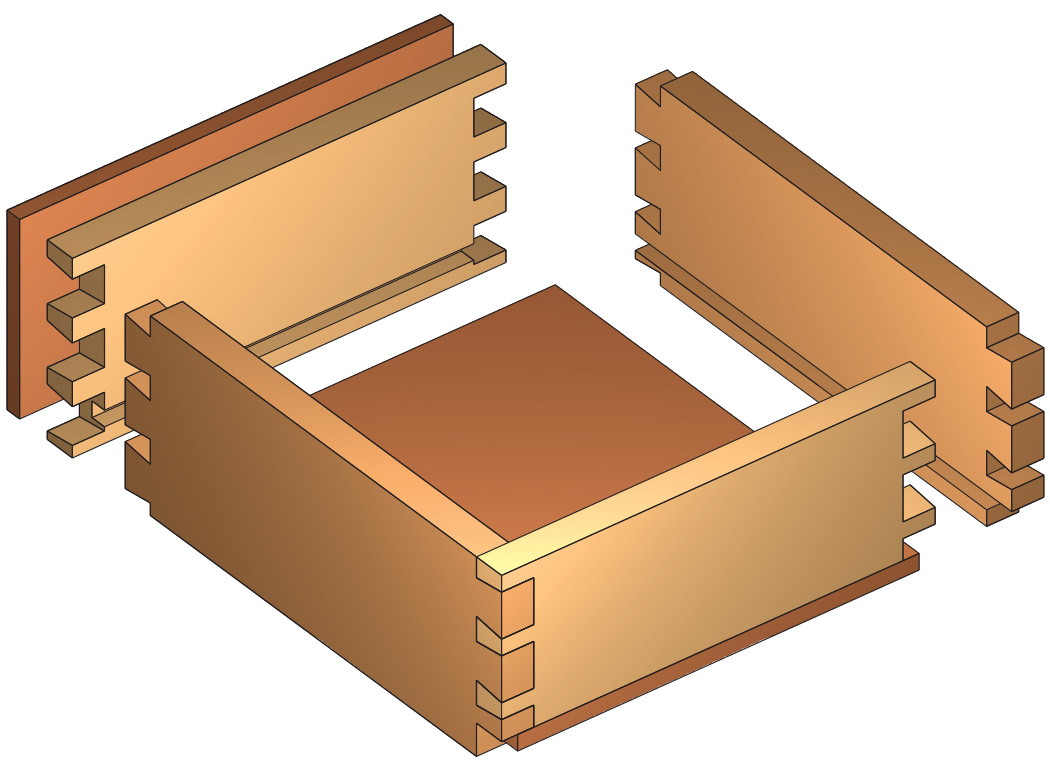
This is the traditional, and many would argue, the strongest way to make a drawer. Traditional drawers have through-dovetails at the back of the box and half-blind dovetails at the front.
Our favorite technique is to make the drawer sides, front and bottom using 1⁄2“-thick stock and then glue on a 1⁄4” -thick piece of veneer for the front. This technique allows you to cut through-dovetails at all four joints (which is easier) and to stretch your supply of good drawer-front material.
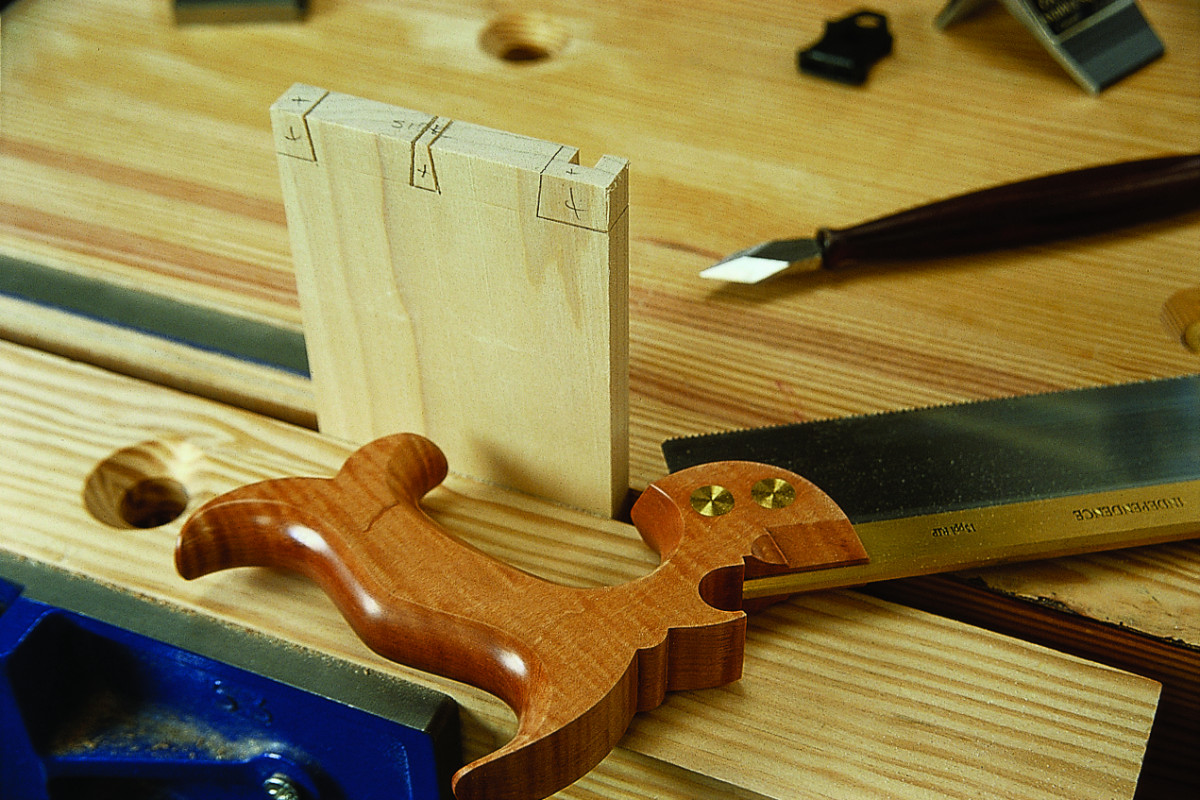
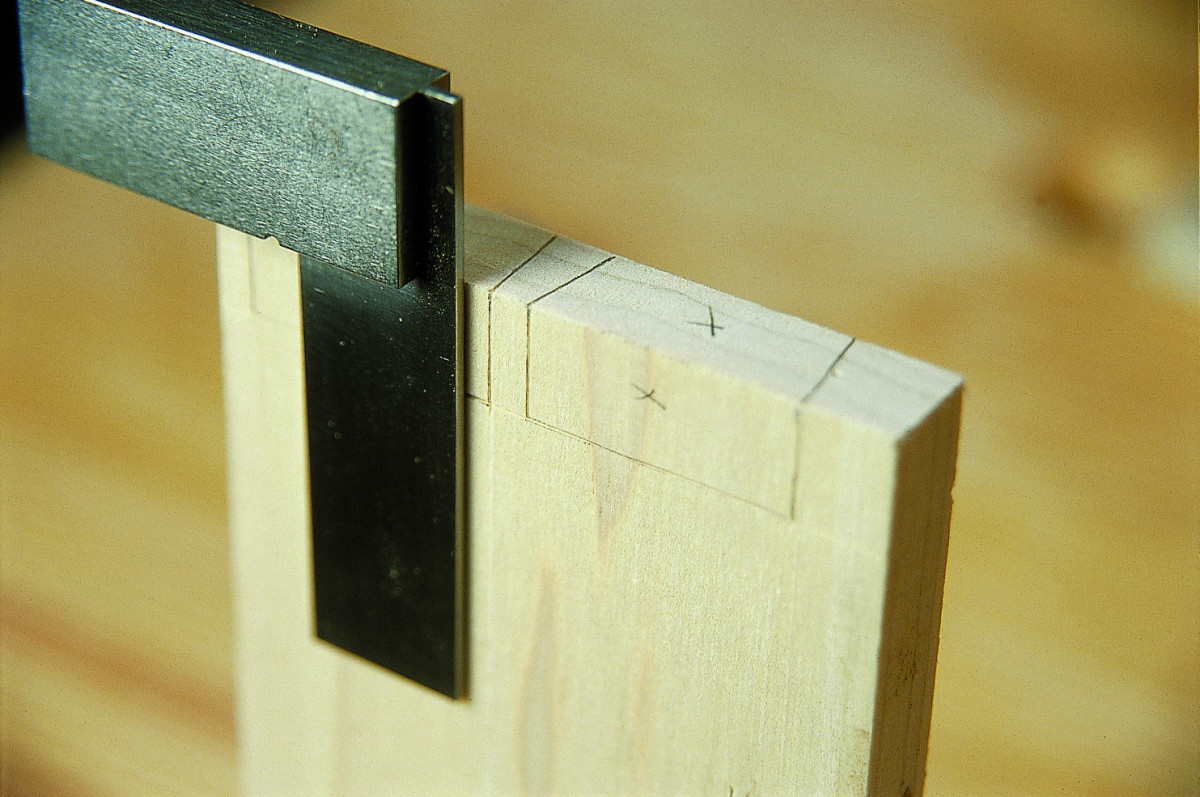
2. Mark out your tails on the end grain and the outside face of the drawer side. Strike your lines with a marking knife followed by a mechanical pencil. This will increase your accuracy. Mark the waste portions of the joint with an “X” and then make your cuts.
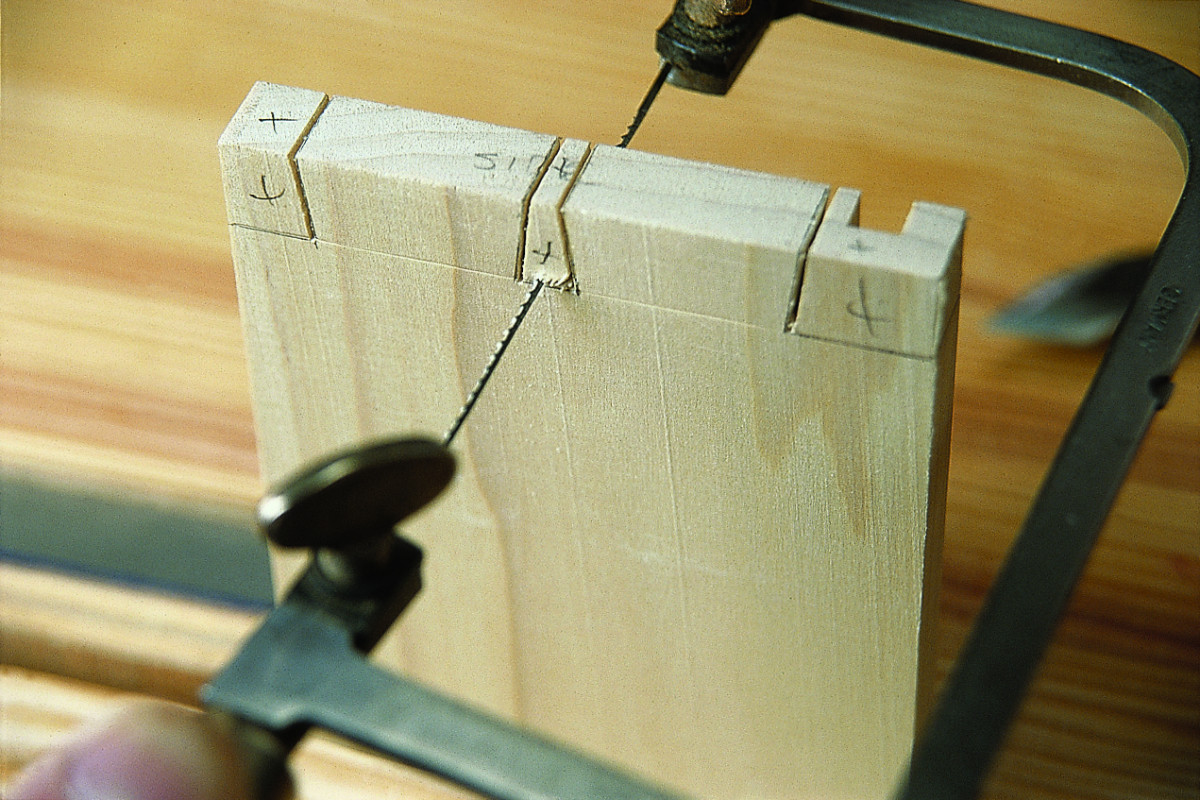
3. Remove the waste between the tails with a fretsaw or coping saw. The closer to the bottom of the tail you get, the less clean-up work you’ll have with a chisel.
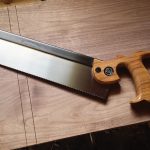
4. Remove the waste outside of the tails with a backsaw, which cuts straighter than the fretsaw.
This method is the most time-consuming of the four in this article. But that’s the cost of strength and endurance.
5. The Tite-Mark gauge can be used like a chisel to remove waste from between the tails and on the ends of the joints, as shown. If you sharpen the tool’s flat cutter, it will slice wood like a chisel.
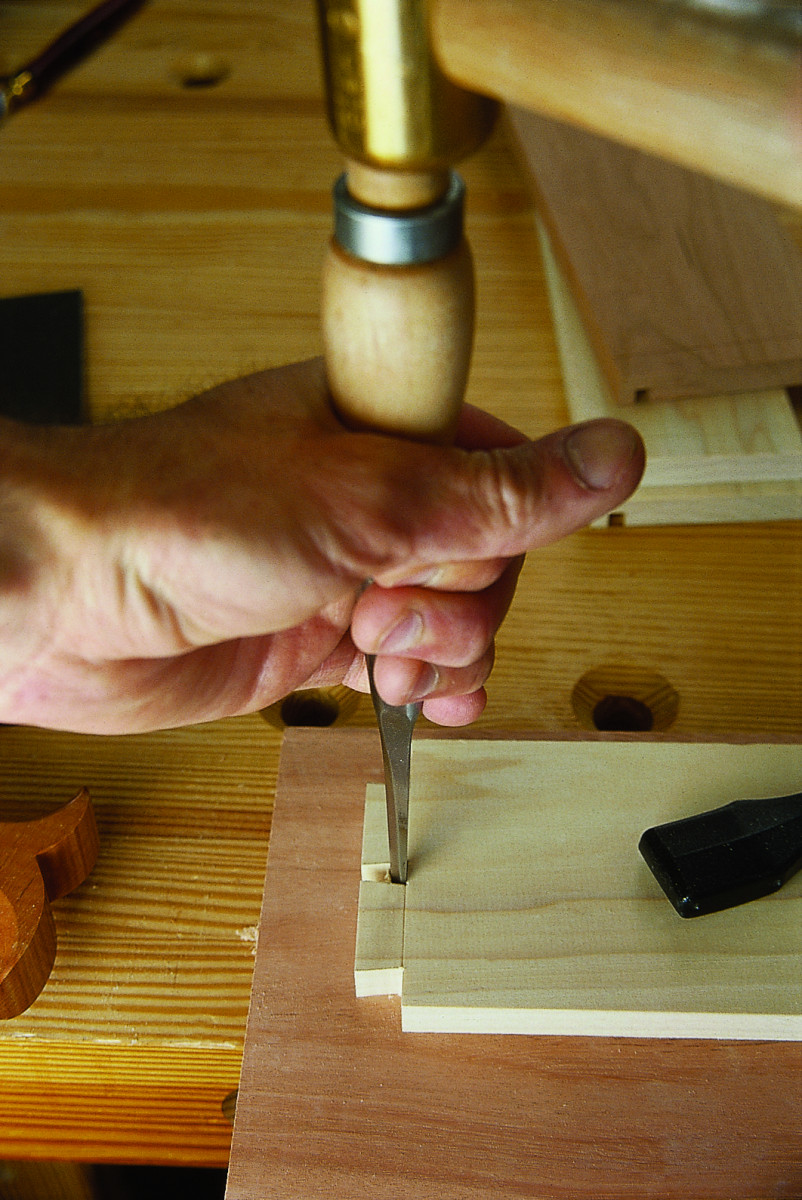
6. Remove the remainder of the waste with a bench chisel. The most important thing to note here is you should stand so you can see when the chisel is perfectly perpendicular to the work, as shown here.
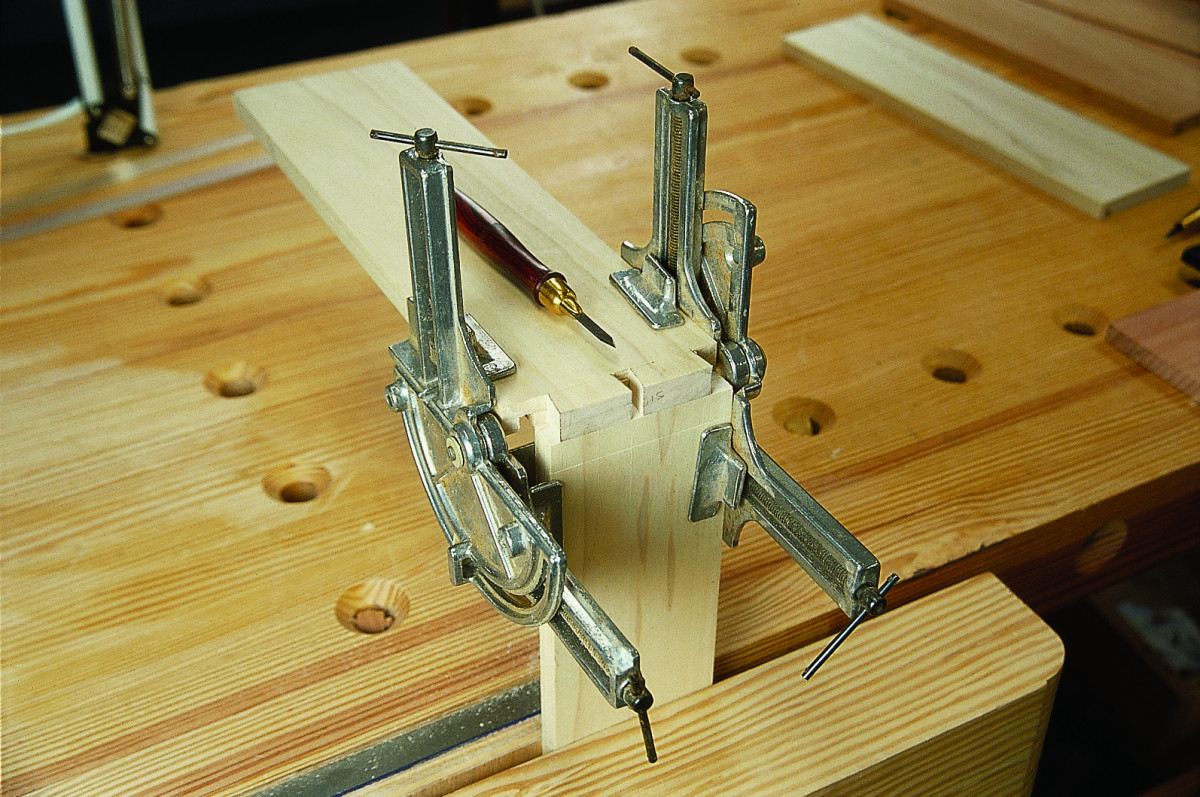
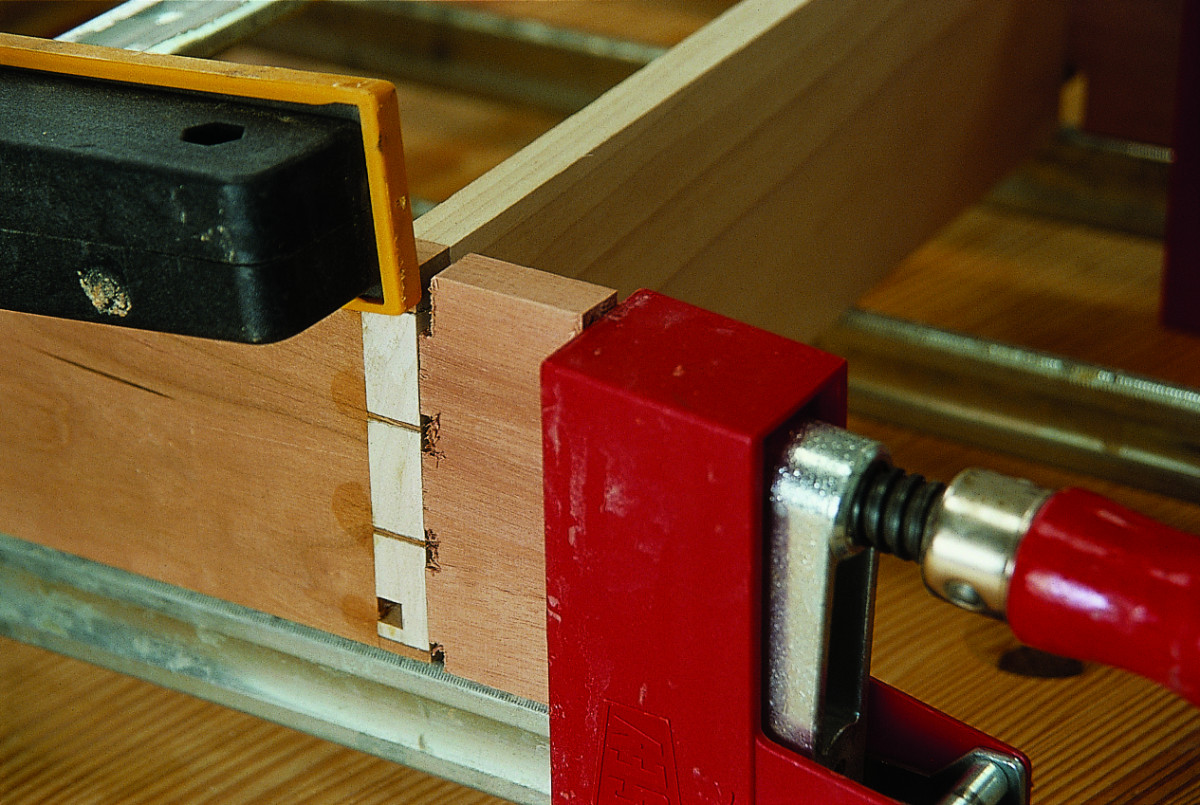
7. I picked up this trick from the Internet and it works great. To mark the pins, clamp the tail board in place to the pin board using a set of inexpensive 90° clamps, available from any home-center store. This clamping setup allows you to focus on marking accurate lines.
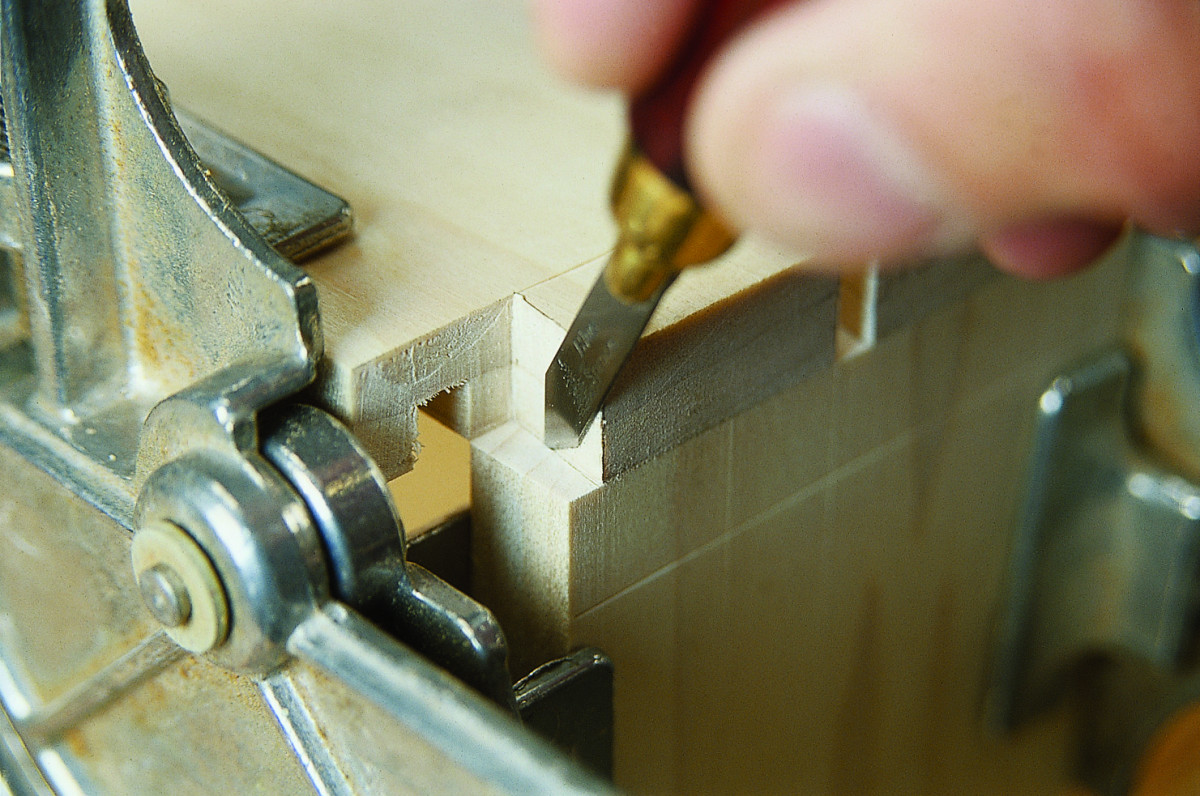
8. I like a spear-point knife as shown here because you can work on the left and right sides of a tail with just one tool. With other tools, such as a pocketknife, you run the risk that your knife line isn’t in exactly the right place.
9. Transfer the lines marked on the end grain down the face of the board. Mark your waste pieces and remove the waste using a backsaw, fret saw and then a chisel.
10. Before you try to assemble the joint, relieve the inside edges of the tail board with a knife as shown. This part of the joint is never seen and it allows you to easily slide the parts together.
11. A deadblow mallet is all you need to assemble small drawers. For larger assemblies, I recommend backing up the joint with a piece of scrap to distribute the hammer blows evenly.
12. The assembled joint. No, those aren’t gaps. Those are the pencil lines that I split in half with my saw.
13. I have tried a variety of ways to clamp dovetails, but I keep coming back to these cauls. They take just a couple minutes to make and put the pressure right where it’s needed.
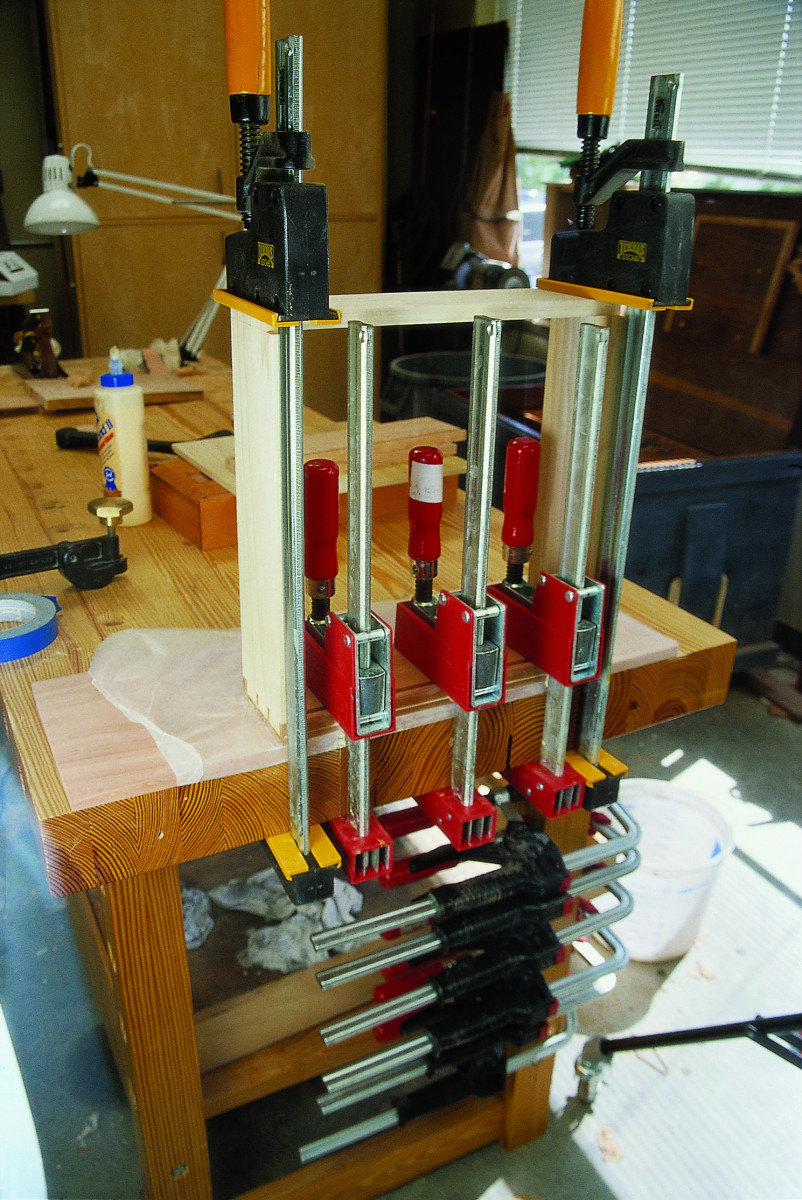
14. To glue the 1⁄4″-thick veneer front to the assembled drawer box, use your workbench as a giant clamping caul as shown.
15. Apply the veneer before planing or sanding your dovetail joints. Otherwise you’ll just make more work for yourself. It’s better to do all the trimming at once.
16. The completed joint. Once the finish is applied and the cherry drawer front ages a bit you will barely be able to tell the front is applied.
Drawer-lock Bits
Some woodworkers swear by the router. And why not? It’s a great tool for many applications − including making drawers. By using a drawer lock bit in a router table it’s a simple process to quickly create dozens of hardwood drawers (plywood isn’t advised) and end up with strong, attractive joints. It doesn’t matter how deep, wide or tall your drawer is. With the bit set, all you do is run the inside edge of each side – no adjustment necessary.
There’s always a trade-off, and with drawer lock bits it’s price and set-up. Though you’ll need only one bit, it can cost as much as $55. Once you have the bit, it’s critical to get it set correctly in your router table for a tight, accurate fit.
While the following steps walk you through the setups for a simple inset drawer, the bit can also be used for overlay drawers and also allow clearance for mechanical drawer slides. By first rabbeting the necessary clearance on the backside of the drawer fronts, the same bit will once again do all the joints for any of these drawers.
Drawer-lock Bits Step-By-Step
1. First set the bit to 1⁄2″ high. This probably isn’t the final setting, but it will put you in the ballpark. Make sure the router is unplugged for any step that puts your hands (or tools) near the bit.
This specialty router bit allows you to cut all the corner joints with one router table setup. With minor adjustments the bit will even mill the groove for the bottom. Drawer-lock joints are easy to assemble and attractive. The interlocking design is strong and offers significant gluing surface.
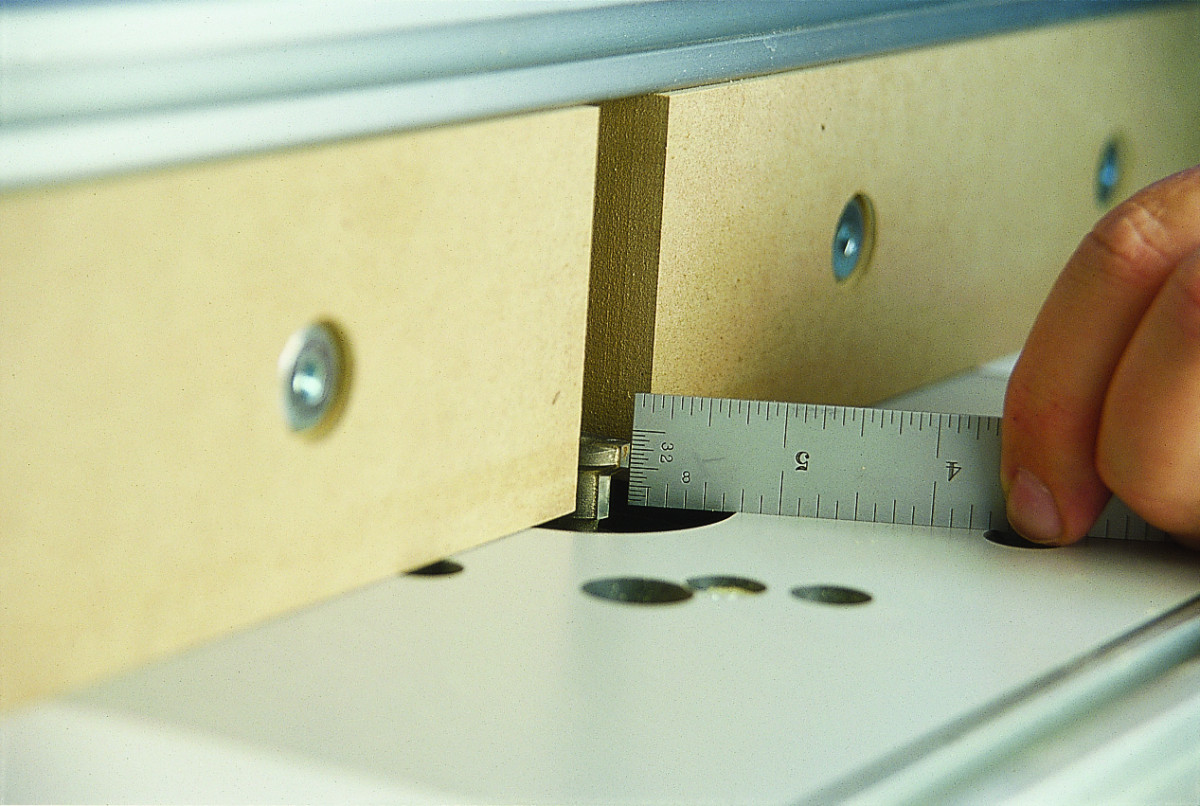
2. The second setup step is to align the rear cutting flute flush to the fence face. A small rule or straightedge makes this quick. To make things easier, it’s also a good idea to set the fence parallel to the miter gauge slot at this time. Note that your fence faces should be set as close to the bit as possible.
The downside to this method is that you need to make several test cuts to get the settings perfect, and you need to purchase a fairly pricey router bit – about $30 to $55 depending on the brand.

3. Now it’s time to adjust the final bit height. Run two pieces of scrap material (the thickness of the scrap doesn’t need to match your workpieces) flat against the table supporting the cut with your miter gauge. A perfect mating fit is shown. If the tongues fit all the way into the socket, great; but if the fit is loose, raise the bit.
4. Make the first cuts on both ends of the sides, with the inside surface against the fence. Use a backing block to stabilize the drawer side and avoid tear-out. This same setup will create the bottom grooves in the front and sides.
5. To run the drawer front and back, the fence must be reset. Unplug the router, then use one of the sides to adjust the fence to set the protruding flute of the bit flush to the outside edge of the side piece.
6. Then simply run both ends of the fronts and backs with the workpiece flat on the router table. Use a miter gauge to guide the cut. If you were making an overlay drawer, the front would need to be rabbeted for the necessary offset and the fence reset to run the drawer fronts.
Rabbets and Brads
 This drawer method is so simple it should be illegal. With one table saw setup and a dado stack you can build drawers all day long.
Two critical accessories are required. You need a stacking dado set. You’ll only use the two outer blades of the dado set to cut 1⁄4” rabbets. (If you don’t have a dado set you could also use a single 1⁄8“-kerf blade. This would require some set-up changes, but the concept is the same.) You also need a zero-clearance insert for your saw, which supports your work during the cut.
On a finished front drawer as shown here, rabbet the front and back. On a false front drawer, rabbet the sides. We recommend shooting brads through the sides into the rabbet. These brads will add some strength and reduce the clamping necessary to build these drawers.
Rabbets and Brads Step-By-Step
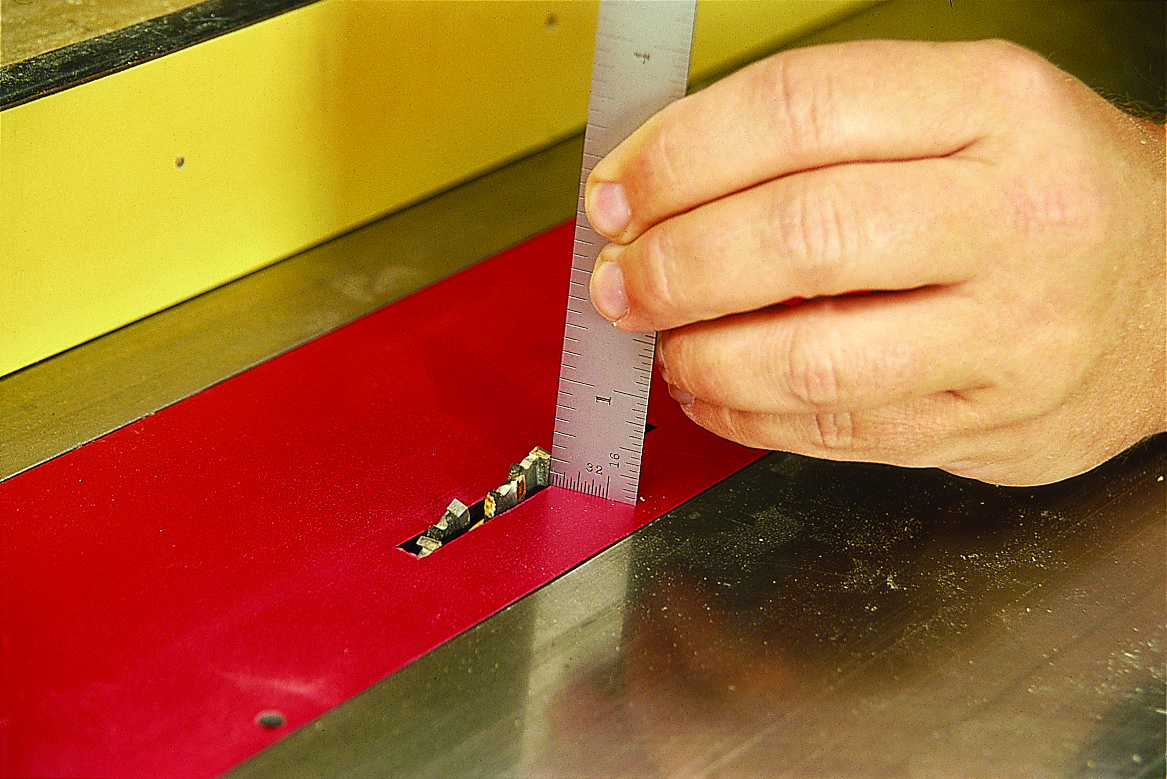
1. Set it up once and forget it – how simple. The first step is mounting the two full dado blades to achieve a 1⁄4″-wide cut. Then set the cut height. to 1⁄4″.
When we need to make drawers fast, this is the way we go. You can cut all the joinery for your drawer (including the bottom groove) with just a stack dado and one setup on your table saw.
It’s a fairly forgiving technique that beginners master quickly. It’s only real downside is that it’s the weakest of the four joints. While the drawer is plenty strong for most applications, it’s not in the same league as a traditional dovetailed drawer.
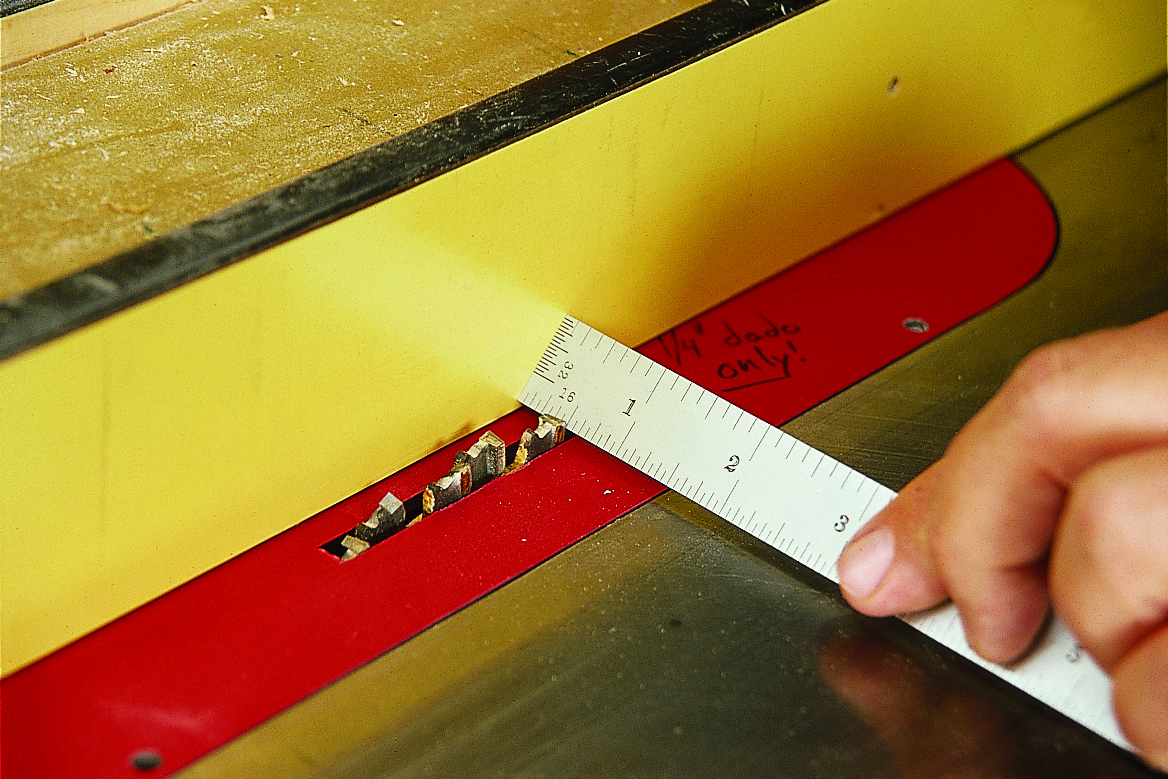
2. Next, slide the rip fence toward the blades and lock the fence exactly 1⁄2″ from the outside tip of the blades.

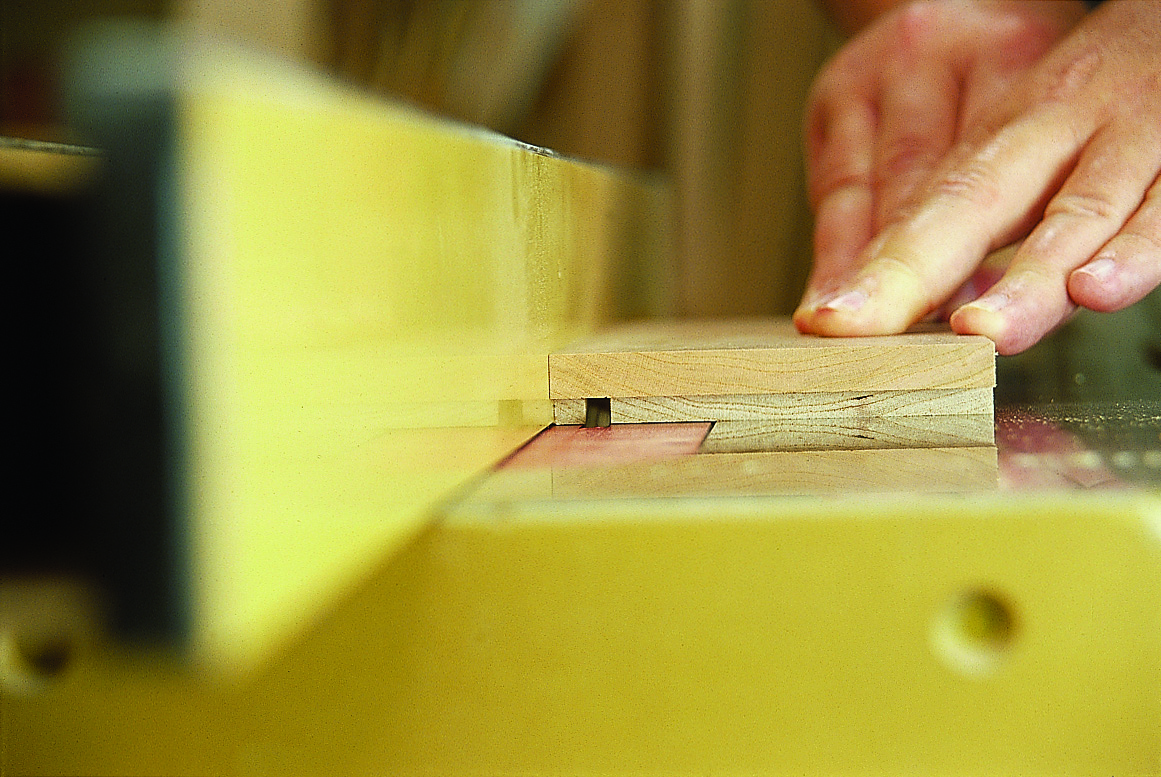
3. You’re ready to cut. The rabbets are made only on the drawer fronts and backs. The side pieces are left intact. The first pass should be made at the end of the piece. Use your miter gauge to guide the cut to remove the waste.
4. The second pass is made with the end of the piece guiding along the rip fence, defining the inside shoulder of the rabbet. It may be necessary to make a third pass to clean out the center of the rabbet’s cheek.
5. The last cut is for the 1⁄4″ x 1⁄4″ groove to accept the bottom. It’s made by running the two sides and front piece (shown) flat on the saw, guiding the bottom edge against the fence. The back is 1⁄2″ narrower and has no bottom groove. pw
Here are some supplies and tools we find essential in our everyday work around the shop. We may receive a commission from sales referred by our links; however, we have carefully selected these products for their usefulness and quality.