


We may receive a commission when you use our affiliate links. However, this does not impact our recommendations.
Finishing figured wood is an intimidating thing. You have a special material and you want to apply a finish that is going to enhance the figure that’s already there. Here is my oil-based approach to most curly woods.
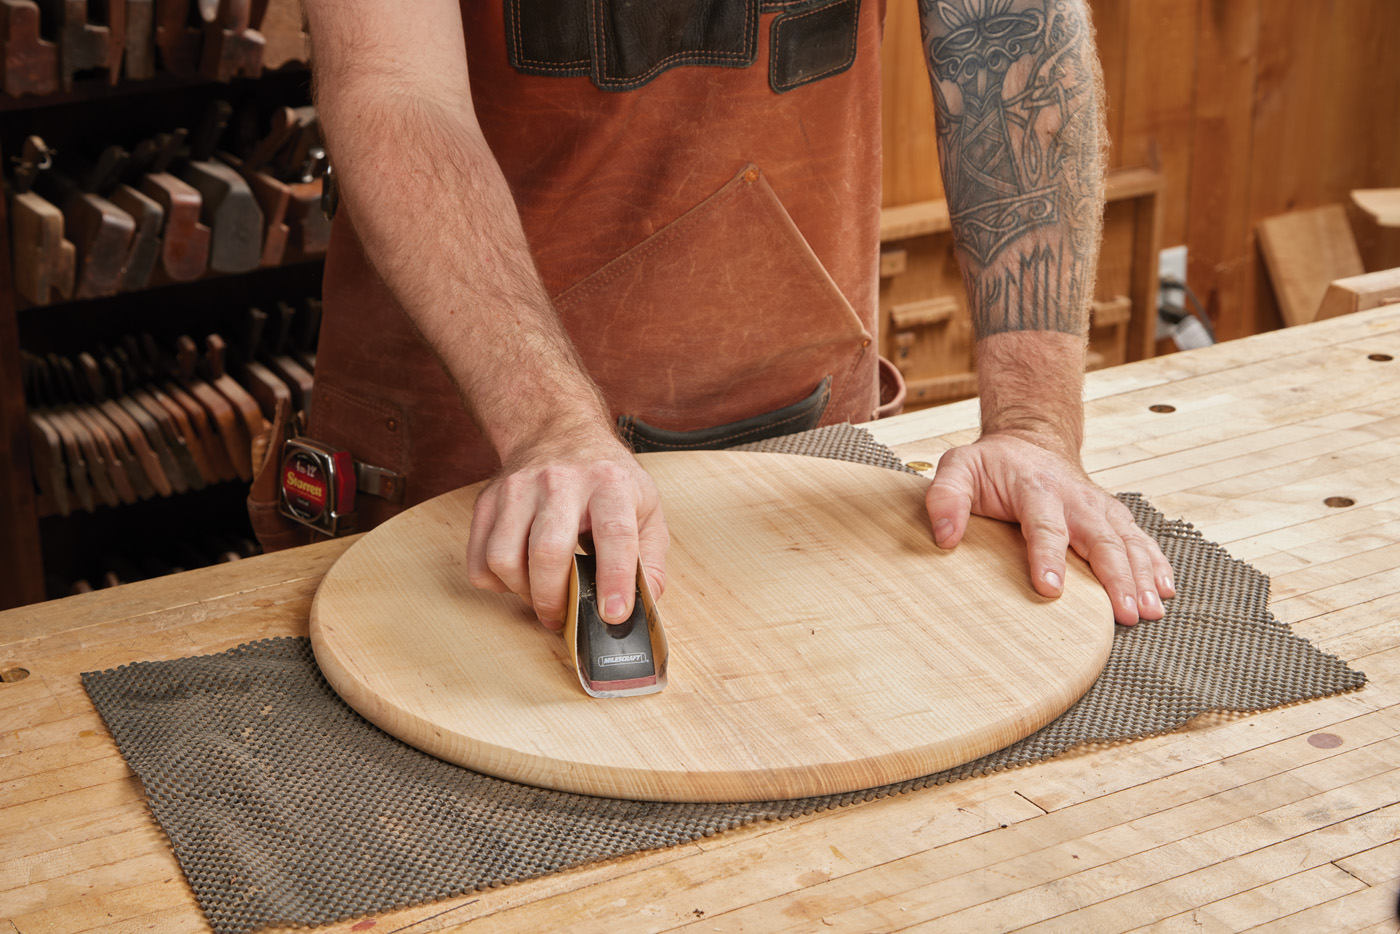
1 Prep the surface. Despite what many hand plane snobs will say, there’s no shame in sanding.
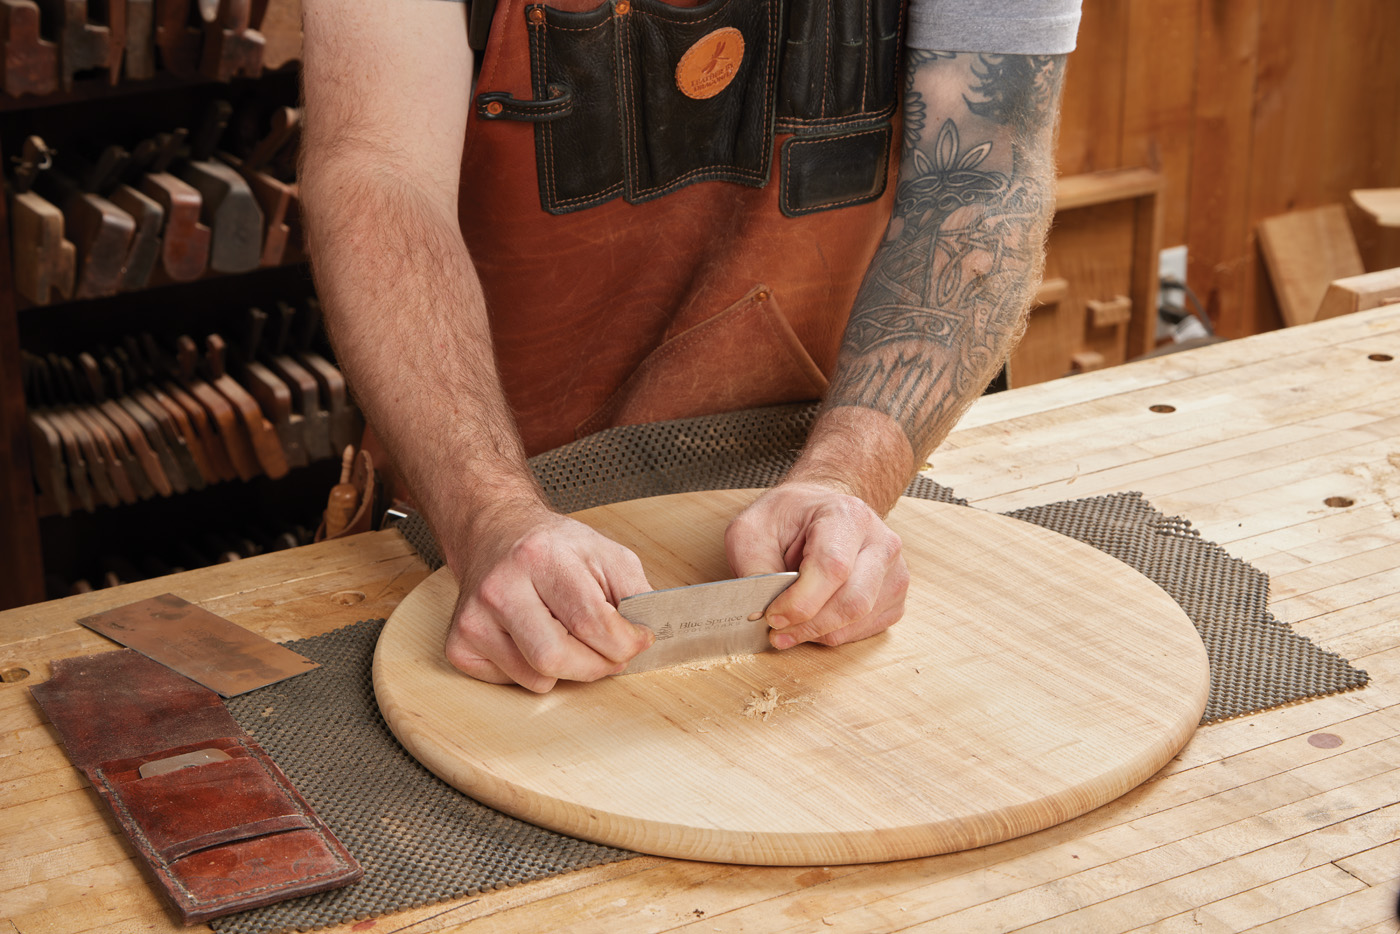
2 Tackle any tearout with a sharp card scraper, then sand through the grits.
My first step is to get a good surface for my finish to soak into. I start (usually) with a rough sanding block. 120-grit or so. Sand the entire surface, and wipe away the dust. What you’ll find is that the dust settles in any small areas of tearout. If you have some of those spots, I tackle them with a card scraper or a freshly sharpened plane. Then, it’s onto sanding. With this finish (penetrating oil), I sand up through 320-grit.
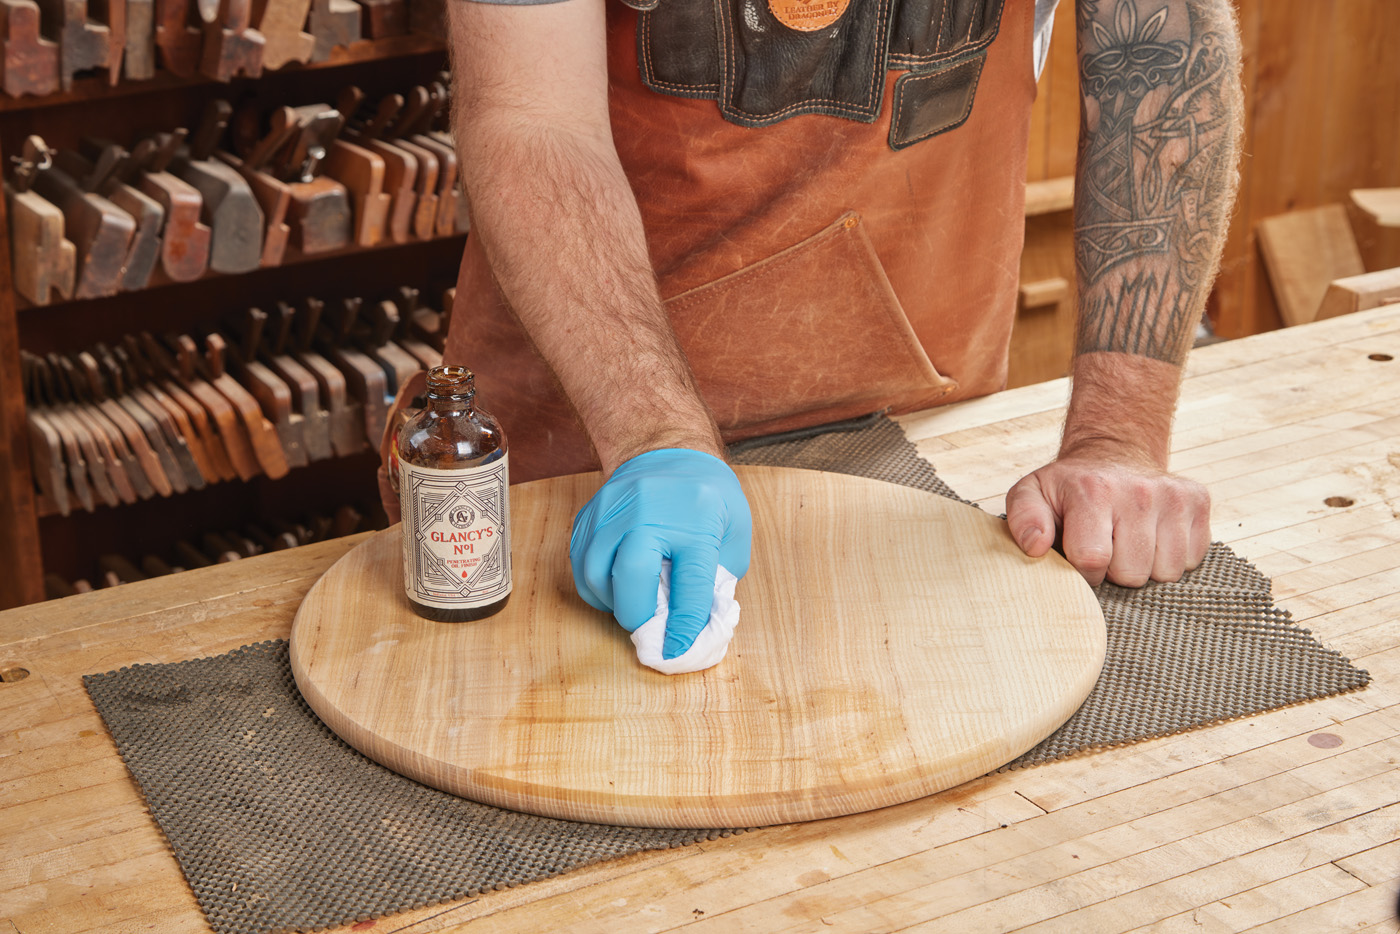
3 A penetrating oil soaks down deep into the figured surface.
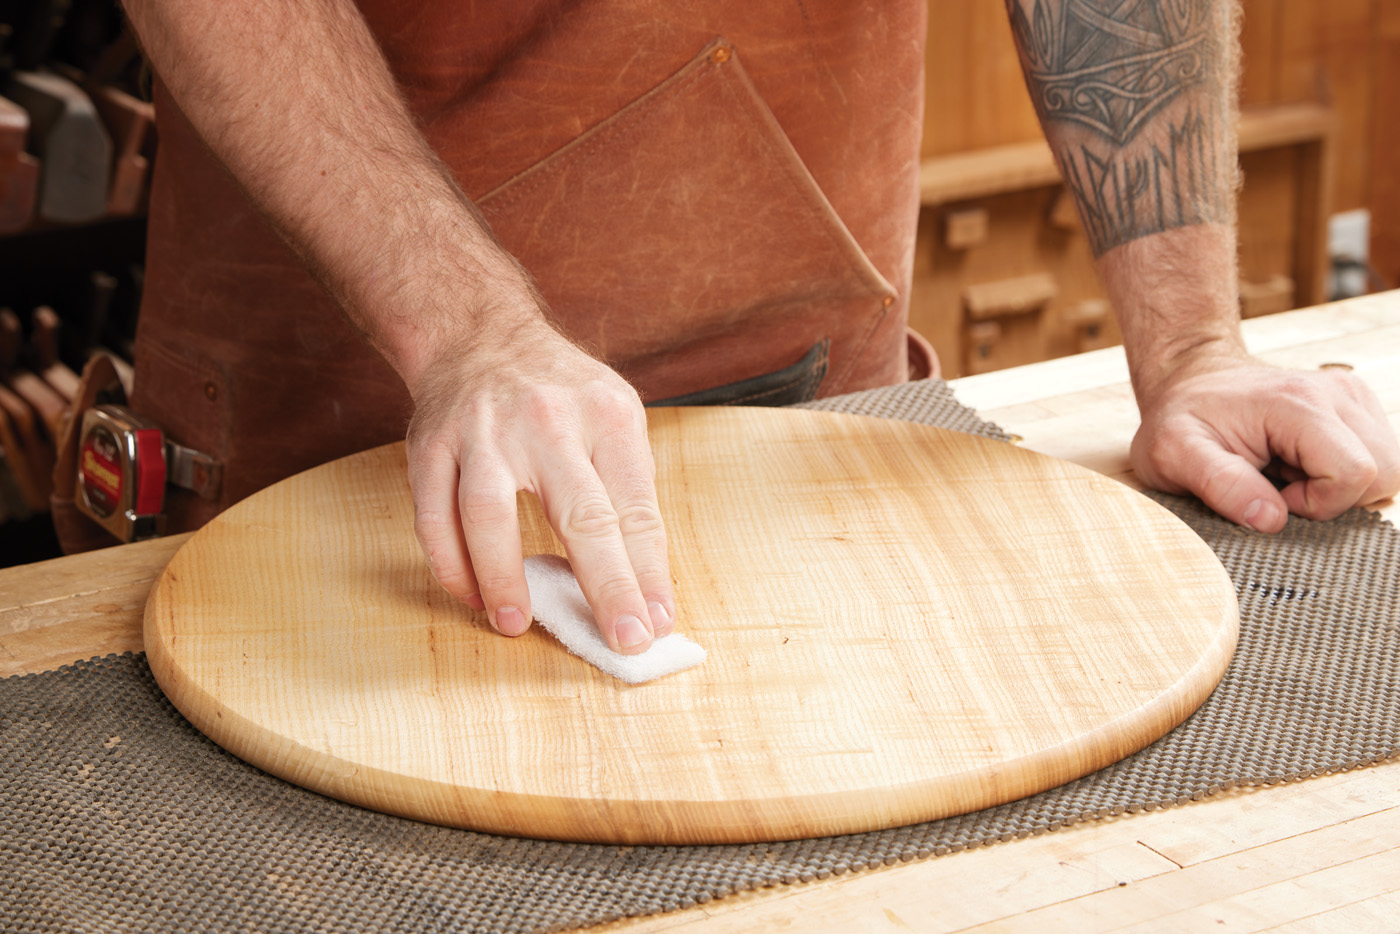
4 Cut back the penetrating oil with a fine scouring pad.
This finish is a two-step finish. The first step is to apply a penetrating oil that soaks deep into the fibers and highlights the figure. I use Glancy’s No. 1 oil for this. This is flooded on and allowed to absorb before wiping the surface dry. After 24 hours, I come back with a white Scotch-Brite and lightly buff the surface. This cuts back any Glancy’s on the top, and opens it up for the next layer, which is Danish Oil. A final coat of paste wax adds extra protection for the day-to-day wear.

5 Then, apply a top coat. I keep Danish oil in a glass jar, ready to use. Sorry, it’s not actually raspberry preserves.


