A good vise is tool money
well spent. It’s a solid
investment in your workbench
that pays off every
time you need to hold a piece
of wood.
Two Types of Vises
Everybody’s familiar with the standard
metal-jaw vise,but there’s a second type
of vise to consider: the wood-jaw vise.
Here’s a quick comparison:
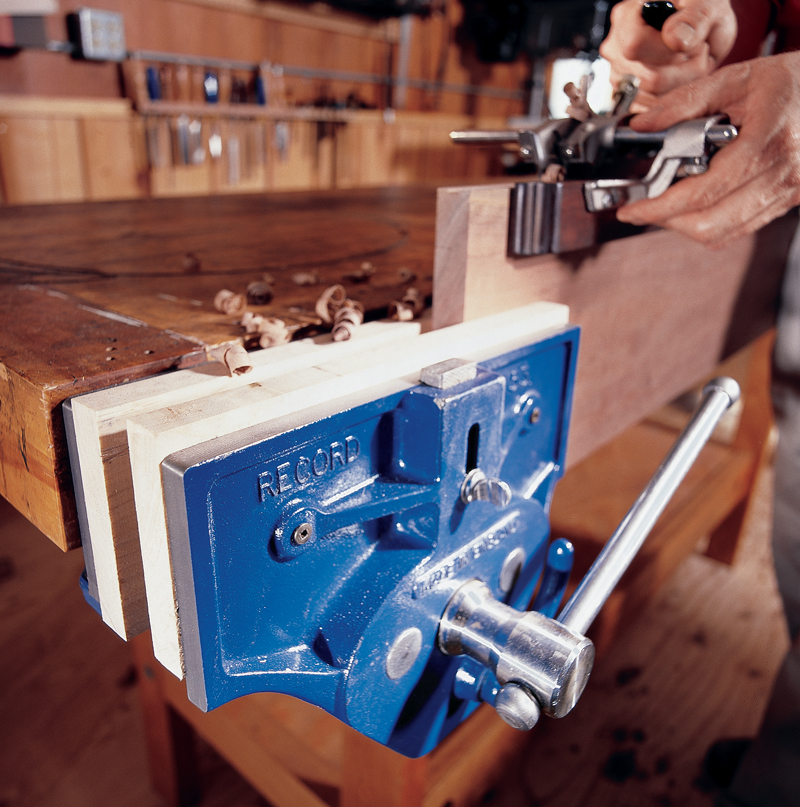
Metal-jaw vises are easy to install
(Photo 1). To drop the jaws slightly
below the top of your bench, make a
wooden plate that fits between the bottom
of the bench and the vise body. If
you want the inner jaw of the vise to be
flush with the edge of your bench (the
set-up we prefer), you’ll have to cut a
notch out of your benchtop. In any case,
add wood cheeks.
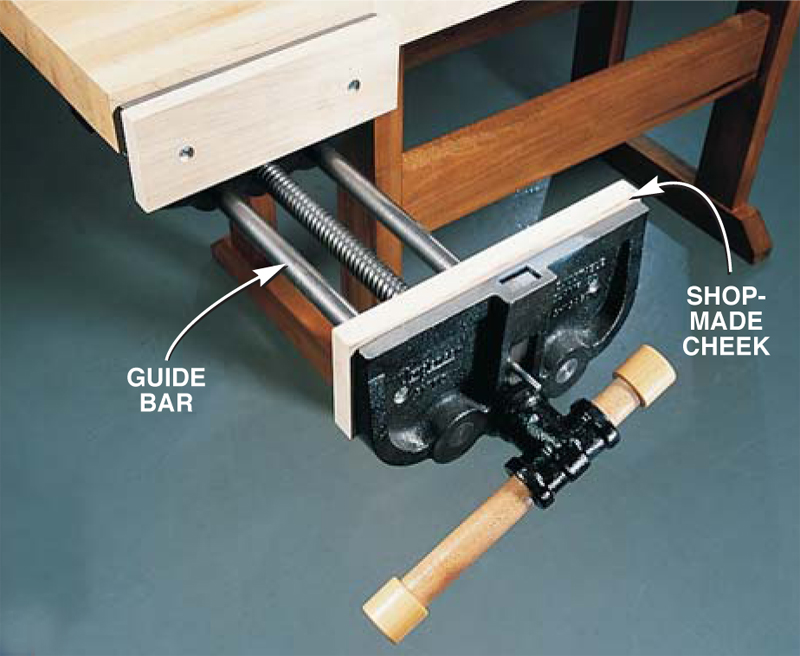
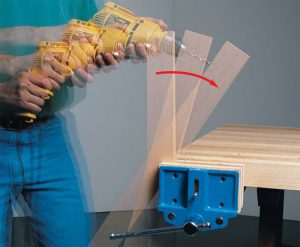
Wood-jaw vises generally come as
starter kits (Photo 2).You buy the metal
Add clamping power
to your workbench.
hardware and make the front jaw, an
optional lower rear jaw and turn or buy
the handle. If you want a traditional
look to your bench, this is the way to go.
The front edge of your bench must be
straight and square because it serves
as the rear jaw.
Features
Vises are built to last. Every vise we
tested delivered plenty of clamping pressure
and was robust enough to hold up
to a lifetime of service. If you’re going to spend your woodworking career with
one vise, it makes sense to buy one that’s
a pleasure to use. Here are the features
we feel make the most difference:
● Jaw Size. Large jaws offer more surface
area to hold your workpiece.More surface
area means more friction to keep
your work from slipping. You can
increase the effective surface area of any
metal-jaw vise by adding oversized
cheeks,but we prefer vises that start out
with large jaws.
For a wood-jaw vise you can make
virtually any size jaws.Use a stiff wood
such as hard maple and make the front
jaw 3-in. thick.
● Jaw Opening. Rarely will you open
your vise all the way, but a deep capacity
gives you more clamping versatility.
The day will come when you’ll need it!
Some metal-jaw vises have a huge
capacity, but wood-jaw vises generally
have shorter openings after allowing
for the thickness of the jaws.
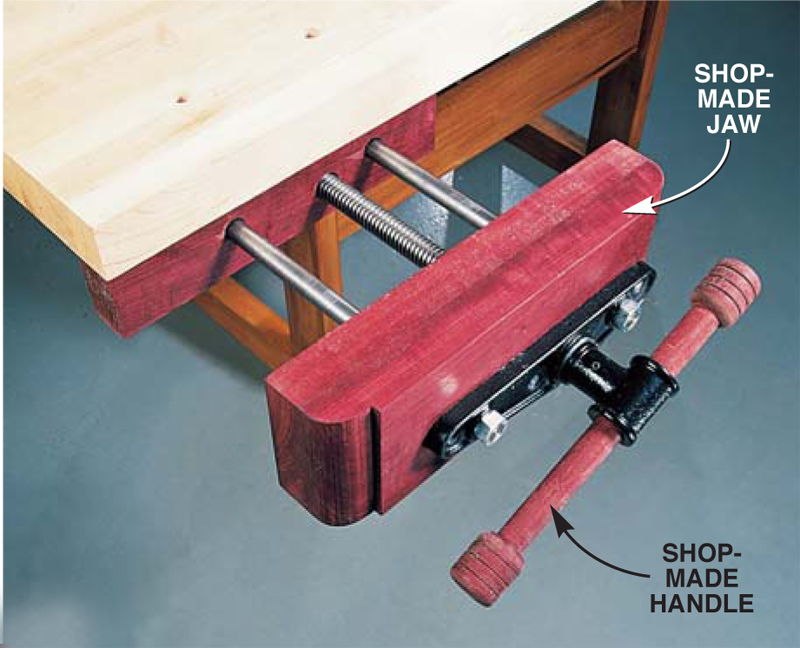
● Quick Release. Sliding the front jaw
in and out without turning the handle
is convenient but not a feature you’re
likely to use often.Almost all the metaljaw
vises offer one of two types of quick
release. They all work well. It’s a matter
of personal preference, but we like the
lever action best (Photo 3).
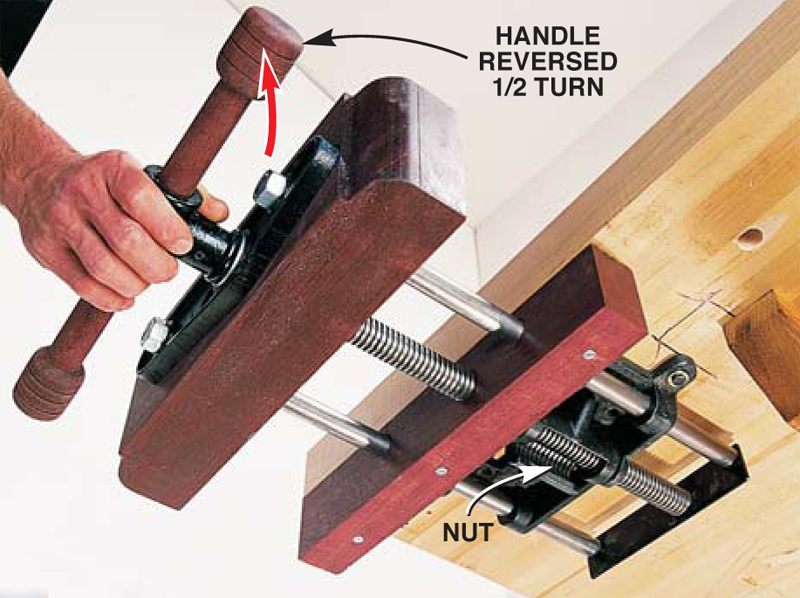
Most of the wood-jaw vises do not
have a quick release, but two offer the reverse action
type (Photo 4).
● Vise Dog. You can hold work on top of
your bench with the vise dog that’s
found on every metal-jaw vise (Photo
5). Friction-fit, spring-loaded dogs are
the easiest to use.
You’ll have to make your own dog
hole in the front jaw of a wood-jaw
vise. One pre-made kit includes the dog
hole.
● Handle. You’ll be using it a lot, so a
handle ought to be comfortable. Some
metal-jaw vises have large-diameter handles that are easier to grip than the
rod-type handles.
To fine-tune the amount of pressure
a vise is exerting, a handle should
have a long “throw” (the distance from
the center of the screw out to the
handle’s tip). Regardless of the amount
of throw, all the vises have plenty of
clamping power.
Choose your own handle length with
a wood-jaw vise. The handle must be a
fairly large diameter to fit into the socket.
Fig. A-C: Top-to-Bottom Racking
Fig. A: The Problem
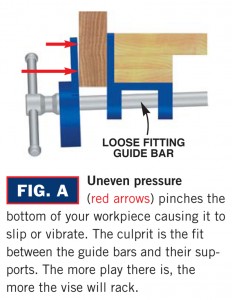
Fig. B: Manufacturer’s Solution
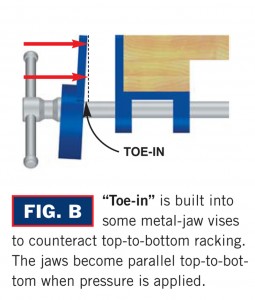
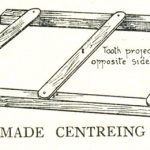
Fig. C: The Shop Solution
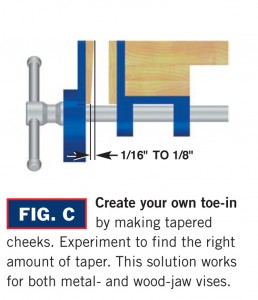
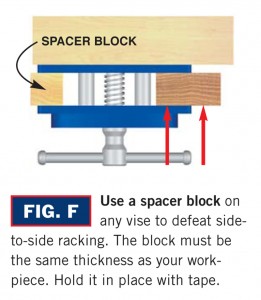
Fig. D-F: Side-to-Side Racking
Fig. D: The Problem
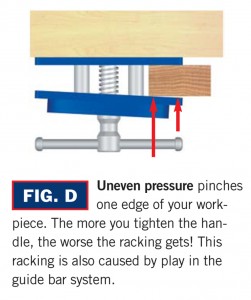
Fig. E: Manufacturer’s Solution
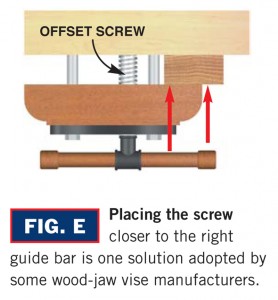
Fig. F: The Shop Solution
This story originally appeared in American Woodworker October 2000, issue #82. |
|
Click any image to view a larger version.
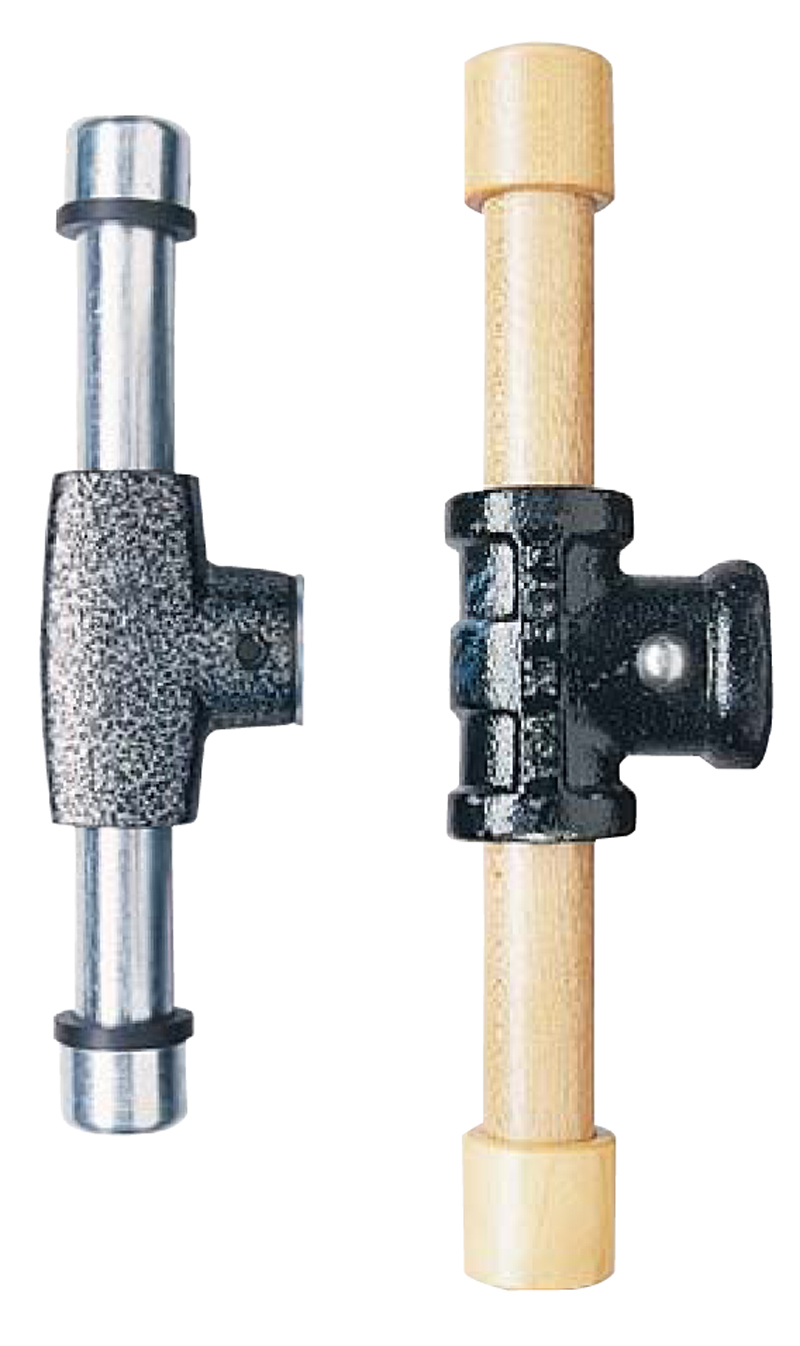
1. A metal-jaw vise is ready to go right out of the
box. Add wood cheeks, bolt it to your bench and you’re
ready to clamp.
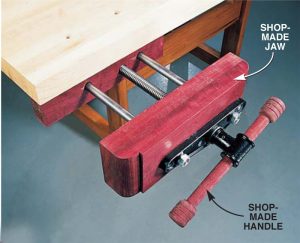
2. A wood-jaw vise requires assembly. Make your
own jaws and turn a handle of any length (or buy one).The
front of the bench doubles as the upper half of the rear jaw.
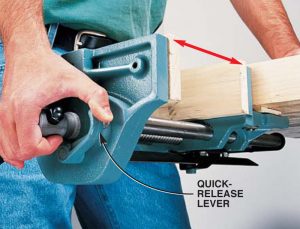
3. Squeeze the lever on this quick-release
mechanism to slide the front jaw in or out.The spring-loaded
lever is connected to a bar that releases the nut from the
vise’s screw. We prefer this type of quick release.
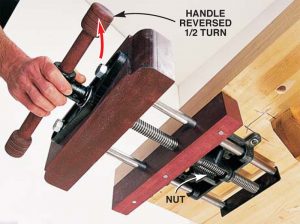
4. Reverse the handle one-half turn for another
type of quick release.This action releases the nut.To engage the
nut, turn the handle clockwise. One metal-jaw and two
wood-jaw vises have this feature.

5. Hold a board on top of
the bench with a vise dog. All metal-jaw
vises come with dogs. Make your own
dog hole in a wood-jaw vise.
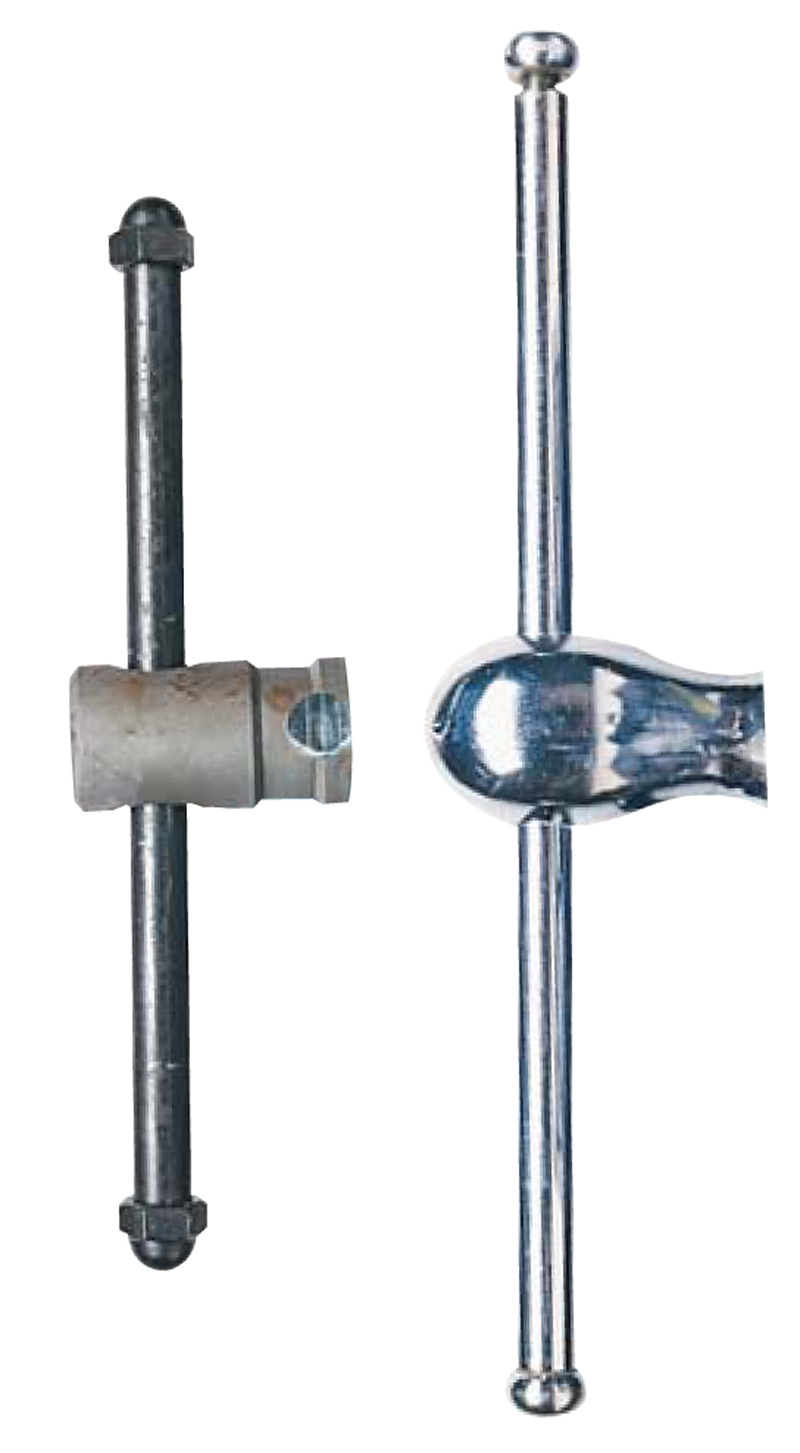
Types of Handles

Large-diameter handles
are comfortable to grip. One metaljaw
vise comes with a short metal
handle (below, left), while two others
have longer wooden handles (below,
right), similar to what you’d add to a
wood-jaw vise.

Long metal-rod handles give you more
leverage and a more sensitive
adjustment (below, right).We find
short metal-rod handles or those
with capscrew ends (below, left)
less comfortable.
The Wilton Vise
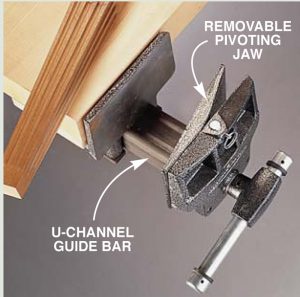
Two features set this vise
apart from the others:
● Pivoting Jaw. It’s perfect for
holding tapered work. Raise up
the pivoting jaw to make a
huge dog. Remove a pin, slide
off the jaw and you’ve got a
standard vise.
● U-Channel Guide Bar. You
can place your workpiece very
close to the screw, minimizing
side-to-side racking. The channel
also protects the screw from
damage.
What’s the deal with racking?
When your workpiece slips in a vise,
blame “racking.”Before you tighten a
vise, the jaws are more or less parallel, but
when you apply pressure the front jaw
can noticeably tilt or twist. That’s called
racking, and it results in unbalanced
pressure on your work (Figs.A and D).
Some amount of racking is present in
every vise, but some suffer more than
others.Vise manufacturers have two
tricks up their sleeves to combat racking
(Figs. B and E). Just as good are the solutions
that woodworkers have used since
the days of sloppy fitting all-wood vises
(Figs. C and F). |