We may receive a commission when you use our affiliate links. However, this does not impact our recommendations.
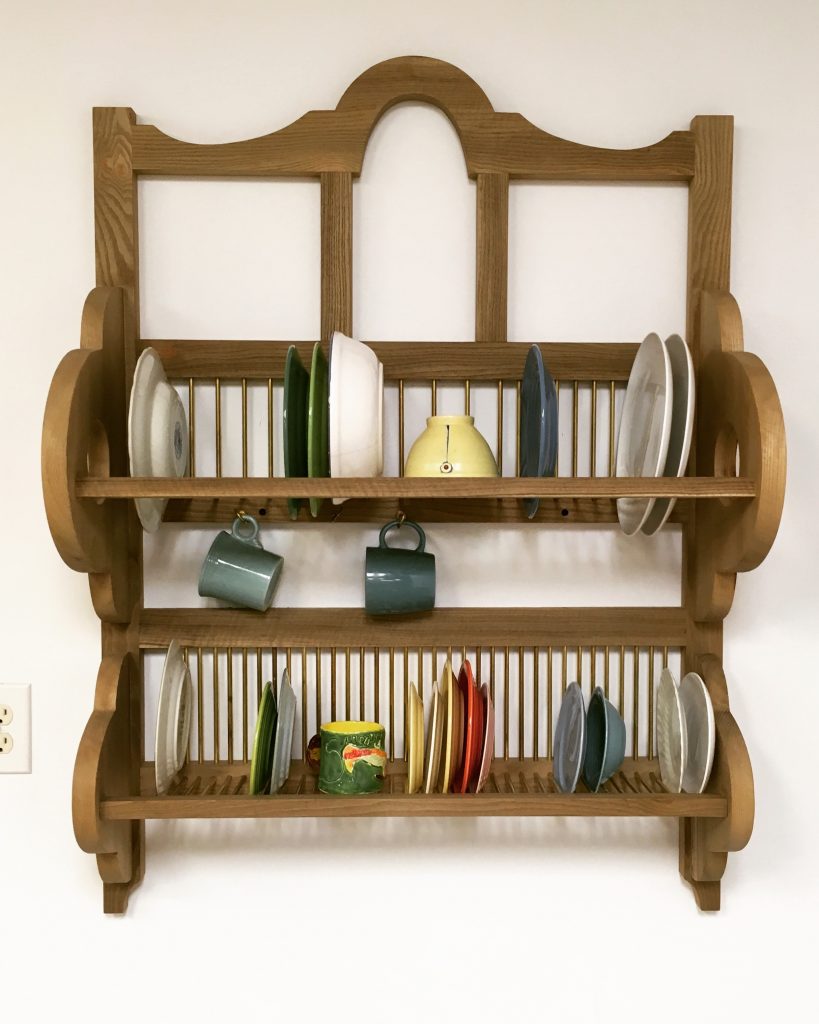
Finished prototype
There’s nothing like building a prototype to offer insights into methods of construction, as well as aesthetic nuance. Having finished this plate rack, I now have several changes in mind for the plans I will include in the book I’m writing about kitchens for Lost Art Press. Here are a few notes of potential usefulness to those considering a plate rack build.
Consider weight and materials cost in your plate rack design
I built this piece in curly sassafras, as I had a few boards left from the hayrake table I built for my last book. The wood is lightweight, which appealed to me almost as much as the figure, but if you use sassafras, be aware that it’s extremely soft and will quickly develop character from dents and dings.
I decided to use 1/4″ brass tubing instead of wooden dowels, because I wanted this design to combine wood and metal. A word of advice: If you want to use brass tubing, buy the entire lot before you start to build. I depleted the tubing supply of my favorite hardware store and then learned that no one else sold it locally. Wanting to get the plate rack finished so I could move on to the current kitchen commission, I substituted solid brass rod for the rest of the dowels. The rod weighs a lot more than the tubing. While it’s probably not going to cause any harm, I was concerned about the amount of weight that would be supported by the front rail of each horizontal section, which is relatively slight in cross section. My revised design will have beefier front rails.
A final note about the brass: It’s expensive. I invested over $100 in the brass for this plate rack. The next one I build will have 3/8″ wood dowels.
A tweak to the visual weight
I decided to lighten up the large bosses by opening up a circular space that would make the remaining area mimic the frame proportions. I used a hole saw, but in the future I will make a template for routing with a pattern cutter; that will leave a cleaner edge. It’s crucial that before you start removing material for this kind of opening, you determine the location of the front rail for the upper section; you must leave enough material to maintain a strong joint.
Joinery
The framework is joined with Dominos. The boss-to-back-frame joint is simply a glued butt–there’s plenty of long grain to make a solid joint–“clamped” by means of 3 countersunk screws run in from the back. Assembling the thing was a royal pain, because there was nothing holding the bosses in place (until they were glued). I will rework this joinery as well as that of the front rails, which I joined to the bosses with dowels.
A general note about awkwardness
I put the dowels in the holes of one rail, then turned the part over so I could see the holes on the mating rail. It took a long time (and a couple of painful blood blisters) to get the rows of closely spaced dowels for the lower section inserted. I started at one end and tapped the dowels partway home as I went, to keep them from popping back out. My best advice: If your dowels fit snugly, as mine did, it works best to gently pull on each one until you can get it *just* touching the opposite hole, then ease it in place.
It’s also critical that you make sure the rails are parallel to each other. Even if your dowels are all the same length and your holes are all the same depth, it’s possible for one end to be snugged up less than the other. Light pattern clamps are your friend here.
Here are some supplies and tools we find essential in our everyday work around the shop. We may receive a commission from sales referred by our links; however, we have carefully selected these products for their usefulness and quality.