We may receive a commission when you use our affiliate links. However, this does not impact our recommendations.
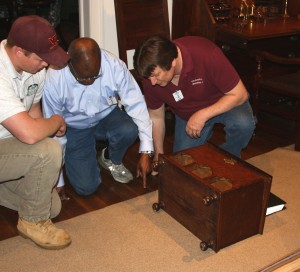
 This week I’m at Acanthus Workshop LLC teaching a class in which we are building the cover project from the June issue of Popular Woodworking Magazine, the Hannah Darlington Chest. Tuesday morning started out great: Breakfast at Annamarie’s; pancakes to die for. Then it was off to the Winterthur Museum, Garden & Library in Winterthur, Del., to get a close-up look at the chest.
Let me say right from the start that I am thrilled with how my rendition of the Darlington chest turned out. When compared to the original photo I had in hand at the outset, I think – aside from 200 years of age and the fact that I used mahogany and the antique was built from walnut – the two small chests are close in most respects.
As I began the drawings for this chest, I had only a straight-on view of the piece. Generally this is great because I can bring the image into SketchUp and get a close approximation of the sizes. However, I wasn’t able to see all that I was missing.
Standing in front of the antique original (I would share pictures of what I am about to describe, but there is some question as to whether I’m able to do so without violating Winterthur rules…) I was immediately able to see things that were not apparent from the photo, such as the corners of the box being mitered at the top. The miter then transitioned into dovetails which is similar to the way Christopher Schwarz built the Jefferson Bookcase corners.
As we moved further into our examination and drawers were pulled from the case, I discovered that the area behind the drawer’s arched top was also cut away. Not knowing this as I began, I elected to rabbet the top edge of the drawer front and to not cut away the arcs in order to add depth inside the box storage area. (The arched cutaway also meant that the drawer fronts were lipped around the arched tops.)
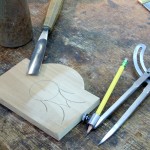
 The biggest shocker I found dealt with the inlay on the drawer front. The string inlay is not symmetrical, as I believed it was from looking at the photo. (It is symmetrical from side to side, but not from top to bottom, as evidenced by the bottom arcs extending nearly a 1/2″ farther than those at the top which terminated at the thumbnail edge.) In fact, it is believed that the inlay on the drawer fronts was not scratched using a compass, as in compass inlay. Thoughts are that the string work on the drawer fronts was set in using a carving gouge as shown in the photo, then the grooves were completed with a small chisel prior to the inlay being fitted.
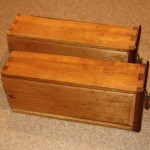
 Also, if you look at the photo, you can see that these drawers have bottoms that slide into grooves cut in the front and sides. While this is the common practice in 18th-century work, often drawers this small in size have applied bottoms, as I did in my build.
I have more to write, but I’ll save that for next week when I am back in the office and it’s easier to post a couple of drawings to help visualize the differences. If you’re building this piece, slow down. You will want to make these small adjustments.
Here are some supplies and tools we find essential in our everyday work around the shop. We may receive a commission from sales referred by our links; however, we have carefully selected these products for their usefulness and quality.


Annamarie’s pancakes weigh somewhere around 37lbs. I saw a waiter throw out his shoulder serving them.
Looks Like a fun project, Glen, thanks! One question….for the arched drawer fronts, if I didn’t have a router and roundover bit, how would I put in the profile? Just use a scratch stock and chisel in the corners? What would the original craftsman have done?
Thanks!
Derek
Thanks Glen.
My wife was quite taken by your project and dropped some good size hints.
Keep us posted with as many details as possible.
Dave