We may receive a commission when you use our affiliate links. However, this does not impact our recommendations.
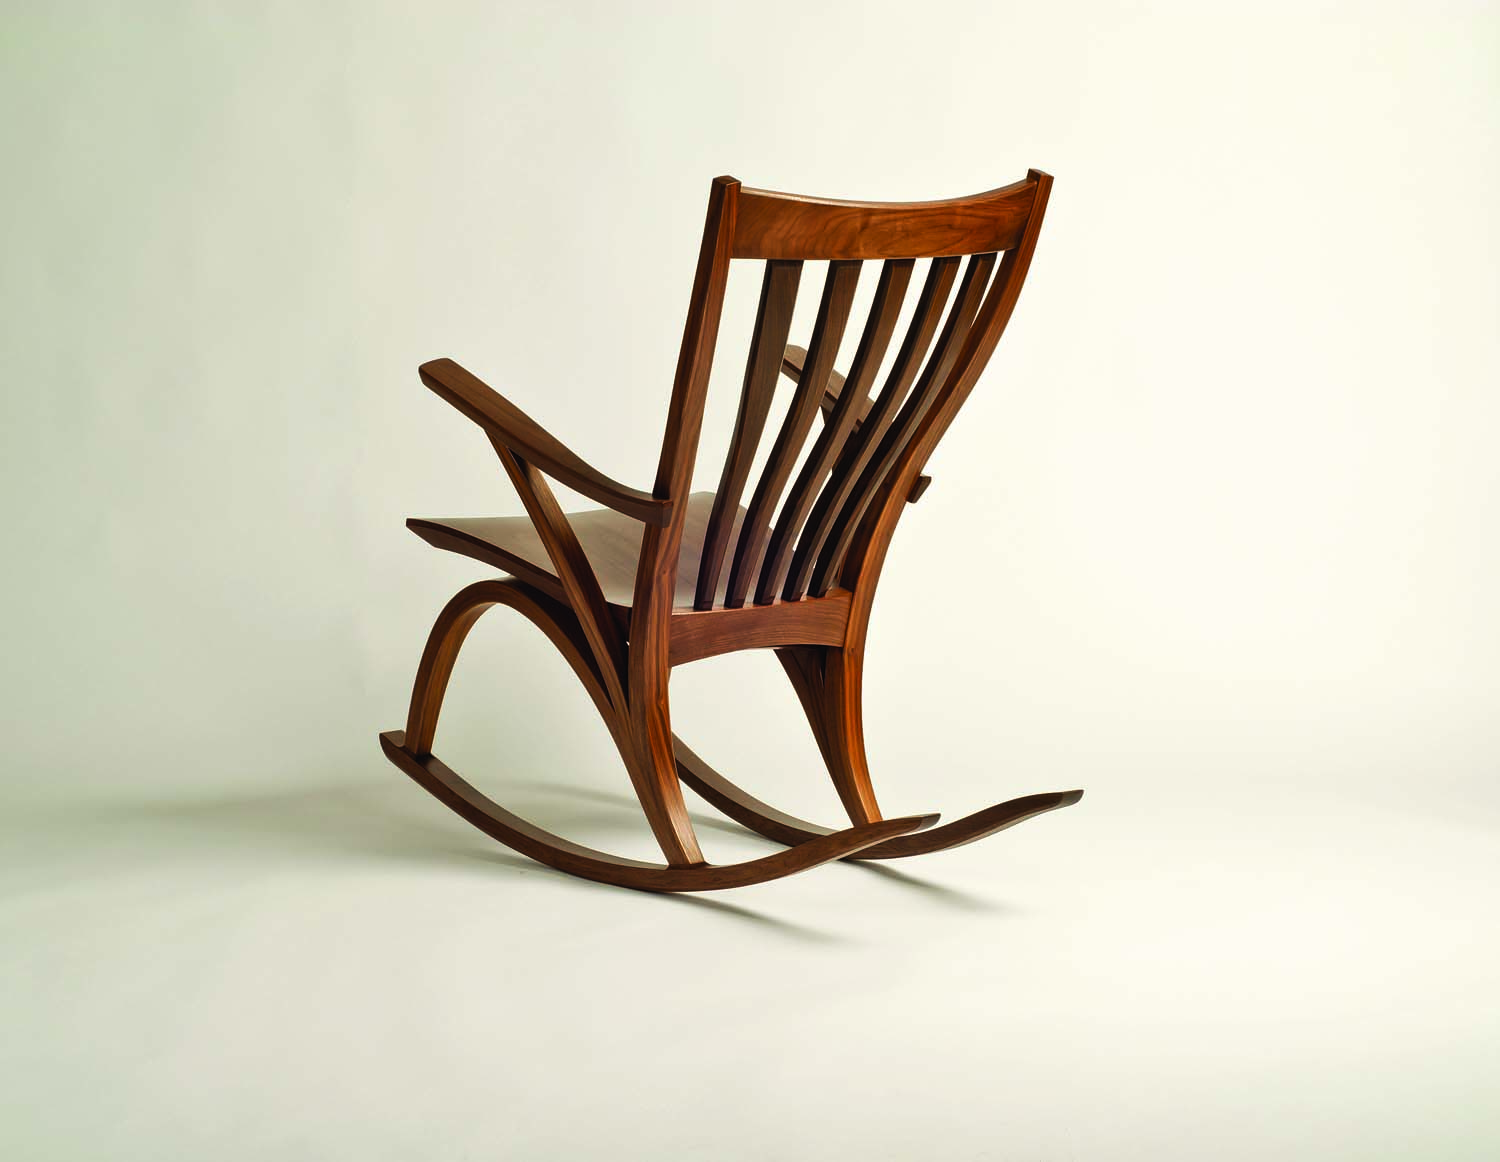
Rest in peace. A rocking chair should take some of the weight off your spine and soothe you with its rocking motion. The rockers and the center of gravity are key to the equation.
A little geometry and a simple prototype ensure a pleasant ride.
I recently set out to design and build a new rocking chair. I’ve designed and built a handful of rockers, but my past efforts didn’t rock as well as I would have liked. I have confidence in my ability to make a comfortable “regular” chair, but it seemed like I was dealing with an entirely different problem with a rocker. So I decided to look a bit more carefully than before into what makes a rocking chair “work.” I wanted to understand the geometry of a rocking chair in hopes that I could improve my overall results.
A rocking chair has a lot of factors in play. In addition to the usual requirements that a chair be structurally sound, comfortable and look good (these are my requirements at least), the rocker adds the challenge of dynamic motion. Does the chair tip back too far, or stay too upright? Does it rock back easily into a comfortable position, or does it take work to push the chair back? Does the rocking chair wander all over the room as you rock back and forth? Does it rock quickly, or is the rhythm more relaxed? Is it easy to settle into the chair? Is it possible to get up out of the chair without a huge effort?
Adding to those complications, I also noticed that, although the perceived comfort of any given (static) chair tends to be consistent for the majority of people, what’s expected of a rocker seems to be a little more personal.
My “book” research was fascinating, although not very enlightening. There’s an awful lot of opinion, lore and conflicting information. Everyone who has made a rocker seems to have a strong opinion. Some people swear by a particular relationship between the seat and curve, or a special shape of curve for the rocker, only to be contradicted by the next person’s opinion. There was little common ground in all the information. I think there are two main reasons for this. First, as I mentioned above, expectations of what a rocking chair should be seem to be somewhat personal. And second, each chair really does seem to generate its own set of requirements.
What Makes a Rocking Chair Work
The most basic way to look at any rocking chair is to see it as the relationship between the center of gravity of the chair (plus the person sitting in it) and the shape of the rockers. What is a “center of gravity?” It’s defined as the average location of the weight of an object. It also can be seen as the balance point of the entire object.
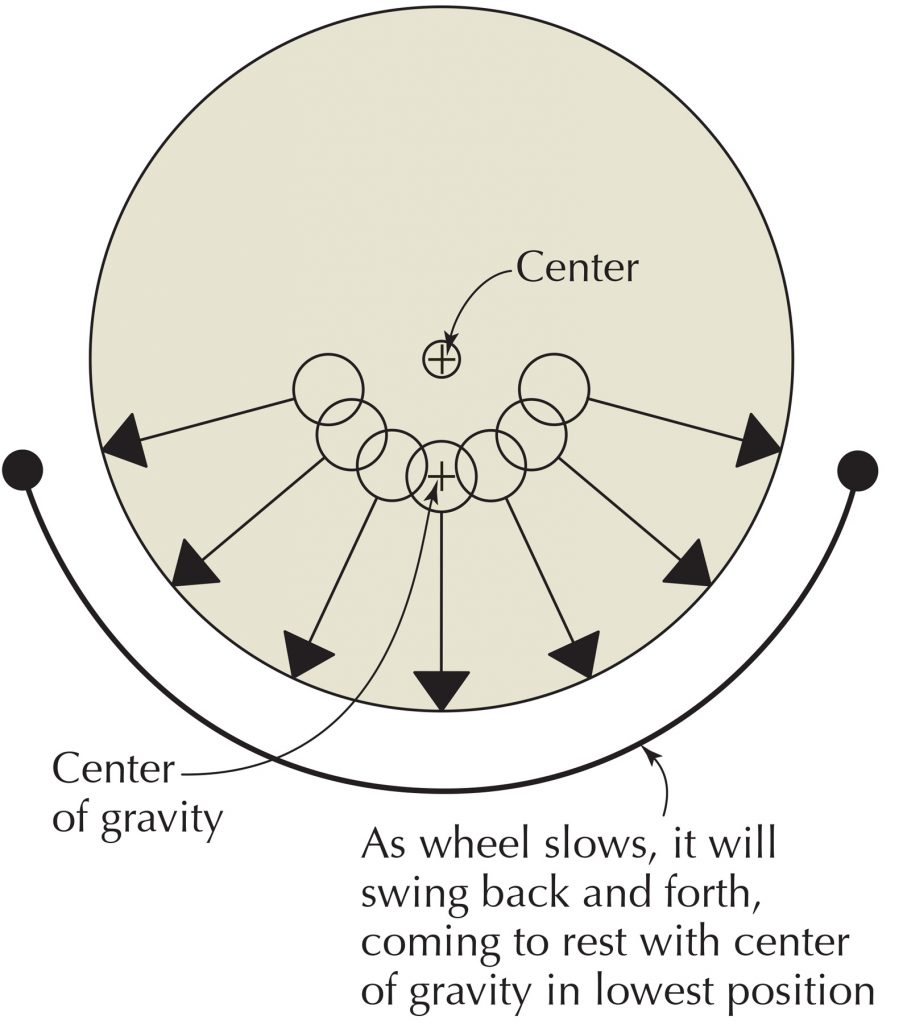
What it means in the case of a rocking chair is best explained with an example. Imagine a wheel standing on edge that has a lead weight added to it somewhere between the center and the edge. Depending on how heavy the weight is in relation to the weight of the rest of the wheel, the center of gravity will shift a certain amount toward that weight. What happens to the wheel? It will roll so that the weight (the center of gravity) eventually ends up closest to the ground. If the wheel is shifted away from that position, it will always return there.
Of course, it won’t settle there all at once, but will overshoot (due to inertia), then reverse and head back down, over and again until gravity and friction overcome the inertial forces and the wheel stops with the weight at the lowest point. The relative distance between the weight and the edge of the wheel will have a large effect on just how the wheel behaves, too.
Locate the weight close to the edge and it will settle there quickly. Locate it close to the center and the wheel will rotate much more slowly, farther and it will take longer to settle down.
Translating this back to an actual rocking chair, if you locate the center of gravity close to the center of the circle, you’ll get a pretty wild ride, tipping way back then far forward; if it’s too close to the rockers (the edge of the circle), you will just sit there.
This is the basic mechanism of the rocking chair. The location and orientation of the seat and the person – and therefore the center of gravity – in relation to the rockers control how it will rock. In reality, the exact location of the center of gravity varies, however, due to body type, body position and the configuration of the chair itself.
The chair influences this location not just through the seat and back positions, but also a little bit by the weight distribution of its components. Just where is the center of gravity? In general, the center of gravity of a person seated upright in a chair will be roughly an inch or so in front of the navel. But each chair is different, and not only is each person slightly different, but every sitting position (feet outstretched, feet tucked under, slouching, etc.) changes the location of the center of gravity.
The shape of the rockers themselves is a subject with even more contrasting opinions and no clear answers. Suggestions abound for arcs of a certain radius, or an elliptical shape, or a catenary curve (the curve you get by hanging a chain or string between points), a cyma (which Sam Maloof called a cygnet curve due to its swan’s neck shape), or some magical combination of the above. The essential fact is that very little of the rocker is actually involved in rocking.
A typical rocking motion only covers about 8″ to 10″ of the rocker. If you account for settling into the chair and for pushing it back pretty far, that might involve all of 14″ of the rockers. This critical part of the curve is most likely very close to an arc of a circle, but slight variations can change the feel of the rock a little. Outside of the critical area, variations in the curve are either cosmetic or work to limit the possibility of tipping the chair over in an extreme situation (such as a child standing up on the chair and leaning back).
Of course, the radius of the arc is important in relation to the center of gravity. If the center of gravity is roughly 25″ or 26″ off the floor (a typical rocking chair would put it there), you can see that a rocker radius of only 30″ would put the center of gravity close to the center of the circle. This would make for a very tippy chair (as well as a very odd-looking one).
At the other extreme, a rocker with a radius of 80″ would tend to just sit there. A reasonable radius with this center of gravity would be in the 39″ to 42″ range. Why am I talking about the height of the center of gravity and not the seat height? The shapes and angles of rocker seats can be very different, and it’s hard to define a consistent reference point that is significant from one chair to the next.
This may all create a better understanding of what’s going on with a rocking chair, but despite that, not much practical information has emerged. You should be getting a little clearer understanding of why that is, though. Each chair really is different, and other than some basic parameters, it’s difficult to apply any hard and fast rules to come up with a solution that works. In other words, there is no foolproof way to calculate how all of the various factors will come together.
Rocking Chair Goals
 Let’s look at what we want out of a rocking chair, then at how we can get there.
There are two main qualities that I think set a rocking chair apart from other chairs. First, the chair should tip you back to a position that takes pressure off your back. How does this happen? Sitting upright in a chair, your muscles are primarily responsible for keeping you upright.
As you tip back in a chair, your muscles don’t need to work as hard to support your spine because the back of the chair, assisted by gravity, takes over more of that job. Assuming that the shape of the back is appropriate, this puts your spine in a relaxed and neutral position. And this feels good. What you want is for the chair to naturally tip you back to that neutral position (somewhere around 25° behind vertical seems to work well).
The other important quality is the rocking motion – the simple movement into and out of that neutral position when you move farther forward or back.
Why this rhythmic motion is so important is a little harder to explain. It seems to be naturally calming. It avoids the discomforts of sitting in a static position, works off nervous energy and is said to promote better blood flow. In terms of rocking chair design, the goal is simply to wind up with a rocking motion that feels comfortable.
Prototype to the Rescue
 To sort all of this out into useful design information, I decided to do some hands-on research and build and play around with a functional prototype. This is something I encourage you to do as well before tackling a new rocking chair project. The prototype was fun to build, and extremely helpful.
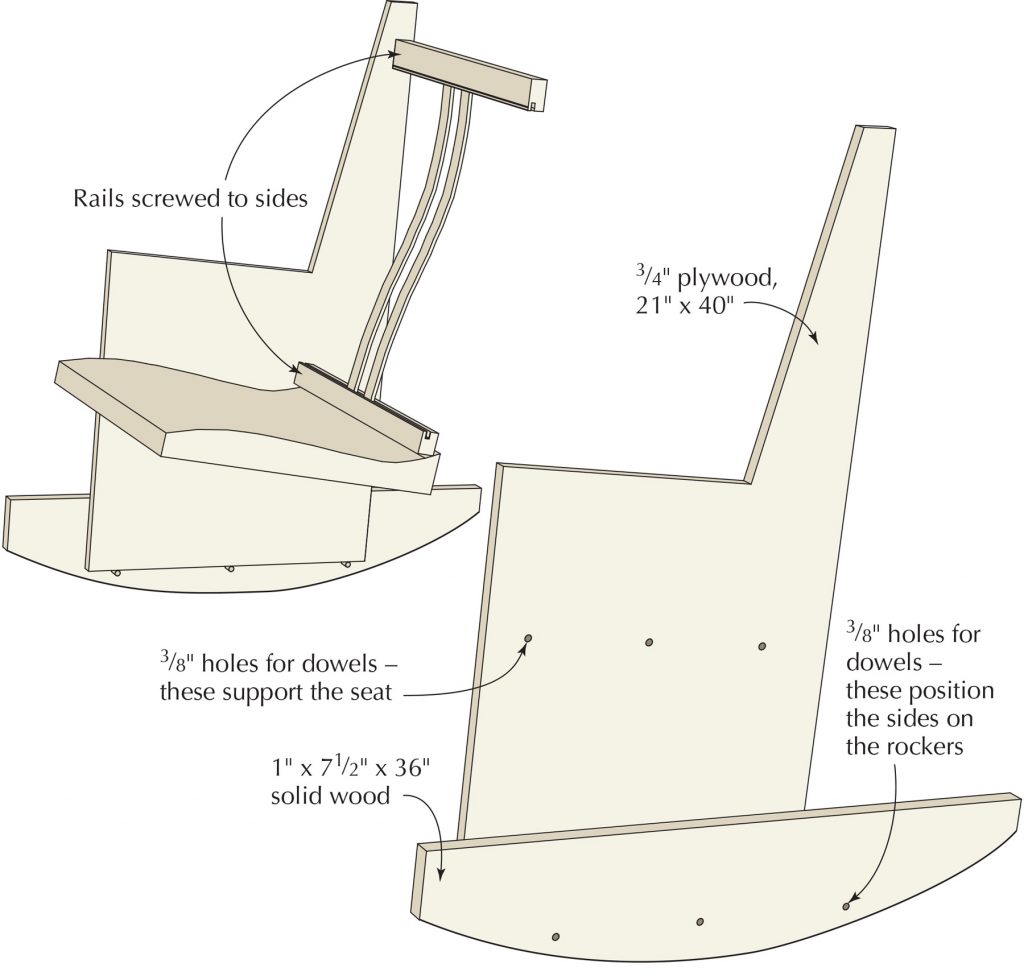
I laid out a potential shape for the basic chair I wanted to build on two pieces of 3⁄4” plywood, roughly 21″ wide x 40″ long. I wasn’t concerned with the look of the chair; I just wanted to get the positions of the seat and the back right to start with, then start my experiments with different shapes, sizes and locations for the rockers.
I made up a contoured seat by skinning a set of hardwood ribs with a piece of 3⁄8” bending plywood. If you plan to make a flat seat, just use another piece of plywood (you can attach it with cleats to the sides). I also happened to have a couple laminated slats that were quite comfortable left over from an earlier chair project. But for this purpose, it’s just as good to cut some slats to shape.
I placed the seat where I thought it should go on one of the plywood sides, then marked out the locations for a pair of holes just below. I then put the two plywood sides back together, drilled 3⁄8” holes on my marks and inserted dowels so the seat would register in exactly the same place on both sides. I put the seat in place and screwed through the sides to attach it. I made up some cross pieces to hold the back slats, played around a little with the angle of the back slats then screwed the rails in place. The rough chair was comfortable. Break time. I had to think a bit about adding the rockers.
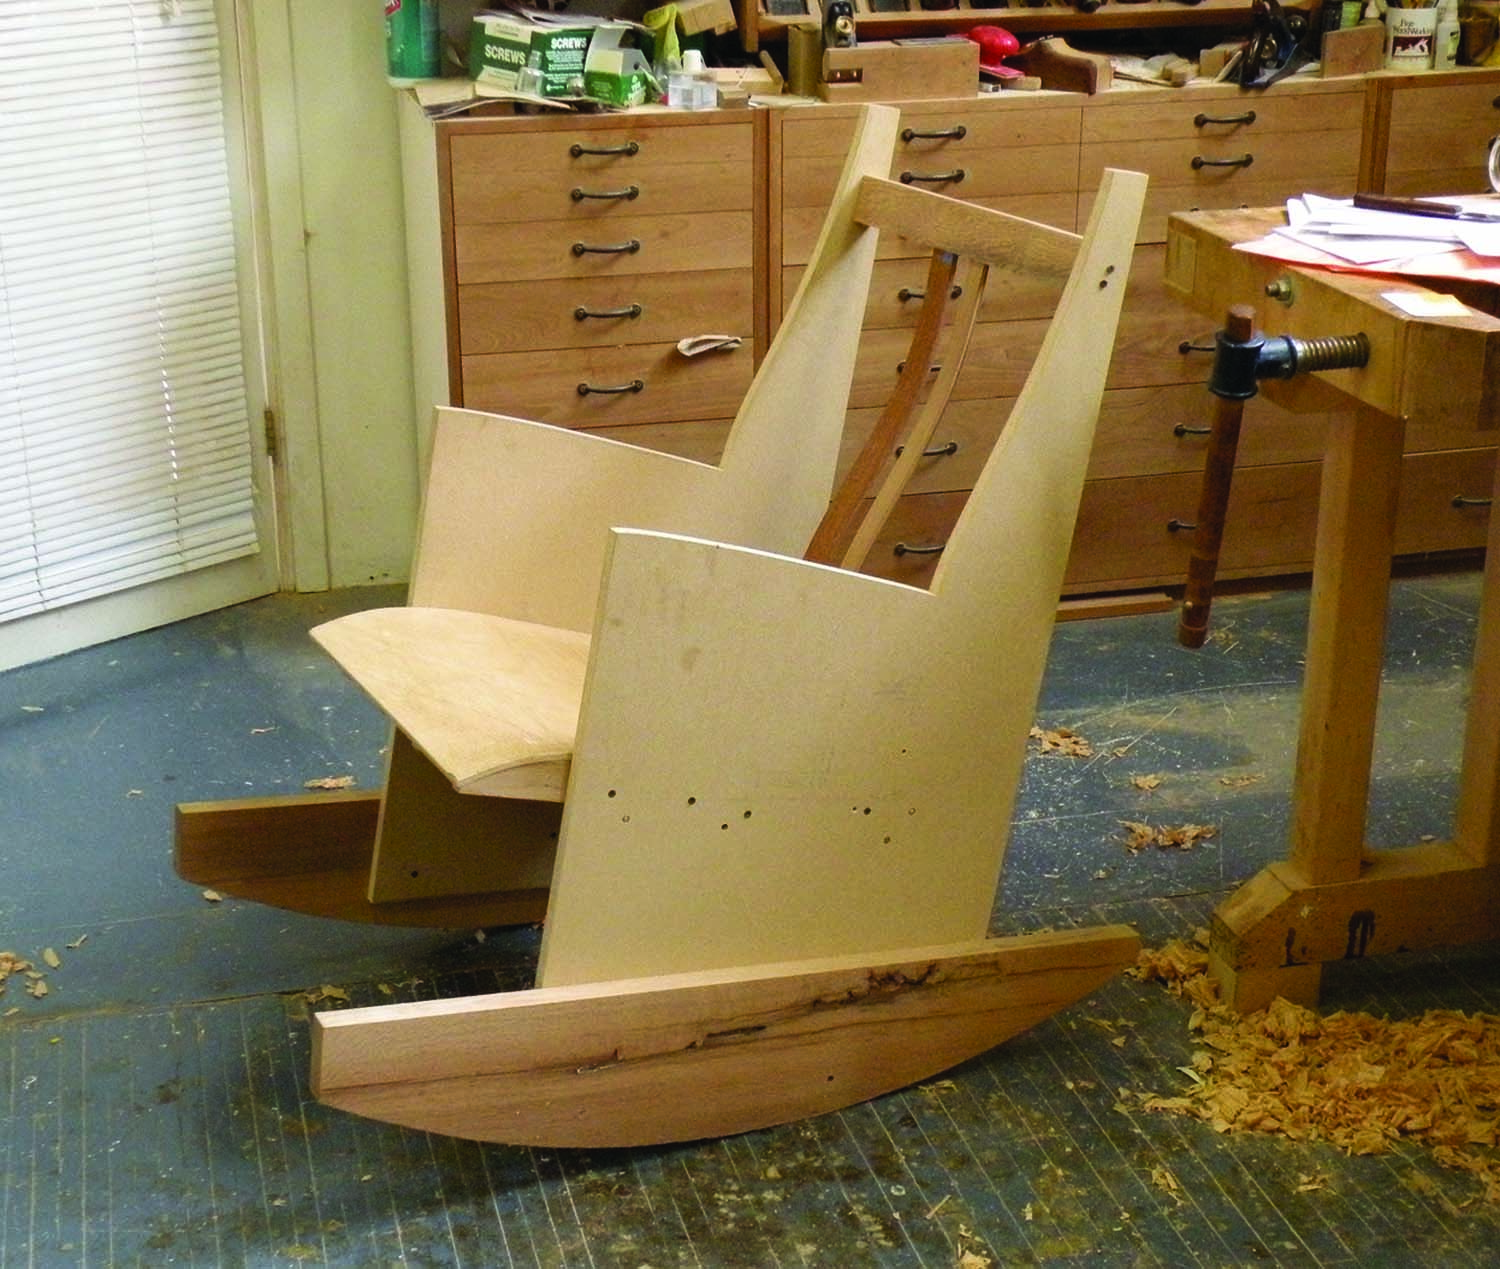
Mock you to sleep. This mock-up of my rocker design allowed to me to quickly change variables and immediately feel the outcome.
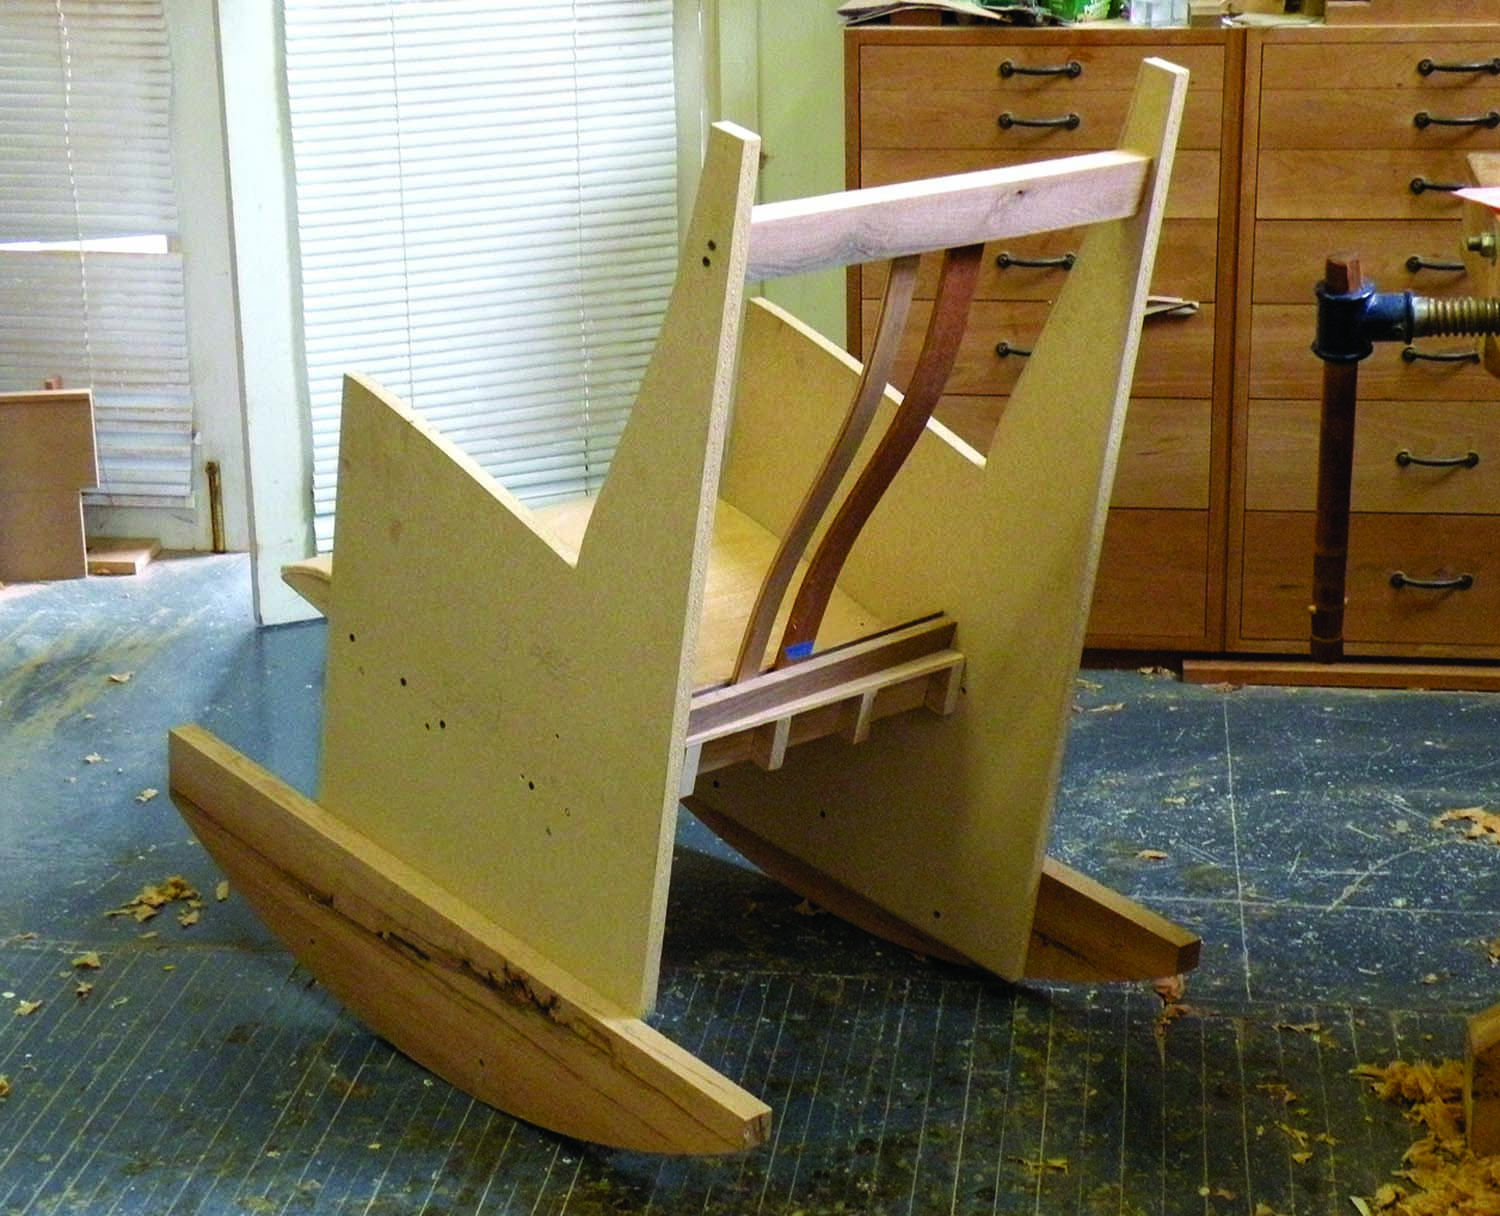 It’s crucial on any rocking chair that the two rockers be shaped exactly the same and aligned perfectly with each other. The end result should be as if they were cut from the surface of a large cylinder. I started with two pieces of wood that were about 1″ thick, 71⁄2” wide and 36″ long, and temporarily screwed them together face to face, with the edges aligned. Then I cut out and smoothed a potential shape, leaving the tops of the boards flat.
I used an approach similar to what I had used for locating the seat to be sure I got the rockers properly aligned. Prior to separating the rockers I drilled a series of 3⁄8” holes 51⁄4” down from the top edge. Inserting dowels into the holes on each side established a “track” so I could slide the set of rockers back and forth as needed along the bottom of the plywood sides. I just needed to measure from the ends an equal amount to line them up, then screw them into place. When I needed to move the rockers up and down, I simply drilled a new row of holes as necessary.
I experimented. The plywood and rockers got more holes as I tried different positions. I made up new rockers of different radii, and some different shapes. I adjusted angles. Finally, I made up a second prototype so I could compare two versions that seemed to work well.
What Did I Discover?
The prototype allowed me to isolate various elements of the design that I had been having trouble with before. I could play around with seat angles and have that be somewhat separate from the height of the seat, and also from the way the chair rocked. To change the seat height I could either cut a little bit off the bottoms of the plywood sides or re-drill the rockers with a new set of holes.
I found it most helpful to be able to slide the rockers back and forth without having to think about leg lengths. Moving the rockers forward or back made predictable changes; the chair rocked back more easily as the rockers moved forward, and vice versa. I knew I had come upon a good configuration when I fell asleep in the chair at lunch one day.
Playing with the shape of the rockers also was interesting, although I thought that rocker location was the more significant factor. I found the difference between a 39″ radius and a 40″ radius very subtle. As I went larger or smaller, the differences were more noticeable. Smaller radii felt less stable; larger ones felt too unresponsive. And I did not notice huge differences with different rocker shapes. This was not altogether unexpected, because it is hard to see that much difference over the 8″ to 10″ of the rockers that actually come into play. For this particular chair I settled on a 39″ radius.
Where the action is. The 8″ to 10″ of curve below the seat is one of the key variables in the comfort of the rocker.
Interesting, although less useful, was the realization that a perpendicular line drawn up from the point of contact between the rocker and the floor will pass through the center of gravity and the center of the circle that generates the rocker arc. As I expected, this was not exactly the same when the chair was empty as it was with a person seated in it, but it was remarkably close.
The final version of the prototype worked well for most people. I was pesky about asking lots of students and visitors to the shop to try it out, and most found it comfortable. I did learn that preferences in arm height vary over a wide range, and that seemed to be the most common complaint from my testers. I had simply cut the plywood sides to a height that worked well for me. It would certainly pay to make adjustable arms if I were to do this again.
Turning the prototype into a real design was an interesting process. Somehow, I needed to pull all of the necessary information off the prototype. What I did wasn’t anything fancy. I pulled one side off my prototype and traced all of the important elements – the rockers, the seat, the back and the arms – directly from the prototype to a piece of foam-core insulation that a neighbor had discarded (1⁄4” plywood is my usual choice).
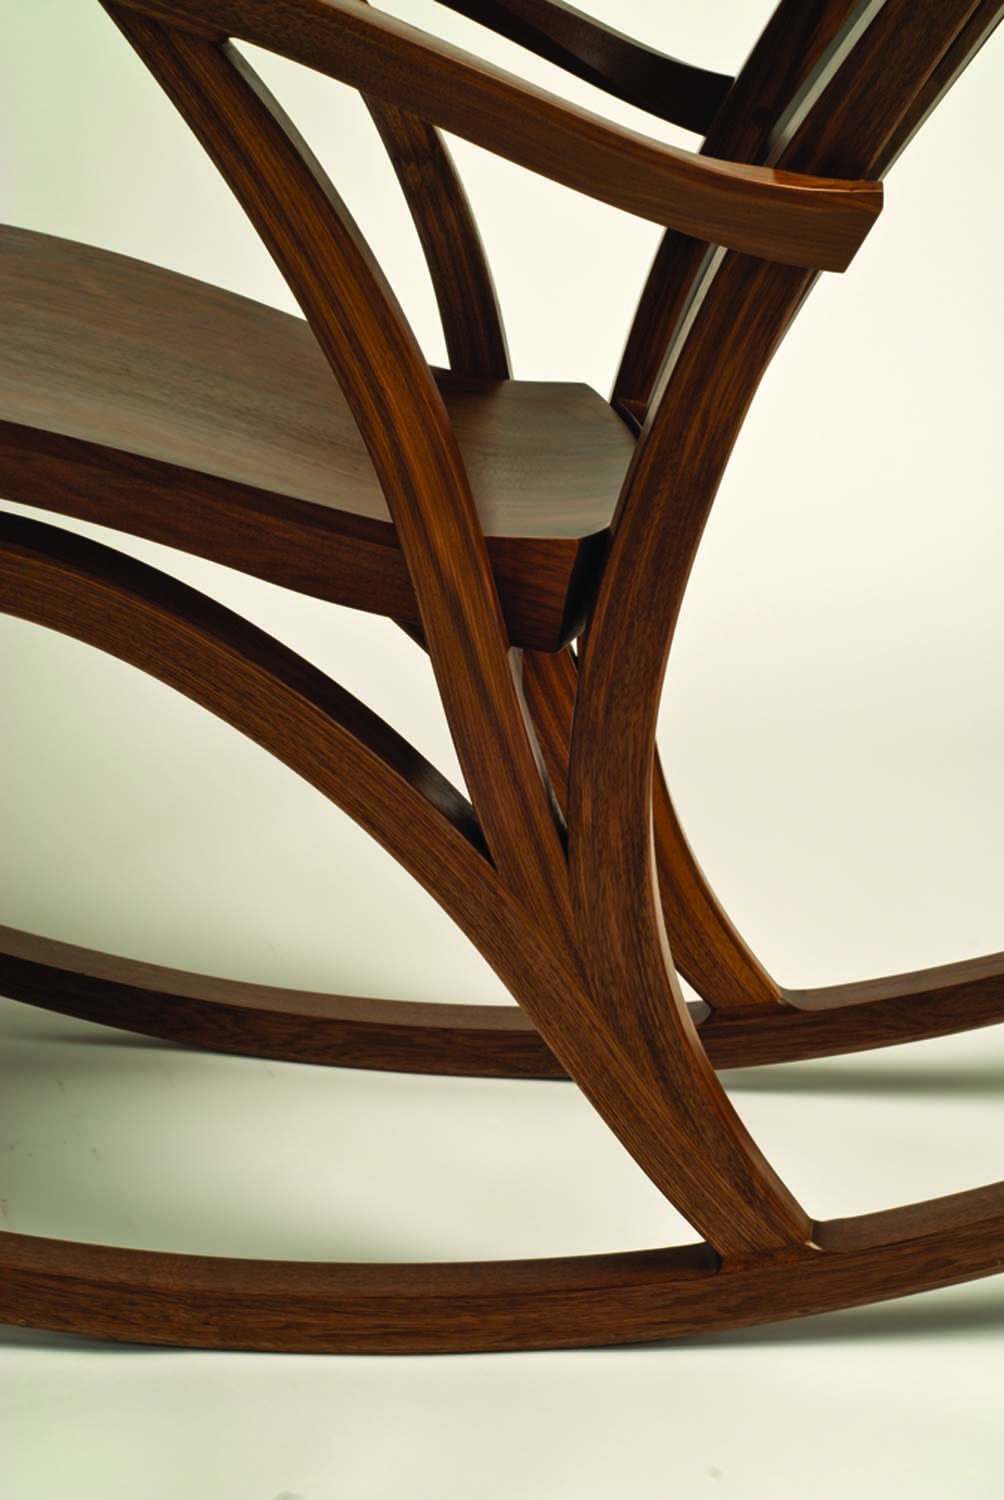
I had an overall concept of the piece with its branching components, and I played around for a few hours filling in details around the pre-determined seat, back, arm and rocker locations until I had a basic sketch to work with. A good eraser really helped with this! Then came the hard work of turning the sketches into a real piece of furniture.
The end results were very satisfying, although I did still have to do a little bit of functional tweaking on the actual chair design. I was surprised to discover that – at least with the design I came up with – those tweaks were minor, and the finished chair was actually quite close to the prototype.
Jeff is a Chicago furniture maker and woodworking teacher at J. Miller Handcrafted Furniture
BLOG: Read Jeff’s blog, which often deals with chair design.

Here are some supplies and tools we find essential in our everyday work around the shop. We may receive a commission from sales referred by our links; however, we have carefully selected these products for their usefulness and quality.