We may receive a commission when you use our affiliate links. However, this does not impact our recommendations.
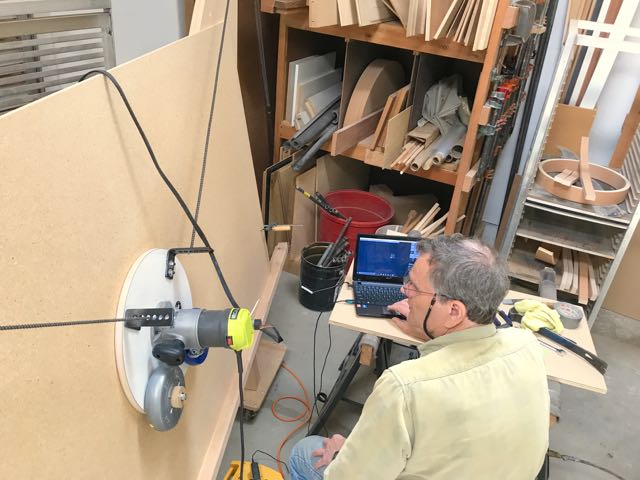
Furniture maker, Curtis Erpelding testing and tuning the Maslow CNC
The Maslow CNC is a CNC kit that costs just $350. For that price, you should expect a few compromises. For one thing, you have to put it together. Of course you’ll get the key mechanical, electrical and electronic parts, however, you will need to provide plywood and a couple of 2” x 4”s to complete it. The good news, after using one for a while, I can confirm that it really does work but there is one more ingredient you need: “Geekiness.”
After reviewing the beta kit, I think it’s important for potential buyers to approach it with realistic expectations. First, the Maslow is not a plug-and-play CNC —not that any current CNC is, but the Maslow throws in some extra challenges along the way. It’s a very basic kit mechanically but there are also a few software issues to overcome. What this means is that if you decide to build a Maslow you need to be prepared to step in and solve a few problems as they come up.
Because of my schedule, I was unable to build the kit, so fellow furniture maker Curtis Erpelding got my beta unit up and running. We’ve found that within reasonable limits, the Maslow CNC does indeed do what it promises. It takes G-code generated from digital drawings and cuts parts out of plywood or other sheet materials.
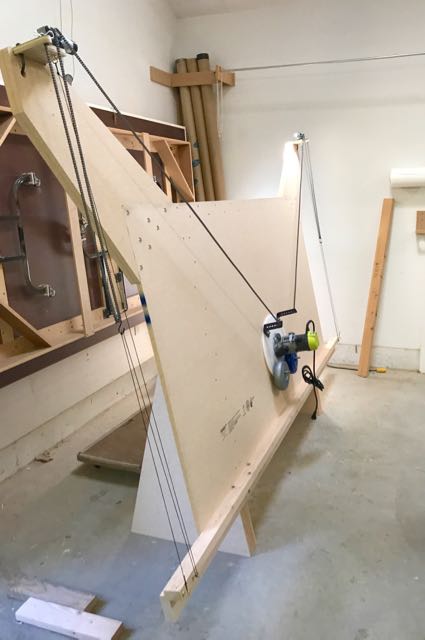
The Maslow CNC may be long at about 12′, but it is narrow, making it ideal for a shop with little space.
Getting the Maslow CNC running
Besides building the base — a straightforward construction task for the average woodworker, getting the machine tested and ready presents several challenges. Remember, the Maslow is not “plug and play”. A key task is you need to install the software and test and tune the Maslow. You need to download the current software, install the firmware onto the Maslow’s Arduino-based controller and set up your PC to run the machine. Then you go through several steps to calibrate the machine.
Along the way, you should be prepared to debug problems as they come up. And, being a new device and lightly documented, you should expect a few. This is why I say that potential buyers need to have some geeky skills. If you thrive on these kinds of modern challenges, you’ll be better equipped to solve these kinds of problems than a woodworker who’s experience might be limited to only dealing with mechanical issues.
Thanks to the support from Maslow and its helpful online community, you won’t be alone in dealing with most issues as they come up. Though many of the members of the forum seem to have little CNC or woodworking experience, they do appear to have a lot of software experience and they are ready to help if needed.
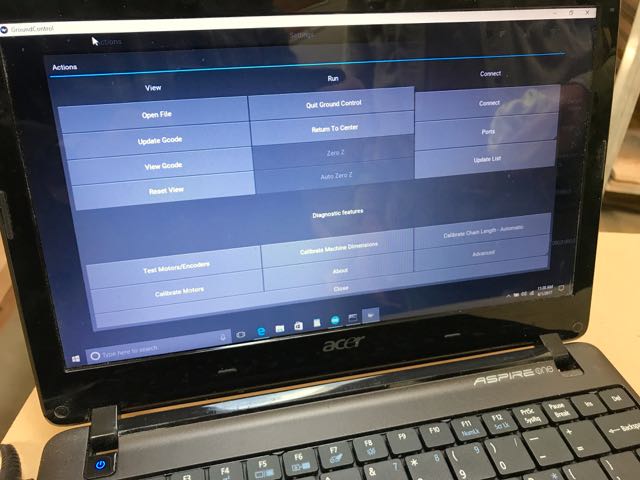
Maslow Ground Control Software works on PCs, Macs, Linux Machines, some tablets and inexpensive Raspberry Pi computers. The software is simple and easy to use.
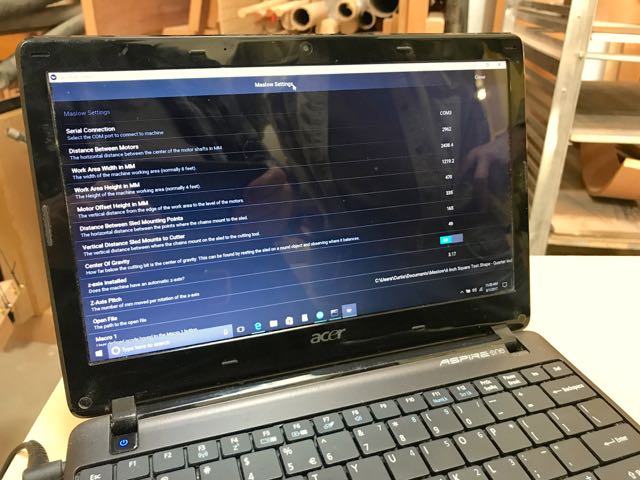
The setup screen is where you fine tune the Maslow’s settings
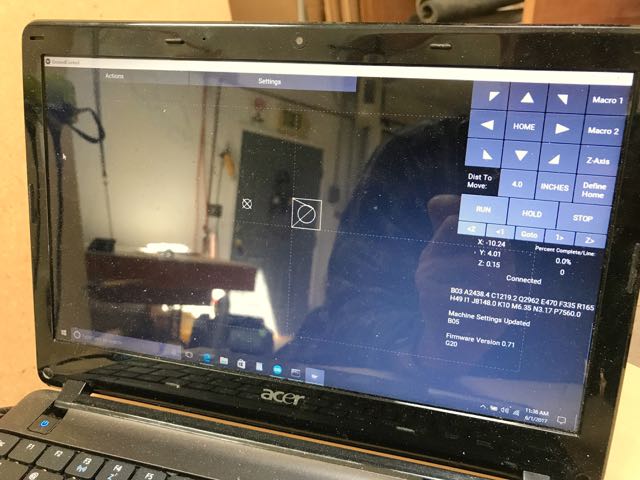
The console screen of the Maslow Ground Control software shows the tool paths of the cut before and during cutting.
Ground Control Software
The Maslow CNC controller software is called Ground Control. Keeping with the goal of Maslow to make the CNC as accessible and inexpensive as possible, it runs on Windows, Windows Tablets, Macs or even Linux-based Raspberry Pi computers. From a user perspective, Ground Control is simple to use and straight forward. You load the G-code file that you want to run, set a few parameters and away you go.
In its current form, the software is not quite done but getting closer to completion. As I write this, each week a new version of Ground Control is released that solves problems that have been discovered by the many Maslow beta testers. For example, Curtis and I ran into some issues with how the Maslow was rendering and machining circles and curves. It was cutting short arcs instead of the smooth curves that we were expecting. Maslow’s team and the community got on it and fixed the problem. Another issue was the controller was having difficulties reading other flavors of G-code files when I provided RhinoCAM generated G-code files for a test. That quickly got fixed, too. So, you get the idea. If problems come up, between the Maslow crew and the community, you won’t be alone.
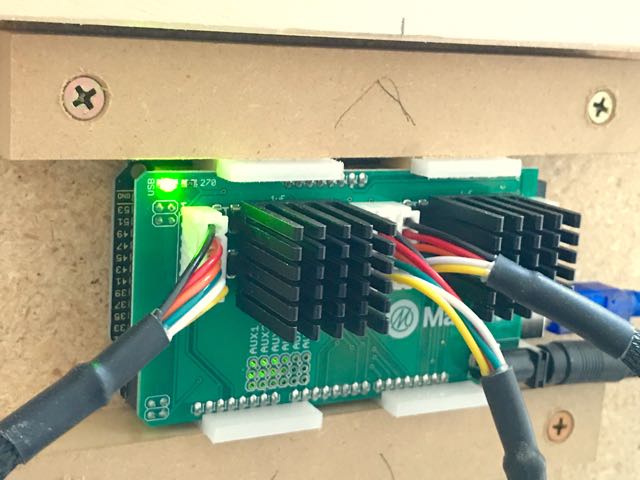
The Maslow’s tiny Arduino processor and daughter board are doing the computing and issuing instructions to the motors to move the router around in the X, Y and Z axis.
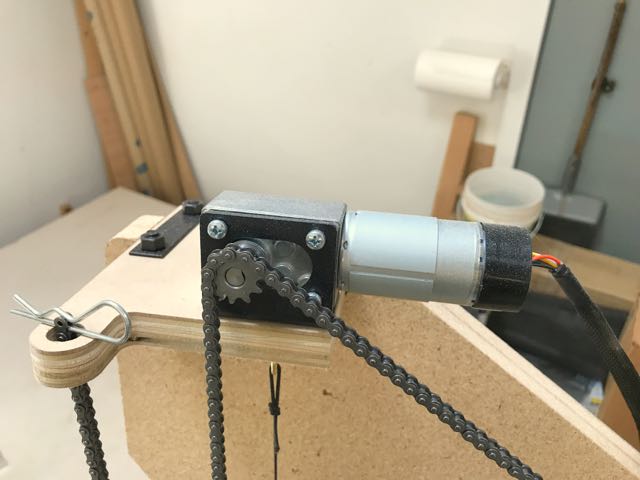
Small closed loop DC motors and gear boxes move the chains and in turn the router around on a Maslow CNC.
How fast does the Maslow move? Watch the video to find out.
Using the Maslow CNC
Once you have set up the Maslow, run a few tests and are all ready to go, what’s it like to run the Maslow? The first word that comes to mind — particularly if you have any experience with other CNCs is: slow. You can expect a feed rate of 20-35 inches per minute. Dragging a router, held down with bricks, using tiny motors, chains and gears come with some limitations. People have pushed it beyond 35 IPM, but besides obvious mechanical limitations, a key issue is the Arduino’s processor ability to keep up with higher speeds. It can only go so fast.
On top of the slow speed, only shallow cuts should be taken. No, you won’t just plow through a 3/4” piece of plywood in one pass. Think three or four passes. Between the tiny motors and dependence on gravity, there simply isn’t enough torque in the equation to do otherwise. Pushing too hard just adds more resistance. The cost of going too fast or cutting too deep is less accuracy. So, go with the flow and take shallow cuts – about 1/8″ to 1/4″ deep.
With shallow cuts, the Maslow is fairly accurate. The best approach is to keep your cuts as close to the center of the large Maslow base as possible. In early tests, it was producing samples that were less than 1/32” off square on smaller cuts. With further tuning of the controller software, it seems likely the team will get close to the 1/64” or .4mm design goal. Particularly challenging are long, straight lines. Trying to run lines as long as six or seven feet sometimes produces a bow up to 1/16”. But, being measurable, consistent and repeatable, results could be further improved with more tuning of the controller software on future releases.
A special thank you goes to Curtis Erpelding for all his work building and testing the beta Maslow CNC. His base is a top notch design. Simple, flat, rigid and cheap. If you’re building a Maslow, study it!
In the final installment of the Maslow series, I’ll have some suggestions for those considering building a Maslow CNC.
To see the entire series on the Maslow CNC click here.
Here are some supplies and tools we find essential in our everyday work around the shop. We may receive a commission from sales referred by our links; however, we have carefully selected these products for their usefulness and quality.


