We may receive a commission when you use our affiliate links. However, this does not impact our recommendations.
Can you spot the patch?
A long-time carpenter shares a repair trick to hide the mistakes made by ham-handed apprentices.
For more than 30 years I was a traveling carpenter foreman in charge of installation of top-quality architectural woodwork and cabinetry. My job assignments were sometimes small, requiring only eight or 10 carpenters, and sometimes 40 or more men.
This was the good part of the job because it was never the same old thing!
However, with each new job there was a new location. This was bad. Every job required a new group of carpenters, many of whom were not experienced at the skill level needed. You guessed it – as a result of the inexperience of some of the workers there were lots of mistakes made, including drilling the holes for door hardware in the wrong place.
The normal way to make repairs in the field is to plug the damaged area with some wood and then have a wood finisher from the shop apply fake grain to the patch and touch up the repaired area with his “magic brush.” This looks just fine for a period of time, but as the repaired wood panel or door lightens or darkens due to exposure to the sun’s rays, the repaired area does not change at the same rate; this causes the touch-up to stand out.
And this can make some customers unhappy every time they have to open that door with the obvious and ugly repair.
The repair technique shown here was developed by me and other carpenters and finishers in an effort to improve on the more traditional “magic brush”- type repairs.
Each repair situation calls for its own unique solution, but there are some basic rules that can be followed to achieve success.
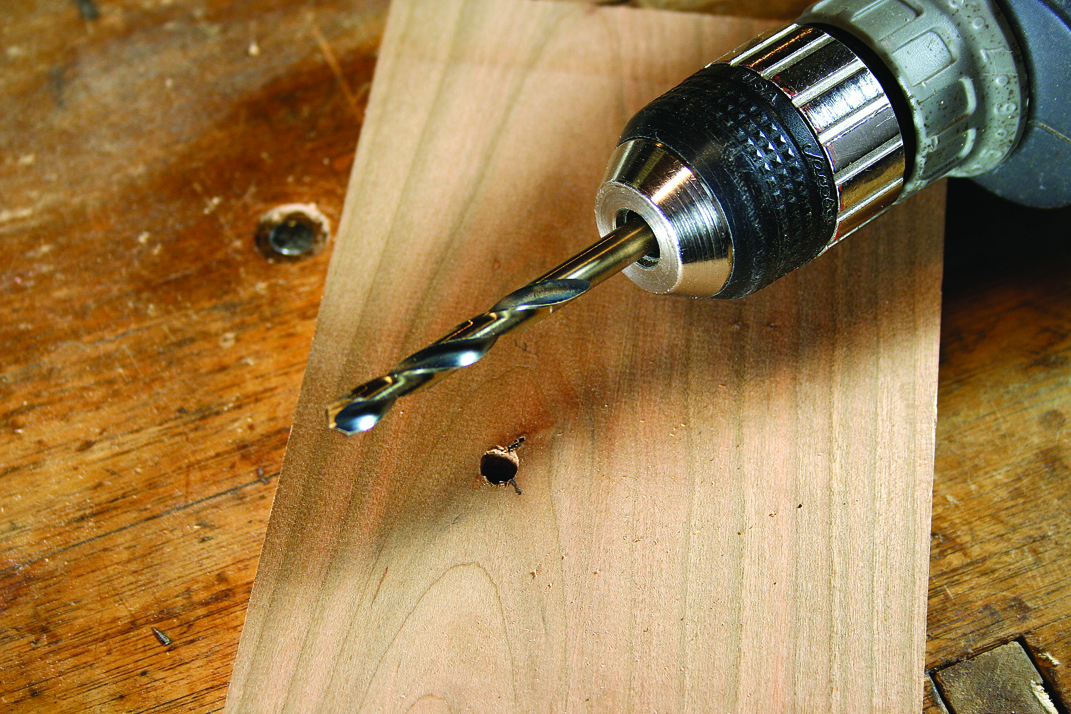
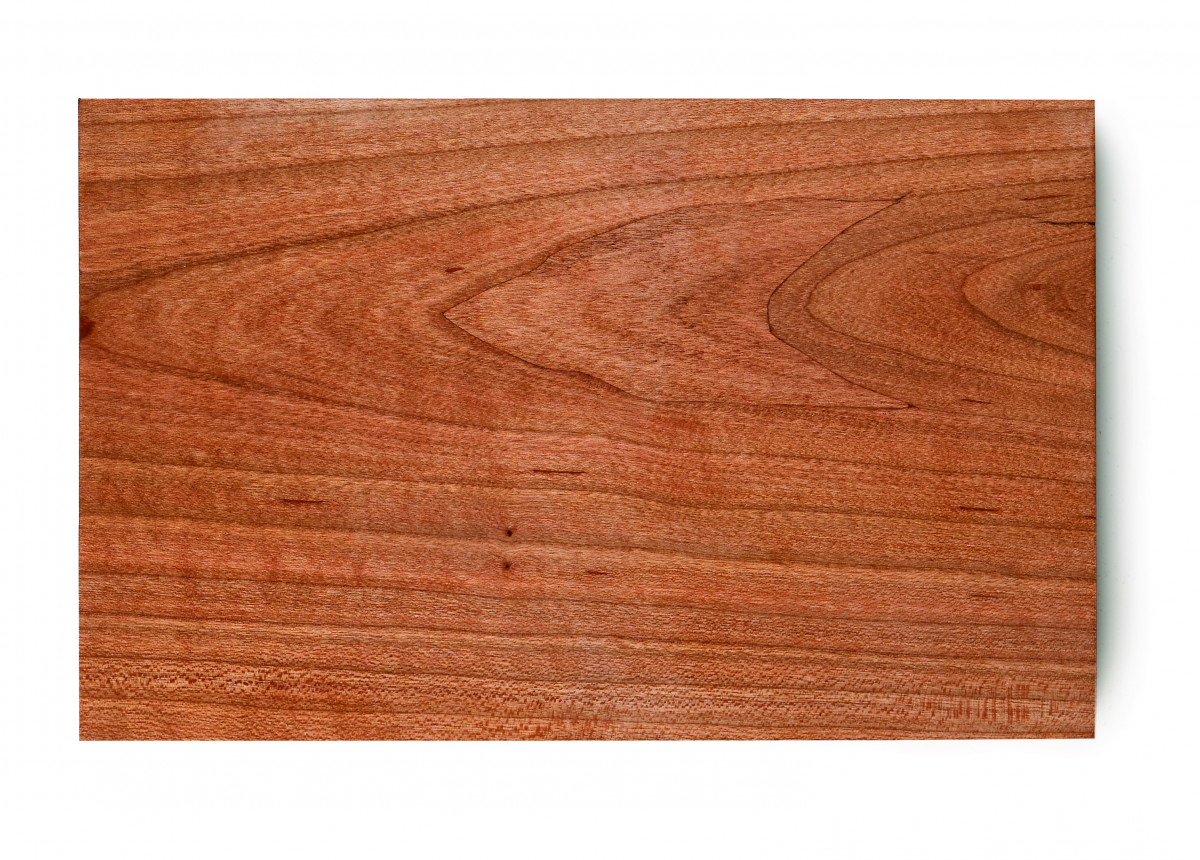
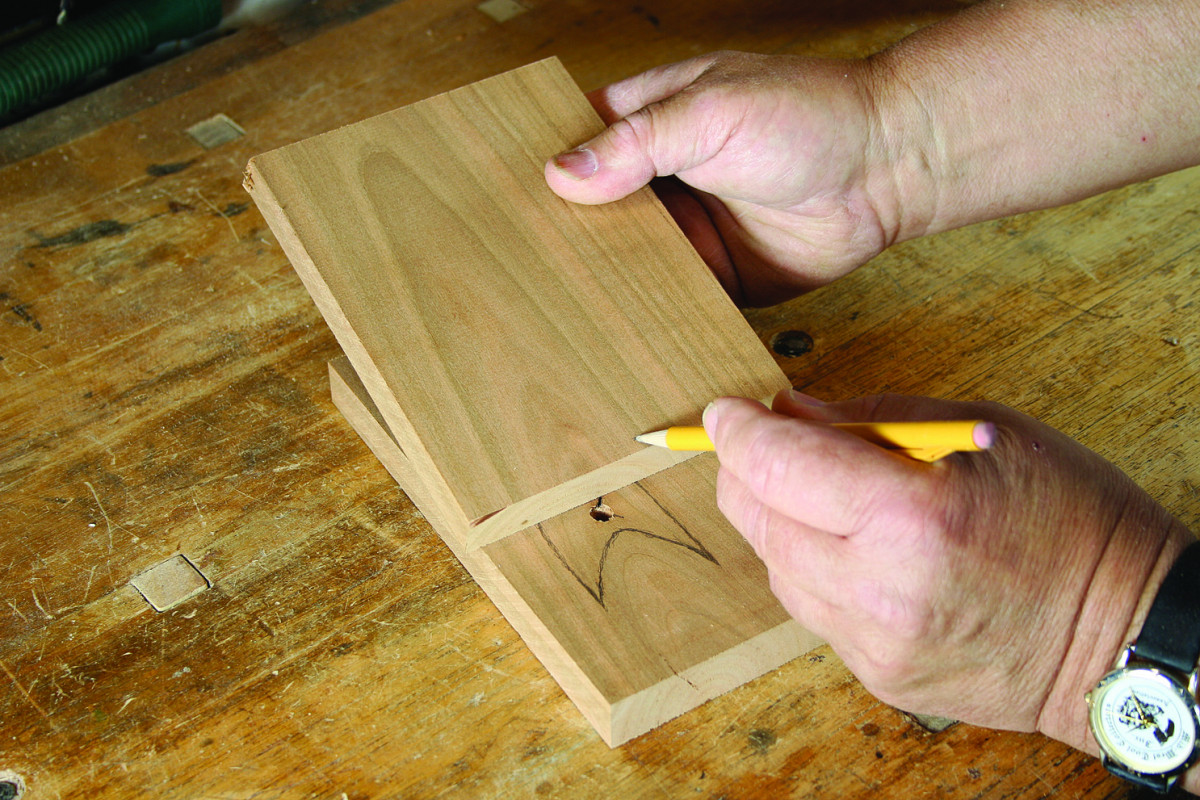
Right hole, wrong place. Here’s the defect we need to remove. We’ve drilled the hole in the wrong place and we need to put a patch in. A simple plug would be obvious to the eye, so it’s best to patch a wider area.
Eight Steps to Fix a Flub
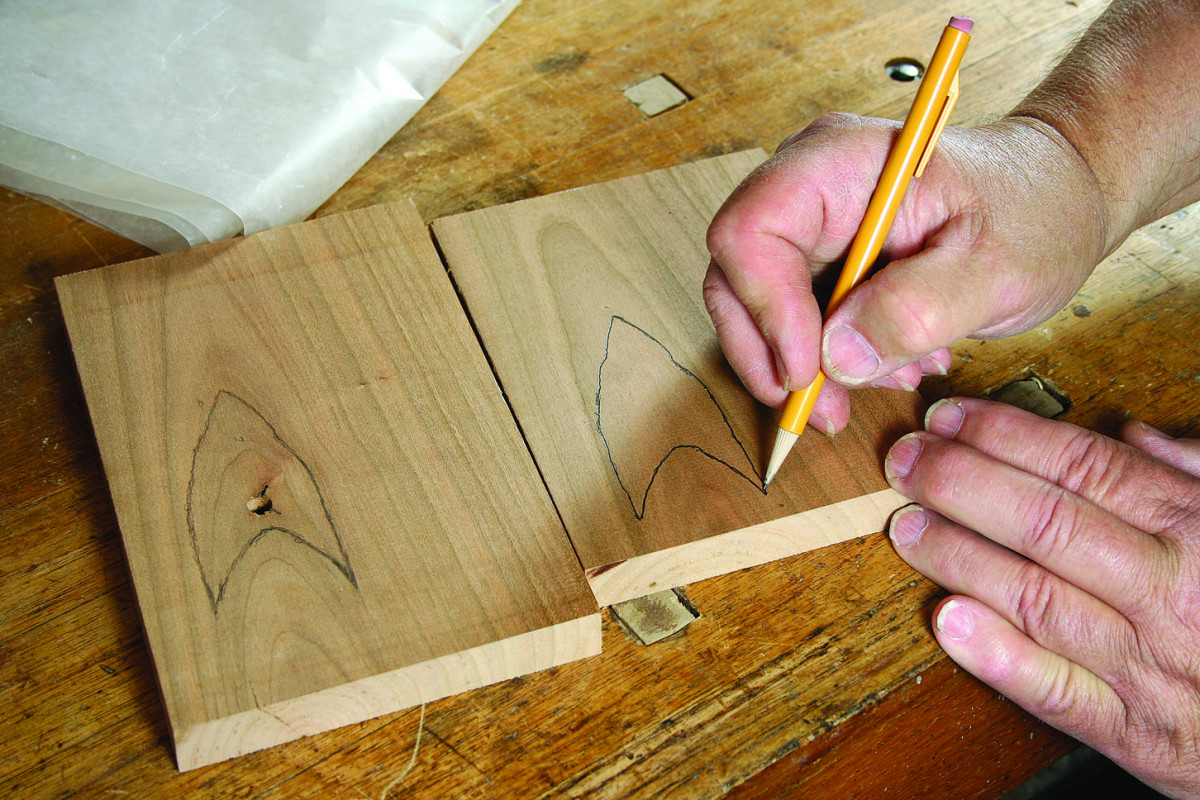
Step 1: Use a soft pencil to outline an area around the damage. The trick is to make an irregular-shaped patch. The way to do that is to follow the natural figure in the board and always try to terminate the repair in a dark portion of the board, such as the grain lines in a cathedral. Also, as a rule, I always spread a repair out over a wider area than where the actual damage has occurred. That’s because I believe the human eye will focus more readily on a small repair than on one that is spread out.
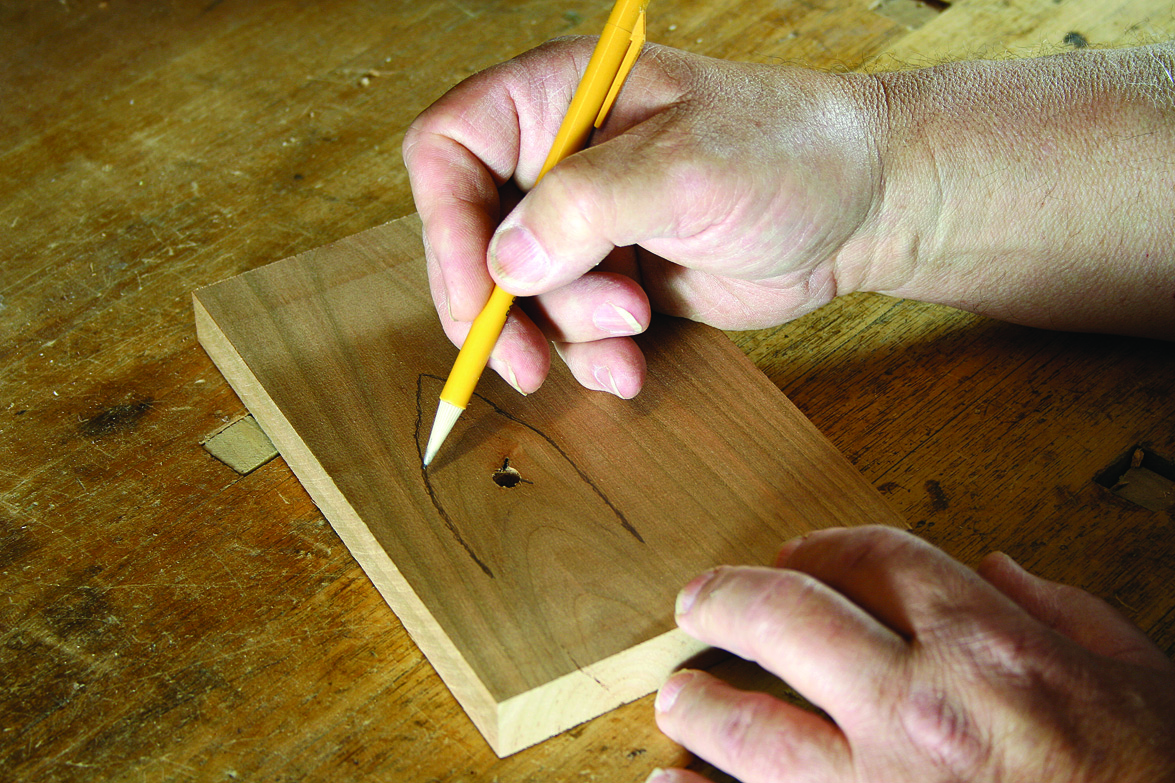
Follow the grain lines. Darken the shape of the piece you want to remove with a soft lead pencil (this is in preparation for the waxed paper that follows). Be sure to follow the grain lines as best you can.
Step 2: Select a donor board of the same species of wood that matches the color of the board you are repairing. This section of donor board should have as little figure as possible so that it does not clash with the figure in the board being repaired.
The blander, the better. When choosing a donor board for your patch, pick something that has the proper color and grain characteristics. It’s best to pick a section of donor board that has few pronounced grain lines. You don’t want the donor to have figure that is noticeably different from what you are excavating.
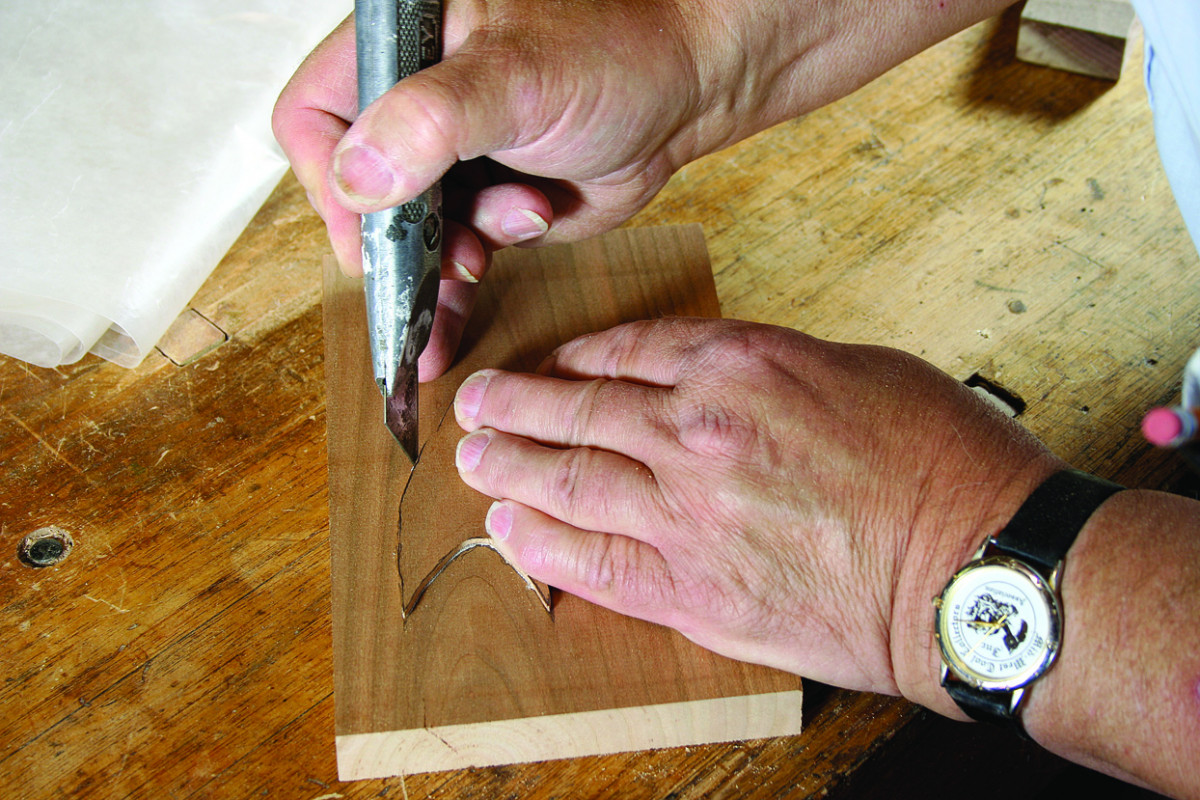
Step 3: Transfer the shape of the planned repair to waxed paper or tracing paper. I use waxed paper because it is always available from the kitchen.
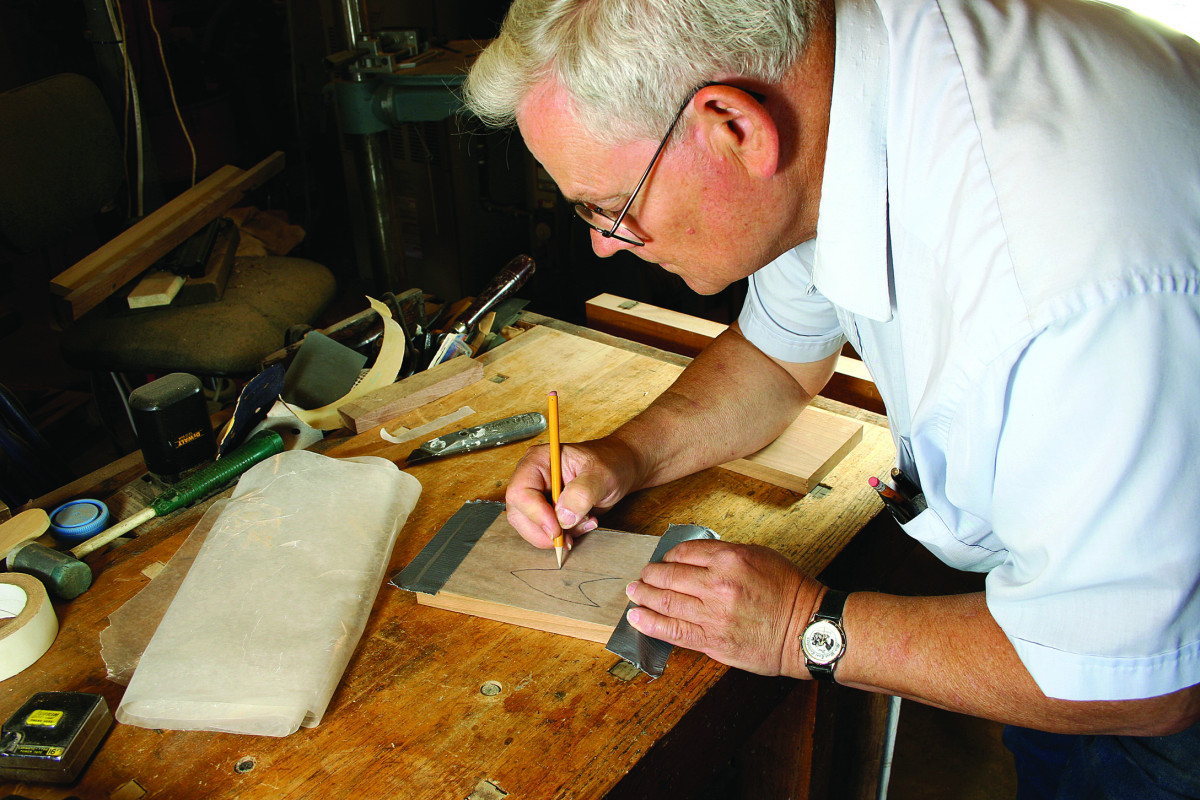
Wax on. Tape waxed paper over the area you want to excavate and trace over the dark lines you drew to transfer that shape to the waxed paper.
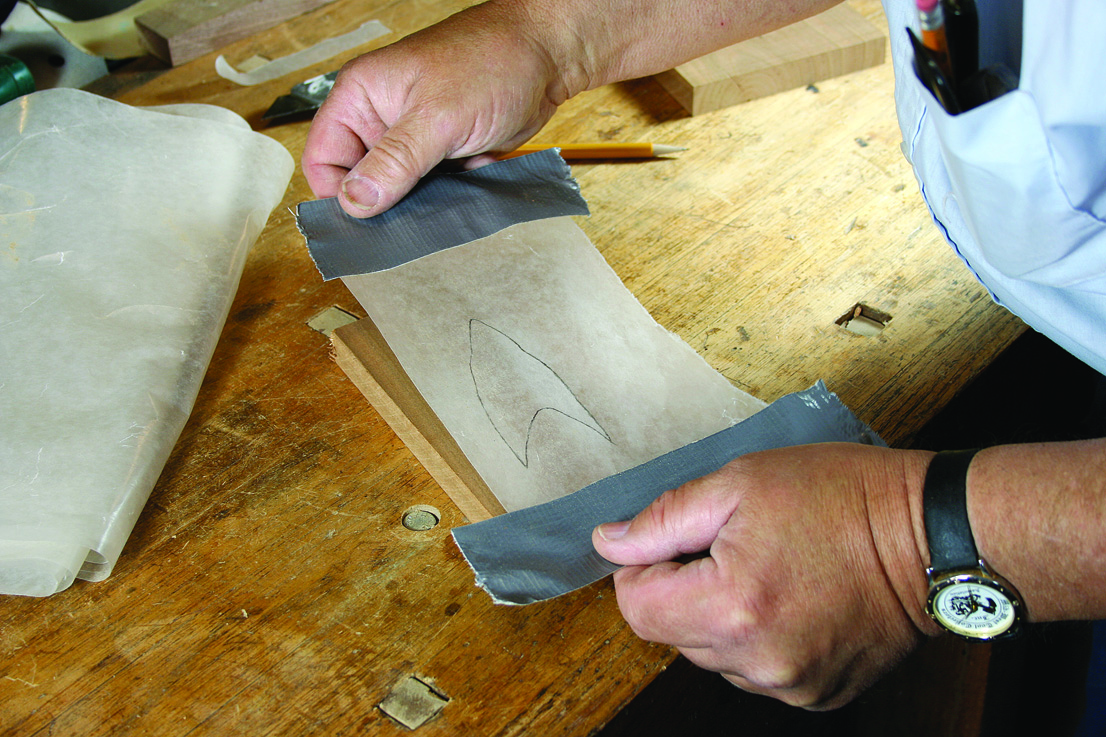
Wax off. Remove the waxed paper and you can see the shape we now want to cut from the donor board.
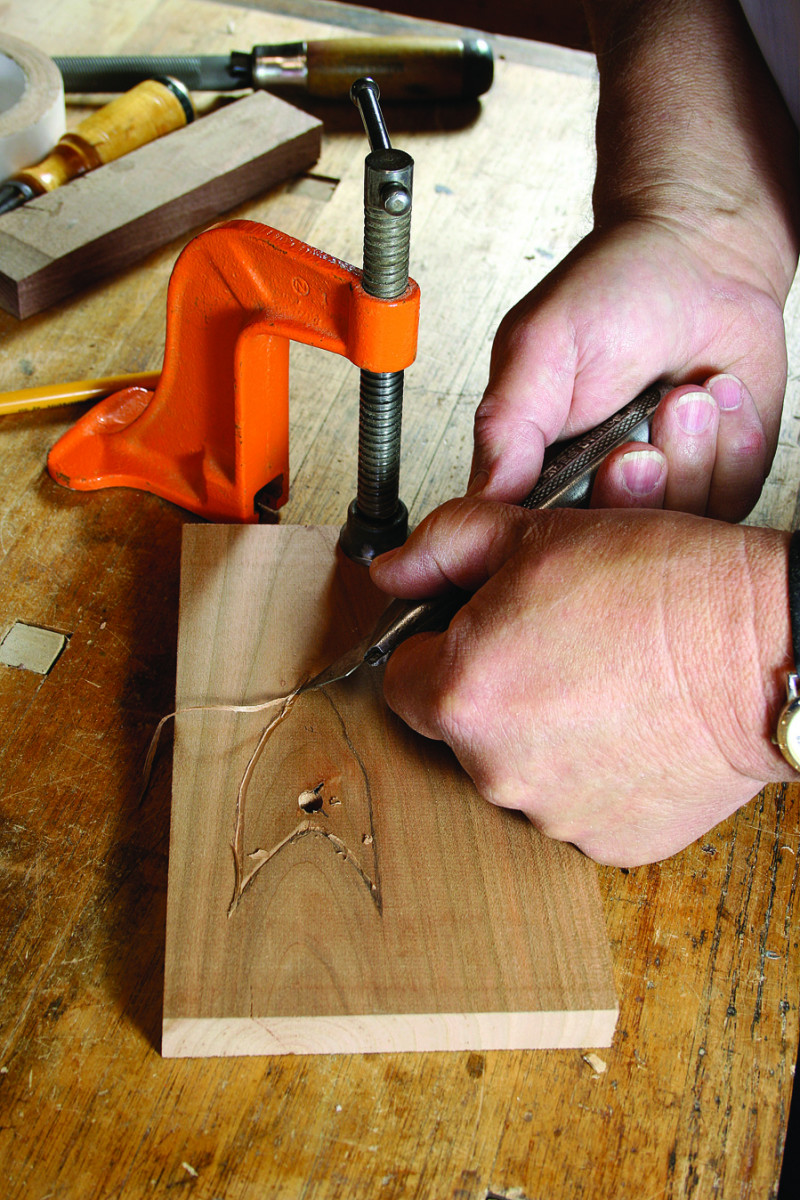
Step 4: Lay the waxed paper over the color-matched board and “engrave” the design onto the board with a hard lead pencil (I use a pencil with No. 3 lead) using heavy pressure.
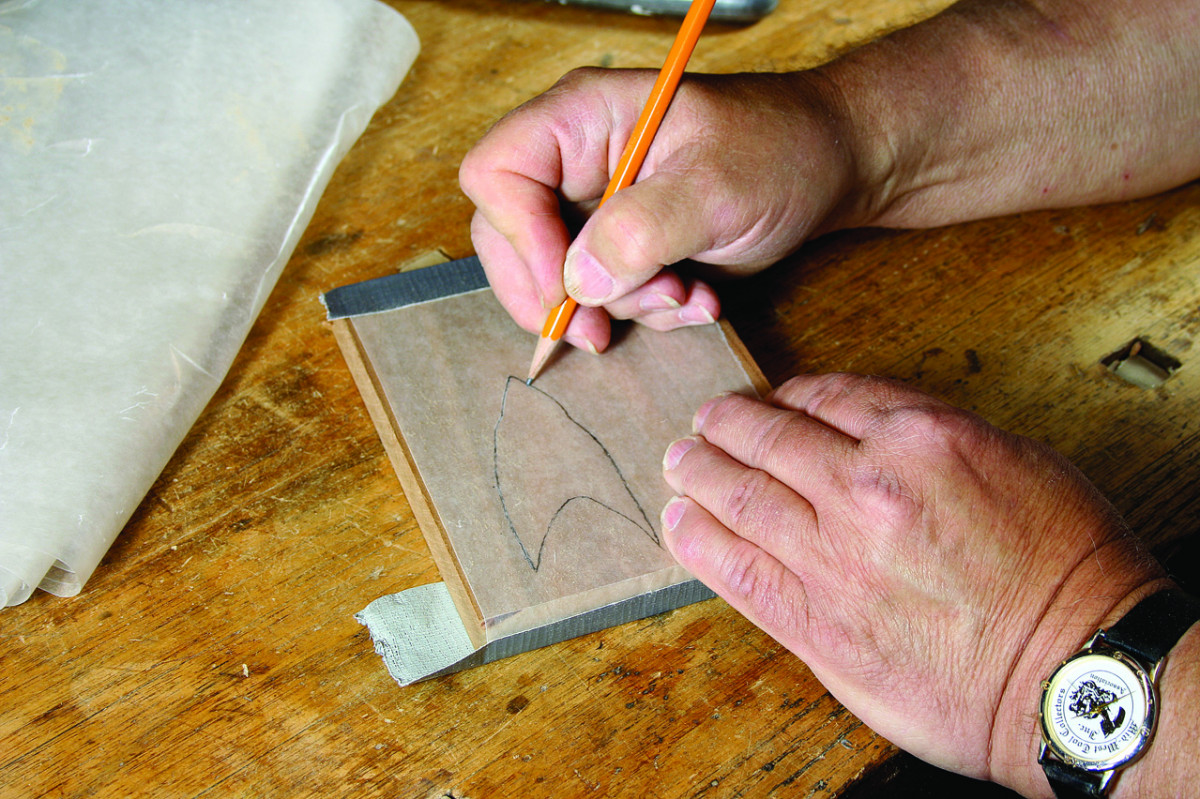
Emboss the shape. Tape the waxed paper on the donor board. With a hard lead pencil, trace over the shape you want to remove. Use a No. 3 pencil – this will emboss the pattern onto the board below. Work with the pencil at an angle (not straight up and down) so you don’t rip the waxed paper.
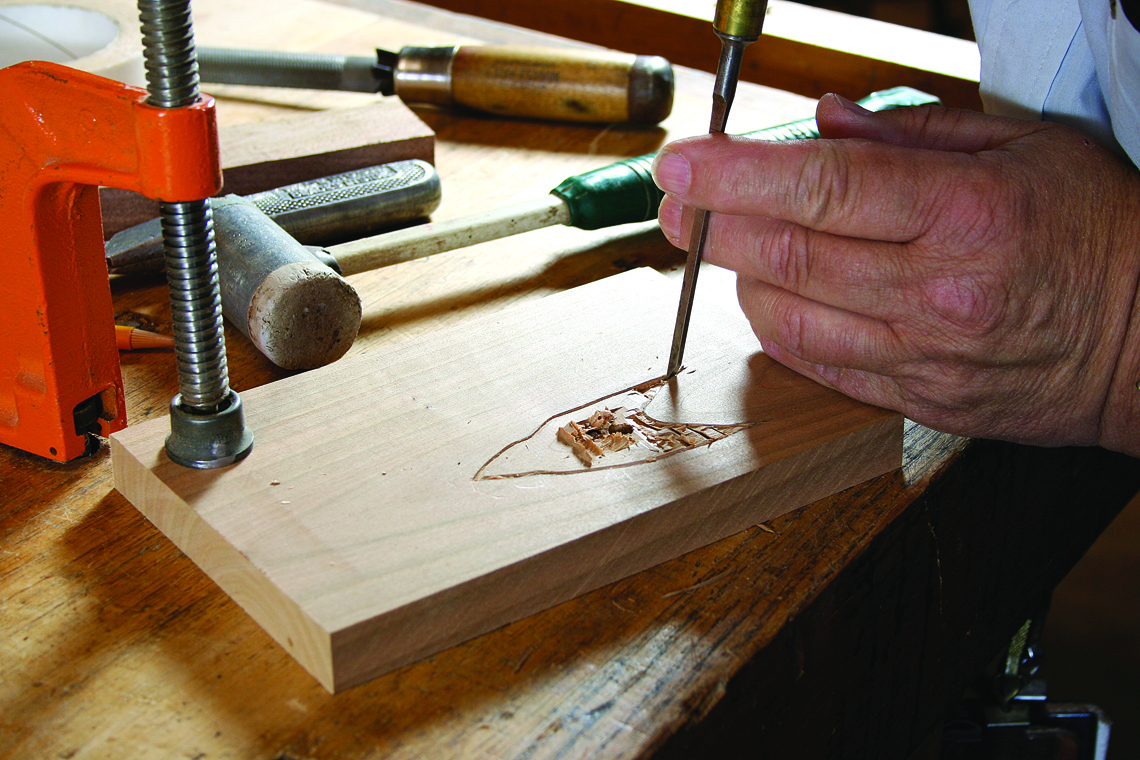
Step 5: Darken the pattern shape with a soft lead pencil. Now reduce the thickness of the donor board to 1⁄4” to 1⁄8“. Using a scroll saw, remove the section of the board that has the needed shape marked out on the surface.
Trace your patch. Go back to a soft lead pencil to fill in the lines embossed on the donor board.
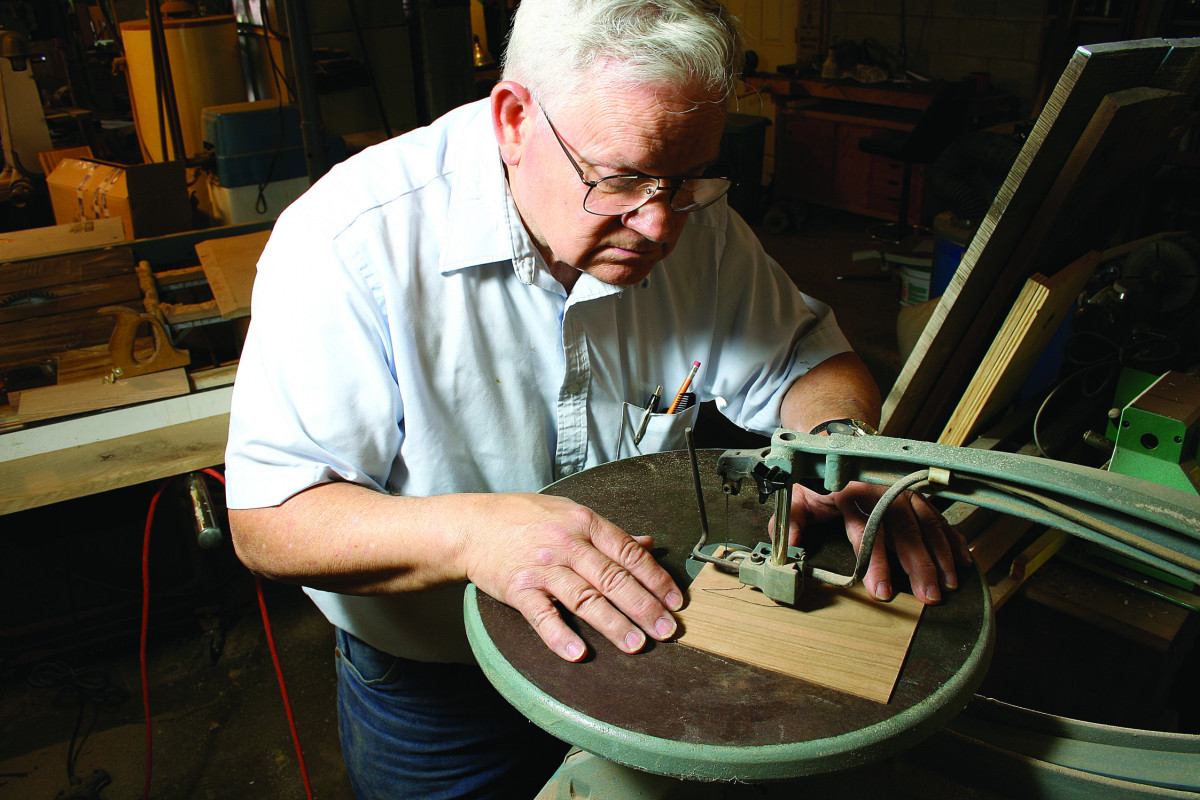
Cut close to the line. After reducing the thickness of the board, I use a fine-tooth blade in a scrollsaw to remove the patch from the surrounding material.
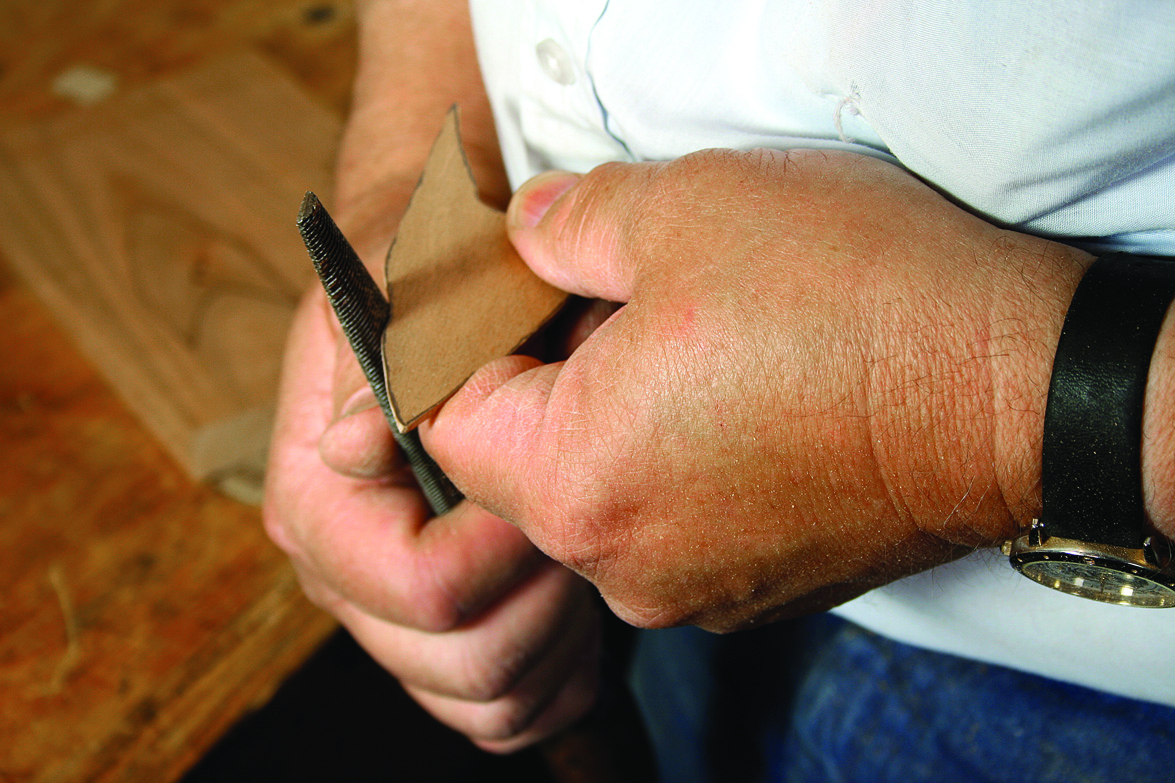
File to fit. Undercut by a couple degrees the edges of the donor piece with a rasp. I use a rasp designed for aluminum, but a Nicholson No. 49 or 50 would be a good choice. You want a fairly fine rasp.
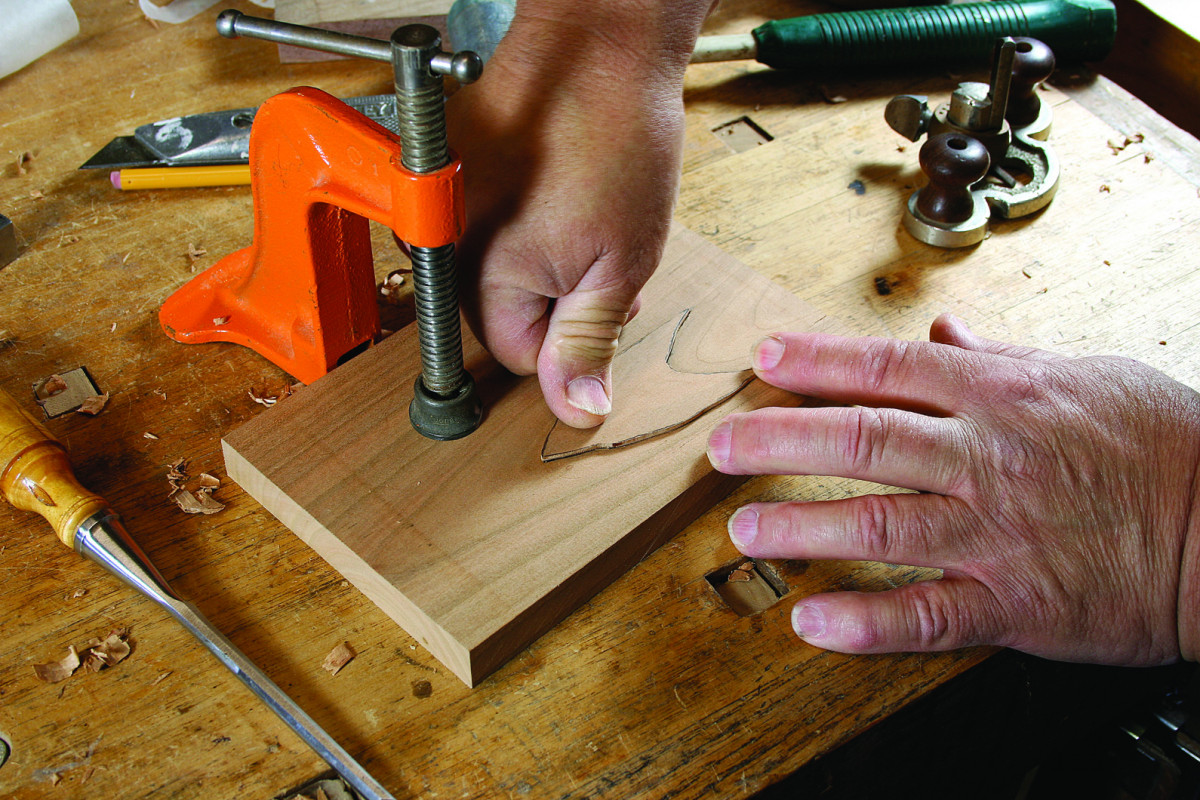
Step 6: Affix the cutout to the damaged area with cloth-backed double-faced tape and carefully cut around it with a sharp knife. Remove the patch and make a relief cut on the waste side of the wood.
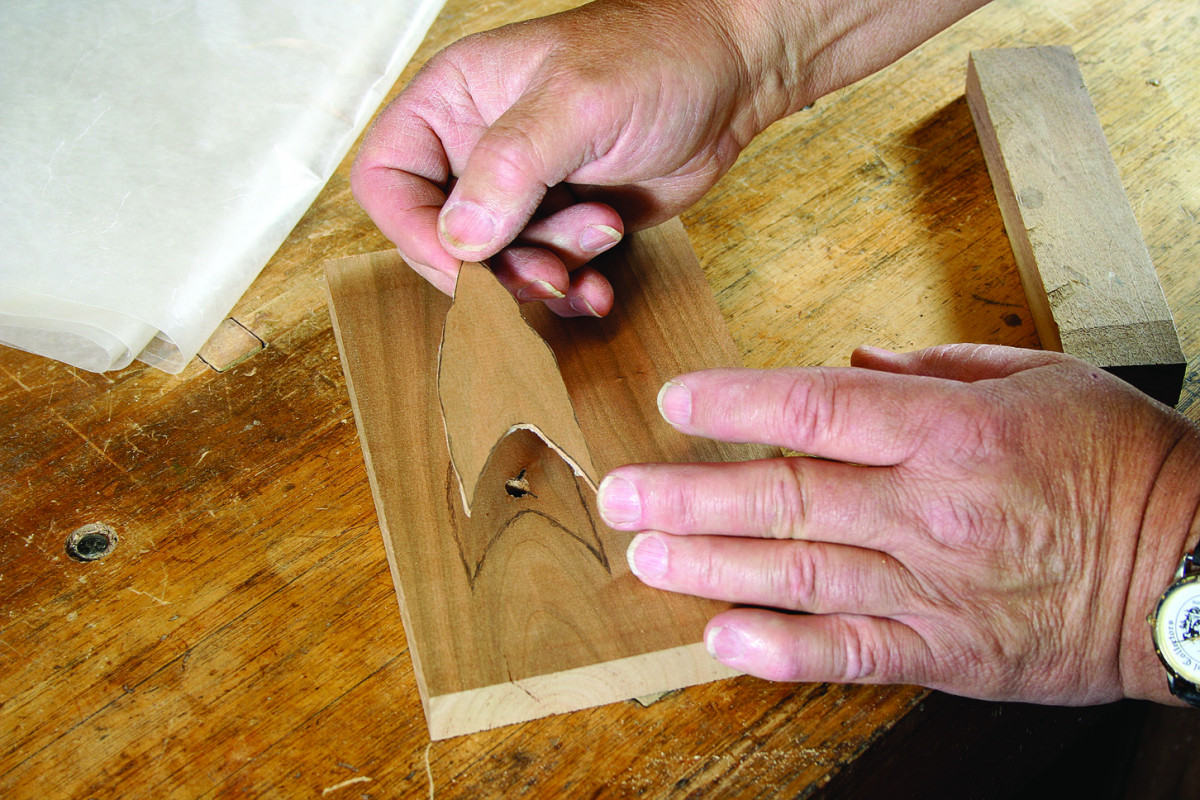
A close match. Here you can see how closely I’ve matched the shape of the patch to the defective area.
Tape and trace. Stick the patch down with cloth-backed double-stick tape. Trace around the undercut edge with a utility knife. Remember that you don’t want the patch to be too thin. A thin patch will get torn up when you remove it.
Step 7: Excavate the wood to a depth that will leave the repair piece slightly proud of the wood surrounding it.
Relieve your knife line. Use a utility knife to make a relief cut all around the defective area in the scrap side.
Chop and pare. Chop out the waste with a chisel. The size of the repair dictates the width of the chisel. Use a 1⁄8″ chisel in the tight corners. At tight points, lay the chisel on its side and use the point to remove material.

Hog out the waste. I use a butt-mortise plane (above) and a little router plane (below) to remove the bulk of the waste. The cutter on the router plane is about 1⁄4″ wide.
 Step 8: Glue the patch into the recess and sand or plane it flush.
15. Almost done. Show the patch to the excavation. Fuss and fit until it will go in. Glue it in with yellow glue. Use a hard block of wood and mallet to drive the patch in (no need for clamps). When dry, flush the patch with a plane or sandpaper.
Note: The first time you try this repair procedure, I recommend you try it out on a scrap piece, as shown in the photos accompanying this article. While there is nothing terribly difficult about the process, a practice session will greatly improve your odds for success on a piece of critical work.
And I’d also like to add that this repair process might be able to be improved upon, as well. It was developed by several carpenters working during several years and it has room to evolve, I’m sure.
Here are some supplies and tools we find essential in our everyday work around the shop. We may receive a commission from sales referred by our links; however, we have carefully selected these products for their usefulness and quality.