We may receive a commission when you use our affiliate links. However, this does not impact our recommendations.

Pocket screws and two back supports make this handsome Shaker-inspired shelf simple to build.
Clear finish updates the look of this classic design.
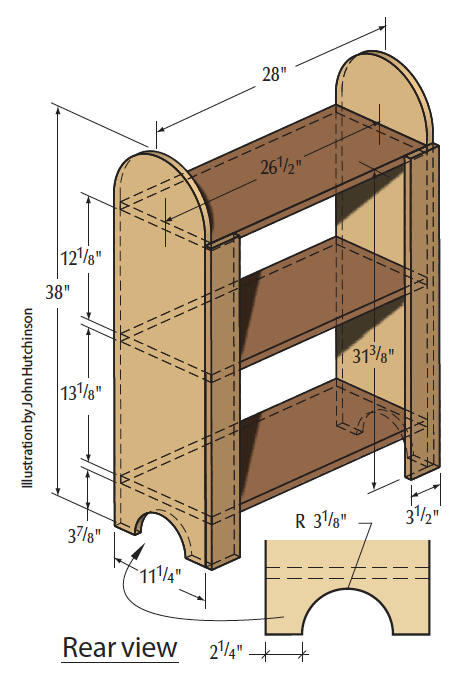
This modified Shaker design, downsized from a set of creamery shelves, is adapted from a Shaker Workshops catalog. To ensure our 3⁄4“-stock would not bow under the weight of even the heaviest items, we decided to make these shelf pieces a bit shorter than those you’ll find on the company’s website.
Many home centers carry only pine, poplar, and oak (you may also find maple or aspen, depending on your region). We decided on oak because we think it has the best natural appearance.
One of the biggest challenges you’ll have with this project is finding wide boards that are straight and flat … and that remain straight and flat after you cut them to size. Take time to look through the racks for the best boards – and if at all possible, avoid shrink-wrapped boards, no matter how pretty. You’ll need two 6′ and one 4′ 1 x 12s (or one 10′ and one 8′ length). You’ll also need a 6′ length of 1 x 4 for the supports.
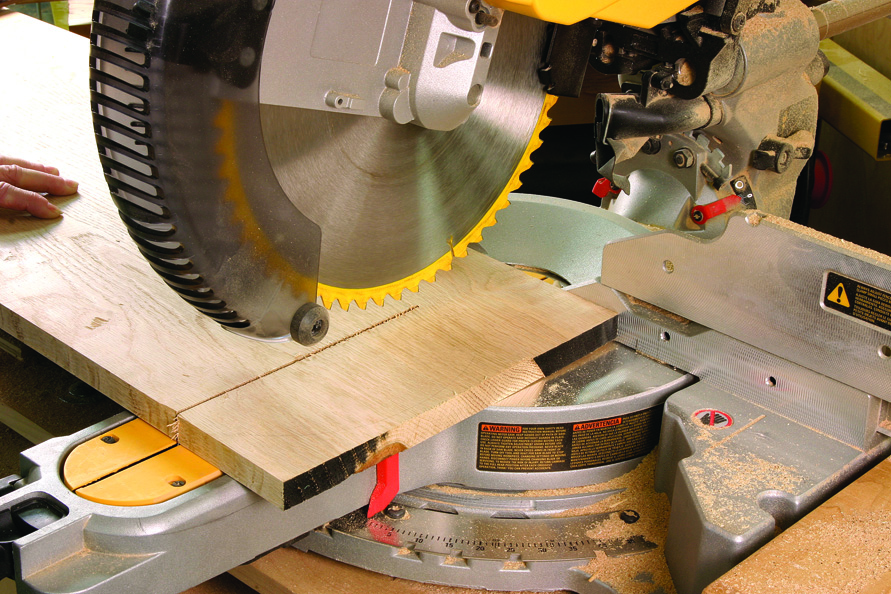
Because the wood for the sides and shelves is 111⁄4″-wide and your miter saw is likely a 10″ model, you’ll have to cut the pieces in two steps. Measure and make the first cut. Then flip the board over and line up the saw blade to the kerf you’ve already cut, and make the second cut.
Once you’re back in the shop, your first step is to cut the sides to length on your miter saw. If you have a 10″ miter saw, your crosscuts on the sides (and shelves) will be a two-step process because the diameter of the saw blade limits the width of the cut. You’ll need to first cut on one side of your board, then flip it over and carefully line up the kerf with the saw blade before completing the cut (see picture at right).
A thin piece of scrap, a nail and a drill are all it takes to make this simple compass jig.
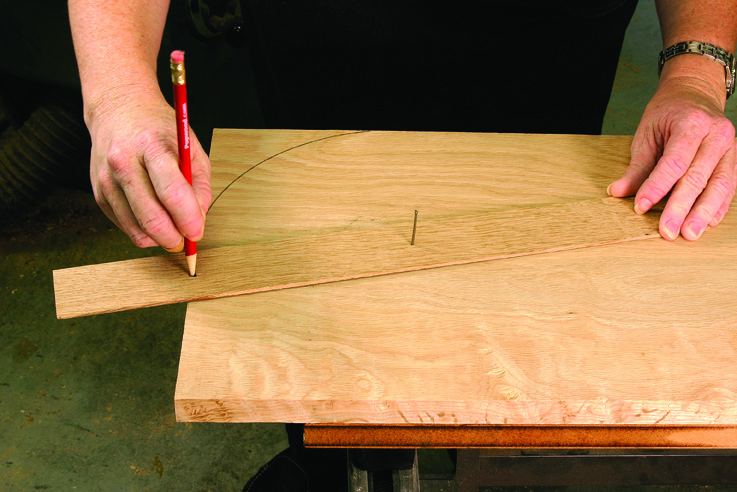
Now, you’re ready to lay out the arched top and cutout at the bottom. Align the top edges of the sides and stick the faces together with double-stick tape to keep them from slipping, then clamp both pieces together flat to your workbench. Now, measure across the width to find the center of your board, and make a mark. That measurement is the same distance you’ll measure down from the top edge to mark the intersection of the two points (5 5⁄8“unless you’ve resized the plan, or used different-sized stock). This point is where you’ll place your compass point to draw the half-circle arch across the top.
And if you don’t have a compass, it’s no problem. It’s easy to make a compass jig. Simply grab a thin piece of scrap and drive a nail through the middle near one end. Now, using the same measurement you already established to find the compass point (again, it’s 55⁄8” on our plan), mark and drill a hole that distance from the nail, and stick a pencil point through it. Voilà – a compass jig.
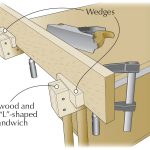
You can pull a cup out of a board by clamping the piece to a straightedge and pulling it tight with clamps before screwing it down.
You can use that same jig for the bottom arched cutout. Simply drill another hole 31⁄8” away from your nail. Set the nail as close to the center of the bottom edge as possible and mark the cutout arch. Or, mark the arch with a traditional compass.
Now use your jigsaw to cut as close to the lines as possible, and use a rasp and sandpaper to clean up the cuts. If you keep the pieces clamped together during this process, you should end up with nearly identical arches. If you’re not confident in your jigsaw skills, practice making curved cuts on some scrap pieces before moving on to the real thing.
Now cut the shelves to length.
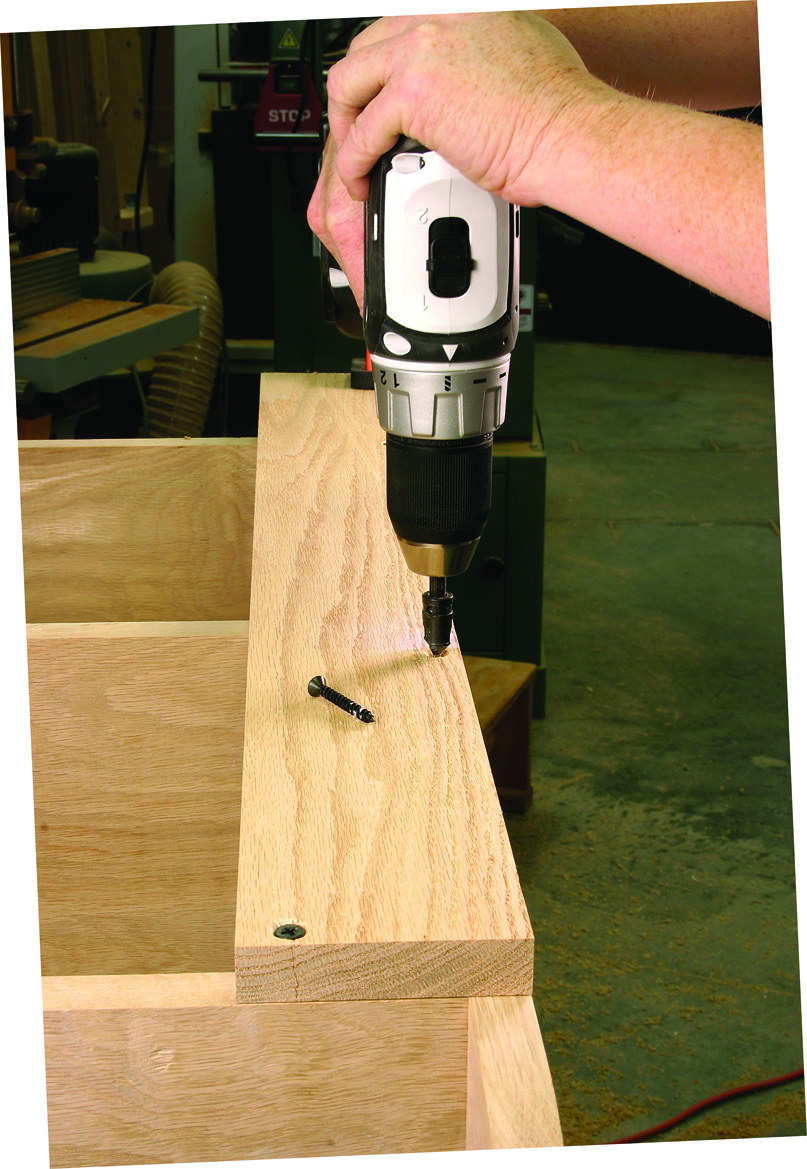
Make sure your drill is at a 90° angle to the most narrow stock through which you’re drilling – in this case, the 3⁄4″ edge of the side beneath the support.
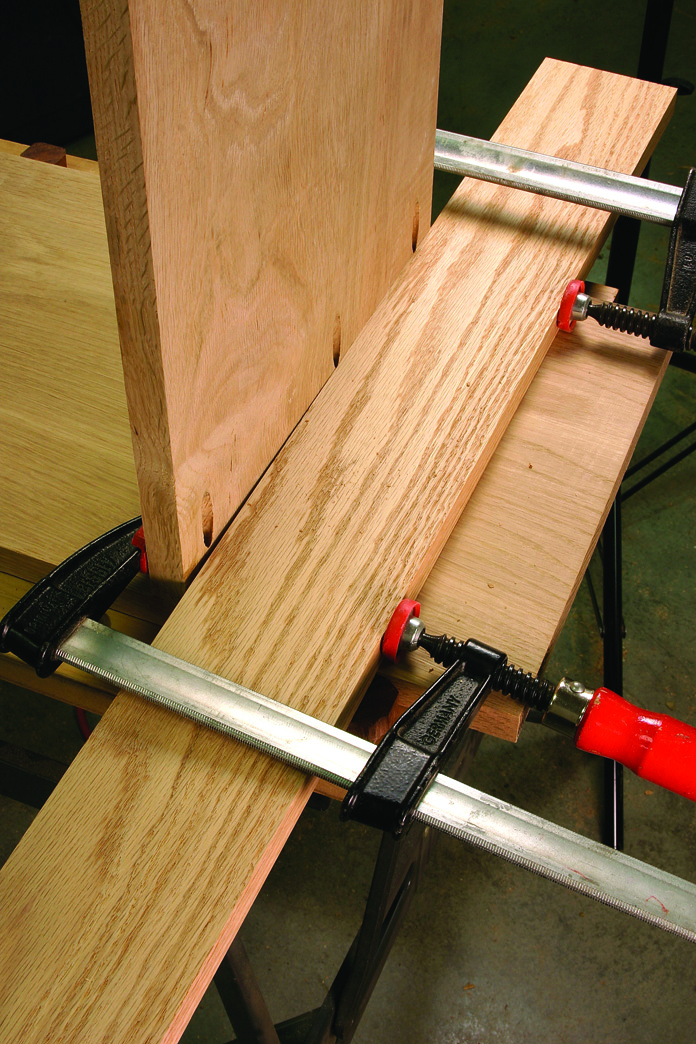
Set up your pocket-hole jig for 3⁄4“-thick material. Mark the placement for three pocket holes on each end of each shelf, two of them 3⁄4” from each long edge, and one in the center of the end. Drill the holes.
Cut the back supports to length, and sand all pieces to #150-grit before assembly (#120 if you’re planning to paint).
Now you’re ready for assembly, and the second trick we promised. Lay one side flat on your bench and mark the location of the top shelf at either side. You may not be able to line up the shelf with your marks because of cupping in the wide board; that’s where the trick comes in. Position the back support (or any straight piece of scrap) along the bowed side of the shelf, if there is one, and use clamps to bring the edges of the shelf flat to the support or straight scrap. Slide the clamped unit to the layout lines, hold or clamp it in place then use screws to attach. This trick will work to pull the bow from any of the shelves.
Attach all three shelves to both sides, straightening the pieces where necessary.
Now lay the assembly face down, line up the support with the top of your top shelf. Drill countersunk holes at the top shelf, at the bottom shelf, and at the inside edge where the support meets the middle shelf. Be sure to hold your drill at 90° to the sides; because you’re drilling into 3⁄4“ stock, you could easily drill through the side if you’re not careful.
Attach the uprights with #8 x 11⁄4” screws (rubbing the threads on some wax will help them seat more easily). Pay particular attention at the top and bottom as the stock can easily split. If it does crack, stop your drill immediately – but don’t panic. Just back the screw out a tiny bit, and the split will close up.
Finish the shelves with two coats of wiping varnish.
Shaker shelves Cut List
No. item dimensions (inches) material
T W L
❏ 2 Sides 3⁄4 x 11 1⁄4 x 38 Oak
❏ 3 Shelves 3⁄4 x 11 1⁄4 x 26 1⁄2 Oak
❏ 2 Supports 3⁄4 x 3 1⁄2 x 31 3⁄8 Oak
Here are some supplies and tools we find essential in our everyday work around the shop. We may receive a commission from sales referred by our links; however, we have carefully selected these products for their usefulness and quality.