We may receive a commission when you use our affiliate links. However, this does not impact our recommendations.
An elegant exercise in bent lamination and joinery.
When I started taking woodworking classes, I needed a convenient way to carry my tools. After looking for just the right toolbox, I decided to design something to meet my specific needs with some elements of style and craftsmanship to make it fun to build and use.
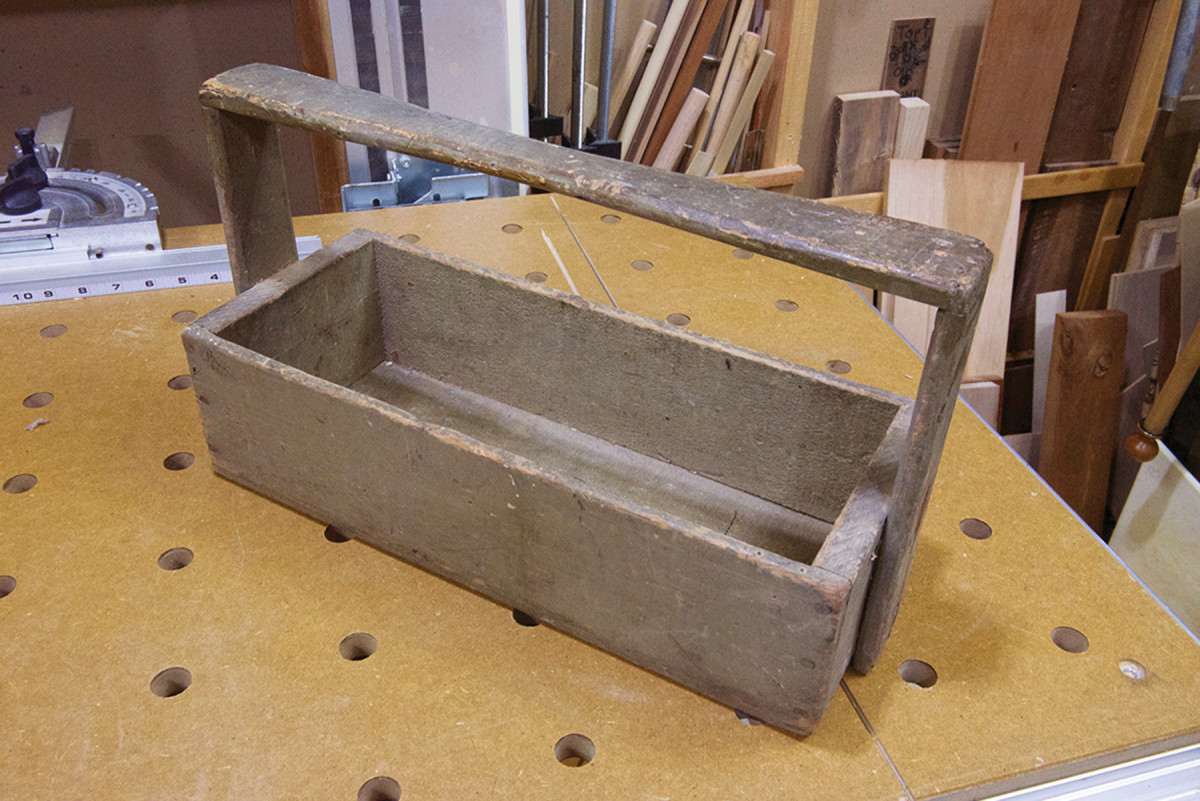
I was inspired by a tool tote made by my grandfather, who was a great mechanic and woodworker, and an inspiration to me. I use his tote to this day around the house to organize tools for all the endless repairs, but it’s a little too small for transporting my stuff to an off-site project or class.
I quickly outgrew the first tote I made, so I modified it by fitting it with a riser with drawers. Soon after, I needed a way to organize and transport my small drill/driver and installation tools and another tote was born. My goal was to follow the design theme of the first tote, especially the handle, but customize it for its intended use.
Family history. My grandfather’s tote was the inspiration for my design, just as he was an inspiration to me.
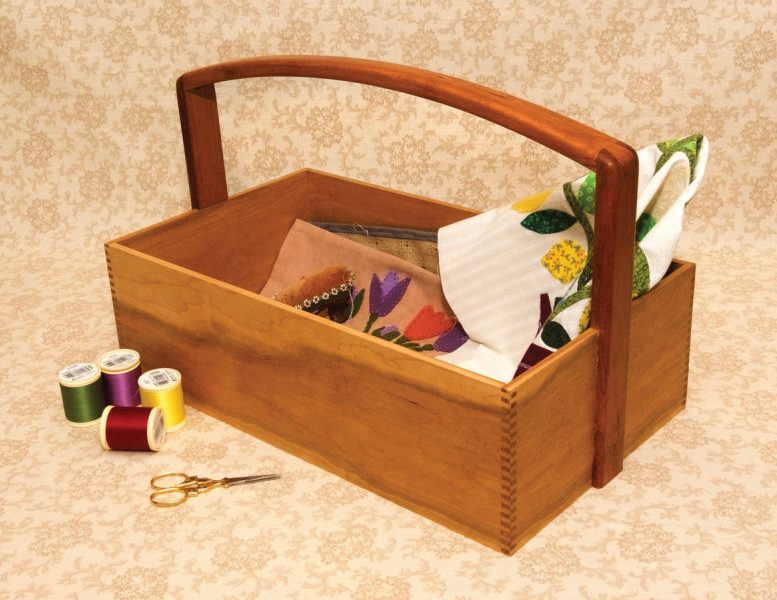
My wife has always liked the totes and asked me to make one for her to carry small projects when she goes to her friends’ houses to quilt. I wanted to maintain the same design theme for hers, but a tote to carry fabric and small sewing supplies didn’t need to be as heavy-duty. So I made the handle lighter and used thinner material for sides and bottom.
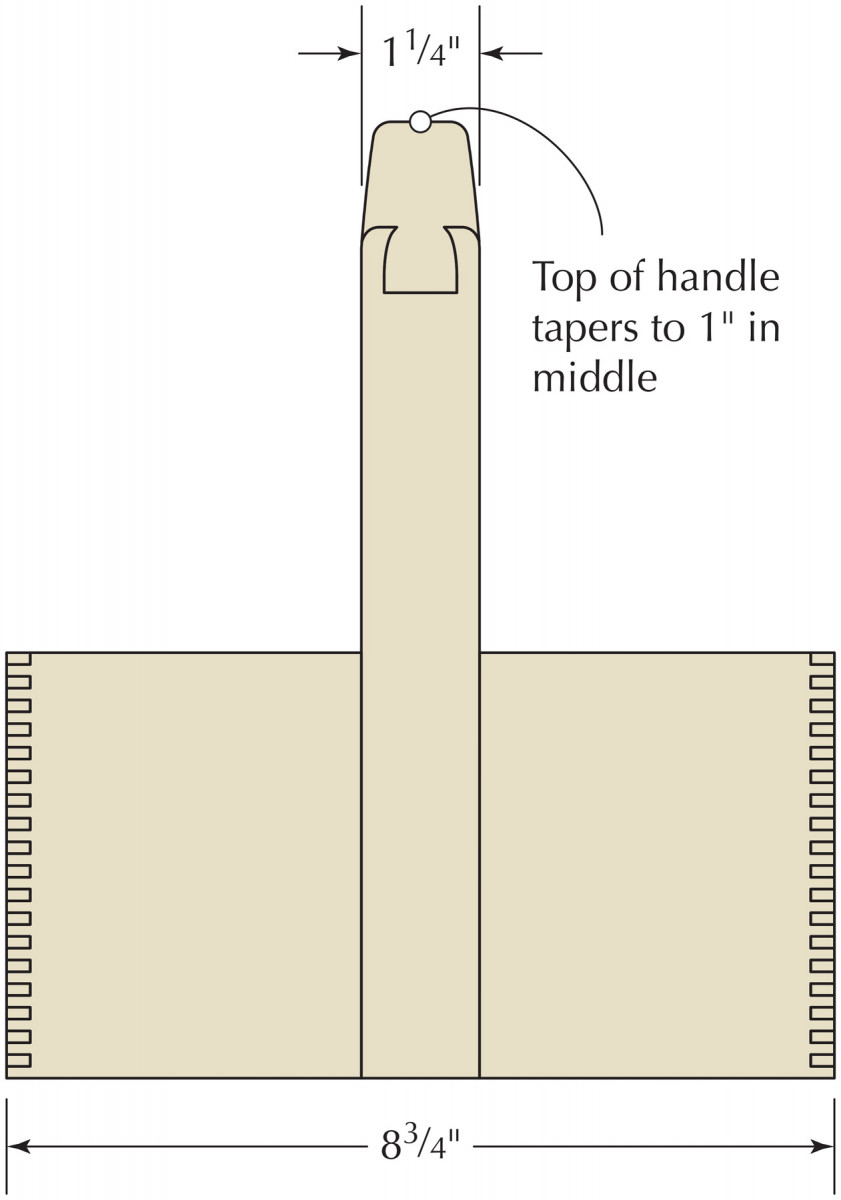
But this quilting tote has many of the same elements, including a curved handle, narrower in the center for a comfortable grip and wider at the ends for sliding-dovetail joinery. I decided on bent lamination to add strength to the thin, curved handle.
Make it On Screen
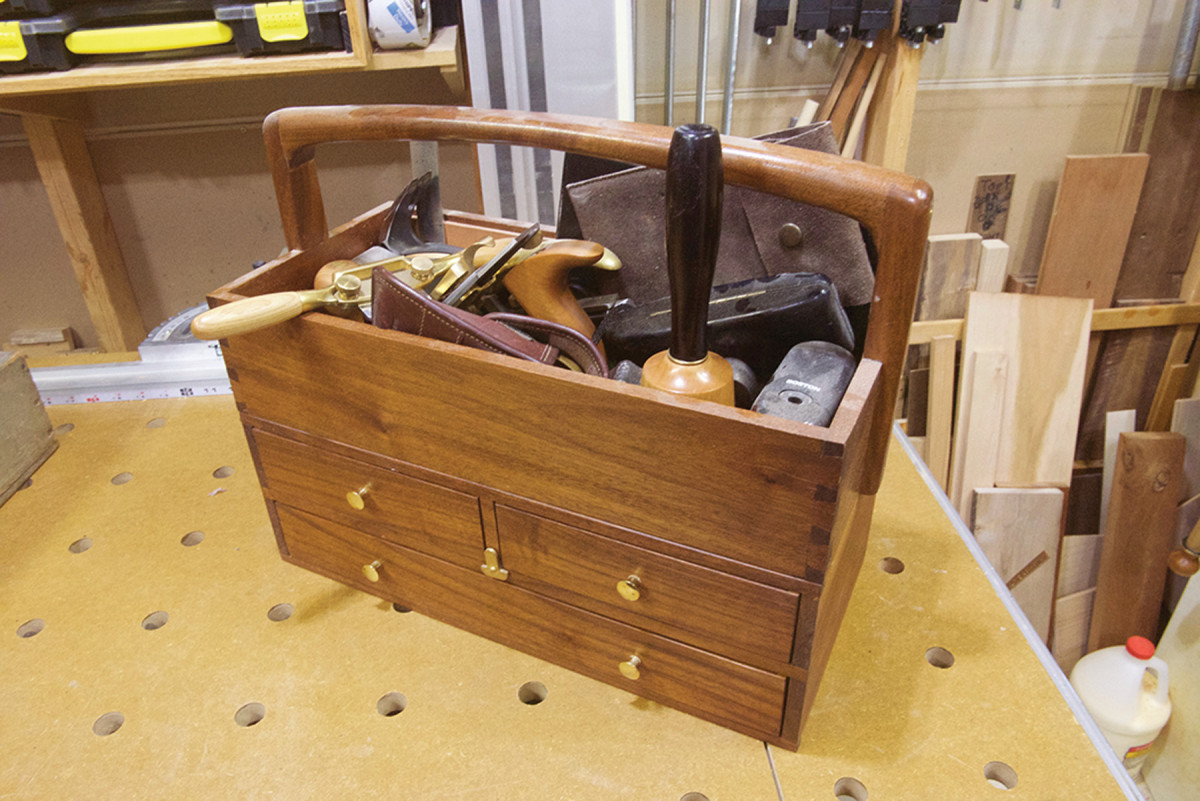
Growing pains. My first design didn’t have enough room for all my tools, so I added some drawers. Then I designed a version to accommodate a particular set of tools.
I enjoy the design process at least as much as the build itself. I use 3D solid modeling software to make and refine my designs, then generate 2D drawings and a cutlist to take to the shop. Other design methods can be as effective, but documentation provides me a good understanding of what I want to accomplish, and a logical sequence keeps the project on track.
Function and proportion top the list of things to consider in a good design. The design should suit the methods and materials used.
The sequence of operations is also important. For example cutting the rabbets in the sides before cutting finger joints might result in breakout of the finger joints.
Prepare the Stock
Stock preparation is always important. In particular, uniform thickness and squareness are key to good finger joints (also known as box joints). The thin stock used in this design can be prepared by resawing thicker material. The material for the box sides should be planed to achieve a uniform 1⁄4” thickness.
The thin strips for the handle, ripped from matching or contrasting species, should come from relatively straight grain without knots or splits. Prior to ripping the strips, mark one edge of the stock so your strips can be assembled in order in the lamination.
I was careful with my sawing; a smooth cut allows me to avoid jointing the stock after each cut and planing the strips. A smoothly sawn surface will promote adhesion and, after shaping, smoothing and finishing, the glue joints will disappear.
Finger Joint the Box
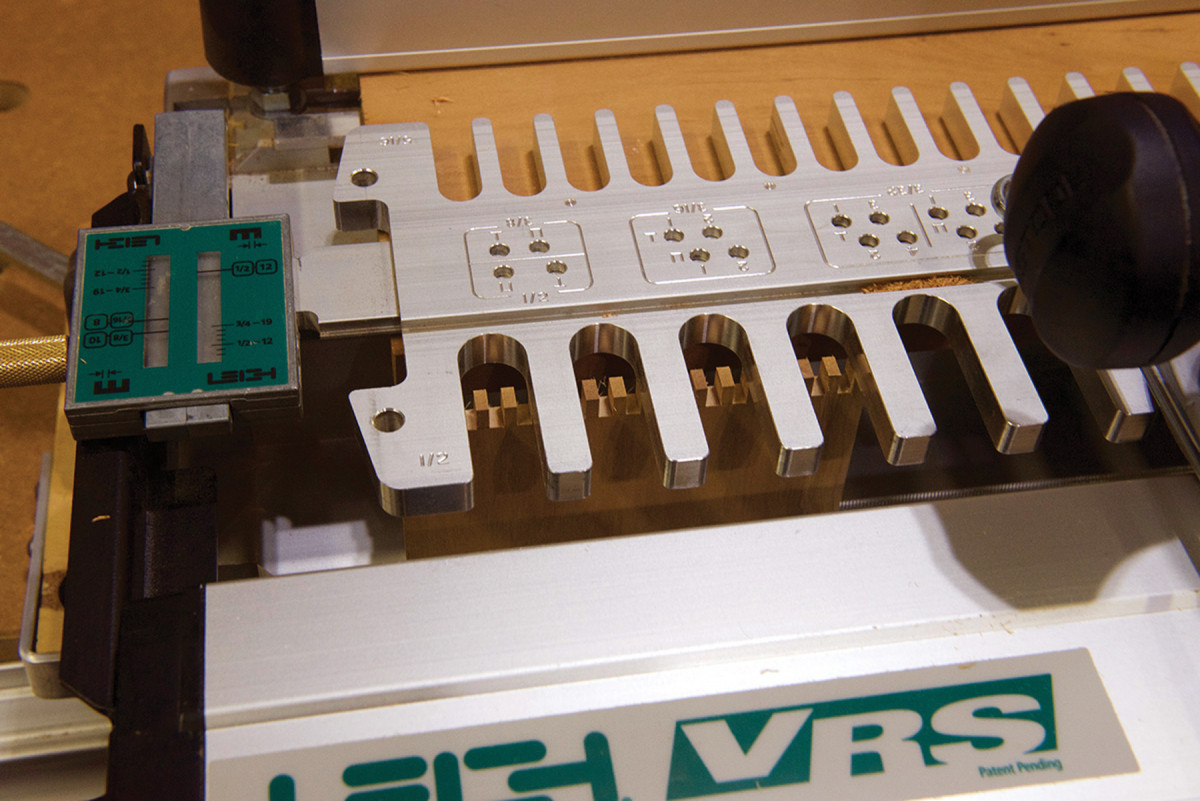
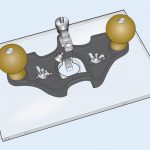
Jigged up. You can cut finger joints on the table saw of course, but I prefer to use my dovetail jig and finger-joint guide.
Finger joints are ideal for joining thin material because of their strength, plus they have a striking appearance. There are many ways to cut them; two of the most popular are on the table saw with a finger-joint jig, or with a router and dovetail jig equipped with a finger-joint guide. I prefer the router and dovetail jig but either method can yield good results.
Always make test cuts and check the fit before making final cuts. When preparing the stock, make extra pieces specifically for test cuts. The fit of the finger joints is affected by the material and how it responds when cut, so use the same material for test cuts as for the finished product for best results.
After the finger joints are cut, rout a 1⁄8” x 1⁄8” stopped rabbet at the bottom edge of all four pieces to house the box bottom.
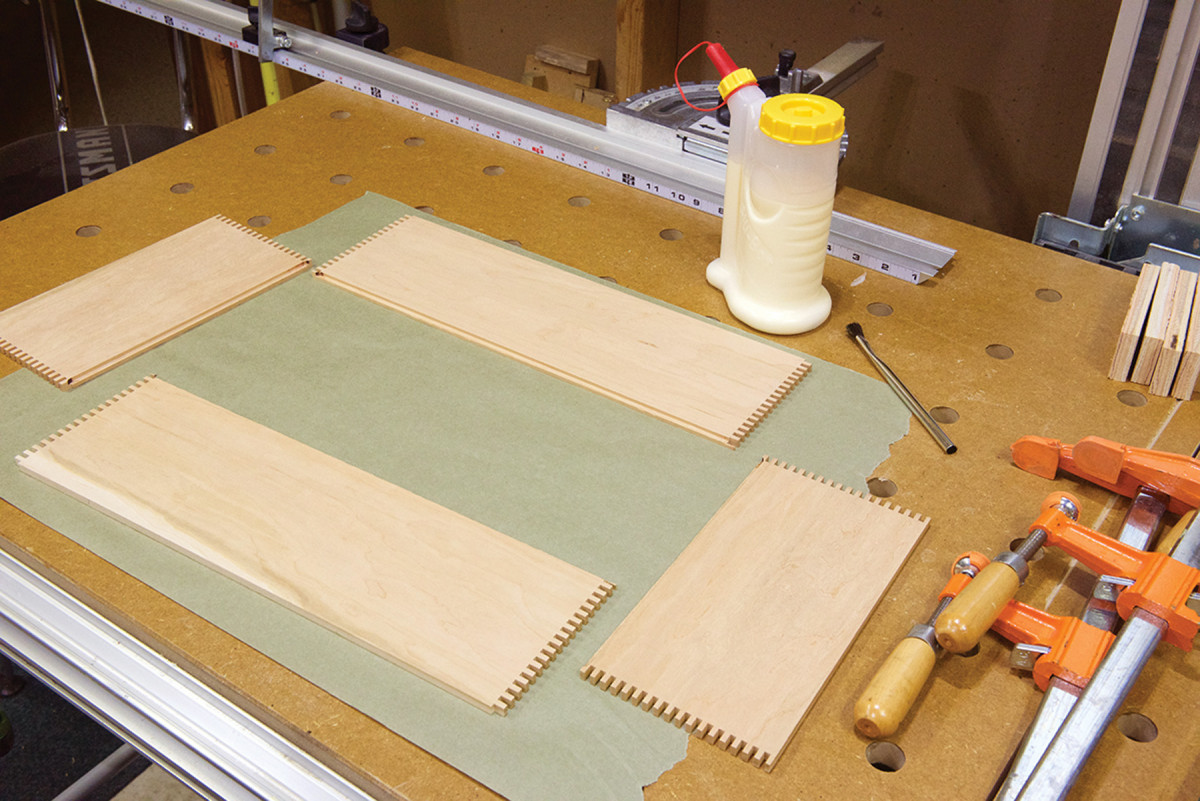
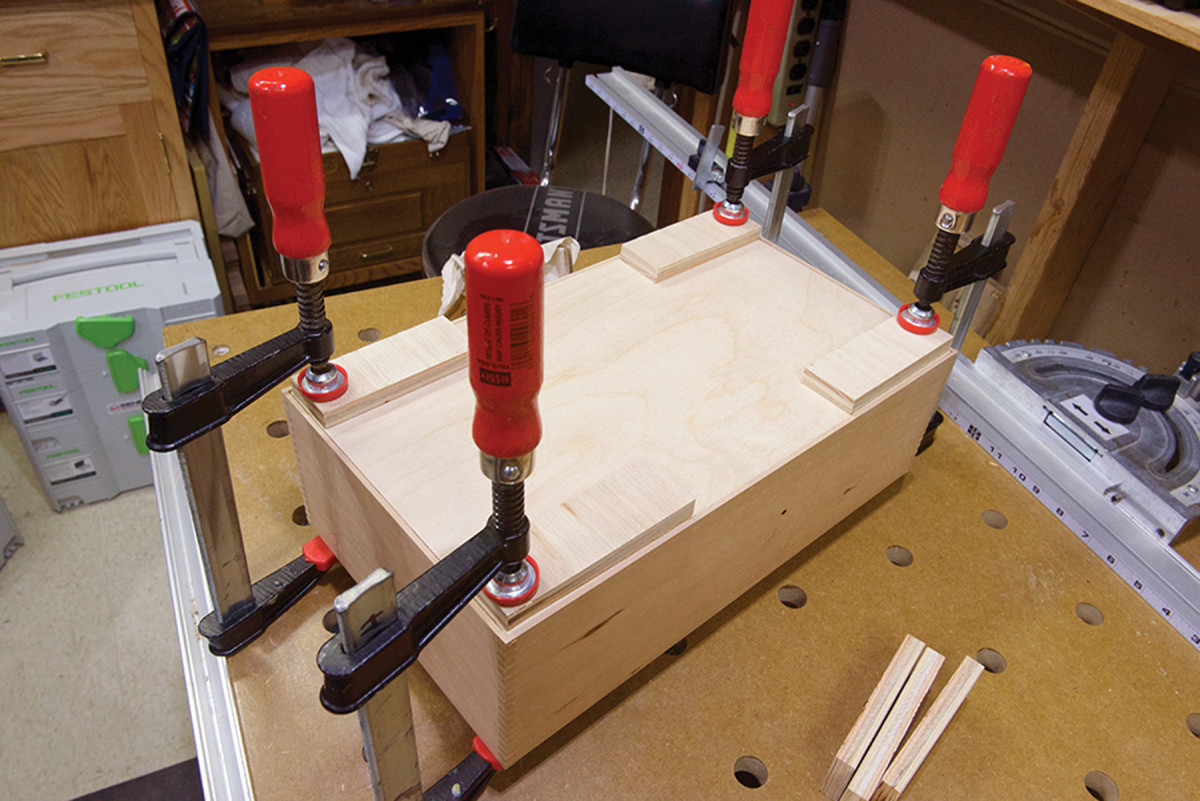
Get ready & go. After a dry-fit, I put my clamps, cauls and glue in easy reach for an anxiety-free glue-up.
Clean off any chips or fuzz clinging to the finger joints and finish-sand the inside faces. Now dry-fit the box. If the joints fit well, only light clamping
pressure is required. Use clamping cauls to protect your surfaces and provide even clamping force.
Now place clamps and cauls at the ready, and apply glue to the inside surfaces of the finger joints. Work quickly and on one corner at a time to prevent the glue from drying before assembly.
 Apply your clamps after all the corners are glued. Check that the box is square by measuring and comparing diagonals, then adjust the box if necessary until the diagonals are equal.
Use a wet rag to remove glue squeeze-out, particularly on the inside corners.
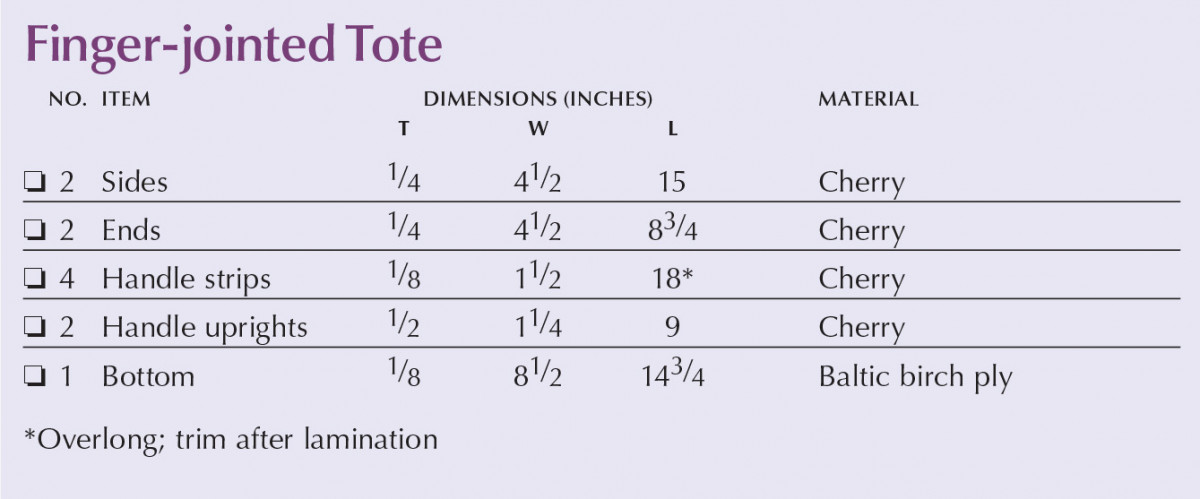
Finger-jointed Tote Cut List

Elevation
Profile
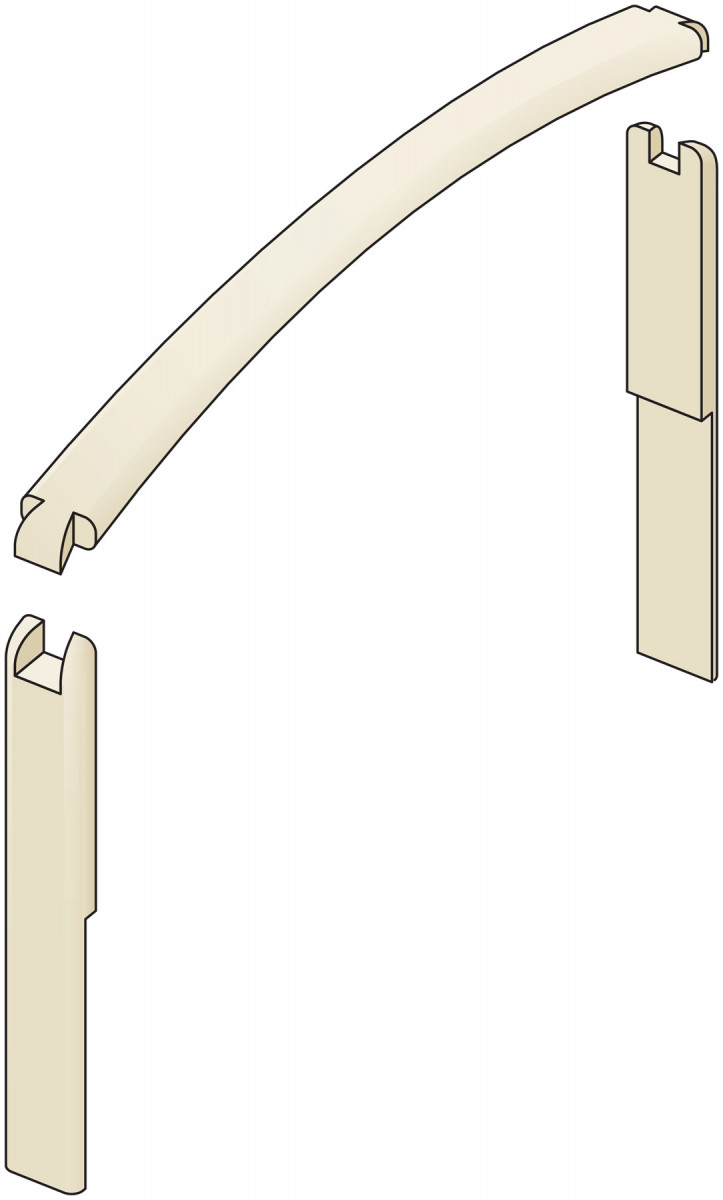
Handle – Exploded View
Bent-lamination Handle
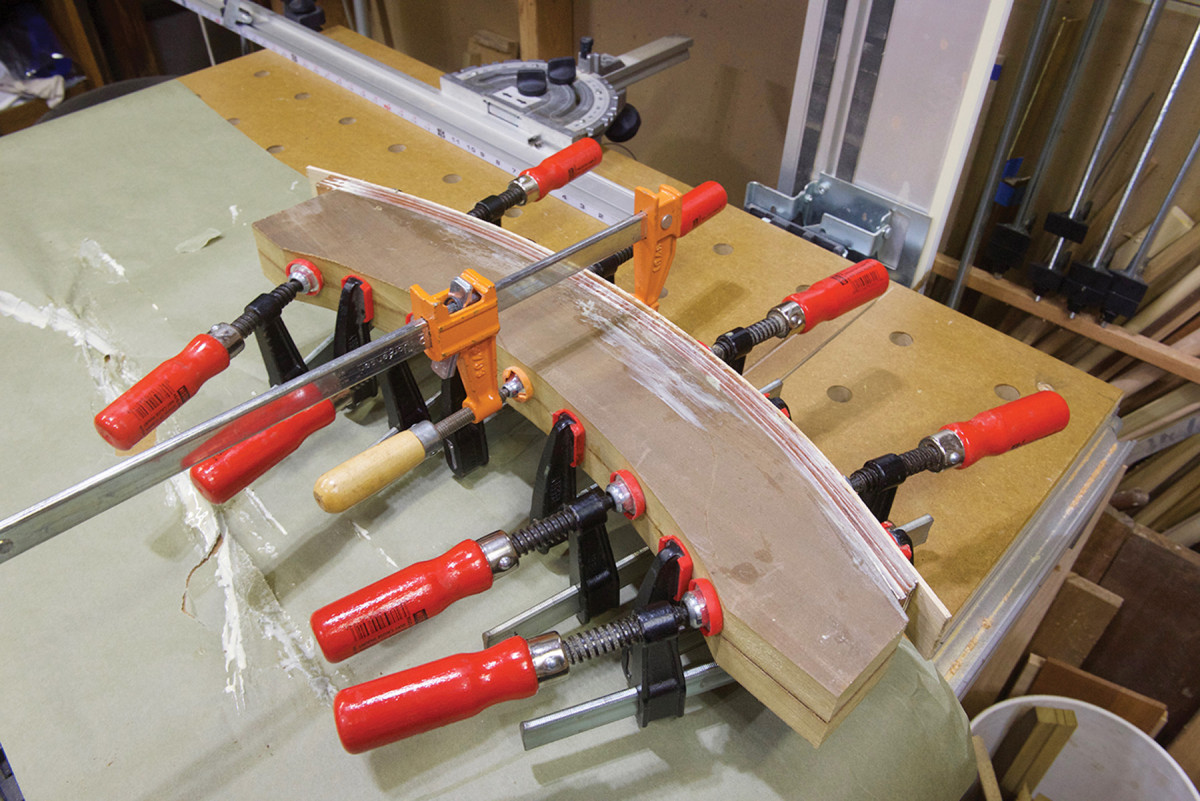
Never too many. Work out from the center and apply as many clamps as you can fit on the form.
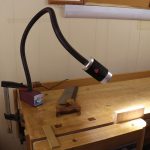
The bent-lamination handle requires a form to create its shape. Reference your design for the 24″-radius of the curve and, using a beam compass, bow curve or other means, draw the curve on a piece of material that is at least as thick as the handle is wide (with a gentle curve such as this, any springback once the glue-up is removed from the form will be negligible). MDF is ideal for this job and can be laminated to provide thickness. I also lay out a curve on the form’s opposite edge to simplify clamping.
Saw the curves close to but leaving your layout line, then fair the curve with a spokeshave until it feels smooth to the touch and follows your line. Wax the form generously so the lamination won’t stick to it.
Clean-up. I used a spokeshave to smooth the handle, paying close attention to where it will be grasped for carrying.
This is a simple bent lamination with a gentle curve, but care must be taken to achieve good results. Use a clamping caul to provide uniform pressure and protect the workpiece, and generously wax the clamping caul so glue won’t stick to it. Place the form on paper or plastic to avoid gluing it to your bench. And, as with any glue-up, lay out the work area and go through a dry run to be sure that all necessary clamps are at hand so the work will progress smoothly.
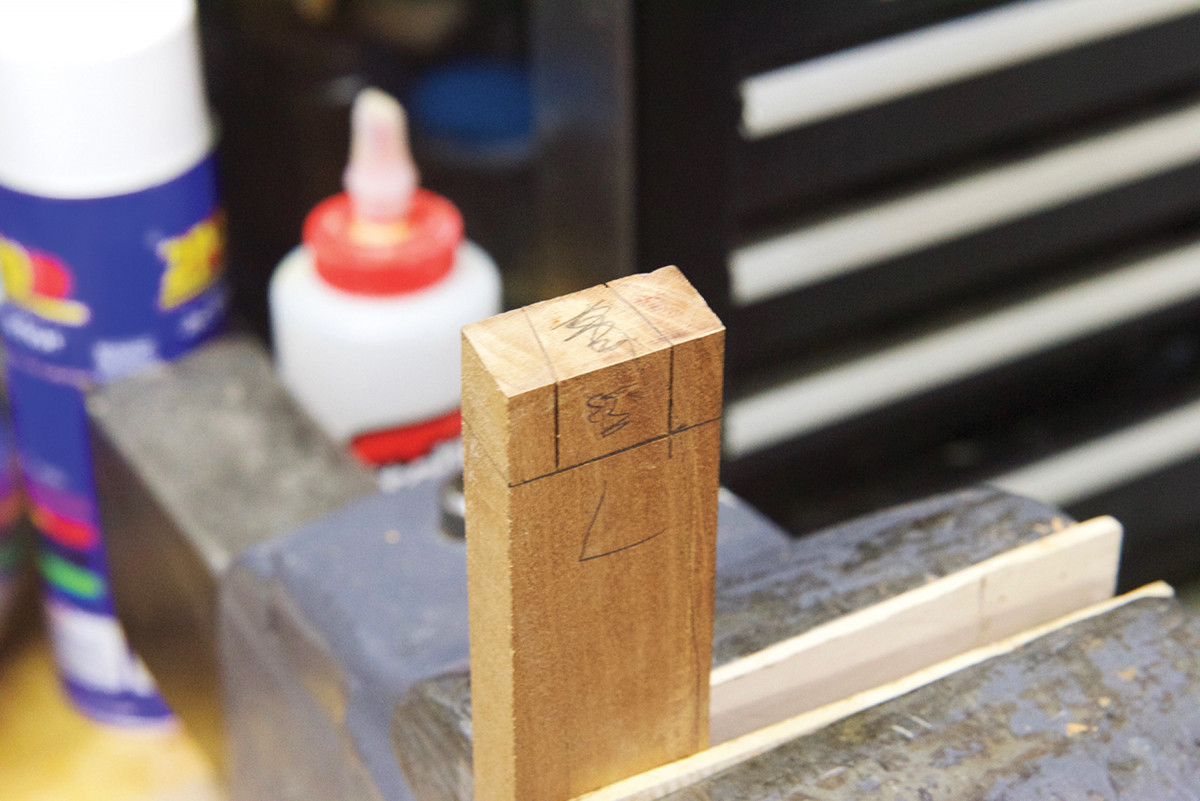
Prominently mark the edges of each handle strip to ensure that they will be properly oriented when assembled. Also, mark a line on the edge at the center of each piece. These marks must be visible through the glue as it drips over the edge.
Mark the uprights. Locate the handle at the top of the uprights, then mark the handle angle on the uprights.
Lay out your pieces and apply glue to two mating faces. Once glue is smoothly applied to the mating faces, place them together before proceeding to prevent the glue from “skinning” while applying glue to the remaining faces. Proceed sequentially until all mating faces have been glued and assembled.
Place the stack of pieces against the form, aligning the center marks with a mark at the apex of the form. Position the caul on the stack and apply your first clamp at the centerline. Tighten the clamp and be sure to correct any sliding of the laminations, loosening the clamp if necessary.
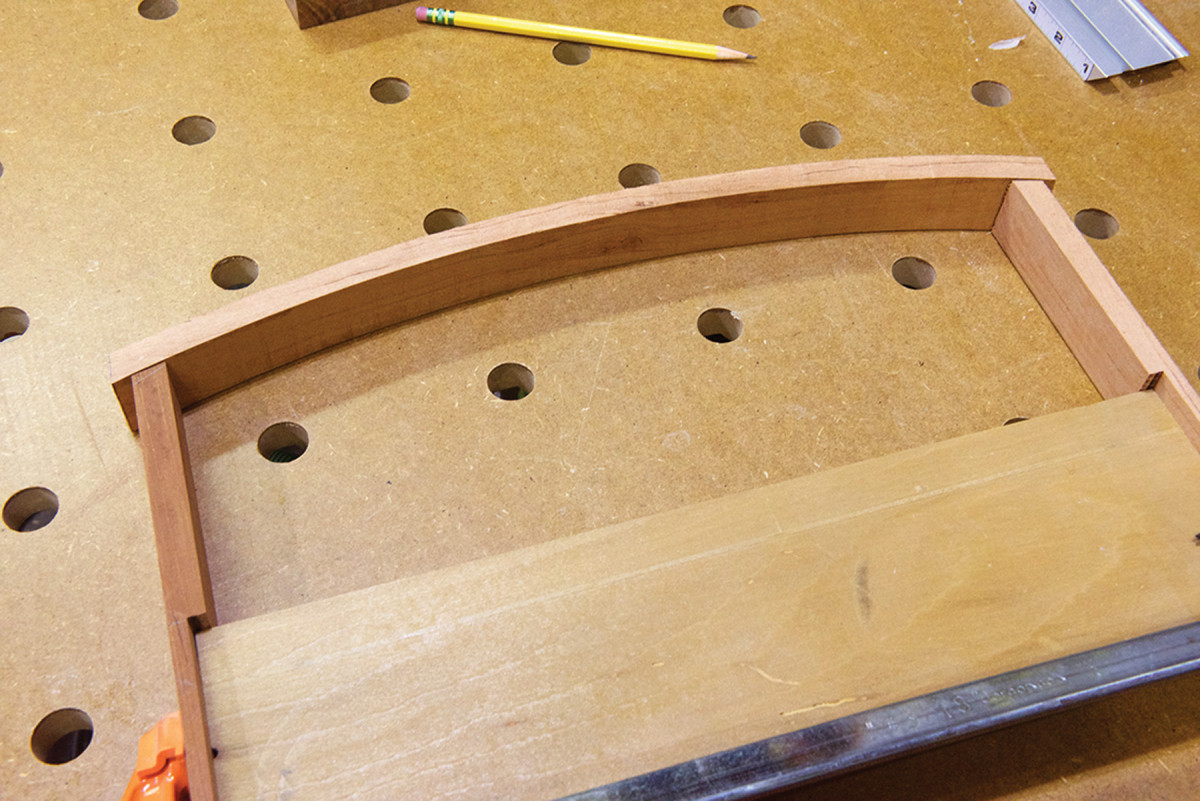
Ready for joinery. With the uprights cut at the correct angle and the handle trimmed, you’re ready to lay out the dovetails.
Tap the laminations’ edges to keep them flush as you apply more clamps out from the center. Don’t overtighten, and work quickly. Place as many as you can fit (alternating the direction of the handles will provide more room to tighten your clamps). After all the clamps are applied, go back and snug all of them uniformly. Set the glue-up aside overnight to dry.
Tails first. Lay out the tails on the handle and cut them.
With the glue dry, carefully remove the handle glue-up from your form. It is likely to be stuck; if so, lightly tap the handle on the edge to shear weak glue joints between the handle and the form and caul. If more than gentle taps are required, protect the handle with a piece of scrap. Remove any excess glue squeeze-out.
Then transfer the shapes to the top of the uprights, cut the sockets and glue the handle and uprights together.
Make any shaping cuts to the handle before the uprights are attached, including shaping the grip (if that is part of your design).
Now prep and size your stock for the handle uprights, then cut the long notches to mate with the box. Mark the right and the left for good measure.
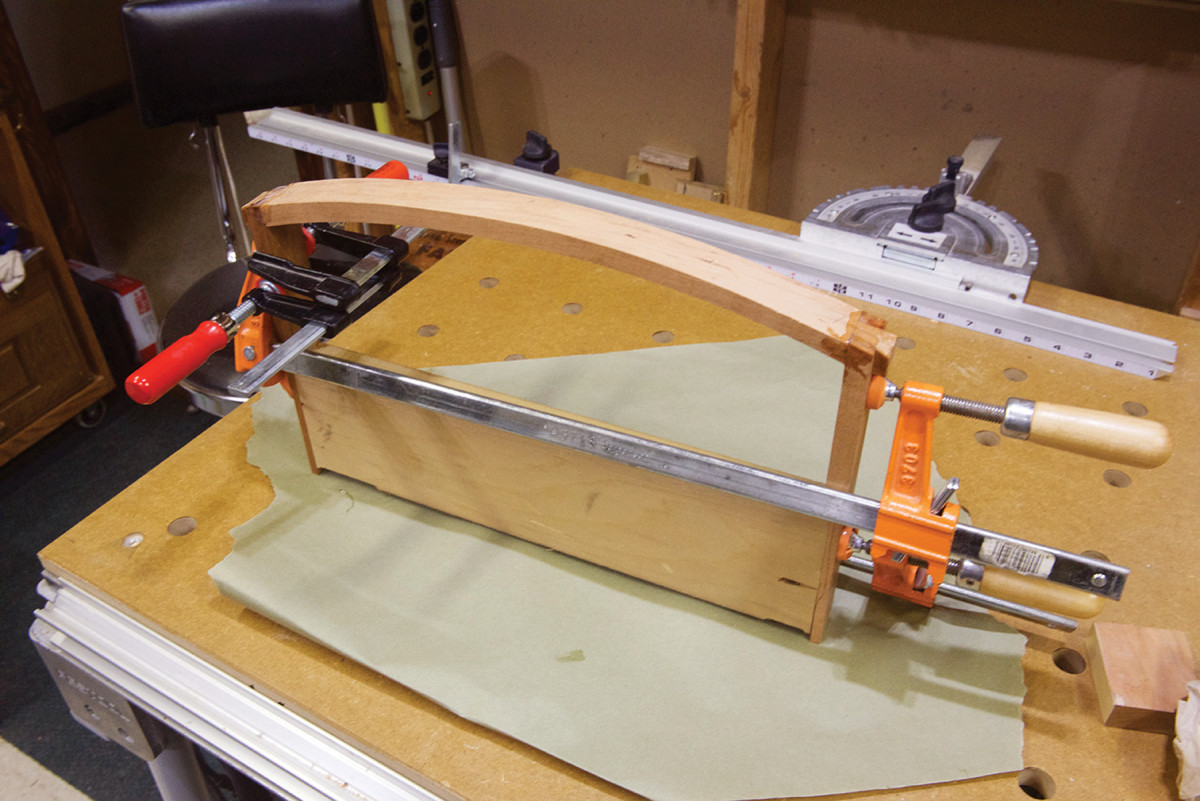
Use your scrap side to assist in clamping.
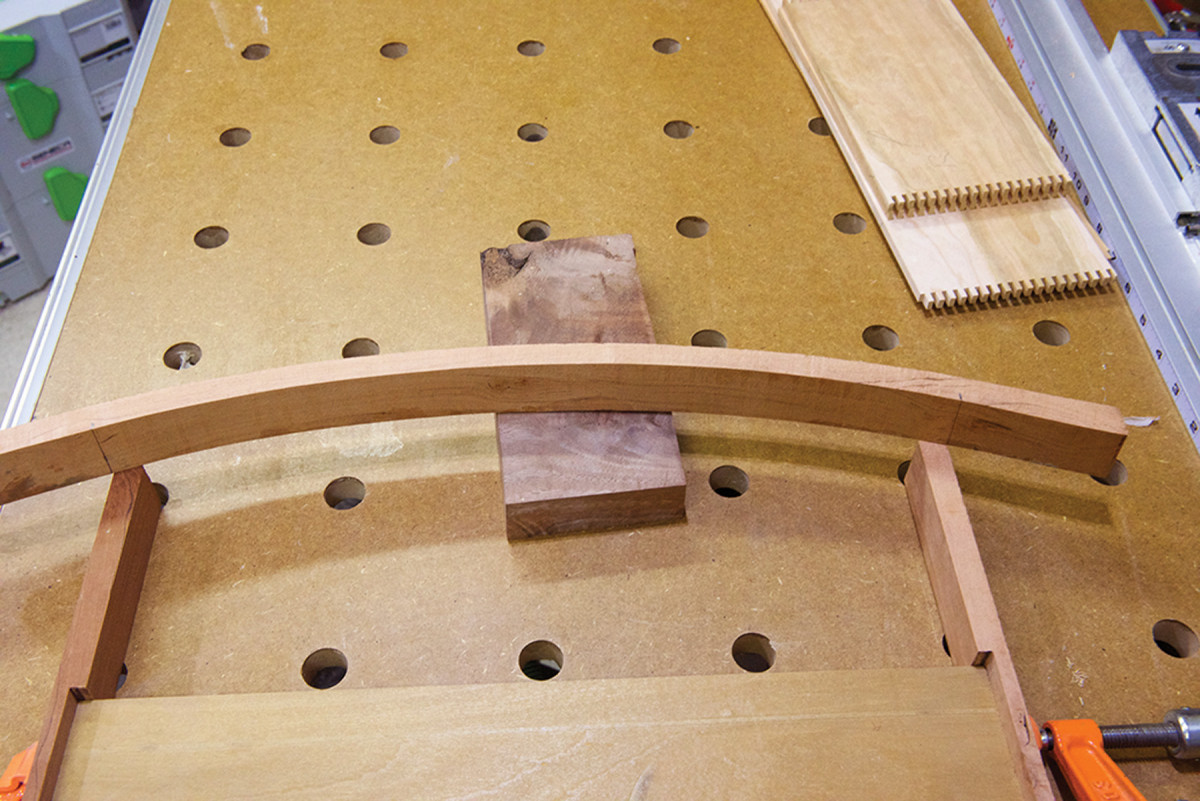
Cut a piece of scrap the same length as the box and use it to help lay out and construct the handle.
Next, clamp the uprights in place on your scrap and hold the handle stock centered in place. Mark uprights to match the angle where the handle stock intersects, and cut them at this angle to make pin layout easier.
Now trim the handle (keeping the grip centered) to about 1⁄4” overlong at each end.
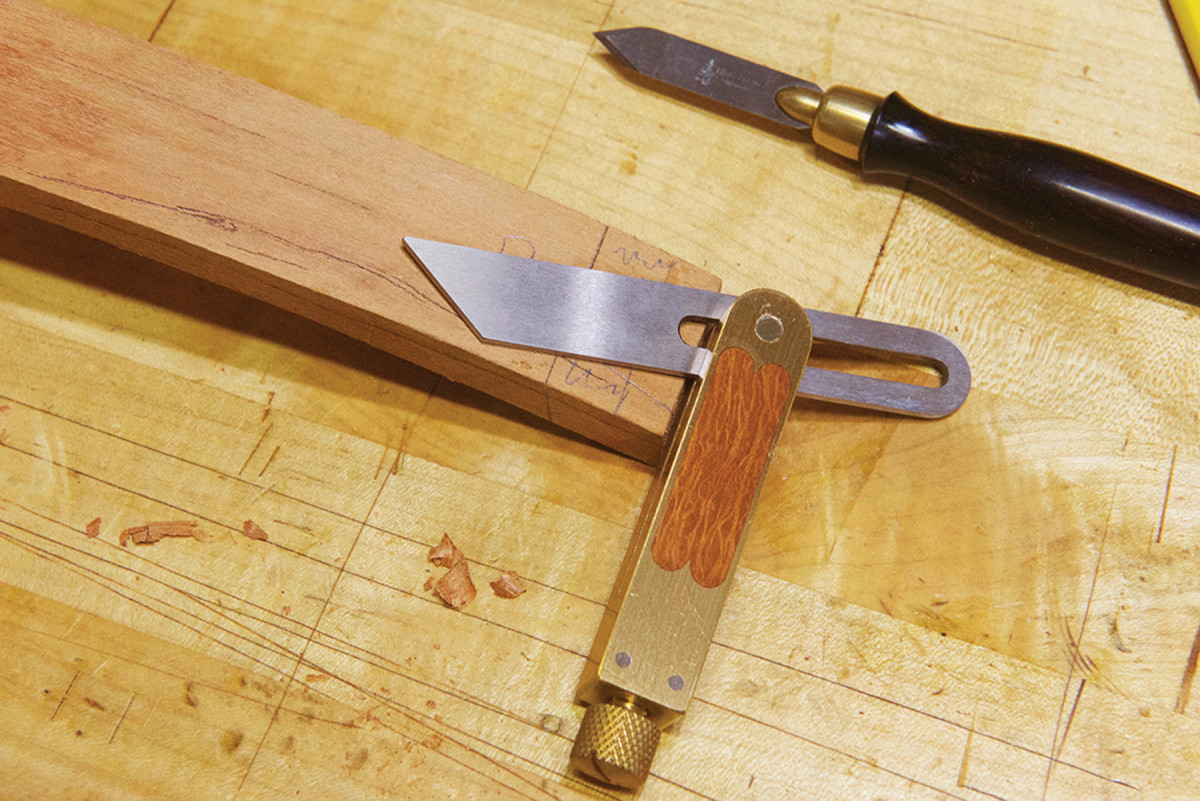
Again, hold the handle stock centered in place and mark it to show the location and angle of the uprights. With a sliding bevel, lay out the tail on the handle stock. Saw on the waste side of your lines and pare the tail surfaces flat and in alignment with the uprights.
Hold the handle stock and mark the pin layout on the uprights with a marking knife. Saw on the waste side and fit your pins to the tails. Make sure to leave the excess length on the handle stock until after glue-up.
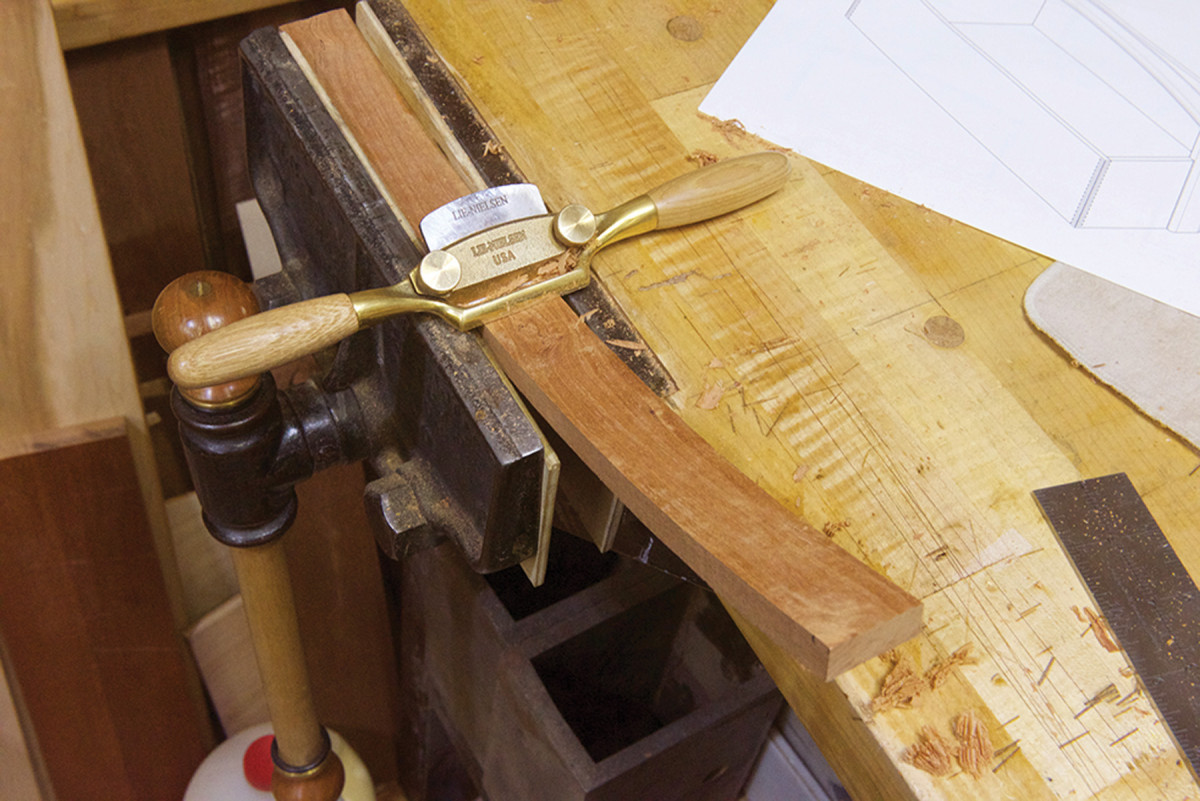
With uprights clamped to the same piece of scrap, dry-fit the handle stock and make any adjustments required. Coat all mating surfaces with epoxy and assemble the handle. I like to use 5-minute epoxy for this – it provides plenty of time for assembly and adds strength where the handle stock meets the end grain of the uprights. The down side of the epoxy, however, is that it is harder to clean up squeeze-out, so be careful in the inside corner where you are not going to be shaping the handle.
After the glue fully sets up, leave the handle clamped to your scrap piece for shaping. Use a spokeshave to fair the handle curve and apply some over-edge radius. Saw off the excess length, then shape the transition from handle to uprights.
After the glue dries, use a trim router and round-over bit to ease the outside edges of the handle and uprights, then smooth the cuts with #220-grit sandpaper.
Sand the box to #220 grit before assembly.
Get it Together
Clamp up. After gluing the bottom in its rabbet, glue the handle in place with light clamping pressure.
Cut and glue the bottom into the box with a thin bead of glue. Place a light weight on the bottom or clamp it up to dry.
Now glue the handle to the box using light clamping pressure.
 This small project is easy to finish with multiple coats of a wipe-on finish, such as Waterlox. For my wife’s quilting tote, I applied a topcoat of paste wax, applied with #0000 steel wool to result in a nice luster.
Here are some supplies and tools we find essential in our everyday work around the shop. We may receive a commission from sales referred by our links; however, we have carefully selected these products for their usefulness and quality.