We may receive a commission when you use our affiliate links. However, this does not impact our recommendations.

Take your box-making and scroll saw skills to a new level.
“Trompe l’oeil” is an old French phrase that literally means “it fools the eye.” Trompe l’oeil has a long tradition in the art world—and in woodworking, too. When you first saw the bows and ribbons on this box, didn’t you think to yourself, “Are they really made of wood?” Of course, the answer is “Yes!”
Here’s a box that will really get your work talked about. It makes a terrific presentation gift, particularly if there’s something special inside. The box itself is fairly basic, but it’s made in a way that can be adapted to many different designs. Making the bows and ribbons just involves one trick: They’re cut on a scroll saw.
The Trick Behind the Bow The bow isn’t bent—it’s sawn. It’s made from a number of pieces that you cut out of a blank composed of three layers of wood. The ribbons are cut from the same material.
Round or square edges?
When I first made these boxes, I left all of the edges square and glued the ribbon pieces directly on to the tops and sides. Although this approach allowed me to make lots of boxes as gifts in a short time, the look of those sharp edges wasn’t quite right. I wondered if there was some way to round over the edges of the box—and the ribbons, too—in order to make the package look more realistic. But how?
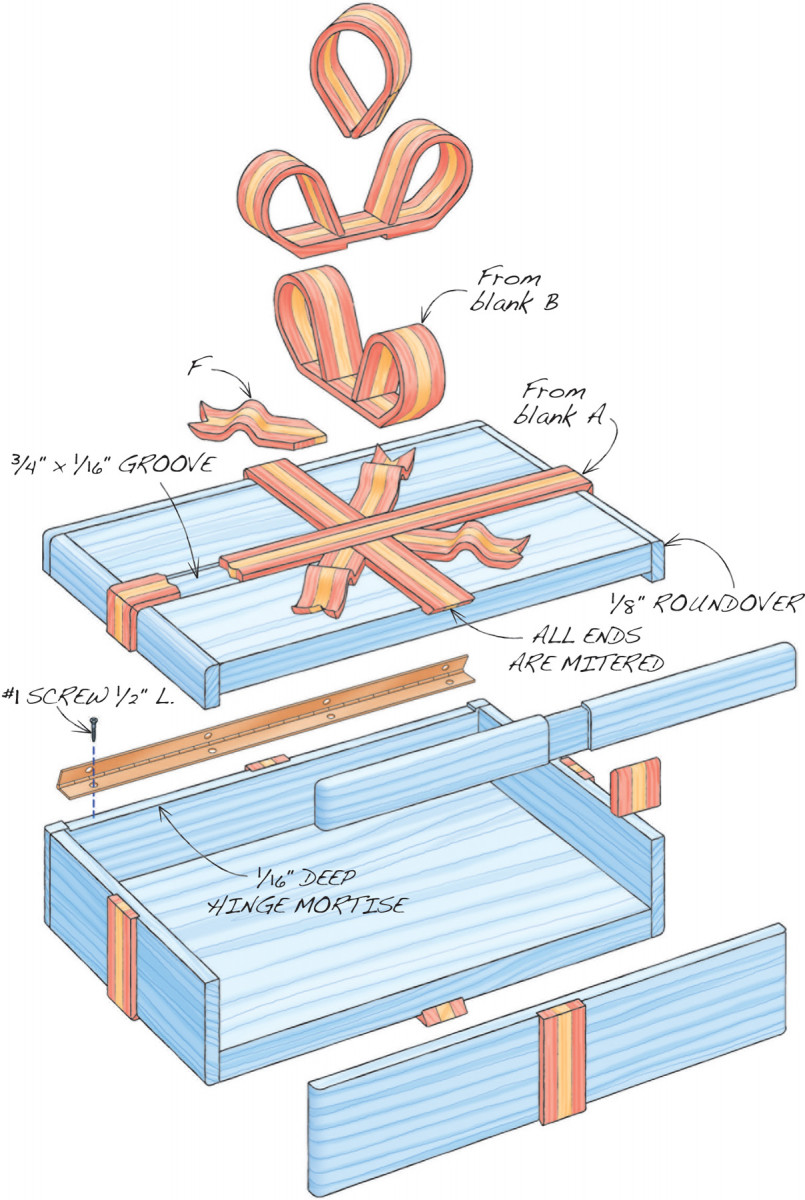
Fig. A) Exploded View
The solution wasn’t really that hard. You round over all the edges of the box first, and then, using a dado set, you cut grooves into the box for the ribbons to sit in (Fig. A). The bottoms of the grooves sit below the rounded edges, so there’s no gap under the ribbons. The grooves also automatically align the ribbon pieces around the box.
I discovered one drawback on my first attempt to saw the grooves: My inexpensive dado set wasn’t up to the job. The cuts going with the grain were OK, but the crosscuts were terrible. Every one had a ragged edge. To get better results, I had to buy a new, high-quality dado set.
To sum up, if you want the rounded-edge look, try out your dado set first. If you get splintered edges, consider having the set sharpened or upgrading to a new one. Or adopt my first method—the square-edge look—which doesn’t require any dado cuts.
Bow Box Cut List
Overall Dimensions: 3-7/8″ H x 8-5/8″ W x 5-5/8″ D
|
Section |
Material |
Qty |
Th x W x L |
Name |
Part |
Qty |
Th x W x L |
Qty |
Th x W x L |
|
Bows and ribbons |
Cedar |
4 |
1/4″ x 2-1/4″ x 12″ |
Ribbon blank |
A |
1 |
3/4″ x 2″ x 12″ |
50 lineal inches |
3/16″ x 3/4″ x length needed |
|
Birch |
2 |
1/4″ x 2-1/4″ x 12″ |
Bow blank |
B |
1 |
3/4″ x 2″ x 10″ |
3 bow pieces and |
see pattern |
|
|
4 ribbon ends (F) |
see pattern |
||||||||
|
Box (Fig. B) |
Birch |
3 |
1/4″ x 2-1/4″ x 12″ |
End |
C |
2 |
1/4″ x 2-1/4″ x 5-1/4″ |
2 |
1/4″ x 2-1/8″ x 5″ |
|
Front and back |
D |
2 |
1/4″ x 2-1/4″ x 9″ |
2 |
1/4″ x 2-1/8″ x 8-1/2″ |
||||
|
Birch ply |
2 |
1/2″ x 6″ x 9″ |
Top and bottom |
E |
2 |
1/2″ x 5-1/2″ x 8″ |
2 |
1/2″ x 5″ x 8″ |
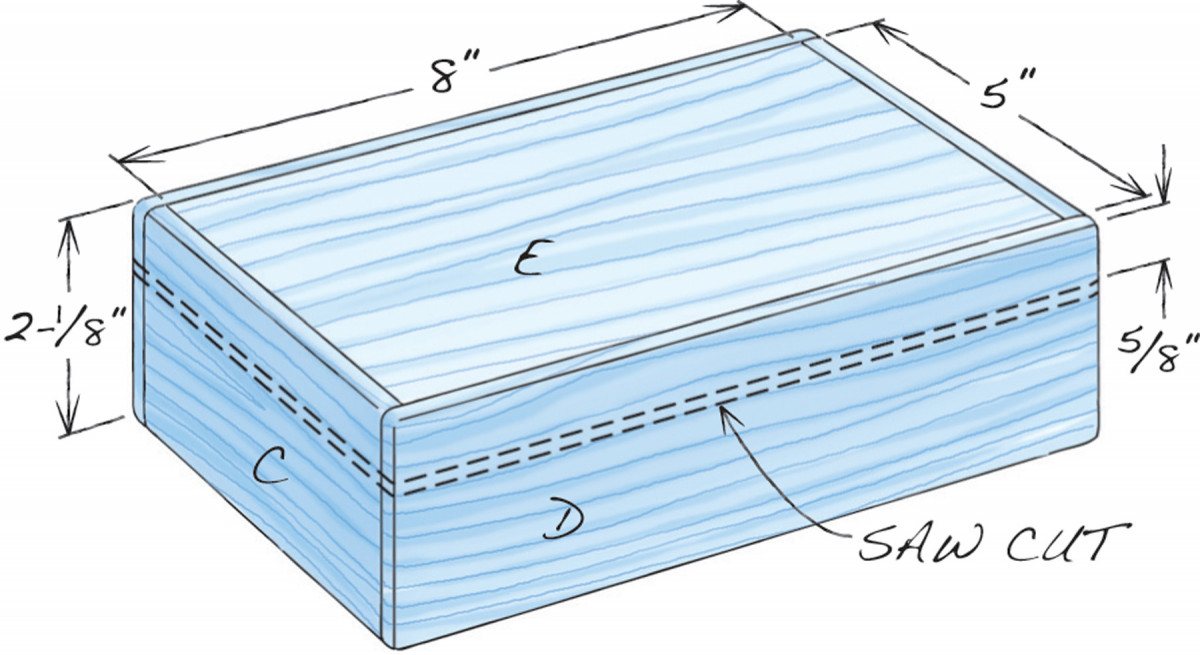
Fig. B) Box Dimensions Before Sawing
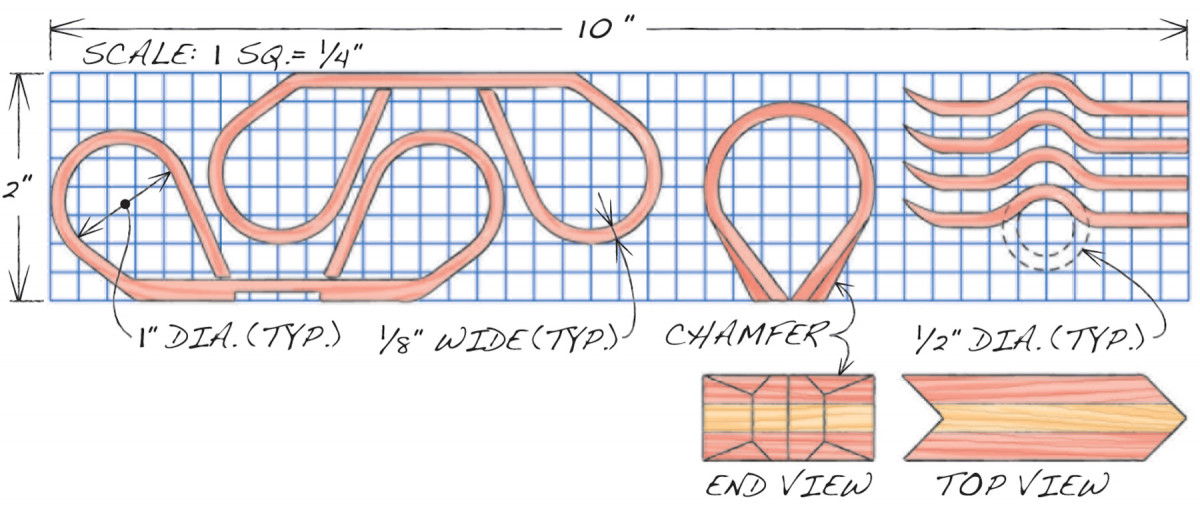
Fig. C) Ribbon and Bow Pattern
Make bow and ribbon blanks
I mention the dado set now for an important reason. It will be much easier to make the grooves fit the ribbons than the other way around. If you’ve got the ribbons in hand, you can adjust the width of the grooves by adding or subtracting shims from the dado set. Therefore, it’s best to start the whole box-building process by making the ribbons first.
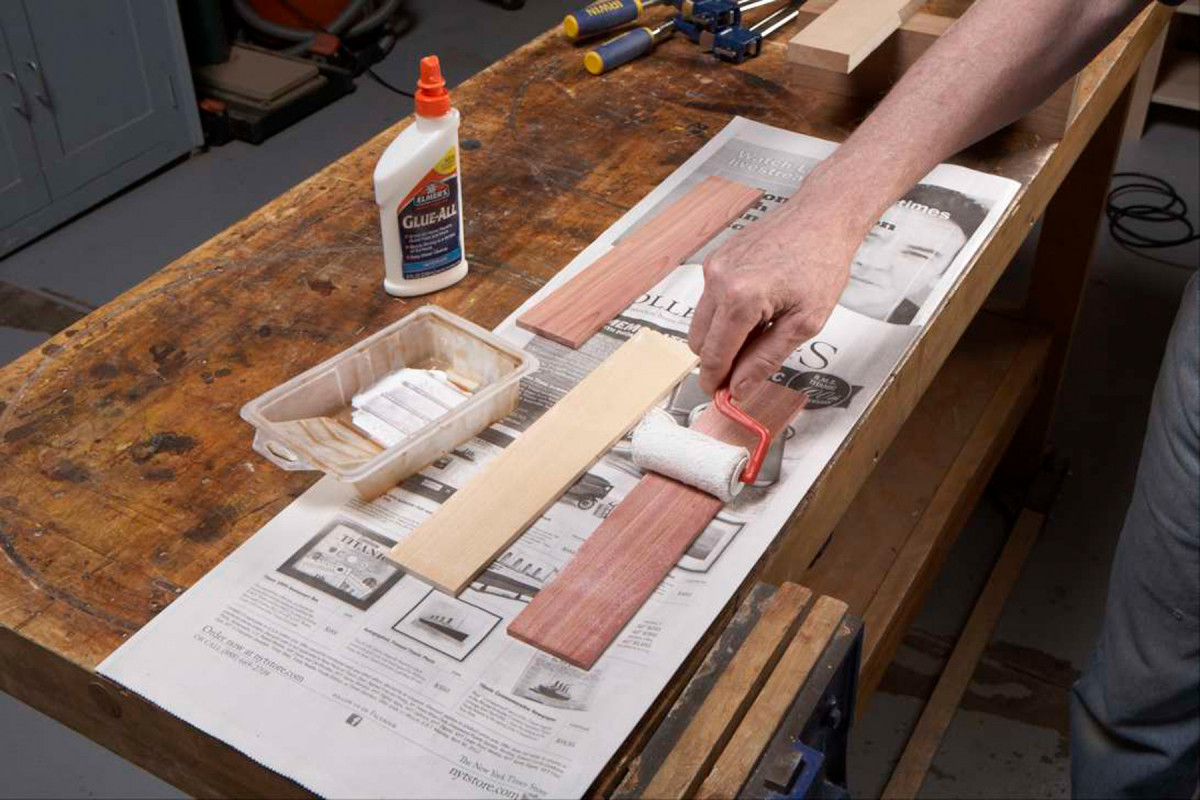
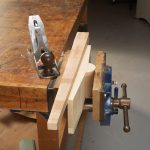
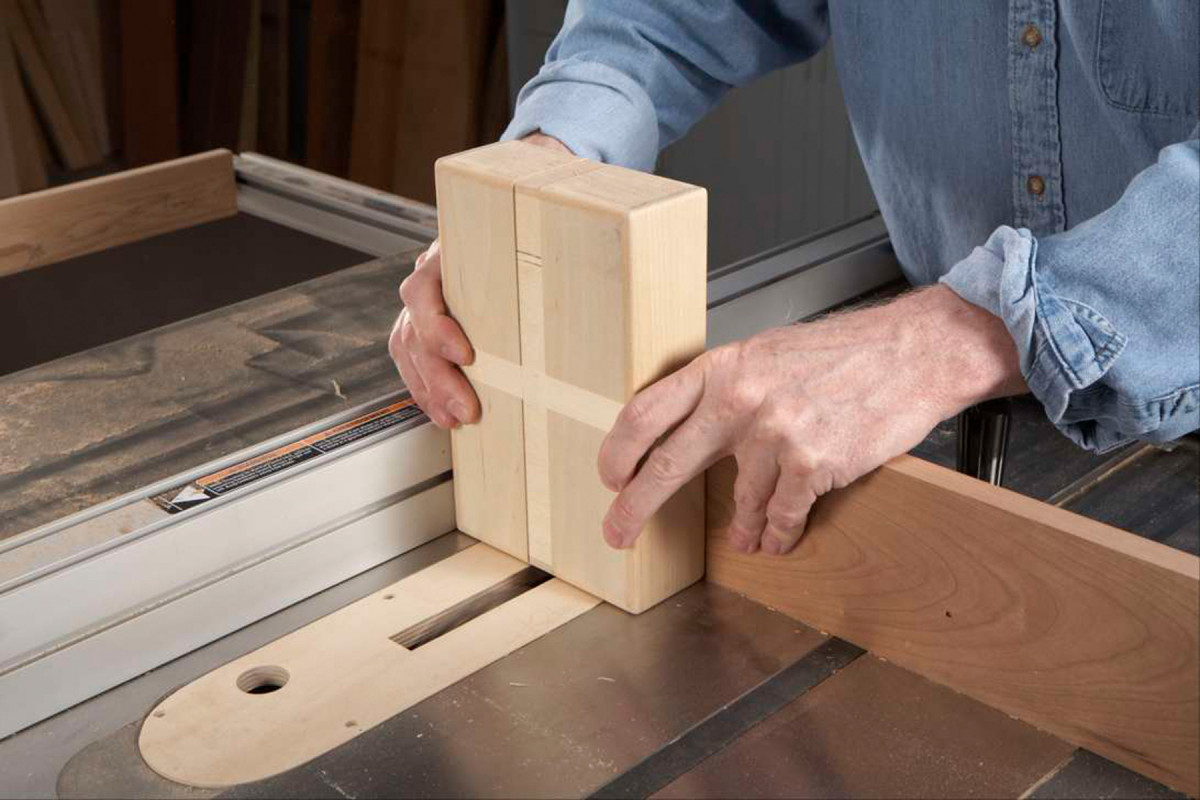
1. Begin by gluing up two blanks for all of the ribbons and bows. Each blank is made from two pieces of 1/4″ thick aromatic cedar and one piece of 1/4″ thick birch.
The bows and ribbons are cut from two 3/4″ thick blanks (A and B). Each blank is composed of two 1/4″ thick pieces of aromatic cedar and one piece of 1/4″ thick solid birch (Photo 1). I cut the pieces of cedar from closet lining, avoiding knots and cracks. Closet lining is a convenient material—it’s available at home centers and is already milled 1/4″ thick—but it’s also very knotty and may contain unusable yellow sapwood. One package will contain much more wood than you’ll need for one box, of course, but it’s perfect for making multiple boxes.
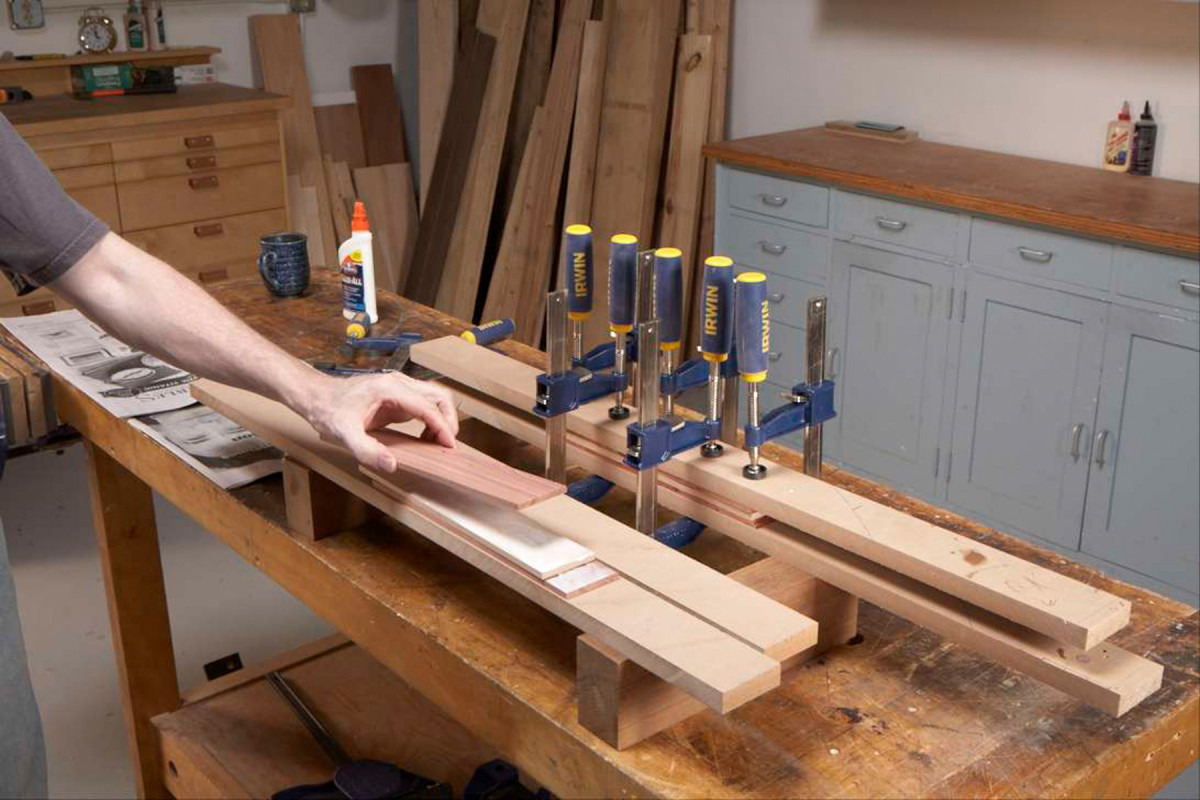
2. Clamp each blank between pieces of MDF, or any flat boards. After the glue dries, saw or joint one edge of each blank so all the layers are flush.
While you’re milling the birch pieces for the blanks, make a few extra for the front, back and ends of the box (C and D). All of these parts are the same thickness, width and length. I run them through a drum sander to make sure they’re smooth.
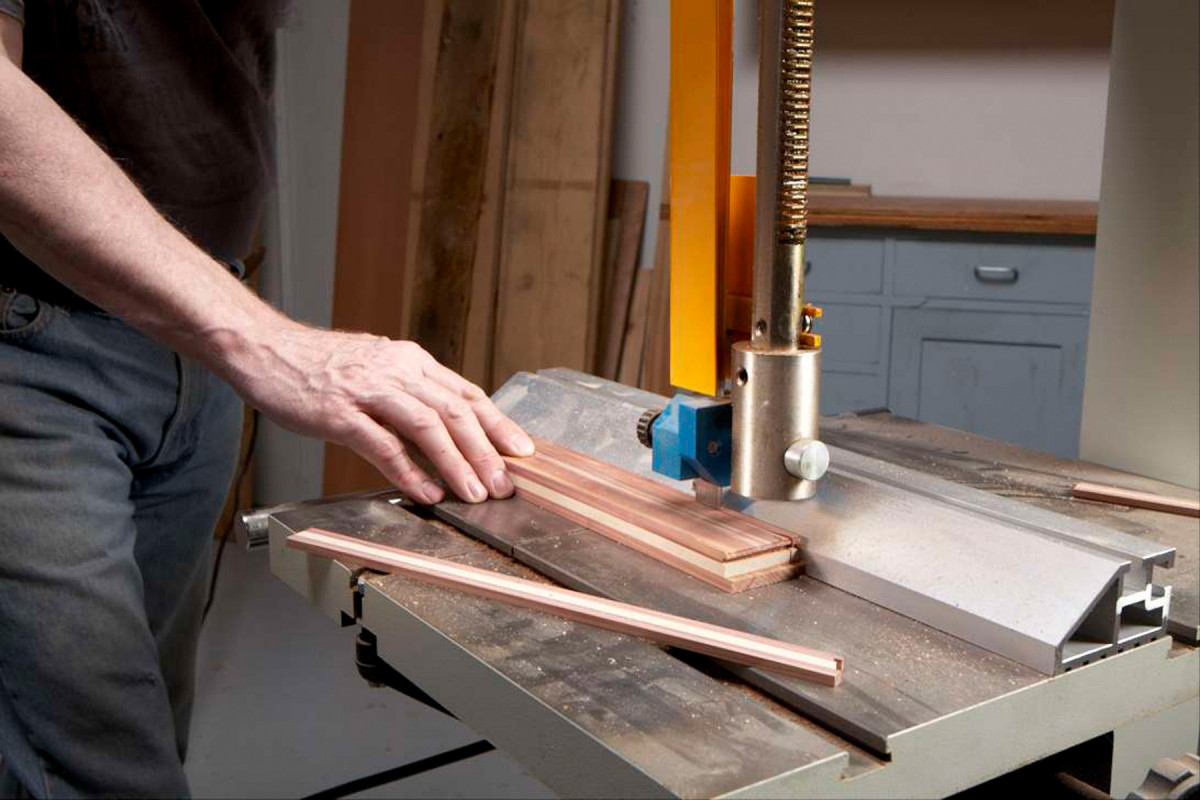
3. Rip one of the blanks into strips, for making the straight ribbons. You’ll use the other blank to make the bows later on.
To glue the blanks, roll glue on one cedar piece and one birch piece, then clamp all three pieces between flat, straight boards (Photo 2). After the glue dries, saw or joint one edge of each blank. Rip blank A into ribbon pieces (Photo 3). I cut the pieces about 1/32″ extra-thick and ran them through the drum sander. If your saw cuts well, you could also sand the rough surfaces by hand.
Make a hollow box
While there are many ways to make a box, I’ve found that the classic method of gluing up a hollow box first, then sawing it apart, works best for this project. The top and bottom pieces of the box are made from 1/2″ thick Baltic birch plywood. While you might consider pieces this thick to be overkill for a box this small, using thick wood means that you don’t have to worry about joining the sides of the box with spline, finger joints or dovetails. Simple butt joints are fine. If you wanted to make the box look more realistic (like a wrapped present, that is), you’d miter the corners—but that’s a lot more work.

4. Glue the box in stages, starting with the end pieces. Place shims under the box to ensure that the ends will be proud. Use spacers to ensure that the top and bottom pieces are parallel.
Begin making the box by cutting the top and bottom pieces (E) to rough size (see Cutting List, middle column). From one of the box side blanks, cut two end pieces to rough length. The trick to gluing the box is to make sure that the solid wood pieces end up about 1/32″ proud of the plywood pieces. Here’s how to do it: Place shims under the bottom of the box to elevate it 1/32″ above the bench top (Photo 4). (I use four piles of playing cards for shims; each pile has three cards in it.) Then, cut spacers to hold the top piece of plywood 1/32″ below the solid-wood ends. (The exact width of these spacers will depend on the precise thickness of your plywood, which is only nominally 1/2″ thick.)
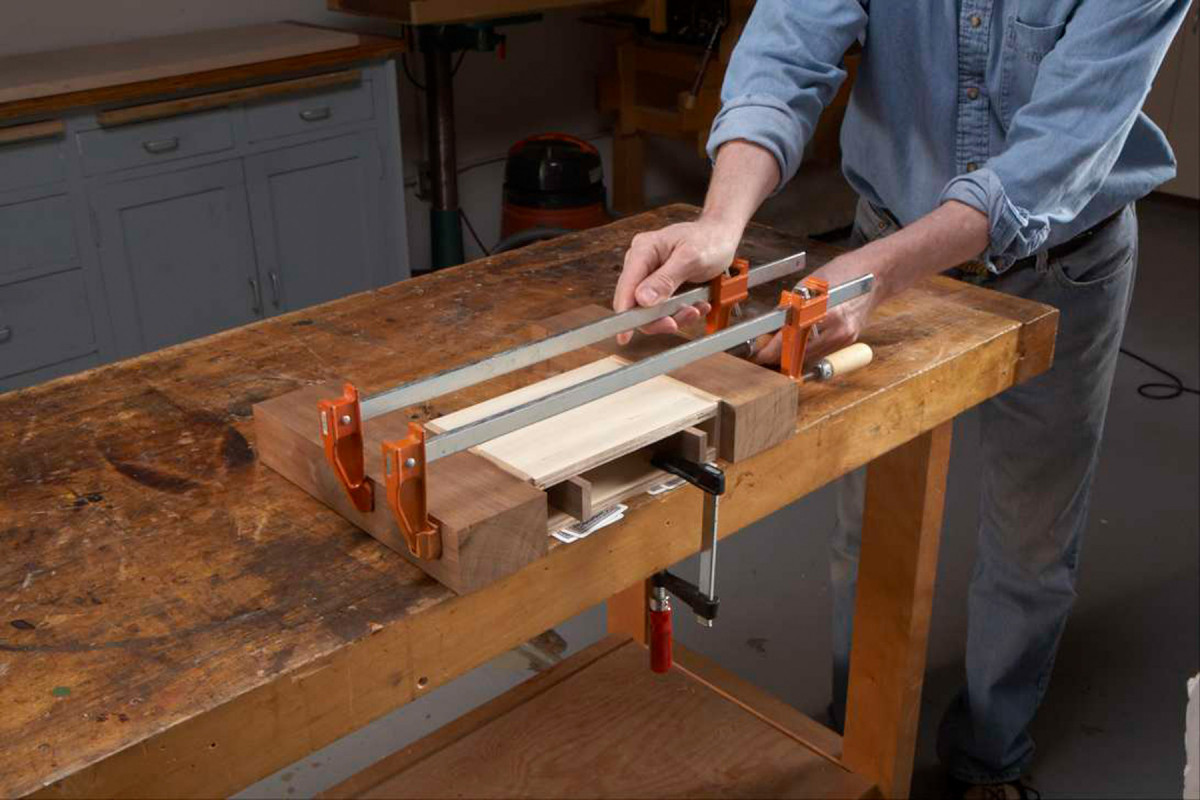
5. Clamp the ends between two large blocks to make sure the box stays square. The box is extra wide at this point, so you don’t have to worry about perfectly aligning these parts.
Spread glue on the end pieces and center them on the plywood pieces, more or less. (The plywood pieces are 1/4″ wider than the end pieces.) Clamp the box between large, square blocks (Photo 5). The blocks are essential. Without them, the box might end up out of square. After the glue dries, rout or plane the end pieces flush with the top and bottom pieces (Photo 6).
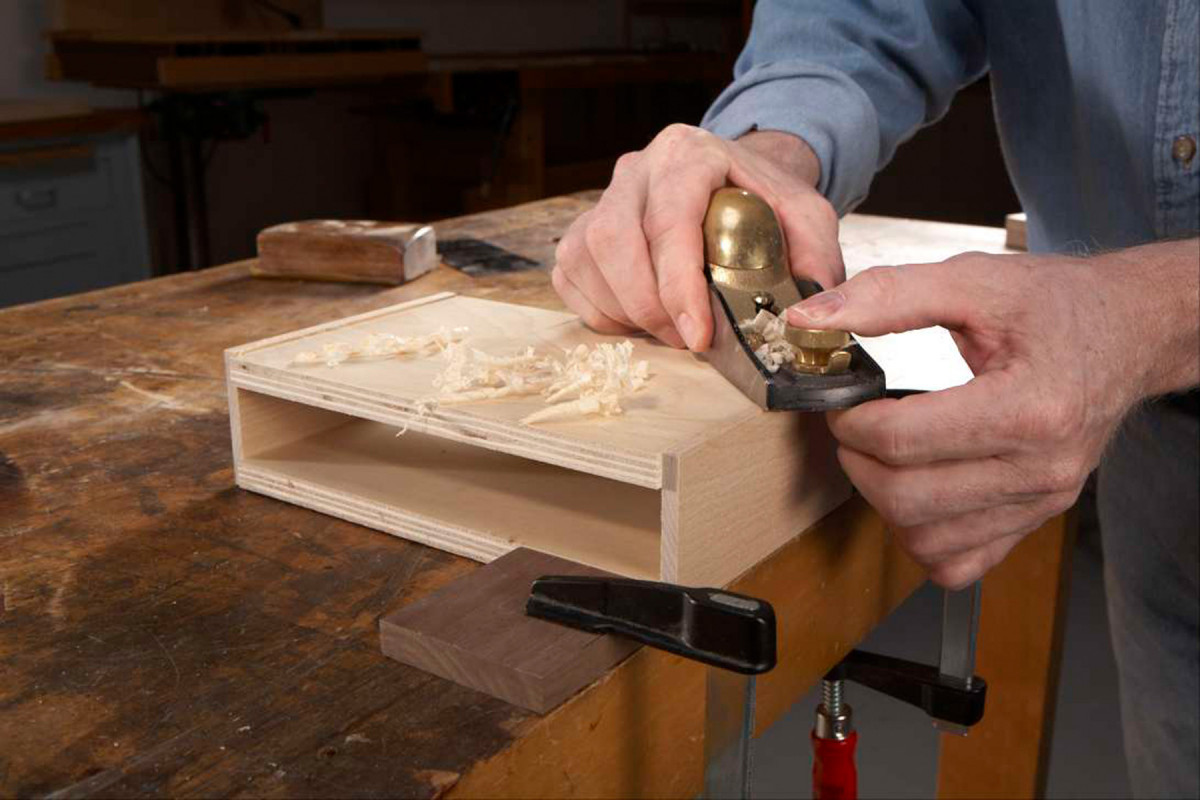
6. Even up the end pieces with the top and bottom pieces. You can plane, scrape and sand (a nice, quiet job!) or use a flush-trim router bit.
Using a fine-toothed crosscut blade, rip the box to final width (Photo 7). You’ll have to cut both sides, of course. The plywood pieces will ride against the fence, since they’re wider than the end pieces, so you’ll get a nice, straight cut. When you’re done, all the parts will be flush (see 7B).
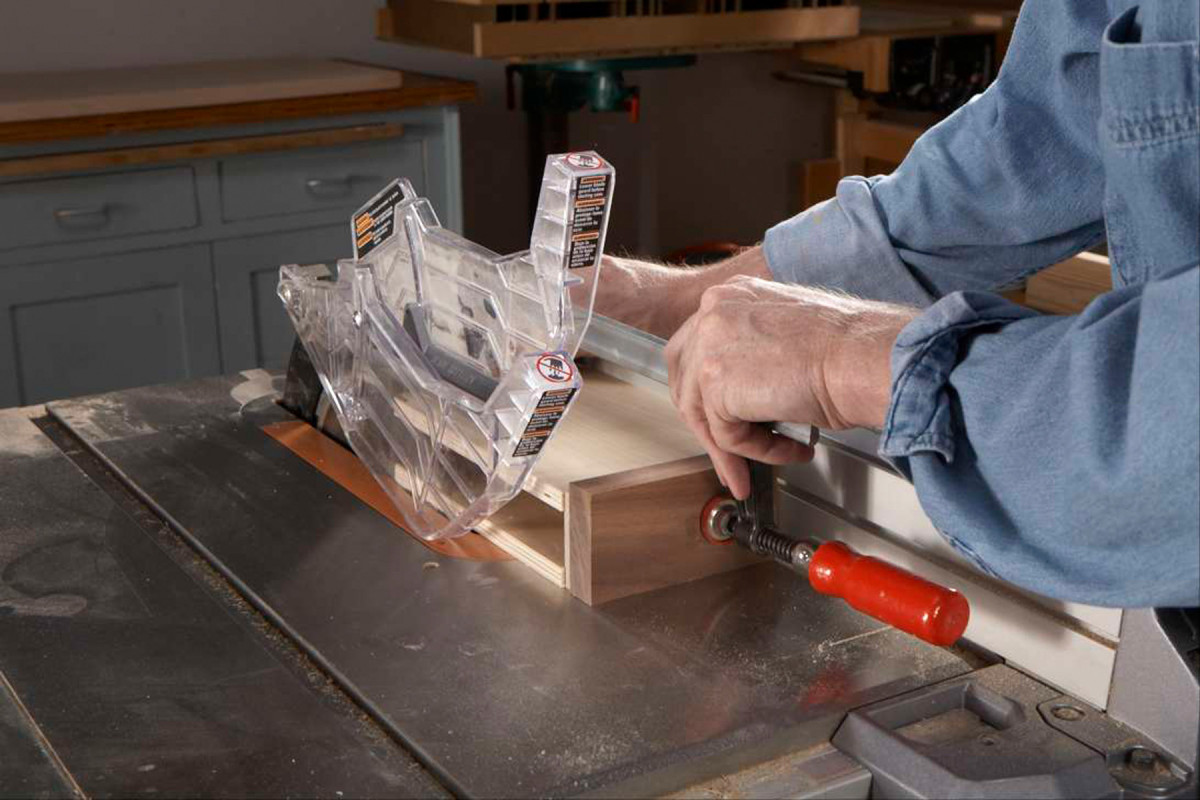
7. Rip the front and back of the box. This operation evens up the end pieces with the top and bottom pieces. Clamp a block to the near end piece to prevent tearout. Glue on the front and back pieces and even them up.
Cut the front and back pieces about 1/4″ extra-long. Glue them to the box using the same shim-and-block method you used before.
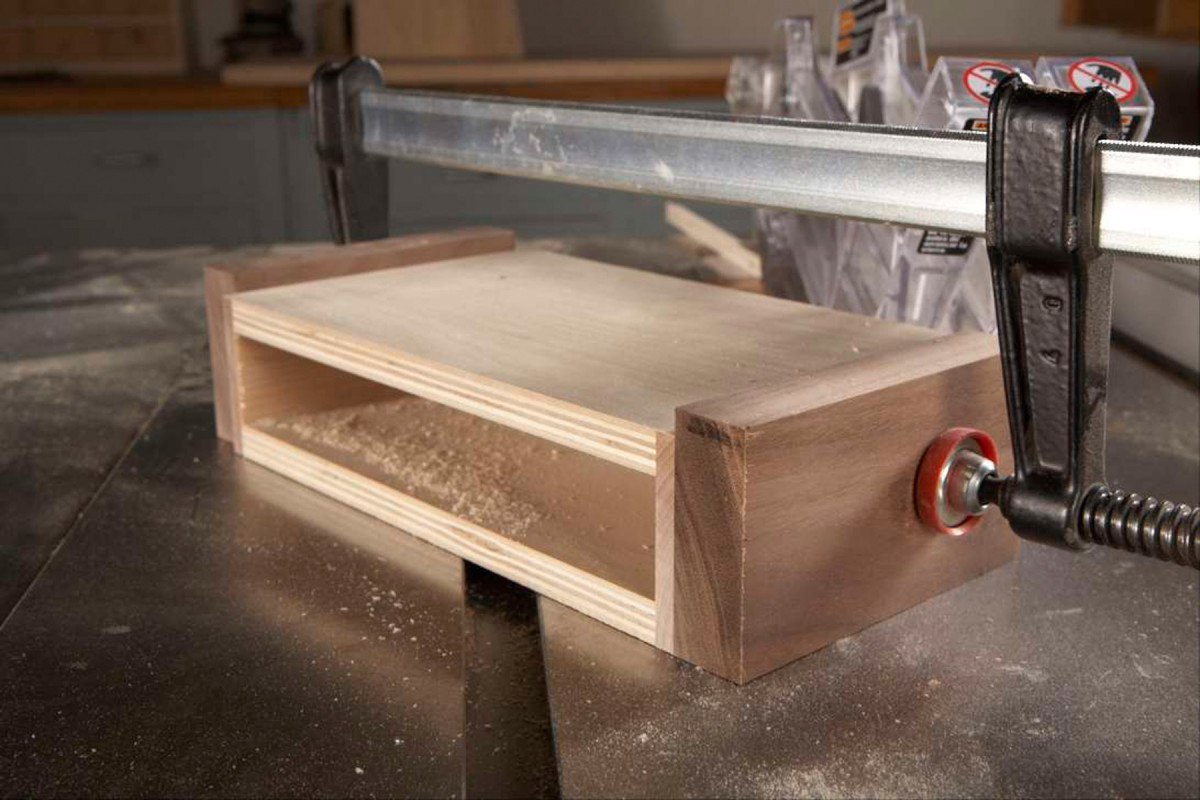
7B.
Trim the pieces close to final length by hand or on the bandsaw, using a miter gauge, then level all the proud edges.
Cut grooves for the ribbons

8. Round over all edges of the box.
Soften all the edges of the box using a 1/8″ roundover bit (Photo 8). To avoid tearout, rout the end grain surfaces last. Sand all of the roundovers so they’re smooth and uniform.
Measure the width of your ribbon pieces, then install a dado set in your saw to cut a groove to fit them. Raise the dado set 1/16″ high and make a few trial cuts on a scrap piece of wood. It’s OK if the fit is a bit tight (you can lightly sand the edges of the ribbon pieces for a better fit), but it’s not OK if the fit is too loose.
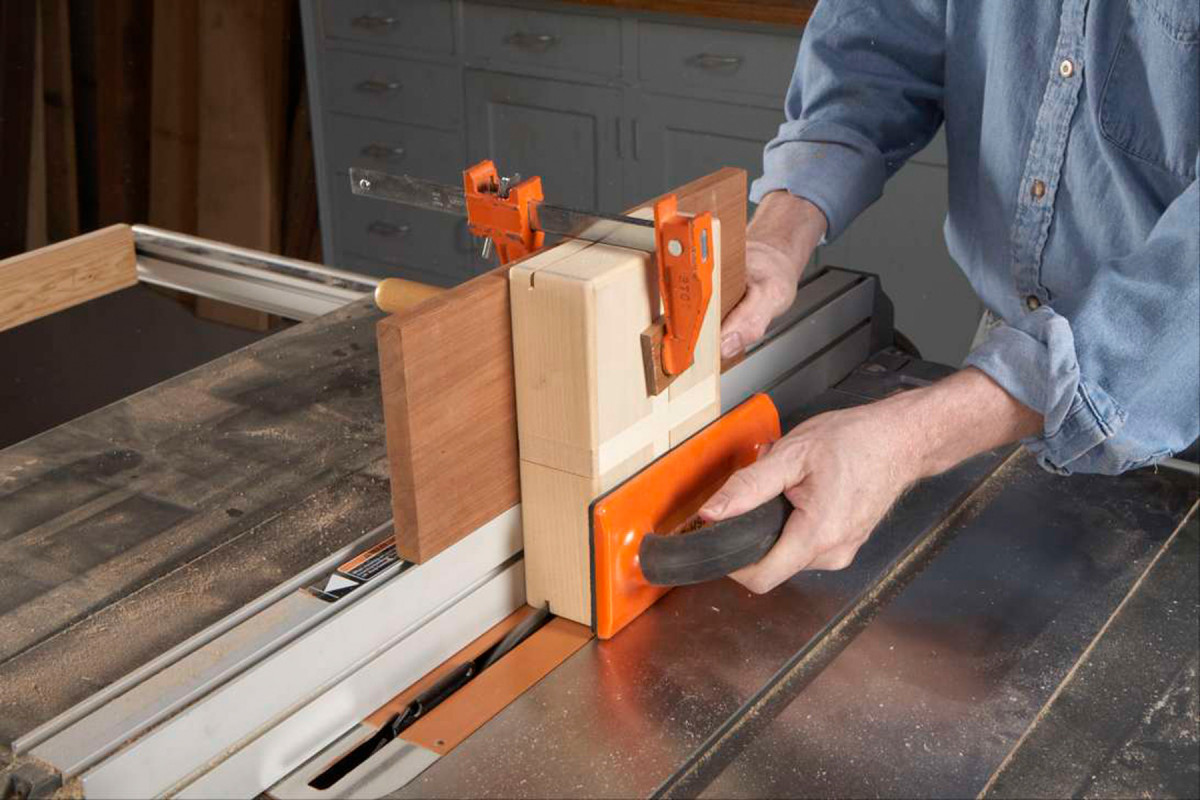
9. Saw shallow grooves all around the box, using a dado set. These grooves must be exactly the same width as the ribbon pieces you cut earlier.
To cut the grooves, fasten a 4″ tall fence to your miter gauge for pushing the box and use the saw’s fence as a guide (Photo 9). Cut all the way around the box. To avoid tearout problems, saw the narrow ends last each time.
Saw the box in two
10. Cut the box into two pieces, beginning with the ends. Clamp the box to a long board riding on the fence, to prevent it from tipping.
Install a crosscut blade in your saw for the next operation. You’ll be making rip cuts, but a crosscut blade will minimize tearout on the back side of the box and works fine on wood this thin. Raise the blade about 5/16″ high and set the fence 5/8″ away from the blade (Fig. B).
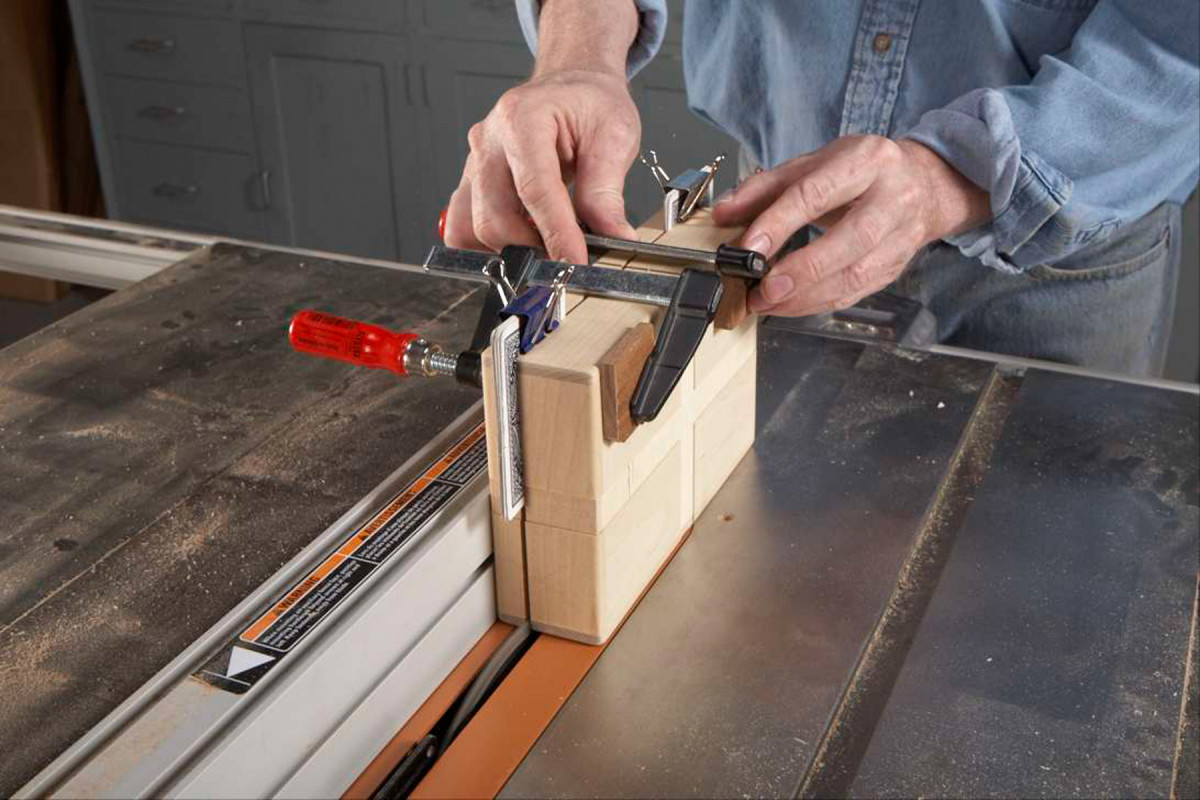
11. For the final cut, place playing-card shims in the saw kerf. Keeping the two halves clamped together helps ensure that the saw cut will be straight and smooth.
Saw the ends of the box first (Photo 10), then the front and back (Photo 11). To keep the kerf from accidentally closing during the last cut and ruining your sawn edge, insert shims into the box. I use playing cards again (and a sheet of notebook paper, if necessary) to exactly match the width of the blade’s kerf. Use a binder clip to hold the cards together.
When you’re done, level the open sides of the box, to make sure it shuts tight all the way around. The easiest way to do this is by sanding. Tape a sheet of 80 grit sandpaper to the top of your tablesaw, then rub the box on the sandpaper until all the high points are gone.
A hinge is optional
Installing a mortised hinge elevates the box to a real presentation piece. The continuous hinge I use has a built-in stop, holding the lid at about 95° (see Source). I have to admit that it’s fussy work, though. It would be far easier to mount a pair of hinges on the outside of the box. (That’s how I made my first sets of boxes.)
Here are some brief directions for installing the hinge. First, use a marking gauge to precisely lay out the two ends of the mortise. Install a 3/4″ wide dado set in your saw and raise it to exactly half the thickness of the hinge—about 1/16″. Cut mortises in the top and bottom halves of the box, staying about 1/16″ away from the layout lines. Taking thin cuts, pare with a chisel to the layout lines.
To lay out the screw holes, use a pin-style marking gauge to scribe lines down the middle of the mortises. Place the hinge in the mortise and mark the screw locations with an awl. Drill 1/16″ pilot holes for the screws, using a drill press and a fence. Drill the holes the full length of the screws.
Add bows and ribbons
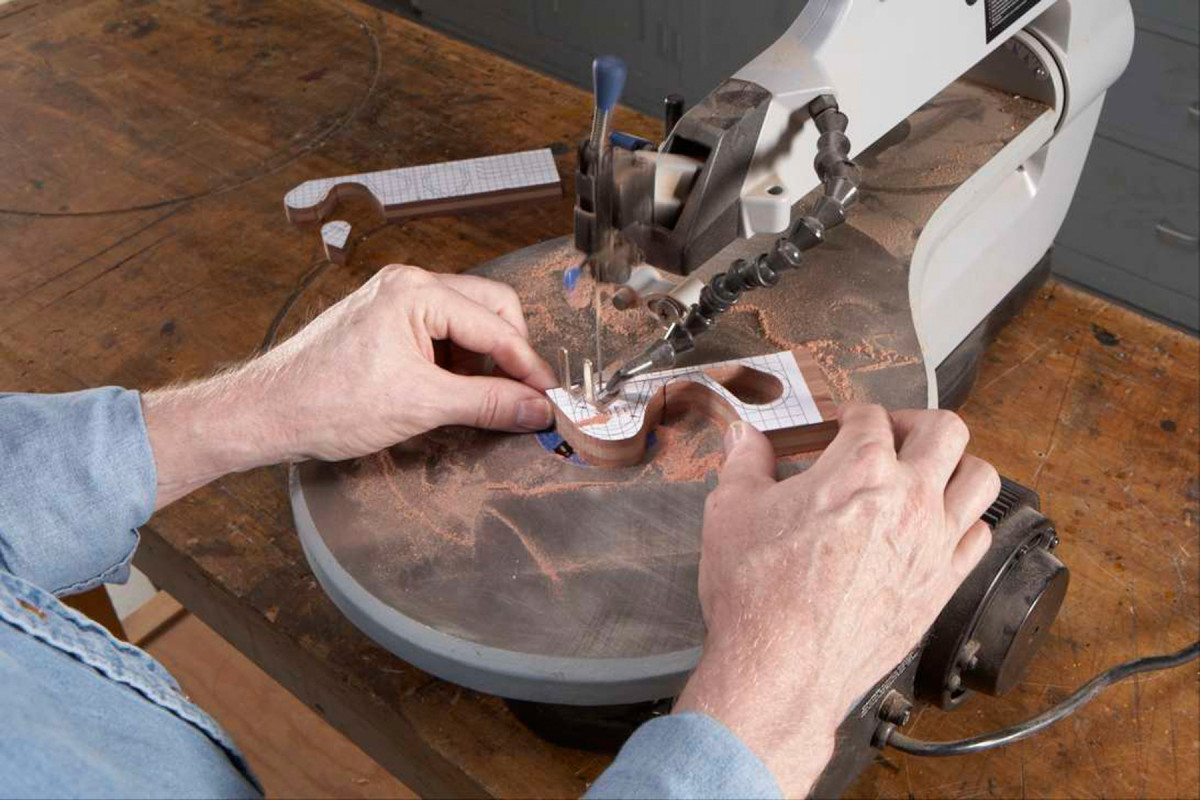
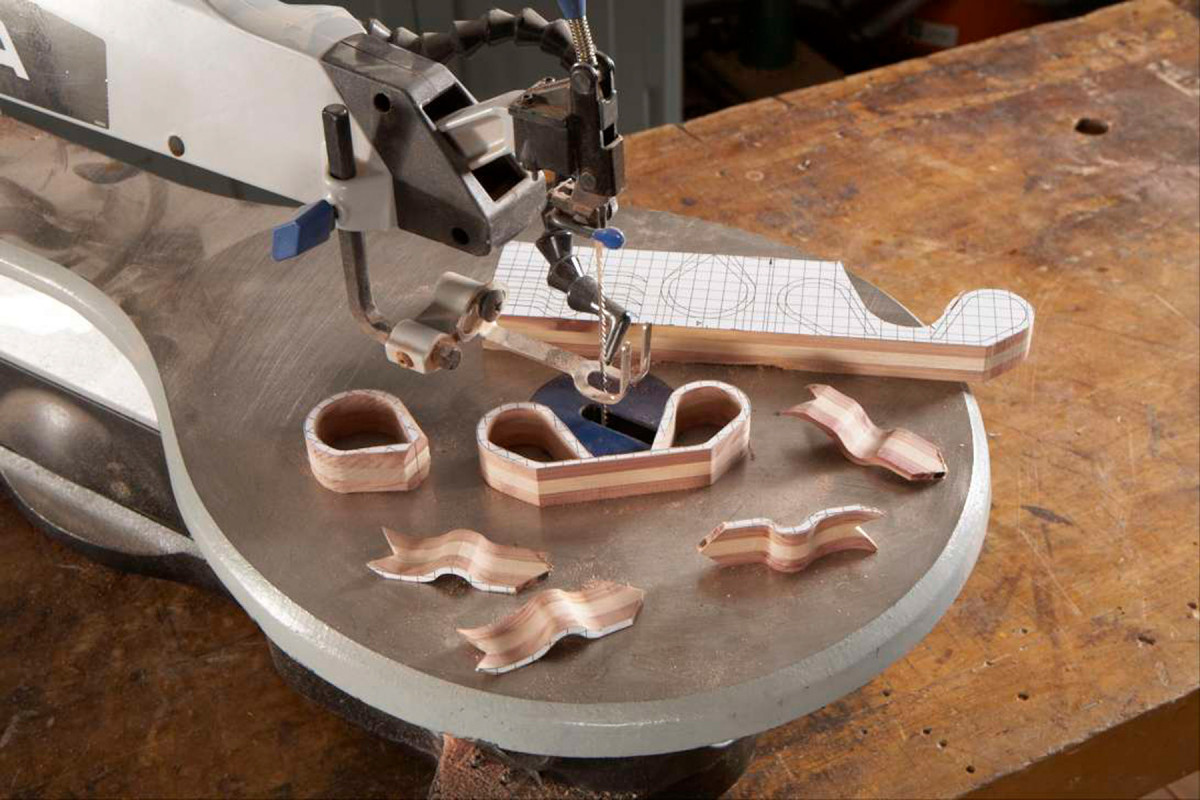
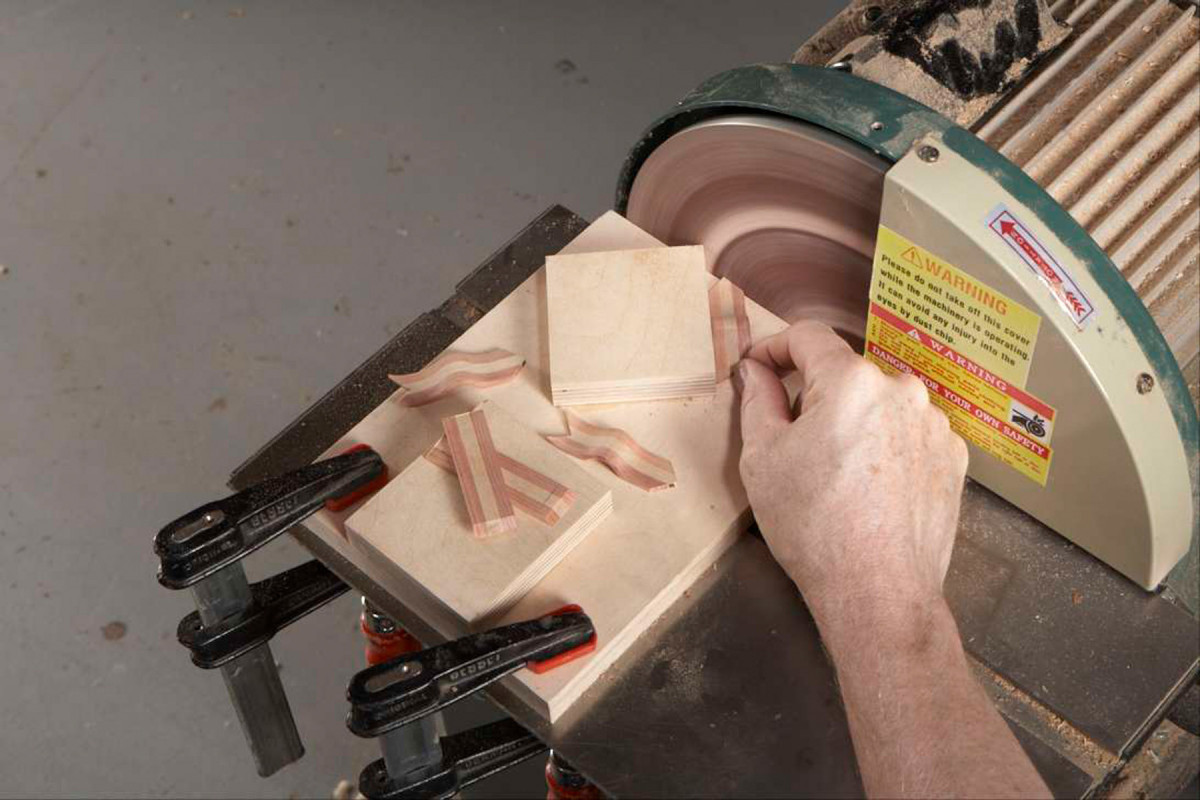
12. Cut out the bows and ribbon ends from the second blank on a scroll saw. Use mounting spray to glue the pattern onto the blank.
Enlarge the pattern (Fig. C) for the bows and ribbon ends (F) to full size, or download a full-size pattern from AmericanWoodworker/WebExtras. Rip blank B to the exact width of the pattern, then glue the pattern to the blank using 3M Spray Mount artist’s adhesive or its equivalent.

13. Cut the ribbon pieces to approximate length. Some pieces will be very short; to be safe, it’s best to use a handsaw and a shop-made miter box rather than a power tool.
Cut out the pieces on a scroll saw (Photo 12) or a bandsaw using a 1/8″ blade. You can saw out the centers of the two long bow pieces all in one shot—just glue the pieces back together when you’re done. Keep the “ribbon” as uniform as possible; it should be no more than 1/8″ thick. Sand the pieces and round over all the edges. This, too, is fussy work, but it will pay off.
13. Trim all of the pieces to exact length using a disc sander. This two-sided jig allows you to safely form both mitered and square ends, even on very short pieces. Glue the straight ribbons into the grooves.
Cut pieces of straight ribbon to approximate length using a hand saw (Photo 13). (See “Pull Saw Miter Box,” page 12, for instructions on how to make this jig.) Note that all the corners are mitered where the ribbon wraps around the box. The most practical way to do this is to use a disc sander (Photo 14). To get the angles right, I make a small jig that butts right up against the disc. The jig enables me to trim all of the pieces to exact length, no matter how short, and miter the ends of the curly ribbons. Round over the long edges of all the pieces with sandpaper.
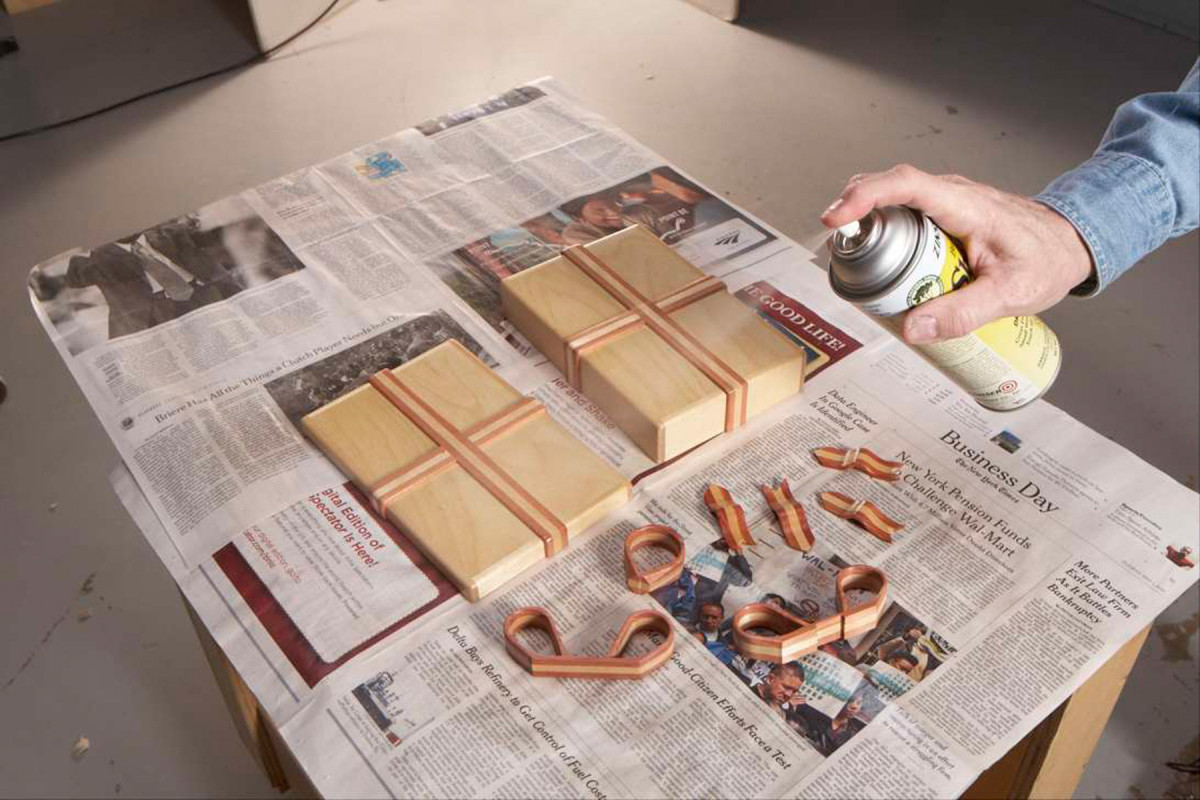
14. Spray finish on the box halves and all of the bow pieces. After the final coat, sand the bottoms of the bows and ribbon ends to remove the finish, so they can be glued onto the box.
Glue the pieces to the box. If they fit nice and tight, you won’t need clamps. After the glue dries, round over the miters with sandpaper, by hand.
Spray the box parts and remaining loose pieces with a clear finish (Photo 15). I use shellac. Avoid a pebbly buildup by applying a few thin coats. Wait a day or so for the finish to harden, then smooth all of the pieces with OOOO steel wool. This
creates a satin finish—if you want a shinier finish, spray one more thin coat.
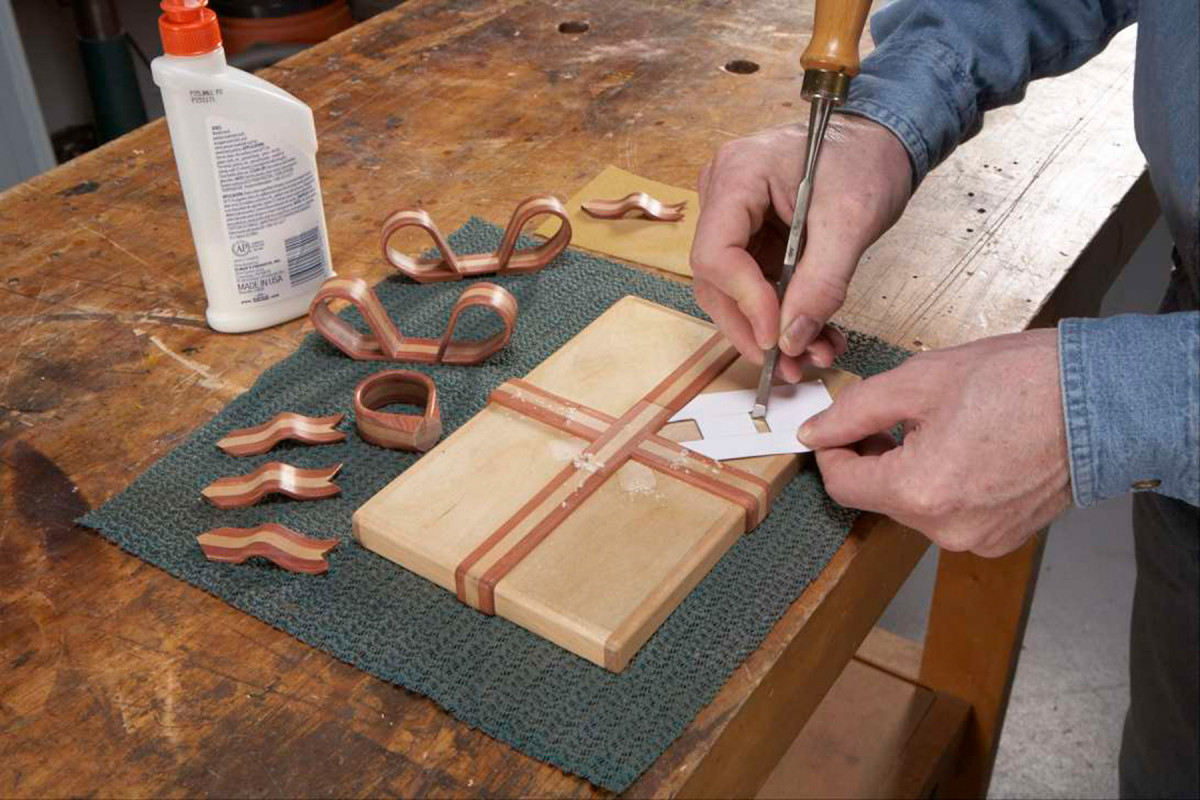
16. Scrape off the finish from glue surfaces using a 1/4″ chisel. For the ribbon ends, make a mask from a business card to show you where to scrape.
Finally, it’s time for the whole box to come together by gluing on the short, curly ribbons and the bows. Of course, glue won’t stick to finished surfaces, but that’s easily remedied. To remove the finish from the bottom of the four curly ribbons, rub them back and forth on a piece of 80 grit paper placed on a flat surface. Determine where the pieces will contact the lid, then cut out a mask from a business card that outlines these areas. Use the mask as a guide to scrape off finish from the box, using a 1/4″ chisel (Photo 16).
Sand the bottom surfaces of the three bow pieces. Mark where the pieces contact the flat ribbons on the box’s lid and scrape the finish off these areas with a chisel, too. Place all of the pieces in position with a few dabs of glue.
SOURCE:
Hinge 200 mm x 9mm (screws included)
Here are some supplies and tools we find essential in our everyday work around the shop. We may receive a commission from sales referred by our links; however, we have carefully selected these products for their usefulness and quality.