


We may receive a commission when you use our affiliate links. However, this does not impact our recommendations.

Inspired by traditional Pennsylvania design, this chest is a dovetailer’s delight.
I’ll bet that there’s a blanket chest somewhere on your honey-do list. It’s a useful piece that looks great in almost any room. And it’s also the perfect project to develop—or test—your dovetailing skills.

Dovetail-friendly wood. This chest is made from butternut, a relatively soft wood that’s perfect for cutting dovetails by hand.
Choosing the right wood for dovetailing can make all the difference in the world. If you use a dense wood that splinters easily or has squirrely grain—watch out! So let me share with you just one magical word: butternut. This wood is a dovetailer’s dream come true.
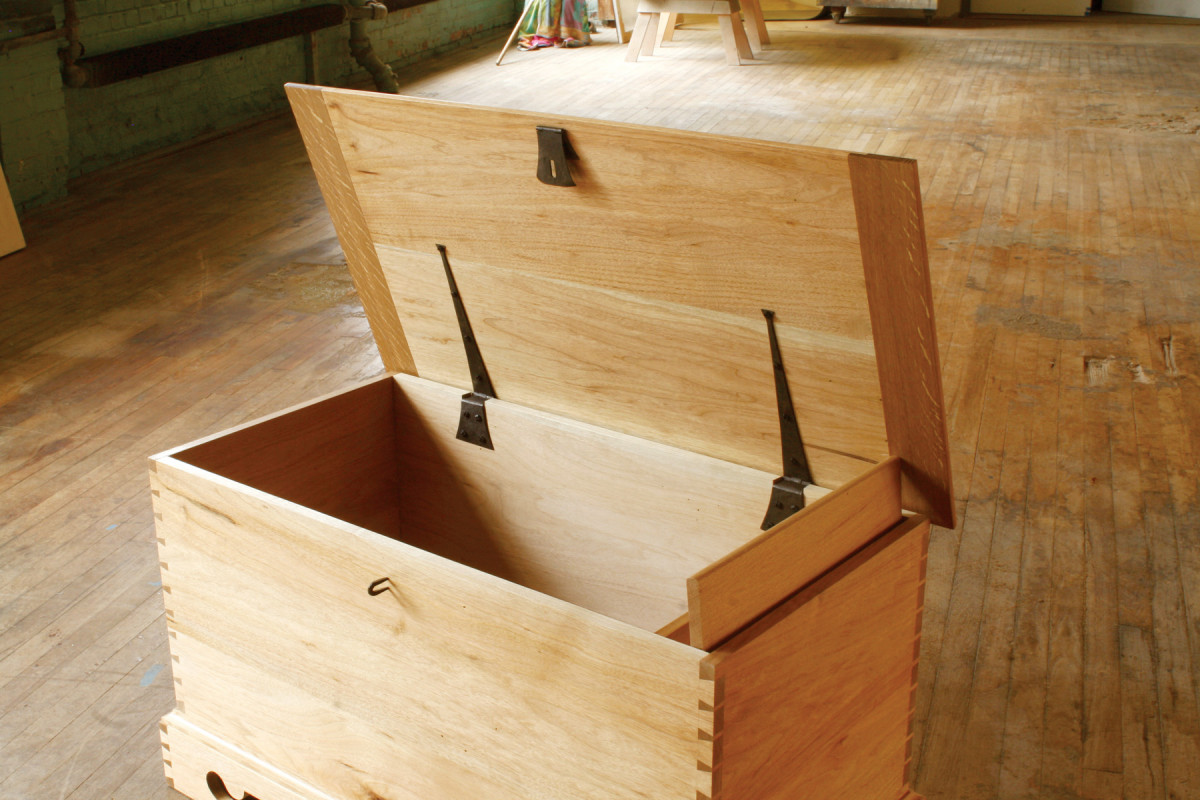
Built-in till. The chest has a small storage box—a “till”—built right into it. To prop up the chest’s lid, just open the till.
Butternut is relatively soft, like basswood. It takes little effort to saw and easily surrenders paper-thin shavings to a sharp chisel. Your dovetails will really stand out when the wood is finished because butternut’s end grain strongly contrasts in color with its face grain. Plus, butternut has beautiful figure: It looks a lot like walnut, a close relation.
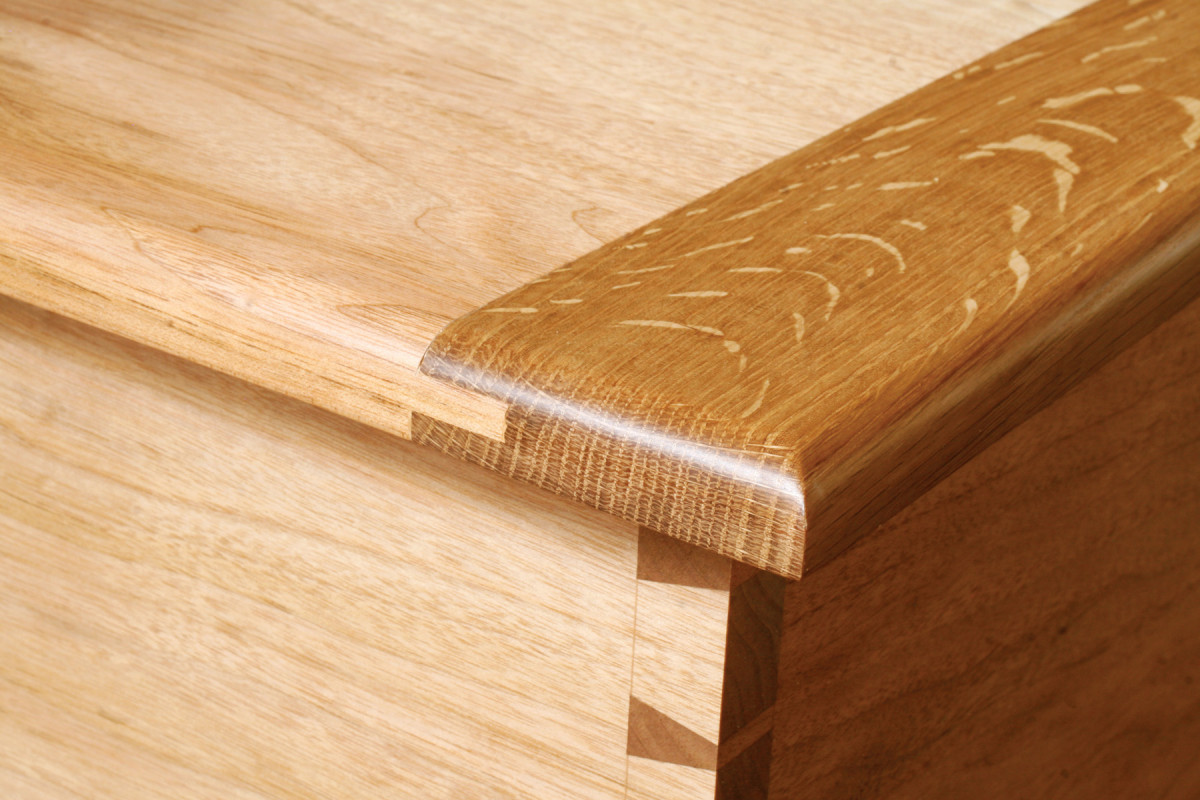
Breadboard ends. These pieces keep the chest’s lid from warping. I made them from red oak, for strength.
While most of this chest is made from butternut, I used red oak for the lid’s breadboard ends and the cove molding that runs around the base. These parts will probably get dinged over the years, so I chose a wood that is more durable than butternut. Combining woods like this may sound unusual, but cabinetmakers of long ago adopted the same practice, particularly on chests that were going to be painted. I wouldn’t paint this chest, of course, but I like the effect. It’s quite striking, and honors those craftsmen’s practicality.
Dovetail the case
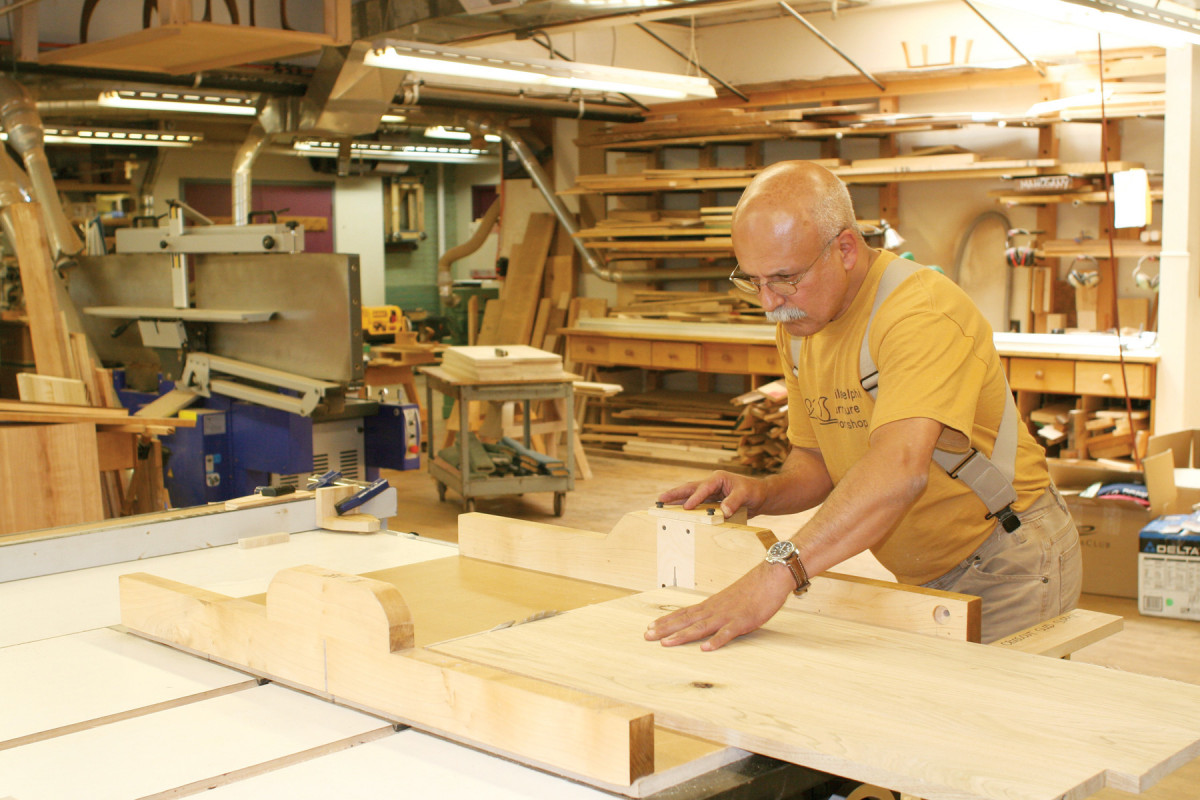
1. Begin building the chest by gluing up large panels for the front, back and sides. Trim them to length using a crosscut sled.
The front (A), back (B) and sides (C) of the chest are 16″ wide, so you’ll probably have to glue them up. I used two wide boards for the front and sides and a number of narrower boards for the back. When you glue these pieces, take every precaution to make sure that the joints are even and the whole assembly stays flat. Rip the panels to final width, then trim them to final length using a crosscut sled (Photo 1).
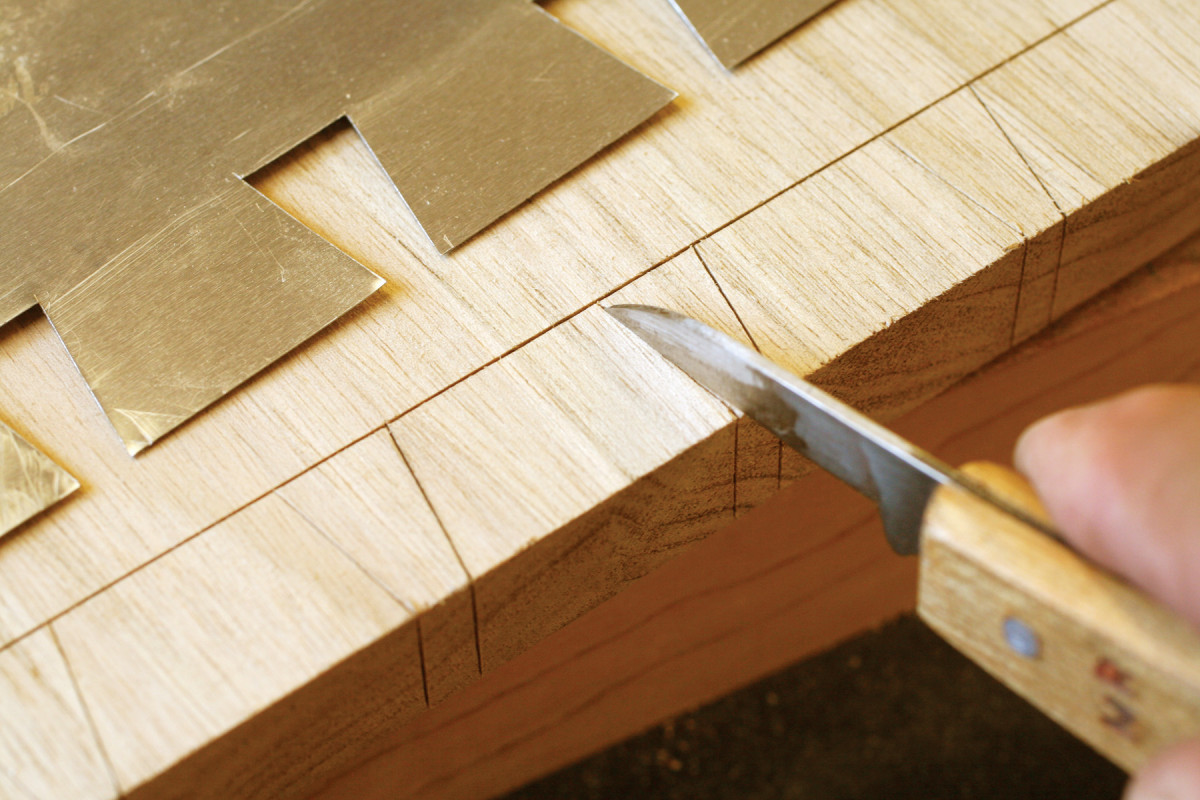
2. Lay out the dovetails by using a template. I made this one from aluminum flashing. Deepen all of the lines by scoring them with a knife.
Lay out the dovetails (Fig. C). I start with the tails (they go on the front and back pieces). With so many tails to lay out, I make a template from aluminum flashing (Photo 2). On the wood, I first mark the baseline of the tails with a marking gauge. Then I place the template in position and use a knife to score lines for the sides of the tails. Finally, I remove the template and score the baseline and the side lines even deeper.

3. Cutting dovetails requires many careful steps; you can find out more about how I do it on the AW website. Here, I use a jeweler’s saw to remove most of the waste between the tails.
I cut the tails to the line, saw most of the waste between them with a jeweler’s saw (Photo 3), then pare the baseline from both sides. I lay out the pins directly from the tails, again using a marking knife. I cut the pins a little fat, then undercut them a bit and chamfer their inside edges—to make assembly easier—and pare to the lines.
Make the till and bottom
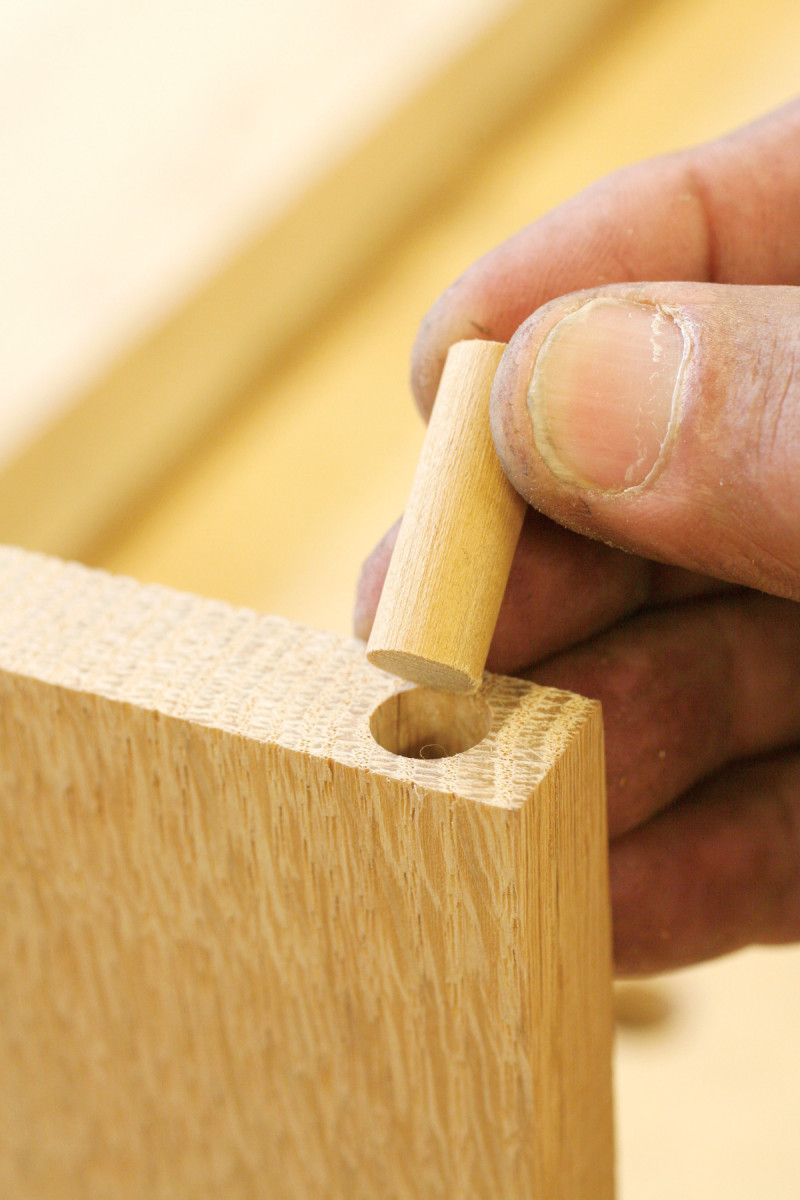
4. Make the parts for the till before assembling the chest. The till’s lid pivots on this dowel.
After all that dovetailing, you’re not quite ready to glue the case together. First, you must make and fit the parts for the till (D through G) and the bottom (H). These pieces will go inside the case as you assemble it.
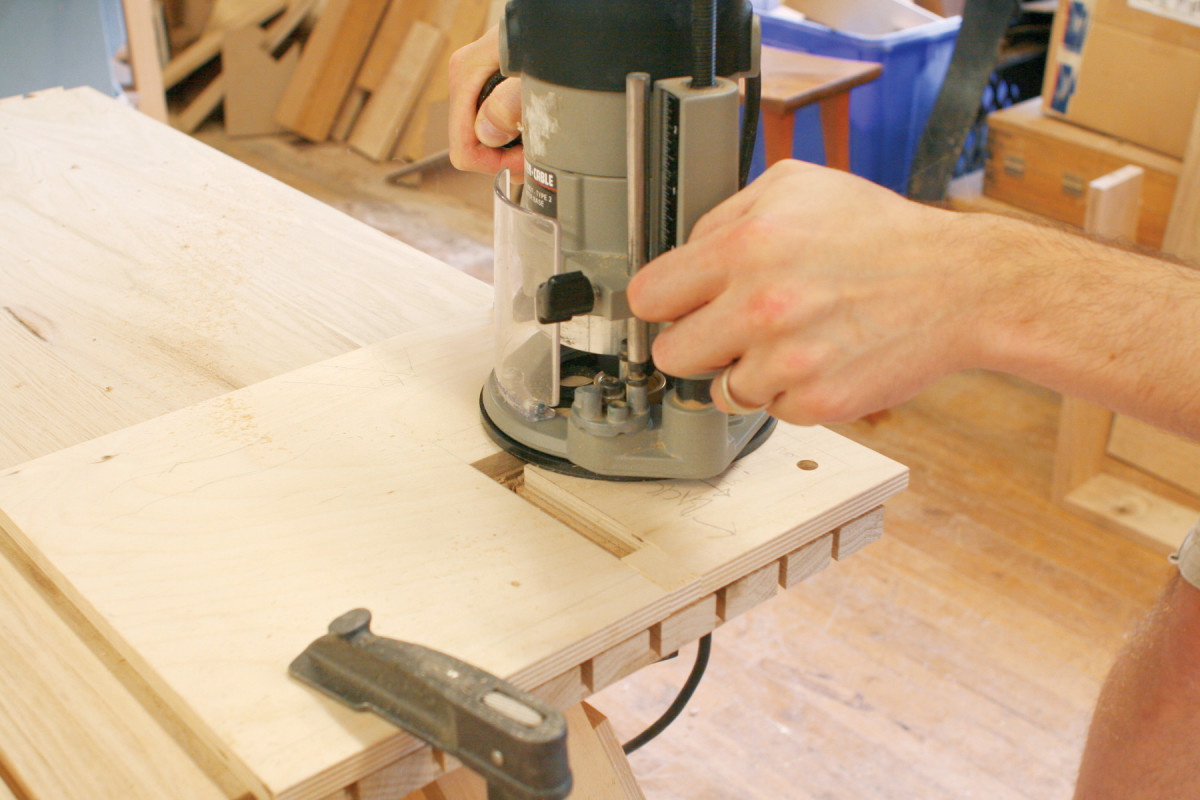
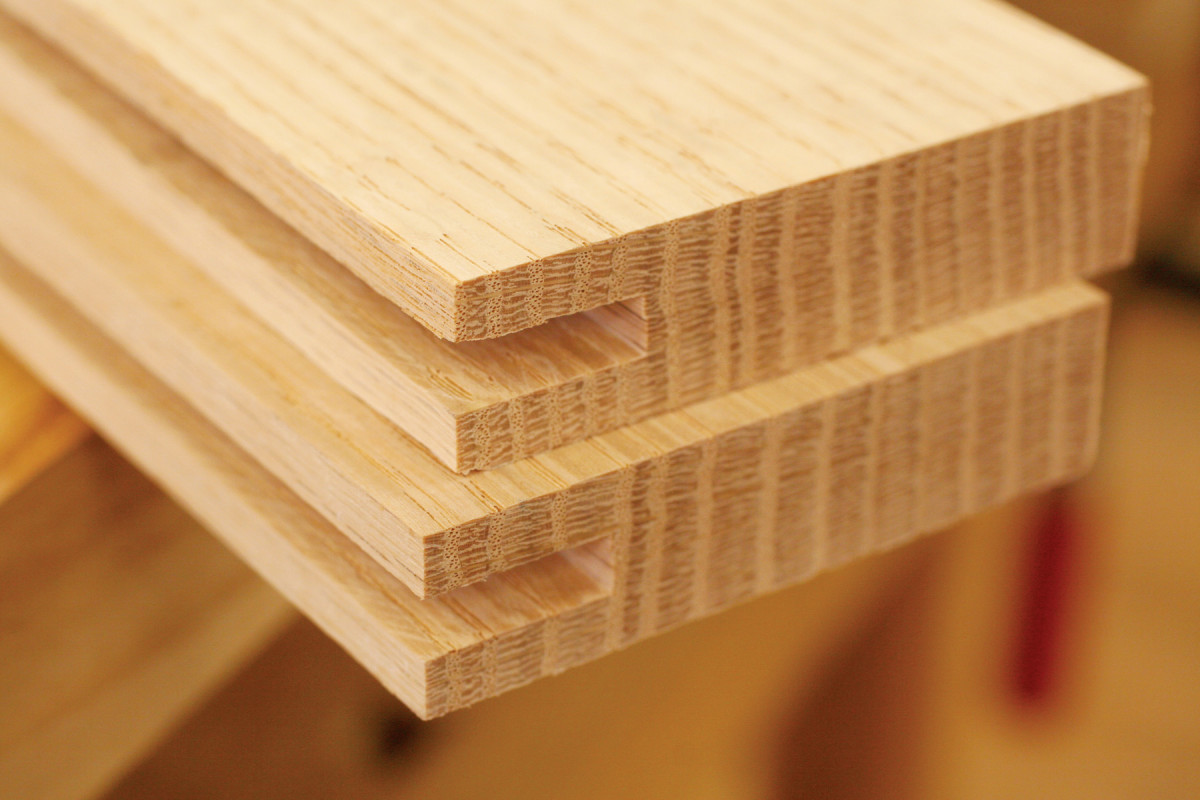
5. Rout grooves into the front and back panels to hold the till. This router template also locates the hole for the dowel in the till’s lid.
The front (E) and bottom (F) of the till fit into housings let into the front and back of the case (Fig. B). The till’s lid (D) pivots on a dowel (G, Photo 4). Make a template to rout the housings and to drill the dowel holes in the front and back pieces (Fig. F). (The easiest way to make this template is to glue separate pieces together, as shown in the drawing.) When you rout the housings (Photo 5), use a 5/8″ o.d. guide bushing and a 1/4″ bit; this will result in housings that are 5/16″ wide. Make the till’s front and bottom pieces. Cut tenons on their ends to fit the housings (Fig. E). Make the lid. Drill dowel holes in its ends and insert the dowels. Bevel the back edge of this piece so it will swing freely. Test fit all three pieces of the till so you don’t run into any trouble when gluing up the case (Photo 6).
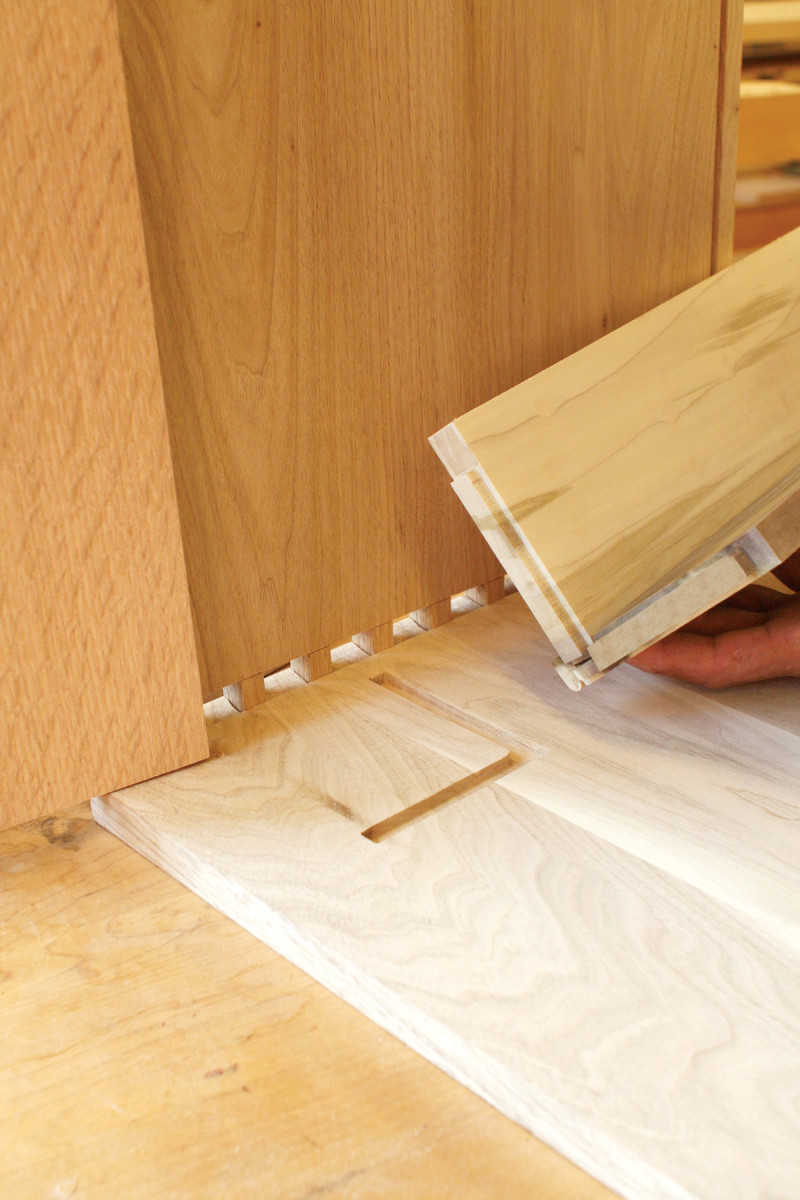
6. Cut tenons on the ends of the till’s front and bottom pieces. Make sure they fit in the grooves you routed. All of these parts, plus the bottom of the chest, must easily slide into place when you glue the case together.
Saw or rout a groove on the bottom edge of all four sides of the chest (Fig. C). When you assemble the chest, the ends of these grooves will be visible on the side pieces; that’s OK, because they will be covered by the cove molding (N) that runs all the way around the chest. Glue the chest’s bottom from a number of pieces of yellow poplar. Rip it 1/4″ narrower than the distance between the bottom of the grooves in the front and back pieces (to allow for expansion and contraction). Trim it about 1/16″ shorter than the distance between the bottom of the grooves in the side pieces (so it will slide in easily). Cut a 1/4″ tongue all the way around the bottom piece and test its fit.
New Hope Blanket Chest Cut List
Overall Dimensions: 22″ H x 38″ W x 19-1/2″ D
|
Part |
Name |
Qty. |
Material |
Th x W x L |
|
A |
Front |
1 |
Butternut |
3/4″ x 16″ x 36″ |
|
B |
Back |
1 |
Butternut |
3/4″ x 16″ x 36″ |
|
C |
Side |
2 |
Butternut |
3/4″ x 16″ x 17-3/4″ |
|
D |
Till lid |
1 |
Red oak |
5/8″ x 4-5/8″ x 16-1/4″ |
|
E |
Till front |
1 |
Yellow poplar |
1/2″ x 4-1/2″ x 16-3/4″ (a) |
|
F |
Till bottom |
1 |
Yellow poplar |
1/2″ x 4-1/8″ x 16-3/4″ (b) |
|
G |
Till dowel |
2 |
Oak |
3/8″ dia. x 1-1/4″ |
|
H |
Chest bottom |
1 |
Yellow poplar |
3/4″ x 16-3/4″ x 35″ (c) |
|
J |
Base front |
1 |
Butternut |
7/8″ x 4″ x 37-1/2″ |
|
K |
Base back |
1 |
Butternut |
7/8″ x 4″ x 37-1/2″ |
|
L |
Base side |
2 |
Butternut |
7/8″ x 4″ x 19-1/4″ |
|
M |
Base stretcher |
2 |
Yellow poplar |
3/4″ x 2-1/2″ x 17-1/2″ |
|
N |
Cove molding |
10 ft. |
Red oak |
5/8″ x 3/4″ x 10′ |
|
P |
Chest lid |
1 |
Butternut |
3/4″ x 19-1/4″ x 33-1/2″ (d) |
|
Q |
Breadboard end |
2 |
Red oak |
3/4″ x 3″ x 19-1/4″ |
Notes:
a) Includes two 1/4″ tenons.
b) Width is slightly oversize. Plane to fit.
c) The width of the bottom is 1/4″ narrower than the distance between the grooves in the front and back of the chest.
d) Includes two 3/4″ tenons.
Fig. A) Side View
Fig. B) Exploded View
Fig. C) Dovetail Layout and Base Detail
Fig. D) Cross Section of Lid
Fig. E) End View of Till
Fig. F) Till Housing Jig (see Photo 5)
Glue the case
7. Glue all of the case together in one shot. With so many dovetails to assemble, this can take a while. Use a slow-setting liquid hide glue to give yourself plenty of time.
A lot has to happen all at once when you assemble the case, so you’ll need plenty of time before the glue sets up. I use a liquid hide glue which has an open time of about 1 hour. To start the process, apply glue to the dovetails on the back panel and the rear pins of the side panels. Assemble these three pieces and drive the joints home, forming a “U” (Photo 7).
Next, slip the bottom panel into place. Add the front and bottom of the till, then the till’s lid. Apply glue to the front pins of the side panels and the tails of the front panel. Put the front panel in position and gradually tap it into place; you’ll have to line up the till pieces at the same time.
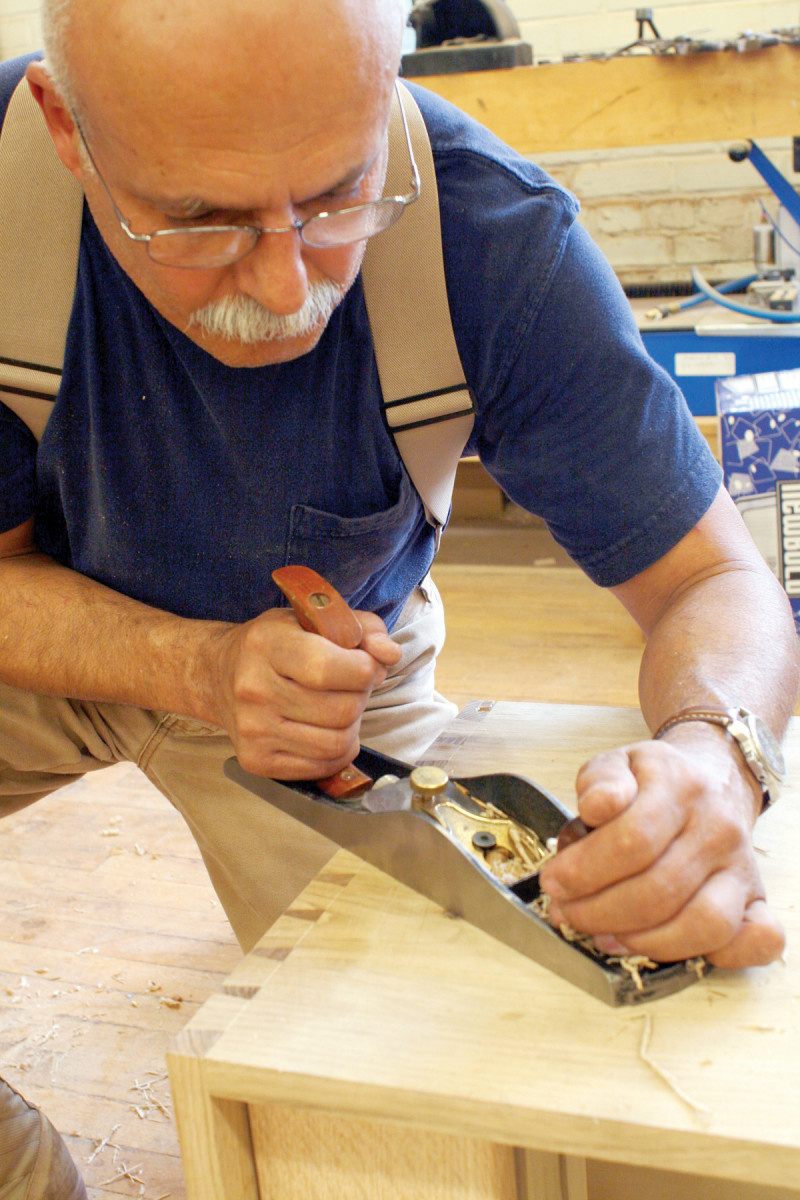
8. Plane the joints flush. For cutting end grain without chatter, I use a low-angle jack plane.
After the glue dries overnight, soften the squeeze-out with warm water and remove it with a putty knife or chisel. Plane all of the joints even (Photo 8). Plane all around the top and bottom edges to even them up as well.
Attach the base
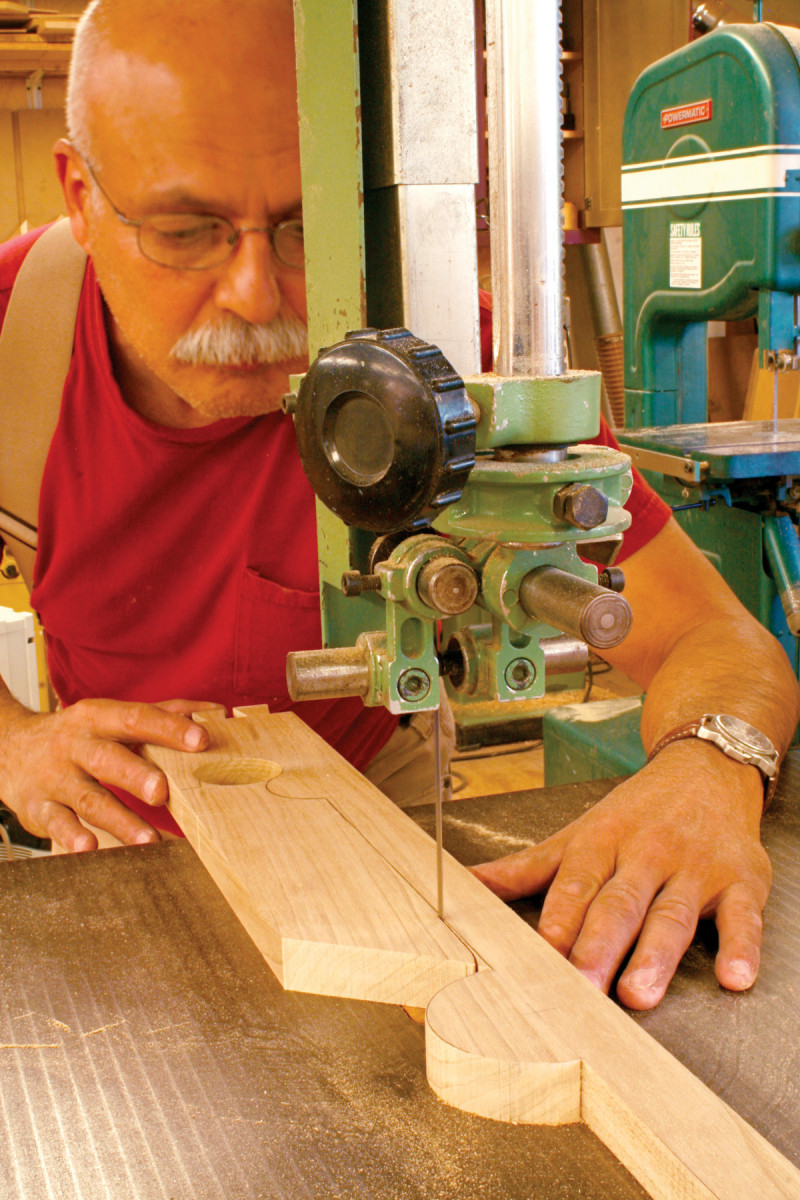
9. Cut the front of the base on the bandsaw. The sides and back of the base are just straight boards. Dovetail all of these pieces and glue them together. Glue two horizontal stretchers inside the base.
Mill the base’s front (J), back (K) and sides (L). Cut their dovetails (Fig. C) and saw the cutout in the front piece. Start the cutout by drilling large-diameter holes at each end, then saw the rest on the bandsaw (Photo 9). Glue the pieces together and even up the joints.
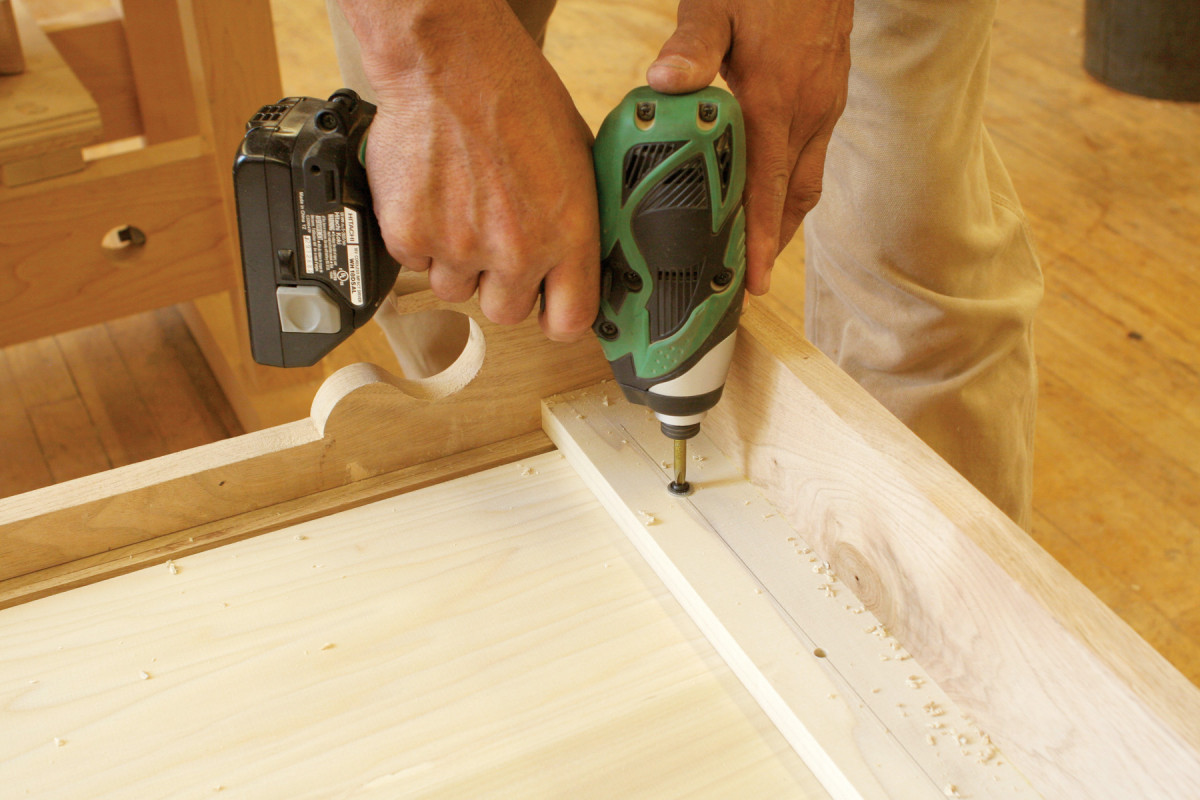
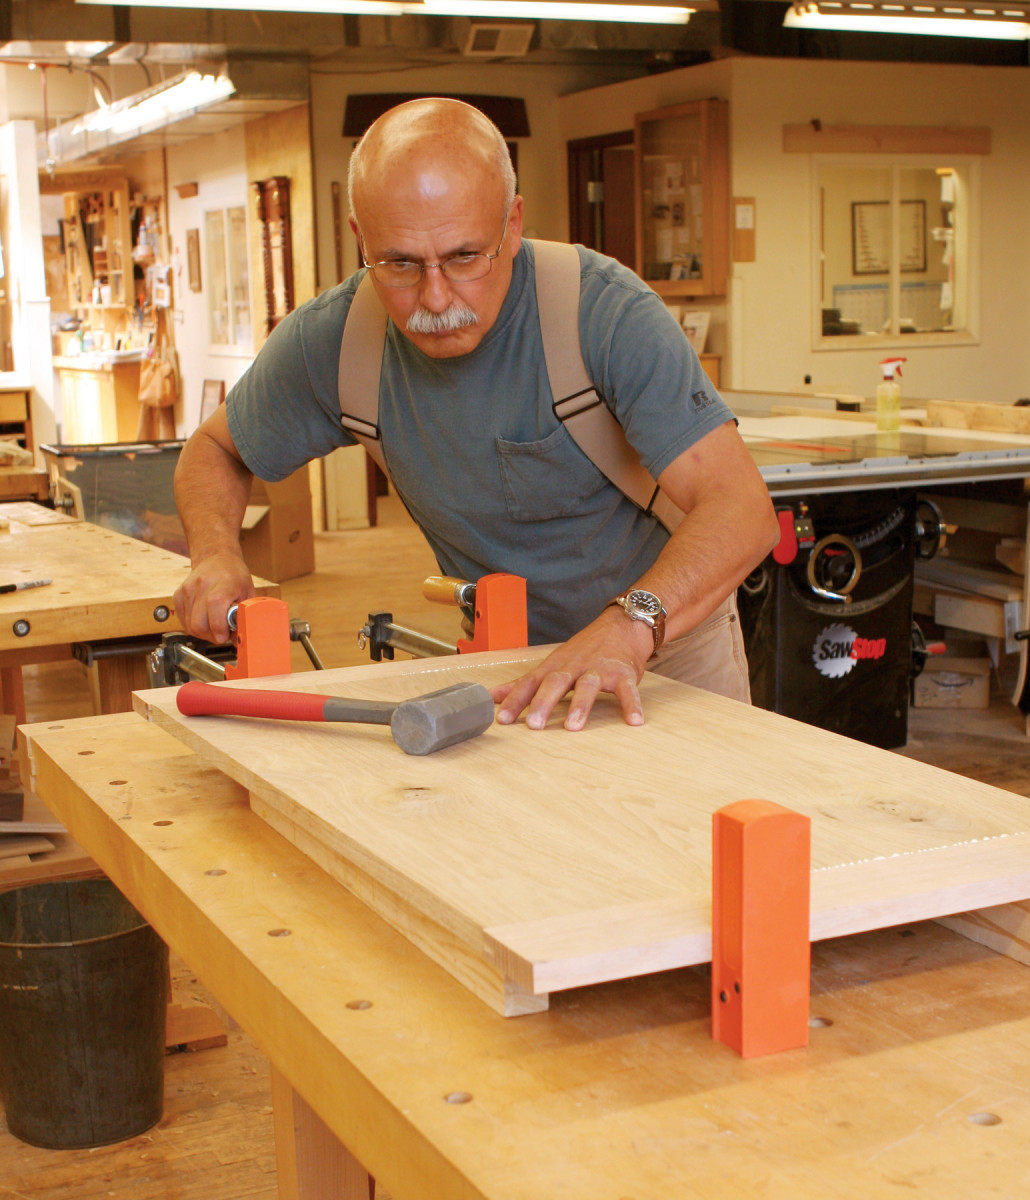
10. Fasten the base to the bottom of the chest. Drill oversize holes in the stretchers, so the bottom is free to expand and contract.
Glue two stretchers (M) inside the base. Drill oversized holes near the end of each stretcher, then fasten the base to the case with screws and washers (Photo 10).
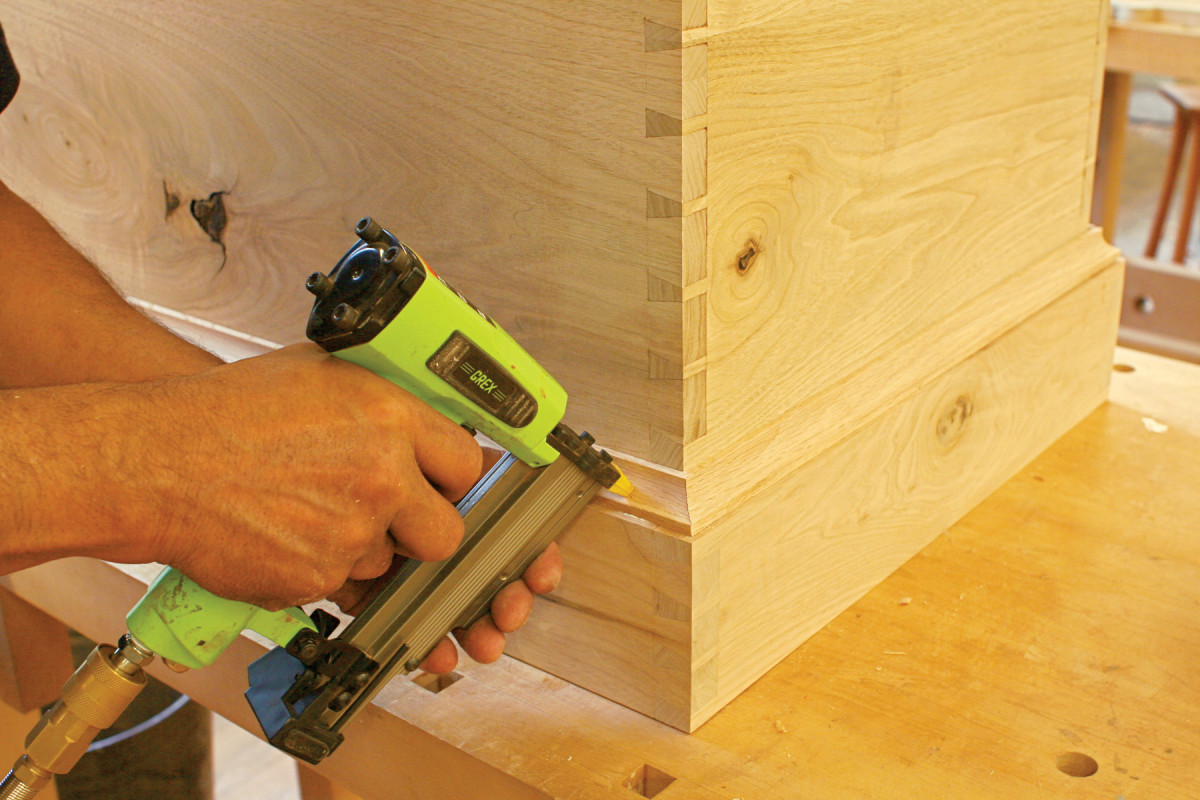
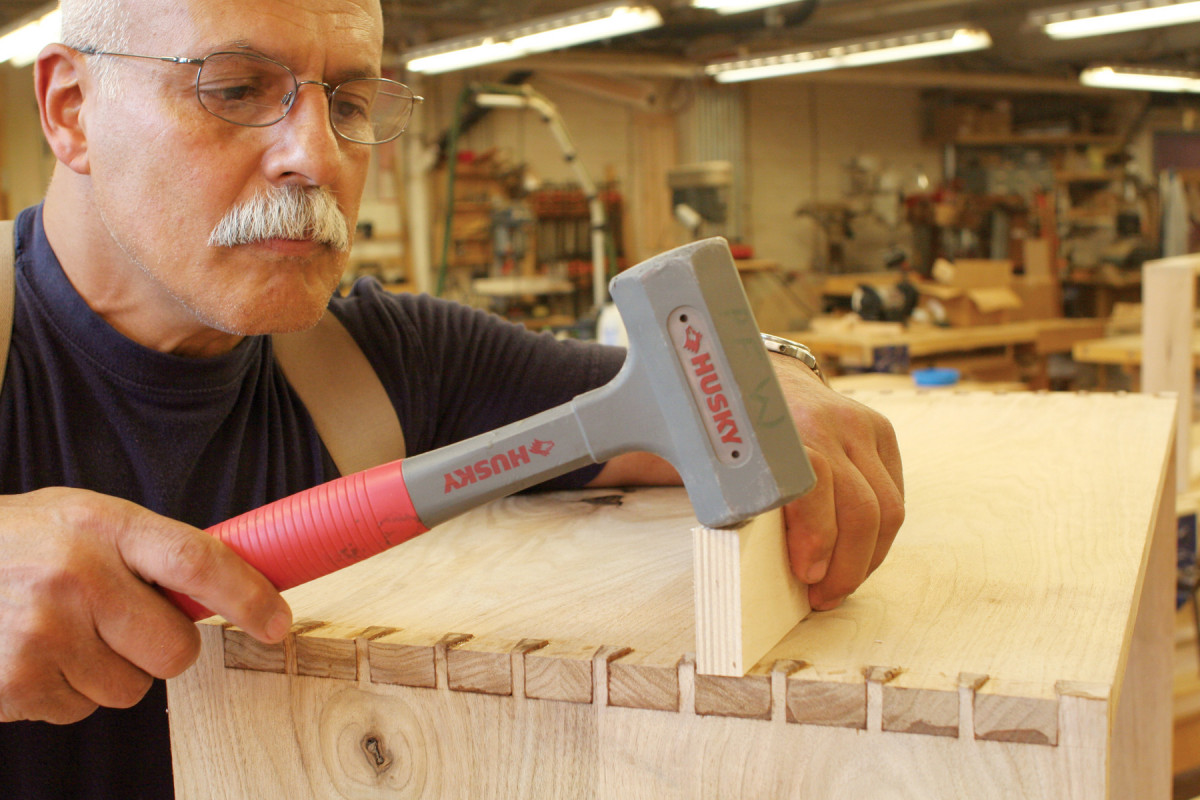
11. Glue and nail a cove molding all around the chest. Shoot the nails into the base pieces.
Rout the cove molding (N) on two sides of a long board that’s at least 3″ wide. Note that it’s not square: the molding is 5/8″ deep, front to back, but 3/4″ tall, in order to cover the groove for the chest’s bottom. Sand the molding, then rip both sides of the board to make the final pieces. Cut the molding to length and attach it to the base with glue and 1″ pin nails (Photo 11).
Make the lid
12. Make the chest’s lid. Plow grooves down the full length of the breadboard ends. While most of the chest is butternut, I make these pieces from red oak, for strength.
Mill the boards for the main panel of the lid (P) and the breadboard ends (Q) to exactly the same thickness. Glue the panel. Rip it 1/4″ extra-wide, but trim it to final length. Rip the breadboard ends to final width, but trim them about 1/4″ extra-long.
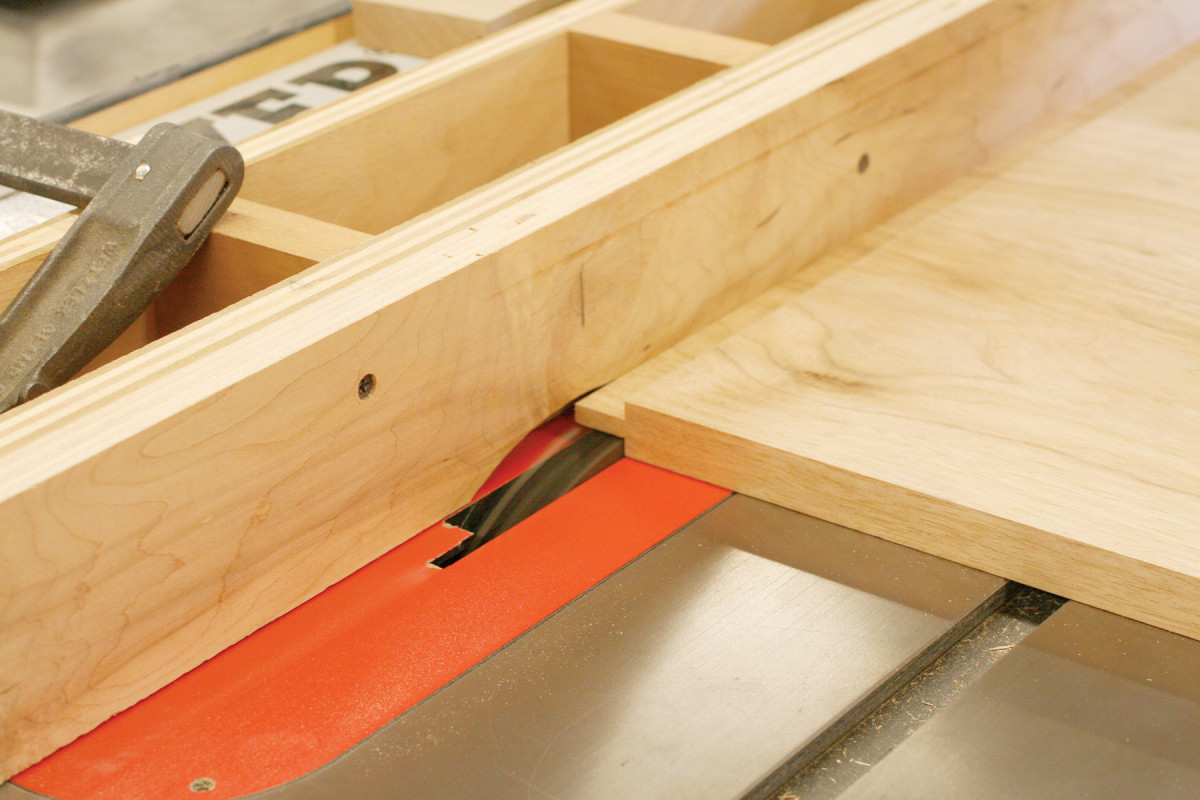
13. Cut tenons on the main section of the lid using a dado set. Start out making the tenons a little fat, then raise the blade until they almost fit the breadboard ends. Use a shoulder plane or rabbet plane to fine-tune the fit.
Cut the grooves for the breadboard ends (Fig. D) on the tablesaw. To ensure that the grooves are exactly centered, I use a standard 1/8″ thick blade and make two passes, one from each side of the board (Photo 12). Cut the tenons on the ends of the main panel using a dado set (Photo 13). I cut them just a hair fat, then use a shoulder plane to get a perfect fit.
14. Glue the breadboard ends to the lid’s main panel. I put glue only halfway down the length of the joint, so the panel is free to move later on.
Glue the breadboard ends to the panel (Photo 14). Apply glue only to the front half of the joint, leaving the back half unglued to ensure that the panel won’t split when it expands or contracts. After the glue dries, rip a little bit off of both sides of the lid to arrive at the final width. Soften the front and side edges of the lid using a 1/2″ roundover bit.
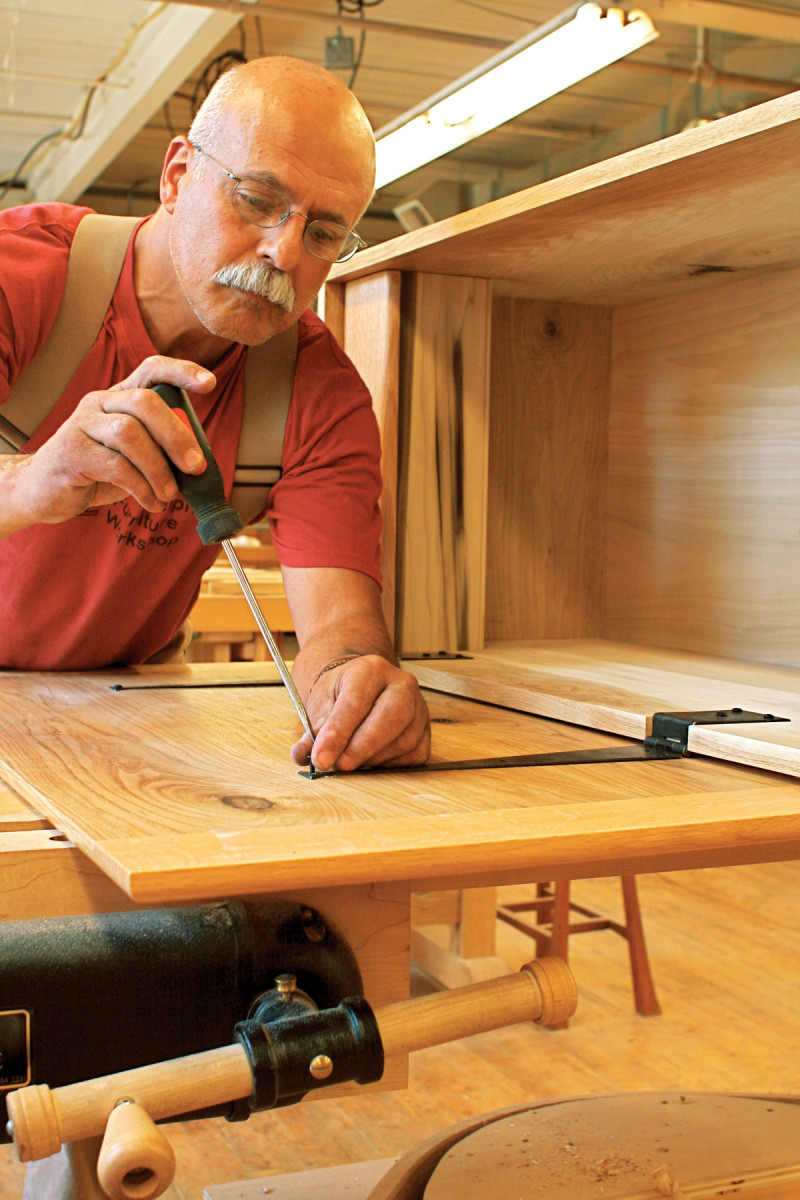
15. Install the hinges. Start out with only one screw per hinge, then close the lid and see if the overhang is even all around. Adjust as necessary, then put in all the screws.
To fasten the lid, I use forged hinges that have a hand-made look. Cut mortises for the hinges and screw the hinges into the mortises. Place the lid upside down on your bench, then center the chest on the lid (Fig. A). Roll the chest over on its side and install the screws at the ends of the hinges (Photo 15). Stand the chest up on its base and readjust the position of the lid, if necessary. Once the lid’s overhang is even all around, install the remaining screws. Finally, install the hasp (it doesn’t require a mortise) and nail its eye to the front of the chest.
Here are some supplies and tools we find essential in our everyday work around the shop. We may receive a commission from sales referred by our links; however, we have carefully selected these products for their usefulness and quality.


