


We may receive a commission when you use our affiliate links. However, this does not impact our recommendations.
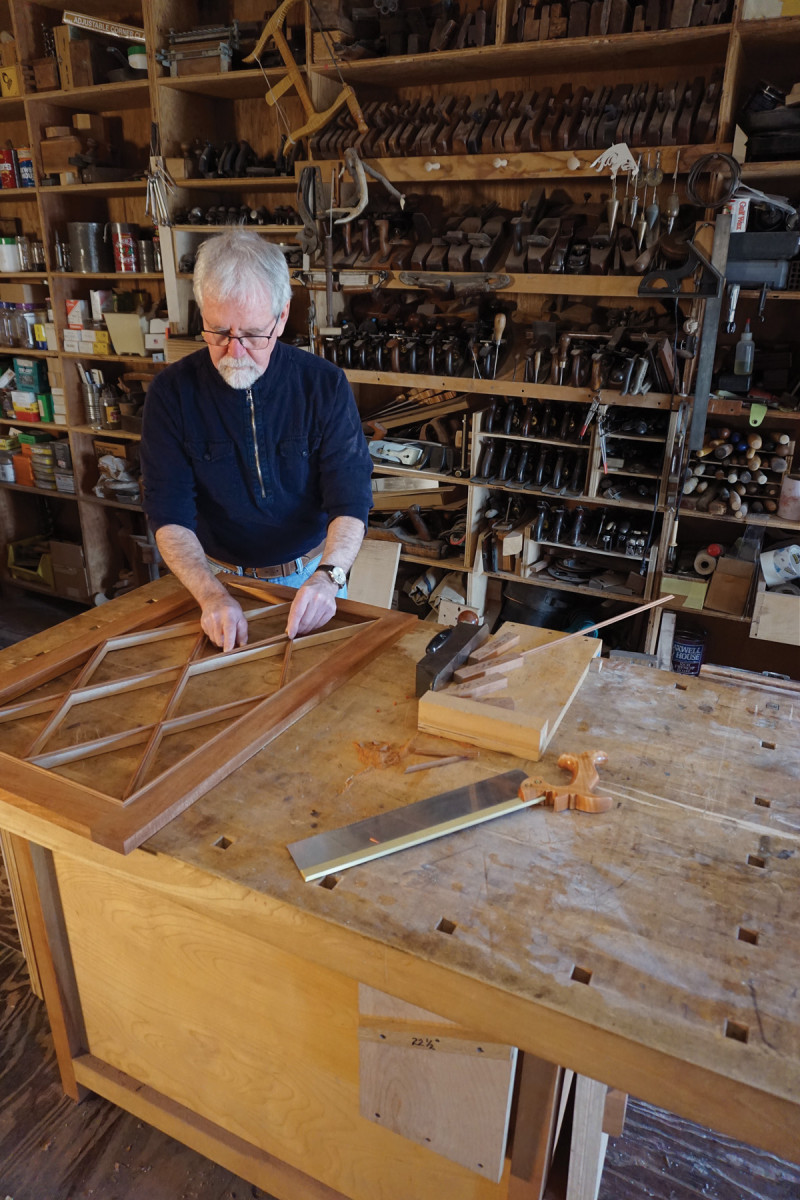
These doors are all about the angles – learn to bisect them using geometry and it’s a snap.
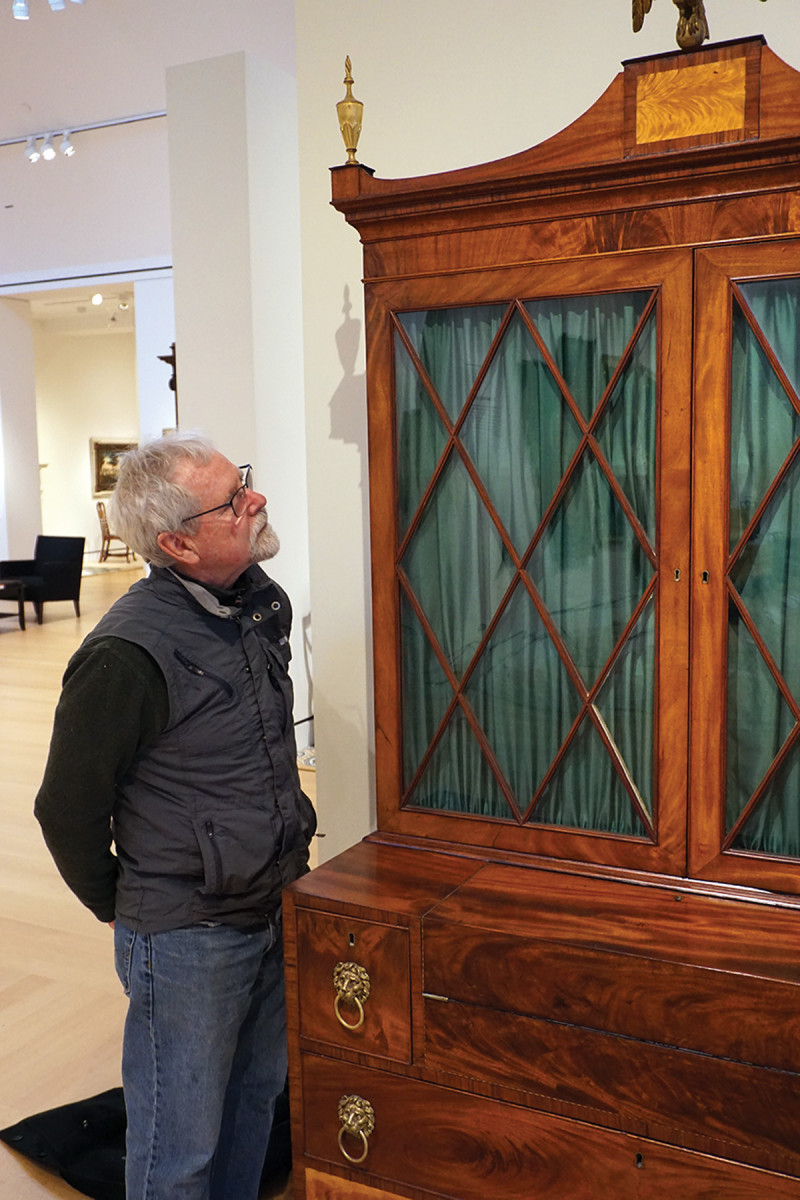
When I walk into the American decorative arts Gallery at the Peabody Essex Museum in Salem, Mass., I am always drawn to a great Federal piece that was built by Cotton Bennett in my hometown of Beverly, Mass. My research turned up Bennett’s close connections with New England turner Thomas True and carver Samuel McIntire, who helped contribute to the tour de force that is this 1809 “Lady’s Secretary.”
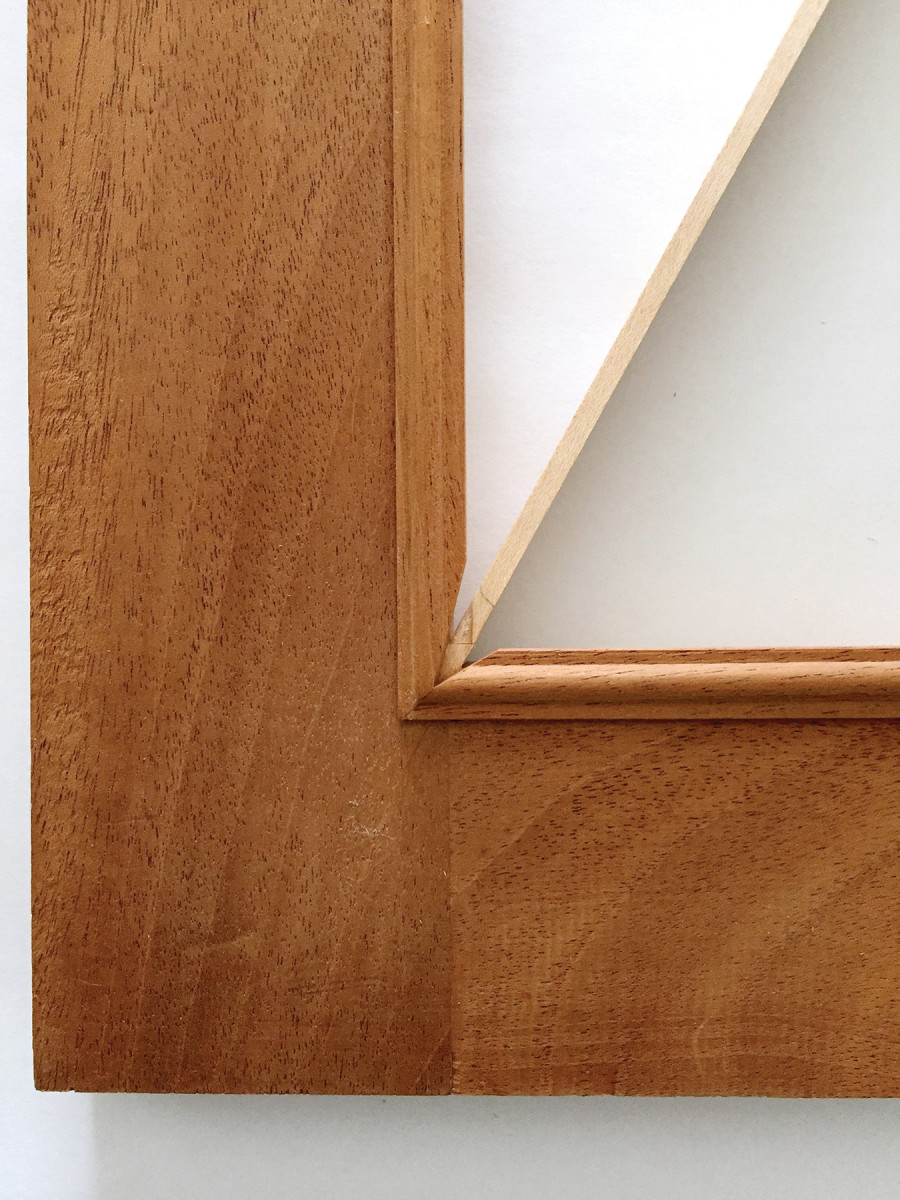
Maple & mahogany. Astragal mouldings in the same species as the door frame sit atop thin hardwood bars underneath to form a solid structure.
There are a number of stunning details, such as the end-matched swirl mahogany on the lower drawer and the crotch mahogany on the fall front. The crotch satinwood panel, which supports the McIntire gilded eagle at the center top, is balanced with the same material spanning the lower apron of the carcase front. The cornice is accented with cross-banded rosewood and mahogany, and supports two gilded flame finials with laurel leaf carving. I’m also astounded by the small multicolored banding that surrounds the fall front and accents the satinwood panel.
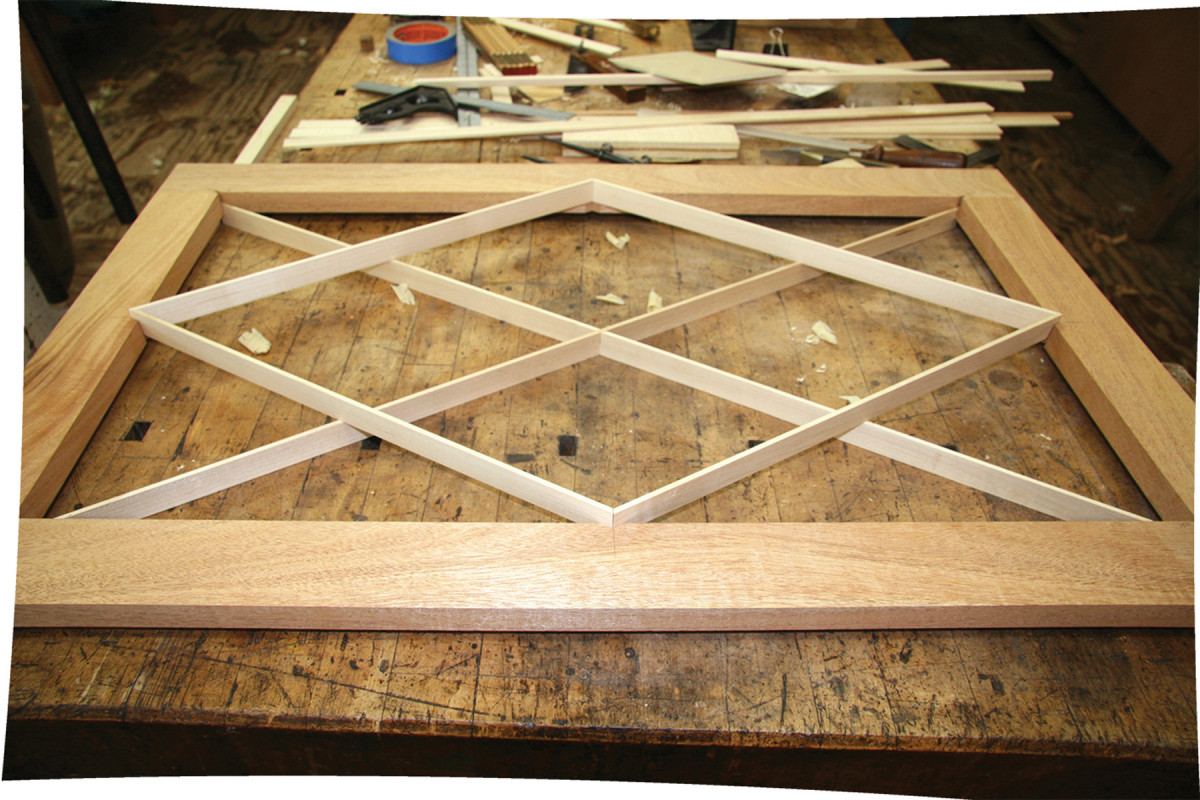
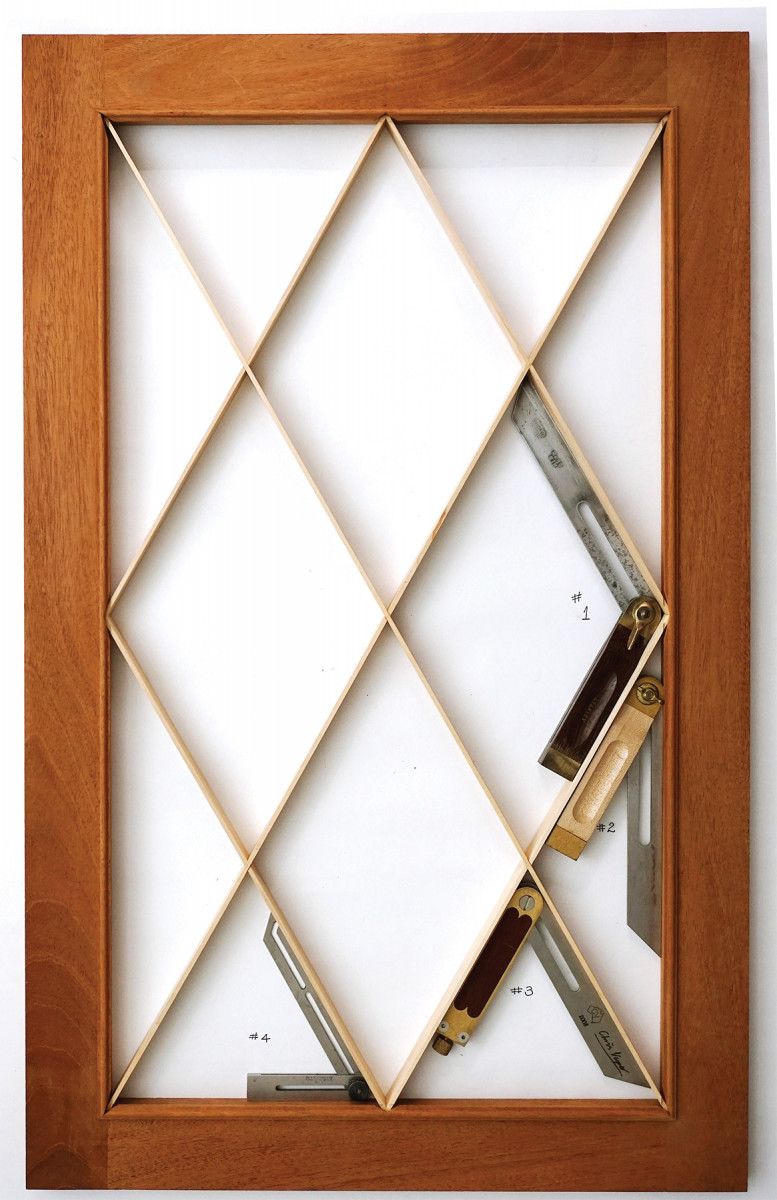
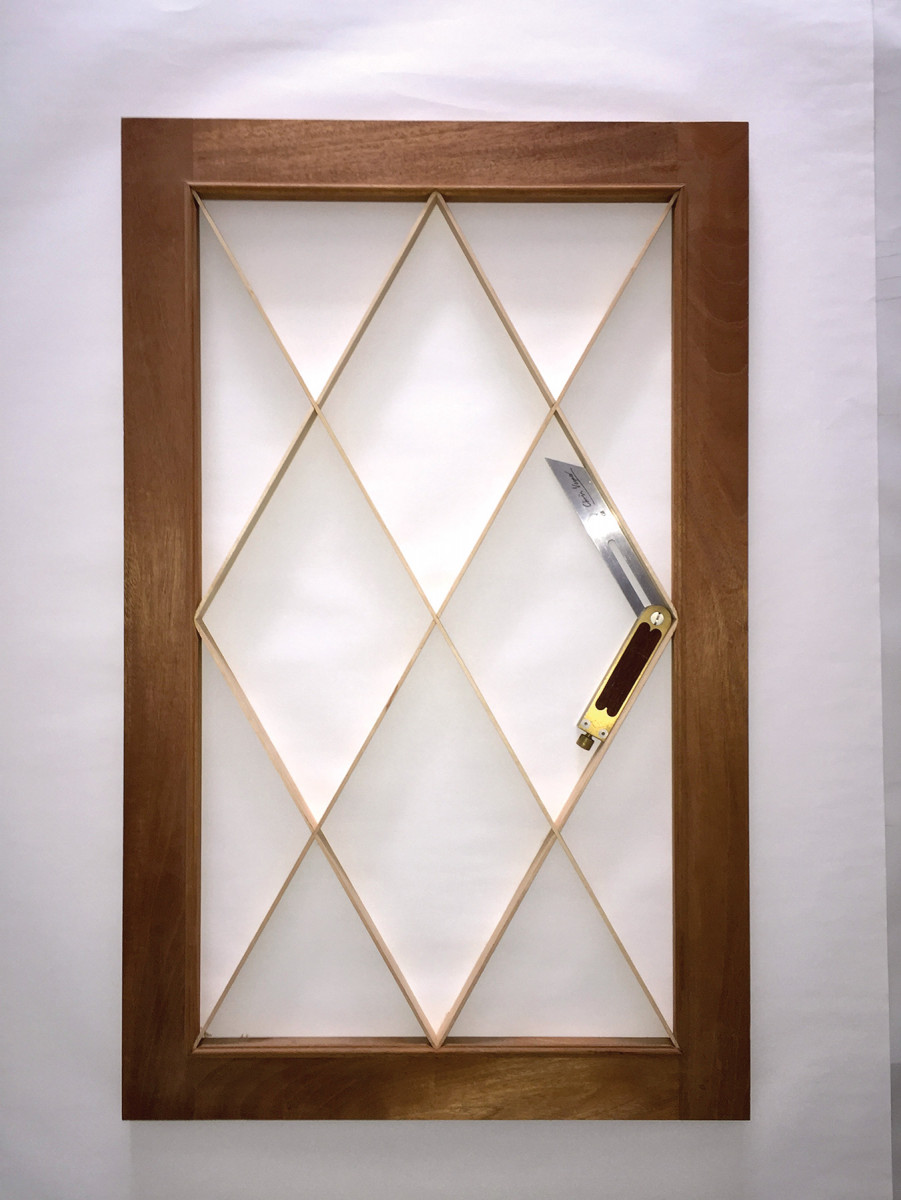
But what really gives this piece presence is the door construction – diamond-paned lights made of maple bars and small mahogany astragal mouldings.
So I worked out how to make diamond divided light doors of any size; I share the pictorial process with you. Before you dive in, study the drawing below and picture 12 – those show the four angles that get bisected to find the complementary miter angles.
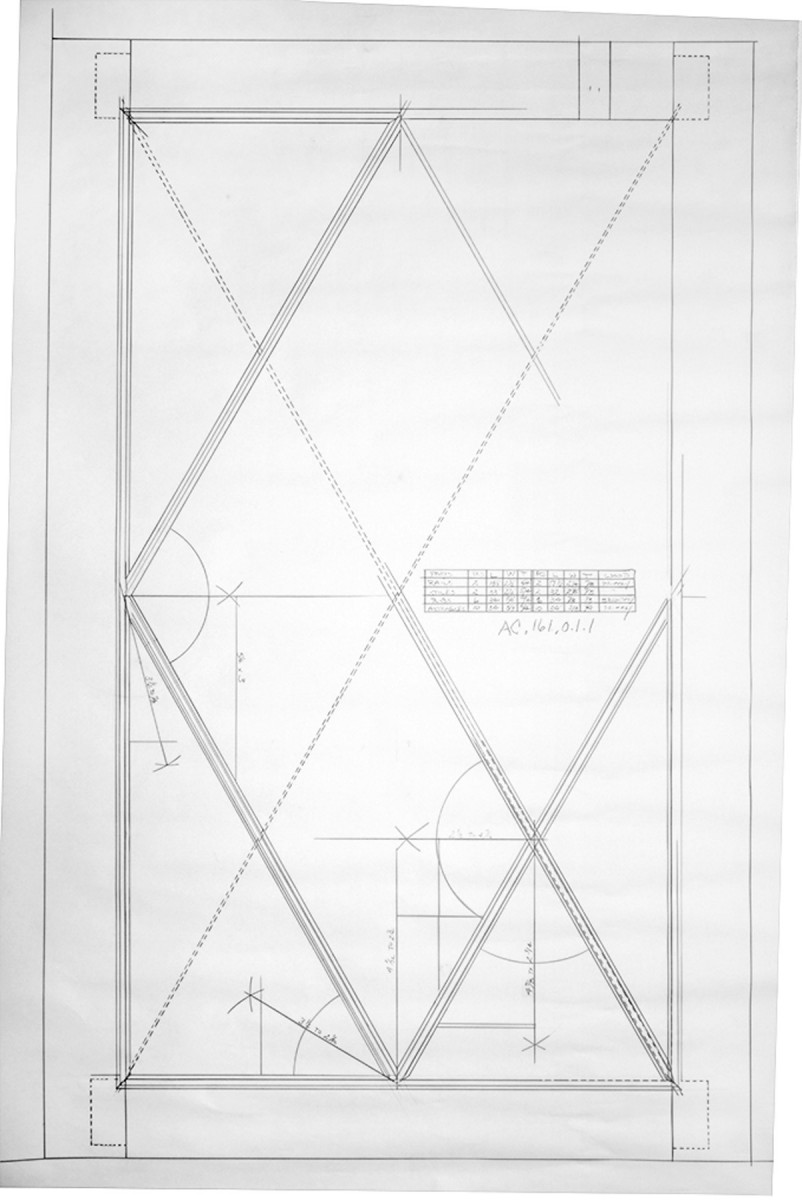
1) Drawing. Make a full-size drawing to determine miter angles for the bars that form the underlying structure – set one bevel square to each discrete angle, then bisect those angles.
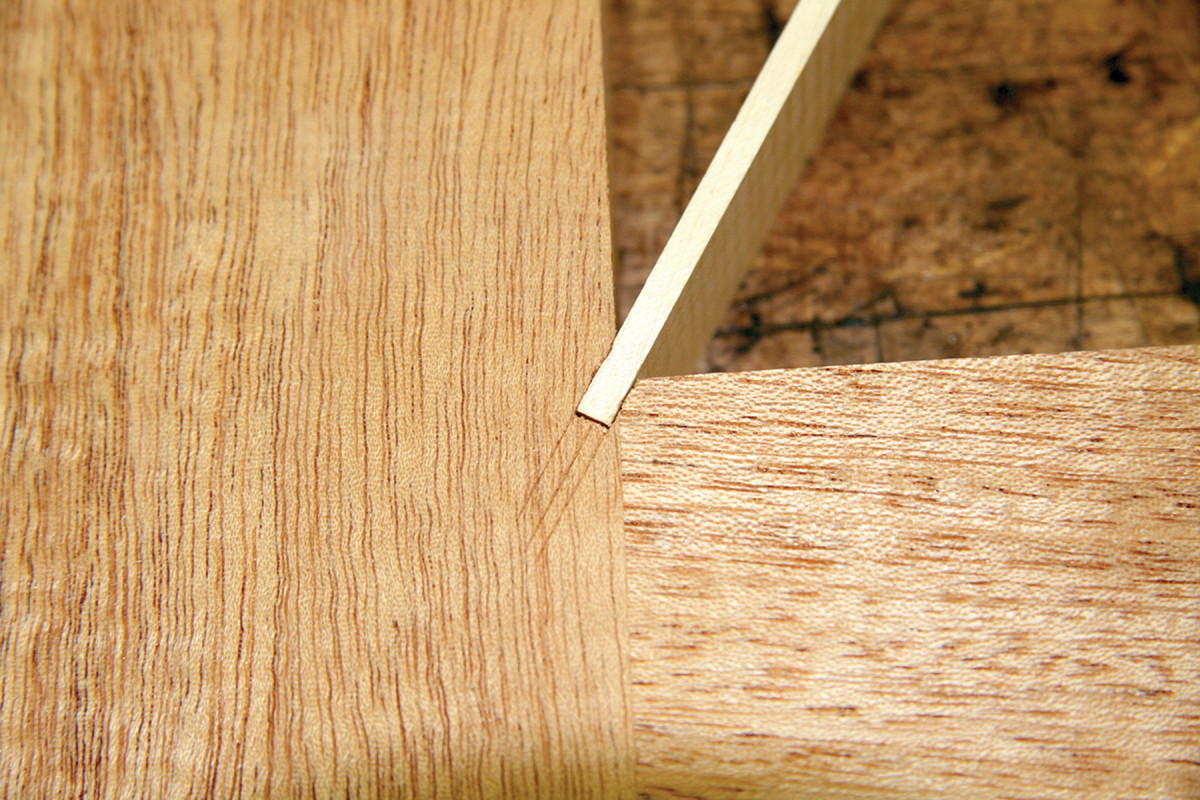
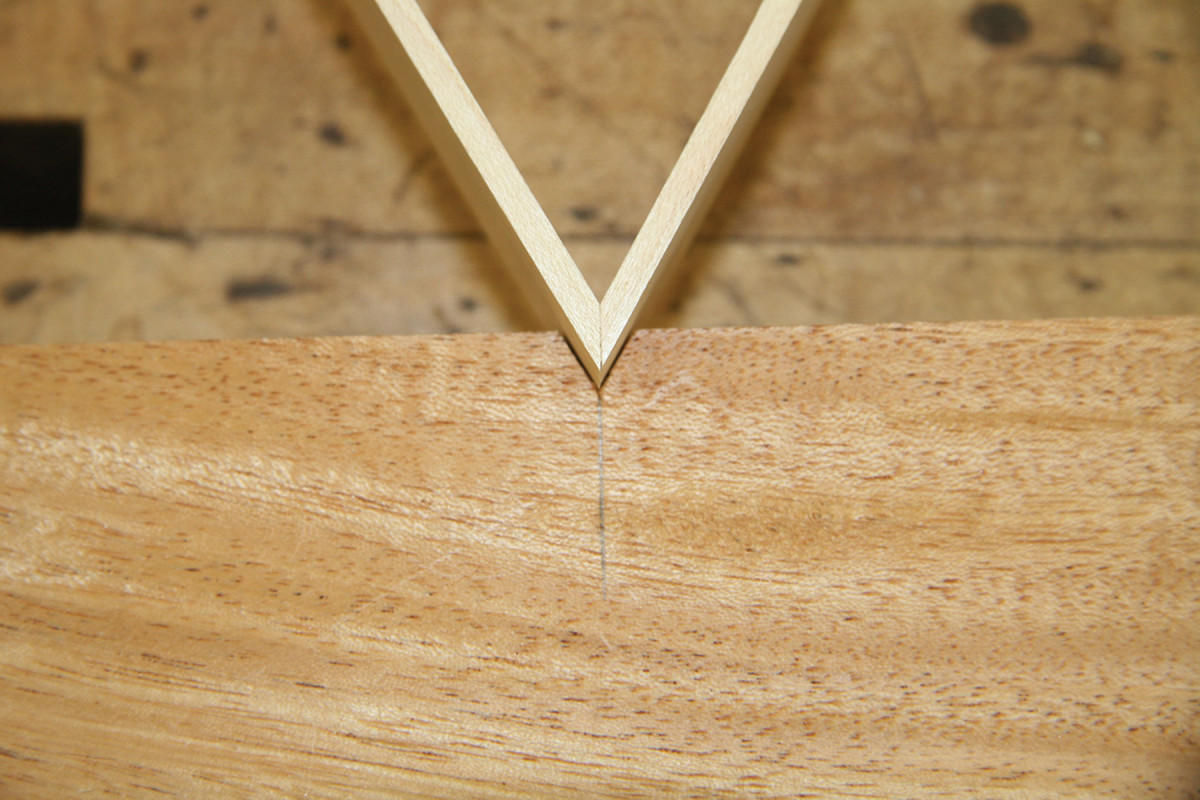
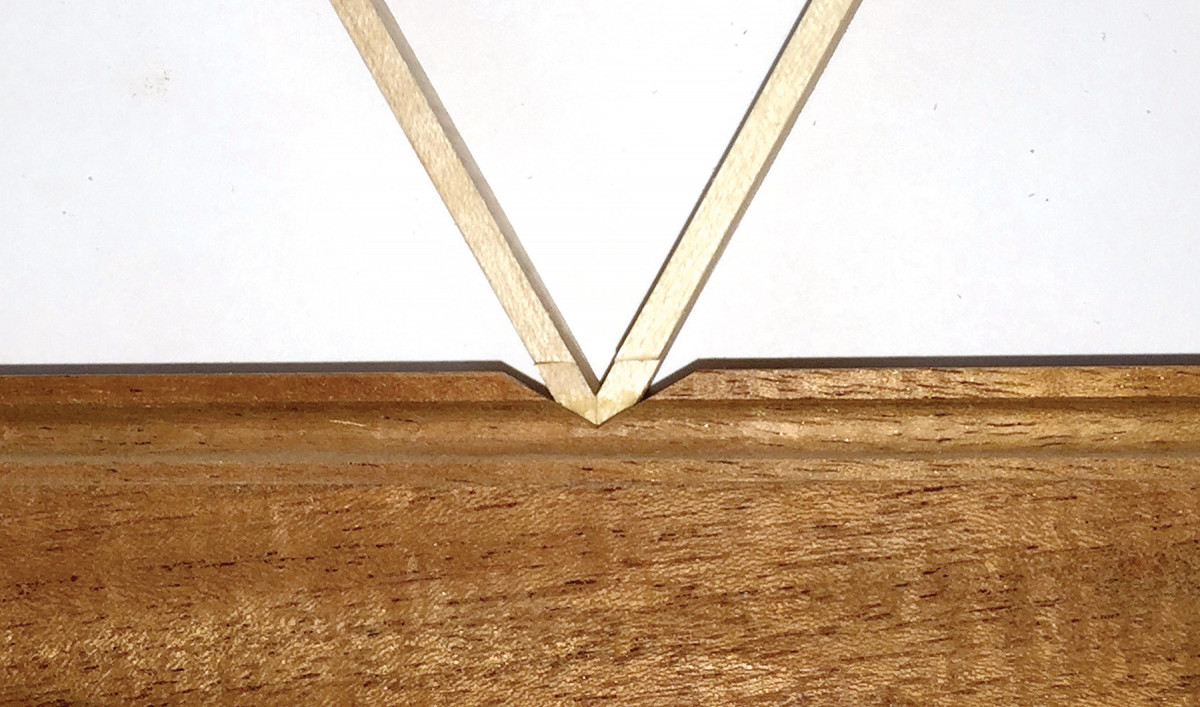
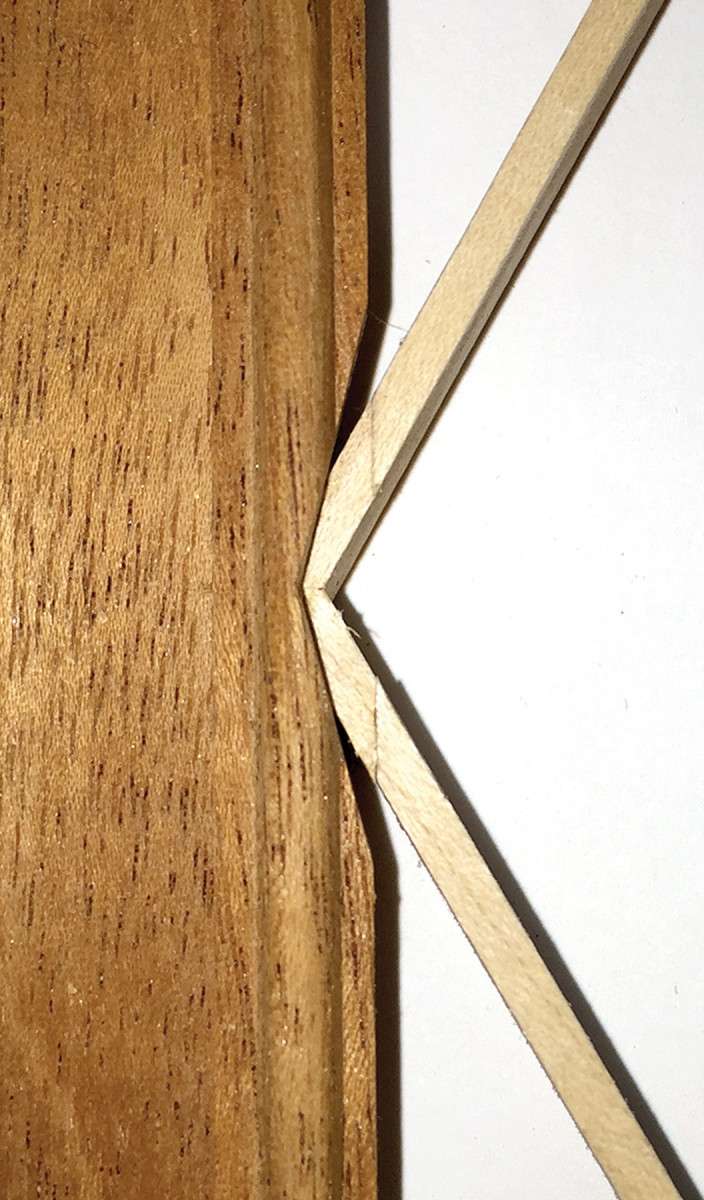
2) Diagonals. Install 1⁄8″-thick maple bars (the same width as the thickness of the frame members) from corner to corner. Strike a centerline using a long straightedge placed where the rails and stiles meet to form the inside corners. Scribe lines half the thickness of the bars (1⁄16″) parallel to and on either side of this centerline.
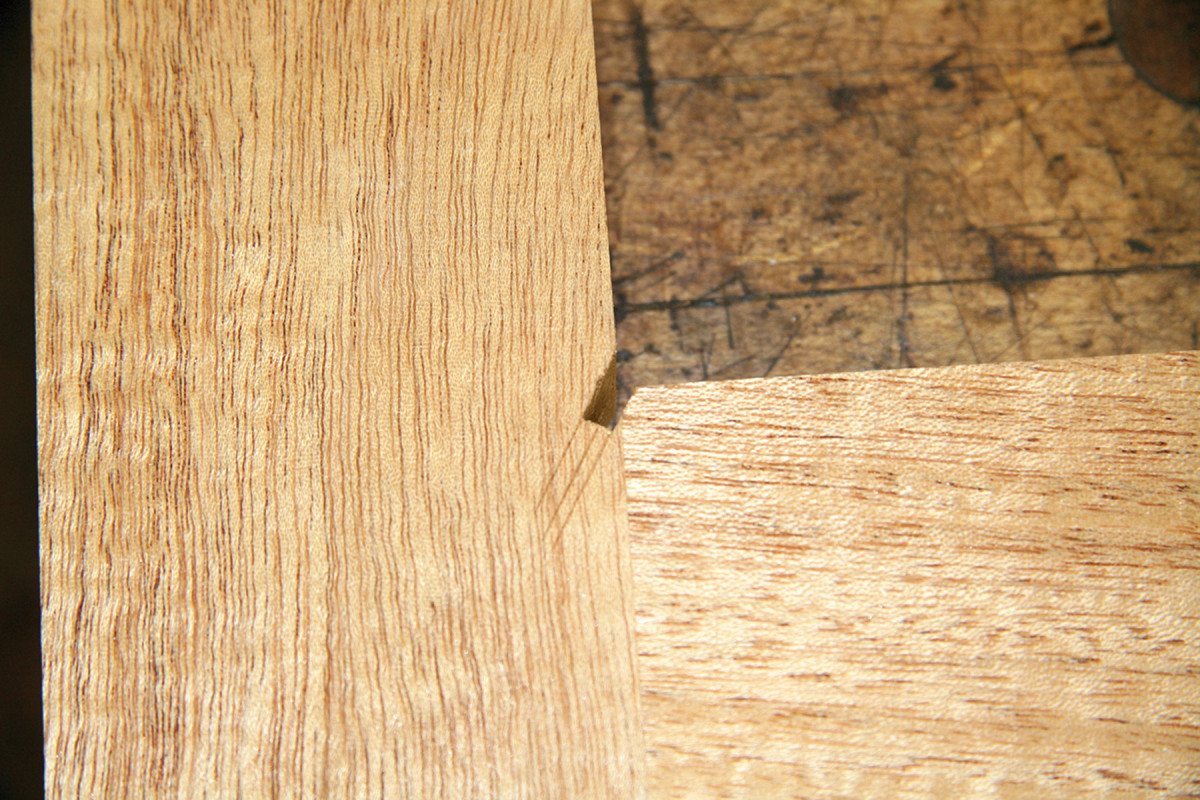
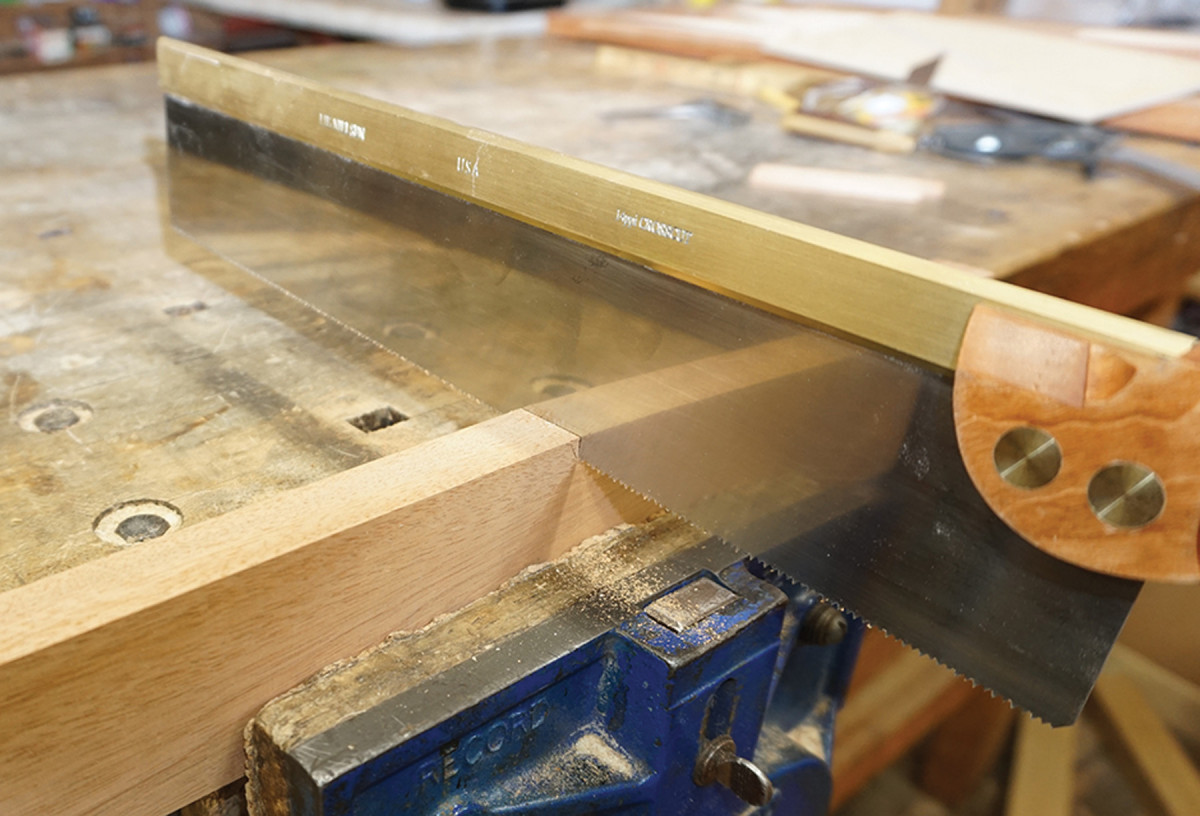
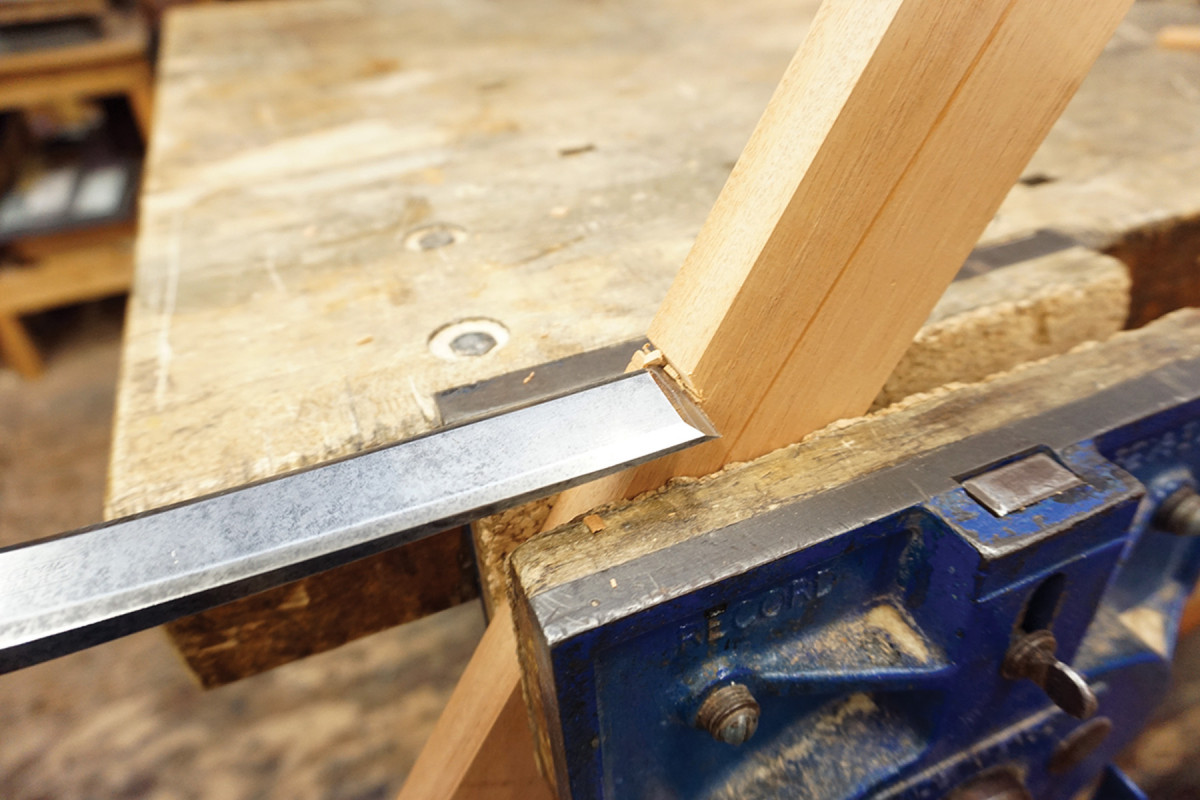
3) Snug fit. Make relief cuts at the scribe lines with a backsaw, then pare with a thin, sharp chisel so the bars fit snugly.
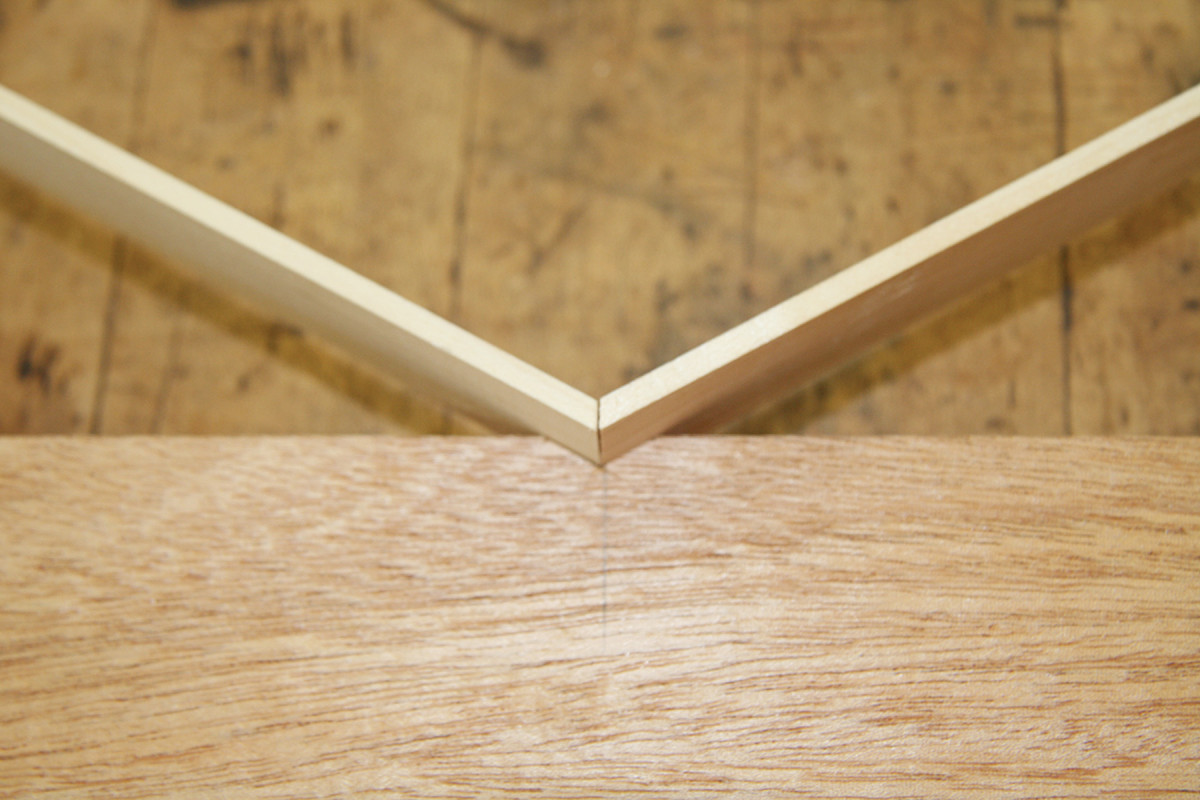
These are the X-shaped overall diagonals.
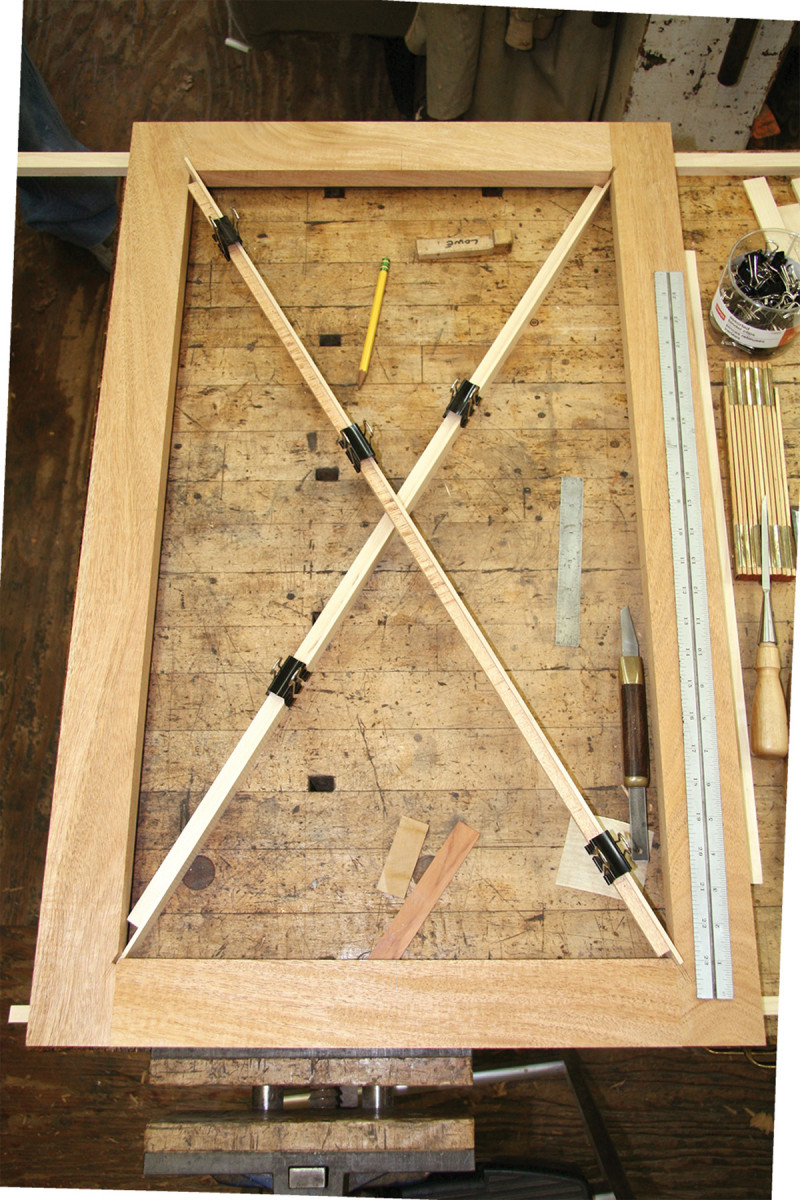
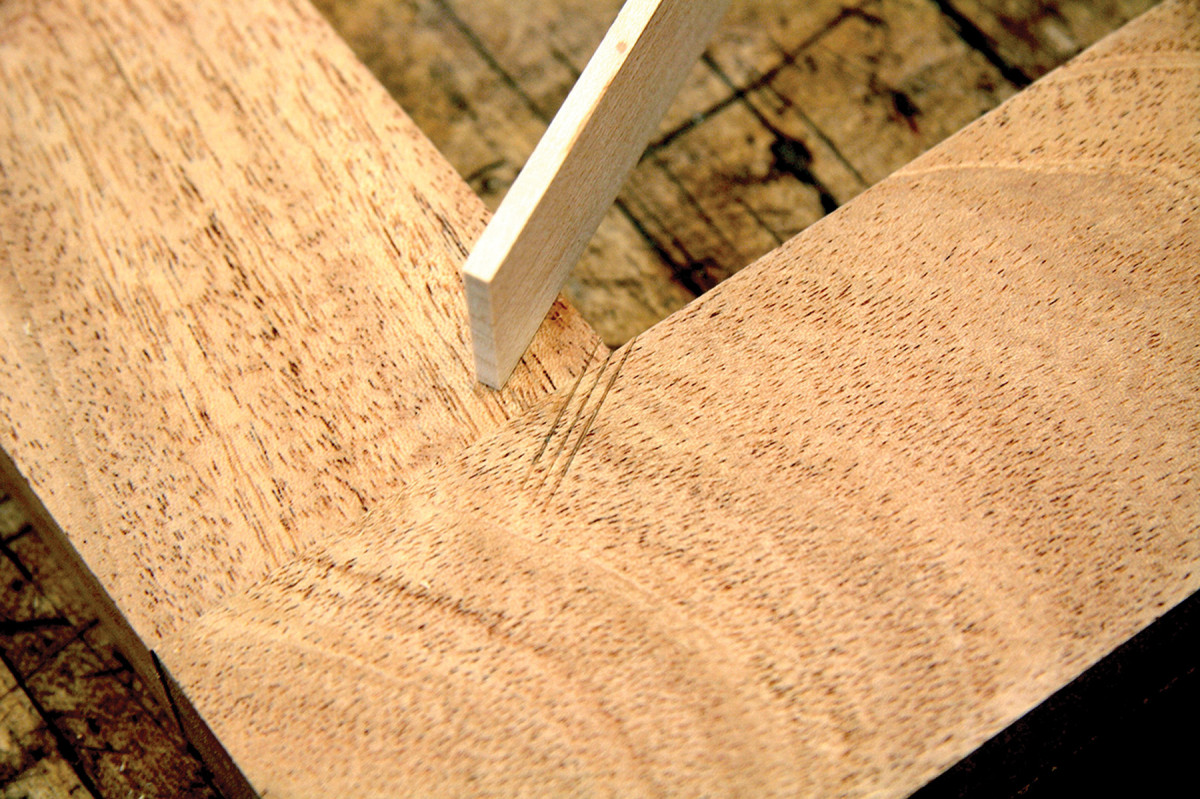
4) Lap layout. To lay out the lap joint where these bars cross at the center, elevate the frame and insert one bar halfway in from the back and the other halfway in from the front. Stiffen the thin bars with battens held in place with a couple of large binder clips – that helps to keep them straight as you scribe the thickness and angle of each bar onto its opposite member.
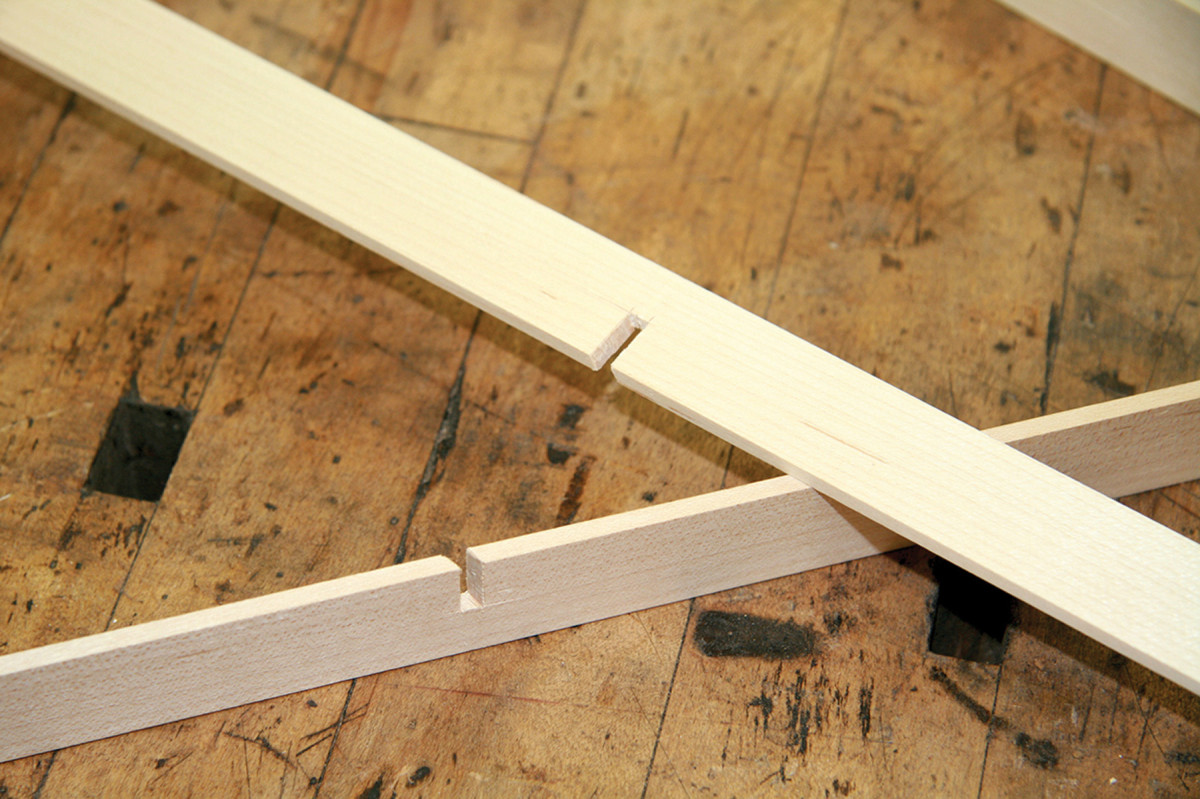
5) Scribe then cut. Extend the scribe lines from the edge to the face of each bar, then saw and pare them to lap together.

6) Large diamond. For installation of the four remaining bars, scribe a centerline on each rail and stile; the bars will be aligned with these, crossing the corner-to-corner bars to form a large diamond in the frame.
Use angle #4 for the rails and angle #2 for the stiles to determine the layout for the bar notches.
Then cut the notches in the rails and stiles with a saw and chisel.
Underlying Structure
7 ) Miter the bars. Determine the lengths of the bars that form the large diamond by placing the bars across the frame and marking directly from the work.
For accurate angles on the ends of bars, trim them with a sharp plane at a miter board to bisected angles #1 and #3. The left image shows the notch shape and mitered bars for the rails (top and bottom); at right is the notch shape and mitered bars for the stiles (sides).

8) Lap-joint the large diamond. After fitting the bars to their notches, mark the lap joints directly from the work, and cut them as you did with the diagonal bars.
This takes care of the initial fitting of the underlying structure to which you’ll attach the astragal mouldings. Remove the bars and set them aside.
Key is to start with a flat and square mortise-and-tenon frame. Make a full-size drawing of the door; work from corner to corner and from centerlines on the rails and stiles to lay out the angles for the bars that hold up the mouldings.
Astragal Mouldings
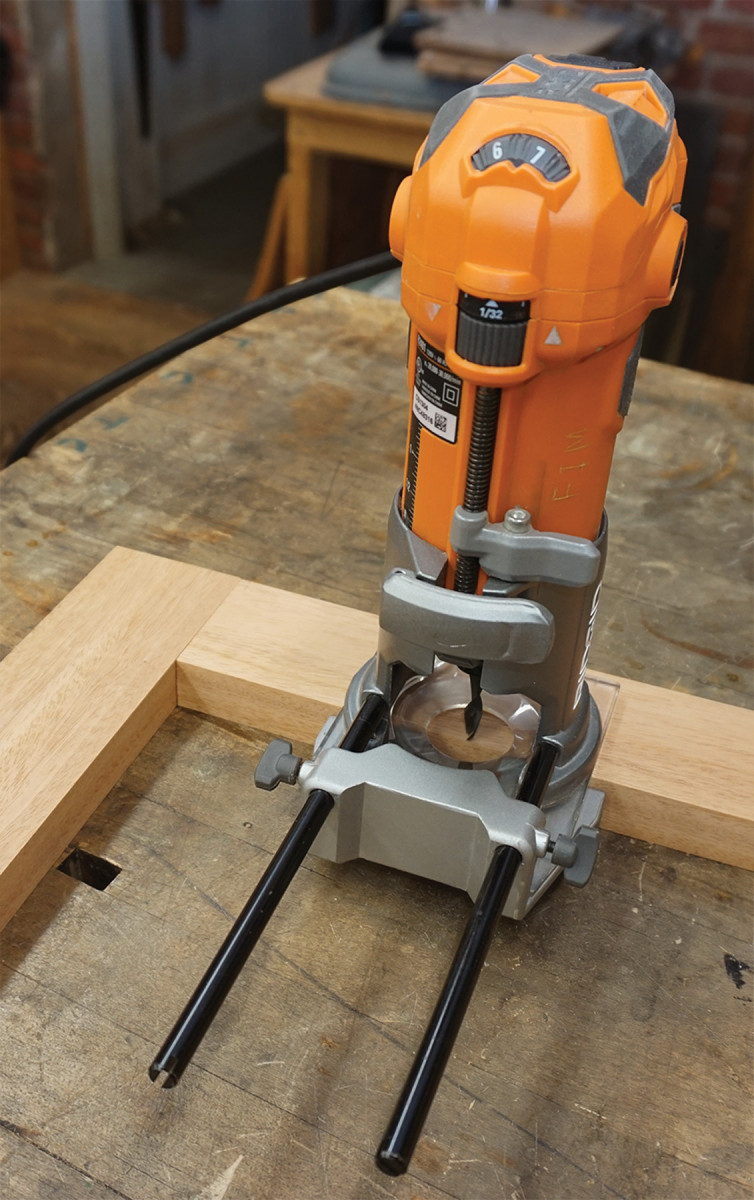
9) Rabbet the frame. Rout a shallow rabbet on the rails and stiles. Once you’ve squared the corners, glue the bars in place.
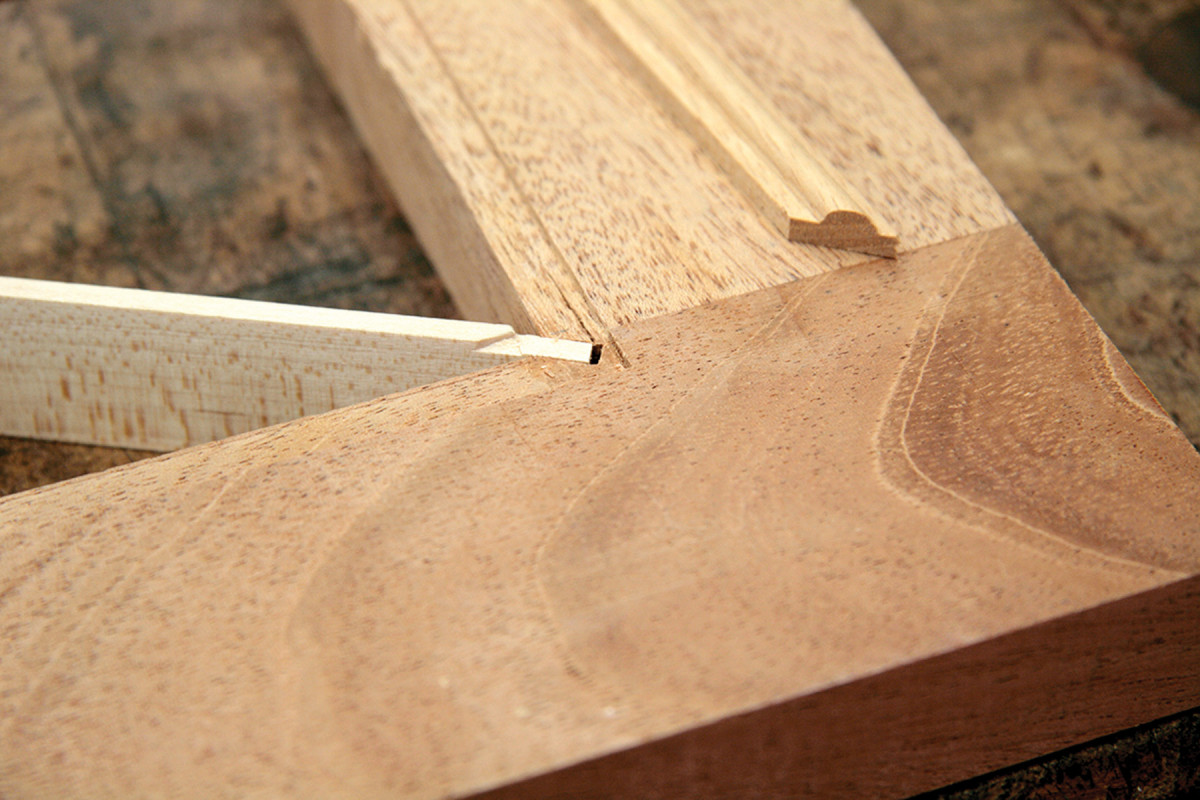
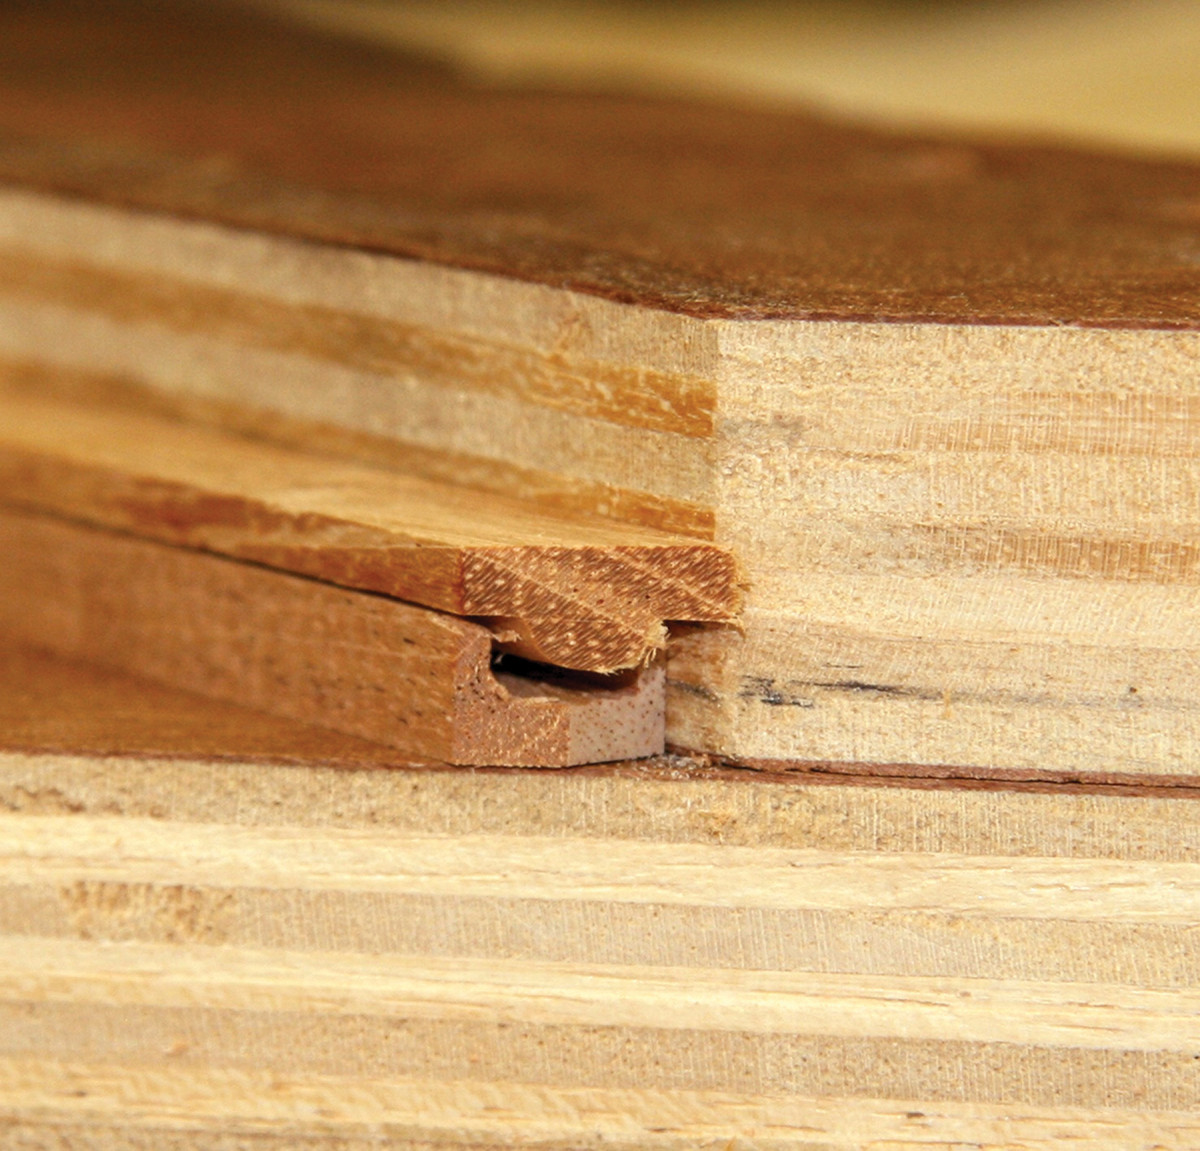
10) Cornered. Miter the ungrooved astragal moulding strips (at 45°) to fit around the inside edge of the door frame – but to make them fit flat, you’ll need to first notch (with a chisel) the ends of the diagonal and diamond bars back to the width of the mouldings.
 For the mouldings, cut up a piece of material about 3″ longer than the diagonal bars and mill it to 3⁄8” thick. Allow about 1⁄2” in width for 12 to 14 pieces (that is, about 6″ to 7″ wide). This gives you a few extras.
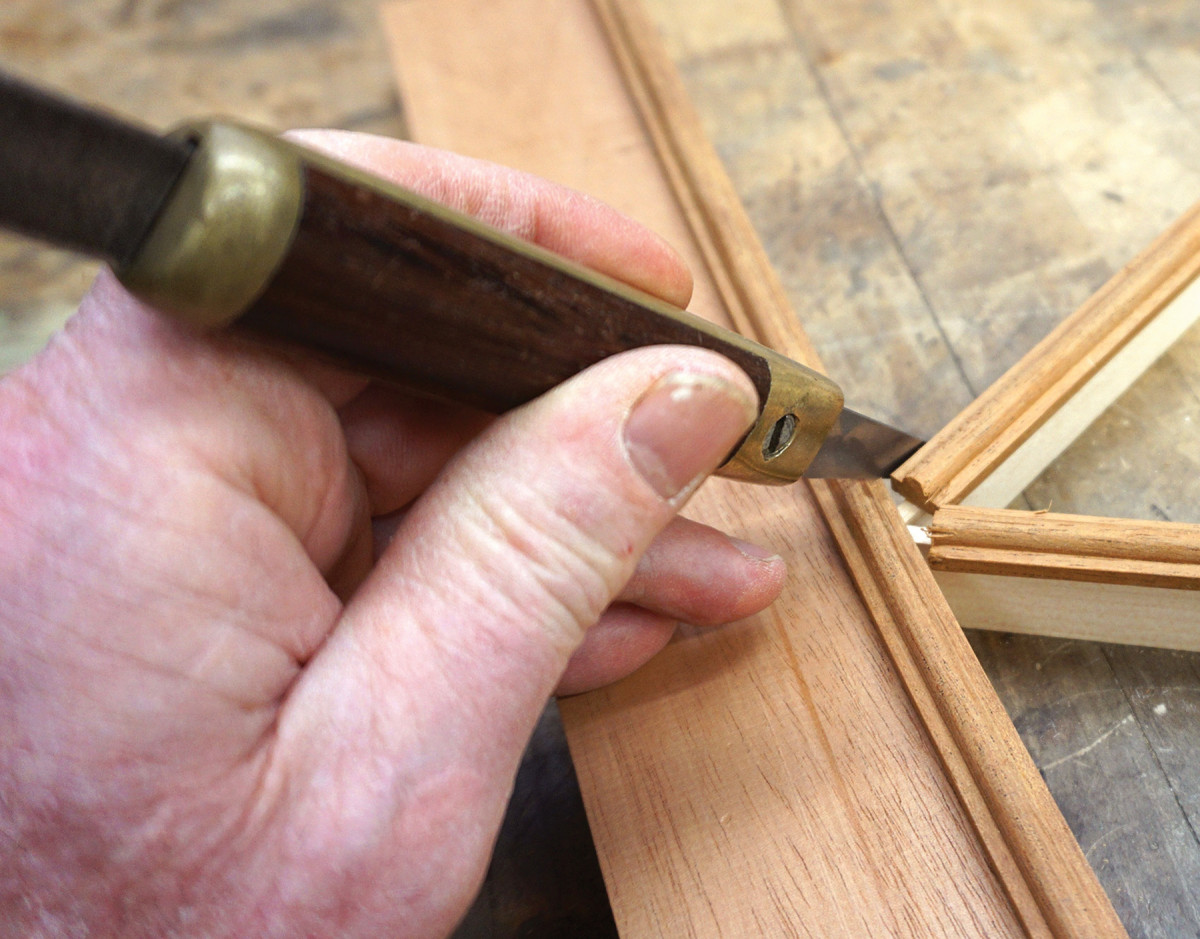
11) Layout locations. The birds’ mouths in the perimeter moulding strips (into which fit the mitered internal mouldings) are located by placing a short length of moulding atop the bars leading into that corner. Slide the sample piece to the edge of the door frame, then register a knife to that piece to scribe a line that indicates the cut. Set a bevel square to the line, and use that to mark the angle on the back of the perimeter moulding piece.
12) Bisect the angles. In this door, there are four discrete angles that must be determined to fit the interior moulding pieces. Set a bevel gauge to each, then transfer those to your angle board to bisect them; that determines the angle of the bird’s mouths that get cut into the perimeter moulding, and the miter angles for the ends of the 16 internal moulding pieces.
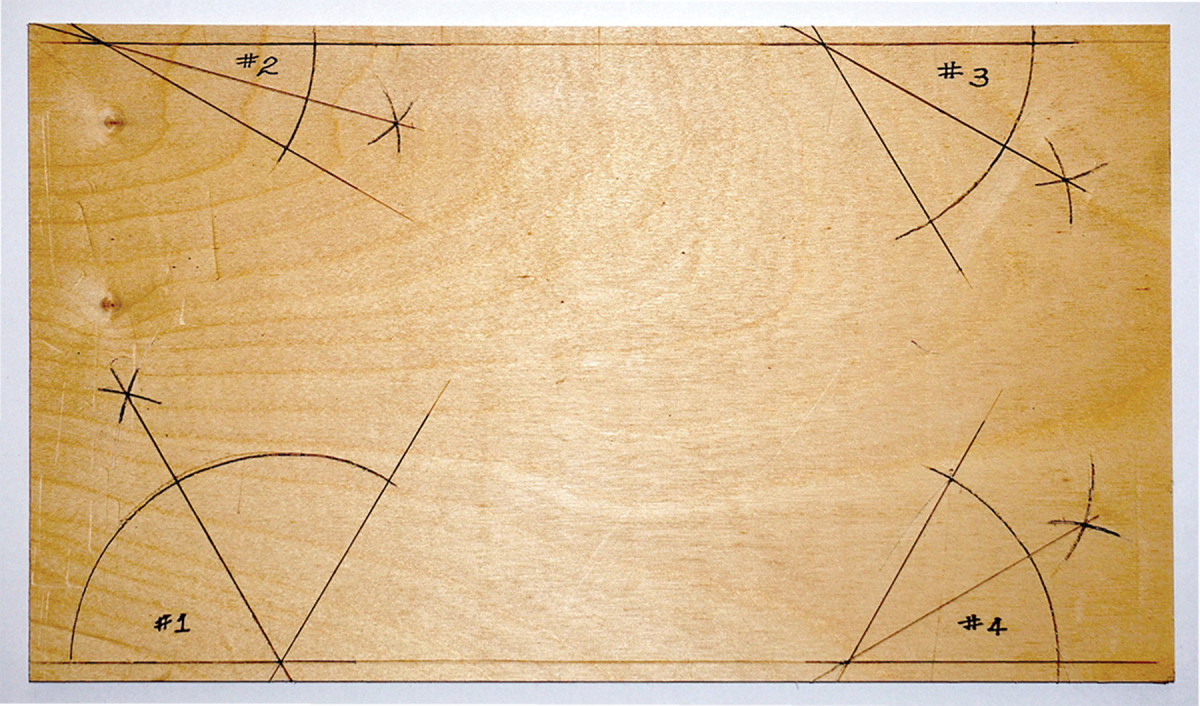
13) Angle board. The numbered drawings on the angle board match the bevel gauges as numbered at left. The centerlines are the four bisected angles needed for this door.
Straighten and square the edges, then choose a router bit, moulding plane or scratch stock that will cut a 3⁄16” bead. Cut a bead on the two long edges, with the profile centered on the thickness of the 3⁄8” stock.
14) Make the cuts. Now lay out and cut the bird’s mouths into the inside edges where all of the bars are mitered into the door frame, using a handsaw and chisels. Rail moulding: Bisected angle #4
Stile moulding: Bisected angle #2
Frame corners: Bisected angles #2 & #3

15) Miter the mouldings. There are 16 internal moulding pieces to cut and miter to the correct length and angles. Mark the lengths from the support bars and add an inch or two for the miters. Each piece gets four miters (two on each end). The moulding can rest on its back for half the miter cuts on each, but on the other half, it must be flipped over so the profile is facing the miter board.
Set your table saw fence to 7⁄32“, and rip the edges you just beaded. Repeat this process until you have enough moulding pieces, plus a few extra.
16) Miter trough. One trick that’s helped me to cut miters when the workpiece is resting on its show side is a strip of material that is the same width as the moulding, that has a 3⁄16″ groove down its center.
Now set up your router table with a 1⁄8” straight bit and cut a 1⁄16“-deep groove centered down the back of all but four moulding pieces. This groove fits over the maple bars to help keep the moulding in place and provide support. The ungrooved pieces are installed in a rabbet around the perimeter.
Rabbet the inside perimeter of the frame (then square the corners) to accept the exterior moulding. The depth of the rabbet should match the depth of the groove you’ve plowed into the back of the mouldings (in this case 1⁄16“) and the width should be two-thirds the width of the moulding (in this case 1⁄4)“. This rabbet helps you to align the perimeter moulding, and sets it at the proper height to match with the mouldings that you’ll sleeve over the top of the bars. With the rabbet done, glue the maple bars into position.
Now follow the steps below to fit the mouldings.
Bisecting Angles
1) Set a bevel square to the first angle you need to bisect.
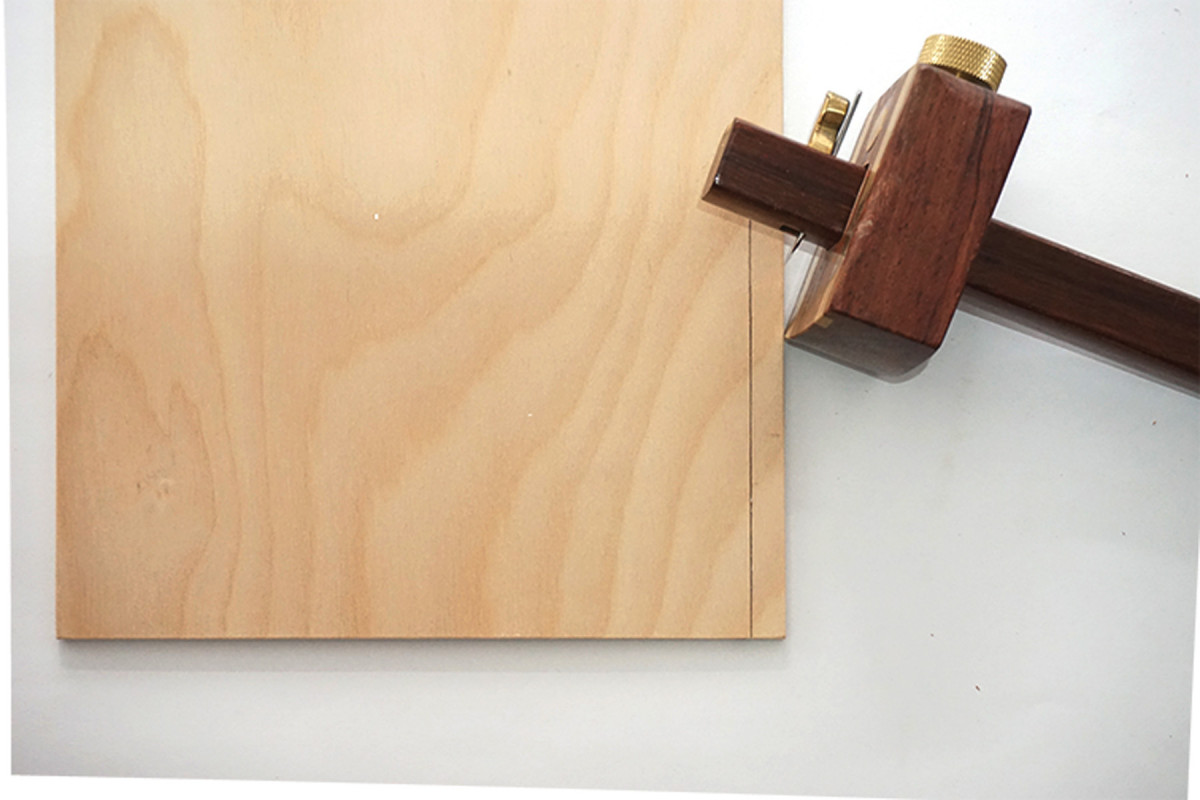
2) Find a piece of plywood that is straight and square. Along one edge, scribe a baseline.
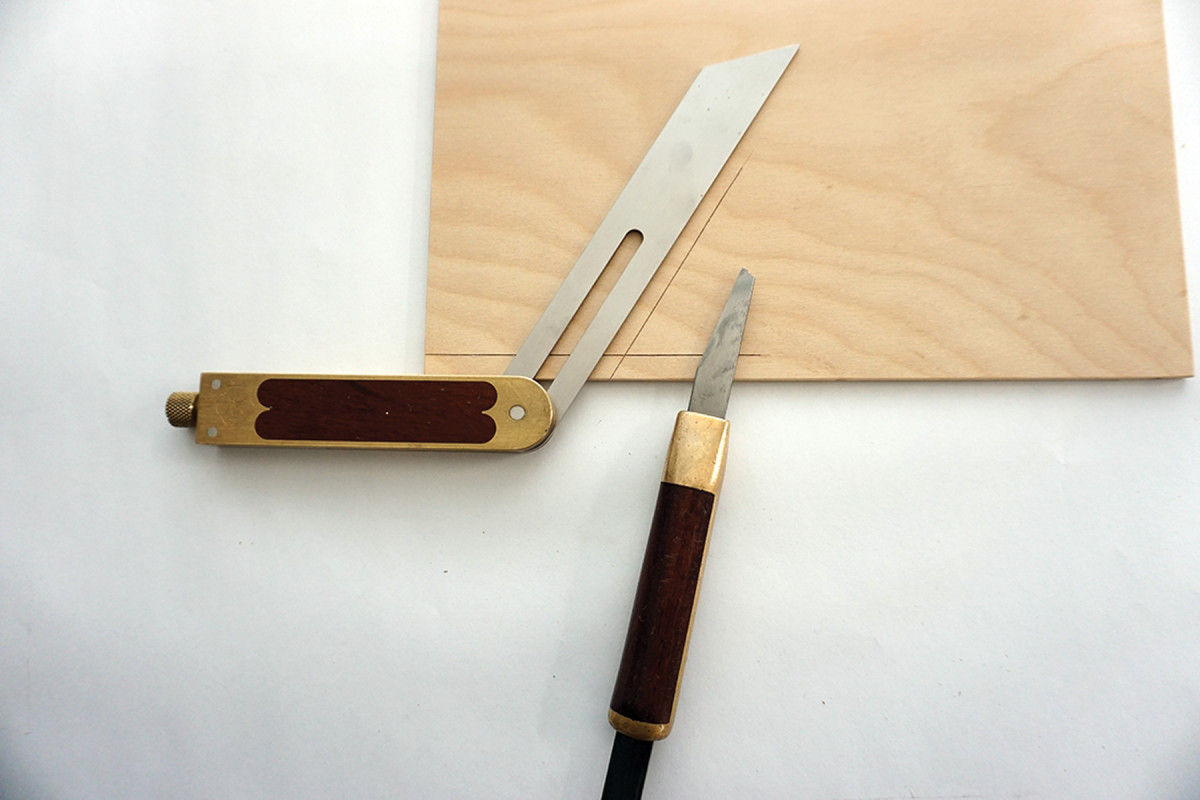
3) Using your set bevel square as the reference, knife a line that intersects the baseline.
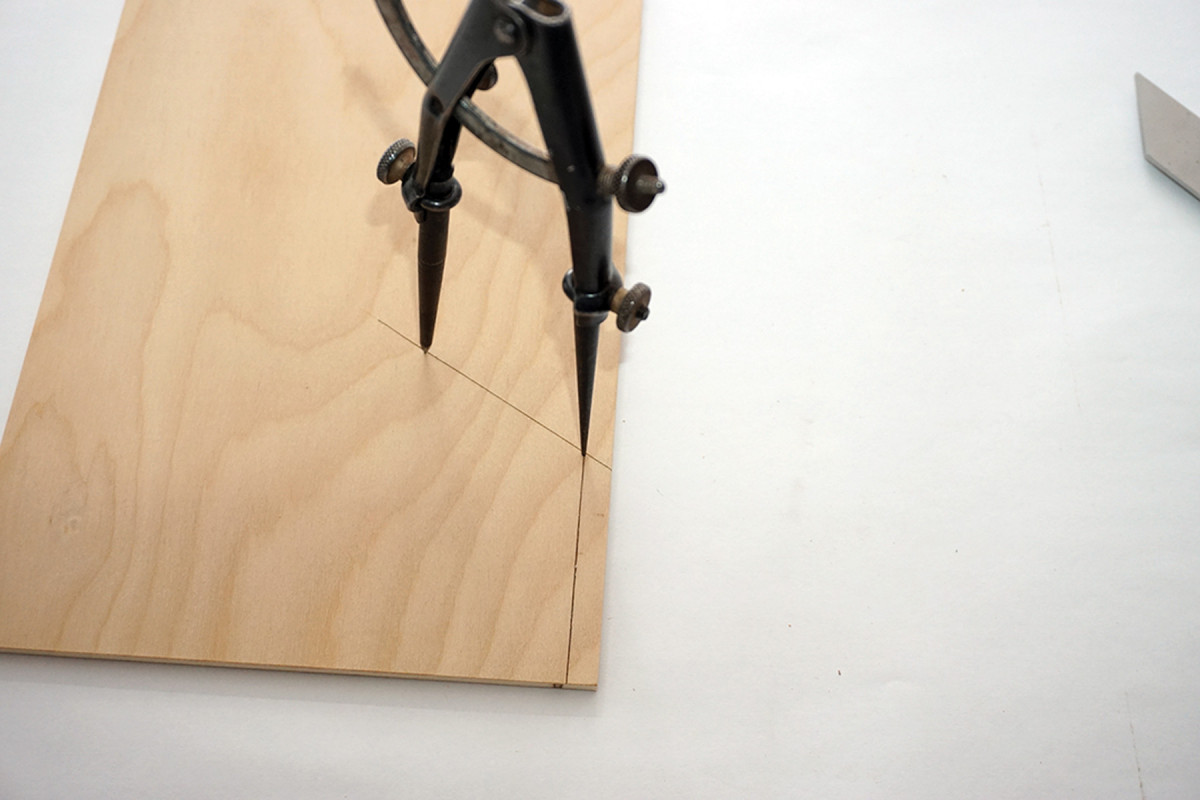
4) Grab a pair of dividers and position the point at the intersection of the baseline and angle line.
5) Extend the leg of the dividers to a convenient distance and scribe an arc.
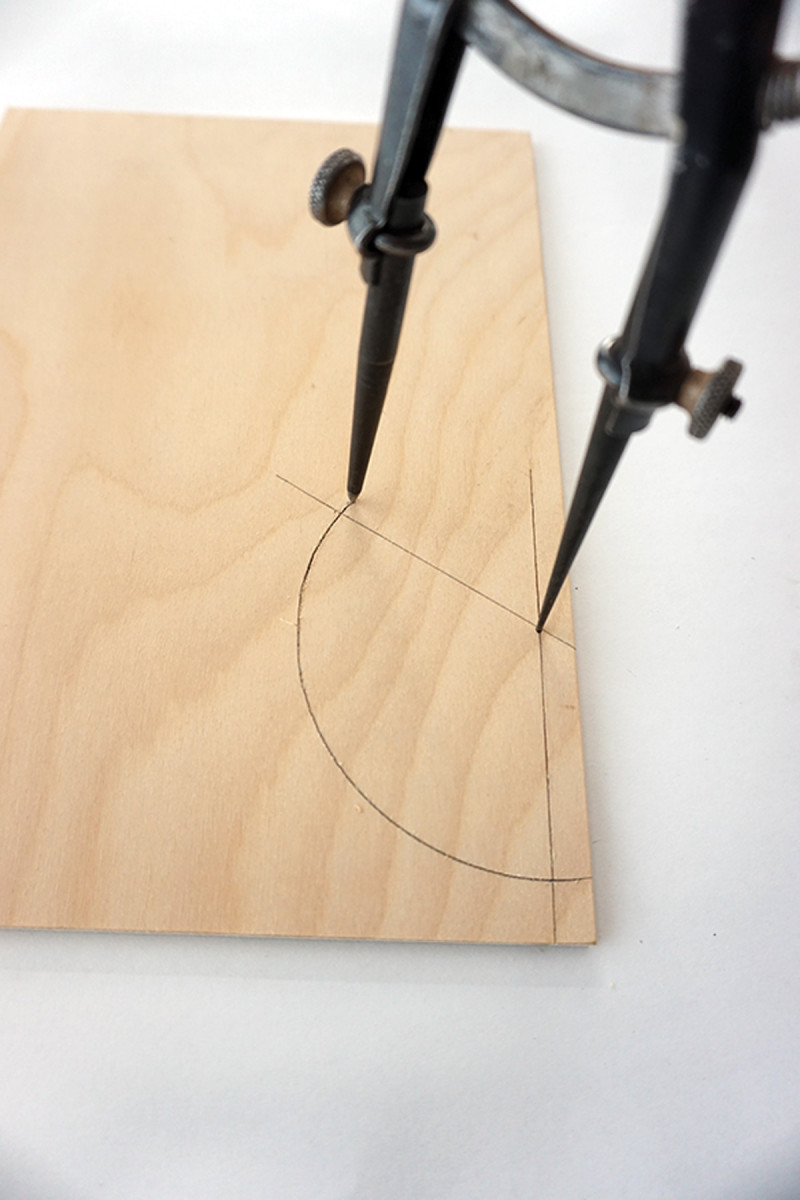
6) Where the arc intersects the angle line, place the point of the divider.

7) Extend the leg of the divider a distance that is more than half of the distance of the arc between the baseline and angle, then scribe an arc.
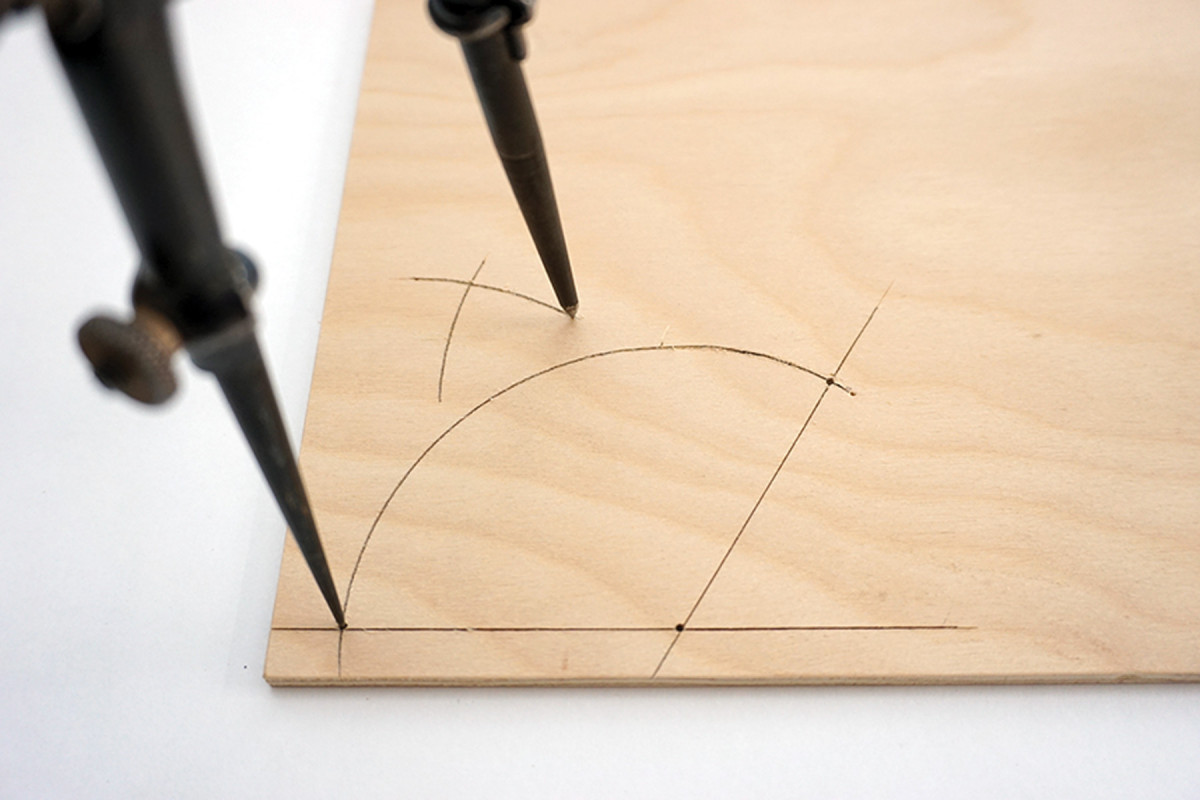
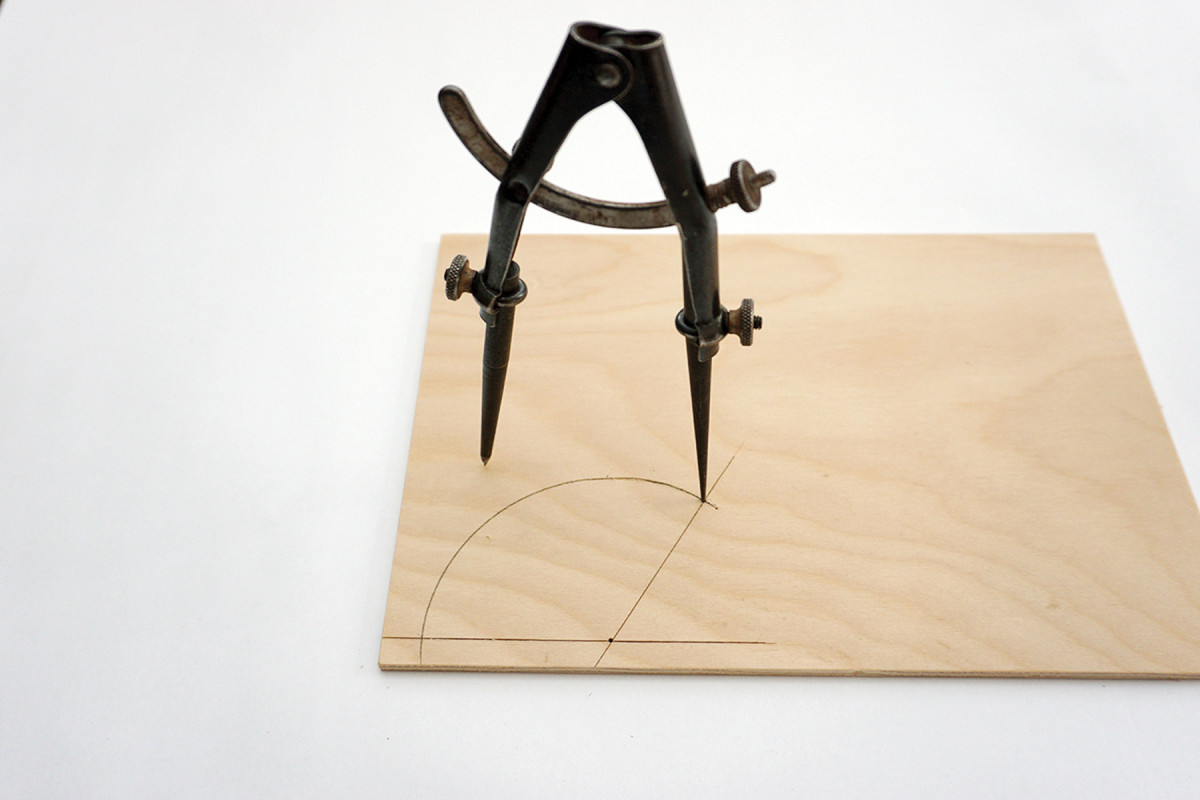
8) Place the point of the dividers (same setting) where the arc intersects the base, then scribe an arc intersecting the previous arc.
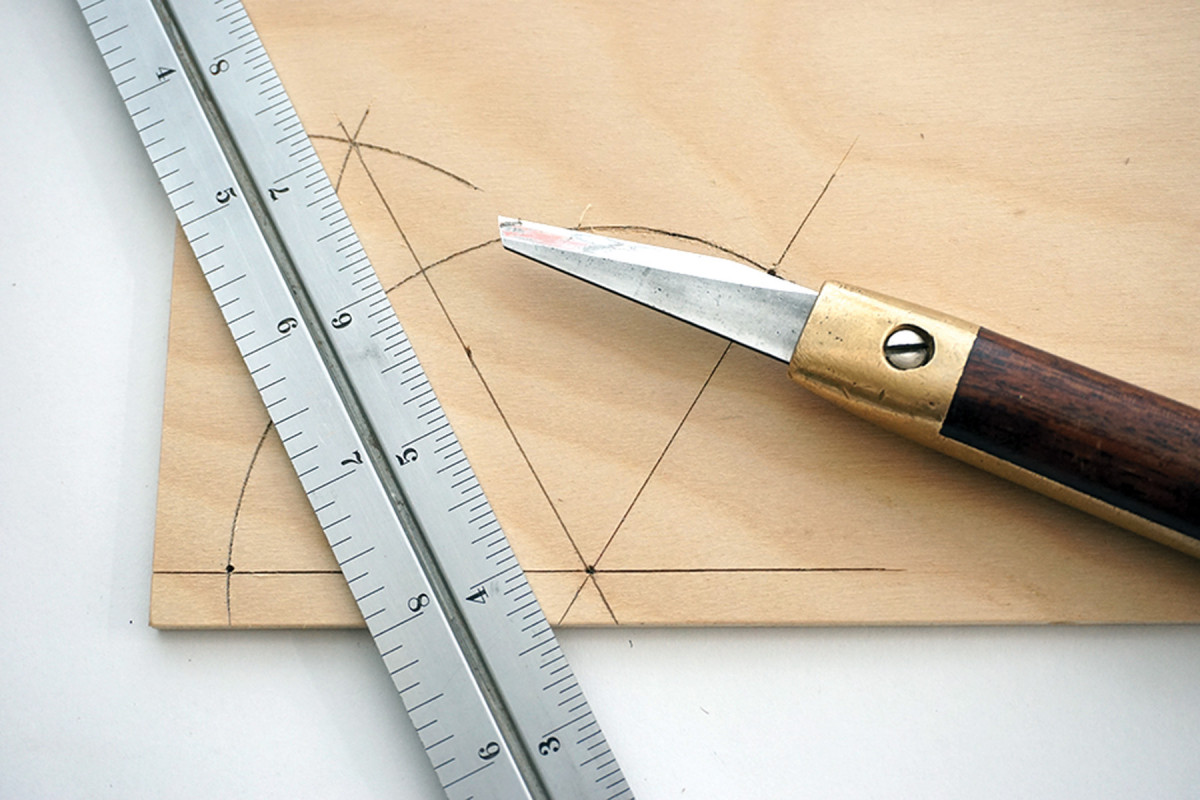
9) Position a straightedge so it cuts through the previous intersecting arcs as well as the point of intersection of the baseline and angle line, then scribe a knifeline.

10) Set your bevel gauge to that line; this will give you two exact complementary angles.
This series of steps will help you determine any miter angle (in this instance the angles for the bird’s mouths and astragal mouldings) and step up your geometry game. You could try to figure out how many degrees the angle is then divide it in half, but quite often this will result in an odd number – such as 34.675 degrees – to which is it difficult to set a bevel square.
—PL
Make a Miter shooting Board
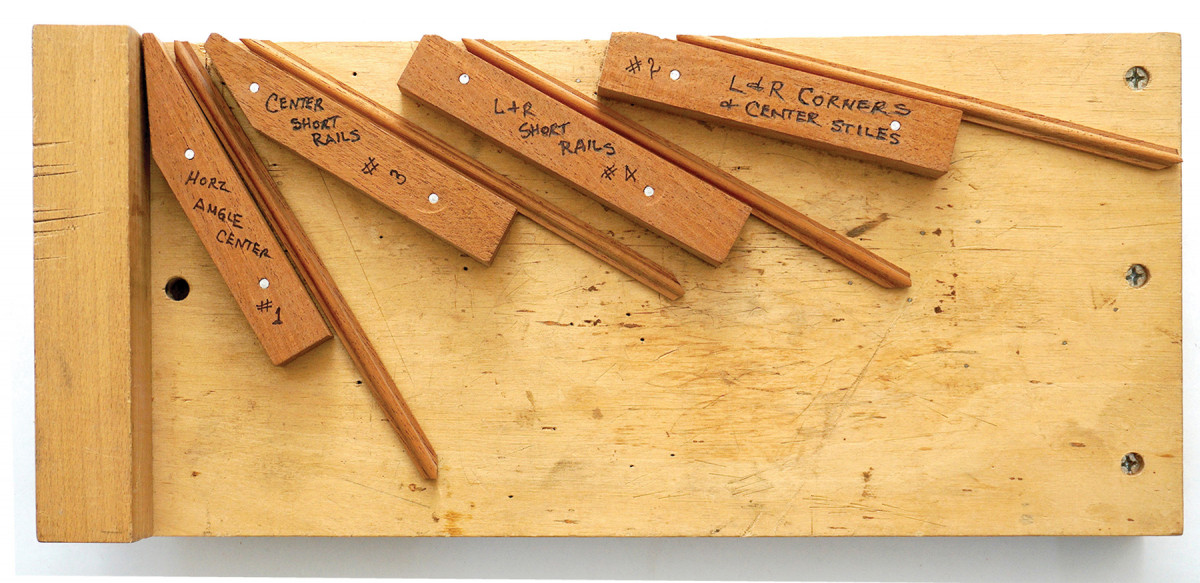
One board, four miters. One miter board (this one is made out an old bench hook) includes all the shooting angles for this diamond-light door.
Make one board with the four fences you need to plane the four angles on the ends of the interior astragal mouldings (two on each end).
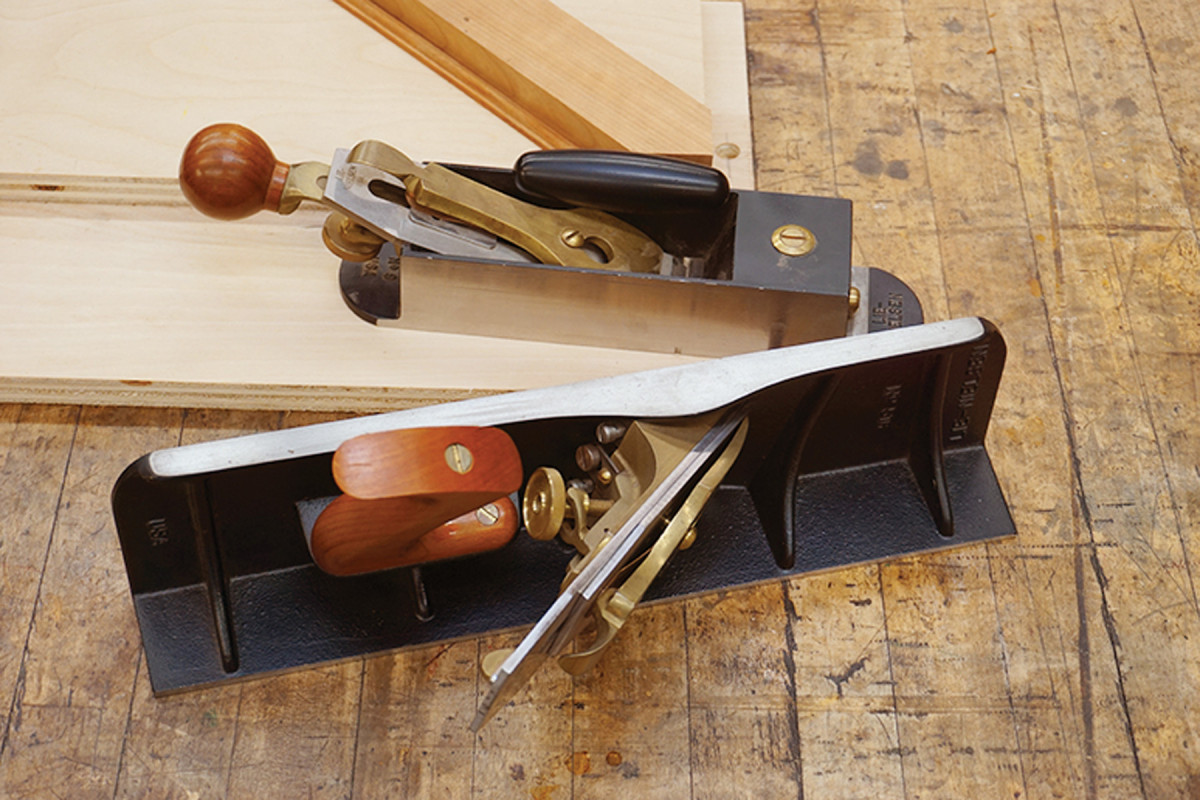
Tools. Planes that I find especially nice for mitering are the Lie-Nielsen No. 51 shoot plane and No. 9 miter plane. Both lie perfectly flat while shooting a miter.
Use your sliding bevel square and a pencil to transfer the four bisected angles from the angle board to a bench hook. Align a hardwood block to each line, with the corners hanging slightly over the edge, then glue and nail the blocks in place. Run the edge of the board through your table saw to cut the angles on the fence ends.
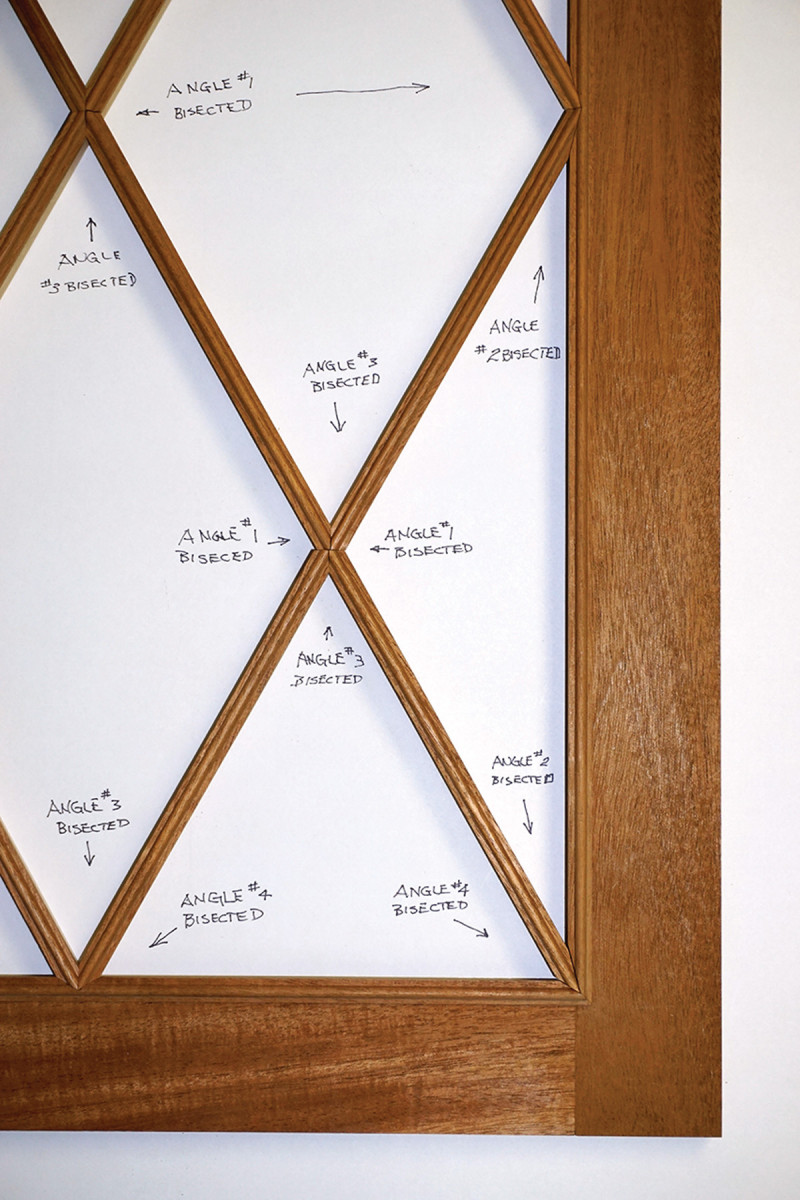
Matching numbers. The numbers marked on the paper correspond to the fence angles on the miter board (and to the angles for the mouldings and bird’s mouths).
Align the moulding pieces to the correct fence, with the end at the edge of the board. Shoot the ends with a plane that has an iron ground and honed straight and square, and that projects parallel to the bottom of the plane. This plane setup ensures the miter has only one angle when it is cut.
— PL
Final Steps
After all of the moulding miters are cut, put some glue on the backside of the perimeter moulding pieces and glue them in place. Then glue each internal divider to its matching maple bar.
The support structure plus the long-grain to long grain gluelines of the moulding atop it, offer plenty of support for glazing.
This all sounds a lot more confusing than it is. While there are many steps and the miters must be dead-on for a crisp look, understanding the geometry will help you get it right, no matter the size of your door. Just remember: the key to succeed is to start with a frame that is square and flat!
Here are some supplies and tools we find essential in our everyday work around the shop. We may receive a commission from sales referred by our links; however, we have carefully selected these products for their usefulness and quality.


