We may receive a commission when you use our affiliate links. However, this does not impact our recommendations.

You need to think a little differently.
A rotary Indexing Head allows a CNC machine to create 3-dimensional shapes in the round. It’s an accessory that can be added to most CNC machines. Some companies even make it as a stand alone machine. A rotary indexing head looks similar to a standard woodturning lathe, but its approach to shaping wood is quite different.
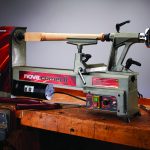
Think Flat CNC turnings usually start out as a flat design, so the first step is to “unwrap” the cylindrical profile. CNC design software uses a variety of drawing tools that assist this process. One tool automatically calculates the flat design’s width, based on the maximum diameter you specify for the turning. Another tool takes complex shapes such as the hexagonal cross section of this handle and converts it into the flat shape.
In fact, it’s more like milling than woodturning. One of the best features of a rotary indexing head is its ability to create shapes that aren’t easily turned on a standard wood lathe, such as this hexagonal chisel handle. Intricate round relief carvings are also possible.
Think Round The design software converts (wraps) the flat design into its cylindrical shape to give you a preview of the final piece.
Because it’s CNC based, a rotary indexing head is capable of great precision and easy repeatability. However, since the shaping is done with a router bit in small increments (as small as 1/50″ per pass), the milling process can take a while to complete.
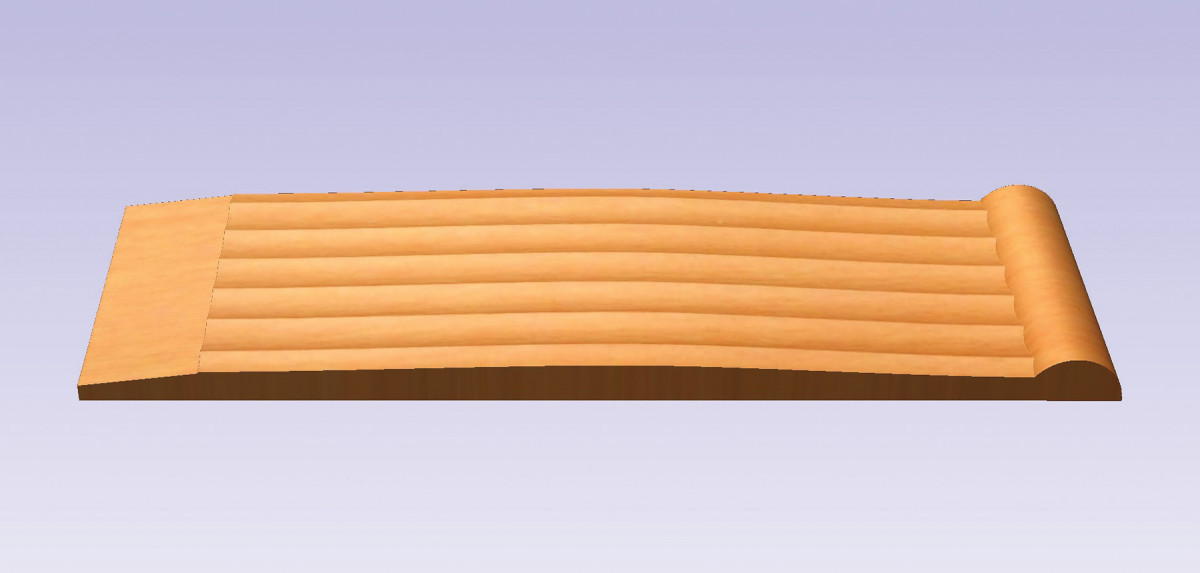
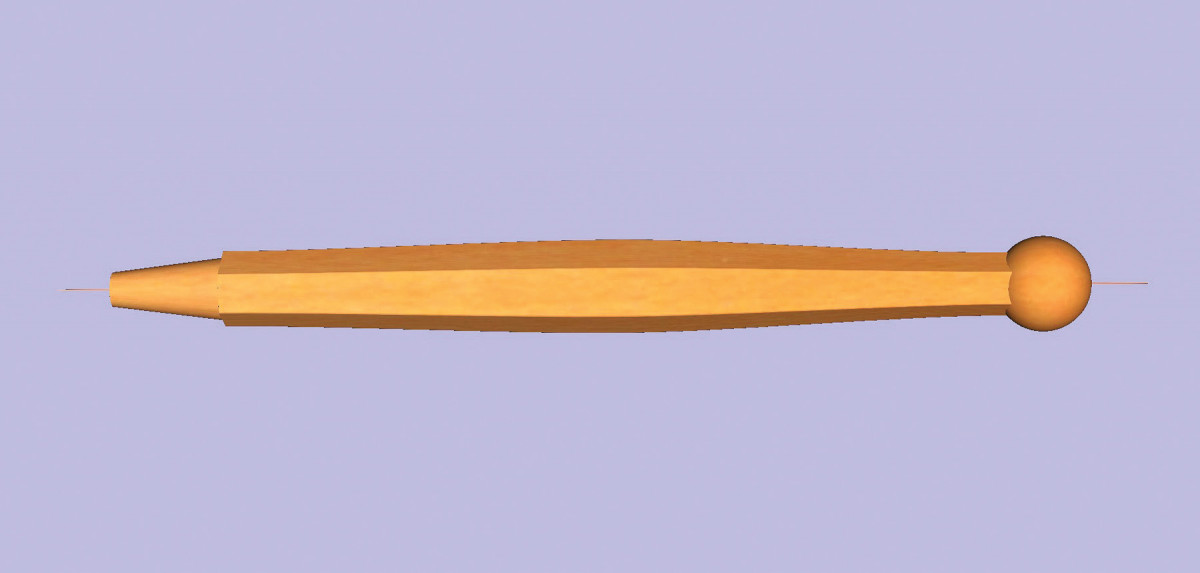
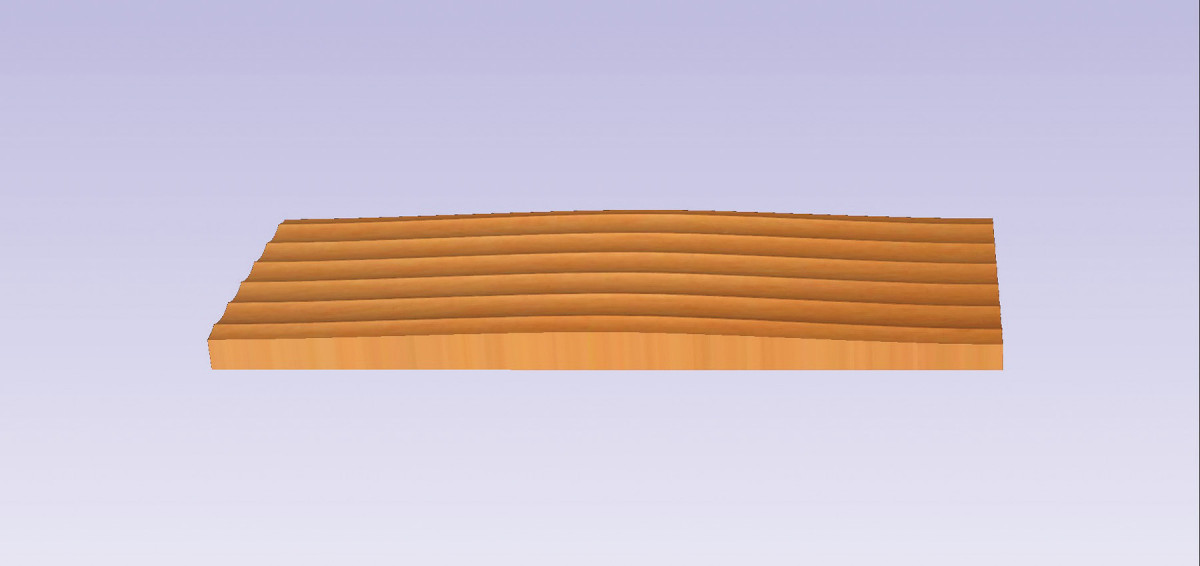
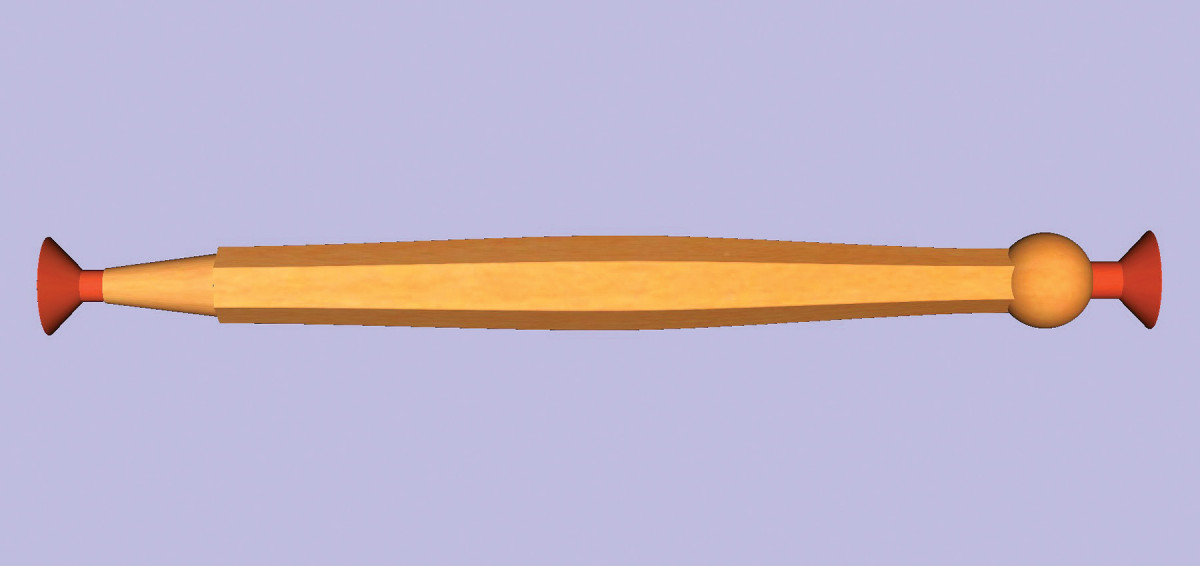
Think Parts Each part of a CNC turning is created separately. The parts are then joined to create the final design. Left to right: Tapered tenon, Handle body, Pommel (knob).
Machining this chisel handle took about 2-1/2 hours, but its unique shape was intriguing to design and mill. It also makes an attractive addition to my tool box.

Tapered tenon
Direction of extrusion (sweep) (Bottom to top).
Pommel (knob)
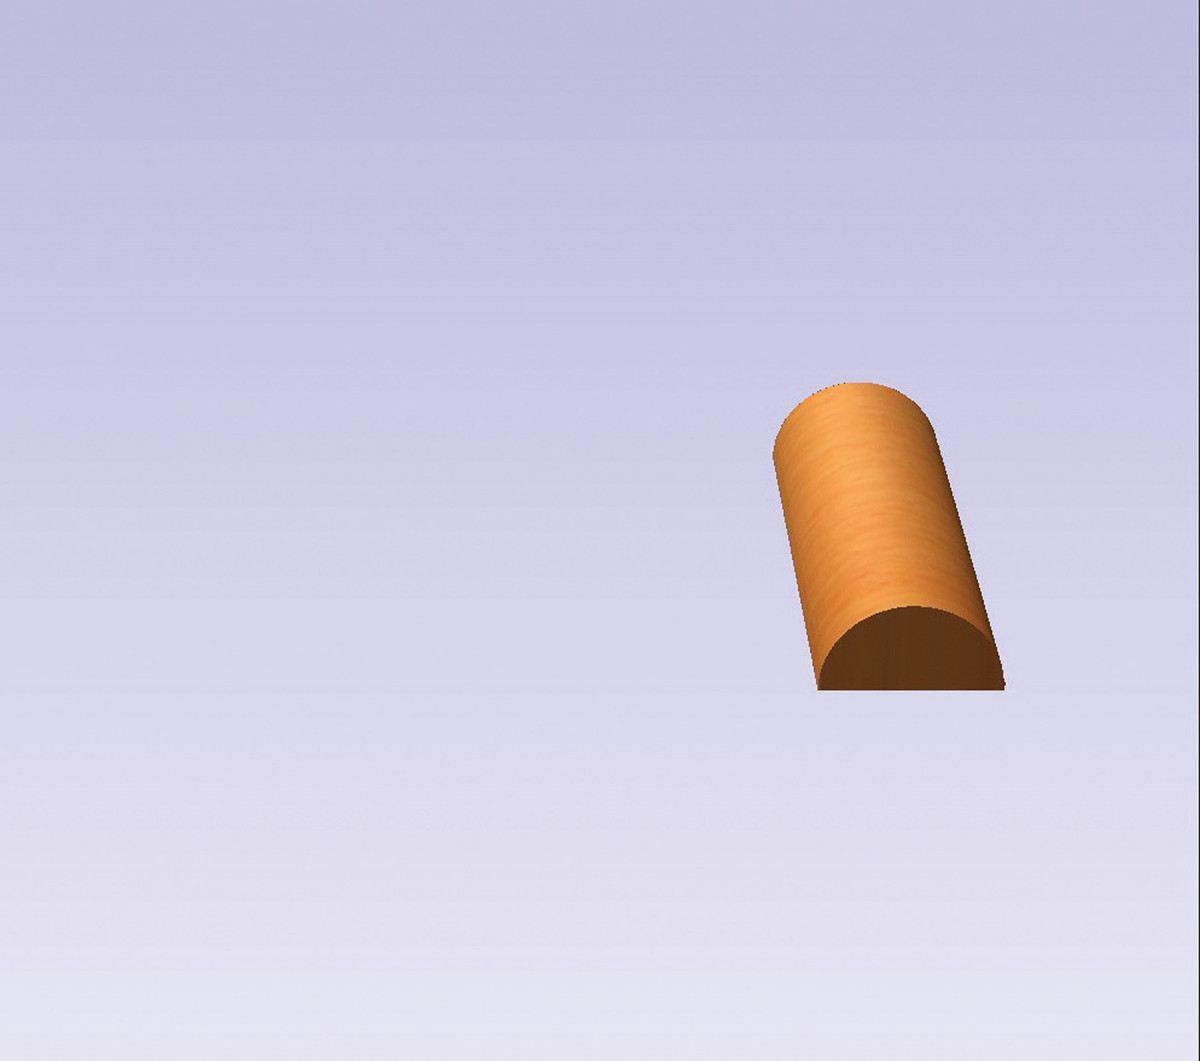
Direction of extrusion (sweep) (Bottom to top).
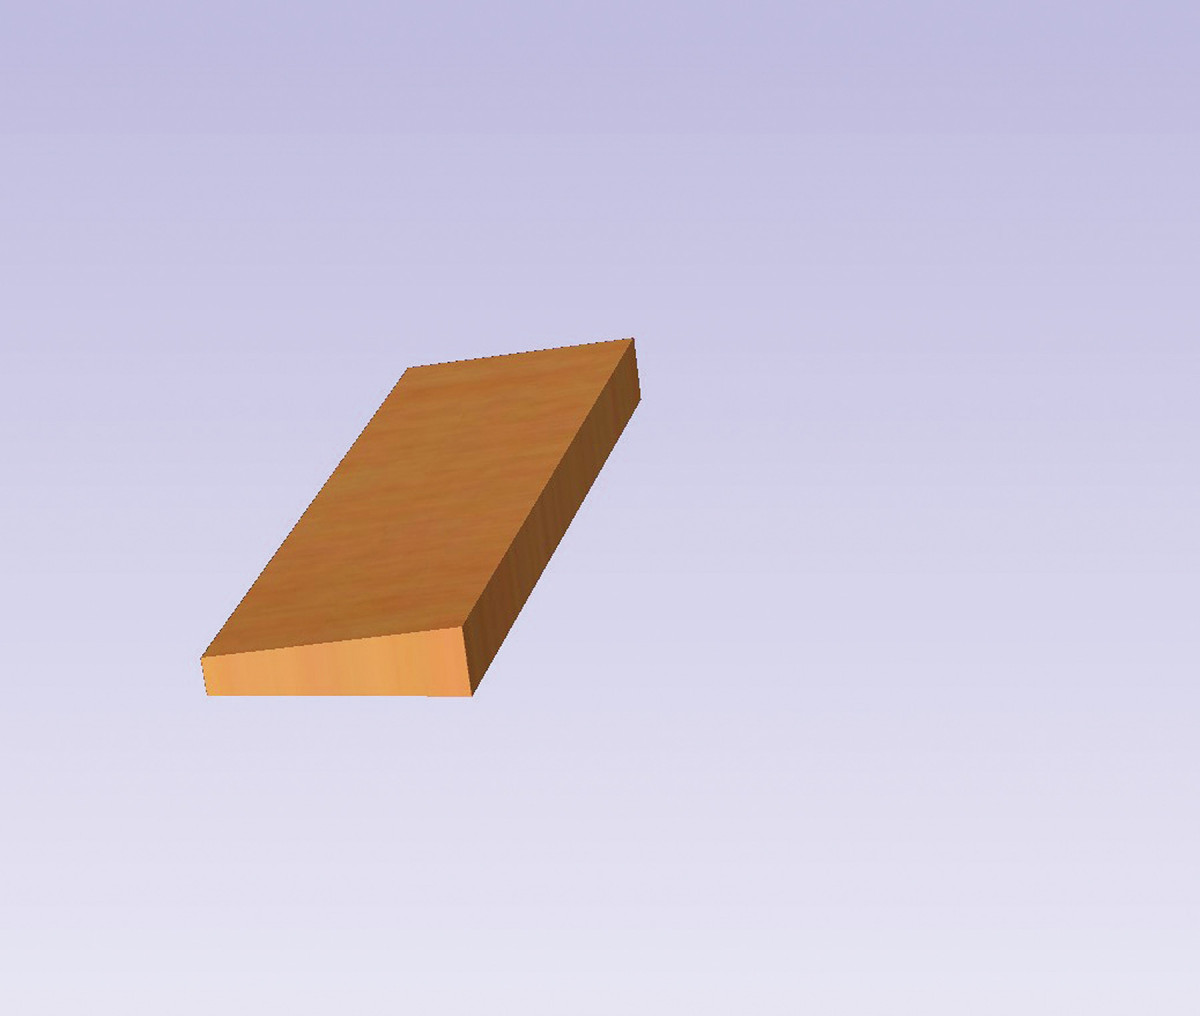
Handle body
Each 3-dimensional part is created using a line drawing of its cross section to extrude (or “sweep”) the shape along a path. The tapered tenon and the round pommel are extruded across the width of their designs, while the body of the handle is extruded along the length of its design. The handle’s contoured hexagonal body is created using three different cross sections and a software tool (or “gadget”) that automatically unwraps the hexagonal shape into its corresponding flat shape.
Parting tabs
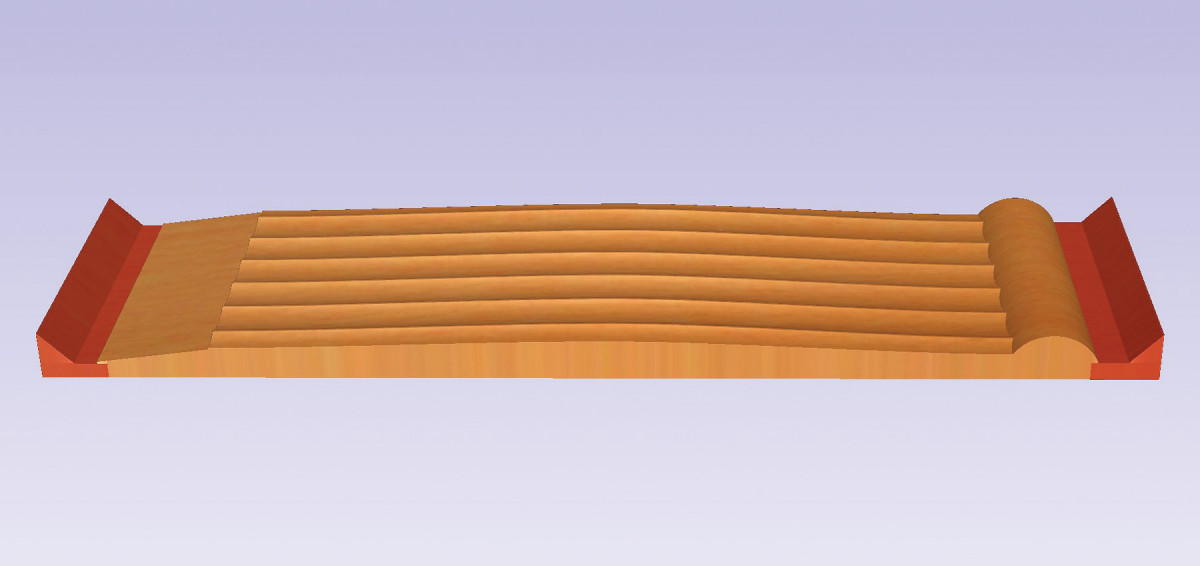
Parting tabs (in red) are added to the ends of the final design to connect the part to the unmachined ends of the billet. The tabs are created using the same drawing tools used to create the tapered tenon and the round pommel.
Basic Machine Steps
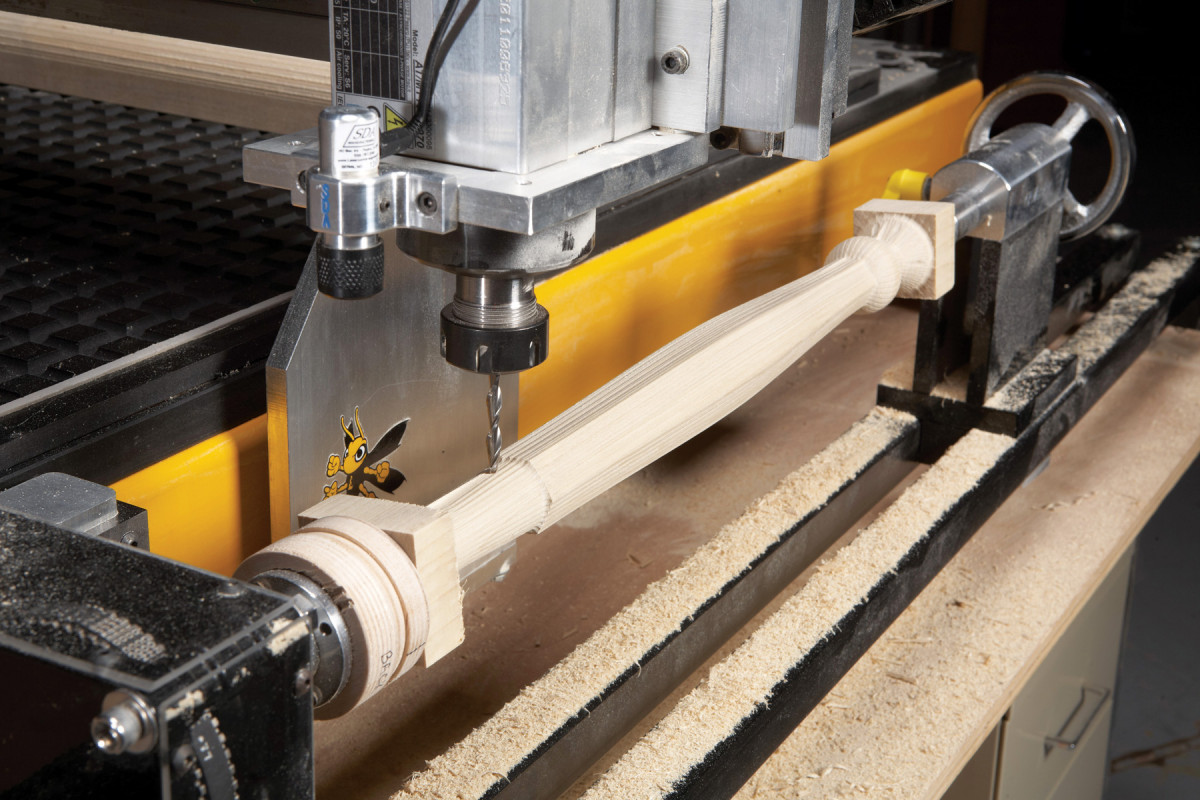
Step 1) Create a cylinder The first step is to round off corners of the billet to create a cylinder. The CNC design software includes a gadget that automatically calculates the cutting paths needed to remove the corners, based on the dimensions of the square billet and the finished diameter of the cylinder. To create the hexagonal chisel handle I started with a 2″ square billet and rounded it to 1-3/4″ diameter using a 1/4″ dia. bullnose bit. Rounding this 22″ long cylinder takes about 20 minutes.

Step 2) Rough rout the shape The same 1/4″ bullnose bit roughs out the handle’s hexagonal shape. In this case, the cutting passes are programmed to run the length of the cylinder and remove a 1/8″ deep x 1/8″ wide a strip of material with each pass. The last pass leaves 1/32″ of material to be removed in the next step. Roughing out this shape takes about 25 minutes.
Step 3) Finish rout the final shape The final (finishing) pass removes the last 1/32″ of material and leaves a smooth surface. To do this, the 1/4″ bullnose bit is programmed to “step over” each previous pass by only 1/50″. This tiny step-over leaves a surface that’s easy to clean up with 180 grit sandpaper. This finishing pass takes about 50 minutes to complete.
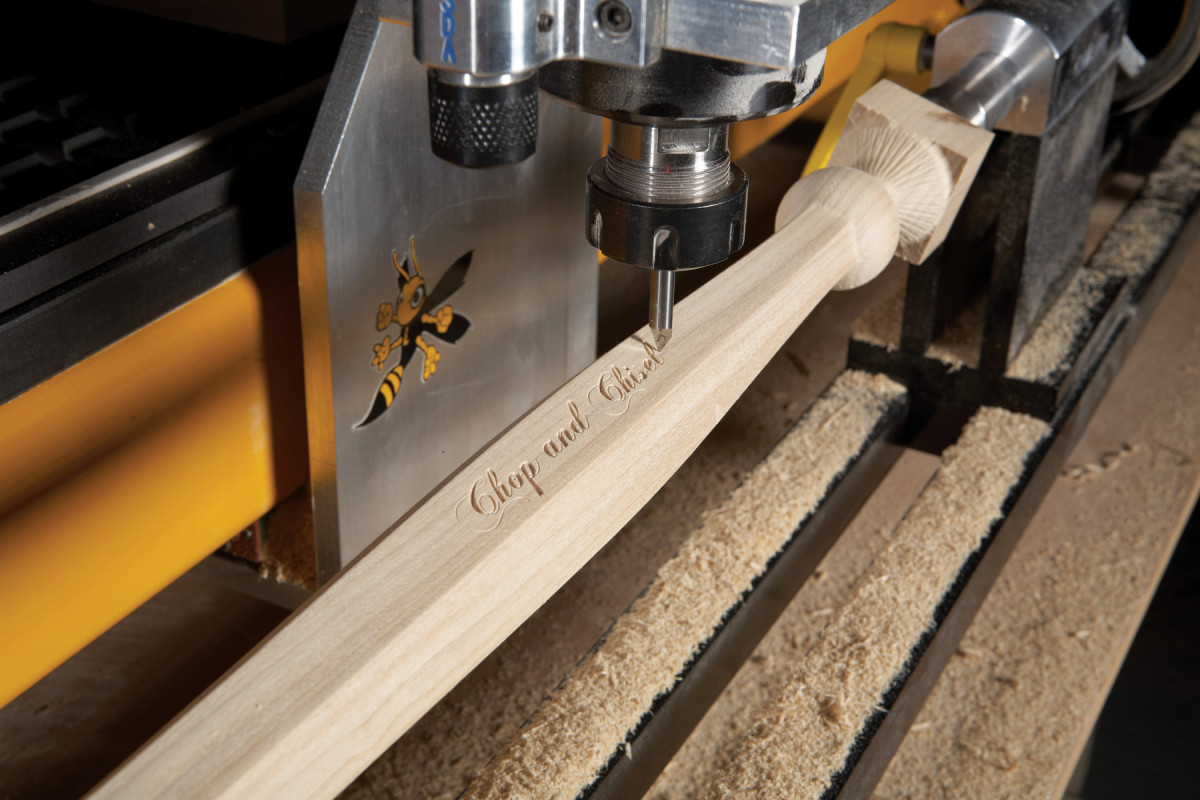
Step 4) Add details The surface of a CNC turning can be embellished with additional details, including lettering. For this chisel handle I combined a 60° V-bit and a script-style font to create a look similar to metal engraving or laser etching. These finely detailed 3/4″ tall letters demonstrate the precision of a CNC’s operation. Routing them takes only a minute. See a “twisted” example of this handle at American Woodworker.com/CNC.
Here are some supplies and tools we find essential in our everyday work around the shop. We may receive a commission from sales referred by our links; however, we have carefully selected these products for their usefulness and quality.