


We may receive a commission when you use our affiliate links. However, this does not impact our recommendations.
The next niece to turn 16 was Lauren. The oldest child of my wife’s sister Christine, Lauren has been a real joy to watch grow up. Gifted athletically, she is a whiz at lacrosse and has the stride to rule her high school’s cross country team. She’s also gunning to become a marine biologist, and is a heck of a self-taught photographer.
 As she approached 16, I realized I had a little bit of a problem on my hands. Unlike Carolina, Lauren lives in Maryland, a cool 18 hour drive, two hour flight or a pricey shipping bill away. So, I had to think – literally – outside the box on this one.
But first, the wood choice. If you can recall the end of 2012, there was the scuttlebutt going around about the end of the world. Remember the whole Mayan apocalypse thing? The Earth was supposed to come to a screeching halt, mayhem would ensue and we were all going the way of the Dodo. Or perhaps someone back in the Mayan days just got lazy and decided not to carry his calendar out past 2012.
Well, anyway, my friends over at Bell Forest Products had recently shipped me a sizable amount of Mayan walnut to build some projects out of. I had drawn up my hope chest plans for Lauren, and determined I had enough to build a frame-and-panel chest with the lumber I had on hand. Since the wood was so dark, I decided to go with some light maple panels to draw a neat contrast with the more exotic, darker wood.
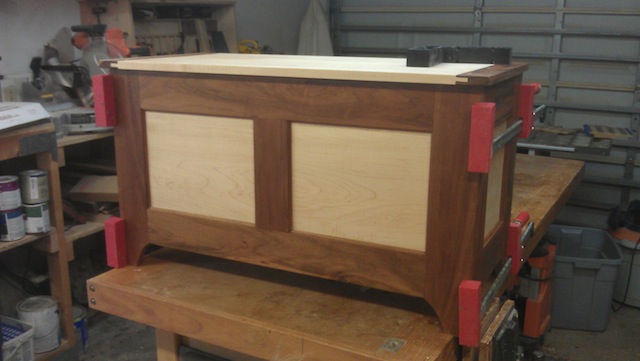
Overview of the completed hope chest. Dimensions are 2’ high, 3’ wide and 20” deep.
Frame-and-panel construction also helped me overcome the long distance challenge. Since my brother-in-law Larry is also a fairly accomplished woodworker, it would be a simple matter to ship him the completed elements, a few assembly squares, and some step-by-step instructions on how everything went together. But I wanted to make sure that it wouldn’t take a shop full of tools to complete. That’s not the kind of aggravating gift I wanted to ship up north. I wanted everything to be self-registering, so there wouldn’t be a lot of figuring out where screws needed to be driven, where clamps would have to go or anything else like that.

Side view. The frames are assembled with cope-and-stick joinery, with the cuts made on a router table.
To join the corners, I knew could skip the dovetails on this one, and build the chest using a tongue-and-groove corner joint for the assembly.
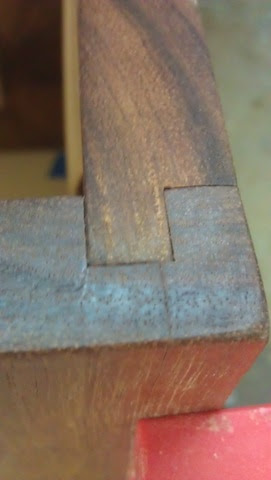
Detail of one corner joint, a simple tongue and dado. This made for easy assembly of the hope chest after shipping to the recipient.
There was one other reason I wanted to go with a frame-and-panel plan for this one. Since the frame-and-panel assembly would allow for seasonal wood movement, I would be increasing the probability that I could build the piece without warping or splitting when the piece went from the very humid environs of my Florida shop to the drier, heated confines of a more northern home.
There’s something rewarding about using cope-and-stick joints on a project. It does take a little bit of mental gymnastics to ensure you are using the right bit for the right piece, but once you have that down, it’s lovely to see how those self-aligning joints are milled and come together.
Before long, I had the sub-assemblies together, sanded down nicely and pre-finished. I also milled some plywood for the bottom and installed the hardware, to ensure the hinges would go into the right spots. Held together with some clamps, I was able to get everything ready to be shipped.
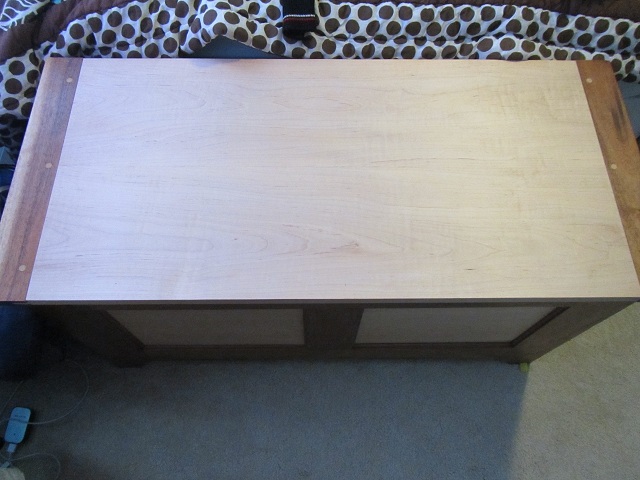
Top view of the hope chest, showing the lid. I chose breadboard ends (rabbet and groove) with contrasting dowels.
During the 2012 holiday season, Lauren and her family came down to Florida to get away from the cold. While they were at our house, I led Lauren out to the workshop. Just as with Carolina, I was a nervous wreck. Would she like it?

There’s nothing like the smile of a happy customer to reassure even the most timid of woodworkers that they have done the right thing.
Looking for hope chest plans from our store that you can modify for a similar gift? Buy our “Hope Chest Combination.”
Don’t miss Tom’s first two posts in this series. Click here and here.
–Dan Farnbach
Here are some supplies and tools we find essential in our everyday work around the shop. We may receive a commission from sales referred by our links; however, we have carefully selected these products for their usefulness and quality.


Great series of articles Tom!